2007 Yamaha YJ125 Vino conversion

mistercrash

10 kW
Joined
Mar 9, 2011
Messages
972
Location
Guelph, Ontario, Canada eh!
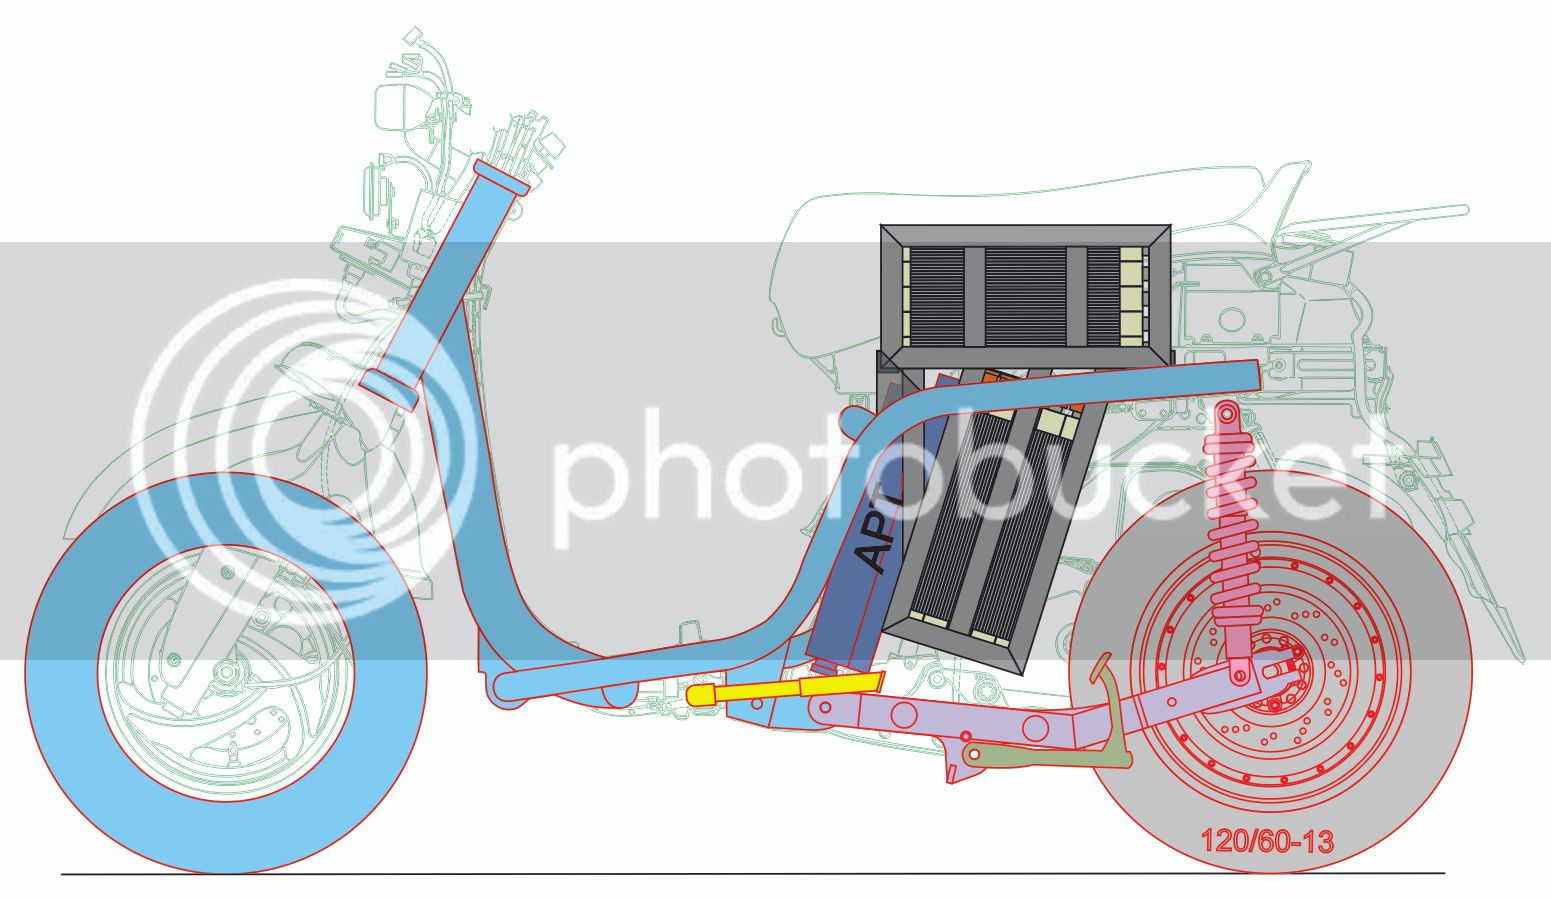
It's a father/son project, I want my 12 year old boy to learn to use some tools and do mechanical work in a safe way. It's the blue scooter in front.

vino%20and%20motorino1_zpsjmkcyyli.jpg


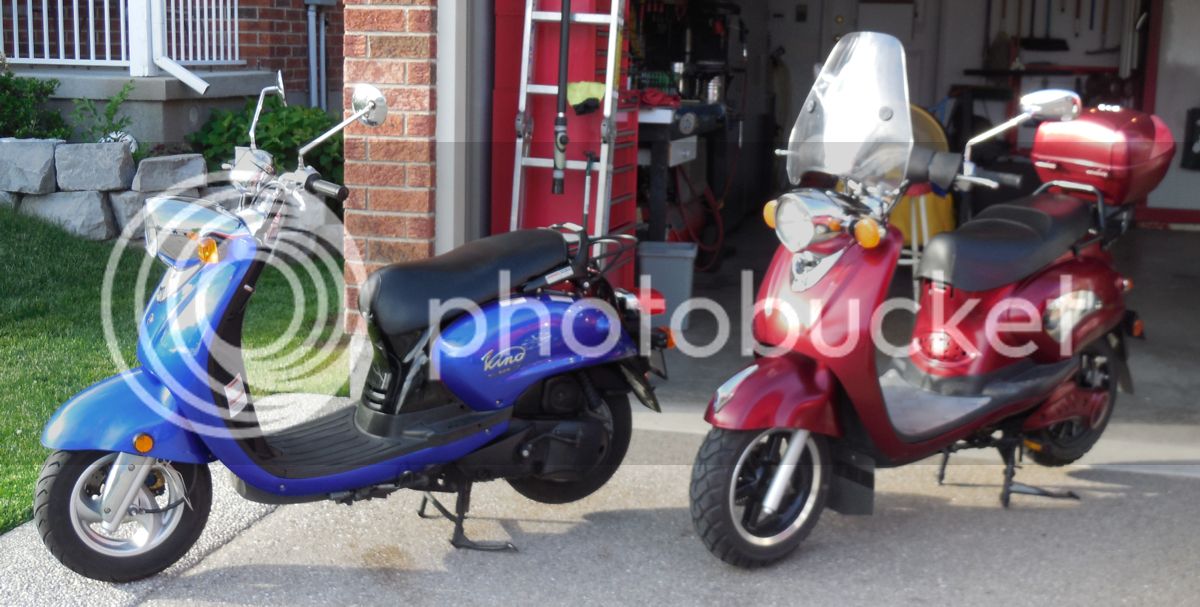
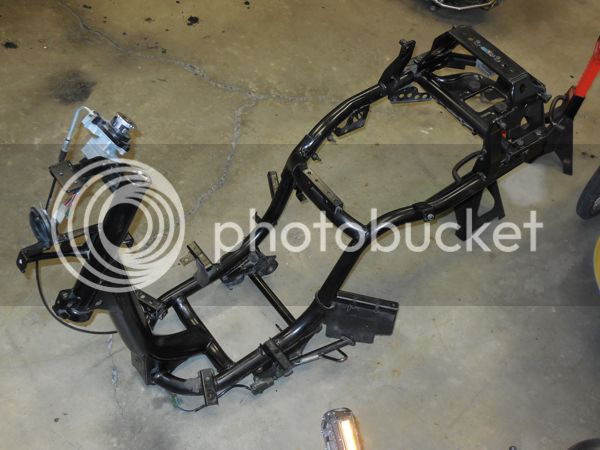
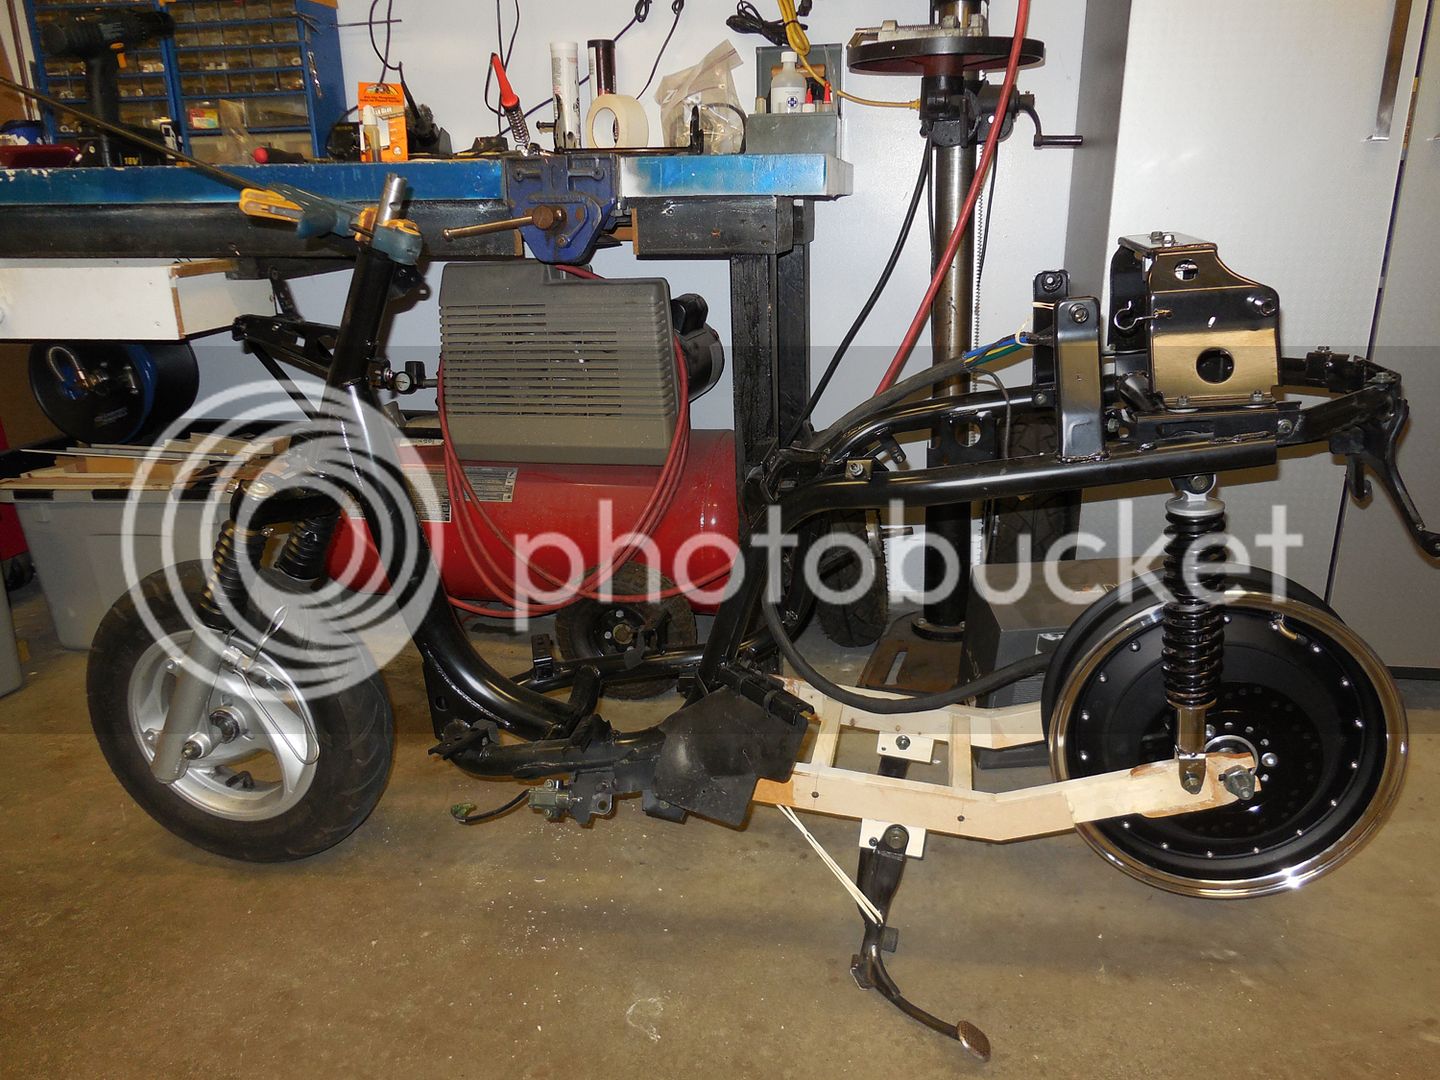
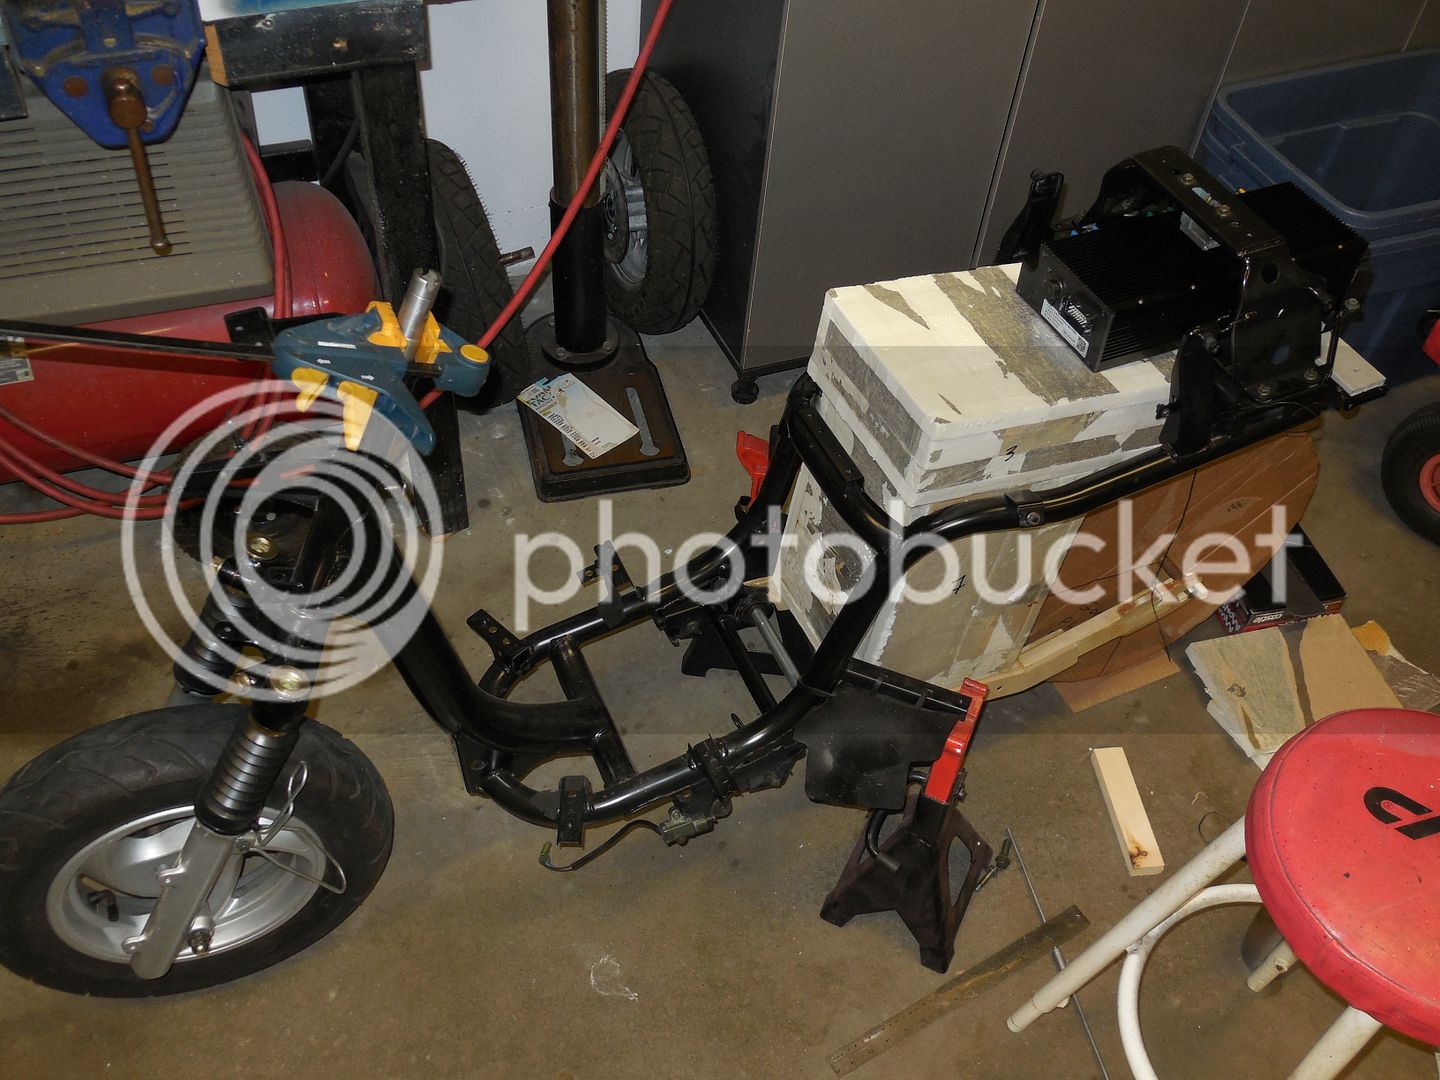
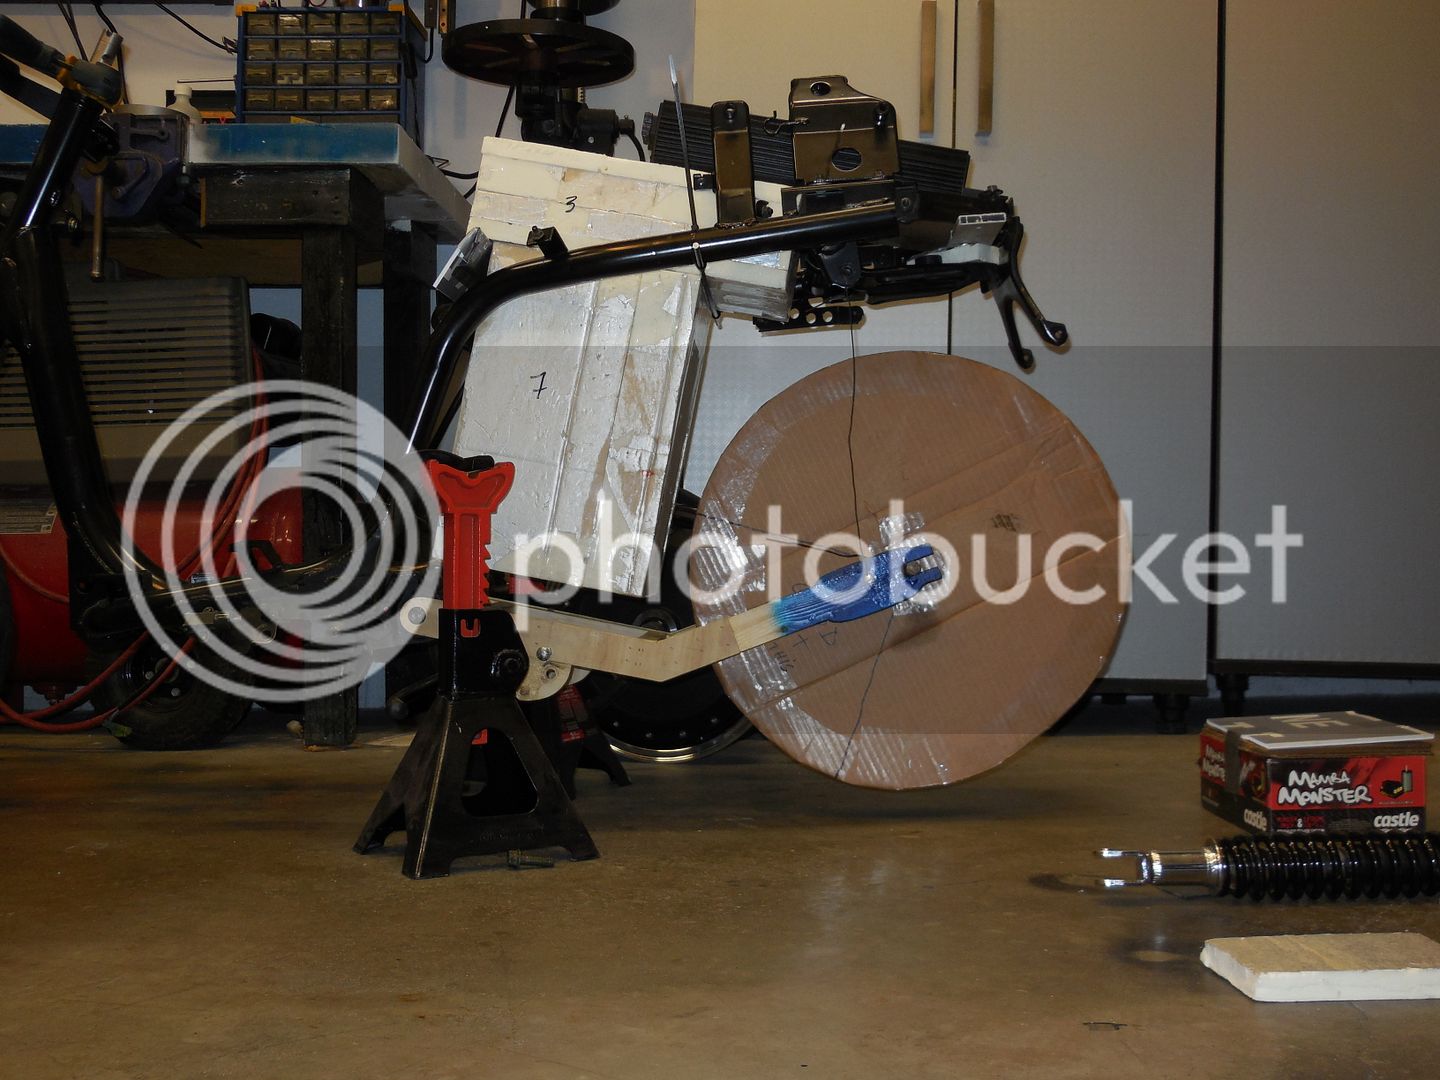
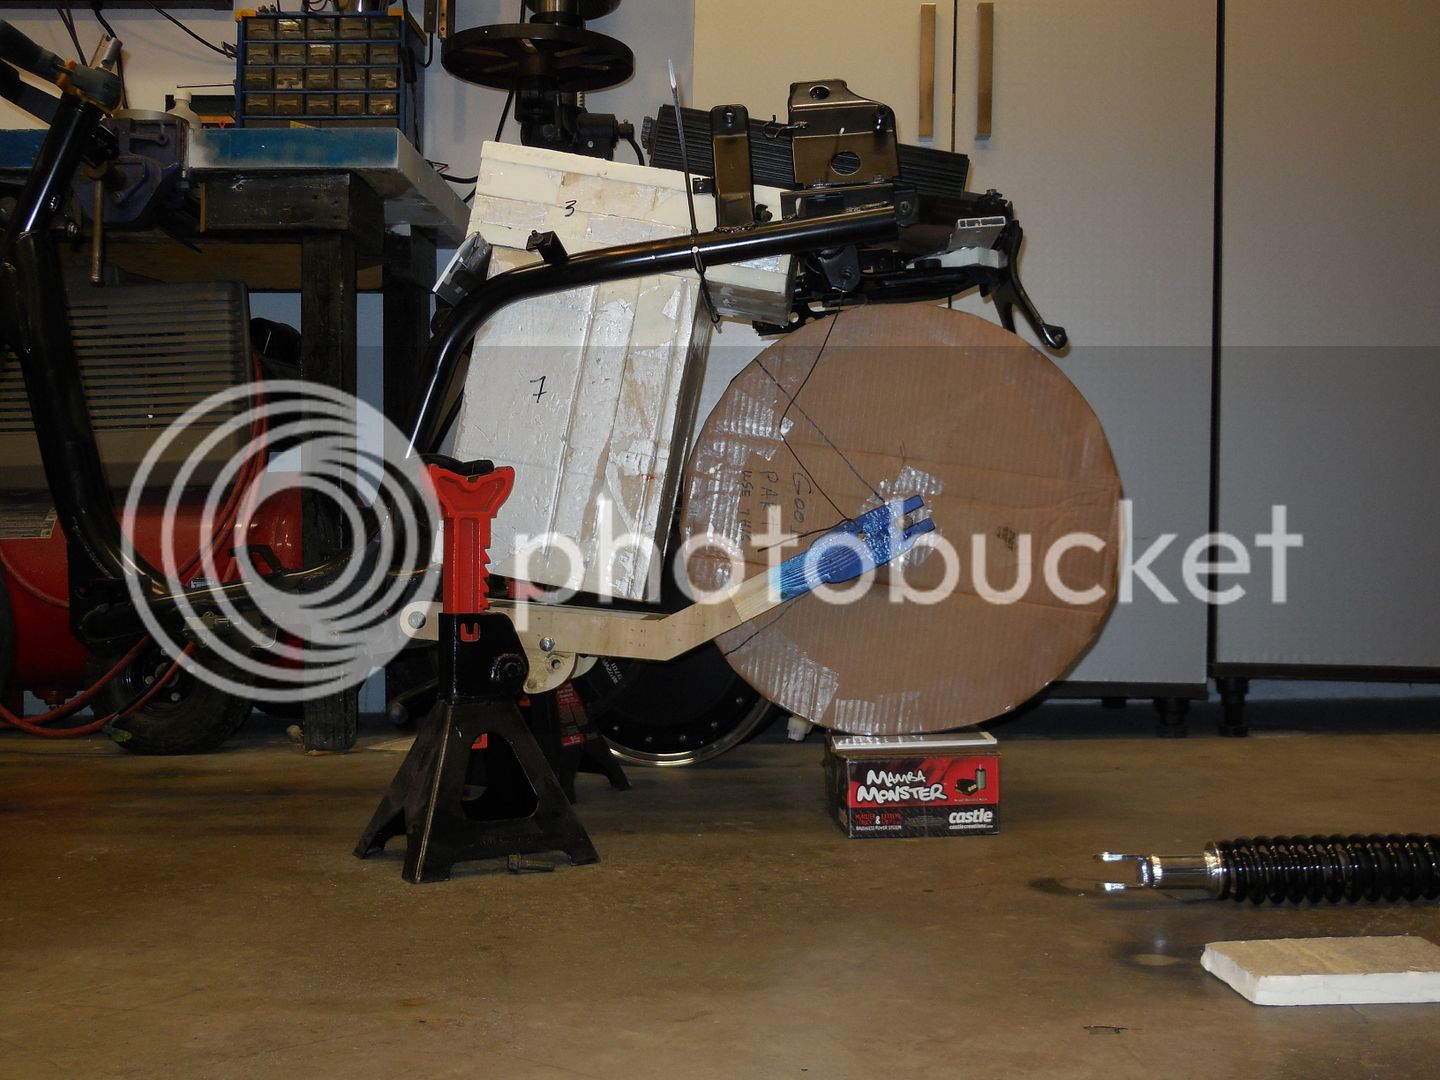
And this is what it looks like at the moment.

evino_chassis1_zpsom1o9bnc.jpg


We have a bunch of parts that we cleaned up and took pictures of, if we are able to sell all of them, including the GY6 engine, we should recuperate the money we spent to buy the scooter.

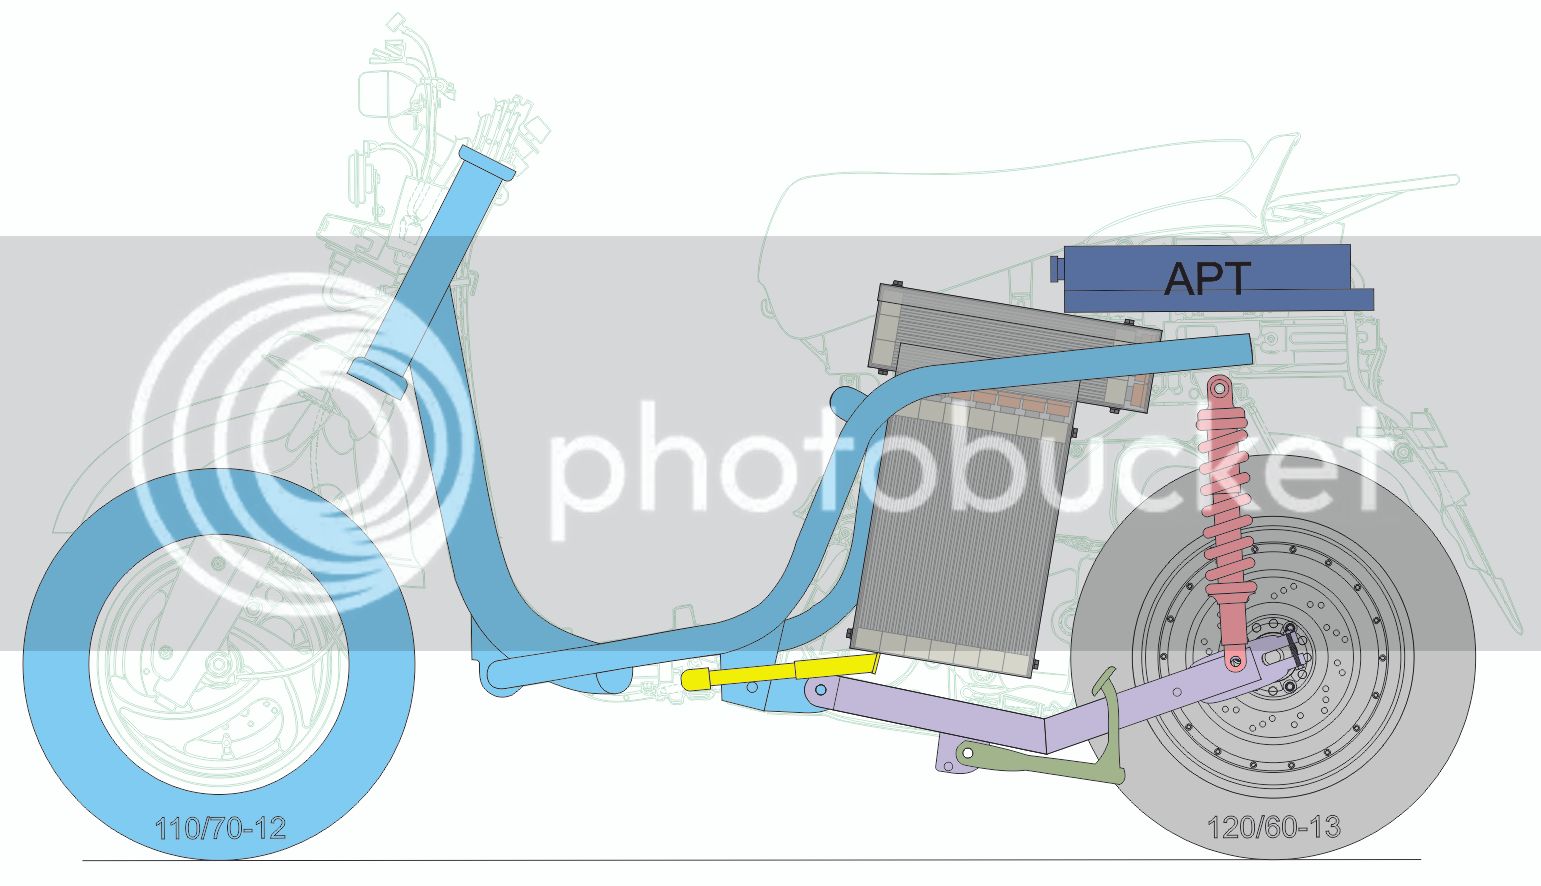
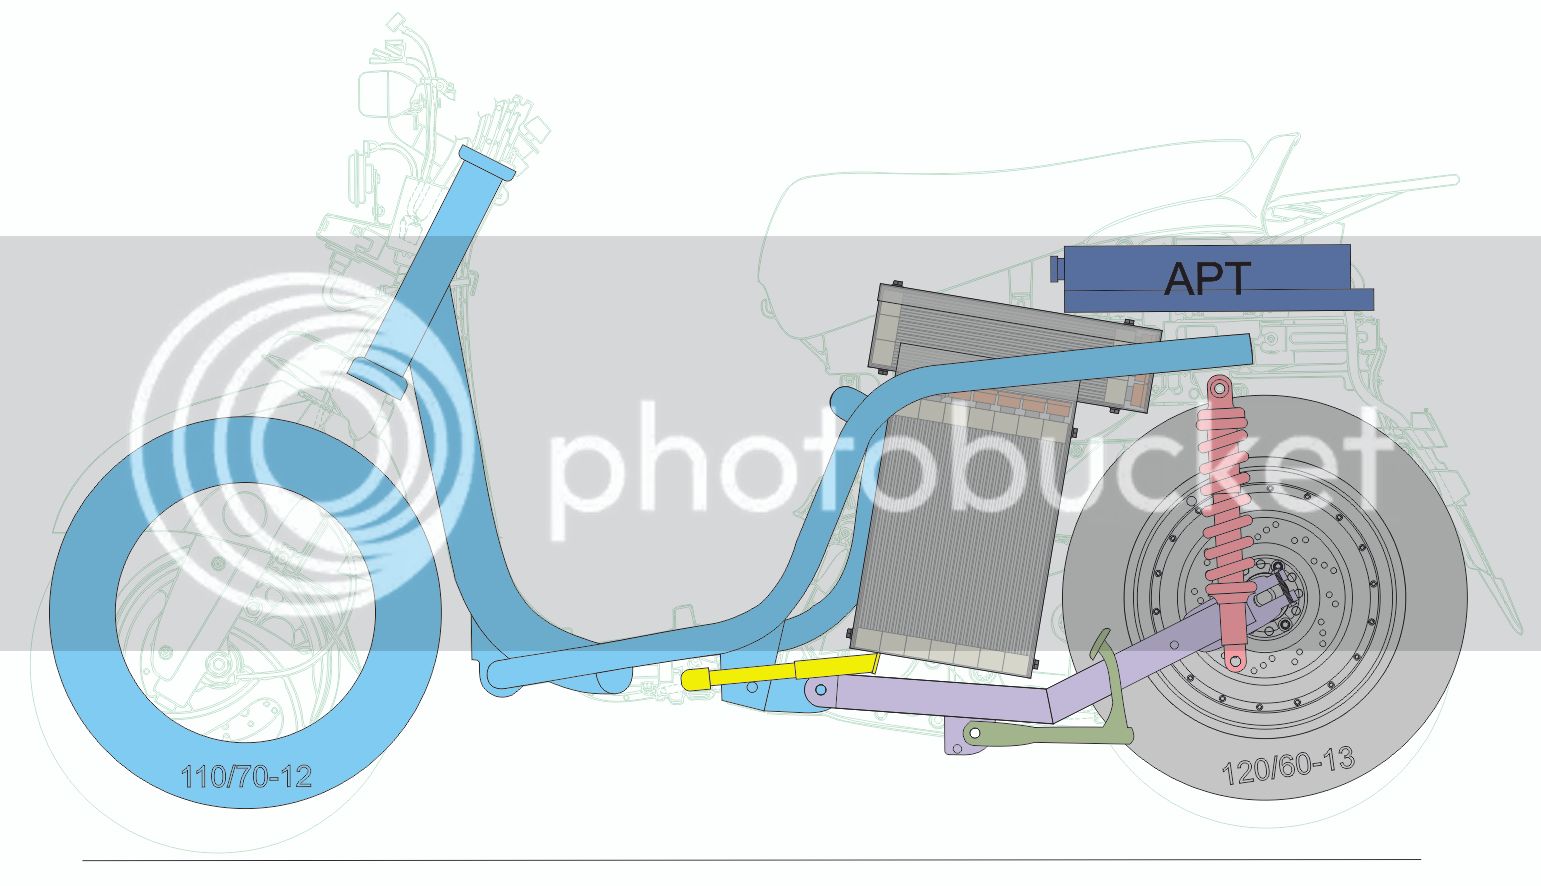
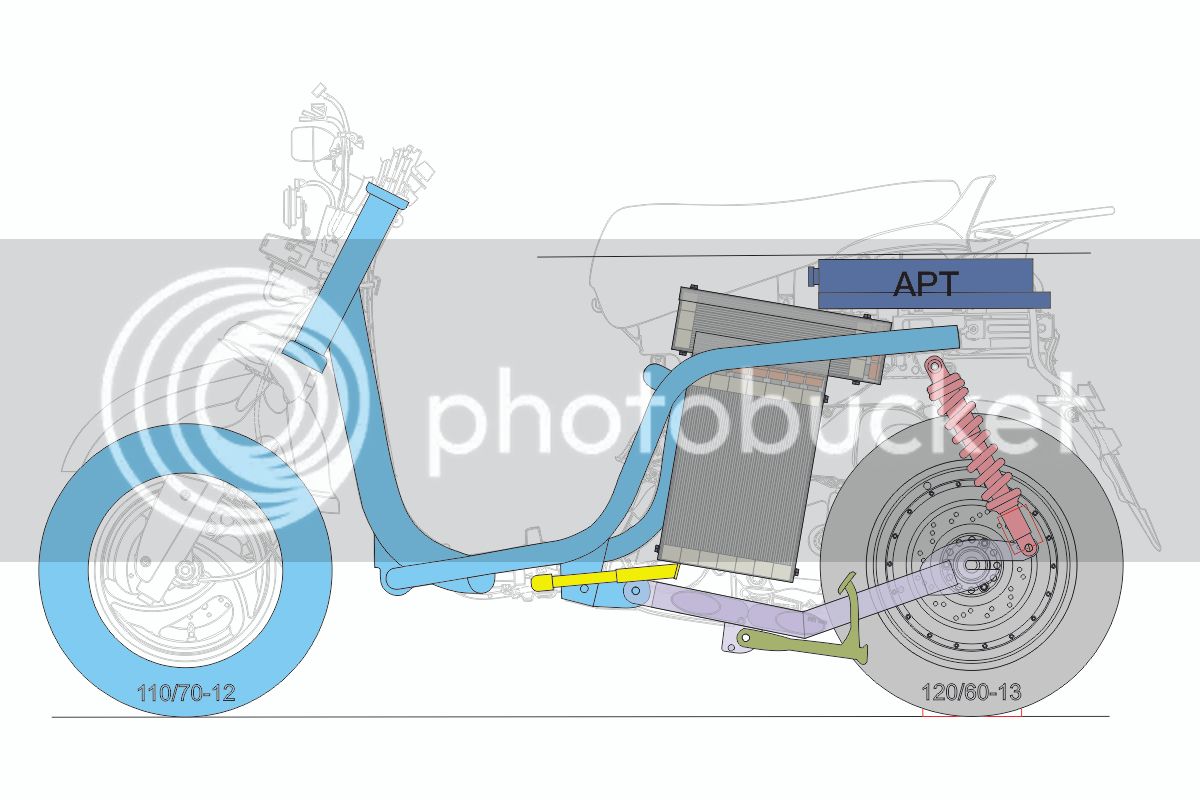
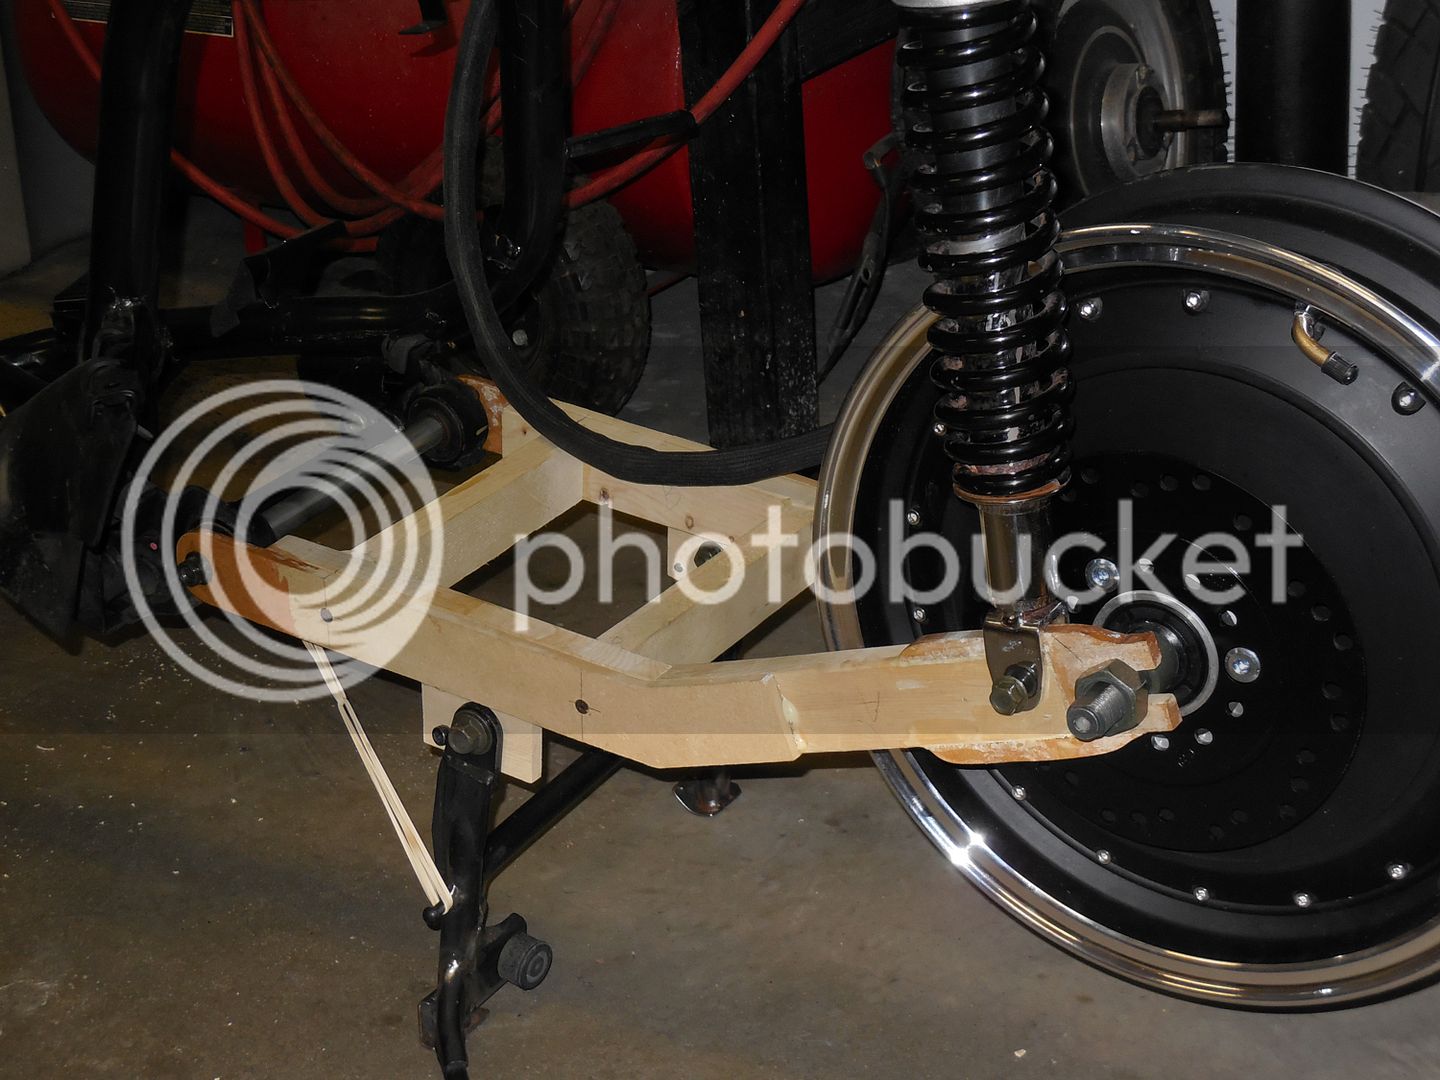
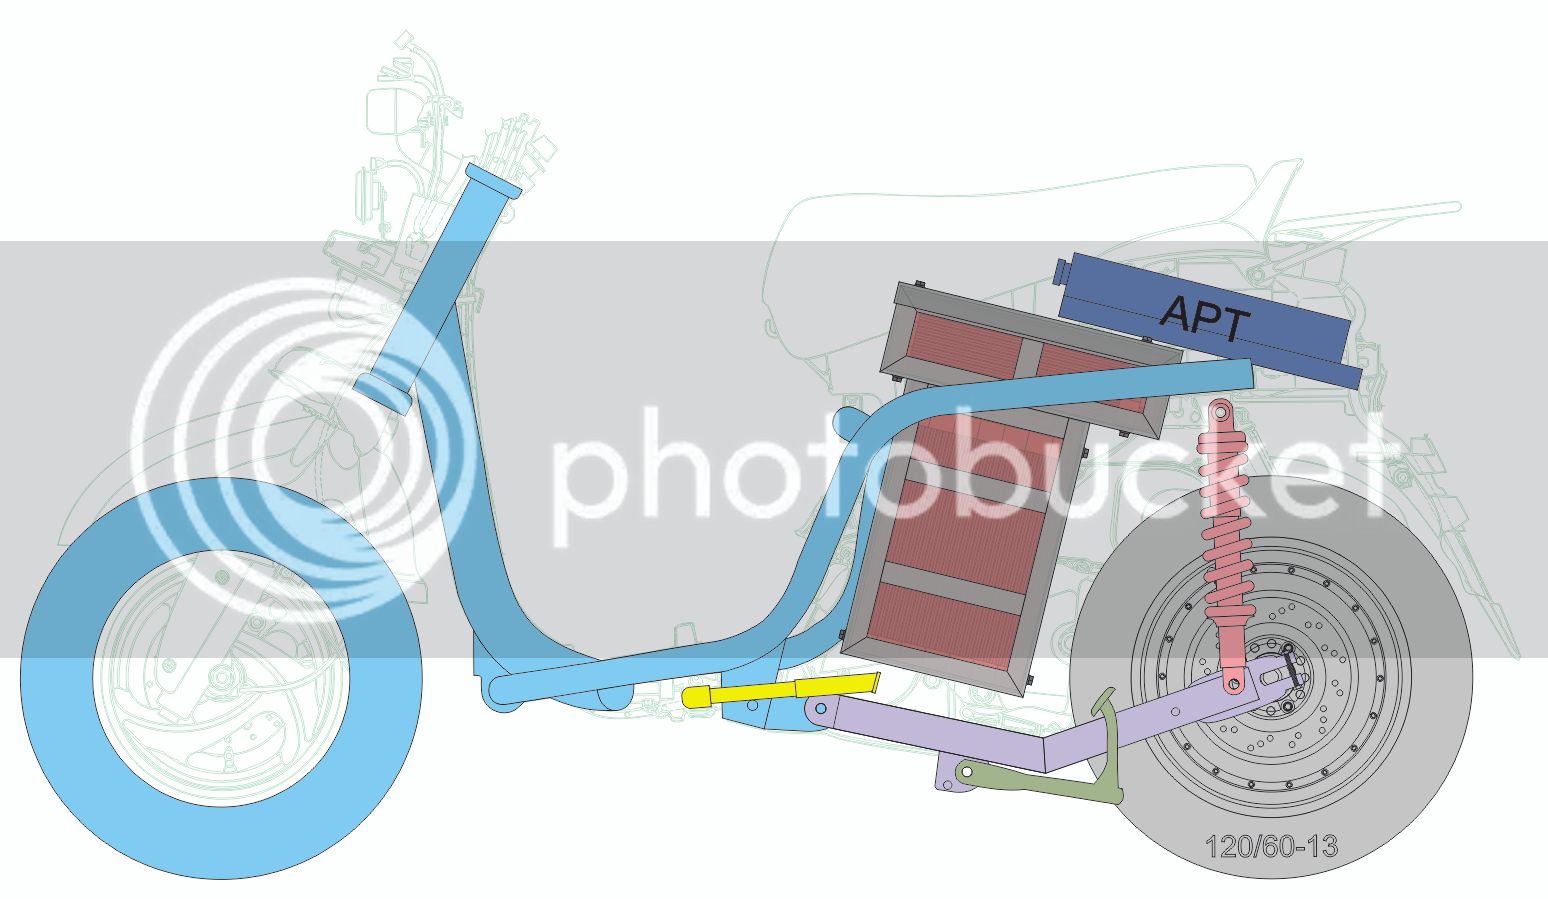
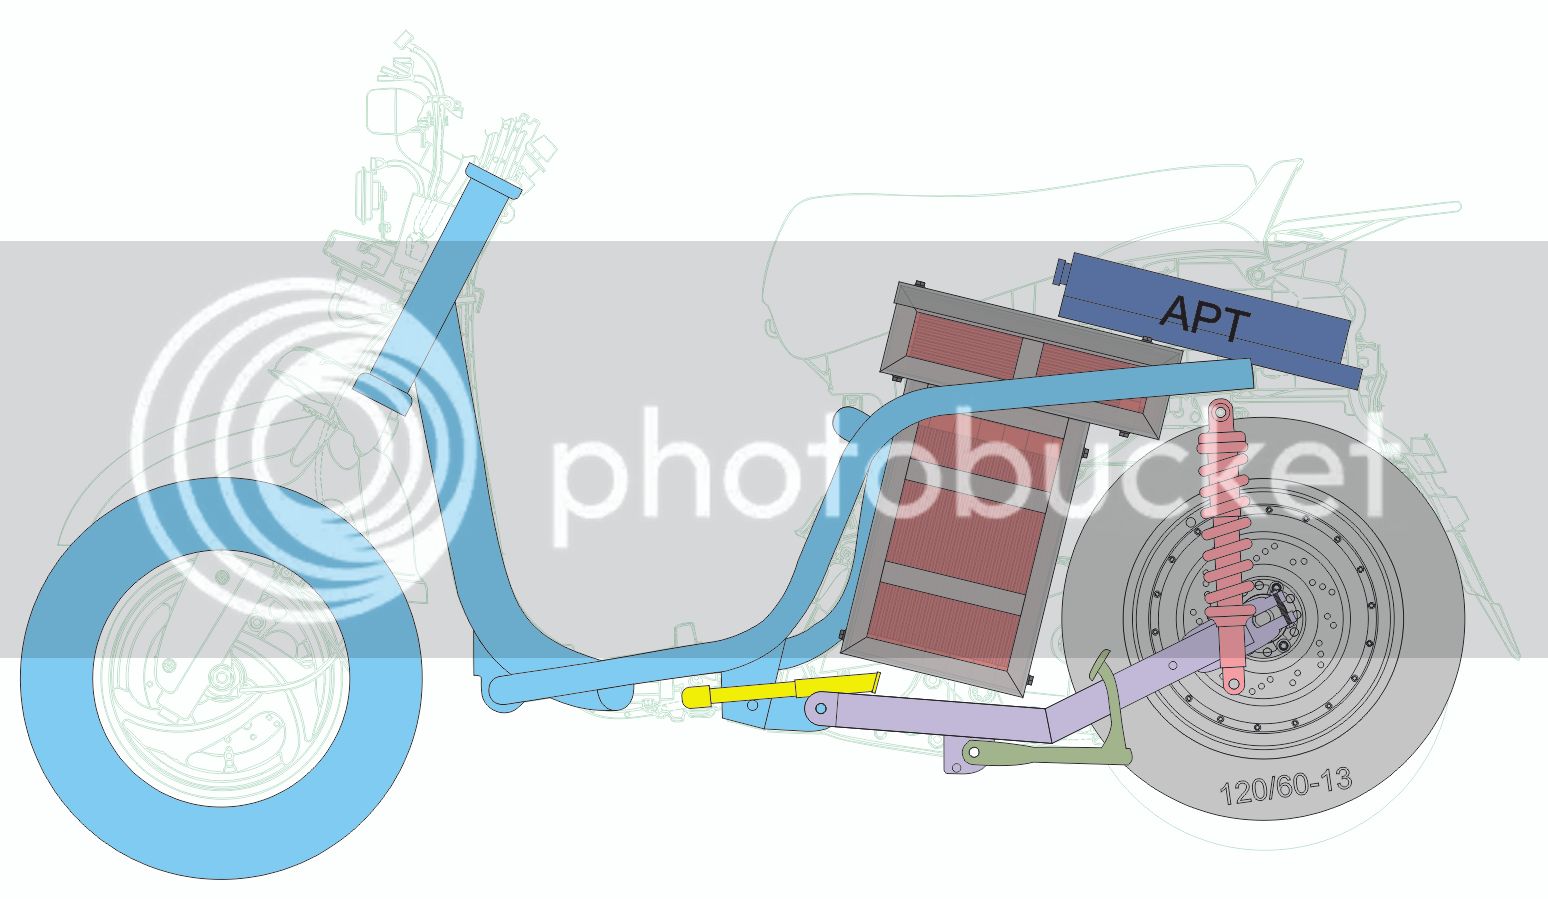
The motor and controller have been ordered from QS Motors. An 8000W 273 (50H) V3 Hub Motor in a 13X3.5 inch tubeless rim. An APT Programmable Sine Wave FOC AE96600 72V/96V 8kW PM Motor Driver Controller. The battery will be 10 Nissan Leaf modules. The cells will be monitored with the HVA/LVA I built for my other scooter. We are hoping to keep the original odometer/speedometer but it has been difficult to find a 12/13 inch front wheel that would be thin enough to use the worm gear. If we have to ditch the odometer/speedometer we will have to use the CA to replace it.

On the list of things we need to do is:
- weld a bracket for a second rear shock absorber on the right
- weld a couple brackets from angle iron to accept the battery box
- build the battery box
- build and weld a bracket to secure the controller
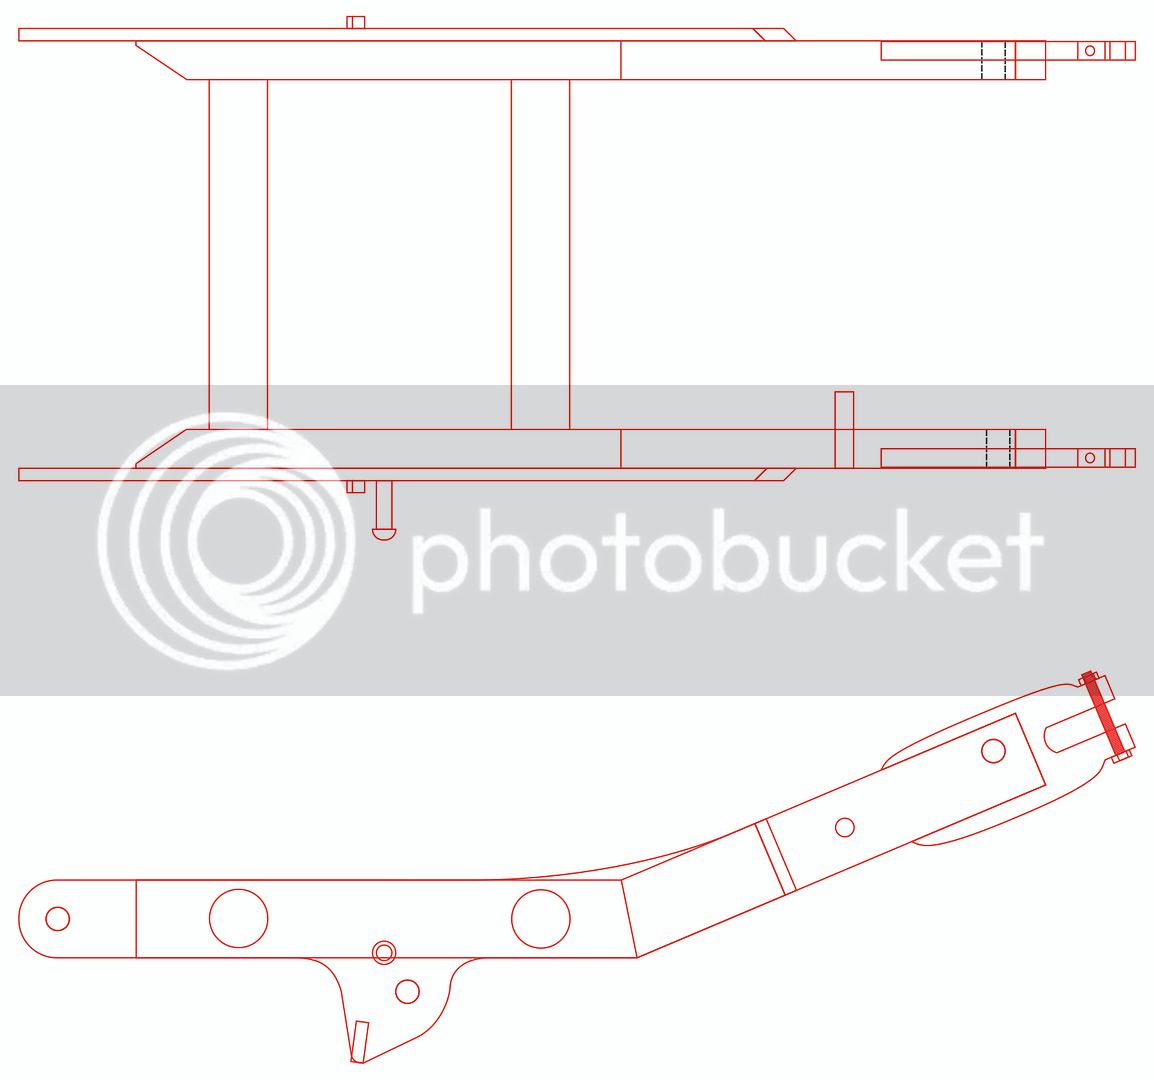
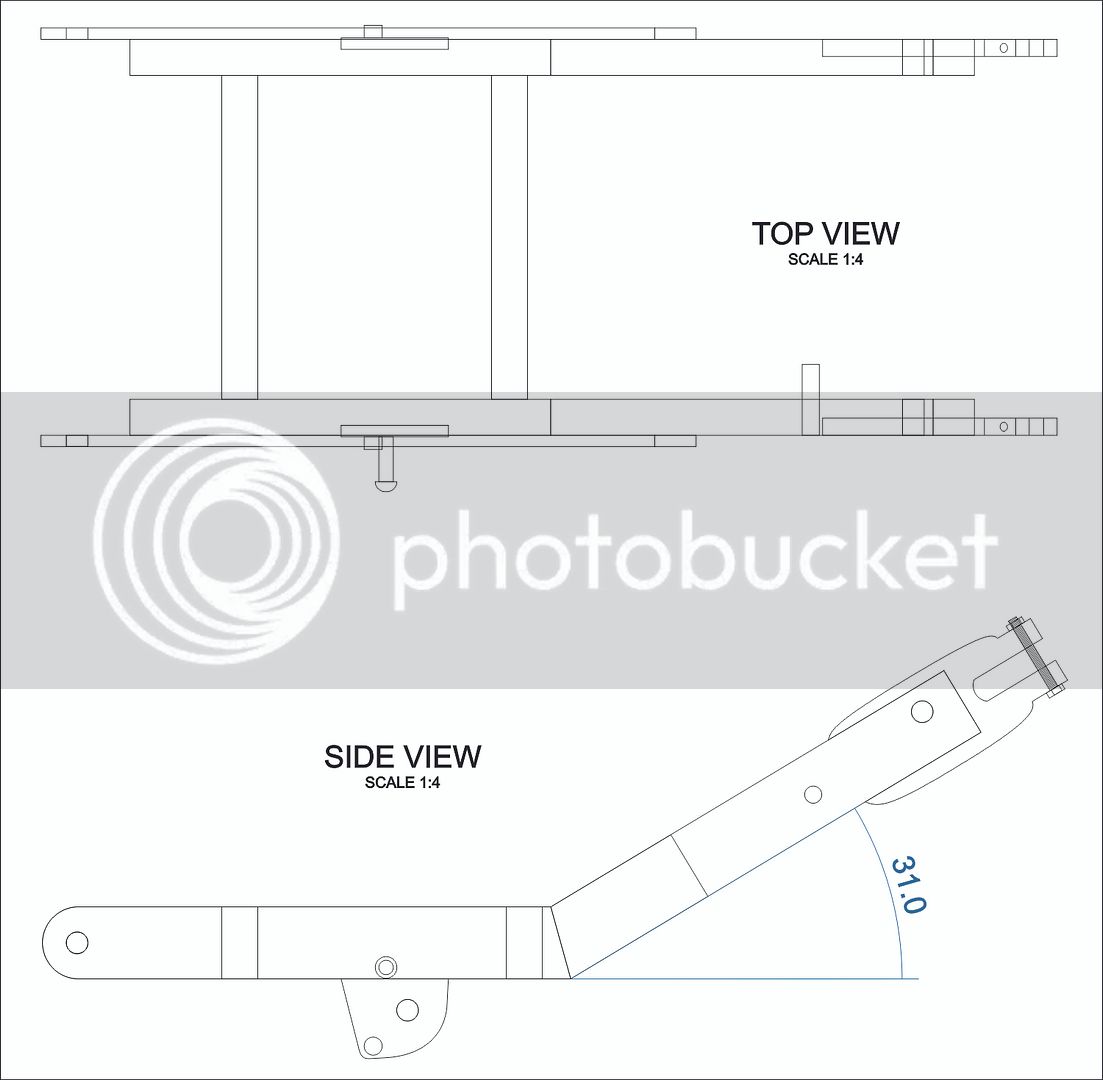
- have a custom bike shop build a swingarm
- clean up the original electric harness

The only things we found that were damaged on the scooter were the o-rings on the shaft where the rear suspension pivots and the front shock boots. The scooter is in very good shape. We plan to have the battery slip in from the top and rest on the angle irons welded to the frame. This will keep it from moving left or right and front or back. A couple pieces of metal strapping bolted to the frame will keep the battery from moving up or down.
The controller is to big to put in anywhere else than between our feet. We need a bracket to hold it and despite the fact that it is completely waterproof, we want some plastic box to hide it from view and protect it from the elements.

We'll update as the conversion goes along.

Thanks for reading
Ray and Gabriel
 
With more than a thousand dollars of our budget that disappeared for other house related things and the parts not selling on ebay, this project is not going anywhere anytime soon. We are disappointed but that's the way it is. This gives us more time to do more planning on how we're going to install the components in the scooter. Space is very limited so we have to think about this. here's a new idea to have the large controller hidden inside the frame and body. And a new drawing for the rear swingarm.

evino_layout1_zpslzxw43p6.jpg


evino_swingarm1_zpslzmhskmy.jpg


Thanks
Ray and Gabriel
 
That prototype will not work. It's difficult sometimes to figure out how to do this when all I have is 2D drawings to go by. The battery would be a bit too high and the seat would not close. So we're back to the drawing board to make a different swing arm and reconfigure the Leaf modules.
 
We redesigned the swingarm, reconfigured the battery and found a different spot for the controller. It's all very tight but we hope that it will all fit under the seat and inside the body. With CAD (cardboard aided design) we were able to determine that the rear wheel would not rub on anything at full compression of the rear suspension. It's time to get serious and start shopping for a mig welder.

evino_layout1_zpseezvqzlc.jpg


evino_layout2_zpstui9ga1h.jpg


DSCN1728_zps6d8iifpw.jpg


DSCN1731_zps4q30otmy.jpg


DSCN1732_zpssqqc7nn5.jpg


evino_swingarm1_zpspnpwjjex.jpg~original
 
Have you ever tried bronze welding? Technicaly its brazing but the bronze alloy makes a nice thick bead witch works like welding. It's much easier and versatile than welding the only con is its not good for high heat applications beyond 500°F. Whats great about it is it works with many different metals and alloys, its easy, its easy to see if the bead atomically attached to the metal or just sitting on top, you can use propane and oxygen instead of oxy acytelyne, you don't melt what your welding so no burn through holes and its easy to weld metals of different thicknesses and shapes together, i have a smith mini torch hooked up to propane and oxygen and my little kit will bronze weld almost any metal.
 
I have heard of it but never thought it would be strong enough for chassis parts. Do you think that if I went to a motorcycle shop to have the scooter inspected prior to licensing that a bronze welded swingarm would past the inspection? I would have to look this up.

EDIT: I looked up a bit into this and it seems that brazing is very strong if it is done correctly. Thanks for bringing this up, gives us food for thought.
 
mistercrash said:
I have heard of it but never thought it would be strong enough for chassis parts. Do you think that if I went to a motorcycle shop to have the scooter inspected prior to licensing that a bronze welded swingarm would past the inspection? I would have to look this up.

EDIT: I looked up a bit into this and it seems that brazing is very strong if it is done correctly. Thanks for bringing this up, gives us food for thought.
welding is also strong if done correctly. Mig is great once properly set up. But can take some experimentation to get the wire speed and voltage right to wear its welding and not burning holes or piling a bead on top of the metal. I like oxy acetylene and tig welding but stil have to worry about burning holes. The bronze welding just get the metal clean and heated to a not bright cherry red and the bronze will just flow into it. No burning through or bead just sitting on top. Just make the bead thicker than you would welding to get the same strength.
 
I started thinking that instead of welding angle iron stock to make a box for the battery, I would use sheet metal instead. So I would use a metal break, some sort of strong glue and rivets. It doesn't really simplify the project, it's a different challenge but it would make the box just a tad smaller which can help tremendously in this small scooter.

EDIT: Actually, instead of glue and rivets, we could maybe bronze weld the sheet metal.
 
mistercrash said:
EDIT: Actually, instead of glue and rivets, we could maybe bronze weld the sheet metal.
you might be able to just use a mapp gas torch. Not good for delicate work and pretty beads but cheap.

They sell kits that use map and disposable oxygen tanks. I got a nicer smith kit which is used for delicate soldering and brazing. The largest #7 tip will braze rather thick metal. I have a low pressure regulator that will hook up to propane or mapp. I started off with the disposable oxygen tanks but they only last for a few mins while the propane tanks last for about an hour. I got a small high pressure oxygen tank thats refillable. Depends on how often you ues it which is cheaper. I have a couple hundred bucks invested in my kit but its cheap to operate.
 
https://www.google.com/shopping/product/10510125718351279699?lsf=seller:8049,store:462848613456605388&prds=oid:18268497295776114746&q=brazing+kits&hl=en&ei=NfO8V7CrHsnZeZLju6AH&lsft=lsf:seller:8049,store:462848613456605388,prds:eek:id:18268497295776114746,q:Welders+Medium-Duty+Cutting+and+Welding+Outfit+with+Tote+-+Oxyacetylene+Victor-Style,+11-Piece+Set,+Northern+Industrial,lsfq:AA316ep6WkwdlyvNsPFrrj4gsfKO8vCgMMjALZUGY7qTDpHqoAzfQjQdDSeEtD6K5s6tIEMYp7-z,hl:en,ei:NfO8V7CrHsnZeZLju6AH,,gclid:Cj0KEQjw6O-9BRDjhYXH2bOb8Z4BEiQAWRdukw2HZMaVjujyQUEOmXWnY7i_xUWmfOJm5ukVuX8K64caAn8o8P8HAQ&lsft=gclid:Cj0KEQjw6O-9BRDjhYXH2bOb8Z4BEiQAWRdukw2HZMaVjujyQUEOmXWnY7i_xUWmfOJm5ukVuX8K64caAn8o8P8HAQ


Or this cheaper version without cutting tip

https://www.amazon.com/gp/aw/d/B007VLW35Q/ref=mp_s_a_1_1?ie=UTF8&qid=1472001061&sr=8-1&pi=SY200_QL40&keywords=brazing+torch+kit&dpPl=1&dpID=51%2B4vix53CL&ref=plSrch
 
We are seriously considering making the battery box out of 16 or 18 gauge sheet metal. It would make the box smaller and we can position it lower and at a different angle which makes the controller fit better. The box would be in two parts the way we see it, the top part housing three modules and the bottom housing 7 modules. The modules would be stripped of their aluminum covers and most of their black padding to make the battery as small as possible.

evino_layout1_zpskxhyqafv.jpg~original


At full compression of the suspension, nothing should rub anywhere at the rear. I know from experience with my other scoot that the front fender will have to be trimmed a little.

evino_layout2_zps9gq9djsm.jpg~original
 
First great father and son project. I don't know the reglementations in canada so maybe it's not possible.
It seems like there wil be a lot of weight in the back of your scooter directly attached to the frame maybe you should consider to reinforce the frame a bit.
There might be twisting at high speeds when turning. Since your controller is supposed to be able to put out 600A I don't think you are going for the slow speeds/acceleration :mrgreen: .
 
Good reason for us doing this is the example of the Chinese knock off pictured above in red, that scooter has the battery hanging from the chassis in the same spot and it has not caused any problems to the frame or handling in over 12 000 km of riding. The chassis of the Yamaha is made with a stronger steel and way better welds.
 
So the father/son project is at a stand still. It will have to be finish at some point because there are too many parts of the original scooter that have been sold to consider rebuilding it as original. Sadly the money went to pay for other house related stuff. But we come back to the planning from time to time and discuss about ways to improve our design. We made a final drawing of the rear swing arm and we think we finally have a winner. We must have redone this swing arm a dozen times. This new design should be stiffer, stronger but still simple to fabricate. The shocks are also brought back to their original angle instead of having them almost vertical like in the previous drawings.

evino_layout3_zps0ygg265d.jpg~original


evino_swingarm2_sideview_zpswbld62vx.jpg~original


evino_swingarm2_topview_zpsceuoiilb.jpg~original
 
Back
Top