Note: pics will be edited in as soon as I get to take them, probably tomorrow; it's dark outside now and I am all hurty from two days' worth of rearranging the house and one of the sheds to find all the stuff for this project, among other things).
This is a new trailer project, to haul larger loads than I can safely haul with the old Bell kids' trailer (which itself has hauled some hefty 200-250lb loads, recently at least 200lbs of metal stuff and dog food on the 12.5 mile ride home from the store I was remodelling last couple weeks).
So, since I want to haul big stuff, and heavy stuff, sometimes at the same time, I need a bigger frame under the trailer, longer, but not wider as I need to still pass thru canal trails or ride on sidewalks with it sometimes. I also need sides on the trailer, preferably ones that can be removed. Then I need wheel wells to cover the tires to keep anything from rubbing on the hweels or tires. And if I have to deal with hills...or under-road tunnels on the canal path, I need power assist on the trailer itself.
It'd be nice if there was a lockbox on the trailer, too, so I can leave tiedowns and the like in there, as well as the batteries to run the power assist.
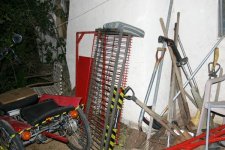
So....I have this frame that was the bottom of our castered book rack at work, which ought to be able to handle teh weight I am after.
I have all the nice pine slats that were part of a crate that our new kitty litter refill station came in.
I have a lot of other metal tubing to build the rails from; most of this tubing also came from the store as we tossed out signage and fixtures.
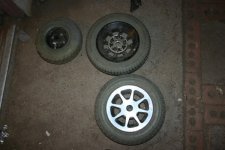
For wheels, and power assist, I have these wide powerchair wheels with airless tires, that bolt right to the axles of the gearboxes driven by the powerchair motors. Those gearboxes are desinged to clamp over round tubing, but can be made to bolt to flat plates (which is how I used them on CrazyBike2's first working drivetrain). So they'll get bolted to the base of the trailer, about in the middle. Probably a little closer to the rear. These gearboxes have a clutch lever to disengage the outputs shaft (axle) from the gears, so it can roll freely wihtout power. The axles themselves have bearings at the far end (inside end) and at the output end, halfway along them, meant to support very heavy people on heavy powerchairs. Should do ok for my cargo trailer. Hubs on the wheels are solid, not spoked, so no worry about side loading.
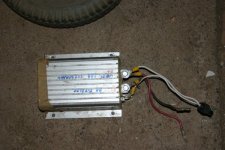
I have a curtis golfcart controller that should work up to 36V, maybe 48V, I forget which. I would like to wire the motors in series but if i do that they'll run really really slow, and I don't think I'd like to go only mabye 8MPH or less with the assist on. So I'll have to parallel the motors, and hope they currentshare well enough. I do have wheelchair contorllers that are dual-channel, but they only work at 24V, (28V max), and are probably speed limited to 4MPH or 8MPH max, and they use a joystick input (which I have, but I'd rather just a throttle). So the Curtis is the best option ATM.
Batteries...I still have these 10 Thundersky 60Ah cells, which weigh around 45lbs or so, and would give me nominally 32V or so. I forget what RPM the motors run at, and what wheel size they were meant for, but I think I should get at least 10MPH out of the system which is acceptable, I guess, when hauling really heavy or really big stuff anyway.
There's a little catch, though. Sometimes...I need to haul wide stuff, like appliances. There's no way to haul that on a trailer that's only wide enough to fit thru wheelchair-sized holes, or sidewalks. So...I either need to make the trailer expandable width-wise, or I need to make sure the wheels are under the frame completely, so wider stuff can still fit on it and be strapped down.
Since teh tires are only around a foot high or so, I guess, (haven't measured yet), it won't raise the traielr bed *too* much to put them completley under it. But it will raise it some, and that will mean that all laods I carry will be slightly more tippy-prone, being higher up.
But if I put the batteries under the frame, slung between the motors, perhaps, then that should help compensate.
I have a big metal toolbox, old and rusty, that could be used as the lockbox on the front of the trailer. But I think I will need to either put it below the level of the bed, too, or off to one side, so I can more easily load long stuff onto the trailer. If I put it on the right side, longways, it will allow me to still tie down long stuff to the hitch boom like I do with the bell trailer.
So ATM this trailer will probably be a four foot long bed, maybe 30" wide, and a foot off the ground. Wider bed by a few inches if I can put the wheels under it completely, though the basic frame is still only about 30" I think. Will weld in extensions to hold the rails and stuff and a sub frame underneath to hold the batteries and make the motor mount points stronger, most likely.
The hitch itself...I want to use a clamp-on hitch that could be used on even a pedal bike...but I think I should go for an automotive ball hitch with the load I want to pull. Maybe make it capable of being clamped or bolted to a regular bike frame still. But I don't actually have the parts to do a ball hitch like that...so I might end up doing a custom design like I used to use on the old kennel trailer
http://www.endless-sphere.com/forums/viewtopic.php?f=2&t=18671
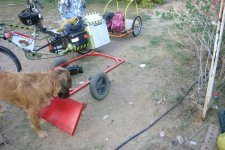
which is all made from old bike parts. I'd probably actually use the parts off that old trailer, as I do not intend to ever use it again due to the problmes i had with it, since I can bolt a kennel to this trailer or the bell trailer easily enough (and I have the huge wire cage type now, which is easier to haul in wind without tipping over, and more fun for the dogs since they can see out all over).


