Amberwolf's Schwinn Trike Rebuild / Conversion to Heavy Cargo Hauler

I think you'll break the axles off if you try that. Plus, keep in mind you have to shift them both from the right side, and drive them both on the right side. That wouldn't work at all for a wheel mounted on the right.
 
Sturmey Archer spec sheet shows 3/8" axle diameter, which, because of the threads the sheer diameter is actually smaller.
Smallest diameter for a typical cantilevered trike axle is 5/8" with no threads in sheer.

Explore this :

This quad used 20mm through axle hubs.
Rear drivers were sourced from Sunseeker (J&B Importers)
Pedicabs / cargo haulers use 1" axles.

orange quad.jpg
 
Thanks; i figured it was just a fever-dream, even typing it up i had a hard time not imagining assorted failure modes.

So, back to the original custom-version of the same kind of hubs already used for the split-live-axle the trike already has, except with bearings to ride on stub axles mounted on the frame itself, and disc brake rotor mounts on the inboard side for mechanical braking and parking brakes.

Just have to figure out what i've already got, or can get very cheaply (rent just went up another $100), to build the stubs and hubs and bearings from.

if I can replace the split-live-axles with tubes (pipe, etc) to do the torque transfer (since they wont' have to support weight while doing it), I can repurpose those as the stub axles, ans see if bearings I already have (other than those already in the trike) will fit them, and have other tube/pipe I can make the hub shells from that will fit over those bearings correctly.

If not, and if i don't have anything else suitable, I'll have to see what's cheap that will still do the job with margin to spare.


I checked the SAE link, but I don't understand how to apply the numbers they give to my design (I'm not an engineer, just a hack, and can't follow most math).
 
SAE link shows shear for 3/8" at 510
with shear for 5/8" at 1510
J&B steel cart hubs with bearings are low cost
Worksman trike hubs might be worth a look see too
Mountain bike thru axle front hubs with disc brake are what's on the front of the orange quad.
Maybe check the local community bike recycler to see if they have a couple ?
 
Last edited:
Thanks!
SAE link shows shear for 3/8" at 510
with shear for 5/8" at 1510
I "understand" that the numbers are for shear (presumably the point at which it would fail from a bending load in this application), but I don't know whether they directly represent how much "weight" I could put on each axle (icnluding forces generated during bumps or drops on road problems), or if there are other mathy factors I'd have to figure out. :oops:


J&B steel cart hubs with bearings are low cost
Worksman trike hubs might be worth a look see too

Unfortunately the only things on the worksman parts list I could presently afford*** are not any of the hubs/etc; they have too many digits in them. The J&B site doesn't have any prices but I don't expect they'd be any cheaper; I'd have to google whatever p/h's they have on the page to see if anyone else sells those cheaply enough.

***I never have lots to spend, but sometimes I have enough extra to splurge on actually buying stuff instead of salvaging / hacking it, so this could change in the future. Maybe if I get enough tax return back...but I should save that to pay for the rent increase for however long it will do so.


Mountain bike thru axle front hubs with disc brake are what's on the front of the orange quad.
Maybe check the local community bike recycler to see if they have a couple ?

It's been a long while since I tried, but last time (years ago) I wasn't able to get responses from local places that have used bike parts. I'd probably have to ride out to wherever they are to pick thru whatever they've got; at the time all those were on the ohter side of the valley from me and outside my time/range limits. Might be new ones around by now that are closer. I used to get stuff from a couple of LBS's within a few miles of me, but neither of them has been around for...a long time.

That's why I am figuring on having to make these myself out of whatever bits I can get to fit togetehr. If I have to I'll just go with the normal double-ended axle hubs I've got plenty of laying around, and build the frame to support them. I'd just really l,ike to try out this experimental method of wheel mounting, because if it works as "planned", it could make some of my life easier. Well, the part *after* the trike is all built, anwyay. ;)

It's also fun to figure out how to repurpose things for uses they were never meant for, when it's safe to do so. (some of my ideas... :roll: :oops: )

If I have to, I already have the hubs / etc on this trike I could modify, but would rather leave them alone if possible; I'd probably have to redesign the stub axles to do the spinning with the hubs and ride on pillow-bearings on the frame instead. Same effect, not sure it'd be as strong given my construction abilities.

I know I can make hubs from "scratch" if I have the right size tubes, bearings, axles. :) Just gotta figure out what those are, and what I have to do that with.
 
Last edited:
The J&B site doesn't have any prices but I don't expect they'd be any cheaper; I'd have to google whatever p/h's they have on the page to see if anyone else sells those cheaply enough.

#371398 (the symmetric one with 3/4" bearings) costs about $25 each full retail. Online discount retail could be somewhat cheaper. The axle diameter is good for what you're doing, but there's no real support for a brake there, so you'd have to use a rim brake on an appendage.
 
Last edited:
Yeah, not going to try rim brakes for the single-ended axle method, just because of having to stick framework out there to support them---if I have to do that I would be better off just using the normal double-ended setup. I'd have to design framework to resist the forces during braking, along the part that would have to stick out past and down below the rim level for the arm pivot.

I'd have to add a piece to the hubs to support a rotor for disc brakes on the inboard side, as well as the drive sprocket (which those hubs don't have either). The latter would have to be done even if I used rim brakes on some funky frame-section.


If I have to go with the normal double-ended axles then rim brakes are easy and would work fine, I'd probably even end up using whole rear ends off these junk bikes to get the "suspension" :lol: they offer (I'd probably use the MC springs/dampers I've got, though, not the pogos that come with them).

I don't really want to, but just to get a second trike going for a spare, I might do that sort of build. It makes a wider trike without giving any more cargo area (less, actually), and doesn't have any of the advantages of the single-ended method that I want to try out...but I don't have to buy parts to do it, and it takes less fabrication work, making it more likely I could complete a spare trike before I actually need to use it due to whatever problem SB Cruiser could develop.

If I do what I intended to, making the rear frame clamp/bolt on to the existing Scwhinn trike frame, then if I end up with the time/budget at some point to do the single-ended version, I can build that separately and swap them out (not possible with SB Cruiser).


Meh. Hard to really think right now; stuffiness and coughing and nausea on top of being worn out. It would help if I didn't end up getting sick just as I start my time off to get things done, just about every time. :(
 
So the peerless diff arrived, it's actually a 141D model. 1" OD x 38" long Axle, threaded ends for lockdown ahrdware, axle is slotted along around 10" at each end for woodruff keys, and ther'es two more rounded key notches a few inches from the diff itself. Some pics from the intarwebz
1739843095126.png 1739843754985.png
My actual diff, sitting on the trike around where it will need to go, with the tiny little diff the trike came with next to it (no axles in that; those are in the wheels on the trike):
20250217_144630.jpg20250217_144713.jpg20250217_144728.jpg20250217_144907.jpg

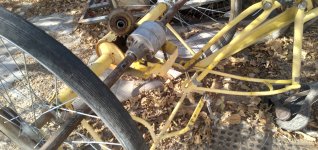
So I thought I'd go dig out the sprockets and chains I have to see waht is usable, and then I remembered I stil have that old broken powerchair lift that has a bunch fo chains, etc. So I didn't get the sprockets dug out, but I did get that lift disassembled as I've meant to for a long time.

The lifting-arm chains are wide and heavy duty, but closer=-sp[aced rollers than bicycle chains. I didn't measure it yet but I"m guessing it's #35, because it's way bigger than #25. There are two chains, onw for each arm, I think they're long enough to reach the rear wheels from the diff axle.
20250217_145812.jpg20250217_151742.jpg20250217_155025.jpg
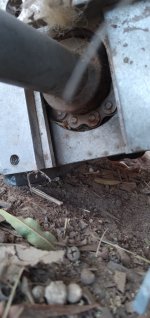
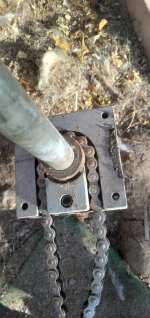
They are driven by a shaft that itself is probably 3/4" and might work as a transfer axle, itself. It has sprockets at each end for it, and a mount at one end with key slot for the drive sprocket and dog clutch that's driven by the giant brushed motor with gearbox that ran the lift. There's capture/guide hardware with bushings that moutns to each end to secure it into the lfit arms (which are holow aluminum box tubes).

20250217_145843.jpg20250217_145836.jpg20250217_154843.jpg20250217_154854.jpg20250217_154901.jpg


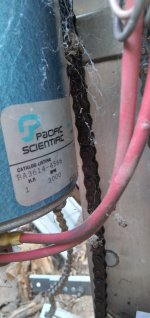
The motor and gearbox, which is huge (the size of my thigh) and probably weighs 50lbs. It's brushed, capable of up to 80A at 12v. It would be very simple to drive (I have a small old curtis golfcart controller that runs on 24-36v, if I wanted to use a low-voltage system; I could gear up the output for more speed because I am certain this thing has more torque than I could use withotu mangling the drivetrain or frame. :lol: But...50lbs.... :( Would be tempting otherwise. Could even run it controllerless and just use contactors to switch cells in and out like some of the old forklifts used to do...it has at least three or four contactors already in the electrics box. I
20250217_145659.jpg20250217_145709.jpg20250217_145726.jpg20250217_154913.jpg20250217_154929.jpg20250217_155833.jpg
 
Only 20 pics per post so

last pic of the lift arm shaft, showing it in comparison to the trike frame nd the diff, etc.
20250217_160040.jpg

the motor has a big thick aluminum plate that it mounts to, welded to one of the aluminum box tubes.
20250217_155841.jpg
This is the dog clutch and sprocket.
20250217_145745.jpg20250217_154909.jpg
This is the dog
20250217_144746.jpg
well, a doglike being that doesn't act like a dog most of the time, anyway, but pretended to be long enough to get the pic

These are the box tubes that are the lifting frame of the lift platform, and the lift platform itself. I am considering using the platform as the rear cargo bed. it's fairly heavy (at least 30-40lbs) but a steel frame plus wood to do the same thing would proably weigh just as much adn require more work to build. I'd still need to bolt a steel subframe to it so I can weld the wheel mounts/stubaxles to the side of it, and have a framework that goes up over teh whole thing for a canopy, etc. liek sb cruiser has. This lift platform is itself as wide asl the whole sb cruilser, so if i use it it will make this trike at least 6-8" wider than sbc, which is probably too wide to use for work commutes because it may not be able to make the corners inside the building to get it back intot he breakroom where i have to park it (to keep thieves and idiots from messing with it while i'm working my dayjob).

I could cut it in the middle and bolt the halves together overlapping....

20250217_145911.jpg20250217_155845.jpg20250217_155904.jpg20250217_165645.jpg20250217_165657.jpg


This shows those roller bearings I was talking about in a previous post, slid over the lift arm shaft that they fit fine, and over the orignal trike dif shaft, which theyre too big for. they're too small to fit over the peerless shaft at all.
20250217_170235.jpg20250217_170334.jpg
 
keyed drive disk brake hubs 32h (I assume 1" ID) Taiwan, so no idea of cost.
https://www.samagaga.com/products.php?cID=5

Staton has 1" ID collars if you can weld these to your existing steel hubs, then file a key-way. They use to have disk brake rotor adapters to mount the rotor on the axle, but I didn't see any on my first pass. They also have a wide assortment of sprockets that fit your Peerless differential bolt pattern.
 
Last edited:
https://www.samagaga.com/products_detail.php?Key=69
Staton has 1" ID collars if you can weld these to your existing steel hubs, then file a key-way. They use to have disk brake rotor adapters to mount the rotor on the axle, but I didn't see any on my first pass. They also have a wide assortment of sprockets that fit your Peerless differential bolt pattern.

I appreciate the link--I've looked at staton's stuff a lot over the years; have had wishlists quite a few times (never could buy the stuff though).

While it is a PITA, I can make sprockets that "work" if i have to; depends on the time I can spend on it vs whether I have any money I can spend. (the former, as hard as it is to find any, is easier to come up with than the latter, since cost of living just keeps going up way way faster than income). I don't really want to, but it's gotten back to the point I was at years ago where if I *can* make it, I have to try, rather than buy, and buy only when I can't make that part or salvage one from something.

keyed drive disk brake hubs 32h (I assume 1" ID) Taiwan, so no idea of cost.
FD-HUB 32H |

Funny, I was just typing up a post about this stuff, and cover info about the hubs, hough at the end of the post below all this. I've also described this in earlier posts in the thread, but the gist is that my wheels need to rotate freely on stub axles, the hubs can't be fixed to the axles because the axles will be fixed to the sides of the cargo area framework. The wheels are not mounted to the diff directly, they're chain driven from the output of the diff.

So I don't want keyed hubs for the wheels; I need hubs with bearings in them. ;)

This was going to be part of the bottom section of this post, but...I'll stick it here: Most likley I'll have to build them from whatever materials I have here, it shouldn't be that hard--more or less a tube and two flat round plates with spoke holes. :lol: Spacer tube between the inboard and outboard bearings on both the outer race and inner race, with the OD spacer tube at least spot welded to the hub shell tube. Getting bearings large enough to work (1" ID, dunno what OD yet) is tougher. I may actually have some in some old powerchair gearboxes, but they may only be 3/4" ID). If not, I'll have to buy them.

Ideally I'm also going to have a single-sided front wheel identical to the rears, so I can carry a single "continental kit" type spare wheel to fix any of the three that might fail on a ride. For this I need to build four identical wheels, so would need to make four hubs, and have to find or get eight bearings (I hope they're cheap :/ ).

(the single sided front means a really strong single-sided fork; I know it can be done; Chalo built some for pedicab usage that is harder on them than I would be).


Back to the post I was working on....

So...a potential plan with the above parts (which is probably easier to build from scratch rather than using the existing trike frame, but I still plan to use this trike if it's possible..so much for an easy build :lol: ).

--Cut the Peerless diff (PLDiff) 1" axles just outboard of the short woodruff key slot.
--Cut the 3/4" lift-shaft to make pieces to replace those cut-off axles above, keeping the sprockets on their ends. ****
--Create a pair of collars from pipe to fit over the mating ends of the above, probably secured with bolts thru each, but possibly using a key in the collar to theslot in the 1" axle, and welding the collar to the 3/4" axle.
--Create a new mounting point on the trike frame (above the old diff housing) with some form of bolt-on pillowblock bushing or bearing on either side of the PLdiff casing to hold it in place. The mount needs to offset the diff to one side so the sprocket I'll put on it for pedal input lines up wiht the output sprocket on the center of the IGH in it's existing mount. The motor input sprocket goes on the other side of the diff and the motor can just be put whereever lines up with that.
--Create new mounting points on the trike frame for those bushing blocks that go around the sprockets on the lift shaft, so that the output end of the blocks points at the rear wheel axles.
That creates a system that lets both pedals and motor drive the diff, and provides suport for the outputs shafts, and places sprockets at the ends to drive the chains to the rear wheels' hubs.


**** an alternate method, given that these don't have to support any weight, is to use pipe large enough to go over the 1" diff sections except right at the sprocket and bushing end, and using a 3/4" pipe there (saving the entire intact 3/4" shaft for some other use later). This saves a tiny bit of weight, though isn't the goal. It saves making the collars, as the pipe *is* the colar.

Also....instead of collars I might be able to use the lathe to core out the cut 1" axle ends to let the 3/4" shaft (or pipe) fit inside it and pin them together with a bolt.


Either way, this leaves me with the two long sections of 1" axle from the PLdiff to use for stub axles on the rear wheels. These would get welded to plates (via short collars, probably, to help with alignment and stress on the joint). The plates would be bolted to the rear extension frame. (maybe welded to it).

I'll keep the threaded ends on them, to use for whatever nuts I end up with to retain the wheel hubs on them.

I wanted to use some roller bearings I already have for the wheel hub bearings, but they're too small a diameter for these 1" axles (they'd fit 3/4" ones), and there are woodruf key slots in these axles, which prevents using htem as bearing surfaces. So have to find bearings that will fit 1" axles tht will also fit whatever hubs I can make.


The 1" PLdiff axles were intended to be live axles so they have that key slot, so they're meant to be used with hubs that don't hafve bearings in them, like the pedicab hubs I've seen so far. However...I need the axles to be fixed in place, and have the hubs ride on bearings on the axles instead.

I can't think of a way to mount the stub axles so that they could rotate as live axles and still be supported properly, or I could do that instead. To support them correclty would require more space inside the cargo area than I'd like to give up, as it would need at least a pair of pillow block bearings secured to the framework, which would have to extend for at least several inches into the cargo bay on each side.
 
Last edited:
Sorry, I haven't been following your build like I should have.

As a possible rear frame consideration, take look at treadmill frames, if it interest you. They litter second-hand stores, so many just give them away. I've built a number of mini utility trailers with them. This one measures 63.5" x 24" and weighs about 10lbs after the excess is trimmed - some weigh even less.

1739861454804.jpeg
 
Last edited:
I should probably poke around for some more treadmills; I've gotten two off Freecycle over the years.

I have some treadmill frame parts that are aluminum, as well as the box tubes from the powerchair lift. I'd have to bolt that stuff together as I can't weld anything that isn't steel, though. I may have some treadmill frame parts that are steel, but I think I already used those to build The Raine Trike.

I also have some heavier steel stuff similar to treadmill frame pieces that was from retail fixtures...but it is heavy.

But it's much more likely I'll use the lighter 1" square tube I have that's worked well for the majority of the SB Cruisers' frame...because I have it (and some of it I even already have in a beige taht is close enough to the faded yellow of the schwinn that I can avoid painting most of it, just dealing with any weld points).

I'll have to modify whatever it is I start with, since it's unlikely to already be the right shape, and it has to eventually make a box that I can secure at least marginally, like the back of SB Cruiser, to deter the more honest thieves (the desperate or vandalistic ones could get in anyway even with a steel safe for a back end). .

I might start out the same way I did with the original SBC--flatbed rear with a strapped-on dog crate. I still have the one I painted white for SBC, that I used to carry Tiny around in (she's the only one that was small enough to fit in it). Then eventually build a custom enclosure like I did with SBC, which was made out of fence planks).
 
Other potential drive parts:

The curtis 1204-410, which I used with powerchair brushed motors with gearboxes on a version of CrazyBike2. Should still work, has been in the shed for a decade.
20250218_214208.jpg

a brushed motor off a large 8x3"-fattire standup(with-a-seat) scooter mdd0127 gave me years ago (wish I still had the whole thing; I just have some of the parts). It's output sprocket matches the chain from the lift arms of the powerchair lift (that's what the chain piece on the spring is from). I think I still have the wheel's input sprocket too, not sure if it is still on the wheel. Would be nice if I do, as if it is the right tooth count (which I haven't determined waht that is yet) I could use it as a template to duplicate for the second one (if they're correct, I could use them for the wheel hub input sprockets). This motor is roughly the same weight as the GMAC or the Ultramotor (as used on the Stromer or A2B Metro) that I have two of on the SB Cruiser. Heavy, but no heavier than I'd be using anyway. Less efficient, being brushed, but much simpler to control (and possible to use even in the event of a controller failure by directly connecting to a battery as an emergency get-home measure)
20250218_214003.jpg 20250218_214010.jpg


The big blue motor in the pics is the 24v 80A one with gearbox off the lift; it's chain is much larger and heavier duty (I don't know which chain type it is, but it looks about the same as the motorcycle chain I had (might stil have) off an old 80s Suzuki dirt bike. If it is, and if I still ahve those Suzuki parts, I then also have some alternate sprockets). This motor is so huge and heavy it is unlikely I would use it, as it would weigh as much as *at least* two whole hubmotor wheels, possibly as heavy as two MXUS450x motors plus the 20" wheels and moped tires I use on the SB Cruiser. I'd rather use that weight for cargo capacity, or for structural strength.
 
I dug out more drivetrain potential parts, including a matched pair of 1/2"-chain sprockets (which if they were the other size I'd be able to use for the rear wheels),
20250223_161253.jpg20250223_161256.jpg

and I also setup a mockup of the trike with the powerchair lift bed as the cargo area, just to test fit things and get a potential idea of the layout. In the process of doing that I got the handlebars and fork and fenders off, and temporarily bolted the trike rear frame to it's front frame.

It was way easier than ever before to get those parts off. On anything that's sat outside for even a few years (much less decades like this trike) I've had to hammer, pry, finagle, and generally cuss-out handlebar quills, seatposts, steerer nuts, etc, but none of these were rusted shut, and only even had a touch of any rust on them at all. Just had to loosen the fasteners (which itself was so easy it was like I had just put them together for the first time immediately prior....).
20250223_161231.jpg20250223_161237.jpg20250223_163028.jpg


One trick I used getting the fenders off was to use a short bit and stick it all the way into the chuck, so I didn't have to deal with the flatblade sliding off / out of the slotted screwheads (the chuck itself sits over the screwhead that way, and keeps it in place).
20250223_162237.jpg20250223_162223.jpg

I keep not ending up using this biog DD-hub type powerchair motor, but this trike would be a good use for it; easier to mount than a hubmotor, but similar speed and torque output. Heavy though.
20250223_180813.jpg20250223_180847.jpg
There's also an old treadmill motor; this was the first motor i'd intended to use on CrazyBike2 but went with a brushed geared powerchair motor instead.
20250223_180857.jpg
I have at least a couple of the wheels shown there that have the removable spindle to go on the gearbox output shafts, they would fit on at least the schwinn's original diff axles, so could b eused to bolt sprockets to. Can probably bore them out for a larger axle if necessary.


The basic layout, though it needs to be shorter; the seat neesd to move forward, so once I remove the trike's basket-holder frame (where the seat is now), and make a subframe to hold the seat and build a lockable cargo box area under the seat, the cargo bed can move forward a few inches (and thus the rest of the rear end). Total length should be close to that of the SB Cruiser, but probably several inches longer, maybe even a foot. Should end up at least 3" lower to the ground than SBC, at pedals and cargo deck base. If I use the full lift bed it'll be wider by at least several inches than SBC; that's a potential problem getting thru certain places with it (though it would make it more stable in turns, etc). There are some "rails" I can put on the sides of the deck, and a ramp that was part of the lift bed that can become the tailgate 9and still bea ramp). Or I can bulid the entire rear end out of steel square tubing, and use a wooden deck, with those rails on the sides. Either way I then have to come up with a covering to enclose it, preferably removable (as SBC's was intended to be, but I ended up making it permanent, which precludes it carrying tall stuff, so requireing a trailer for those things). ingore the buckets holding up the lift bed.
20250223_165719.jpg20250223_165726.jpg20250223_165033.jpg20250223_165733.jpg20250223_164602.jpg20250223_170255.jpg20250223_163714.jpg20250223_163732.jpg20250223_165056.jpg
Not all the pics will fit in this post, so the rest are by themselves in the next one. but below are a comparison pic of sbc, and in the next post are measurmeent comparions of the deck level and the crank height

20250223_165140.jpg
 
leftover pics from the above post comapring crank and bed hieghts.
 

Attachments

  • 20250223_165318.jpg
    20250223_165318.jpg
    4 MB · Views: 1
  • 20250223_165308.jpg
    20250223_165308.jpg
    4 MB · Views: 1
  • 20250223_165247.jpg
    20250223_165247.jpg
    4 MB · Views: 1
  • 20250223_165232.jpg
    20250223_165232.jpg
    4 MB · Views: 1
Still looking for drivetrain design input
 
I flipped everything over to chekcout some layouts of framework on the bottom of the ex-lift deck. It'll be stiffer if I go with a steel square frame around all the edges and an X across the four corners, and stiffer means less flexing and less likely to crack the aluminum deck from fatigue over time. IF this frame is all welded up and then as a whole bolted to the deck, it'll stiffen the deck istelf and the deck will stiffen it.
20250310_162942.jpg

But there's also the option to go with the large rectangular box tubes that used to be the lift's arms and framework. I can't weld these, though, as like the deck theyr'e alumnum. And I don't think I can bolt them securely enough together to prevent frame flex (though I can bolt them to the deck itself easily enough), and I don't have enough to do both an X and an ourside square, .

Those box tubes would certainly stiffen up the sides really well, and using one across the cdnter directly between the wheels, secured by gussetted L brackets or something to the side box tubes would help prevent bowing of the deck from loading between the stub-axle wheels.
20250310_164242.jpg 20250310_164249.jpg

20250310_164300.jpg

Then I set a couple of possible motors (the casing from one of the Fusins, dunno where I put the core at and the big heavy powerchair "hubmotor") , and the diff and the other axle with the sprockets on there to get some idea of scale, placement, clearances, etc. The side shots don't show the front frame at the right angle, or the rear wheels at the right height, because I couldn't set the deck any higher with the stuff I happened to have right there (couple of litter buckets). The wheels should have their axles "above" the top lip; of the deck sides, rather than in the middle of them, and the front frame should be angled much further "up" at the front.
20250310_163001.jpg 20250310_163011.jpg 20250310_163103.jpg 20250310_163109.jpg20250310_163517.jpg

20250310_163403.jpg
 
Last edited:
I like what you are doing with this build.

I don't have much in the way of advice to offer for it since your resources are limited and you and others here have already figured out most of it. Should you ever build a canopy, it would be a great place to put some used solar panels, which you might be able to find for cheap or even free. It's the charge controller that's going to cost you...
 
I like what you are doing with this build.
Thanks. I wish I had time (and energy) to really work on it, either physically or mentally; I have the "itch to experiment". ;)


I don't have much in the way of advice to offer for it since your resources are limited and you and others here have already figured out most of it. Should you ever build a canopy, it would be a great place to put some used solar panels, which you might be able to find for cheap or even free. It's the charge controller that's going to cost you...

Oh, it wil have a canopy similar to SB Cruiser's, just because I need the shade here most of the year. :)

Solar...thre's some posts over in SBC thread with thoughs on that; was a few years back but I think i concluded that i couldn't get enough energy to be wroth putting the panels on the trike itself vs the weigth and complexity they add. I have three identical panels that ocvuld ber seriesed, covered in that post, and another different panel that's rpobably better than those; it's made of a bunch of separte cells while the triplets are single cell panels.

Would be a good coolfactor but it's more practical to leave the top fo the canopy usable for cargo carrying; iv'e done that a fair bit with SBC and couldn't with panels up there; they'd probably be broken by ths.


EDIT:
1743143214577.png
 
Back
Top