another 80-100 rear drive build thread (now with Tongxin)

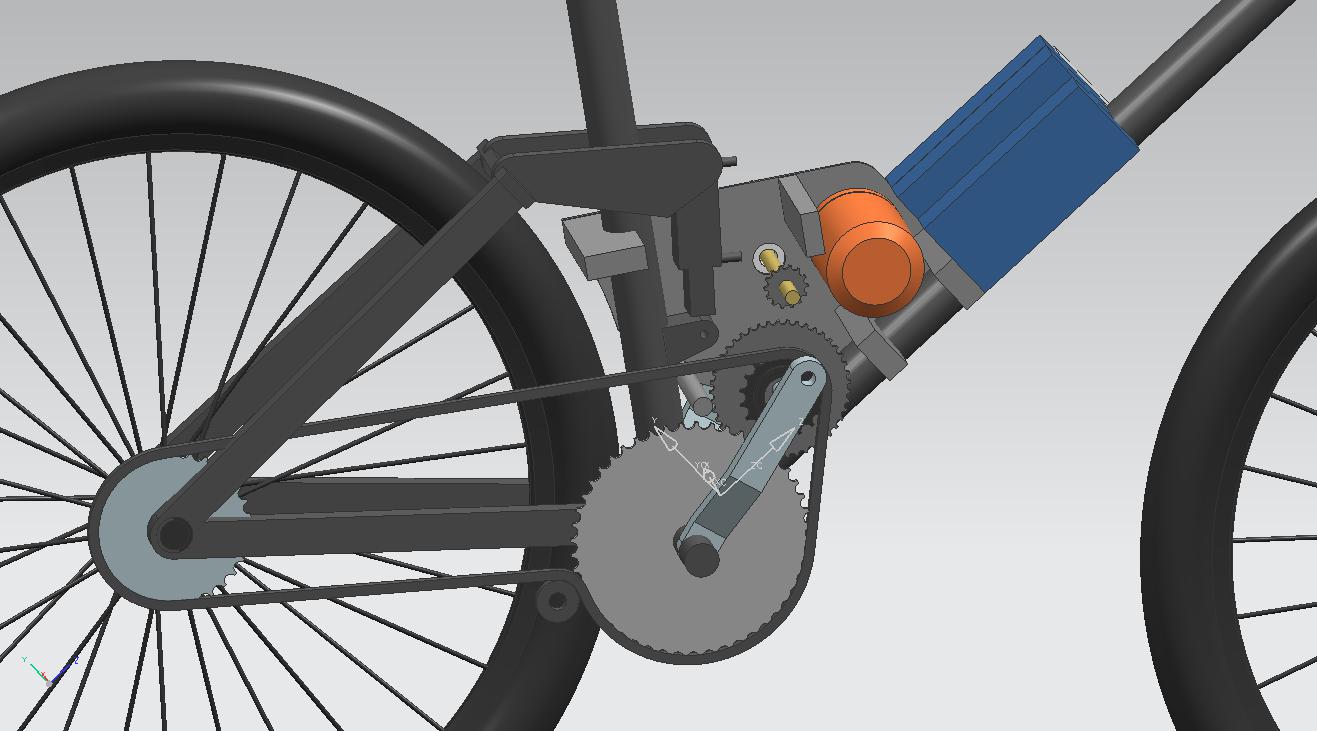
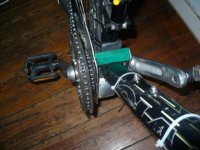
The chain cracked again due undercharged chain tension. A roller type chain tensioner cannot work good with a short chain.
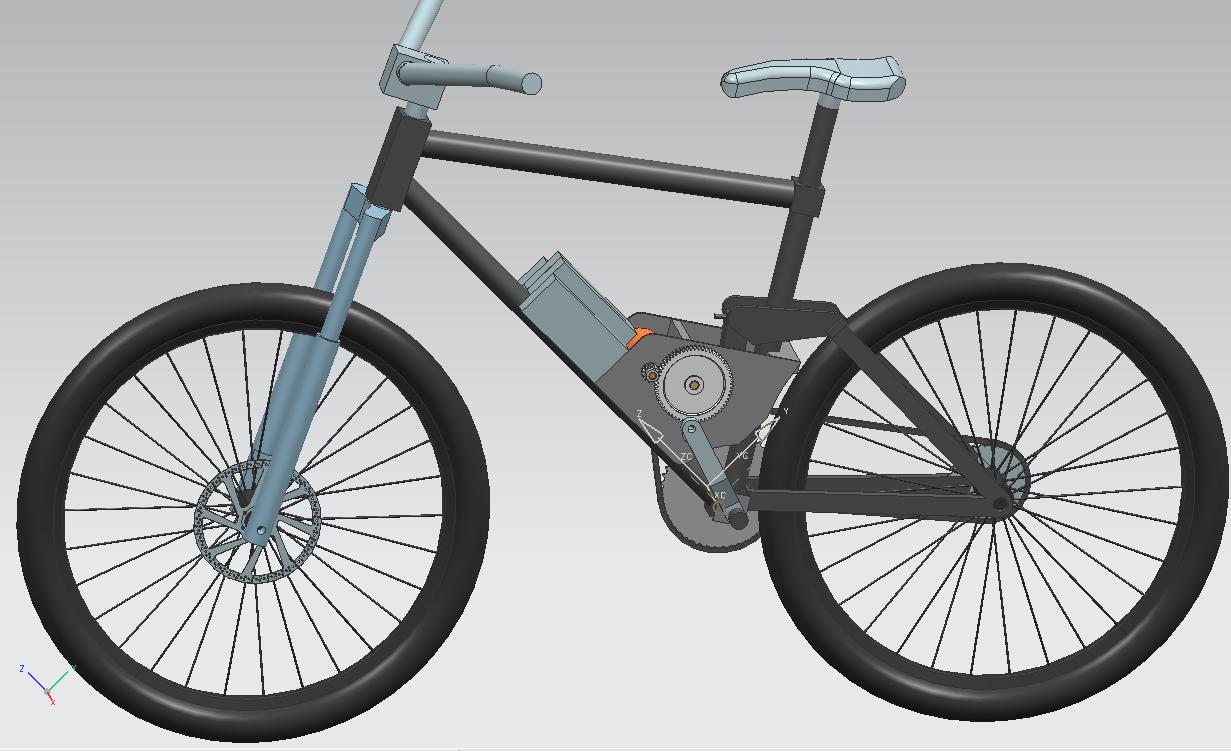
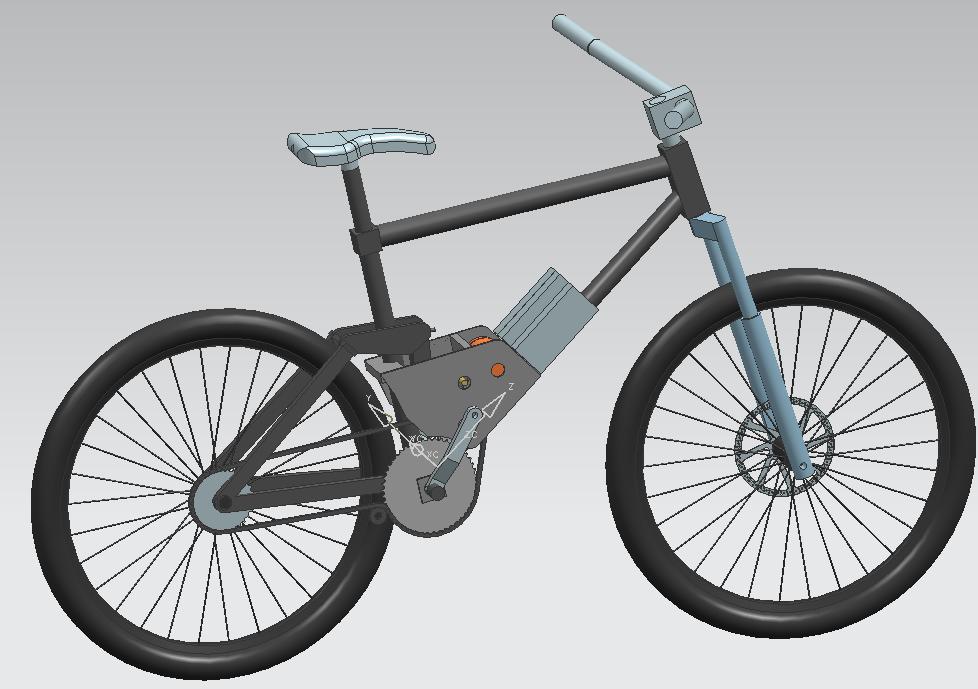
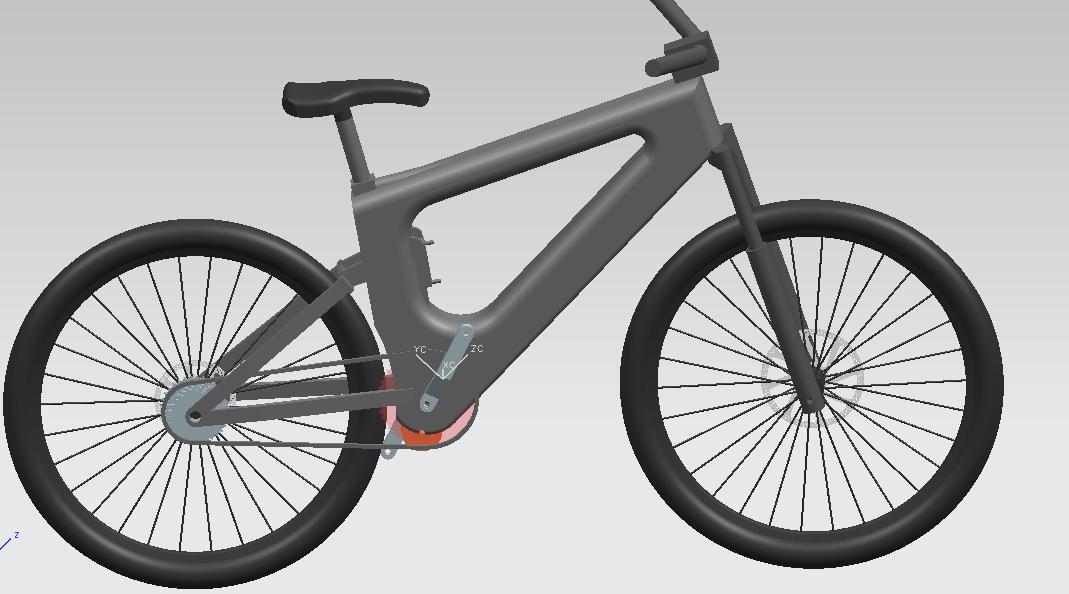
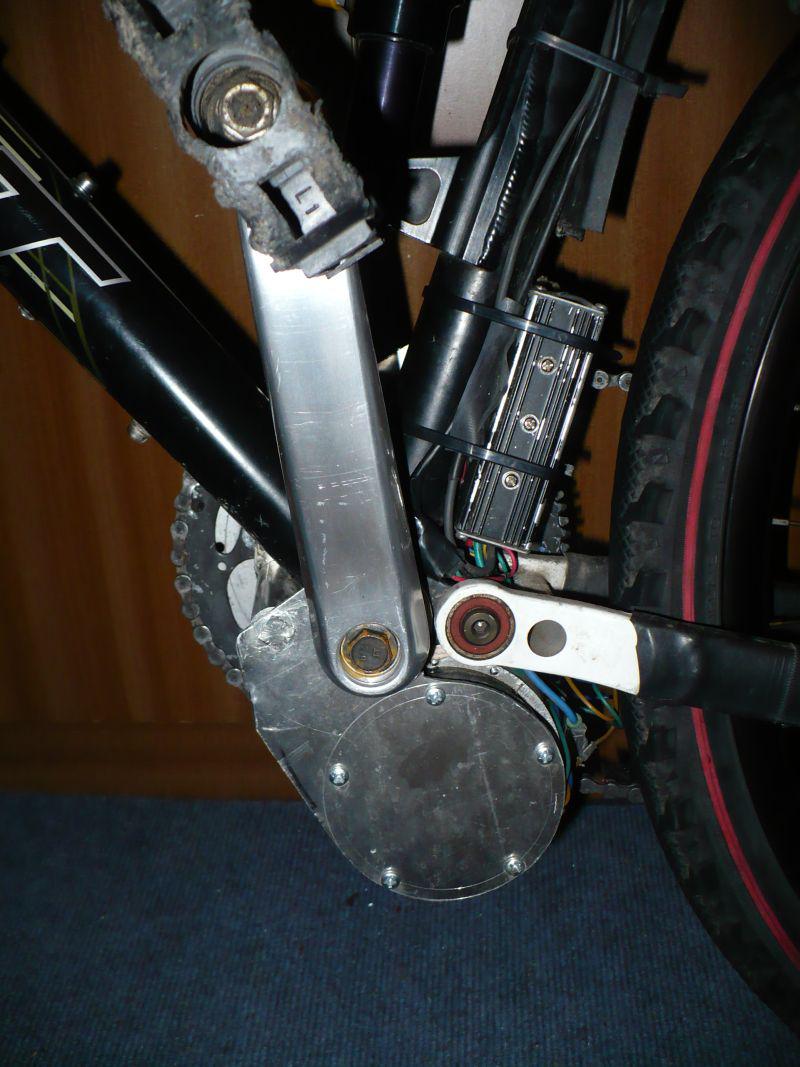
Also, fastening the motor with it's housing on any frame part radially will always lead to bad alignment. So I decided to directly mount it on the bottom bracket by a 5mm alloy sheet on each side of the bracket. The right sheet will be fastened by the bracket directly, the left sheet by three bushings and screws on the right sheet.
The motor will the be fastened on the right sheet axially by twelve M3 screws. The left side will just have a hole in which the motor fits in.

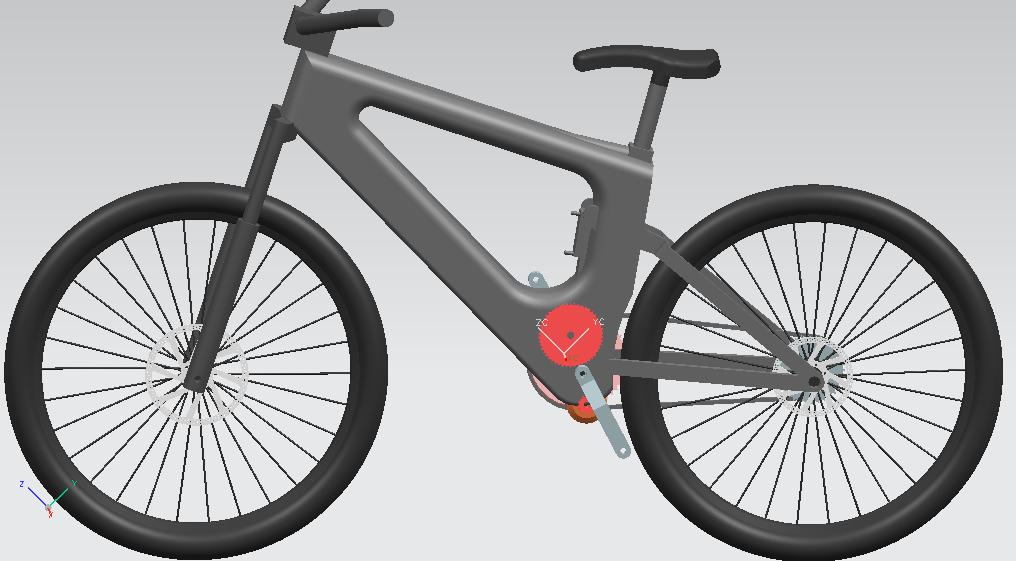
I decided to use a spiral type chain tensioner now, which varys the distance between bottom bracket and motor axle. I've got one on my motorcycle which works great. Should look like these:

Edit: they are also called " snail cams", as denise told me.

bultaco-montesa-rear-alloy-chain-tensioner-pair.jpg


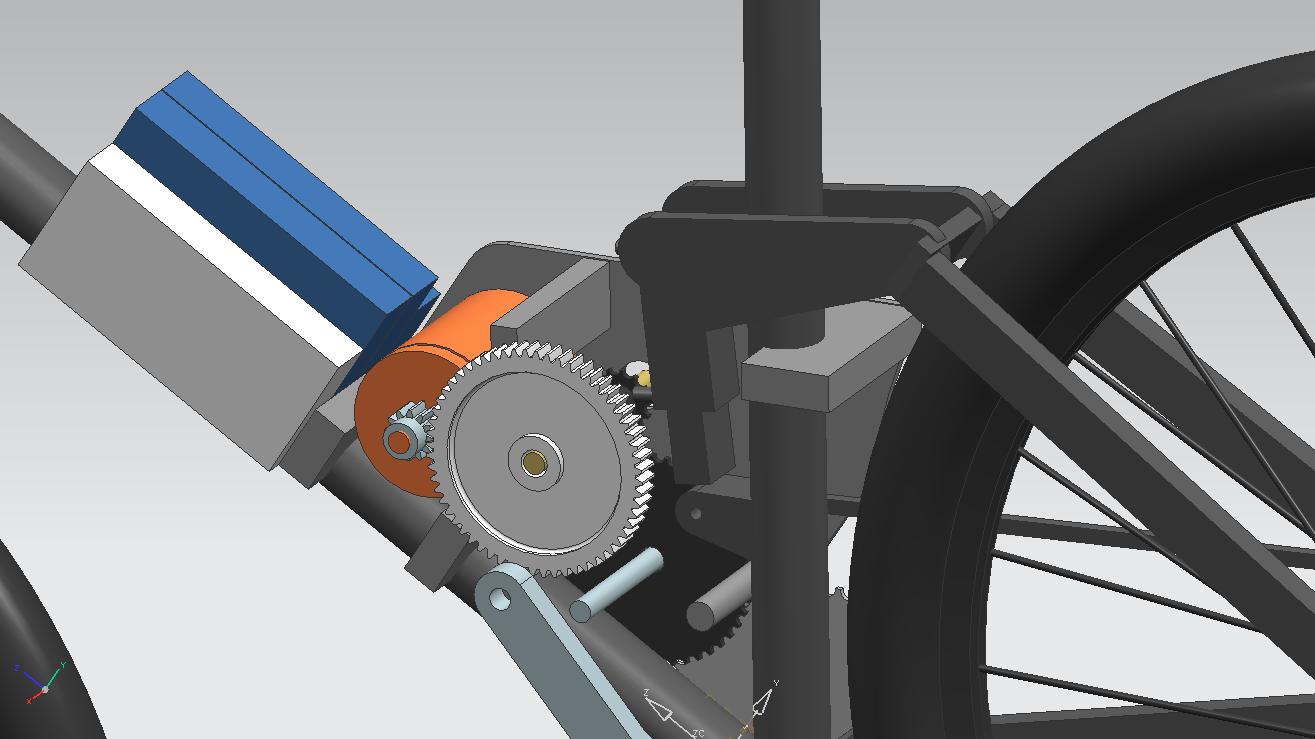
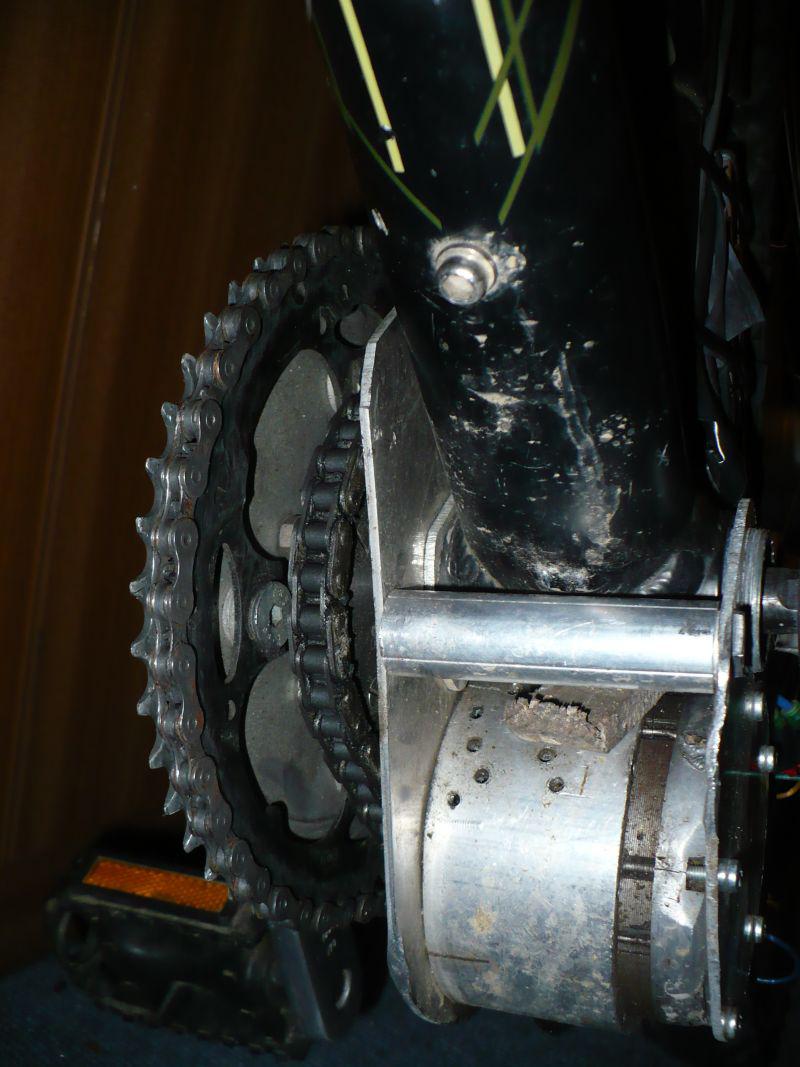
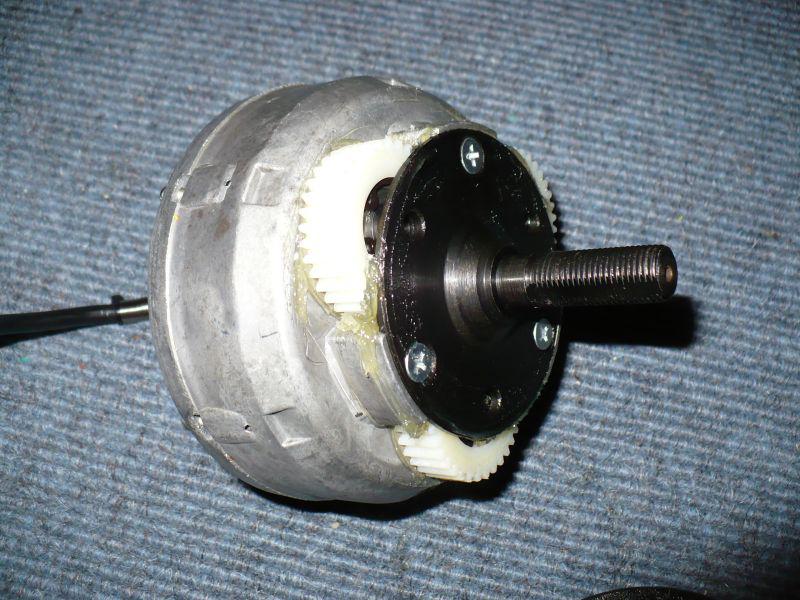
I also shortened the Tongxin by one centimeter:
c23gk0xggdbtmms44.jpg

c23gfteh7fw04k3bo.jpg


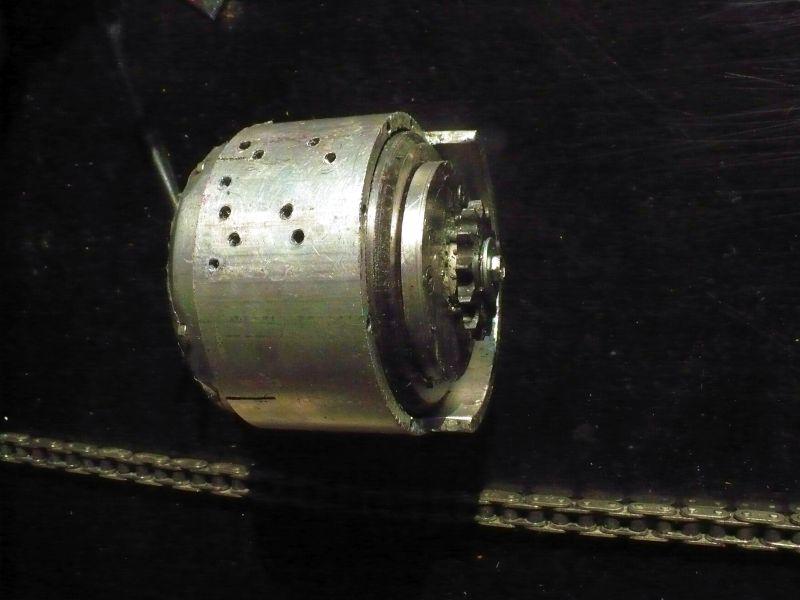
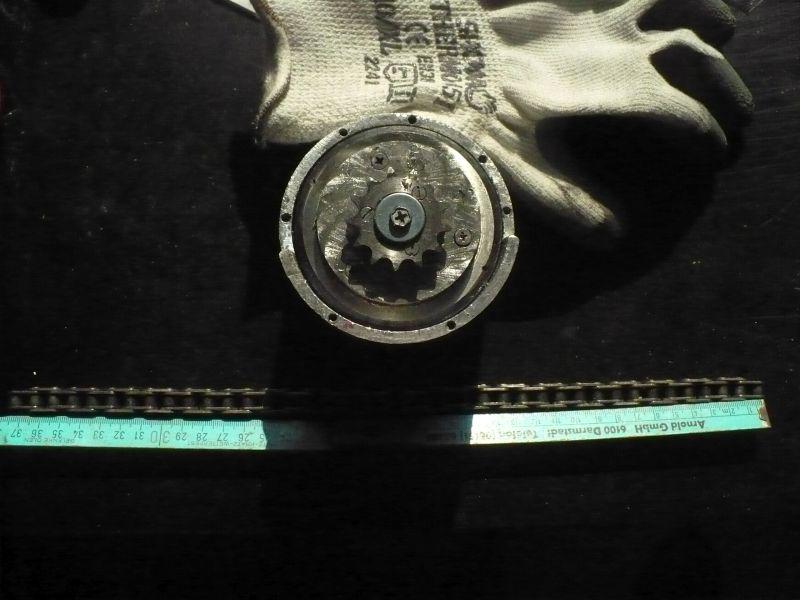
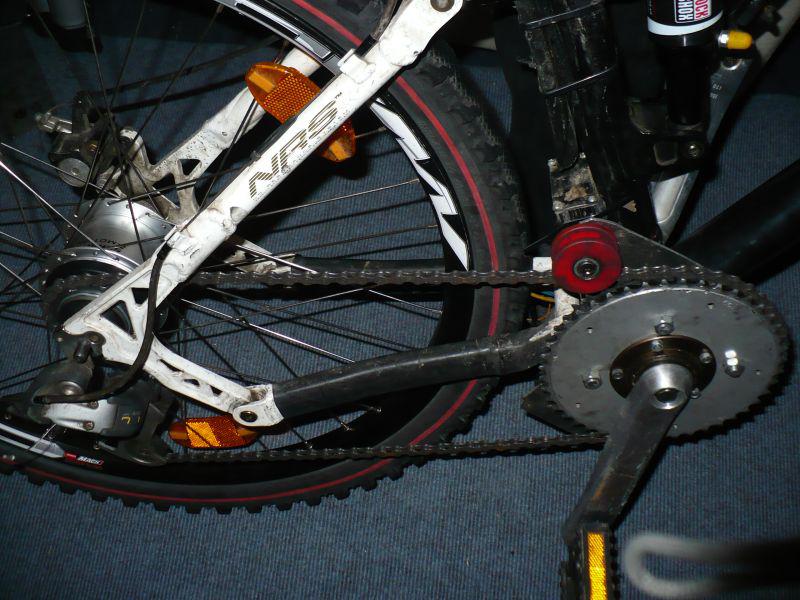
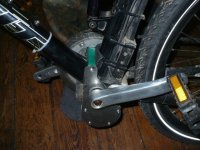
As you can see all the holes, I tried hard to radially fasten the tongxin with M4 screws and get the chain aligned. It worked so bad I cannot recommend at all. I thought, there are so many on endless-sphere who did it similar, it just has to work. It does but not very long, since it's not stiff enough. The green plastic spacer I made, sucks. It was just a bad idea. When I got the new sheets done ( I ran out of alu alloy :( ) , I will post the plans for everyone whos interested.
 
Awesome work! Enjoyed reading this thread, very clean and well thought out designs. Personally I think this was the best design. Keeps the motor protected, has the reduction gears, and is still quite stealthy. Keep it up!


crossbreak said:
 
shock said:
Awesome work! Enjoyed reading this thread, very clean and well thought out designs. Personally I think this was the best design. Keeps the motor protected, has the reduction gears, and is still quite stealthy. Keep it up!
[/quote]

thanks for your post!You are right, this design has many advantages as you mentioned. It is signal gear, but a three speed gear hub in the jackshaft would make it complete (it would take less load there). I'm working on this.

My Tongxin design has it's own 5mm alloy housing armor :D That's why it wont be harmed through dirt.
 
c2gyhw18ysbsnzrz8.jpg

c2gyihh7ihqafta3o.jpg


the motor could be mounted under the bottom bracket, the hubgear above. Inside the frame. I imagine a two sheet design like the tripendo (http://www.tripendo.com/) with blended edges. Wouldn't that be a beauty without an cables boxes mounted to the frame etc...

Such a frame souldn't be to hard to make if one has a good master plate like a great existing conventional frame 8)
 
It ran good for 450km, now my 8th and 7th gear are waste :( I get 35km/h in the 9th gear. Hill climb is also great. yet i could not find a hill that i didn't drive up at less than 22km/h.

now i got an i-motion 9 gear hub . I want to install a 52t chainring in the front, thats thi largest i can use without loosing more of the 20cm ground clearance. I hope it will survive this little motor and me...It's not yet completely installed.

c38j4lld64k1rc7nk.jpg

c38j6j7w3ngdef074.jpg

c38j83d9cr0i4njy8.jpg
 
I just accidentally ran across this thread--it looks like you are building just about exactly what I am wanting to do on the Nishik-E. :) The only difference so far is that you are using the actual righthand axle, cut to length as needed, whereas I want to save the orignal axle (as someone else would like to have it and the casing intact for another project, and/or I could then use it to return the TongXin to original hubmotor usability should it not work out in this role).

Well, that and you've actually made it work already! :oops:


On mine, I was thinking of thick plates in a squared upside down U shape, bolted to and/or thru the kickstand area under the chainstays, and bolting the back end of the TongXin to the left side of that, and the right side plate having a side-loaded bearing retained in it that presses against the plates that secure the clutch assembly onto the face of the motor, and keep stuff out of that area (since I'm not using the axle). If the shaft/plate I use extends out far enough without clearance issues to cranks, I would then also run that thru the rightside plate so that it cannot wiggle around under load.

Does that make sense without a drawing?
 
I would then also run that thru the rightside plate so that it cannot wiggle around under load.

Thats very important, without that your construction wont survive seconds. My first attempt failed because of that.

Without any sketch you wont make it. you even have to know the exact distance between the shafts. you can calculate them with a online chain calc.

BTW a Q128 bms-bat motor looks just the same like the tongxin from the inside. It just uses a gear drive (90T ring gear , Module 1, 10mm gear width), has a 105mm outer dia and is rated for 30amps, the disassemble is much easier, too (if you unscrew it, it will fall apart) :
c39f3cp3p2rsf71dg.jpg

c39f4s78c9p19oipg.jpg

c39f4xfczd4p56w8k.jpg
 
A maintenance disassembly after 1000km (the motor has about 5200km on the clock now):

i231716_P1020543.jpg

i231717_P1020545.jpg

i231721_P1020555.jpg

i231722_P1020556.jpg


my parts for the next drive, isnpired by slawek's angle grinder drive (will be continued in another thread):

http://endless-sphere.com/forums/viewtopic.php?f=28&t=26699

i231718_P1020557.jpg


200KV Aeolian 6374 motor
44 to 12T module1 angel drive
12T #25 chain sprocket
 
If you attach them to the posts themselves, they should stay. The server they are hosted on here at ES is regularly backed up nowadays (unlike before when it might or might not ever have been, and no access ot any of the backups that might've existed anyway).

So they should all be pretty safe for the foreseeable future. :)
 
Crossbreak, wouldn't it be the chain under increased stress? It looks symmetric to me, i.e. no worse on the 13T cog. but the chain tension, felt on both gears, goes up as the chainring diameter goes down (for the same crankarm length). Hmmm... a small front chainring is typ 29T ... dropping to 13T would more than double the chain tension for the same crankarm. I've never broken a healthy chain, but that sounds like a recipe for a chain break. :(
 
Hi lonestar-not,

if you have problems reading my PM, don't bother ;)

. dropping to 13T would more than double the chain tension for the same crankarm.

Sth. got mixed up here. The chainring which is driven by the motor has 32teeth not 13. The motor sprocket has 13. A 13T would not fit on the botton bracket.

If you look at the pictures carefully, you can guess that this chainring is about half the size of the big final drive chainring. As a matter of fact, this leads to double chain tension on the motor drive chain, while not pedaling.

While pedaling hard, the chain tension on both chains is about equal.

BUT: The motor drive chain is not a bike chain but a #35 go-cart chain. It lasts more than twice as long as a normal bike chain with the same stress. That's why you should bother more about the final drive chain, it will be waste first.

Btw, the chain break stress (bike chain: about 8kN) should not be used more than 1/6 at full throttle+pedaling, otherwise the chain will not break but the sprocket :!: will be waste very quick.
 
Hi guys,

I have an update. The torque mount was made poorly, I made a new one, again of green plastic, to prevent the frame from scratches. I took the frame triangle because I think this is a very durable point to take the motors torque.

The motor has now about 6000km on the clock. Sadly my odo was reset :(, so I can't tell exactly. The 13T #35 chain sprocket does now have signs of usage :D but is holds up well.

file.php


this pic was taken before I screwed the lockring onto the BB:
 

Attachments

  • mount1.jpg
    mount1.jpg
    86.1 KB · Views: 4,441
  • mount2.jpg
    mount2.jpg
    82.3 KB · Views: 4,441
Just read through your post for inspiration - thanks for taking the time to post it up :)

I have a couple of the "new" tongxins on the way to me - 1.6kg and smaller diameter. One will be a spare for my existing tongxin on my commuter and one will be for a project to "mid-drive" my full suss mtb.

I'd really like a freewheel on the cranks so I can motor along without peddalling if needs be (I don't like the idea of the motor pushing my feet round) - time to get the thinking cap on!
 
amigafan2003 said:
Just read through your post for inspiration - thanks for taking the time to post it up :)

I have a couple of the "new" tongxins on the way to me - 1.6kg and smaller diameter. One will be a spare for my existing tongxin on my commuter and one will be for a project to "mid-drive" my full suss mtb.

I'd really like a freewheel on the cranks so I can motor along without peddalling if needs be (I don't like the idea of the motor pushing my feet round) - time to get the thinking cap on!
Hey amigafan! Where did you get your Tongxins from? I'm trying to get a couple but for rear hub drive.
otherDoc
 
Thanks Amigafan. I cross posted this question so you just answered it!
otherDoc
 
the motor has gone out of service in september 2012, since a grain of sand got into the friction reduction drive. I tried to repair it by turning the sun"gear" shaft around but it only worked for a hundred km. Then the struggling noise returned and I inspected the friction reduction drive again. It looked like a grain of sand got the drive stuck and all of the motor torque worked against it. The planet rollers got a punch indentation :? that's why I now abandoned the drive due decay :( It still works but sound horrible. The
motor is still fine, maybe i'll reuse it on another drive.

after all I can say this motor is great, but the reduction is not as efficient as it could be. A bafang is a much better choice IMO, even if it's heavier.

plz don't post into this thread again since it's finished.

EDIT in 2013
In the end I developed the Dual Jackshaft Drive that gets rid of all of the issues I had. http://endless-sphere.com/w/index.php/EBike_Motors_Middrive#Jackshaft_Dual_Freewheel_Config The freewheel does not see any side load anymore. I dont need an internal geared hub for higher reduction since it has built-in overdrive. I can push >2000W through the normal chain drive since I can use bigger gears, which would not possible with freewheel cranks. Still, I learned a lot during this project. I would not have gotten so far without.
 
Back
Top