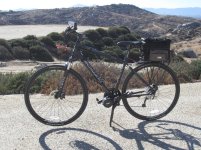
Following is my build of a Schwinn Searcher 1 hybrid/road bike with a Bafang BBS02 500w 36v mid-drive system. The build process was fairly easy thanks to all the helpful info from posters on the various threads here on this forum. So a big thanks to all those who went before me and posted on this forum. This build process will describe what I went through. It is a bit long but it pretty much sums up all the pages of posts regarding the Bafang mid-drive system.
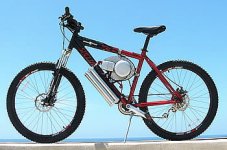
I currently have an e-bike that was built for me back in 2004 by ZVO-Bikes. It is a Specialized Comp hardtail mountain bike with a 500w 36v chain-driven mid-drive motor with a custom NiMH battery setup. It has a twist throttle and no Pedal Assistance System.
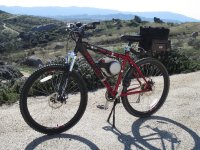
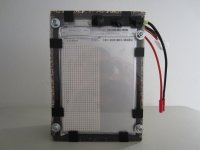
About 2 years ago, the NiMH battery finally died and I found this forum to help build my own 12s 36v 20ah LiFePO4 battery using A123 cells. The bike and battery have been working great but I wanted a new lighter, faster, and quieter bike and hopefully more efficient for more distance. I want to be able to do the 100 mile century rides with my bike club. The Schwinn has 700cc x 1.5in road tires and 9 rear gears while the Specialized has 26in x 1.75in hybrid tires, 34T front chain ring and 8 rear gears. The ZVO X-Power motor is also very noisy, making a loud whinnying sound and takes up the entire center frame of the bike.
I was debating between the 48v or 36v BBS02 units and finally decided to go with the 36v mid-drive since I already had a battery I could share with it. I also had a chance to test ride a 750w 48v BBS02 unit at San Diego Electric Bike Company. That test ride was “scary” fun. That bike could pop wheelies with no problem and accelerated to over 40kph very quickly. It has much more power and speed than I need since I plan to use the new bike on paved roads on leisurely paced rides. I am more interested in distance than speed.
So I decided to get the Bafang 500w 36v unit, but was hesitant about buying it directly from a seller in China. I considered using a US based seller (sdelectricbike.com, lectriccycle.com or hi-powercycles.com) even with their higher prices in case of warranty problems and the ability to choose various optional hardware and have the controller settings customized. Then I came across the posters on this forum highly recommending Paul at em3ev in Hong Kong. Paul could customize your Bafang order, provided good product support and had a good reputation for quality products. His prices were much less than the US dealers even after adding in the cost of overseas shipping. I was all set to order from Paul in early November when Alibaba ran a special 11/11 one day sale. BTN (Back to Nature) offered the unit at $355.30 plus $83.08 shipping minus a $10 Alibaba discount for a total of $428.08. I could not resist the sale price and got lucky with the purchase. The unit arrived here well packaged and in good condition on Nov. 25th in southern California.
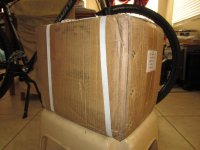
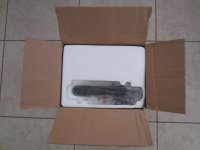
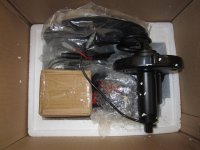
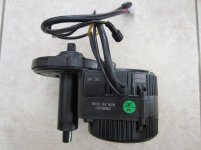
After unpacking all the parts, I found I was missing the 5 screws that hold the chain cover to the chain wheel and the spoke magnet for the speed sensor. The 5 screws were no problem but the local bike shops here did not just sell the spoke magnet. I contacted BTN using their on-line chat service and they quickly agreed to give me a Paypal credit of $10 to cover the cost of buying a speedmeter with magnet on e-bay. I was able to get a speedmeter on e-bay from a CA company in 3 days which worked out better than waiting on the part from China.
I have since completed installation of the BBS02 unit on my bike and everything seems to be working fine, so I am more than happy with my purchase from BTN. However, as I will discuss in more detail later, if you plan to program the controller yourself, then you can take a chance with a direct purchase from China. I would also recommend using Alibaba and/or Paypal in case of any problems. If you don’t want to mess with programming the unit, than I would recommend you use em3ev.com or other US companies for their custom programming and options. I did not like the stock controller settings at all. I also got the stock brake levers which are useless since I have hydraulic brakes. I also got a left thumb throttle which I managed to fit on the right side of the handlebar but I would have preferred a right thumb throttle. More on accessories later.
I currently have an e-bike that was built for me back in 2004 by ZVO-Bikes. It is a Specialized Comp hardtail mountain bike with a 500w 36v chain-driven mid-drive motor with a custom NiMH battery setup. It has a twist throttle and no Pedal Assistance System.


About 2 years ago, the NiMH battery finally died and I found this forum to help build my own 12s 36v 20ah LiFePO4 battery using A123 cells. The bike and battery have been working great but I wanted a new lighter, faster, and quieter bike and hopefully more efficient for more distance. I want to be able to do the 100 mile century rides with my bike club. The Schwinn has 700cc x 1.5in road tires and 9 rear gears while the Specialized has 26in x 1.75in hybrid tires, 34T front chain ring and 8 rear gears. The ZVO X-Power motor is also very noisy, making a loud whinnying sound and takes up the entire center frame of the bike.
I was debating between the 48v or 36v BBS02 units and finally decided to go with the 36v mid-drive since I already had a battery I could share with it. I also had a chance to test ride a 750w 48v BBS02 unit at San Diego Electric Bike Company. That test ride was “scary” fun. That bike could pop wheelies with no problem and accelerated to over 40kph very quickly. It has much more power and speed than I need since I plan to use the new bike on paved roads on leisurely paced rides. I am more interested in distance than speed.
So I decided to get the Bafang 500w 36v unit, but was hesitant about buying it directly from a seller in China. I considered using a US based seller (sdelectricbike.com, lectriccycle.com or hi-powercycles.com) even with their higher prices in case of warranty problems and the ability to choose various optional hardware and have the controller settings customized. Then I came across the posters on this forum highly recommending Paul at em3ev in Hong Kong. Paul could customize your Bafang order, provided good product support and had a good reputation for quality products. His prices were much less than the US dealers even after adding in the cost of overseas shipping. I was all set to order from Paul in early November when Alibaba ran a special 11/11 one day sale. BTN (Back to Nature) offered the unit at $355.30 plus $83.08 shipping minus a $10 Alibaba discount for a total of $428.08. I could not resist the sale price and got lucky with the purchase. The unit arrived here well packaged and in good condition on Nov. 25th in southern California.


After unpacking all the parts, I found I was missing the 5 screws that hold the chain cover to the chain wheel and the spoke magnet for the speed sensor. The 5 screws were no problem but the local bike shops here did not just sell the spoke magnet. I contacted BTN using their on-line chat service and they quickly agreed to give me a Paypal credit of $10 to cover the cost of buying a speedmeter with magnet on e-bay. I was able to get a speedmeter on e-bay from a CA company in 3 days which worked out better than waiting on the part from China.
I have since completed installation of the BBS02 unit on my bike and everything seems to be working fine, so I am more than happy with my purchase from BTN. However, as I will discuss in more detail later, if you plan to program the controller yourself, then you can take a chance with a direct purchase from China. I would also recommend using Alibaba and/or Paypal in case of any problems. If you don’t want to mess with programming the unit, than I would recommend you use em3ev.com or other US companies for their custom programming and options. I did not like the stock controller settings at all. I also got the stock brake levers which are useless since I have hydraulic brakes. I also got a left thumb throttle which I managed to fit on the right side of the handlebar but I would have preferred a right thumb throttle. More on accessories later.


