
Arnaud WOODALPS
10 µW
Hi all,
I'm converting a bike to electric, with a H640 48V RM G0900.750.D/DC hub motor from Bafang, a grin Baserunner controller hidden in a Hailong battery case, a T17 torque sensor, and a 600C display from APT. I was seaching for info about the H640 motor (750W), notably the number of pole pairs and the gear reduction to set the correct parameters in the Grin controller.
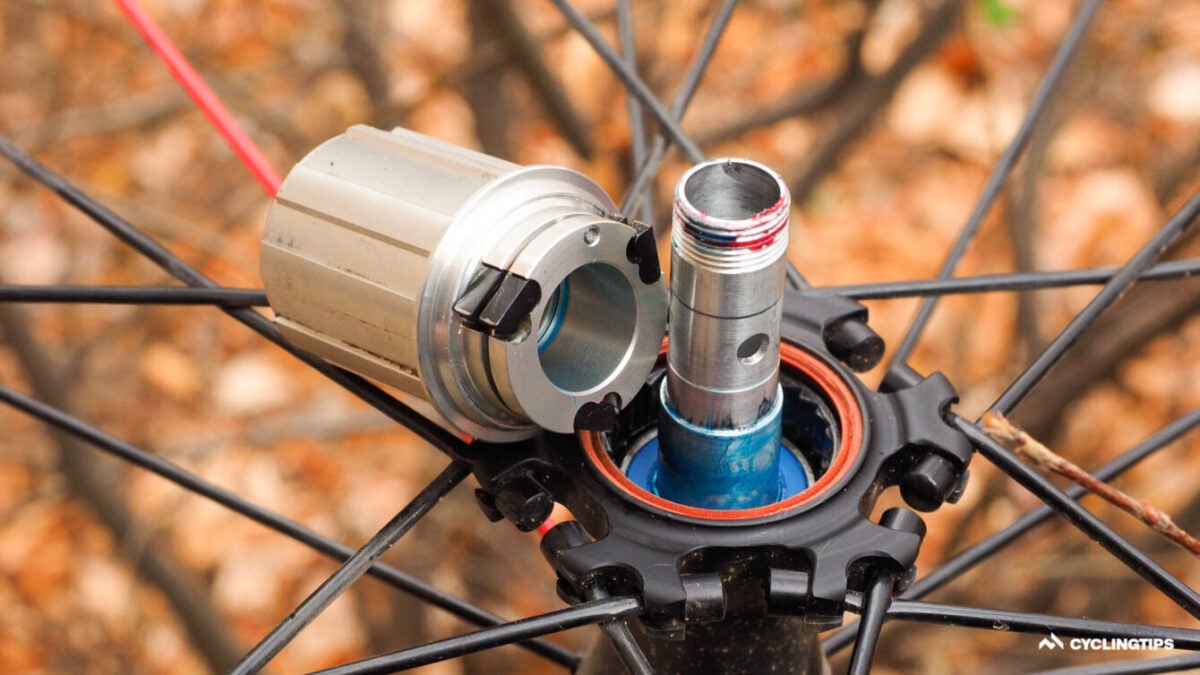
As I did not found anything on the forum and elsewhere, I have opened the motor to be sure.
There is 10 pole pairs (20 magnets) and a gear ratio of 1:5 (15/30/75 teeths)
I just wanted to share the info, I hope it will help.


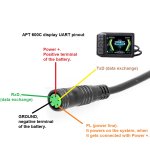
I'm still struggling to make the correct connection between the Higo mini connector of the APT 600C UART display with the Baserunner harness, I don't have the info about the pinout on the display connector. If someone has details, I'm interested.
This e-bike conversion is for my father. I also buit wooden bikes, but i do not yet have a dedicated ebike model. Just a glimpse of my wooden bikes :

This is the gravel. I will will use the MTB model for the Ebike conversion.
My brand is WOODALPS, this is just a secondary activity.
I'm converting a bike to electric, with a H640 48V RM G0900.750.D/DC hub motor from Bafang, a grin Baserunner controller hidden in a Hailong battery case, a T17 torque sensor, and a 600C display from APT. I was seaching for info about the H640 motor (750W), notably the number of pole pairs and the gear reduction to set the correct parameters in the Grin controller.
As I did not found anything on the forum and elsewhere, I have opened the motor to be sure.
There is 10 pole pairs (20 magnets) and a gear ratio of 1:5 (15/30/75 teeths)
I just wanted to share the info, I hope it will help.
I'm still struggling to make the correct connection between the Higo mini connector of the APT 600C UART display with the Baserunner harness, I don't have the info about the pinout on the display connector. If someone has details, I'm interested.
This e-bike conversion is for my father. I also buit wooden bikes, but i do not yet have a dedicated ebike model. Just a glimpse of my wooden bikes :
This is the gravel. I will will use the MTB model for the Ebike conversion.
My brand is WOODALPS, this is just a secondary activity.
Last edited:


 Inside the Bafang G0900 750W Motor: Teardown, Analysis & Temp Sensor Mod!
  Why add a temp sensor? Monitor your motor temps accurately, push performance safely, and avoid overheating meltdowns!