BAMBOO BIKE & CROMOTOR

zappy

100 W
Joined
May 26, 2011
Messages
149
I have wanted a second ebike in the family for a while.
My 5000w downhill bike is great but as it has gotten faster it has become less practical for everyone else in the family.
The downhill bike runs 20 A123 batteries entombed in a carbon box with no BMS so everyone who rides it has stern instructions about running it flat then there’s motor temps, cooling fans etc. etc.
I also really love our hobby and always encourage the other cyclists or general public to have a go on the bike (some shit, some flip most are impressed) and create more instant converts to clean fun transport.
With this next build I want to build a bike for the family that is.

Simple for anyone to jump on and go.
Simple plug in to charge (managed battery system).
Good stable geometry from downhill bikes for downhill type speeds
Good ergonomics for enjoyable upright riding like Dutch roadsters and townie type bikes with slight pedal forward so it’s easy to put your foot down and wide bars.
Be more integrated than the usual zip ties duct tape and random boxes strapped all over a bike (the local cop referred to my last bike as the time bomb bike)
Be a viable reliable commuter with a 30-40km range
Have a shopping basket
Be desirable retro very old school styling with an eco slant not instantly recognizable as electric
To look frail but hall ass, have street sleeper cred

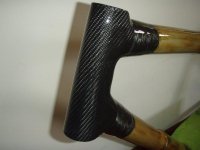
My background is a machinist but i have been doing research and product development in the carbon composites industry. I have made several bikes before, mainly trikes and low rider 2 wheel recumbents for HPV racing 18 years ago and this is my 5th ebike build.
I'm 4 weeks into this build and I hope this to be an 8 week spare time build including battery pack assembly, frame, home wheel building etc
I can list suppliers and prices if people are interested as this can be very time consuming tracking down obscure bits.

P6030130a.jpg
P6030132a.jpg
P6160009a.jpg
P6290015a.jpg
P6290018a.JPG
Zappy
 
Holy crap that is impressive.. that battery box looks pretty sweet as well.. what a nice looking bike.
I did not realize bamboo was that strong. Love to see that thing in action.
 
This is possibly the coolest thing I have ever seen on ES. I don't even know where to start with how awesome it is... I love it.
 
Looking great so far. I take it that you'll be using carbon to join the bamboo and metal. Please take lots of pics along with plenty of instructions for that part, pretty please! Since we have access to lots of natural materials here, I've wanted to build a mostly non-metal bike for a very long time. I want stronger than steel worry-free connections at the critical parts, but have no experience with carbon.

John
 
Awesome! I did a gas scooter up like that a few years back, with neon green paint. It looked awesome but the color didn't hold up well to daily driving. Impressive work there!
 
zappy said:
I can list suppliers and prices if people are interested as this can be very time consuming tracking down obscure bits.
Zappy

Thanks, please do.What type of bamboo? Locally sourced? Did you heat treat for the bamboo for strength? What is the diameter of poles are you using?


John in CR said:
Looking great so far. I take it that you'll be using carbon to join the bamboo and metal. Please take lots of pics along with plenty of instructions for that part, pretty please! Since we have access to lots of natural materials here, I've wanted to build a mostly non-metal bike for a very long time. I want stronger than steel worry-free connections at the critical parts, but have no experience with carbon.

John

Very interested in this part of the project as well.

I was considering building a bamboo bike a few years ago after reading this article. http://www.npr.org/templates/story/story.php?storyId=121628758
IIRC, for a few hundred bucks, they would guide you through the process and you would build one over a weekend. I tried to check the website again but my browser is detecting Malware from the site. There are a few websites with pretty good instructions. I gave up after having trouble sourcing Bamboo. Ebay was getting expensive for shipping and not too many options, that I know of in New York City.

I've seen a few Bamboo bikes here in the city. One in particular, usually parked outside the Empire State building.

Looking forward to any details you can provide.
 
I've cut a lot of bamboo in the jungle
You can't just take any random stalks and build something.
It has to be specific types of bamboo with the right strength properties.
Then it has to grow to full size, then stay there for a few years to harden.
then it's full strength.
there's also little bugs that would eat all of my bamboo that was by the beach. In the jungle the bugs were not there.
These bugs are called bamboo boring beetles. They will literally turn all of your bamboo to dust. Look for little holes. If you see holes, the bamboo cannot be saved.
From the time you plant the actual bamboo plant it will be 7 years before you get a fully hardened stalk.
It won't replace aluminum for bikes but for certain things it's great. I made a sail raft out of it, which the bugs ate.
I want to make bamboo structured windmills to generate power. But that's a few years away,.
 
This is exceptional! Great work!
 
Cromotor... no suspension... experimental materials. You sir are a brave one!
 
Thankyou very much for the compliments everyone!
Here are are few pic updates
I hope you can all see a bit more detail.
basic specs
approx 50mm diameter bamboo main tubes 30mm diameter stays
26'' downhill rims with fat frank kevlar tyres laced with 2.55mm spokes on the rear.
9.5 KV cro motor which weighs a whopping 11kg (full of detroit wonder metal)
16S A123 prismatics 20 ah cells, so about 1000W/Hr at 52V
50 km/hr top speed for effecient cruise speed (bugs don't hurt the eyes too much) My other 20s 66V pack can fit in the basket for a top end boost :roll: )
The battery box can fit a 12,18 or 24fet controller as in pics or upto a 10kw kelly if you trim up the mounting ears and also a BMS etc and try and hide as much clutter as possible and keep it all dry.
65 degree head angle, 100mm of fork trail approx, 1200mm wheel base (fairly stable)
I stole the smaller bamboo out of the capitals central garden. The bigger stuff i ordered online from byron bay bamboo very cheap($50). Then flamed with a gas torch (thanks toolman2!) then i put it in the oven for a couple of hours at 95 degree c. Make sure you drill out the nodes to stop a steam explosion. It loses about 30% of its weight from drying. I'll weigh the bare tubes but they are very light.
The lugs are from some aluminium tube but most of it had to be billet because of the odd sizes. So there was a lot of drilling big holes up the middle of billets to make thin tubes. All lugs are different (bloody grass is all different sizes)
Forks are chromoly dumpster specials with a caliper bracket welded on for the 203mm disks
Tubes will be aligned in a accurate jig and bonded with toughned epoxy (methacralate would be even better but mine went hard) then wrapped in carbon ,still to be done.

Zappy
P7030018.jpg
P7030027.jpg
P7030034.jpg
P7060007.jpg
View attachment 6
P7060012.jpg
P7060017.jpg
P7060018.jpg
View attachment 2
P7060034.jpg
 
That is so awesome. It looks rock and roll.

I can't believe I would ever use the term "stealth" in relation to a fluoro green bamboo bike, but that design of the battery and controller box down with the chainring etc.., is actually amazingly stealthy, and a great design. Hats off.

EDIT: Also meant to mention, I love the choice of the 24 Fet, shed of its casing, inside the chainring box. I run a 24 Fet in my 12S lipo/50amp Yuba for the same reason, that I can totally airproof and waterpoof it without worrying about overheat. I must say my 5304 has never managed to get my 24 fet vaguely warm (hermatically sealed in the ammo can), but my 5303 used to get it pretty toasty even on 12Slipo/50amp, so taking the effort with the bigger controller is awesome. The more I look at what you have done I keep scratching my head as to its brilliance (I mean the whole box that contains battery/controller/wiring/weight distribution down low). I personally consider this to be the most interesting build I have seen on the forum since I joined. It's simply stunning.
 
Wow! That work looks sooo SWEET!
I luv the seemless integration of the chain guard and battery box.
Great job man!
How are you going to finish off the end of the bamboo members at
all the joint connections?
 
Philistine said:
I can't believe I would ever use the term "stealth" in relation to a fluoro green bamboo bike, but that design of the battery and controller box down with the chainring etc.., is actually amazingly stealthy, and a great design. Hats off.

... The more I look at what you have done I keep scratching my head as to its brilliance (I mean the whole box that contains battery/controller/wiring/weight distribution down low). I personally consider this to be the most interesting build I have seen on the forum since I joined. It's simply stunning.
+1!
The integrated BB/BattBox concept is brilliant - a surprising reverse twist on existing integrated BB/motor assemblies that leave the battery placement issue unresolved. Although the bamboo is wonderful, this packaging concept needs to be reincarnated with a custom full aluminum frame...
 
I didn't touch the bamboo frame for 5 weeks (been busy enjoying riding the going downhill e-bike and been helping on another cro-motor downhill build for "PICKLE").
I first started doing drawings for the frame geometry and component fit full scale on a thick piece of chipboard. I found it a very good way to tweak the design and geometry and pinch a bit of space or make space for all the bits and pieces that needed to fit into(as opposed to duct taped too) the overall design. I made some turned aluminium billets with bolt holes through the middle to hold the rear drop outs, bottom bracket, and head stem etc. in accurate alignment and correct spacing with the frame center line, 200mm off the chipboard face. Which allows space to work around all the bond joints. I have been involved with a bit of R&D composite/metal bonding for Ford Mo. Co. carbon fiber suspension shaker rigs, carbon fiber reinforcement of concrete bridges and some of very large super yacht carbon tube to hydraulic cylinder boom vangs (150ton) My measly 50ft yacht has a 3.5ton vang.
Bolt thick things glue thin things seems a good rule of thumb, but tubes are somewhere in between so need reinforcing on the joints. Bamboo is made of mainly all very strong unidirectional fibers and the grasses lignen holds the bundle of wood fibers/straws together in the shape of a tube. But bamboo is very frail in hoop strength (stand on it and you can squash it) so the ends of the tubes have to be bound with fibers going around the tube to stop the joint from flaring or splitting open.Bamboo also has the brilliant natural evolution of nodes every foot or so to help stop crack propagation along the uni fibers direction. To help put some material properties in perspective standard mild steel has a tensile strength of 250Mpa, cromoly steel 650Mpa, good alloy steel bolts 1000Mpa, carbon uni fibers 3000Mpa!! so you don't have to use very much and if you over use it, is a tiny weight penalty.
The key to good bonding with dissimilar materials is extreme attention to surface prep and an adhesive with high enough elongation so the bond line can stretch and spread the load into the joint with out cracking along a brittle glue join and coming undone like a zipper. Some times toughened adhesives with high elongation but with lower tensile strength out perform superior "strength" adhesives in destruction tests and in the real world. Another trap is underestimating bond strength with temp and proper heat curing of epoxies to get full max temp. A black carbon mast, epoxy tube or bike in the aussie sun can get above 75deg. C which is above the glass transitional temps for many standard room temperature cure epoxies. Ie: they turn to poo. Please take note!
To prep my bamboo i first flamed it with a gas torch and then put it in the house oven for 1hr at 95C (drill nodes 1/2"dia so it doesn't blow up first)
Bamboo has a slippery hard high silica layer skin on the outside which should be a removed in the bond area(i really got stuck into it and used a wood saw dragged across it to get down to the load carrying fibers without making deep notches) do this just before you are about to bond.
Put a clean disk sanding disk 80 grit or grinding disk to prep any metals only minutes before bonding, aluminium especially! you can actually apply a bit of epoxy and use wet and dry sand paper to wet sand the epoxy to make sure there is no oxide formation on the bond line.

The bike is finished and rides beautifully!

Zappy
 

Attachments

  • 1 frame jig.jpg
    1 frame jig.jpg
    71.8 KB · Views: 6,095
  • 2 prepared bamboo ends.jpg
    2 prepared bamboo ends.jpg
    79 KB · Views: 6,095
  • 4 seat post faired up for fibre wrapping.jpg
    4 seat post faired up for fibre wrapping.jpg
    54.5 KB · Views: 6,095
  • 5 shows uni layer.jpg
    5 shows uni layer.jpg
    75.2 KB · Views: 6,095
  • 6 shows fiber layup on head tube.jpg
    6 shows fiber layup on head tube.jpg
    55.2 KB · Views: 6,095
  • 7 drop sheet over table for oven.jpg
    7 drop sheet over table for oven.jpg
    66.7 KB · Views: 6,095
  • 8 finished head tube.jpg
    8 finished head tube.jpg
    38.2 KB · Views: 6,095
  • 9 finished head tube.jpg
    9 finished head tube.jpg
    47.5 KB · Views: 6,095
I was skeptical at first... but you clearly know what your doing.

That looks awesome! Be sure to get some video footage!
 
That is hands the the BEST looking carbon wrap I have seen on a bamboo bike! Is the final layer on the headtube underneath the wrapped tow?
 
Back
Top