DH dual motor = LR mid drive + Grin all-axle front hub

nutspecial said:
John- liking the controller integration and the battery storage. Little jealous of that bike :D !

I cut up some square plastic boxes for protection of my softpacks in my bags. Worked great, strong and cheap. Also, different velcro rolls from ebay really came in handy to sure up the mounting of 40 cells right about where you have pictured yours to be. Lots of cheap bags to choose from also. Top tube pannier was the style that worked for me, but also various handlebar bags seem to work.

Yeah have always loved velcro. Never ceases to amaze me how awesome = strong / reliable the stuff is. My dual motor bike would fall apart without it.

On another note

I have been aiming at 3kw as my goal recently. 3kw continuous is both the motor and controller rating, under 60v statiator limit, 3x4s packs 12s is the highest for how everything can work easily.

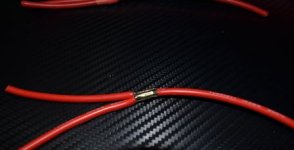
However the high amps to hit 3kw needed has been bugging me for a while. With my current bike it makes me aware every time I ride that my phase wires get hot every time I go up over 3kw for longer than a quick on road hill. Iv'e started freaking out at the phase wires being either 10 or 12 gauge on the future LR kit.

I am now back to square one with my voltage choice and all the connectors that I accounted for and ordered.... The way I see it I have two choices.

1. Run the bike at 12s with CA limiting to 2kw. I doubt I could climb any serious hills like this since gearing this down with smaller single chainring is looking harder the more info I get. Although I thought I would start low powered (closer to bafang peaks) using the existing cassette I think it would fail quickly and chainline to granny is very poor.

or

2. upping the voltage to 20s and CA limiting to 40amps (the logical choice most have made)

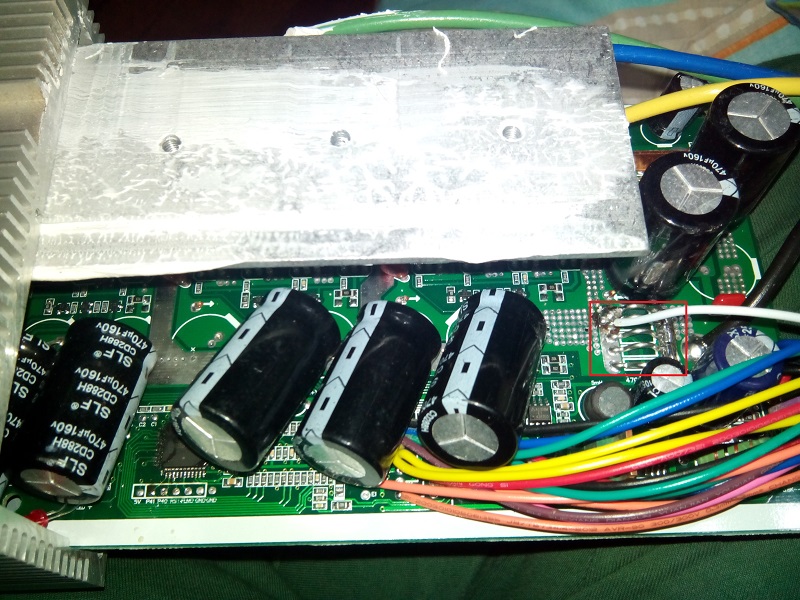
Option one now makes a big ass 24 fet 80amp controller redundant and all the work on mounting it.

Option two I have to go out and buy another pack and new charger for 84v, change 3p to 2p as I don't want to carry much more for now.

I don't want to go half arsed at 16s either since I would have already gone over the 60v satiator limit....

EDIT

I usually run all the wiring I can on the non drive side of bikes for obvious reasons. Although on this kit I am going to run as much as possible on the drive side.

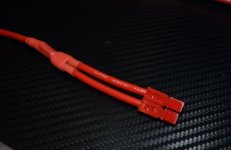
Reason is the motor wiring is on the drive side and the throttle is on the same right hand side. I will have the end of the controller come out on the throttle side too. The wiring from the controller will be as short as possible which should be aimed for with the phase wiring.
 
1. Run the bike at 12s with CA limiting to 2kw.

I doubt you will be happy with a 2000W peak limit. Isn't the high power the reason you went with the Big block over the AFT 1680w ? The Big block is a lot heavier motor and steel brackets then the AFT 1680w which I have seen peaks at 2850w on other threads. So you would have all the extra weight of the big block not sure how many KG heavier it is ? and 850w less peak power ??

To make the Big block work well it seems you need to go high voltage and lower current otherwise you are carrying extra weight for no gain....
 
jk1 said:
1. Run the bike at 12s with CA limiting to 2kw.

I doubt you will be happy with a 2000W peak limit. Isn't the high power the reason you went with the Big block over the AFT 1680w ? The Big block is a lot heavier motor and steel brackets then the AFT 1680w which I have seen peaks at 2850w on other threads. So you would have all the extra weight of the big block not sure how many KG heavier it is ? and 850w less peak power ??

To make the Big block work well it seems you need to go high voltage and lower current otherwise you are carrying extra weight for no gain....

Yep that's totally agree, although I would add the reason I would go the big block is for the extra copper / mass to absorb heat on bogging.

I do intend to go the 20s route now (logic) however I have run 21s 40a on a hub motor before and it would bog down on the super steep stuff, once I changed controllers to 21s 60/70amps I could climb everything until heat saturated. If this motor and the gearing is matched for similar high speeds of around 55-60kmh I can only imagine I will be facing the same heating issues (although mid drives shed heat better).

I have to make a slower geared bike still. I don't want to be blowing 5+kw on every hill even if the freewheels could handle it.

I am hoping I can do everything sustained at 3kw with no overheating and keep gearing down until I can.

at 84v I will be using a 3 way switch for sure, wasn't going to bother with 12s.
 
the reason I would go the big block is for the extra copper / mass to absorb heat on bogging.

You won't get any use of that extra copper mass if you have to limit the power due to the phase wires to 2KW at low voltage.

So you will only use that extra copper mass at high voltage as the power gets passed the bottle neck of the phase wires when used at low voltages.

Should be interesting when you run it at 84v !
 
jk1 said:
the reason I would go the big block is for the extra copper / mass to absorb heat on bogging.

You won't get any use of that extra copper mass if you have to limit the power due to the phase wires to 2KW at low voltage.

So you will only use that extra copper mass at high voltage as the power gets passed the bottle neck of the phase wires when used at low voltages.

Should be interesting when you run it at 84v !

Dont know exactly, I may mistakenly believe that the motor only experiences watts not volts nor amps (not talking phase wires to the motor) when it comes to heat.

REgardless of this I have just ordered another 4s pack to get me to 20s 2p. At 3kw Ca limited that should keep the phase wires happy temps, and offer a higher top speed on flats.

Glad I didn't start doing my harnesses as I would be very p*&&$d off right now.

Forget the pannier bags now both sides will look 5x4s a side and be custom packed like this:

11898690_10153456453114845_8440985145648832264_n.jpg


EDIT: In this configuration the 20c batteries at 2p 10ah should be fine for hot off the charge 50amps so about 4kw if doing short burst fun.
 
gridlok said:
Nice build, I can't wait for my Big Block to arrive.

Karl

Thanks, I got fingers crossed to have it running before Christmas holidays :|

11987013_10153489364574845_3702108848210994332_n.jpg


I was planning to put bullets here but wondering if I can or should just hard wire the 2p into the series. The four wires would meet equally together at each point.

Thinking of a 6amp greentime 20s charger http://www.aliexpress.com/store/product/High-Quality-Electric-Bicycle-Charger-20S-72V-84V-CV-5amp-Li-ion-LiPoly-Battery-Charger/313864_32220904923.html

or

From: cryzymotor
To: John Bozi

Hi

20s 5A charger=135.0USD
20s 10A charger=240.0USD

express shipping cost = 75.0USD

83V output and Australian AC plug is available for AC 240V.

lead time within 15days.

EDIT 6/9 if the big block is 10 gauge then that would be 55amp limit.
11960157_10153497264849845_254510748982580363_n.jpg
http://www.powerstream.com/Wire_Size.htm
 
Tried in my limited free time about 5 times different methods to solder 12 gauge directly to a 7mm bullet to avoid extra connection points, but finally decided it was because my iron was not heating up enough. Not sure if it's on its way out. Anyway tried my dads old one and instantly could heat up the bullet enough to do what I needed.

Basically you can't pretin the 12 gauge x 2 because it won't fit. I had twist the wires together, and fill the bullet through the window until everything melted all around it.

I hate soldering by just happy I finally have something.... Now for another 2 of these and 2 with much longer ends toward the controller.

12043006_10153532513239845_4024512366391335314_n.jpg


12038097_10153532513204845_8761847596619263078_n.jpg
 
I use this method...(just copy this method from people before me). A cooper sleeve, and an hydraulic crimp. If you have a big sleeve, you can put 4 or more 8 gauge wires in parallel. In my case, I just need 2 parallel....easy and clean. :mrgreen:

Luís.
 

Attachments

  • DSC_0936.JPG
    DSC_0936.JPG
    55.7 KB · Views: 3,320
  • DSC_0940.JPG
    DSC_0940.JPG
    57 KB · Views: 3,320
Yeah I have seen and heard about that method. I was under the impression it was a another expense, but googled them and they aren't that expensive!

Dam, next time I need to make a harness I'm buying one.....

thanks

Decided to order an 18t to get more adapters that I might be able to join up and have an option if the 20t doesn't hold up as hoped.

$_12.JPG


EDIT 21/9 Being new to using this bullet housing, this is a usefull video that shows how the housing is pulled off. Heat up and then screw driver it down against the table.

[youtube]glik9iWFtKE[/youtube]
 
I ordered the kit with a deposit on 22 July although with a tumbling Australian dollar that was a poor choice. I was hoping it would improve not keep getting worse.

I was under the impression there's a 60 day minimum wait, and can see that Mike is possibly biting off more than he can chew with off shooting products.

To be honest I don't mind the wait as he has made some big changes to things I was worried about, namely the complexity of adjusting the primary and secondary tension.

I will be asking for the spring loaded chain on both sides which should do away with the need to adjust so much and handle better off road.

To do list:

Prior to getting the motor:


Phase wire bullets
order a 3 way switch / throttle
on/off switch
mount the batteries

Still not sure:

put on new sprockets / single speed tensioner (was thinking to try it with the gears on the bike for a while since they are already installed.)

I highly doubt 10ah will be enough, so am tossing up how I'd mount the rest. I could have an alu bracket along the top tube and downtube for another stack of 2 x 5 batteries, or carry extra in a back pack.

pretty sure I have already ridden the bike in a couple of dreams. :oops: :roll:


mount
 
I ordered the kit with a deposit on 22 July although with a tumbling Australian dollar that was a poor choice. I was hoping it would improve not keep getting worse.

Why didn't you pay up front ? So now every month the price will go up and you have locked in a deposit ?


That's one of the other reasons i didn't get an LR as it used to be cheap compared to the AFT kit, but now the AUD has dropped the AFT kit is looking a lot cheaper and the LR is looking expensive since its only parts not a complete kit with still with lots of bugs to sort out.
I ended up getting a cyclone but AFT price has recently dropped a lot Dohhhh
 
Nathan said:
Why didn't you pay up front ?

As I said in my last post, I was hoping the Aussie dollar would improve.

The only bug I see is that its capable of twice the power of the AFT.

As for a total kit, whats the total price of the aft these days? I got quoted around $3k au ages ago. no difference here mate. the lr will handle what the aft can do without a question, anyway no pissing match...

Ive had some brews.
 
Mike's confirmed he's working on my kit now. :D

I am getting 219 on both sides with the new spring loaded tensioners
12065748_10153552658649845_1760601018570746514_n.jpg

and solid mount.
12036617_10153552658574845_5892990205964881653_n.jpg


So I have started trying to get everything else cooking. Thought I'd show you how I soldered with a heat gun.

[youtube]LcfTlxIm_38[/youtube]
 
Sweet! How long will it take him to finish? Should be a great climber and tear up the trails. I'm sure it will be a little loud though but don't think you can get around that with mid drives. Yeah, better get everything ready so when it comes, nothing will delay you because I know your eager to get it running.
 
No idea as I haven't received my final invoice.

Have been organising my paypal account, which I noticed this year without being specifically told (you know banks send almost monthly notices saying we have updated our policy bla bla bla)

that for overseas purchases using visa debit or credit cards there is an international 3% fee! And this is for even hobbyking australia since they get paid in USD. aaaaaaahhhh already Aussie dollar sucks....

anyway have connected an online account which has no cards its just for online transactions and there appears to be no extra fee thank god.

The other thing I am contemplating is how I am going to limit my 80 amp controller
https://endless-sphere.com/forums/viewtopic.php?f=2&t=31643&p=1078770#p605440

At first I will use the CA max watts setting, but I know it will jerky, I've never had a smoothe CA setting thats why I dont run my throttle through it and even run the ca with the blue wire pulled out on my hub motor.

If I am sure I will be satisfied with with quarter less amps I am going to file down or cut one of the shunt wires as in the link above.

Should look something like this.

gCp3yZS.jpg


thanks Sam Dee for pointing me to all these mod possibilities!

EDIT 12/10

Have started messing around with 200g of polymorph plastic testing what it could possibly do.

11139444_10153571556394845_7521321526185620151_n.jpg
 
That stuff looks really dam useful! To avoid welding/paint on aluminum frames, it looks like it would be excellent to make mounts for different things.
On yours, rather than make the whole support or enclosure out of it, maybe just the mounts, then rivet or bolt other already made containers or diy from raw al or plastic stock?

My panniers also lay flat/open, would you be able to flatten yours and and fasten them right there to diy mounts? There's also the bigger handle bar bags that you could connect into a midsized pannier?

Not sure your entire intensions, so just throwing in my 2c!
 
Awesome stuff John. You can make some cool designs with that. You always come up with creative stuff. Look for to seeing the end result.

Also, have a question about your AS 150 Connectors. I'm going to change to those or xt 150s but I like the antispark feature. You like them?
 
The 4kg should arrive today or tomorrow as I bought from Australia, so I am keen to get this done this week. Lots of fun.

nutspecial said:
That stuff looks really dam useful! To avoid welding/paint on aluminum frames, it looks like it would be excellent to make mounts for different things.
On yours, rather than make the whole support or enclosure out of it, maybe just the mounts, then rivet or bolt other already made containers or diy from raw al or plastic stock?

My panniers also lay flat/open, would you be able to flatten yours and and fasten them right there to diy mounts? There's also the bigger handle bar bags that you could connect into a midsized pannier?

Not sure your entire intensions, so just throwing in my 2c!

Yeah wasn't intending to make a complete enclosure. Too many options still to consider. I was actually wishing I had more PVC drain pipe left, because it is good at UV and heat. The drain pipes are like $20 and you cut out really long straps. My aspirations to build complete hard plastic boxes were thwarted by not being able to find cheap sheets the dimensions I want under $200!!!!!!!! Stuff that. They are much harder to weld to each too.

I was thinking of creating 5 long straps about 4 cm wide, leaving space for the wiring to poke out. And feed them into the poly morp into the base at the bottom.

I also want to see how this stuffs bonds to fabric. Was thinking using a kitchen fire blanket. If I ever had a fire it would help with the flame while the batteries just fall off the frame on the concrete because the plastic would just droop right off.

Drew, the only down fall with these anti sparks are it is possible to short red to black, but if you heat shrunk the plugs one a bit longer so that they can't be pulled apart then that would be no problem. Also they are pretty fat... I haven't run them with power yet so can't comment much accept how easy they were to solder and lovely housing.
 
Can't be larger than these big sb75 andersons I'm using. They take up way too much space. They work though.

For antispark connectors, once it's connected the housing protects it from the other? Or you still need heat shrink?
 
drew12345 said:
Can't be larger than these big sb75 andersons I'm using. They take up way too much space. They work though.

For antispark connectors, once it's connected the housing protects it from the other? Or you still need heat shrink?

You don't need heatshrink once connected they interlock inside each other. I just thought it was odd that they designed the housing so that one of them would poke out so that you have to still be mindfull of posivitive and negative touching before everything is connected.

you can see it in the above video still https://endless-sphere.com/forums/viewtopic.php?f=6&t=71633&start=25#p1100711
 
Back
Top