DiamondBack, Cyclone 650watts and Dewalt A123 packs

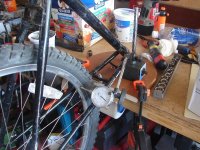
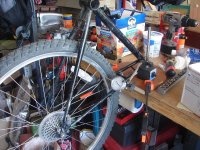
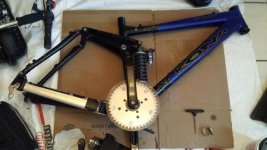
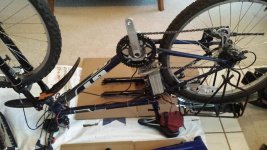
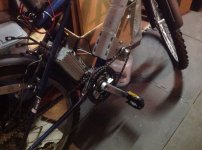
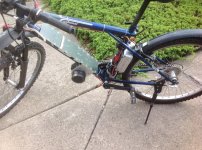
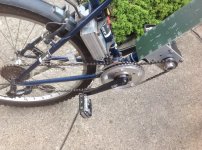
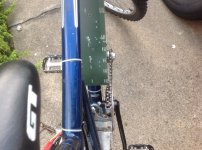
Wow, I've seen the forks crack near the crown but nothing like that. You're very lucky you didn't get hurt.
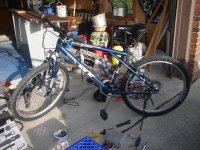
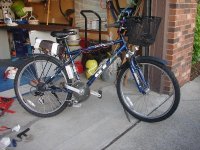
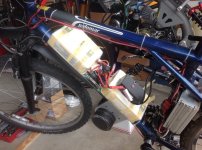
Now you have an excuse to get that full suspension set up you obviously need to satisfy your desire to do jumps!
 
Yeah it could have been a lot worse. I was just lucky. I would have never expected it to break like that as well. I also discovered the bike is steel framed and not chrom-moly. I did find another donor bike locally that is out of chrom-moly, but has a cheap front suspension, hopefully it will hold up to my abuse. I really need to finish my full suspension BMC build, but I still have to have a utility bike for errands. So getting this bike repaired has priority.
 
WOW. I somehow missed the update to this thread on the 6th. I've never seen the whole headstock just snap off like that! That could have really sucked if it'd snapped all the way thru as you were landing. :(

Can you use the fork from this one on the other bike, instead of it's suspension fork? Assuming you think this fork is better than the cheap suspension one. ;)
 
Amberwolf, unfortunately the new frame has a 1.25” head tube. The broken Diamondback is a 1”. Just as well since, I was never able to upgrade it due to the old style headset. I’m going to pick up the replacement bike later today. I’ll know more about the front shock once I have the bike. I don’t plan to put much into this, since it’s suppose to be just a utility bike for errands and shopping. The only reason I’ve been riding it so hard is because it’s my only ebike at this time. Once the other bikes get running. It will see a much easier life. The full suspension BMC build is coming along, but this weekend, my CNC computer crapped out. I need to fix it before I can move on. In the mean time I’m really missing my ride and the trails. I’m hoping I can just bolt on my cyclone tonight and be riding tomorrow.

amberwolf said:
WOW. I somehow missed the update to this thread on the 6th. I've never seen the whole headstock just snap off like that! That could have really sucked if it'd snapped all the way thru as you were landing. :(

Can you use the fork from this one on the other bike, instead of it's suspension fork? Assuming you think this fork is better than the cheap suspension one. ;)
 
Well, when life gives you lemons. Here is my Diamondback with a new purpose in life. I needed a way to true my rims and it occurred to me that the old frame could still serve a purpose. I ended up cutting off the broken ends with a hacksaw.
 

Attachments

  • truing stand.jpg
    truing stand.jpg
    115.2 KB · Views: 4,393
  • truing stand2.jpg
    truing stand2.jpg
    125.9 KB · Views: 4,393
That's a nifty idea. :) And now you also have spare tubing, headset, etc for other projects. ;)


kfong said:
Amberwolf, unfortunately the new frame has a 1.25” head tube. The broken Diamondback is a 1”.
I have seen somewhere an interesting in-headtube-shock that uses such a configuration. Not a lot of travel possible, depending on the length of the old fork stem vs the new headtube, but it might be better if the old fork is a better made one than the new one.
 
Here is the replacement bike I picked up for $95. It’s a GT Palomar in great condition. I’m really happy with the purchase. The bike frame is chrom-moly. From what I have read on the frame, it’s able to take all the abuse I can give it. The rest of the components are ok, a little better than dept. store stuff. The front shock is a low end RST 191 Omni CL. It looks like it should hold up. It’s an elastomer shock with 63mm of travel, requiring little maintenance. For now I’m content with leaving the bike as is. Here are pics, ready for Ebike surgery.
 

Attachments

  • GT polarmar1.jpg
    GT polarmar1.jpg
    117.9 KB · Views: 4,076
The operation was a success, the donor bike lives. Here are pics of the converted GT. I now plan to get a Cycle Analyst so I can get rid of the wattmeter and long wires. I rode it today and I’m really happy with the results. The right shifter has been moved to the left side. The left shifter has been removed. Shifting is smoother than my old bike. The cheap front shock works fine for street use. The braking is better as well on this bike. The geometry feels better. I can’t wait to take it out on the trails and bash on it. I did have to cut part of the rear fender to get the controller to fit. I also had to redo the controller mounts so it’s lower in profile. There is less space in the back with this bike and I wanted the controller like it was with the old setup.
 

Attachments

  • GT ebike 2.jpg
    GT ebike 2.jpg
    119.6 KB · Views: 4,071
I just put back all the pics from this thread from my archives. Hopefully the server won't loose them again. Looks like I will be prepping this bike for more serious trail riding now, since my BMC build has just broken. I seem to be really hard on equipment since I keep getting break downs.
 
It's been a while since I had to do post anything on this bike. The Cyclone setup has been ultra reliable until today. I've been taking it out on the trails recently with a new front 100mm RST Omega fork, it's been quite rideable. It's still a low end suspension fork, but way better than the previous elastomer fork. The geometry on the GT works good in the trails. I probably should of picked up a better fork, but still want to keep this bike a low profile utility bike. With all the spring mud, this has been my preferred beater bike that I don't have to clean up afterwards. About 40 mins into my ride, the bike totally shuts down. I went through some of the connections to no avail. Had to cut short my ride. Once home I was able to measure voltages on my throttle and the output of the throttle varying with twist so it wasn't a throttle issue. It also signifies something quite wrong with the controller.

Last year I switch over to using a Topeak rack so I could interchange my batteries. I could run my Konions at 40 volts and my lipos at 48v. 50V is the limit of this controller due to the cap on board. I was running lipos today. Hopefully it's something minor. I have the controller apart, but won't know more until put my o-scope to it.

I also have the Nuvinci hub laced and will install it on this bike when I get more time. It's a high end part for such a bike but since the Nuvinci is rather heavy, this was the only bike I felt I didn't mind having the extra weight. It might ruin it's trail riding qualities though. Have to see how I like it.

I'm also switching over to tubeless this year. I've ordered Stan's no leak and will try the ghetto tubeless tire approach. I should probably post pictures of the bike as well.
 
Looks like pushing 48volts on this controller stresses out the voltage regulator. They seem to be using a transistor for the first stage. Q9 part KSP 42. Voltage coming out of it is way too low for the LM7815. Also the transistor is rather hot to the touch. Not sure if replacing it is a good idea, it's a rather wimpy part. I think I will modify this section with a dropping resistor and LM317.
 
Was able to repair the controller and put the bike back together for a trail ride before dark. Today was exceptionally warm for this time of year. I only wore a long sleeve t-shirt while riding. The bike is running good again. Fell asleep later in the evening from the workout. Really tried to make the 10amp pack last. Now I'm up an can't sleep. Here are pictures I took of the repairs I did.

The controller was removed and part was unsoldered. You can see the transistor in the middle of the board.
View attachment 7

I decided not to keep the original design since it would of burnt out again at 48volts. I was able to modify a board I did for my RC stuff years ago. Shorting out the first stage of the current section gave me a circuit similar to the circuits found on a lot of controllers using a resistor as a voltage drop and an LM317 to bring the voltage down. I chose aprox. 18volts for the first stage, giving the controller's LM7815 a voltage level it could work with.
View attachment 8

I ended up mounting it to the side of the box. I had to isolate the LM317 from the case by using a plastic sleeve and mica backing.
controller repair3.jpg
For those running 48volts on this 24volt controller will eventually run into this problem. I have extra blank PCB boards available if you need them. $5 shipped. They are good for other low current applications as well.
View attachment 5

During the teardown, thought it would be a good time to see how the Nuvinci drive would fit. Looks like I will have to mill out the plate since it interferes with the rear derailleur. Not quite plug and play.
nuvi1.jpg
nuvi2.jpg
nuvi3.jpg

I also notice the motor having a slight offset. Took it down as well and discovered some damage to the frame. This is what happens when you start bashing into logs. Oh well, have to make a conscience effort to avoid the steeper ones. The mounting setup could of been better as well. It was designed around the first frame that broke on me. I might have to redo this part of it but for now I used a conduit pipe cut down the center and place over the damaged area. Hopefully it will give a bit more support against being crushed.
frame damage1.jpg
frame damage2.jpg
 
Here is the quick repair I did using electrical conduit pipe, grinder and hammer. I'll see how it does before I spend the time remaking the motor mount. It held up fine yesterday in the trails and I was rather hard on the bike hitting a few log piles that I should really avoid.
quick repair.jpg

Here is how the bike is currently setup. I lost the front fender and will be getting a new one. The controller has been resealed with silicone RTV and the smaller connectors wrapped in silicone self fusing tape to keep out moisture.
current setup.jpg
current setup2.jpg

Here it is all decked out for shopping and running errands. Not much to look at, but that's the whole appeal. I want a sleeper bike that performs, is reliable and still be fun. The only drawback is the original cyclone mounts are crap. You need to create your own or purchase better ones. The noise is also an issue, it's not as bad as an RC setup. For trail use the noise is noticeable to others, but for general street riding it's not bad and I prefer to make some noise when coming up on pedestrians. This bike goes 27-30mph with the 48V setup. Not bad for those not chasing after speed. It gets me to my corner grocery store faster then I can drive to. Gets hardly any attention, especially if I'm pedaling.
shopping setup1.jpg

Here is the new front shock, RST Omni TNL with 100mm of travel. Cheap low end shock, but acceptable. Anything less I would find it hard to consider them shocks. It comes ready for front disks, so that will be an eventual upgrade on this bike since most of the stopping happens in the front. The previous RST 191 Omni CL had only a small amount of travel using a polymer cartridge, while fine for short trips. It totally sucked for trail riding and long distance. It would however, make a good front hub shock since it's steel and would take the edge off the vibration vs. a solid fork. If anyone is looking for a steel front shock for a front hub with a 1.25" steer tube that I don't think was ever cut down let me know. The frame has been holding up and is solid when jumping it. The trail reviews on the frame was good when I did a search. Geometry works well and the chrom-moly should last much longer than most bikes.
front shock.jpg
 
Having switched over to Lipos, I needed a safe way to charge them. The only solution I felt comfortable with was to use a quality RC charger. The Hyperion was the one I felt was best designed. I then made a DB25 board to use as the balance plug. Here is the board attached to 4 6S 5000mA Turnigy packs. This setup is a 12S 2P configuration giving you 10ahrs at 48volts. The balance wires are just long enough to plug into the DB25 board. You need a second one at the recieving end of the charger.

View attachment 4

As you can see the board is attached to the end of the pack. The balance wires are just long enough to fit. There is enough room for my smart switch which would make this pack completely stand alone. Allowing me to let others use the pack without worry.
12S setup.jpg

The bag used is a Topeak RX. It uses an integrated sliding mechanism for easy removal.
Topeak bag.jpg

I padded the pack to protect the lipos
Padded lipos.jpg

I balance charge during every charge, this setup makes it easy to do.
Balance charging.jpg

I could of shortened the wires going from the charger to the DB25 board but the wire pattern is not 1:1. You would need to wire it, instead I just used short extension cables. I used ribbon cable for the connection between DB25 boards. This allows for hardly any wiring.

I still have boards available for anyone wishing to go this route.
 
Picked up a Kona Stinky frame, I will be moving the cyclone to this frame. I had not planned to buy the Stinky but it came up and was a good enough price not to turn down. If anyone is interested, I will be selling the old GT Palomar frame with the cyclone mounting brackets. This makes a great utility ebike that isn't noticed much. The brackets are super solid and the frame is chrome-moly. Size is medium.
 
Picture of the Kona Stinky Frame and the GT teardown. I was in the process of upgrading the GT mid drive setup at the time, it has an upgraded dual main gear. I had planned to do a similar setup as the GNG. If anyone has a spare cyclone setup they want to part with I can complete the build and sell the GT to a friend.
 

Attachments

  • Kona Stinky.jpg
    Kona Stinky.jpg
    49.6 KB · Views: 3,815
  • bike teardown.jpg
    bike teardown.jpg
    67.6 KB · Views: 3,815
This bike has been my cheap workhorse used for groceries and errands. The cyclone motor was to be moved to the kona stinky frame, but since my last post. I've picked up a bbs02 for the Kona. I've never really been happy with the cyclone design, even after I rebuilt the motor mounts. I had some time over the break to redesign it similiar to an AFT setup with some ideas of my own. Here are the machined parts, it will all go back onto the old GT. This should make it even more reliable and this time trail worthy. Too bad the noise on the cyclone is so noticable. I'm also hoping to use it as a winter bike, something I can trash around but still be durable enough to take it. Middrive makes switching out the wheels and servicing so much easier than hub motor bikes.
 

Attachments

  • image.jpg
    image.jpg
    34.8 KB · Views: 3,701
The new motor mount for the cyclone is finished, just waiting for good weather to try it. Looks and feels solid, should be able to beat on the gears now. I plan on 14S with packs now in the triangle for better handling in the trails.
 

Attachments

  • image.jpg
    image.jpg
    73.2 KB · Views: 3,649
Recieved a freewheel from Pablo for testing. It will be used on this ebike since it has trashed two other freewheels. With the new motor mounts and higher voltages, it will be a good test for this new design.

I just need to finish the battery mount and wait for dry weather to really push it in the trails. Riding season is just around the corner.
 
I wanted to take the freewheel apart to see how it was designed. Unfortunately my freewheel socket does not fit into this new design. I did make a spanner out of scrap aluminum, and could make a new adaptor. Decided weather is getting ridable and have too many other things to get done.

The freewheel adapter fits the ENO freewheel but is too large for the new design.

I was not able to remove the old freewheel from its crank arm, gave up after an hour of trying. Got a hold of a new bottom bracket and cranks, this time it's an isis crank rather than the old square taper design. The new freewheel has no play compared to the old freewheel, that had a lot of side play.
 

Attachments

  • image.jpg
    image.jpg
    44.9 KB · Views: 3,524
  • image.jpg
    image.jpg
    46.9 KB · Views: 3,524
  • image.jpg
    image.jpg
    70.5 KB · Views: 3,524
I finally have the battery mounts worked out. I've been using Kevlar straps to hold the batteries, but wanted a setup to try other configurations. The previous setup, the straps needed to be cut to remove the packs, with the new design, it's very much like a buckle type system. I will post pics of the packs, once I work out which packs to dedicate to this build.

Here are pics of the motor mount with the new bottom bracket assembly and main gear along with the new freewheel setup. Chain alignment looks good, no issues with the motor mount. It's looking to be a solid middrive now.
 

Attachments

  • image.jpg
    image.jpg
    130.2 KB · Views: 3,272
  • image.jpg
    image.jpg
    124.5 KB · Views: 3,272
  • image.jpg
    image.jpg
    102.4 KB · Views: 3,272
Picture of the mounting setup I came up with. Eventually I will put a cover to hide the packs, but for now I want to keep an eye on it to see how well the Kevlar straps hold up. The buckle system I came up with is untested. My past setups, the straps are permanent and need to be cut to remove.

Here is a video of the drivetrain.

Noise level is reduced due to the simpler execution. Still noticeable in the trails though. The controlled does get warmer. Freewheel has been very smooth and solid.

Update:
Top speed for this setup was 36mph on my garmin GPS. Unfortunately I won't be taking it to the local single track due to the noise. Been called out once by a mountain biker, so I generally keep a low key these days, and only use my stealthy setups.

I did take it recently to a park nearby and tested it on the sledding hill. Climbs like a goat, very torquey setup. no chain issues like the previous setup. Freewheel has been taking all the abuse quite well. I'm going to have to make a winter bike out of it and get some studded tires.
 

Attachments

  • image.jpg
    image.jpg
    90.7 KB · Views: 3,227
  • trim.15B8031B-7901-4484-863D-F57A488068FD.MOV
    7.6 MB
Back
Top