SimonKagstrom
🔌 New-ish
Hi!
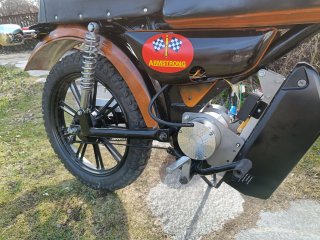
I've done (well, are these things ever finished?) an electric conversion of a classic moped. It actually consists of parts from here and there, but most are from Zündapp, so I'm saying it's a Zündapp. It also says so on the gas tank, which by the Swedish saying is what counts ("det är tanken som räknas")! I bought it in a good condition without the original engine, so most of the bike styling is not thanks to me.
The mopeds from the 70s/80s were capped at 30 km/h, which was also my target speed for the conversion. It comfortably does 30 km/h, and I'd say it oomph-wise feels like a 50cc two-stroke moped from the era, although I have little actual experience with them.
It's based on a VESC controller, the Spintend single UBOX 100V / 100A and uses a Vevor 1800W motor for the true lethargic 50cc 1hp feeling. I've coupled it with a 52v em3ev king shark battery, basically an e-bike-style battery mounted between the frame and the front wheel. Lights have been converted to 12V and are driven via the Spintend adapter board.
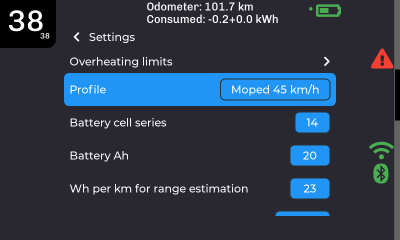
Now, I'm a software developer, so I've also done a ESP32P4-based display for the VESC controller (link to another thread on this forum) to show the speed, the position on a map and trip data. That's were I've put in most work, and it's also what I'll keep on developing. It sits in a rectangular 3D-printed case on the handlebar, which is sort of crude but I'd also say fits fairly well with how the speedometers looked on these. At least it's as good as I can make it!
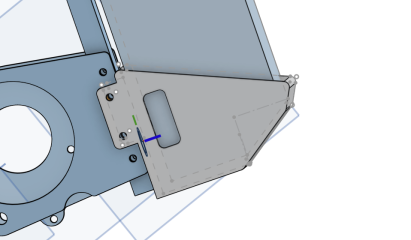
Conversion-wise, I got help from a friend who works as a mechanical engineer to design the motor mount adaptors (thanks David Ålind!). I went through many iterations of 3D-printed ones before ordering them in steel, and I think in the end it turned out just fine. There are also a lot of other 3D-printed parts on the moped, and what a revolution it is to be able to do that!
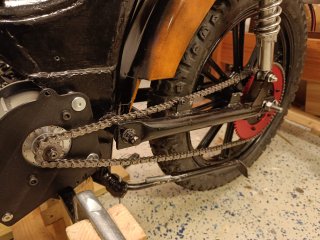
So far, I've done about 100km on the moped. It's slow, but that's also how I intended it to be (and 8 tooth front / 42 rear helps with the slow starts). The motor and chain is slightly noisy, which I think is partially due to VESC configuration and partially due to the small 8 tooth front sprocket. My back don't quite agree with the low position of the handlebars, so it's a bit uncomfortable to ride for longer times. I won't ride it very far and often, so I don't mind too much. I mean, it's mainly an excuse to do a software project after all!
Links to some more information about the project (including to the OnShape CAD work), and the source code and more information about the VESC display
GitHub - SimonKagstrom/e-zundapp: Electric moped stuff
GitHub - SimonKagstrom/radbuzz: Infotainment for a VESC-based electric moped


I've done (well, are these things ever finished?) an electric conversion of a classic moped. It actually consists of parts from here and there, but most are from Zündapp, so I'm saying it's a Zündapp. It also says so on the gas tank, which by the Swedish saying is what counts ("det är tanken som räknas")! I bought it in a good condition without the original engine, so most of the bike styling is not thanks to me.
The mopeds from the 70s/80s were capped at 30 km/h, which was also my target speed for the conversion. It comfortably does 30 km/h, and I'd say it oomph-wise feels like a 50cc two-stroke moped from the era, although I have little actual experience with them.
It's based on a VESC controller, the Spintend single UBOX 100V / 100A and uses a Vevor 1800W motor for the true lethargic 50cc 1hp feeling. I've coupled it with a 52v em3ev king shark battery, basically an e-bike-style battery mounted between the frame and the front wheel. Lights have been converted to 12V and are driven via the Spintend adapter board.
Now, I'm a software developer, so I've also done a ESP32P4-based display for the VESC controller (link to another thread on this forum) to show the speed, the position on a map and trip data. That's were I've put in most work, and it's also what I'll keep on developing. It sits in a rectangular 3D-printed case on the handlebar, which is sort of crude but I'd also say fits fairly well with how the speedometers looked on these. At least it's as good as I can make it!
Conversion-wise, I got help from a friend who works as a mechanical engineer to design the motor mount adaptors (thanks David Ålind!). I went through many iterations of 3D-printed ones before ordering them in steel, and I think in the end it turned out just fine. There are also a lot of other 3D-printed parts on the moped, and what a revolution it is to be able to do that!
So far, I've done about 100km on the moped. It's slow, but that's also how I intended it to be (and 8 tooth front / 42 rear helps with the slow starts). The motor and chain is slightly noisy, which I think is partially due to VESC configuration and partially due to the small 8 tooth front sprocket. My back don't quite agree with the low position of the handlebars, so it's a bit uncomfortable to ride for longer times. I won't ride it very far and often, so I don't mind too much. I mean, it's mainly an excuse to do a software project after all!
Links to some more information about the project (including to the OnShape CAD work), and the source code and more information about the VESC display
GitHub - SimonKagstrom/e-zundapp: Electric moped stuff
GitHub - SimonKagstrom/radbuzz: Infotainment for a VESC-based electric moped
Last edited: