
jmwhite151
1 mW
Here's info on my first bike build in case people are interested or it helps others:
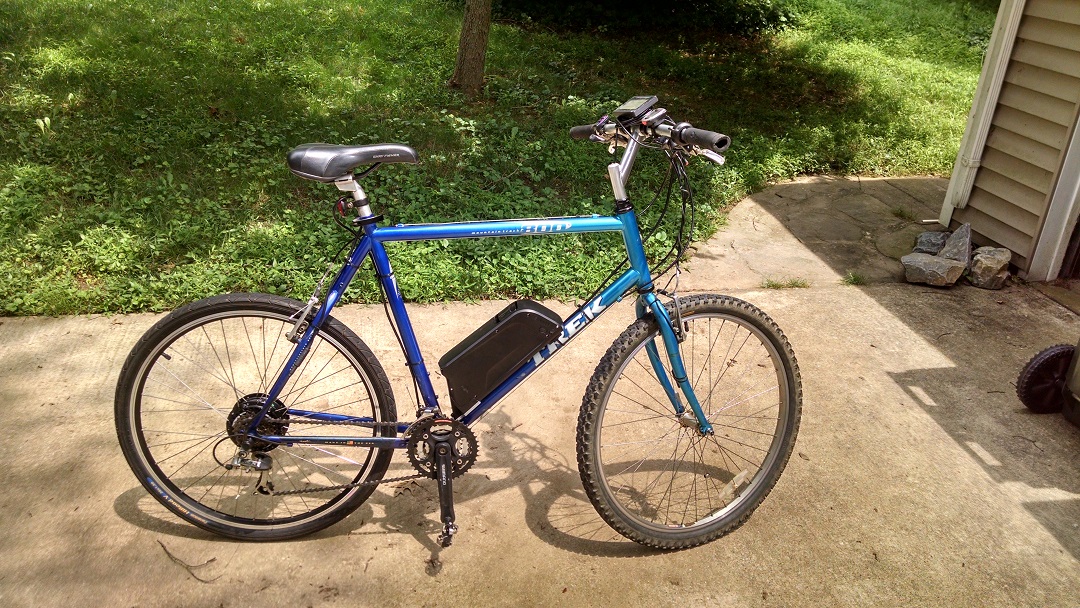
Background - This is my first bike build. The motivation was to build a bike for my brother. He can only pedal with one leg due to an injury. This makes going up hills very difficult. So the goal was to build something that can get him up slight hills, while not weighing a whole lot so he can put it in and out of his SUV. Speed and range were not important. Here is a picture of the build after the first test ride.
Performance
As of this writing, I have only had a few short test rides. It does what I hoped it would, which is go up some hills reasonably well. I weigh 175 lb. And it was able to carry me up short, decently steep hills (maybe 6% grade... don't quote me on that). I didn't really test it, but from one video I shot, it seems to top out at 15 MPH (don't hold me to this), which is what I expected.
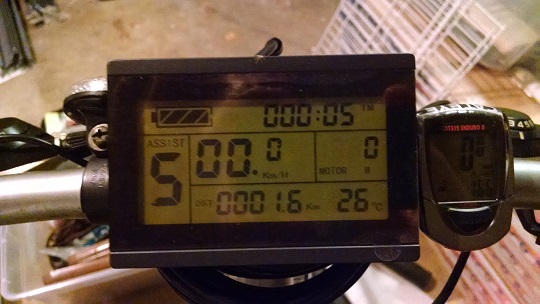
8/10/2015 Update - The speedometer goes to 0 when free wheeling. And the power to the display (and motor) will turn off after ~10 minutes. This is due (I'm 98% sure) to the fact that the Bafang SWXH does not have an internal speed sensor, contrary to what Green Bike told me. Fortunately, d8veh has posted a nice work around (link below). Another option would be to buy a motor with an internal speed sensor instead of the SWXH. I believe most/all of the Cute motors have an internal speed sensor.
http://www.pedelecs.co.uk/forum/thr...y-controller-speed-sensor-installation.20709/
Bill of Materials
Trek 800 (~1998)
Bafang SWXH 36V 250W (201 RPM) rear driving conversion kit - $110
36V10AH Samsung frame battery with built-in sine wave controller - $300
Shimano 7 speed freewheel - $8
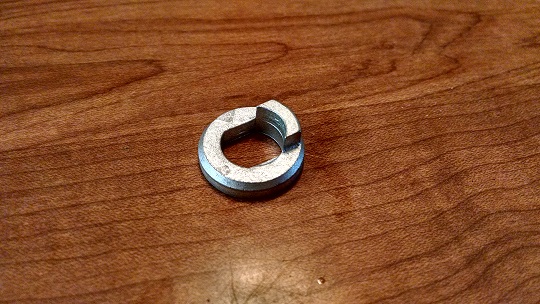
E-bike brushless hub motor anti-torque washers (qty: 2) - $2 ($1/ea)
Not currently installed:
HWBS (qty: 2) - $11 ($5.50/ea)
E-Bike central harness with waterproof connectors - $15 (One of these came with the battery kit, but I wanted an extra in case I needed extra connectors for anything. Unfortunately, the one I bought separately was not identical and the connectors are not interchangeable.)
Total, not including bike: $440.50 (shipping was an additional $223.50)
Other required items: Rim tape, Zip ties
Procurement
I bought the e-bike parts from greenbikekit.com. I asked them a few questions before the purchase, which were generally responded to within 24 hours, I believe. I purchased the parts on 6/24/2015. I got a shipment notice on 7/2/2015. I received the parts (in Delaware, USA) on 7/8/2015. It was shipped via UPS. In general, I would say I am pretty pleased with how things went. The components in the battery kit worked out well. The LCD has some useful stuff on it (speed, motor temperature, power output, distance, etc.) The speed seems to only be displayed when power Is applied to the motor. Otherwise it displays 0.0 km/hr when coasting. (See update above for explanation.) It seems to check out against the Cateye bike computer. I am not 100% sure that there is a temperature sensor in the motor or that the temperature display is motor temperature. But the display shows a temperature that seems to make sense. It went up a few degrees Celsius while I was riding around. I suppose it could also be ambient air temperature. (If someone knows for sure, let me know and I will update this.) According to the manual, the temperature in the bottom right corner is air temperature. Motor temperature can be displayed in place of motor power, depending on settings. The battery is nice. It's easily removable and has water-resistant covers on all of the ports.
I think my only complaint is that the rim was not dished properly relative to the hub (see picture below). It might be as much as 0.5 inch off center. It was bad enough that the original tire would occasionally rub on the chain stay. Fortunately, I had some spare road tires that fixed the problem. I expected some truing would be required, so I'm not terribly disappointed about this. I took it to the local bike shop. Unfortunately, they said the spokes were too short on the one side to be able to fix it. However, they offered to order new spokes and fix it for me. (I plan on doing this later.) When I went back to the bike shop, they were able to true the wheel pretty close to center without new spokes.

Build
Everything was pretty much bolt-on, plug-and-play, off-the-shelf. It went together fairly easily. I think the only tools that I used that you wouldn't find in a standard toolbox were a chain whip to install the cassette/freewheel, a torque wrench to install the axle nuts and a Dremel to file a little off of one of the shifter knobs. I would say I spent maybe 3-6 hours between opening the box to first test ride. It can definitely be done in less time if you have a decent workspace and all the right tools at hand.
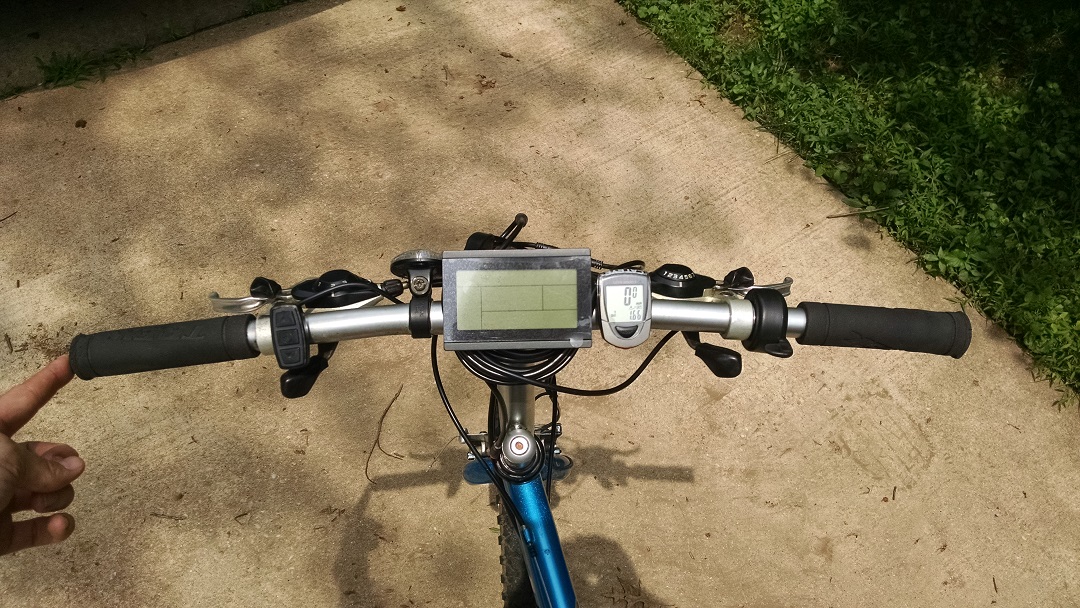
Controls - Everything worked out pretty well on the controls. Everything mounted on the handlebars in such a way that it is all accessible without removing either hand from the grips. The only thing I had to do was remove a little plastic material from the end of one of the shift knobs so it can go through it's full stroke without hitting the throttle. I'm pretty fortunate here that everything came together fairly well. I imagine that in some builds, it could be tricky to make all of the brake levers, shifters and throttle easily accessible.
Torque Arms - Since this is a pretty low torque build and the frame is steel, for now I am just using the torque washers. I also torqued the axle nuts to >25 ft-lb. (Based on the data provided at the following link, I figured that would be sufficient... http://endless-sphere.com/forums/viewtopic.php?f=2&t=14195) I may add torque arms later.
Wiring - I bought the integrated controller/battery, to try to cut down on required wiring. But there was still a ton of it, even with the nice harness that was provided. (The harness does provide nice water-resistant connectors.) Because it's a pre-made harness the wires are longer than you need. So figuring out what to do with the excess can be tricky. For now, I just found things to wrap them around. I want to wait until we've had a chance to ride the bike a bunch just in case we decide to change something. Long term, I may cut off the unused connectors and/or shorten the wires that are too long. It definitely makes you appreciate a factory built e-bike or one where the builder really thought through the wiring. Another interesting point is that Bafang hub motors seem to have the wires exit on the drive side, whereas the Cute motors and MAC motors seem to have the wires exit on the non-drive side. This is worth noting when you are planning cable routing. Originally I planned on routing the cable along the chain stay. But because the derailleur cable was routed on the bottom of the chain stay and there is risk of chain slap on top of the chain stay, I ended up routing the motor cable up the seat stay and down the seat tube to the controller. It ended up being a good use of the excess wire length anyway.
Motor cutoff switch (brakes) - Because the brake levers and shifters are integrated on this bike, I wasn't able to use the supplied e-bike brake levers that have the motor cutoff switches. So my plan is to install a hidden wire brake sensor (HWBS) fairly soon.
I think the only thing I would do differently in the future is that I would probably just buy the hub motor, not built into a wheel. Based on my reading, it seems like almost anywhere (from China) that you buy a pre-built e-bike wheel, some truing will be needed once you get it. (em3ev.com may be the exception. I would consider give them a shot at building a wheel for me.) And now knowing that my local bike shop is willing and capable to build an e-bike wheel, next time I will just order the hub motor and spokes separately from the rim and have it built locally. It should save a fair amount on shipping. One comment: on the wheel I got, the rim was centered with the hub. So I assume they just figured out what length spokes fit the rim and used those on both sides. For a front wheel, where the rim is supposed to be centered to the hub, maybe a pre-built wheel will work out.
Remaining Work
1. Install HWBS
2. Get wheel trued
3. Clean up wiring(?)
4. Install torque arms(?)
Long Term Review
(To be filled in later.)
Thanks
Thanks to ebikes.ca for hosting this forum! (They do host this forum, right?) Also, thanks to the users who took the time to respond to my questions, particularly the following: motomech, d8veh, dogman dan who responded to multiple questions.
Pre-build Posts & Responses
Help selecting a kit/components for first time build - http://endless-sphere.com/forums/viewtopic.php?f=3&t=70031
Trek 800 dropout width - http://endless-sphere.com/forums/viewtopic.php?f=3&t=70416
Will this combo work? - http://endless-sphere.com/forums/viewtopic.php?f=3&t=70221
Background - This is my first bike build. The motivation was to build a bike for my brother. He can only pedal with one leg due to an injury. This makes going up hills very difficult. So the goal was to build something that can get him up slight hills, while not weighing a whole lot so he can put it in and out of his SUV. Speed and range were not important. Here is a picture of the build after the first test ride.
Performance
As of this writing, I have only had a few short test rides. It does what I hoped it would, which is go up some hills reasonably well. I weigh 175 lb. And it was able to carry me up short, decently steep hills (maybe 6% grade... don't quote me on that). I didn't really test it, but from one video I shot, it seems to top out at 15 MPH (don't hold me to this), which is what I expected.
8/10/2015 Update - The speedometer goes to 0 when free wheeling. And the power to the display (and motor) will turn off after ~10 minutes. This is due (I'm 98% sure) to the fact that the Bafang SWXH does not have an internal speed sensor, contrary to what Green Bike told me. Fortunately, d8veh has posted a nice work around (link below). Another option would be to buy a motor with an internal speed sensor instead of the SWXH. I believe most/all of the Cute motors have an internal speed sensor.
http://www.pedelecs.co.uk/forum/thr...y-controller-speed-sensor-installation.20709/
Bill of Materials
Trek 800 (~1998)
Bafang SWXH 36V 250W (201 RPM) rear driving conversion kit - $110
36V10AH Samsung frame battery with built-in sine wave controller - $300
Shimano 7 speed freewheel - $8
E-bike brushless hub motor anti-torque washers (qty: 2) - $2 ($1/ea)
Not currently installed:
HWBS (qty: 2) - $11 ($5.50/ea)
E-Bike central harness with waterproof connectors - $15 (One of these came with the battery kit, but I wanted an extra in case I needed extra connectors for anything. Unfortunately, the one I bought separately was not identical and the connectors are not interchangeable.)
Total, not including bike: $440.50 (shipping was an additional $223.50)
Other required items: Rim tape, Zip ties
Procurement
I bought the e-bike parts from greenbikekit.com. I asked them a few questions before the purchase, which were generally responded to within 24 hours, I believe. I purchased the parts on 6/24/2015. I got a shipment notice on 7/2/2015. I received the parts (in Delaware, USA) on 7/8/2015. It was shipped via UPS. In general, I would say I am pretty pleased with how things went. The components in the battery kit worked out well. The LCD has some useful stuff on it (speed, motor temperature, power output, distance, etc.) The speed seems to only be displayed when power Is applied to the motor. Otherwise it displays 0.0 km/hr when coasting. (See update above for explanation.) It seems to check out against the Cateye bike computer. I am not 100% sure that there is a temperature sensor in the motor or that the temperature display is motor temperature. But the display shows a temperature that seems to make sense. It went up a few degrees Celsius while I was riding around. I suppose it could also be ambient air temperature. (If someone knows for sure, let me know and I will update this.) According to the manual, the temperature in the bottom right corner is air temperature. Motor temperature can be displayed in place of motor power, depending on settings. The battery is nice. It's easily removable and has water-resistant covers on all of the ports.
I think my only complaint is that the rim was not dished properly relative to the hub (see picture below). It might be as much as 0.5 inch off center. It was bad enough that the original tire would occasionally rub on the chain stay. Fortunately, I had some spare road tires that fixed the problem. I expected some truing would be required, so I'm not terribly disappointed about this. I took it to the local bike shop. Unfortunately, they said the spokes were too short on the one side to be able to fix it. However, they offered to order new spokes and fix it for me. (I plan on doing this later.) When I went back to the bike shop, they were able to true the wheel pretty close to center without new spokes.
Build
Everything was pretty much bolt-on, plug-and-play, off-the-shelf. It went together fairly easily. I think the only tools that I used that you wouldn't find in a standard toolbox were a chain whip to install the cassette/freewheel, a torque wrench to install the axle nuts and a Dremel to file a little off of one of the shifter knobs. I would say I spent maybe 3-6 hours between opening the box to first test ride. It can definitely be done in less time if you have a decent workspace and all the right tools at hand.
Controls - Everything worked out pretty well on the controls. Everything mounted on the handlebars in such a way that it is all accessible without removing either hand from the grips. The only thing I had to do was remove a little plastic material from the end of one of the shift knobs so it can go through it's full stroke without hitting the throttle. I'm pretty fortunate here that everything came together fairly well. I imagine that in some builds, it could be tricky to make all of the brake levers, shifters and throttle easily accessible.
Torque Arms - Since this is a pretty low torque build and the frame is steel, for now I am just using the torque washers. I also torqued the axle nuts to >25 ft-lb. (Based on the data provided at the following link, I figured that would be sufficient... http://endless-sphere.com/forums/viewtopic.php?f=2&t=14195) I may add torque arms later.
Wiring - I bought the integrated controller/battery, to try to cut down on required wiring. But there was still a ton of it, even with the nice harness that was provided. (The harness does provide nice water-resistant connectors.) Because it's a pre-made harness the wires are longer than you need. So figuring out what to do with the excess can be tricky. For now, I just found things to wrap them around. I want to wait until we've had a chance to ride the bike a bunch just in case we decide to change something. Long term, I may cut off the unused connectors and/or shorten the wires that are too long. It definitely makes you appreciate a factory built e-bike or one where the builder really thought through the wiring. Another interesting point is that Bafang hub motors seem to have the wires exit on the drive side, whereas the Cute motors and MAC motors seem to have the wires exit on the non-drive side. This is worth noting when you are planning cable routing. Originally I planned on routing the cable along the chain stay. But because the derailleur cable was routed on the bottom of the chain stay and there is risk of chain slap on top of the chain stay, I ended up routing the motor cable up the seat stay and down the seat tube to the controller. It ended up being a good use of the excess wire length anyway.
Motor cutoff switch (brakes) - Because the brake levers and shifters are integrated on this bike, I wasn't able to use the supplied e-bike brake levers that have the motor cutoff switches. So my plan is to install a hidden wire brake sensor (HWBS) fairly soon.
I think the only thing I would do differently in the future is that I would probably just buy the hub motor, not built into a wheel. Based on my reading, it seems like almost anywhere (from China) that you buy a pre-built e-bike wheel, some truing will be needed once you get it. (em3ev.com may be the exception. I would consider give them a shot at building a wheel for me.) And now knowing that my local bike shop is willing and capable to build an e-bike wheel, next time I will just order the hub motor and spokes separately from the rim and have it built locally. It should save a fair amount on shipping. One comment: on the wheel I got, the rim was centered with the hub. So I assume they just figured out what length spokes fit the rim and used those on both sides. For a front wheel, where the rim is supposed to be centered to the hub, maybe a pre-built wheel will work out.
Remaining Work
1. Install HWBS
2. Get wheel trued
3. Clean up wiring(?)
4. Install torque arms(?)
Long Term Review
(To be filled in later.)
Thanks
Thanks to ebikes.ca for hosting this forum! (They do host this forum, right?) Also, thanks to the users who took the time to respond to my questions, particularly the following: motomech, d8veh, dogman dan who responded to multiple questions.
Pre-build Posts & Responses
Help selecting a kit/components for first time build - http://endless-sphere.com/forums/viewtopic.php?f=3&t=70031
Trek 800 dropout width - http://endless-sphere.com/forums/viewtopic.php?f=3&t=70416
Will this combo work? - http://endless-sphere.com/forums/viewtopic.php?f=3&t=70221