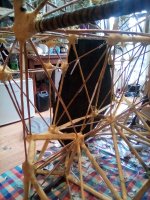
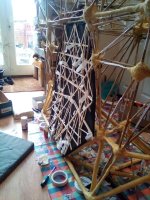
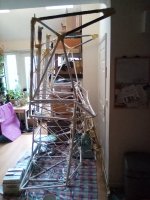
FOSSHW Category L7e Hybrid EV (full build: not a conversion)

amberwolf said:
I only asked because it is very common for DIYers to not even consider this until too late, and lose their work or be unable to use it. (there've been a few vehicle builds of various types over the years where it was very sad to see this happen to them...and I hate to see it happen to anyone).

ooo, ouch. yes ironically if you built this exact same vehicle in e.g. Belgium the only way i heard that it could be declared road-legal is to submit QTY 4of production units for testing, one of which will be independently crash-tested, one disassembled... yes *production* units. my friend is investigating if there is an equivalent to Q-Plate (Single-Vehicle Approval)

by contrast the UK has a long history of weird car inventors doing weird errstuff (e.g. Clive Sinclair)

i mean, y'know, if you add pedals and keep it to 15 mph max it could actually qualify as an e-bike :) i saw a youtube video of a guy who made a Mercedes AMG fibreglass pedal car (full size, gullwing doors, everything!) absolutely brilliant

edit https://m.youtube.com/watch?v=o6nobuceVd8

at least if people build an illegal EV there's hope in the form of a conversion :)
 
amberwolf said:
All it should take, assuming the pack is in one single rectangular box, with the cells packed in a long line, wide sides to the ends, is to install stiff inflexible plates on the ends, and strap them down tightly along the length of the pack. Each cell will then compress the next, and all will be compressed by the end plates.

ahh got it. proper bolts. aluminium plates. okaay. quite straightforward as well. thank you. yes those cells you found are the exact ones i got. 19 of them were GBP 1300 including shipping and customs duty so yes, ways to look after them much appreciated.
 
i'm using loctite extreme glue here at this early phase, *not* the loctite extreme epoxy: the rubbery clear stuff, and tons of it (about a 2 to 3mm puddle surrounding each bamboo pole, i've got through 7 tubes already and i am only about 1/2 way done). then using painter's masking tape which is a pig to work with, it doesn't properly stick except to itself (which can be exploited with the right kind of wrapping technique).

question: why the hell would anyone do that?? why not use superglue or epoxy? answer: because undoing mistakes with a hard glue is a cascade of catastrophic modifications and damage, getting pipes out from their nodes it would actually be better to cut and splice.

i just found (36 hours late) the first major assembly mistake (2 nearly-the-same-length pipes swapped) and it is relatively easy to correct by digging in through the masking tape, scraping the rubbery glue until it gives way, and pulling the pipes out.

https://youtu.be/cTf0AWNWHjo

the other reason for using the rubbery glue is that sometimes the nodes get off-axis: the pipes are not flush perpendicular to their joint-seat. epoxy would once dried be virtually impossible to get it to come loose a bit under the masking tape.

remember that all i need is for this glue and tape (and occasional string loop to create compression) to hold together long enough to get the Kevlar / Hessian / Flax / Hemp cloth and Epoxy around it. beyond that point the strength of the glue and masking tape is completely irrelevant.
 
creating three sections, this was the original plan for the mid-section:

2023-01-24_13-39.png

however the complications involved in the sheer overwhelming number of epoxy-bamboo-bridges and the lack of stability led me instead to cut the front off at the floor-line. after staring at the back part for over a day i realised i need to do the same thing for the back, leaving a (very short!) floor as a separate assembly, and the roof also as a separate assembly.

some things you just can't predict until you spend the time properly paying attention to them :)

https://youtu.be/-yC20TXjBxI
 
after seeing that mercedes pedal car i realised that one of the key advantages of gull-wing doors is that there is a central roof portion that provides significant structural strength: the parts that come down from the roof down to the door-frame are much stronger.

this gave me an idea to modify the design, based in part on the old 1930s convertibles (the MG, Morgan Aero) which had a really large door undersill and you actually stepped into the car, over that large door-sill.

i can rearrange the roof to leave the central part (500 mm wide), as a separate fully-geodesic object, then create tetrahedra left and right to the top windshield line, which will help take stress off the windscreen as a structural member, and also provide a location to put gull-wing doors.

quite a radical change but one i feel is necessary, to get rigidity in the middle section which is presently entirely missing. also it will look cool.

2023-01-26_02-24.png
 
okaay so a decision on the roof construction is quite easy once the decision was made to go 1930s "sports convertible" high door sills with gull-wings: from the driver position a central front-running "bridge arch" goes over their head, across to a toblerone (wedge) shape that has the windscreen top line at its thin end of the wedge.

each end of that wedge is chopped inwards, at appx a 45 degree angle, leaving plenty of room for occupants to climb in. temporary roof/door i will construct out of canvas pockets to put pipes into, and hold a thick PVC clear plastic sheet as windows. later i will design and construct actual gull-wing doors, which will come out at 45 degrees from the centre line rather than the more normal 90 degrees.

i'll do some more pictures later once i am further along, but for now, hooray, the back box behind occupants is completed.
 
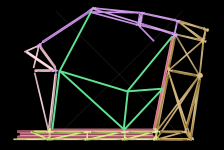
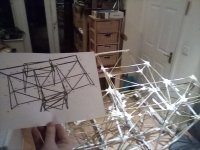
like this. the first picture shows the front wedge which has at its front the top centre of the windscreen. the picture on the left is the isometric screenshot from OpenSCAD, marked up as a build diagram.

this one was a total pain in the ass to assemble as two roofline parts needed hotgluing, leading to inaccuracy that is clearly visible with the windscreen drooping down to the left. this will get corrected when it can be joined up to the side support i designed this afternoon (and will construct tomorrow).

the second picture is the sideview. youtube video https://youtu.be/BWJfB_zfVHo

IMG_20230128_021817.jpg

IMG_20230128_021836.jpg
 
top windscreen line is in. separate bracing from the dashboard gives a triangular window port left and right of the windscreen, in front of each door. the "wedge" above the driver, onto the top windscreen line, really is very thin.

this is basically phase 2 completed, phase 3 involves separating the backbox, then moving the midsection outdoors, then continuing assembly of the rear section.

IMG_20230128_185429.jpg
 
hargh, wha-howw that was risky and awkward: with 15 sticks of hotglue i got the roof, floor+doorsills and driversupport+backbox separated.

the roof came off easily because it was resting under gravity with very little tape: the backbox was properly glued on and a couple of pipes had vertical inserts (at both ends) preventing them from being separated horizontally. fortunately nothing broke, only some hotglue came away which was easily fixed.

next version will need replacement floor support corner Nodes of their own, so the trapping of the upright pipe doesn't happen again.

now i can carry on with phase 3: the back box needs a rear section and a bumper, and the skeleton assemblies are done.

IMG_20230129_162752.jpg

IMG_20230129_175812.jpg
 
i had to scoot to FOSDEM2023 so didn't get a chance to complete the rear section, but managed about 30% remarkably quickly, by switching to hotglue. i was somewhat reticent to use it because it is so much stronger and could soften the PLA but it works well including the usual dismantling after a mistake. what is particularly good is that once set the bamboo sticks out entirely freefloating in midair without falling off the Node. will edit and add a couple of pictures next week. in the meantime here is me complaining about hotglue :) https://m.youtube.com/watch?v=xUJ181bh4x0

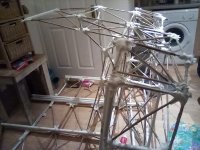
edit: here. the rear assembly is front-down, view is from left side, the "back box" (behind occupants) is on the floor and the top line of the rear bumper is pointing upwards. rear wheel arch is in the middle right part of the photo.

the swingarm will be attached to the backbox, and there is a macpherson-like housing for the top of the suspension which will need some steel reinforcement connecting to the swingarm area. that comes later but is already part of the CAD.

IMG_20230207_120800.jpg
 
done, the last third, bumper is in (top of picture) on both sides. i'm just going round reconnecting rods that have pulled off under tension, using twine to put them under compression. some areas are not going to connect (roof line) no matter what. there is a regular 6mm gap that will not close. i am just going to have to bridge them.

after finishing the twine tomorrow, i will start the kevlar-epoxy wrapping, beginning with a few nodes to see how it goes, and how much epoxy is actually needed. also i need to work out a way to stop pipes from bending, without using too much kevlar.

IMG_20230208_232242.jpg
 
ok so this is the very first wrap session, a few layers on each node, you get the general idea of how this is going to go: QTY 135 Nodes, each one probably 3 metres of 50mm wide Kevlar "belt", it's a hell of a lot of kevlar and resin, and that's just the Nodes: the pipes need a minimum 3 layer wrap as well.

initially my idea was to remove the masking tape on each Node but having now seen quite how much gets down into the area around the PLA instead of around the ends of the bamboo and PVC pipes i think *deliberately* wrapping layers of masking tape around is a good idea, not least to significantly reduce weight. Especially given that the strength of the frame is from how bonding of cloth and resin *around and in between* all Nodes and Pipes, not the Pipes and certainly not the PLA that deforms above 60C.

the areas where cloth-rein density around Nodes will particularly matter is the Section Joins, which will have metal strap and stainess steel bolts embedded in them.

some experimentation required :)

IMG_20230209_150133.jpg
 
i'm packing out the... concave(?) parts in the 3D printed PLA Nodes with crumpled paper and masking tape. this leaves no areas where when the Kevlar is stretched across it could leave a large air pocket or just as worse require significant amounts of kevlar and epoxy to fill up the holes. given that the strength is entirely from the *resin and kevlar*, and the paper bamboo tape PVC and PLA are all "skeleton former" material i have no problem whatsoever in using "flimsy" paper as an extremely light-weight filler.

bottom of the picture is completed, note no concave dips: top is underway.

IMG_20230211_154023.jpg
 
wha-howw the epoxy-kevlar phase is taking time. at the rate i am going it will be 2 MONTHS full-time to complete. i have to find ways to speed up. will experiment with different layering strategies and report back what worked well. MBFG recommended using foam pads (non-styrene ones when using Silicomin SR5550 epoxy), for example, instead of brushes.
 
been busy laminating. this is 1 layer kevlar underneath 2 layers industrial hemp with 5in x 50 mm MBFG Kevlar tape at each end and double helix garden twine to finsh it off. Wow the hemp hessian drinks resin: that was 75 ml gone in a flash.
IMG_20230218_102033.jpg

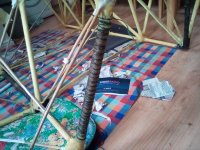
put the frame level on the floor as i have to paper-mask up some of the nodes that were hard to reach, but found some of them have come loose. loctite rubbery glue pulled off: hotglue to the rescue. for reference: left rear wheelarch is at the front.
IMG_20230218_101953.jpg
 
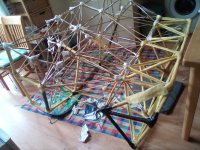
two assemblies (rear, floor) currently resting under gravity, a bit of a pain to slot together. bolts need to be affixed now.
IMG_20230222_193236.jpg

and this is one that i have messed up. see how it is at a slight angle? if there were two tubes and the bolt slid into them it would not be a problem, but in my infinite wisdom i decided to epoxy the bolt to the frame. what that means is, when assembling the bolt may not slide cleanly into the tube. argh

IMG_20230223_181435.jpg
 
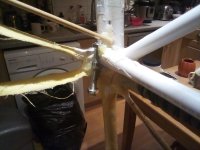
okaay this is the roof-line / top-doorframe point just behind the right passenger head. an M10 bolt head is encased in MBFG Kevlar-epoxy resin, and it comes down through two 30mm long 12mm OD 10mm ID Stainless steel 316 tubes (cut from a 3m section), finally an M10 nut with a Nylon lock insert. part of the 21.5 mm Floplast PVC has been cut away to give access by a 17 mm socket wrench.

the bolt itself is epoxied to the roof, the first tube to the rear section, and the second to the floor/door-frame section. saves one bolt and two stainless steel tubes but is quite risky (epoxy in the threads, the bolt cannot be removed and must be repaired in-situ)

once i am happy with the stability of the bolts and the stainless steel tubes i will disassemble the three parts and continue individual wrapping, it is very inconvenient at the moment. of course, it will result in overwrapping such that parts are too close to reassemble and some filing and cutting (OUTSIDE!!) will be needed, i very much want to avoid that.

IMG_20230225_201449.jpg
 
Last edited:
bolts are attached to the roof! they go on and off cleanly, there was some resin dripped across the Nodes and the bolt threads (eep) which fortunately separated. the M10x75mm bolts cast shadows at the bottom of the picture. remaining Node sites i will use back-to-back L-Brackets with M5 bolts, to pull across gaps. the leftmost and rightmost bolts are critical as they also join the doorframe to the rear section, the innermost bolts are likely overkill and could have been replaced with sturdy L-Brackets, but hey.

when separated i can do clean lamination wrapping especially carefully around the bolt heads, ensuring not too great a thickness such as to prevent assembly!

IMG_20230227_101048.jpg
 
the first panel has been created, it goes at the rear midde top, at the bumper, where a boot lid would normally be. you can see the metal brackets currently hot-glued in place, and the side-on picture shows that this is a compound curved shape. most slats are doubled-up, with bridges 9mm in between, not closed off because the construction foam needs to flow between gaps and fill the entire structure. estimated weight without foam or Dacron is around 200 grams, mainly due to the metal brackets. the next stage is putting the dacron on the back.

IMG_20230304_092845.jpgIMG_20230304_092911.jpg
 
here you can finally make out the outline of part of what is "a car" because in 2D image form there is a panel attached to the space-frame. no mid-point brackets are attached to bamboo pipes, yet, i forgot about them, they can be added easily (before foam that is!).

the underside dacron has been stretched across the frame (i took it off to do that), hotglued in place, and reattached. superglue-baking-soda is currently in the brackets, expanding to 3x its original size (so far!) i think it's stopped now.

the next step is to put the outer polyester on, and label-gun-barb it at regular 30-40 mm intervals, but only about 15 in at a time then fill with construction foam only 10 in at a time. otherwise if too much is done the entire thing could burst.

IMG_20230304_132318.jpgIMG_20230304_132258.jpg
 
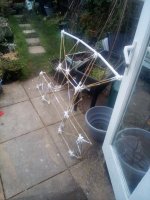
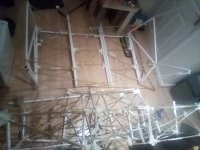
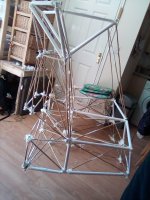
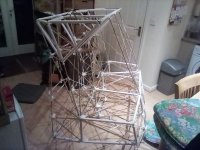
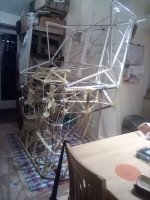
i completed the first wrap of the rear section, sufficient for it to be stable. it's now outside, and the front has been brought in. nose-down in the picture below, rather than tail-down. the roof (right, near door) fits nicely, i will show that another time.

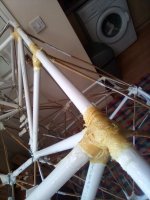
currently i am in "repair" mode, doing hotgluing of all bamboo. the loctite extreme rubbery glue worked perfectly on the 21.5 mm FloPlast PVC but went very badly on the bamboo. some Nodes which have only bamboo poles were twisted in *all three* axes by over 10 degrees. three days and i am almost done cutting away masking tape down to the pad and injecting hotglue. i have the last two bamboo poles with 5 mm gaps that need tensioning (serious amounts of force, four strands of garden twine).

i shoule be able to begin Node-wrapping of both the front section and the adjoining floor part, including the 316 stainless tubes, in a day or so. tubes and M10 bolts went really well for both roof and rear btw.

i do have to say, though, that this is a seriously labour-intensive technique. that's down to literally fabrication of every single laminated pipe and Node. manufactured variants will be far easier, more like those Stand / Venue "kits" using cast aluminium Nodes and 4040 aluminium rails.


IMG_20230317_095756.jpg
 
Last edited:
Back
Top