Hailong battery isolation switch

fill

100 W
Joined
Aug 17, 2023
Messages
249
Location
uk
I have a couple of 36v hailong batteries for my ebike, One of which is fitted with its own isolation switch while the other has not got this feature, I am planning on adding a dc/dc converter for additional lighting to help illuminate the bike making it more visible as the nights close in.

Ideally i would like to add a simple isolation switch to the battery without one as this would give me the simple cut off to stop the dc/dc converter draining power when not required. Without having to remove the battery whenever the bike is unused or adding the further complexity of an isolation switch or circuit elsewhere on the bike.

will such a mod require a new bms? since the switches used are nothing special or dont look it anyway? im asuming that they are indirect and switch a logic level state on the bms rather than break the battery power circuit directly? if so or is this probably an unused bms feature in my lacking battery or is my bms likely to be a cheapest feature poor option requiring an upgrade??

Rather than just hack open both batteries for a look see and bms pcb inspection for unused switch connections, i thought it better to ask first as if its going to require a replacement/upgraded bms pcb its probably not worthwhile.
 
Cheers thats what i thought would probably be the case.. I may still crack both cases and see if i can find unused solderpads or if the bms pcbs are a match between the two.
 
What precisely do you mean by this?

In addition to what?

More visible to who?
Since you ask I live in fairly busy city and while can cycle on many dedicated tracks and traffic lanes i also have to share the roads with significantly more massive and powerful machines often driven by tired and frustrated folk.. If i travel north Im heading into the city but if i head south Im off into the country on unlit roads that wind round bends and hide bellow a 6-8ft hedgeline off the road surface with a 70 mph speed limit..

In addition to the stock lighting front and back which are adequate at best, and while adding lights i will also add indicators. Though I will not stop hand signalling during the day..

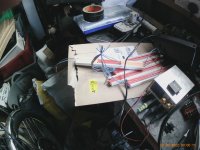
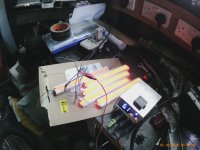
More visible to other road users who could kill me with ease, I have heard "sorry mate didnt see you.." too many times already no need to hear it again.. ever.. so will be filling the rear panel of my back carry box with red neon led strips 6v for lighting, 12v for brake/warning.
this is just a work in progress of the rear light bars..lightbars1.JPG

@6v for lighting
6vtest1.JPG


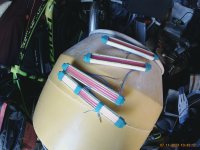
and 12v for brake/warning light
112vtest2.JPG


ignore the camera timestamps its circa 3pm this monday past under a north facing window.. i just point and click the camera it does its own lighting/flash things.. but its day time..

Again this is supplementary and is significantly brighter than some motorcycle aftermarket rear lights i initially bought for the job. to finish i will be filling the gaps with clear sillicone, poking wires out the rear and closing the ends with hotglue/heatshrink
and fixing reflective beading in the trunking lid catch.. well thats the plan at least,..
 
More details. I bought this BMS but checked the wrong option so it came w/o a switch. I had to buy a second one with the switch. They were identical circuit boards with unused pads for the switch on the first one. However, I could not get the switch to work on the first one. I traced the circuit lands, but did not see any extra components that would short the traces either. I concluded they must flash the microcontroller on this particular design. The downside of this was that after all of my experiments with soldering leads and testing, both quit working. Maybe static damage.

Since then, I have looked at some of my other BMS cards, Some of them do have two extra holes, Could be a switch for thermal too. YMMV.
 
Many thanks @docw009 As i would be very likely to fit a test switch upon discovery of unpopulated labeled or matching with my other battery solderpads.. and then on its failure would be prone to confused panic..
 
Thanks for the info.

For rear lights, DIY fixtures are the only way to get something decent.

You’re going about it correctly. Intense point sources aggravate and distract other road users. The key is large surface area with wide viewing angle, which you have well covered.

Your quantity is bordering on overkill though. While you need the large surface area, you don’t need to generate all the light. Car headlights provide plenty of it. Personally I’d substitute reflective tape/panels/patches for some of your fixtures.

You might consider a separate battery, especially if the alternative is going to the trouble of replacing the BMS. Little dc-dc buck converters are relatively unreliable, and there’s other benefits to isolating lighting/peripherals circuits.
 
Cheers, a separate battery would resolve the isolation/drain issue easily, Im open to suggestions..
with the proof of concept testing complete i can now work out how to weatherproof.

I actually need a few more rear light bars, (3 x bikes needing illumination), i ran out of trunking, ;)

Im thinking black gaffer or pvc electrical tape to cover the white pvc sides of the trunking used to hold the neon rope, and reflective paracord 'pipping to cover the trunking lid grips. but these are just ideas as of now,

I also need to find a reliable 6v source, i orderd a small 3a potted regulator but a 4.2v version turned up ;(
 
6V RC UBEC would fit the bill. They won’t step down from full bike battery voltage, you’d feed it from your 12V supply.

An alternative to 12V and 6V converters would be to jump the resistors in the led strips and instead use constant current drivers such as micropucks. I’m sure I’ve seen ones that’ll handle up to 60V input voltage.

If you went the separate battery route, it’d ideally be four LiFePO4 in series, or five LTO. The charger for it can be as simple as a tiny adjustable buck converter board bolted on to the BMS.

You could obviously power the charger from the primary battery, but it’d be best to maintain separation by wiring it up along the lines of a 3-pin primary battery charge plug (e.g. XLR) that bridges contacts whenever the primary battery charger is connected, such that the lighting circuit battery is charged (only) whenever the primary battery is.

I.e. on bike side, pin 1 can be common, pin 2 positive to primary battery, and pin 3 positive to lighting battery charger. On charger side, pin 1 is common, and pins 2 and 3 are bridged (positive).
 
Thanks for the rc ubec tip.. thats saving a few quid so all good there ;)
Battery wise our thoughts are miles apart, Im not doubting your suggestion is top shelf stuff but..
I was considering 4x salvaged 18650 cells i can pull and charge individually and slide down the seat post or reclaimed tablet pouches that can lie flat under the false bottom of the rear carrier box. (not that i have either at hand..)
But ideally would prefer the simple battery isolation solution.. though will not be undertaking battery surgery to fit a new bms into an old battery.. probably just not use and leave that battery on the bike unless needed as a 2nd.. (never needed yet but??)..

Im not planning any 2 hour long in the dark rides and can carry a spare battery if plans change.


The aesthetic i want to create and maintain for my bike is not exactly junk but that of an old mans or old ladies bike with 2nd rate diy fittings not worth a 2nd glance when passed in the street.. again see profile pic.. battery is always removed when parked in town etc..

I had planned on simply buying lights and fitting, but the first round of 'quality' led bike lights were disappointing, so i bought a few m/cycle aftermatket lamps which indicated i have a problem, i read cm in an ad at midnight and think inches?? Twice ive ordered rear lamps only to open packages and find tiny wee fittings.. ??

so here we are.. If i can seal up with silicone and make a half neat finish i will make a few white front bars and finally wire it all up and post pics.. hopefully before christmas
 
Fair enough. There’s salvageable batteries everywhere.

As to sealing lights up. I do the same. However am usually impatient and skip an important step, which is to leave the lights running for a week or so before doing so, to provide an opportunity for any faulty parts or workmanship to become evident.
 
waiting for the final sealing to cure.. the silicone cartridge swallowed the gun plunger. HUGE MESS..
IMG231107-134317F.JPG


managed to kill 1x strip bending the lead wires through the trunking rear ripping off the led strip solderpads.. whoops, note to self - solder wires in the exit direction..
 
Back
Top