I had a spare 5 minutes so I put together a Light Bulb Discharger courtesy of YPedal's design. Thanks YPedal!
I couldn't find the exact same fixture as he used so I just improvised and looked around to see what was at the hardware store.
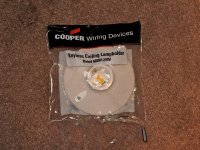
I saw the overhead light sockets first ($1.50/each):

Then I saw these amazing 300W 120V utility light bulbs next ($3.98/each):
View attachment 3
I used a spare piece of wood to mount the two sockets. (free!)
After that, I wired it up with a couple of short lengths of red and black wire I had laying around terminated with a couple of Anderson Power Poles (what else!). (free)
I then hooked up my extra Drain Brain battery analyzer (I've upgraded to a CA DPS) in series between the battery and the LBD.
I first tested a single Bosch Fat Pack battery by itself which barely turned the bulbs on and were only drawing around 110W.

Then I put a series pair of Bosch Fat Packs and saw a dramatic increase in light brightness and in the amount of power being drawn from the batteries. The setup was drawing over 300W with the battery's 80V when first plugged in.

I then used a couple of "Y" Power Pole connectors and hooked up my digital voltmeter so that I can watch one pack at a time. I cut off the test probes from the DVM and added some APPs on the DVM's test leads just for this purpose. Of course, I kept the test leads and added some APPs to them as well so that I can reconnect them and use it as a conventional probed meter if I needed that. However, I've found very little need for the probes since the change.

Total cost for the sockets and the bulbs was $11! This will be a very useful device to diagnose any battery issues I may have.
Ambrose