Marin Muirwoods eBike (3RD BUILD)

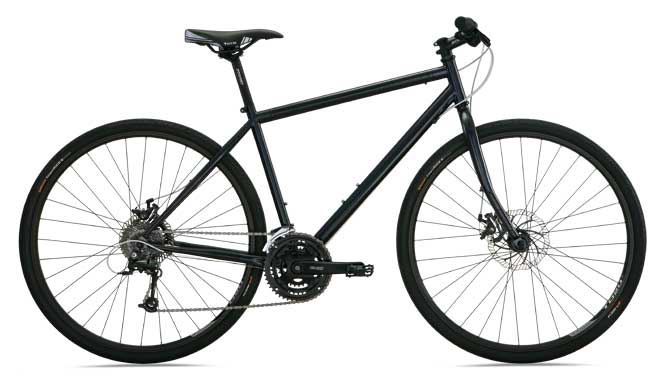
How about a custom build based on an On-One bikes Inbred 29er ?

CBOOIN29SLX_P3.jpg


They're a UK company, but recently started selling online from Portland, Oregon for customers in USA and Canada :

http://shop.titusti.com/collections/frames

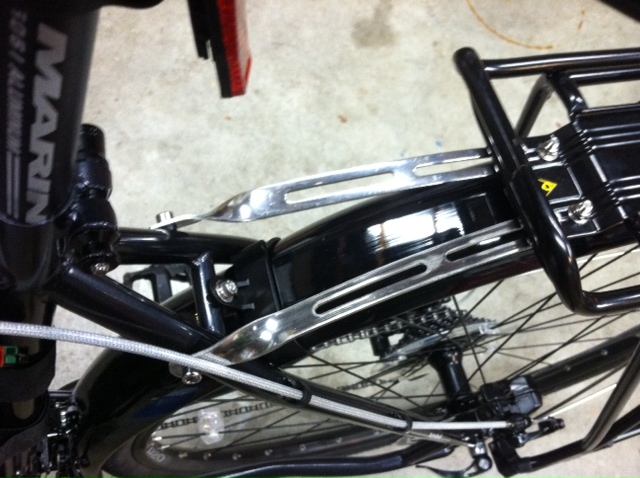
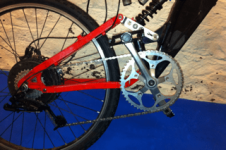
What makes the frame interesting for an e-bike project are the removeable drop-outs (or "swap-outs" as they call them...) :

FROOIN29V3_P2.JPG


It looks like the ones supplied are alloy, but it shouldn't be too difficult to make up some steel ones. No messing around with torque arms / plates :)
I guess you could even shave them down a bit to get an 8 or 9 speed freewheel in there without having to respace the frame.
 
iperov said:
TonyReynolds said:
didnt saw a photos of damaged forks...


You have been warned of the dangers and injuries caused by motors damaging front forks and people going over the bars. I have personally seen the pics many of which may no longer exist due to corrupted back up software for the forum. I have also read the posts of several here on the forum that went through plenty of suffering due to the experience of going over the bars as the failure occurred. There are plenty of pics and stories of rear dropout failures as well. You don't have to believe them if you don't want to that is your choice. You may be a lightweight rider running a low powered motor on beautiful roads so nothing has happened as yet. It may be that it never happens so if you want to take the chance do so. If you think of others and realize your injury affects many and not just yourself then you will likely build with safety in mind. Still in the end what you choose to believe and how you choose to build your bike is entirely up to you.

http://www.endless-sphere.com/forums/viewtopic.php?f=2&t=14195&start=135#p232469
 
I've seen beefy-looking BMX forks fail on flat ground without a motor attached. It was a smaller rider, under 150lbs, just doing a wheelie - it didn't happen from X-Games style jumping.

It's not that big of a deal when it happens at 5mph in a parking lot, like I've seen, but it'd be totally different at speed and in traffic (with a heavier bike).
 
Well, after weeks of looking, researching and agonizing, I ended up getting a 2012 Marin Muirwoods from REI:

MARIN-2012-URBAN-MUIRWOODS_29ER.jpg


Nicely spec'd, well made, understated and stealthy looking; the graphics seem to be silkscreened, are reflective and are barely discernible... I test rode the only one in my size that I've been able to find in a store in two months of looking. No one had any Redline D440's that they were willing to ship, and the frames that were available were too small. I needed a 20" frame, or close to it. The Muirwoods comes in a 20.5" and that's what I was able to find.

Riding position was comfortable and the cockpit felt perfect for my torso and arms. The brakes are improved over prior year models. Nice wide bars for good leverage.

This is gonna be fun!

Now I have to get a rear rack that will work with disc brakes, a front rack (there're lugs for that!) and transfer the rear disc to the motor, get some torque plates laser cut to reinforce the drop-outs and add Planet Bike fenders as a finishing touch.
 
This is a great platform to start with. Very stable and smooth. The work done so far is to mount by Brooks Flyer, battery pack, front rack, rear rack and Planet Bike 29er fenders.

photo1.JPG

Side view

photo2.JPG

Side view

photo3.JPG

Front rack: Jandd low front rack. This will be used for an extra 11.5 Ah battery as well as a place to mount yellow LED lights for conspicuity

photo4.JPG

Cell_man A123 triangle pack

photo5.JPG

Topeak rear rack

photo6.JPG

I may be able to mount the controller on the stainless rack stays, saving room for a large Topeak bag on the rear rack

I have a double kickstand on order from Velo Orange. The fenders and racks were very tricky to install around the disc brakes. I've primed and painted the machined rim of the 700c rear wheel I got from cell_man so that it matches the Alex rim on the front of the Muirwoods. I need to transfer all of the stuff from the Diamondback handlebars to the Marin: CA, bell and throttle, as well as the mag pickup on the front wheel for the speedo. One of the trickiest things will be mounting the rear rotor on the 8T MAC and getting it to line up with the caliper.

:D :D :D
 
Just scored one of these hummers on close-out:

01060225.jpg


$63 plus shipping from Dennis Kirk. This helmet got a good writeup earlier this year from another member. Not full-face, but far better protection than my current bike helmet and should be quieter as it goes over the ears. Positive reviews from buyers.

EDIT: Excellent helmet, see Kingfish's review over here: http://endless-sphere.com/forums/viewtopic.php?f=4&t=23862
 
Rim is now much closer in looks to what came with the marin:

photo7.JPG


Obviously not as durable as anodizing, but at least I won't have a bright silver rim on an all black bike...
 
I spent yesterday evening swapping the tire, tube and rotor from the stock Marin wheel to the Chinese hub-motor wheel. Both measure 20mm on the inside of the rim, which is good for holding larger tires...

All went well until I tried to get the rotor off the stock wheel. I was finally able to do so with a 1/4" drive socket and the correct 'star' drive tip, the only combination that allowed me enough torque to break the blue Locktite that'd been used to secure the six machine screws. When I tried to install the rotor on teh hub-motor wheel, they bottomed-out in the provided holes and one broke off trying to back it out to add washers. Sooooo, now I have to figure out how to extract a very small broken screw. Will be studying "Screw Extraction 101".

Even with washers as spacers, I ended up with interference between the inside portion of the rear caliper and the hub-motor. I removed that portion of the caliper and used a pattern-maker file to dress the set/adjustment screw (steel) and the aluminum caliper body to try to get clearance. I only need a couple millimeters, so hopefully this will work. I also removed one of the six small screws holding the hub-motor cover, used a bit to increase the countersink and replaced the screw, as they weren't flush, but proud of the surface. I'll repeat this for the remaining five screws/holes.

I'll be taking a tracing of the rear dropouts to develop a CAD drawing to send out for laser-CNC torque plates. Not a lot of room around the dropouts what with racks, fenders and disc-calipers. I can see how (in some ways) a bike with rim brakes can be easier to work with. My previous two attempts were certainly a piece of cake compared to this one...

:?
 
Last evening was spent massaging the rear disc caliper to create clearance for the hubmotor, as well as trying to extract to broken machine screw from the hubmotor coverplate. Never having had bike disc brakes before, I was able to figure out how to get some adjustment to move the cliper outboard. My rotor now fits and the motor housing doesn't rub on the caliper. I was however, less than succesful at removing the screw. I wasn't able to drill a pilot hole directly on-center, but tried left-hand threaded drill-bits as well as an extraction set to no avail. At this point I'm looking at tapping new threads for a slightly larger screw for that position and (most likely) ordering another coverplate from cell_man to replace the one I messed up.

:cry:

Oh well, at least the rear brake now works! Now on to creating a torque plate!
 
Coming along:

Marin%252520eBike%25252007.JPG


Rear wheel and motor are installed. Waiting for Nordlocks to come in the mail. Not certain how to get the Nordlock washers over the motor harness as the wire clip that goes to the controller will have to be dismantled to get the Nordlock threaded over the harness to the axle.

The center stand came in the mail from Velo Orange and is installed (sort of). It looks like it will work, but there's interference between it and the control cables that are routed underneath the bottom bracket. Looks like it's Dremel time... The nice thing about this center stand is that it gets more narrow as it swings into the stowed position, yet is wide when on the ground for good stability. Relatively light too. I don't care too much that it's not steel; I won't be sitting on the bike when it's on the stand. I just wanted it to be stable when parked.

Probably pretty ho-hum to most around here, but it's exciting for me to get something that more closely meets my needs, and the total cost is still WAYYYYY less than I would have spent had I gone with the Ohm 750 last spring, with more watt-hours available, higher speed and much more scaleable and user configurable than a Bionx-based system.

Hope this ends up being useful for someone.
 
I thought the controller might fit on the support arms for the rear rack. Test fit shows it to be a perfect fit:

Controller.JPG


The advantage of going with a larger-framed bike shines here. The DiamondBack has a compact-road geometry with a shorter wheelbase. There's much more room on the Muirwoods. The rear holes of the controller line up with the rack support rails; I'll have to use zip-ties or fab a bracket for the front holes. I'll most likely prime and paint the controller black before mounting it. I'm going for stealth, and a largish, bright aluminum box with wire doesn't help me there.

Now to get all the stuff off the bars of the old bike and onto the new...
 
Well, major disappointment today, when I tried to fit the Schwable 622x60 tire to the rear of the Muirwoods. The 622x60 on the front had been almost impossibly tight (not with the frame, but with the front fender), so when I looked at the rear, I assumed there might be a clearance issue with the front derailler and sure nuf, there is:

Tire.JPG


I was really hoping to get more float for comfort from the fatter tires.

I looked at the diameter specs on Schwable's website, and going down the a 622x50 would *probably* work, but that's another $100 for two tires. I got a deal on the Big Apples: $55 for the two, including shipping, like new with 25 miles on the tires. Yes, I could have checked the Schwable website BEFORE buying the Big Apples, but the frame looked like it had tons of room around the stock tires, so it seemed like they'd work. Looks like I'll have to go back to the 622x42 Continentals that came with the bike.

I'll just have to suck it up and eat the bumps.
 
TonyReynolds said:
Well, major disappointment today, when I tried to fit the Schwable 622x60 tire to the rear of the Muirwoods. The 622x60 on the front had been almost impossibly tight (note with the frame, but with the front fender), so when I looked at the rear, I assumed there might be a clearance issue with the front derailler and sure nuf, there is:

Tire.JPG


I was really hoping to get more float for comfort from the fatter tires.

I looked at the diameter specs on Schwable's website, and going down the a 622x50 would *probably* work, but that's another $100 for two tires. I got a deal on the Big Apples: $55 for the two, including shipping, like new with 25 miles on the tires. Yes, I could have checked the Schwable website BEFORE buying the Big Apples, but the frame looked like it had tons of room around the stock tires, so it seemed like they'd work. Looks like I'll have to go back to the 622x42 Continentals that came with the bike.

I'll just have to suck it up and eat the bumps.

622 x 60 Big Apples, so these are 28 inch tires? Sorry to hear your tires don't fit! That is still my favorite tire, but a good less expensive tire with similar performance is the CST Cyclops for about $15, might even be able to get them at your local bike shop.

Also, I am curious if your hub motor came with screws for the brake disc? It seems most of them are a very different size than standard, I would guess generally shorter.

Sorry to hear about that screw breaking! That is one bear of a problem to fix, especially in aluminum. Have you looked at a heli-coil? You might be able to drill out for the larger size, add heli-coil and then still be able to use the standard sized screw.

Nice looking set-up! I like the black-out look. 8)
 
LI-ghtcycle said:
622 x 60 Big Apples, so these are 28 inch tires? Sorry to hear your tires don't fit! That is still my favorite tire, but a good less expensive tire with similar performance is the CST Cyclops for about $15, might even be able to get them at your local bike shop.

Also, I am curious if your hub motor came with screws for the brake disc? It seems most of them are a very different size than standard, I would guess generally shorter.

Sorry to hear about that screw breaking! That is one bear of a problem to fix, especially in aluminum. Have you looked at a heli-coil? You might be able to drill out for the larger size, add heli-coil and then still be able to use the standard sized screw.

Nice looking set-up! I like the black-out look. 8)

Yeah, "28", "29er", 700c are referencing a 622xXX rim, where XX is the tire cross section and 622 is the rim diameter. Confusing, which is why I like the metric sizing system. I'll look into the Cyclops...

As for the disc screws, yes, the motor came with them. At this point, sometime I'll need to take e cover plate off the motor and drill it out from the back side in a drill press and yes, the helicoil nods like a good way to go. That or get a new cover from cell_man.

Glad you like the all-black look, wasn't sure I would but it looks really sharp. Good thing it's crummy rain up here so I don't have to feel bad about taking so long getting his thing on the road.
 
Nice build Tony. Nightmare with the tyres. I have 2 of the big apples sitting waiting to go on the right bike but I was a little disappointed with how thin the sidewalls of those tyres are. Maybe you should invest in some sort of seat suspension. I have been recommended one of those suspension seat posts by cloud 9. maybe that would do the trick for you.

What is your battery setup and weight if batteries?

How will you hide the cables from your controller and make it waterproof?

Sent using Endless-Sphere Mobile app
 
BATFINK said:
Nice build Tony. Nightmare with the tyres. I have 2 of the big apples sitting waiting to go on the right bike but I was a little disappointed with how thin the sidewalls of those tyres are. Maybe you should invest in some sort of seat suspension. I have been recommended one of those suspension seat posts by cloud 9. maybe that would do the trick for you.

What is your battery setup and weight if batteries?

How will you hide the cables from your controller and make it waterproof?

Sent using Endless-Sphere Mobile app

I have a Brooks B17 Flyer that is sprung and actually works quite well for butt fatigue. Forearm fatigue relief was what I was hoping to get from the Big Apples.

The controller has been painted black and will bolt to the silver straps that secure the rear rack to the frame.

The wires from the controller go through the opening in the rear frame stay to the battery and points forward. Not much shows. As for waterproofing, the rear fender protects the electronics from spray.

The motor control harness that comes out of the axle was nicked and now the insulation is completely cut. I will have to mark the wire locations for the five-way plug that goes to the controller, remove the clip and slide a section of heat-shrink tubing down over the harness to the axle to protect the wires. The inside edges of that axle are SHARP. I'll see what I can do to de-burr them before applying the heat-shrink.

Oh yeah, battery is an 11.5Ah A123 52V (57V HOC) from cell_man in a frame bag. Motor, batteries and controller add about 18 lbs. to the bike. The Muirwoods is really light for a steel bike. All said and done, bike, electrics, fenders, lights and racks should be about 50 lbs. all told.
 
LI-ghtcycle said:
...a good less expensive tire with similar performance is the CST Cyclops for about $15, might even be able to get them at your local bike shop.

Here's the CST website: http://www.csttires.com/Bicycle.aspx

Looks like the Cyclops is no longer in production, but they do have some other tires that looks very nice, in sizes up to 622x50.

Most seem to have reflective sidewalls (NICE!) and some sort of Kevlar puncture protection...
 
joe tomten said:
Other than aesthetics - no reason you couldn't leave the big apple on the front and go with something smaller on the rear?

Yes, I thought of that. Not sure of how it would look, but perhaps looks don't matter that much...

There's another solution: Remove the front triple ring, crank and derailleur and replace it with a single chain-ring and crank. Not sure i want to go that way, but it's a valid option.
 
+1
Remove the front triple ring, crank and derailleur and replace it with a single chain-ring and crank.
Do you really use all 21 of your gears? Can you live with 52front and 7 speed in back?
 
That is exactly what to do, I just did the same thing but I did it by choice, what do you want with all those gears? A lot of road bikes are only 2 cranks at the front nowadays and a lot of downhill mountain bikes are being converted to single cranks. You will never miss those gears, you will save a smidge of weight, lose a cumbersome gear changer and make room on the handlebars and also fit your big apples.

Sent using Endless-Sphere Mobile app
 

Attachments

  • image-3576601140.png
    image-3576601140.png
    43.4 KB · Views: 3,641
I think I'm going to look into this... Not sure how to do it myself, I might have to have my LBS do it.

I know that a 52T front ring is about the biggest. I think I can live with that no problem when the motor's going, but what about peddling it home with no battery? Would 7 gears be enough spread?

It would be nice to eliminate the front shifter and free up some real estate on the bars...
 
The build is looking Good. What did you end up doing with the front derailleur? I was thinking you could just remove it but leave the original triple ring crank. you can always just stop and manually switch the chain to a different ring as needed. Assuming you would just be using the lower gear ratios on the rare occasion you need to peddle home w/out electric assist this may not be as much of a hassle as it initially sounds.

If, however your riding style has you shifting the front chain ring frequently maybe a top-pull style derailleur would give you the clearance you need? I was going to dig through some parts boxes and find one to snap a picture of but the image of the silver Kona on page 2 of this thread shows the type I am suggesting. A thumb shifter mounted to the seat tube could be used to actuate it eliminating the need to braise on new cable stops and freeing up some handle bar space on the left side.

I know everyone has their own ergonomic preferences so take this w/a grain of salt but I have always tossed the stock brake-lever/shifter combo units so I could mount ebrake cut-off levers to kill the throttle or disengage cruise control or activate a brake light or all three. I find that a twist style shifter controlling the rear derailleur on the left and just the throttle on the right makes for a clean and functional set-up. I don't use a front derailleur on any of my Ebikes at the moment but last time I did I used a twist shift for the rear gears and an old school thumb shifter for the front, both mounted on the left side of the bars. Just my 2 cents.

DC
 
DCMotorworks said:
The build is looking Good. What did you end up doing with the front derailleur? I was thinking you could just remove it but leave the original triple ring crank. you can always just stop and manually switch the chain to a different ring as needed. Assuming you would just be using the lower gear ratios on the rare occasion you need to peddle home w/out electric assist this may not be as much of a hassle as it initially sounds.

If, however your riding style has you shifting the front chain ring frequently maybe a top-pull style derailleur would give you the clearance you need? I was going to dig through some parts boxes and find one to snap a picture of but the image of the silver Kona on page 2 of this thread shows the type I am suggesting. A thumb shifter mounted to the seat tube could be used to actuate it eliminating the need to braise on new cable stops and freeing up some handle bar space on the left side.

I know everyone has their own ergonomic preferences so take this w/a grain of salt but I have always tossed the stock brake-lever/shifter combo units so I could mount ebrake cut-off levers to kill the throttle or disengage cruise control or activate a brake light or all three. I find that a twist style shifter controlling the rear derailleur on the left and just the throttle on the right makes for a clean and functional set-up. I don't use a front derailleur on any of my Ebikes at the moment but last time I did I used a twist shift for the rear gears and an old school thumb shifter for the front, both mounted on the left side of the bars. Just my 2 cents.

DC

DC, some good stuff here.

I've not gotten any further on the build due to WORK and cold temps in that garage. I *could* live with no front derailleur and change the front chainrings by hand, and thought of that, but looking at the front derailleur, I can't figure out how to get it off without splitting the chain?

As for the handlebar setup, going to a rear derailleur setup only would mean that I could free up some real estate on the bars. I have a gear drive motor, so no ebraking...

Tony
 
Back
Top