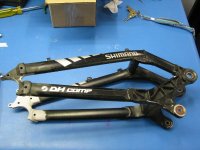
PROJECT no 4 Doc's Giant DH comp 2003

Seriousknot said:
Will you be using the standard batteries that come with the lights, or will you connect them to the main battery?

i'll connect to the main 24s lipo battery using a DC-Dc to lower the voltage to 12V

Doc
 
Doctorbass said:
Mark_A_W said:
"less stress to the rear dropout"

That depends on the motor (volts and amps).

Not the wheel size.


Actually for the same trust, a X5 on a 26" wheel WILL offer more stress on the dropout than a 24" or 20 " wheel.

I confirm.. I tested... and also I saw twisted X5 axel on a 26" wheel with equivalent power trust than my 20" rear wheel setup that never twisted...

Today, CHXS shown me his twisteed X5 axel !! the first i ever saw!

look like Methods is not the only torture tester here!

I am curious, is the size of the wheel it's self just stronger at 24" because of less of a fulcrum created by the distance of the axle to the rim? I am only asking because I would have thought the outside diameter would be the determining factor, and if the 24" has a 3" tire that would have it virtually the same outside diameter of the 26", wouldn't that still be the same speed as a smaller tire on a 26" wheel?

I don't doubt your expertise, I'm just trying to better understand why the 24" is stronger. Also, I am very interested because I often thought of using a 24" myself. :)

Keep up the good work!!

I can't WAIT to see that bad-boy with the 4 MS lights?!!?!! :twisted: :twisted: :twisted:

Oh, how many AH's is you battery going to be btw? And what specific Lipo batts are you using? 8)
 
LI-ghtcycle said:
Doctorbass said:
Mark_A_W said:
"less stress to the rear dropout"

That depends on the motor (volts and amps).

Not the wheel size.


Actually for the same trust, a X5 on a 26" wheel WILL offer more stress on the dropout than a 24" or 20 " wheel.

I confirm.. I tested... and also I saw twisted X5 axel on a 26" wheel with equivalent power trust than my 20" rear wheel setup that never twisted...

Today, CHXS shown me his twisteed X5 axel !! the first i ever saw!

look like Methods is not the only torture tester here!

I am curious, is the size of the wheel it's self just stronger at 24" because of less of a fulcrum created by the distance of the axle to the rim? I am only asking because I would have thought the outside diameter would be the determining factor, and if the 24" has a 3" tire that would have it virtually the same outside diameter of the 26", wouldn't that still be the same speed as a smaller tire on a 26" wheel?

I don't doubt your expertise, I'm just trying to better understand why the 24" is stronger. Also, I am very interested because I often thought of using a 24" myself. :)

Keep up the good work!!

I can't WAIT to see that bad-boy with the 4 MS lights?!!?!! :twisted: :twisted: :twisted:

Oh, how many AH's is you battery going to be btw? And what specific Lipo batts are you using? 8)

24" rim that use 3.0" tire are more damper than 2" tire, but i agree that the overall diameter remain nearly the same so the torque on the dropout remain the same as for a 26" wheel.

i'm using 6 x zippy 6s 5000mAh in 24s 3p ( 15Ah)

Doc
 
Here's another source for tubes and tires. According to Zero Electric, the 24" bicycle is equivalent to a 20" motorcycle. The tubes are very reasonable at $10 http://www.zeromotorcycles.com/shop/index.php?main_page=index&cPath=6
 
This should be a great build. Can you tell us about the BMS you'll be using doc? Also what is the weight of the batteries used? Should be a reasonable saving on the weight of your current bike!
 
UPDATE.. Today my torque arms are ready... E.B.M Laser cutted them with great accuracy. A bit expensive but it worth for so strong parts!! i'll post pictures.

About the PCB for serie parallel, my frined that is supposed to make them is still busy and yesterday, it was his birthday so i dont wanted to bother him with my needs...

Propbably that for the trip to meet Blackarrow i'll connect in serie (5306 mode) and will make the updaye using the relay and pcb once these will be done by Martin.

i'm still short in tome and the battery box and bms are not ready and the bike is dissassembled...

Also i'll neeed to share some time with my wife , she will comeback from montreal today.

Alot of job to do until 3 next days!!

Doc
 
Hi Doc,

If you time is running out (too short) we can assemble your ebike here my friend don't worry about that it will a great pleasure for me to help you finishing it and I'm in vacation on the 30 of July with many time left at my disposal after this date.

About your PCB is not possible to make it without CNC cuttings involve, like we did the with the old fashion methods with acid, and to cut it round with a Jigsaw? Of course this design is not a professional looking like CNC one but it can do the job for testing purpose in your 5303.

I have iron welder, gun welder, hot glue, drill, Jigsaw, Core resin, wires and lot of tools to assemble this ebike if you need some help buddy.

Good day my friend!
Black Arrow.
 
UPDATE 25 july 2010


-The PCB is finished!!

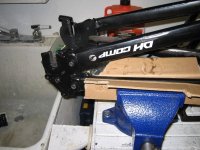
-The torque arm is finished and assembled to the swing arm

- I received the 4 MAGICSHINE LED yesterday !!! that really rock!!! 3600 lumens!!! and the red 3W rear LED

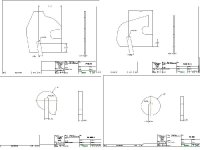
150$ of high precision laser cutting but that was 100$ minimum quote so i added more universal torque arms job!!!

1/2" thick steel on each side of the swing arm, welded,
(with screw and 3M EPOXY DP460 glue ( to link the aluminum to the steel)

Soon pics of the torque arm:
 
very exciting build,cant wait for torque arm pics. :D
 
Doctorbass said:
UPDATE 25 july 2010


-The PCB is finished!!

-The torque arm is finished and assembled to the swing arm

- I received the 4 MAGICSHINE LED yesterday !!! that really rock!!! 3600 lumens!!! and the red 3W rear LED

150$ of high precision laser cutting but that was 100$ minimum quote so i added more universal torque arms job!!!

1/2" thick steel on each side of the swing arm, welded,
(with screw and 3M EPOXY DP460 glue ( to link the aluminum to the steel)

Soon pics of the torque arm:
lets see that pcb!!!!
 
OK ok :mrgreen: !

Now time taking a break from that ebike work and let share the coming results wit the crowd!

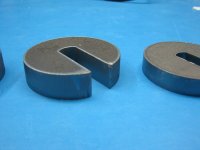
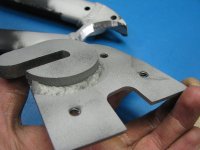
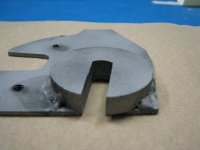
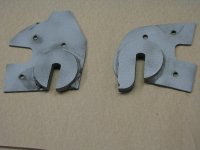
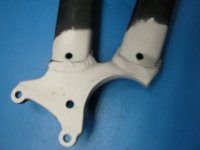
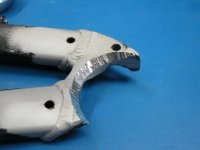
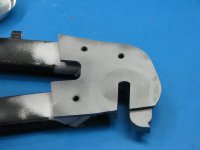
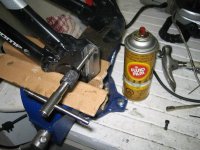
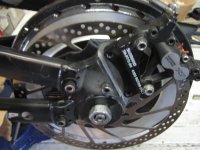
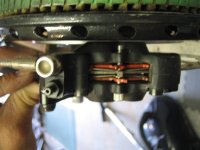
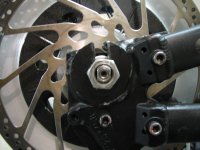
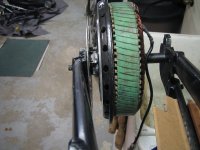
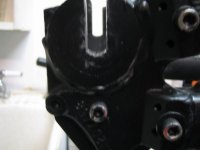
First 10pics are the torque arm& dropout itself.. i can say i rebuilt copletly the dropout for better job and make is just OVERKILL !!! :twisted:

THE ONLY TORQUE ARM THAT WILL NEVER BREAK EVENTHOUGH YOU USE REGEN AT FULL POWER !!!

10 first pics
 

Attachments

  • T0 Preview 4 pieces.JPG
    T0 Preview 4 pieces.JPG
    34.2 KB · Views: 4,566
  • T1_800x600.jpg
    T1_800x600.jpg
    59 KB · Views: 4,859
  • T3_800x600.jpg
    T3_800x600.jpg
    45.3 KB · Views: 4,870
  • T4_800x600.jpg
    T4_800x600.jpg
    62.4 KB · Views: 4,857
  • T5_800x600.jpg
    T5_800x600.jpg
    48.3 KB · Views: 4,857
  • T6_800x600.jpg
    T6_800x600.jpg
    61 KB · Views: 4,870
  • T7_800x600.jpg
    T7_800x600.jpg
    69.8 KB · Views: 4,870
  • T9_800x600.jpg
    T9_800x600.jpg
    40.6 KB · Views: 4,870
  • T10_800x600.jpg
    T10_800x600.jpg
    61.3 KB · Views: 4,857
Some more:
 

Attachments

  • T11_800x600.jpg
    T11_800x600.jpg
    58.8 KB · Views: 4,856
  • T14_800x600.jpg
    T14_800x600.jpg
    81.3 KB · Views: 4,856
  • T15_800x600.jpg
    T15_800x600.jpg
    66.2 KB · Views: 4,869
  • T16_800x600.jpg
    T16_800x600.jpg
    56.1 KB · Views: 4,869
  • T17_800x600.jpg
    T17_800x600.jpg
    61.9 KB · Views: 4,856
  • T18_800x600.jpg
    T18_800x600.jpg
    67.4 KB · Views: 4,869
  • T19_800x600.jpg
    T19_800x600.jpg
    34.4 KB · Views: 4,856
  • T20_800x600.jpg
    T20_800x600.jpg
    85.1 KB · Views: 4,869
It's just IMPOSSIBLE TO BREAK WITH ANY POWER YOU PUT ON AN X5 !!

it's total of 25mm width of High grade STEEL dropout that touch the axel !!

now i'm 100% confident that it can't break and i have absolutly no worry!

The 1/8" steel plate is the larger area part that link the actual aluminum swing arm to the steel "packman" dropout and are welded together. That new part is then glued on 8.5sq inch area to the aluminum parts on for each dropout. this epoxy is rated 3500 PSI shear test !!.. that's more than 10 tons of force!.. and as wel also have 3 bolts of 1/4-20 to "secure" the join...

I snadblasted and alcool cleaned all parts before to glue and weld each one.

Now let's work on the serie parallel..

tomorrow.. The controller connections and the LiPO battery assembly.

Doc
 
Oh.. I forgot the original swing arm plan!!

Manually CMM drawed... :lol:
 

Attachments

  • T21.JPG
    T21.JPG
    24.9 KB · Views: 4,849
Doctorbass said:
Some more:


steveo bows down to the doctors work !!!!..

doc is a Ebike God!

-steveo
 
wow phat-fat dropouts!! :shock: ,unbelievable.......
 
Picture T10 worries me Doc.


There's not a lot of metal left...
 
yes i agree,but i sure like those round fat dropouts,i could use those for sure.
 
T10 doesn't worry me as much as T17. Cut those puppies a bit wide and it's turned a little already, so the axle will rock back an forth due to regen. That means you still have to check the nuts. I'm sure it will be fine in terms of strength, but clamping dropouts are the ultimate solution and make axle nuts irrelevant.

STRONGEST, sorry but only 2nd strongest. Those I made some months ago are 5/8" thick for each side (31mm+ total steel), and they clamp firmly on the axle allowing no rotation. Your pacmen are prettier though. It will be interesting to see how the epoxy holds up long-term.

These are the strongest (at least so far), one pair for the front and one for the rear. I love epoxy, but for holding my wheels on, only welds and high strength steel bolts for me. Don't let the pic fool you, because the flats are 12mm on my motors, not the typical 10mm.
 
Mark_A_W said:
Picture T10 worries me Doc.


There's not a lot of metal left...


No worrie here :wink: .. The other side of it

take a look on pics T13 and T11.. You'll see that the head of the screw is on the original thick soldered aluminum brace... not just on the tube.. Plus.. The large 1/8" plate is also glued with stronger force than the 3 screw together!.. The screw are like decorative.... 8)

The glue itself make possible to link both dropout and swing arm on large surface that follow every contour of them...

Now let's return working on the serie parallel stuff.. 85% finished!)éé i'"m assembling and wiring everything.


I will use a 9 conductor flat cable ( I mean very flat!!).. just like in the Audio components that link many board together. On all these 9 pins i'll use:

-2 for the temp sensor
-2 for the relay coil ( 72V 0.1A)
-5 for the hall sensor


That electronic type flat cable allow me to easy fit 3 large silicon 10 gauge turnigy cable on the axel slit!

Now let's return to that work!!.. It must be finished TOMORROW because the day after i go to join my friend Blackarrow at 1000km from here :shock:

Doc
 
Hi Doc,

Nice work, so you arrived thursday my friend my ebike will be charged and ready to go :D , i hope the weather will be with us this year! :wink:

Good day!
Black Arrow
 
Doctorbass said:
...Now let's return working on the serie parallel stuff.. 85% finished!)éé i'"m assembling and wiring everything...
Doc

Yeah baby! That's what I can't wait for. Glad you decided not to settle for just a static series wiring for the trip. I have a feeling that everyone is going to want 2 turn motors after you prove it out.

John
 
Hey Doc,

Will your PCB board fit in new gen x5 motor with all the relays and wiring?

I am deciding to sell my x5303 if i can not use dual winding x5303 - x5306 ... it all depends if your pcb will fit... I will keep motor then to experiment

please let me know !

thanks
-steveo
 
Back
Top