Cortnzs1
10 µW
Hi !
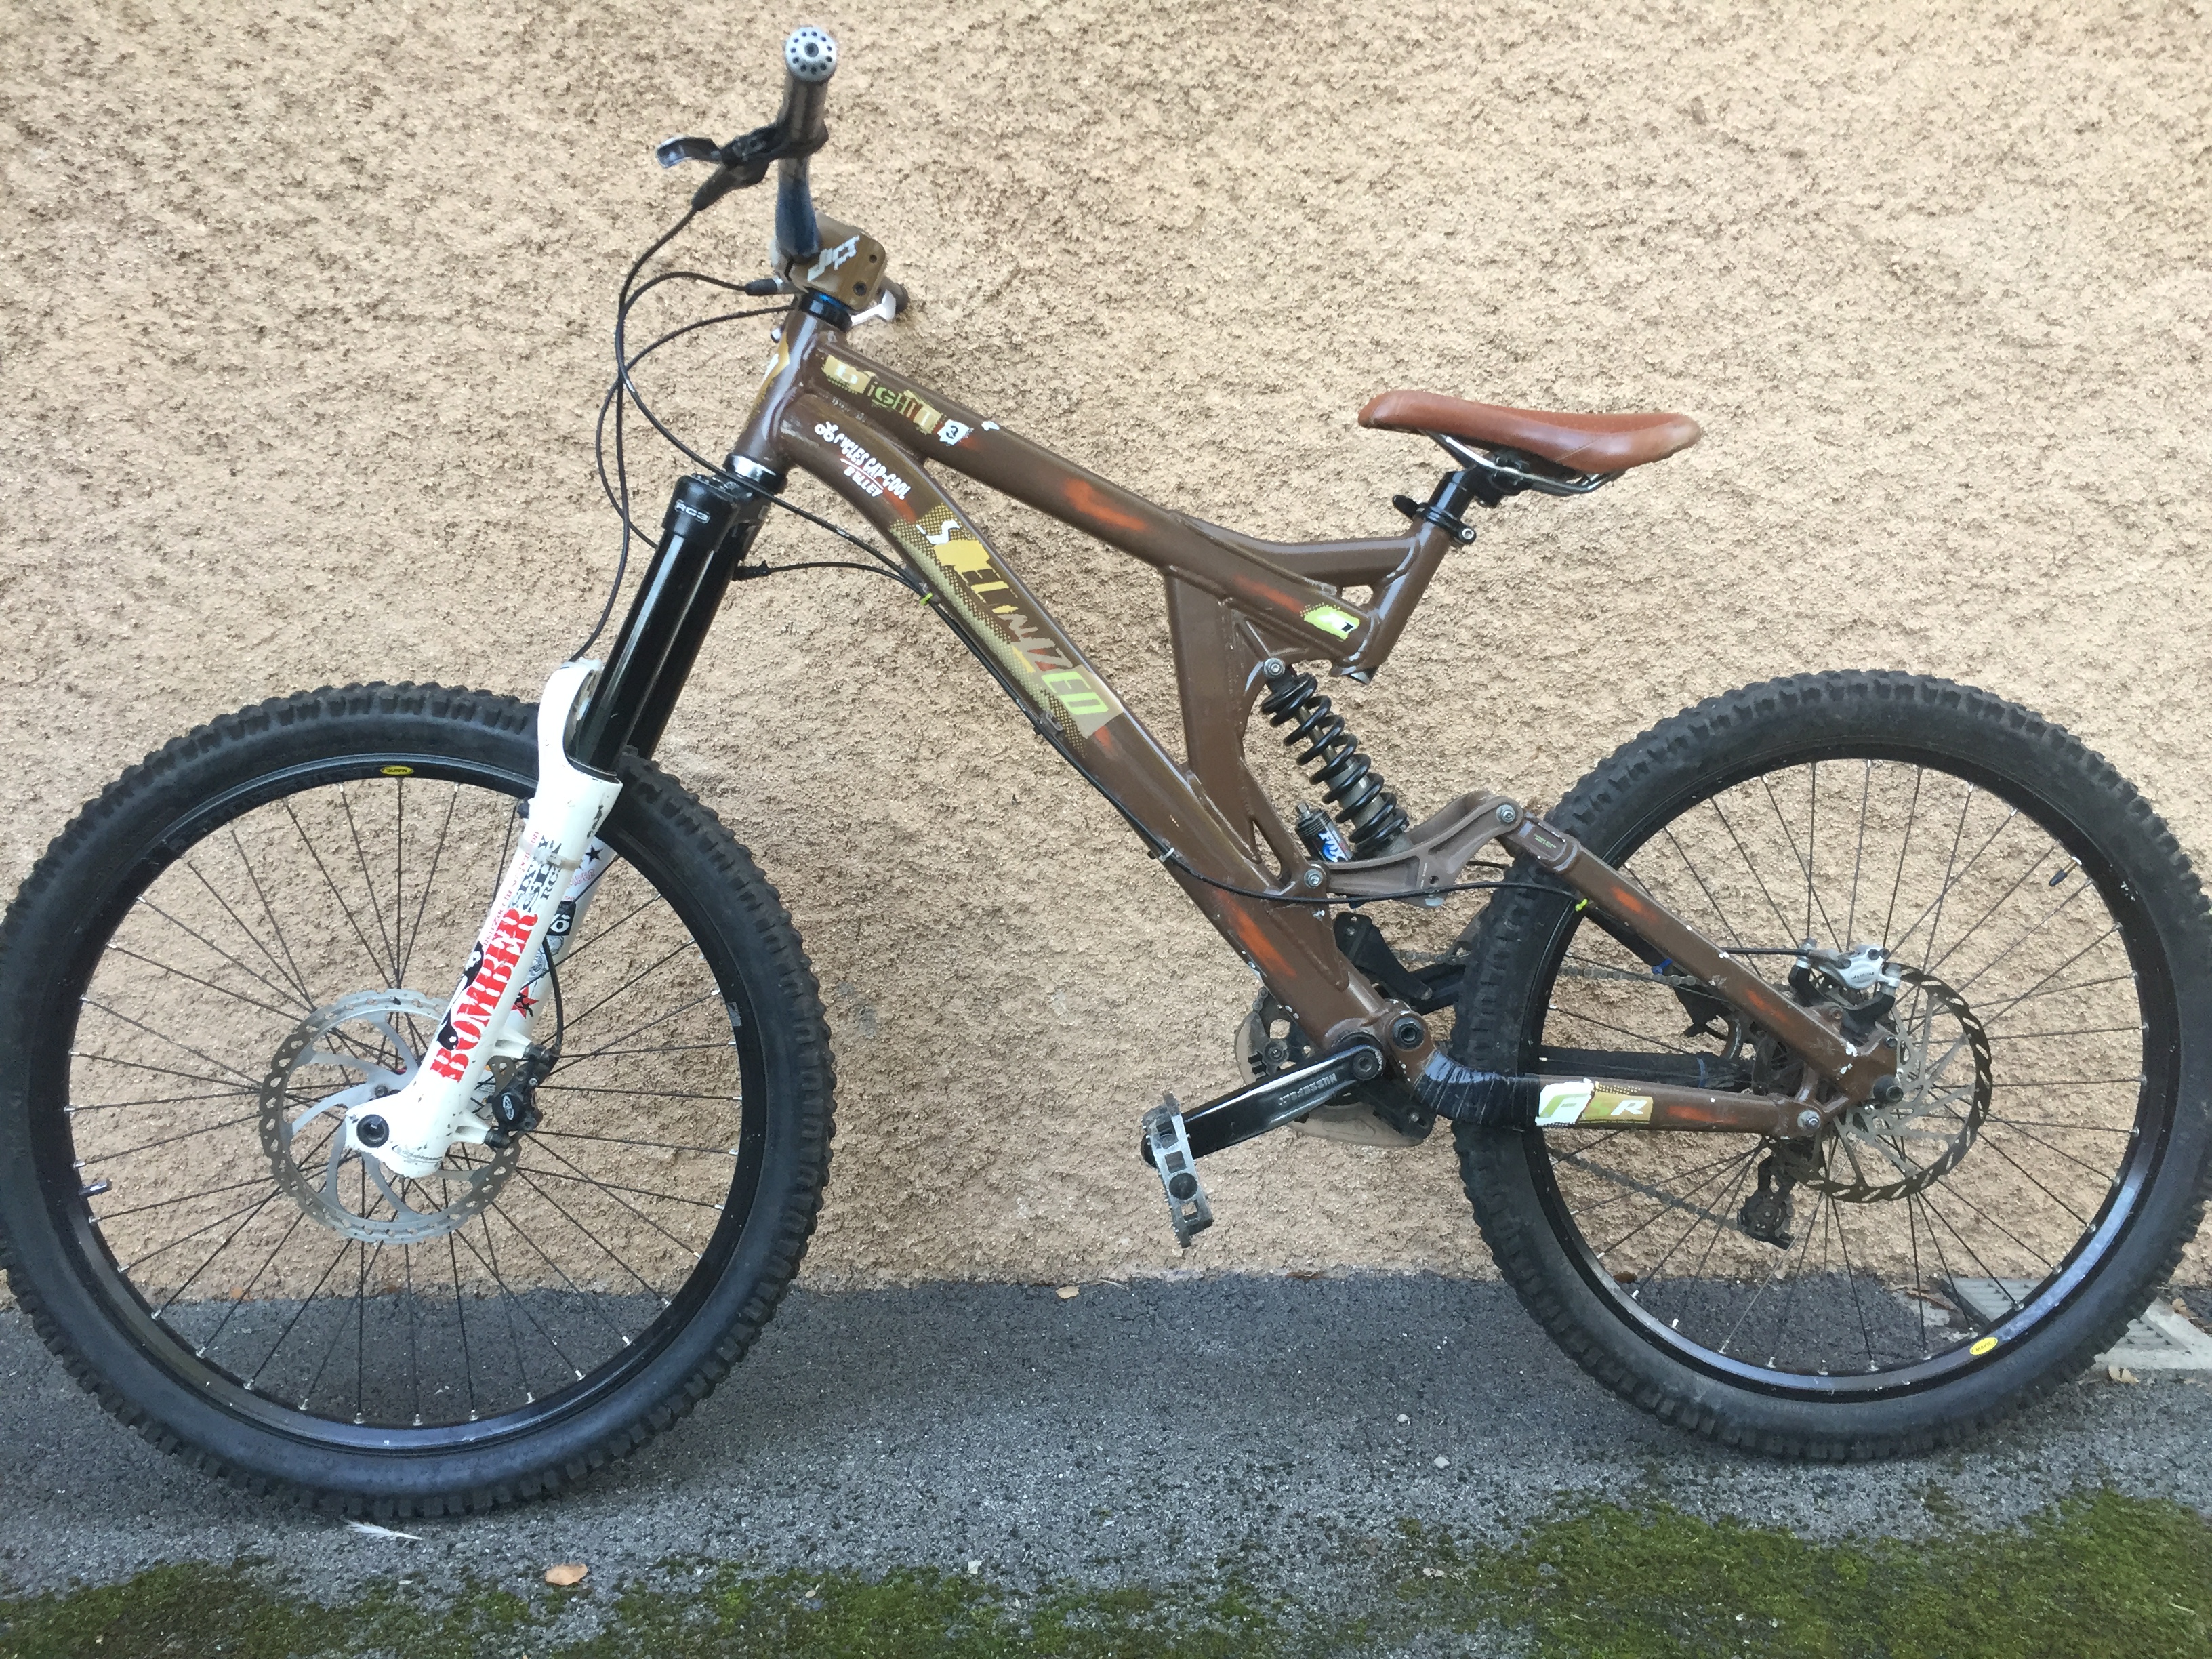
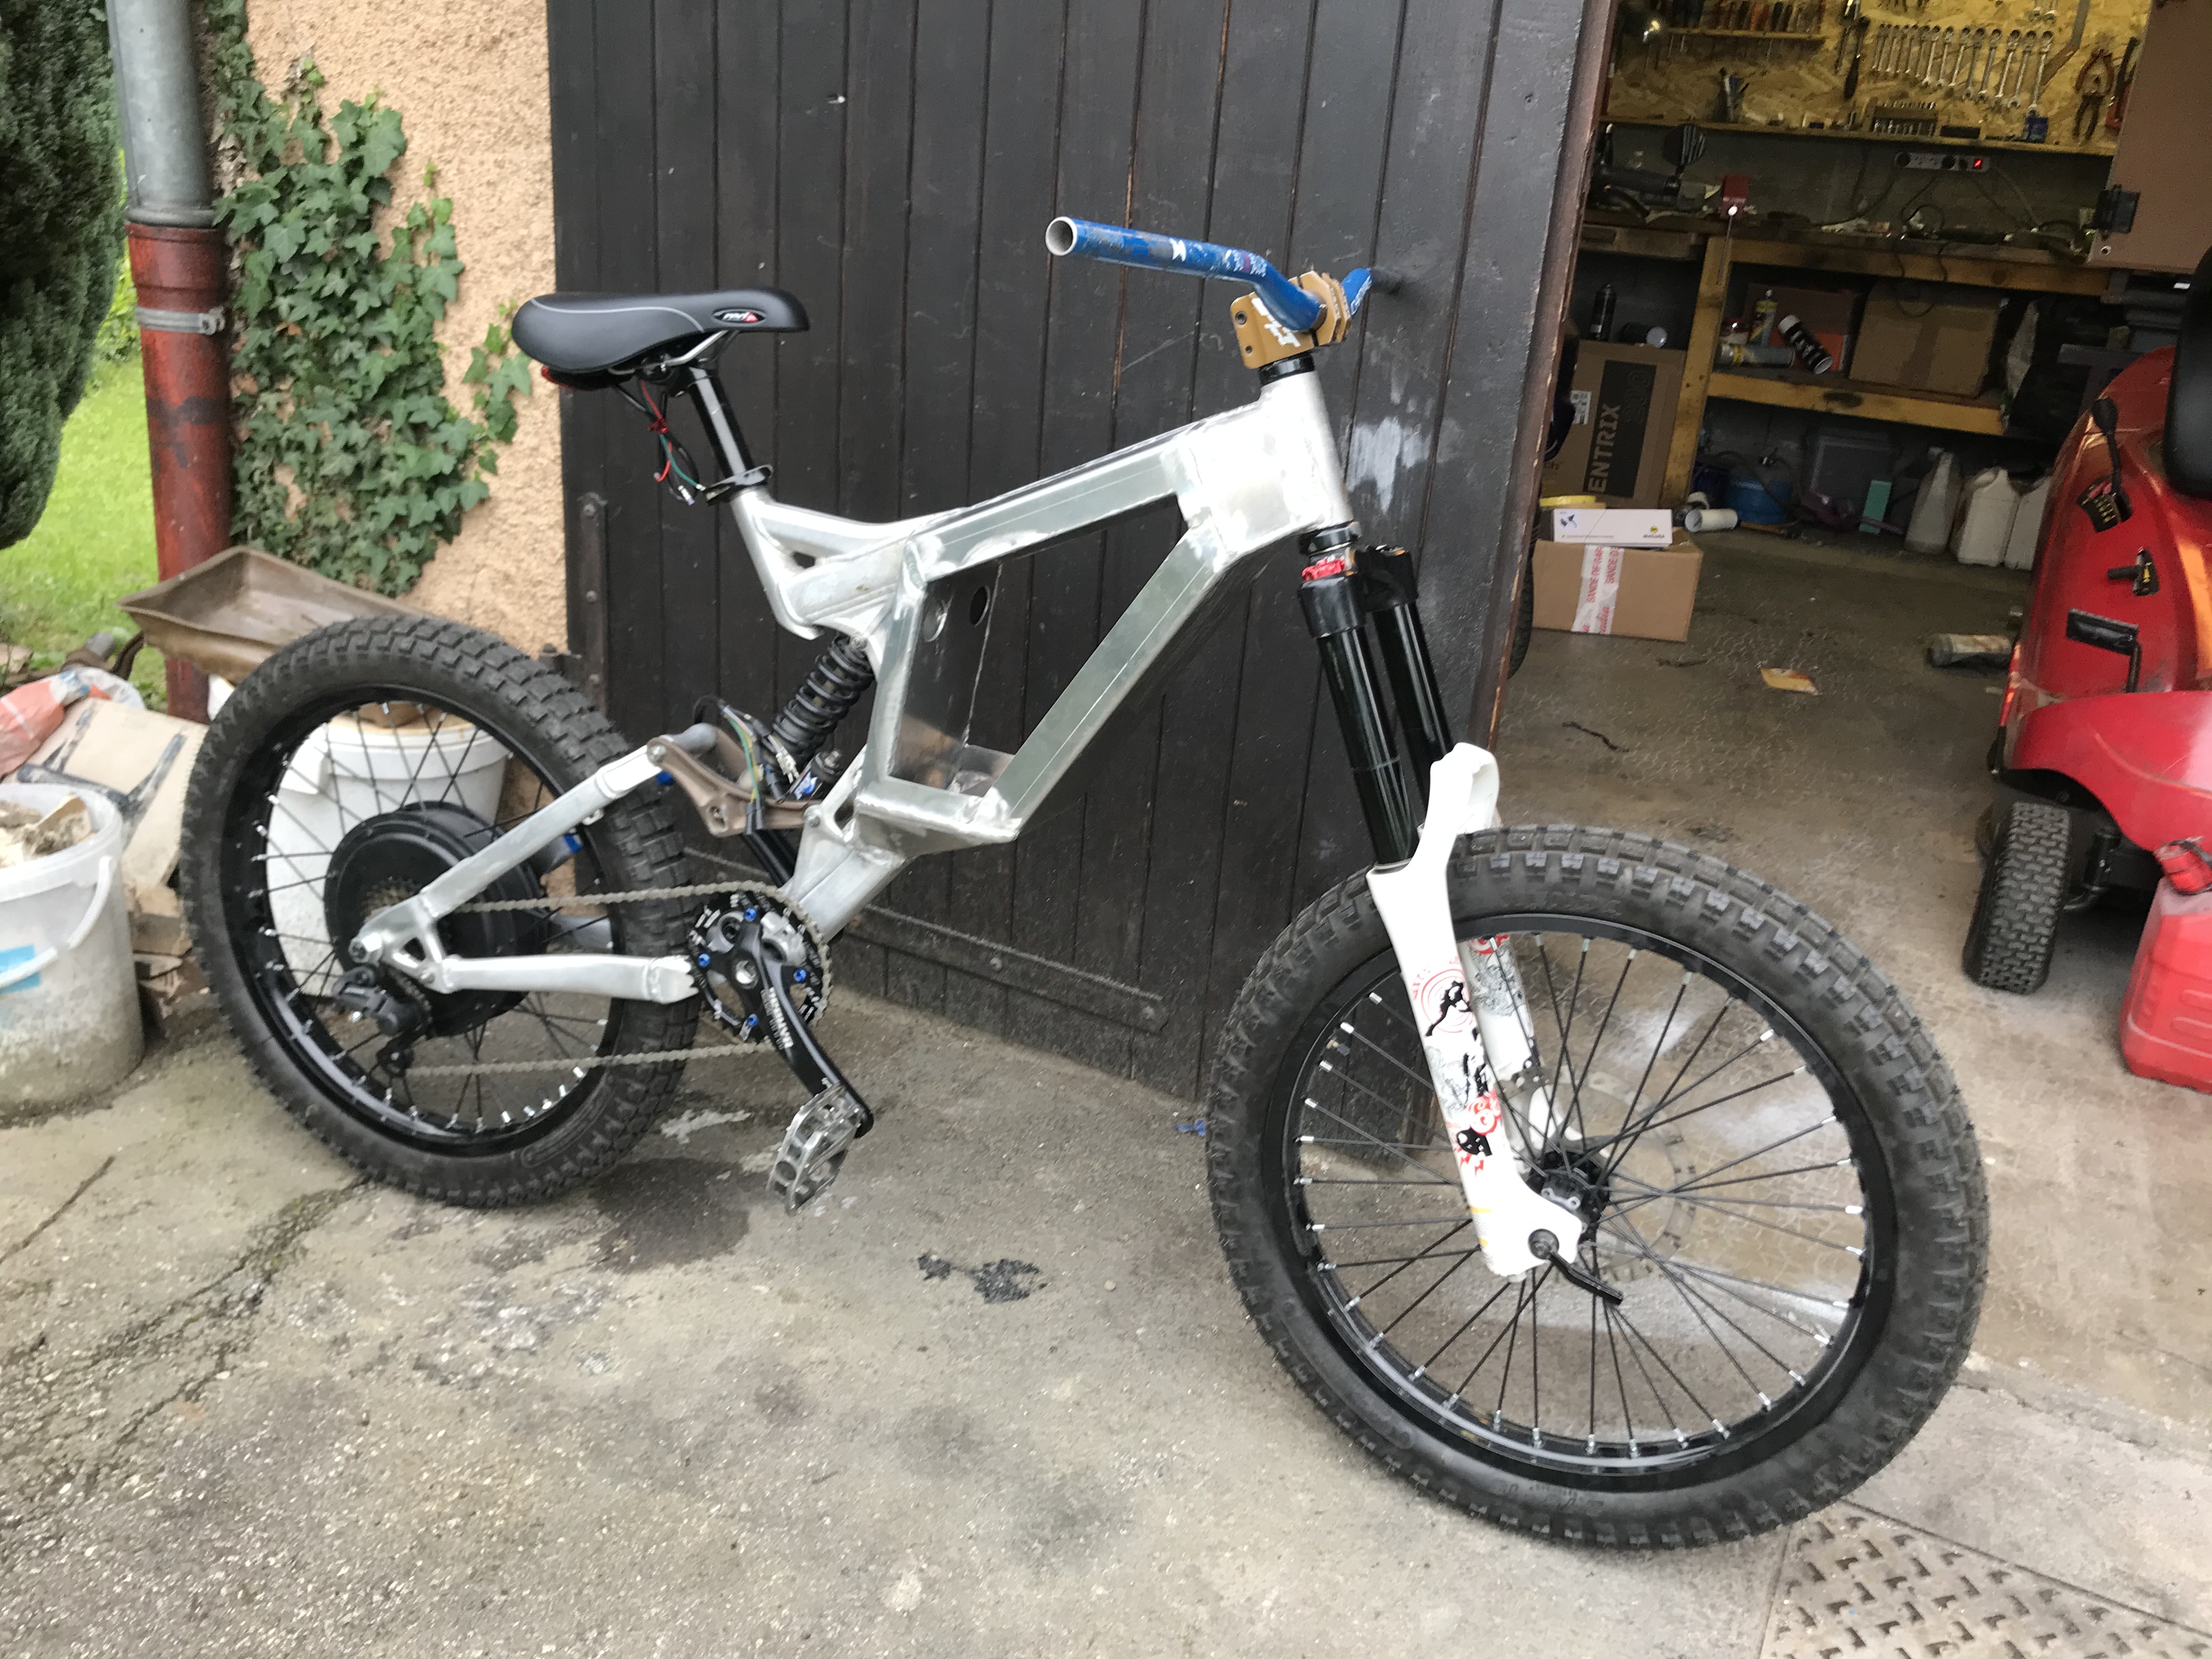
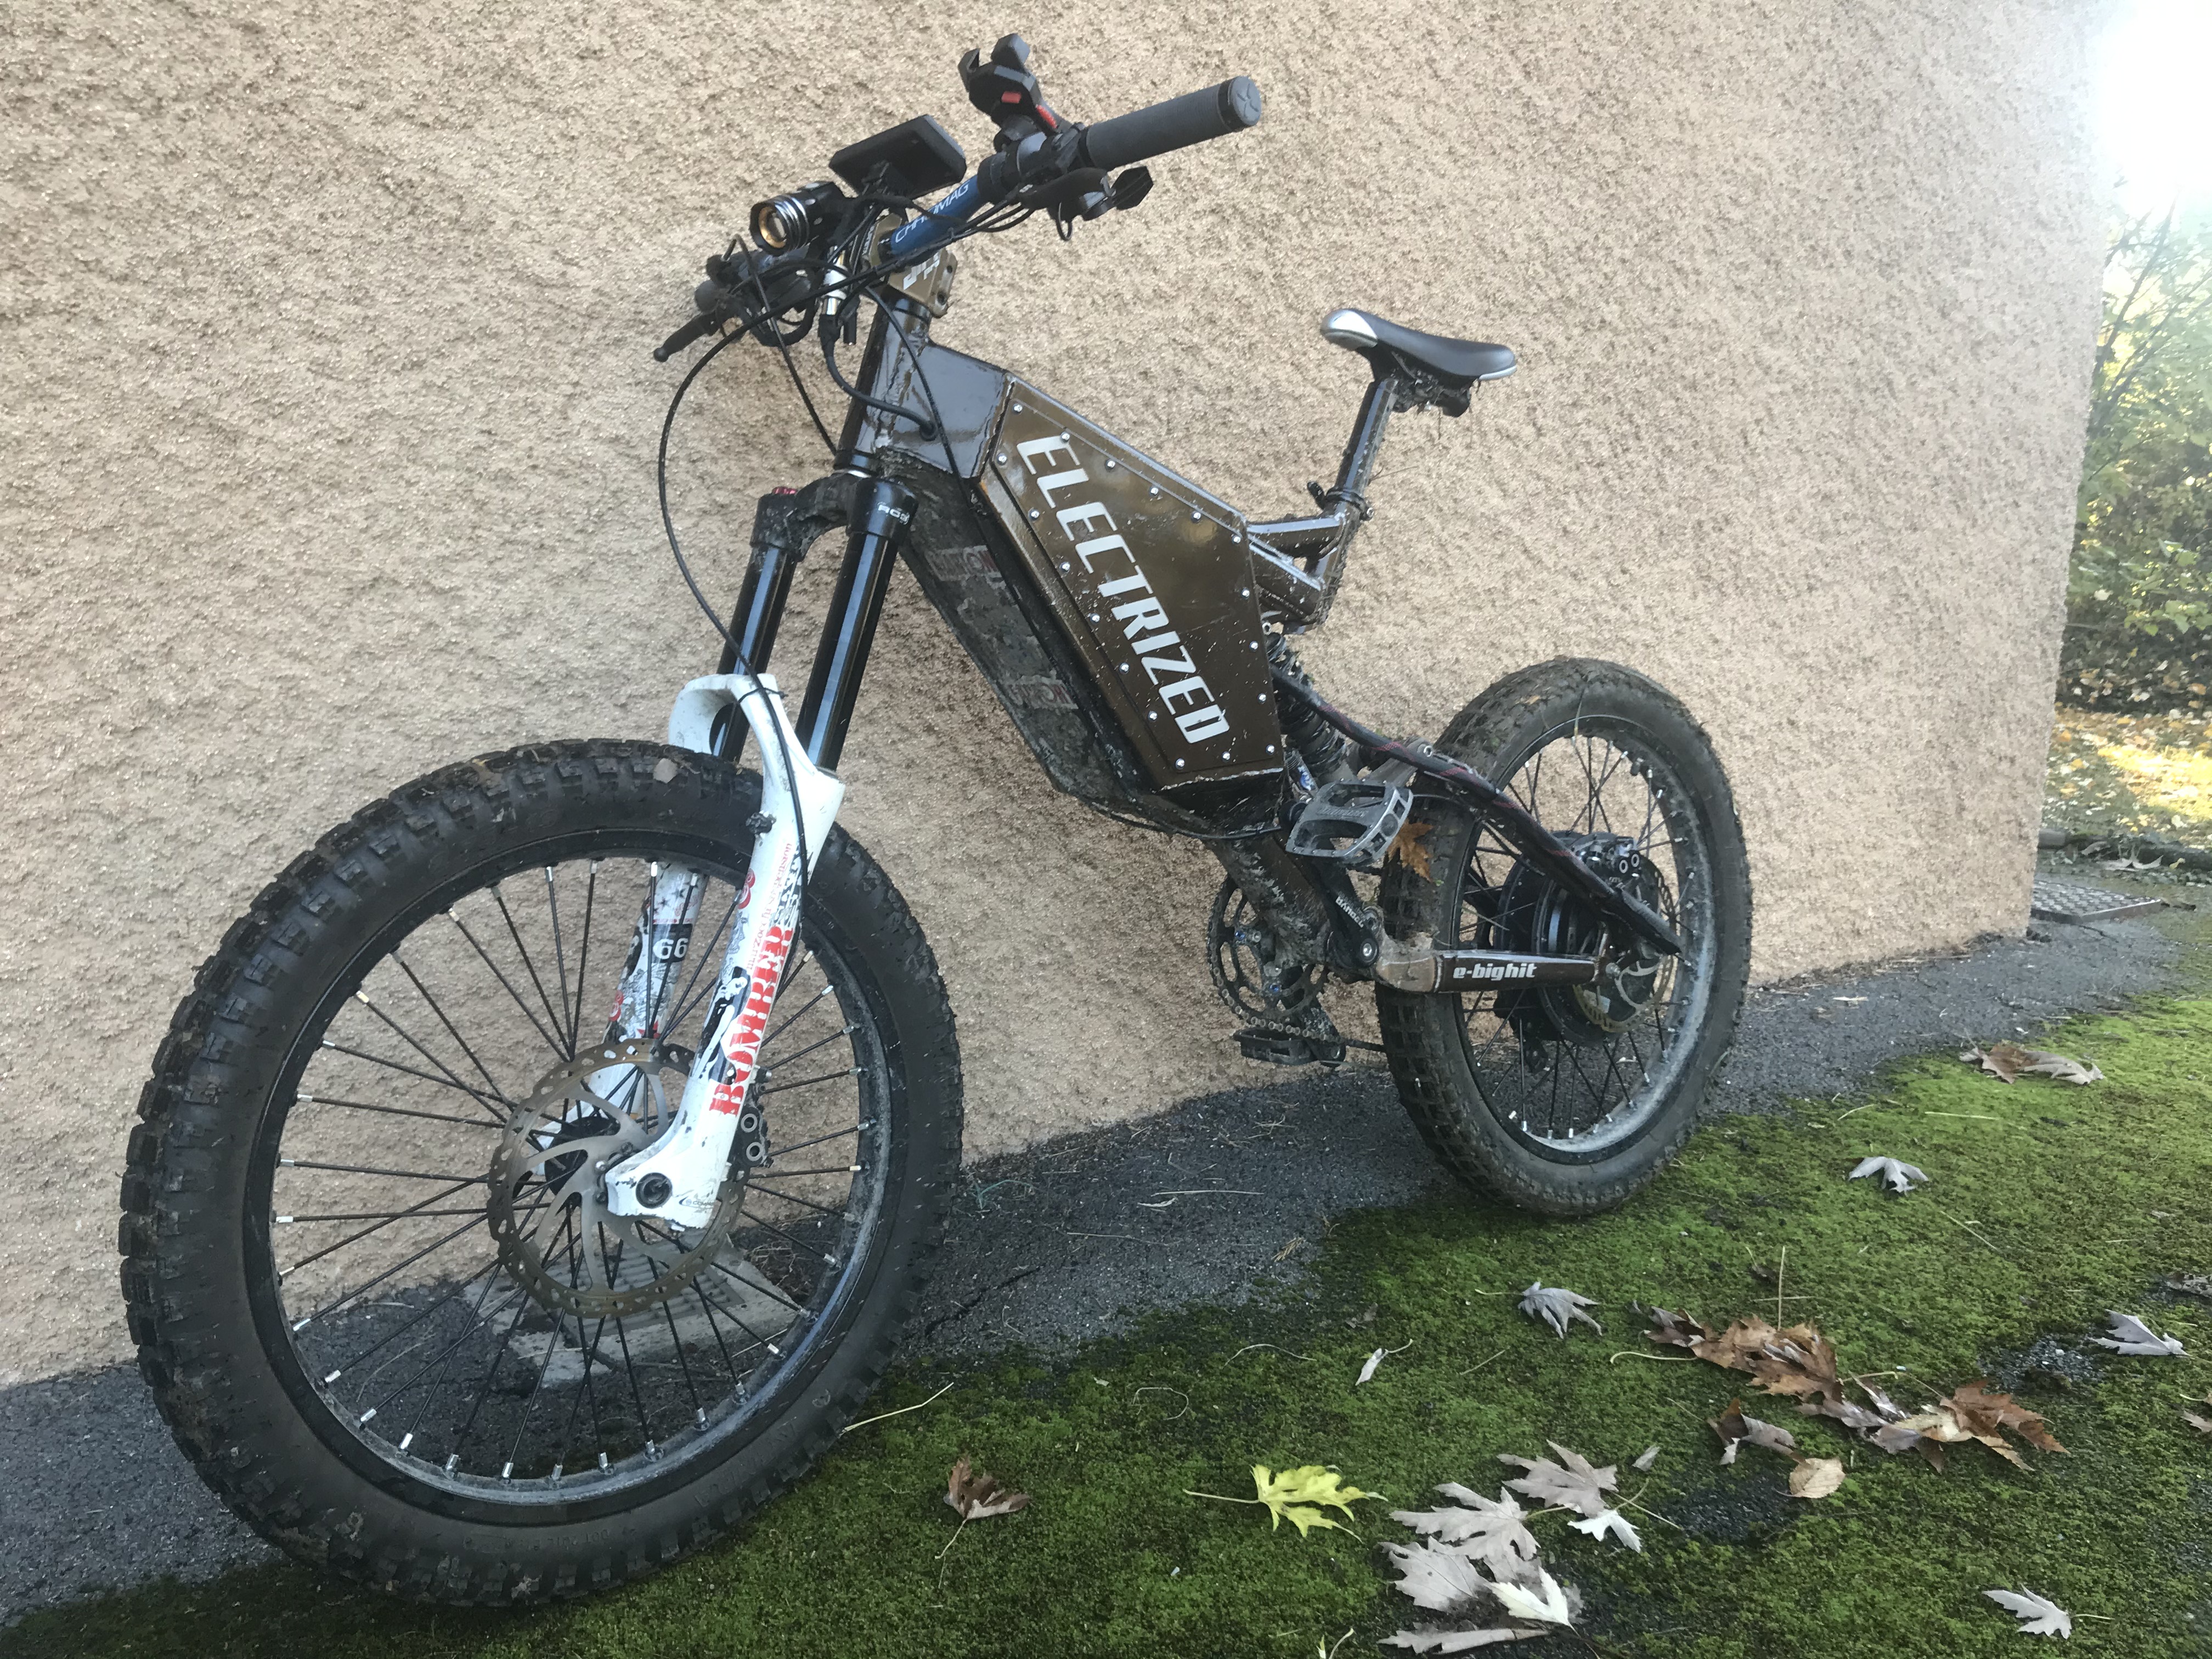
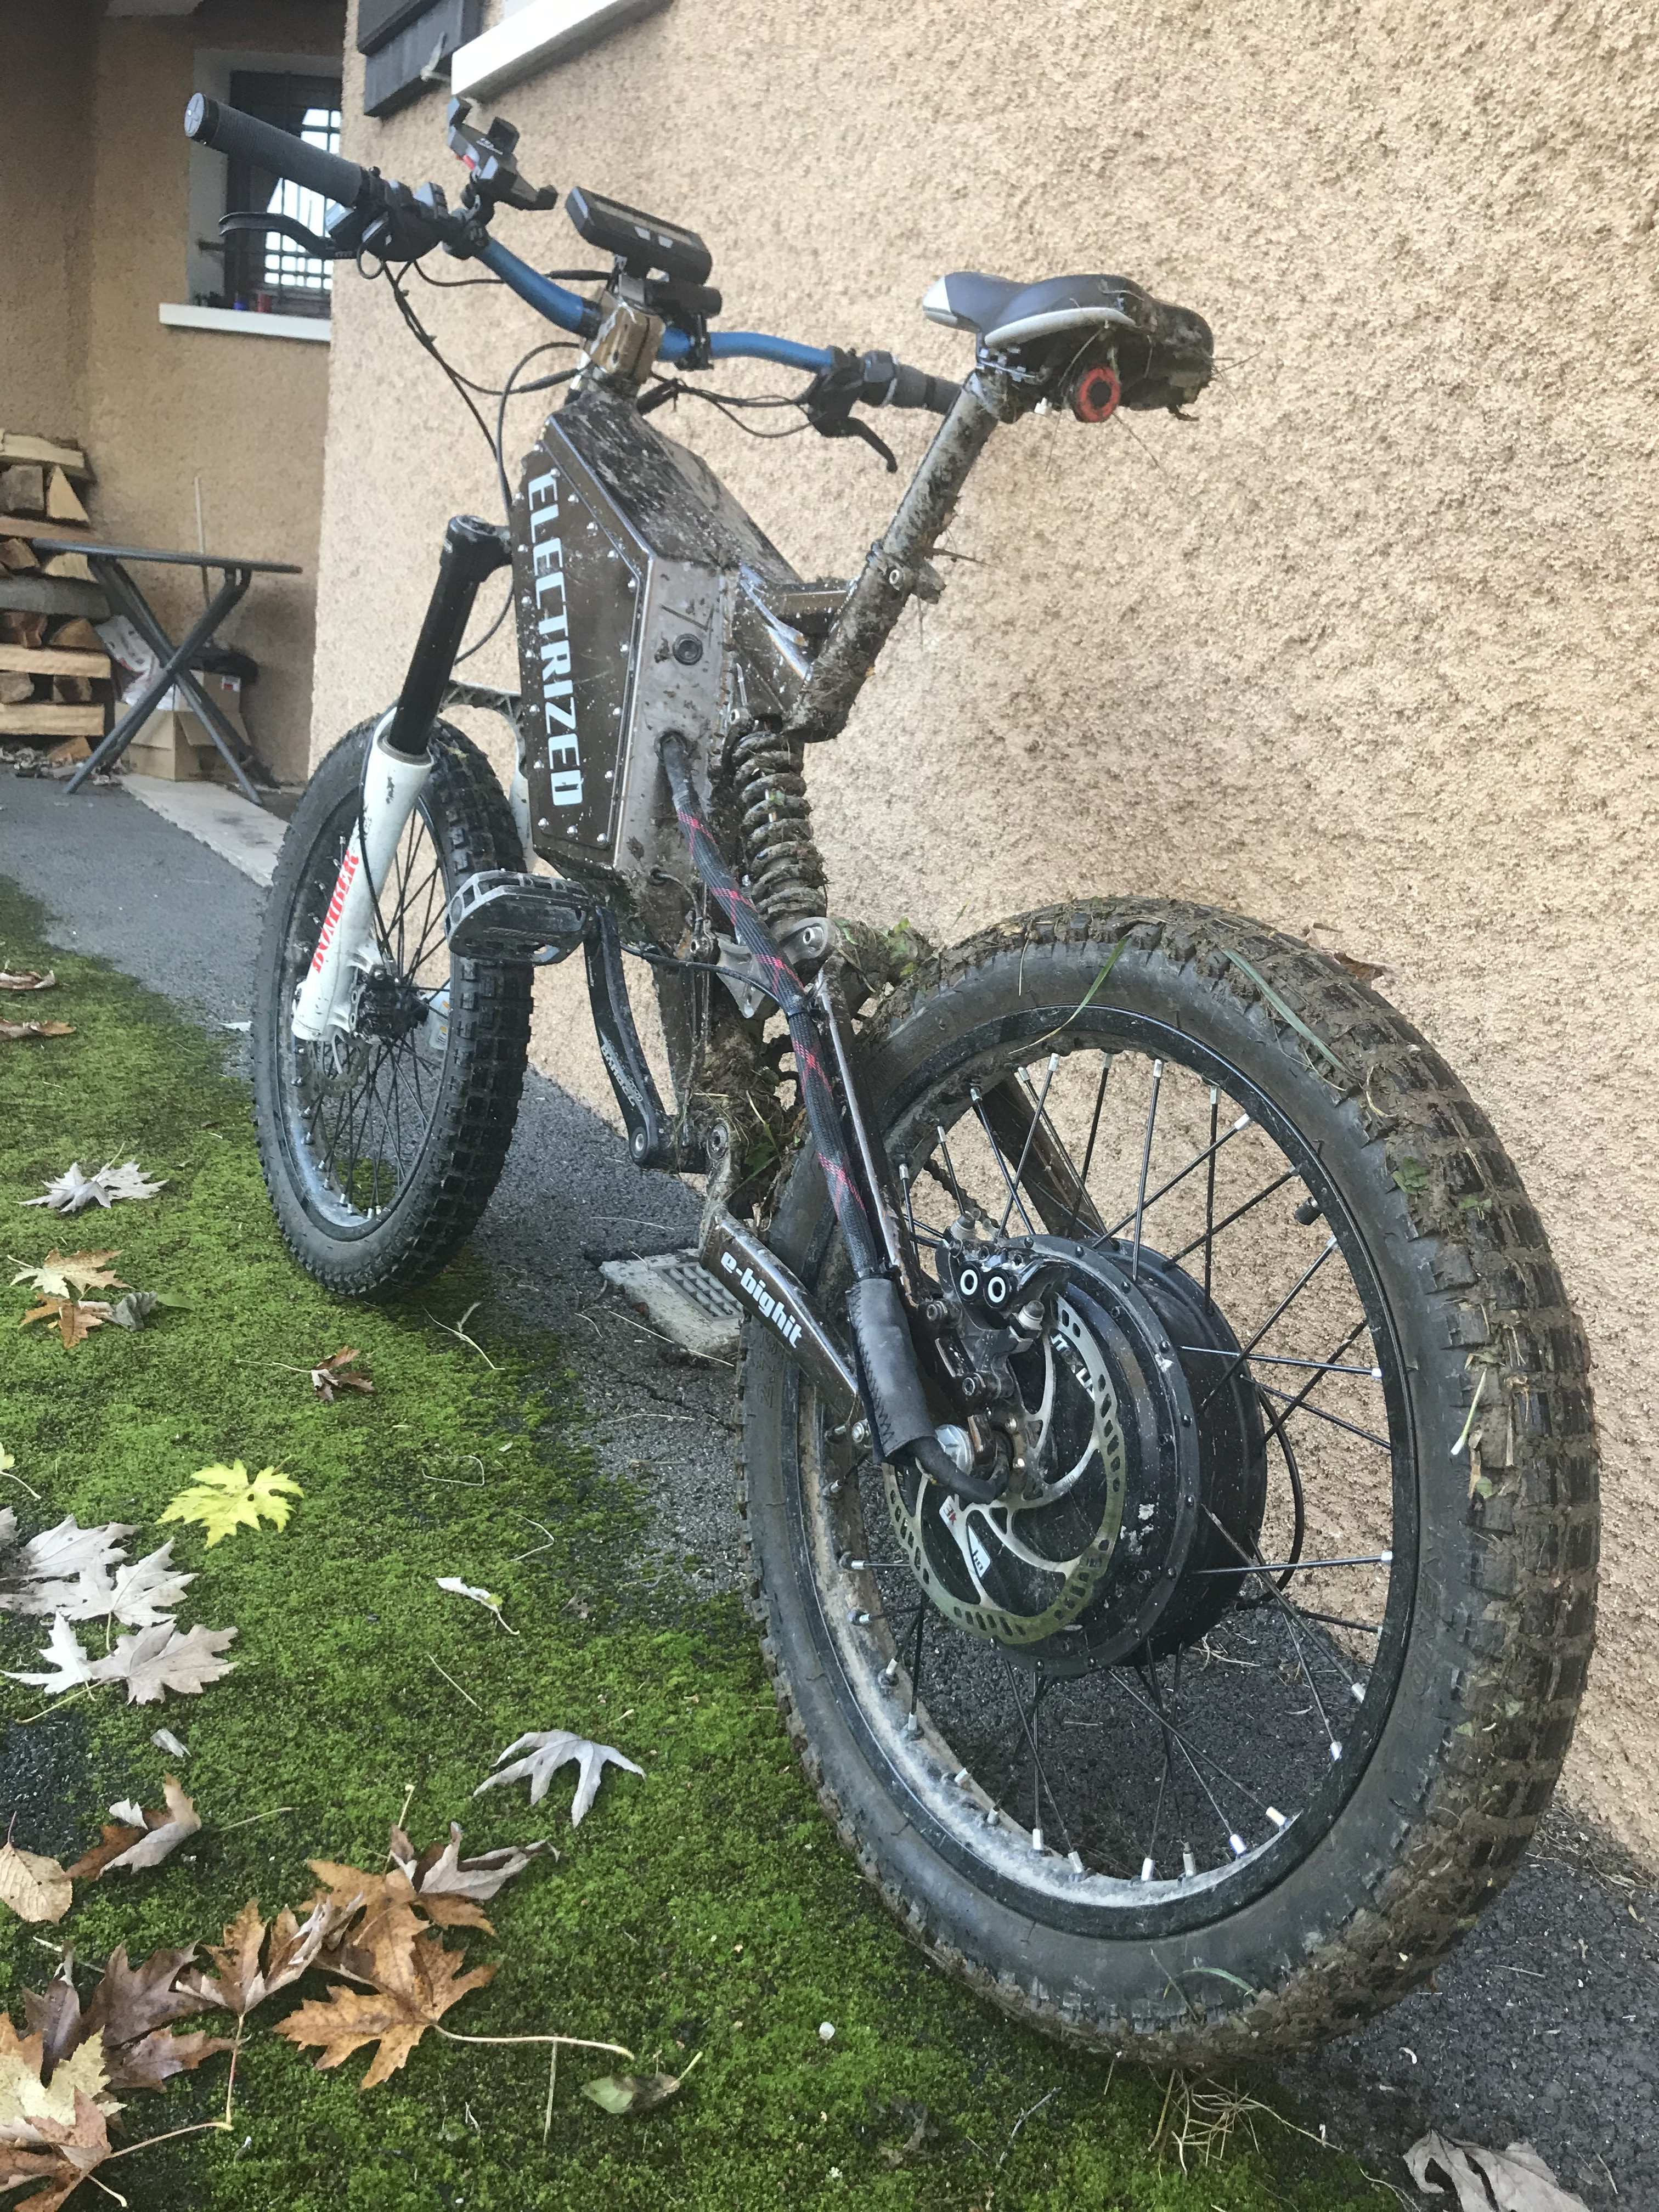
I wanted to show you my built ! A big electric bike made from a Specialized big Hit
Electrized with a MXUS 3K turbo, sabvoton 72150 and 20s8p battery (vtc5a cells)
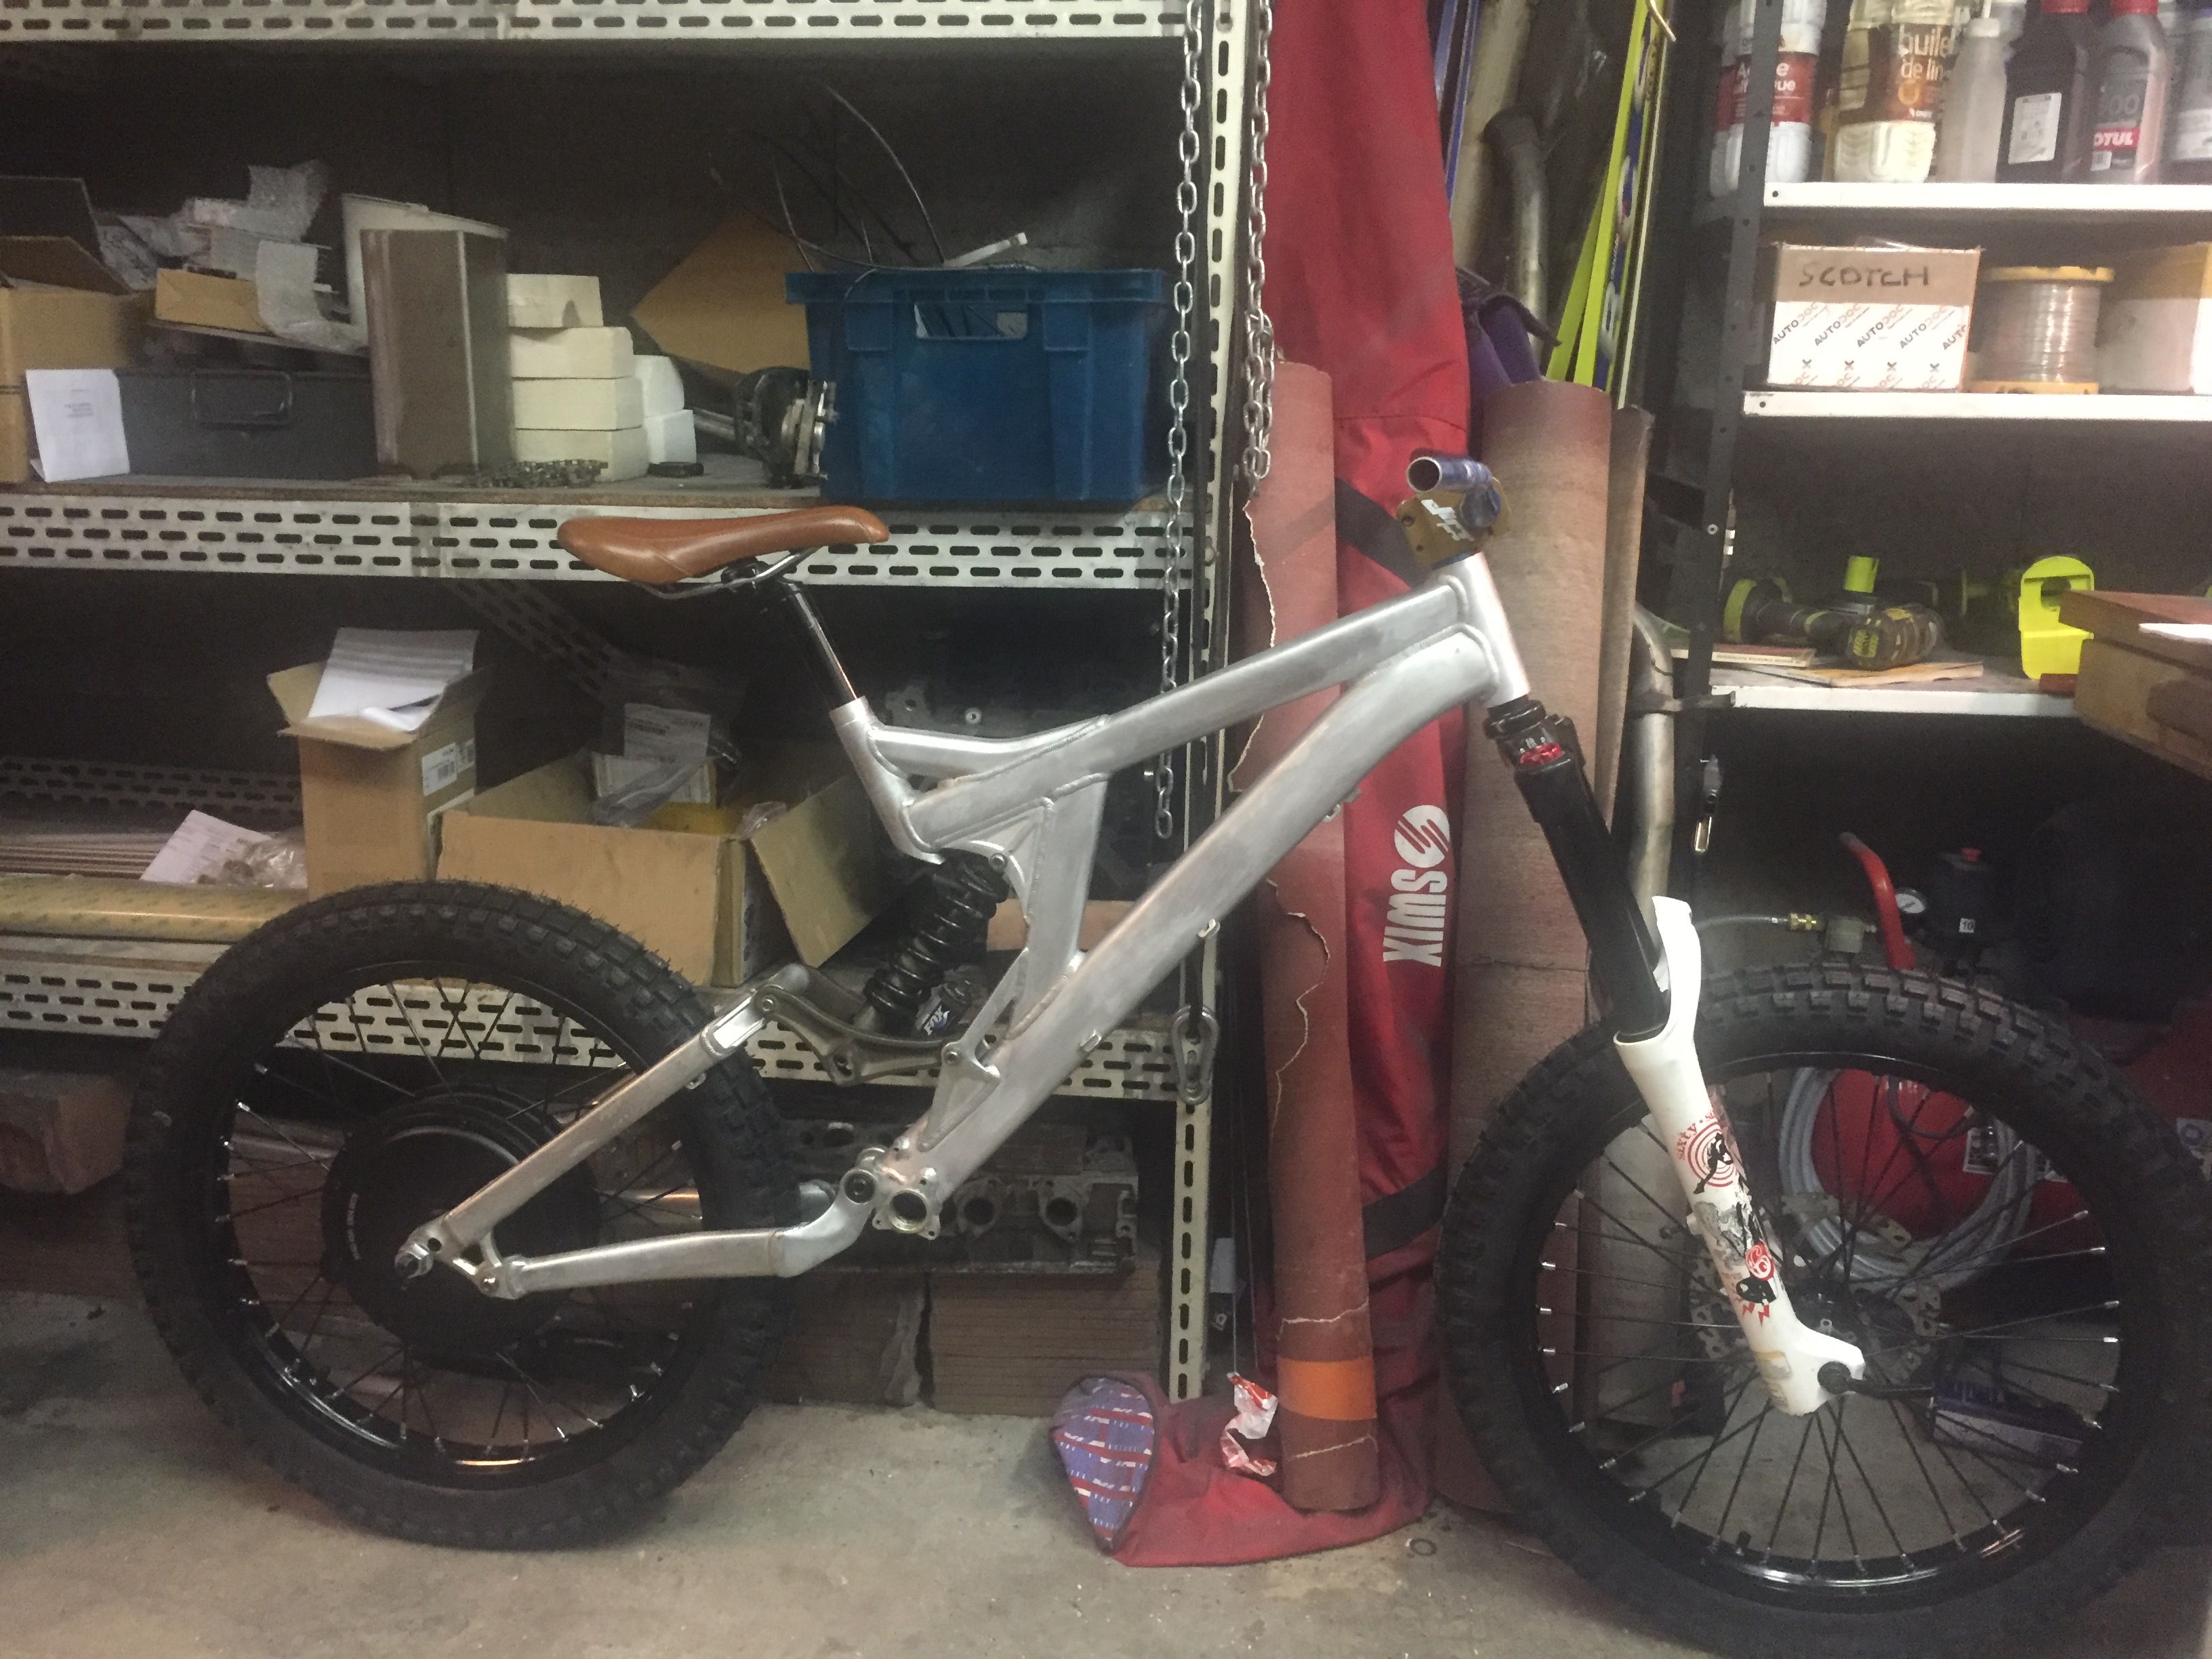
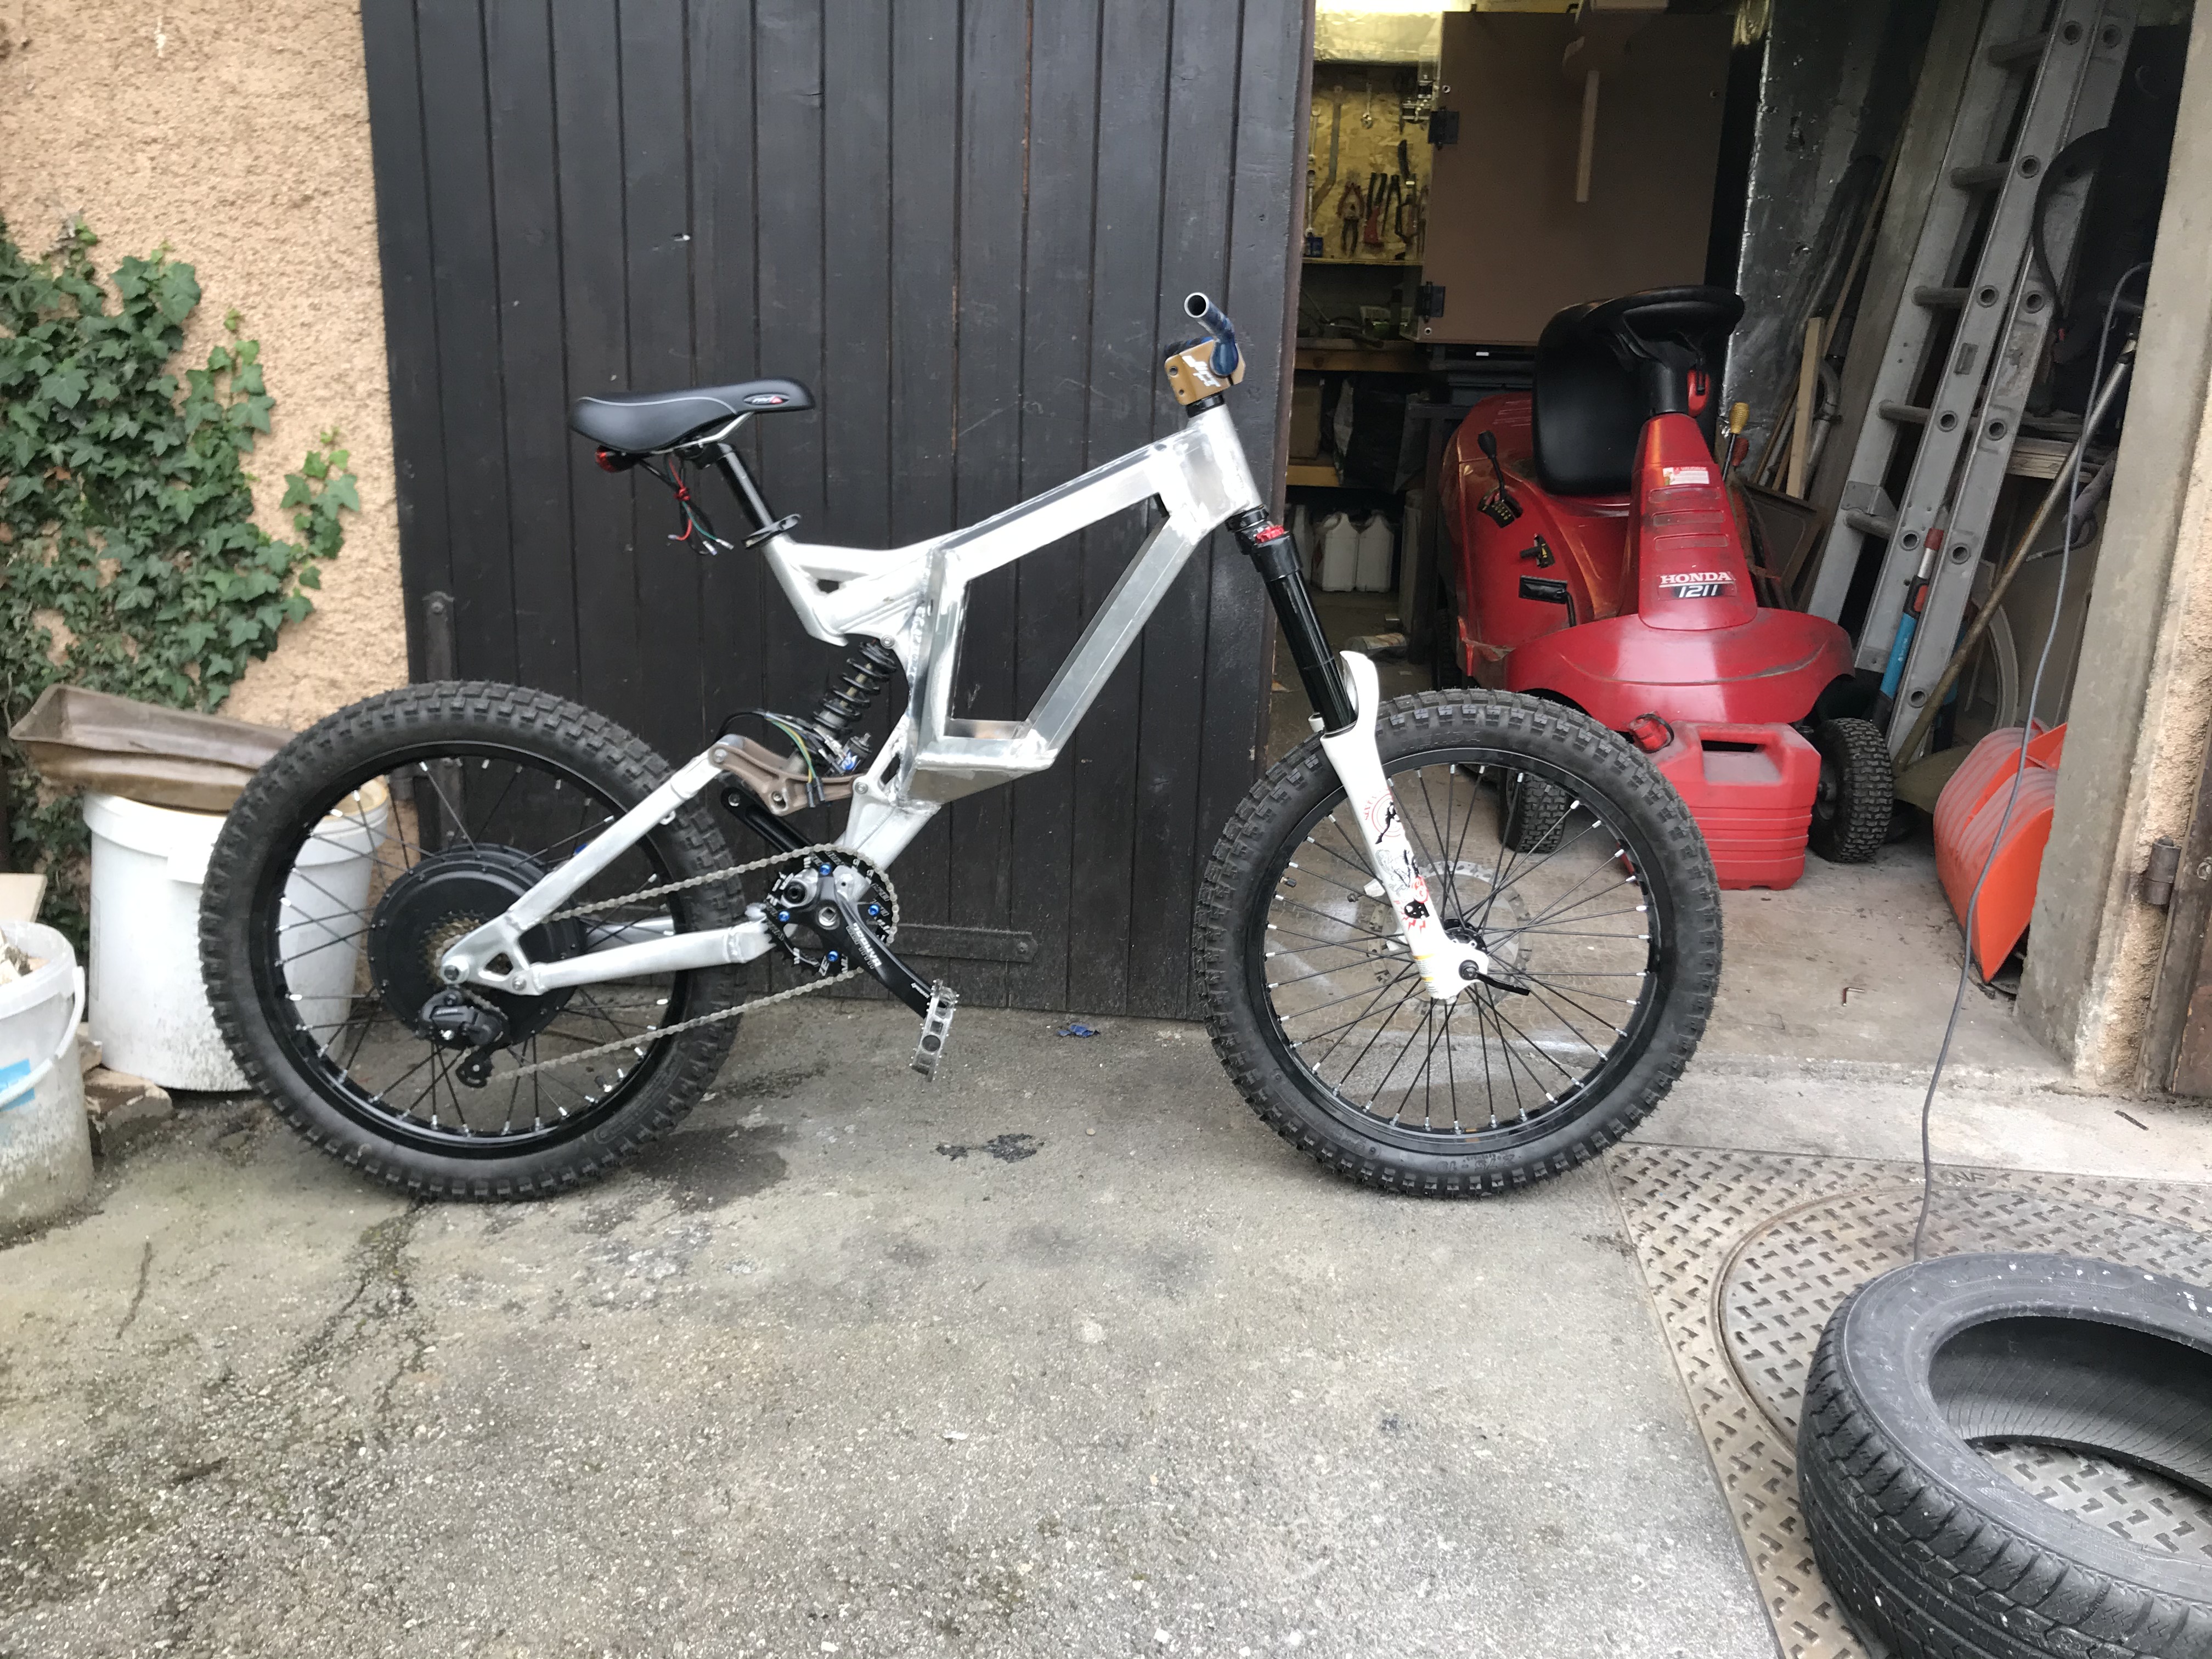
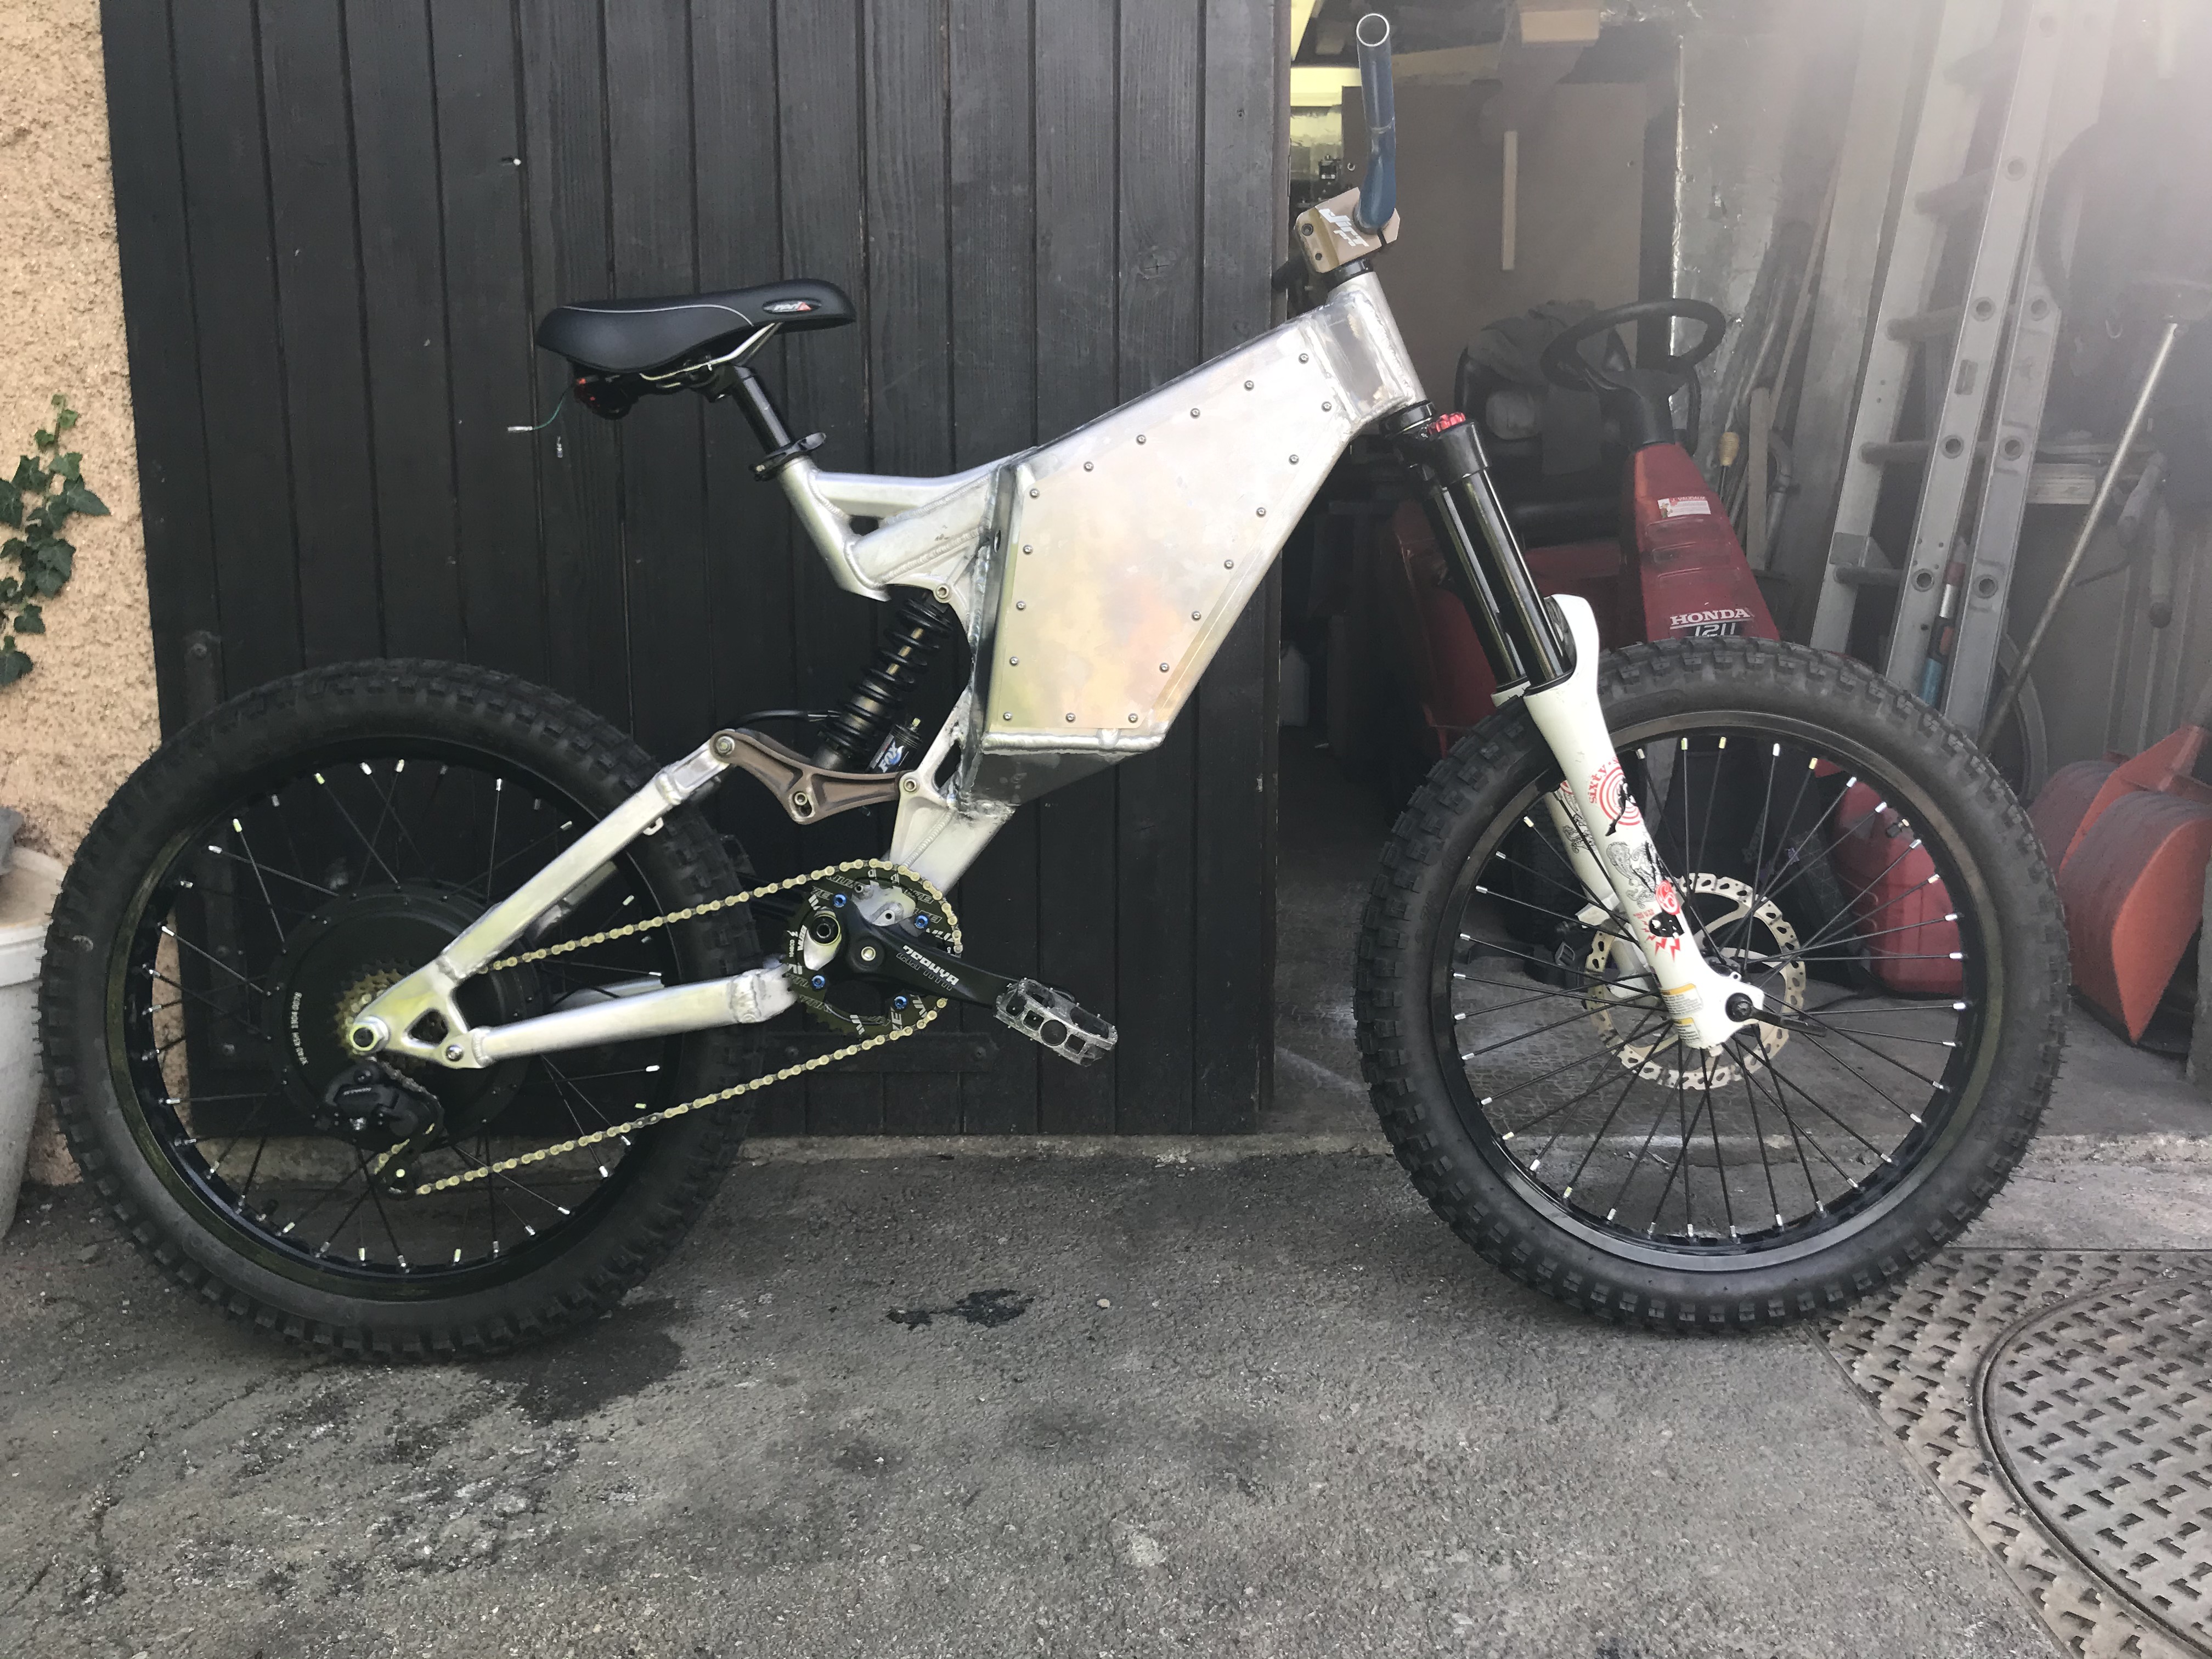
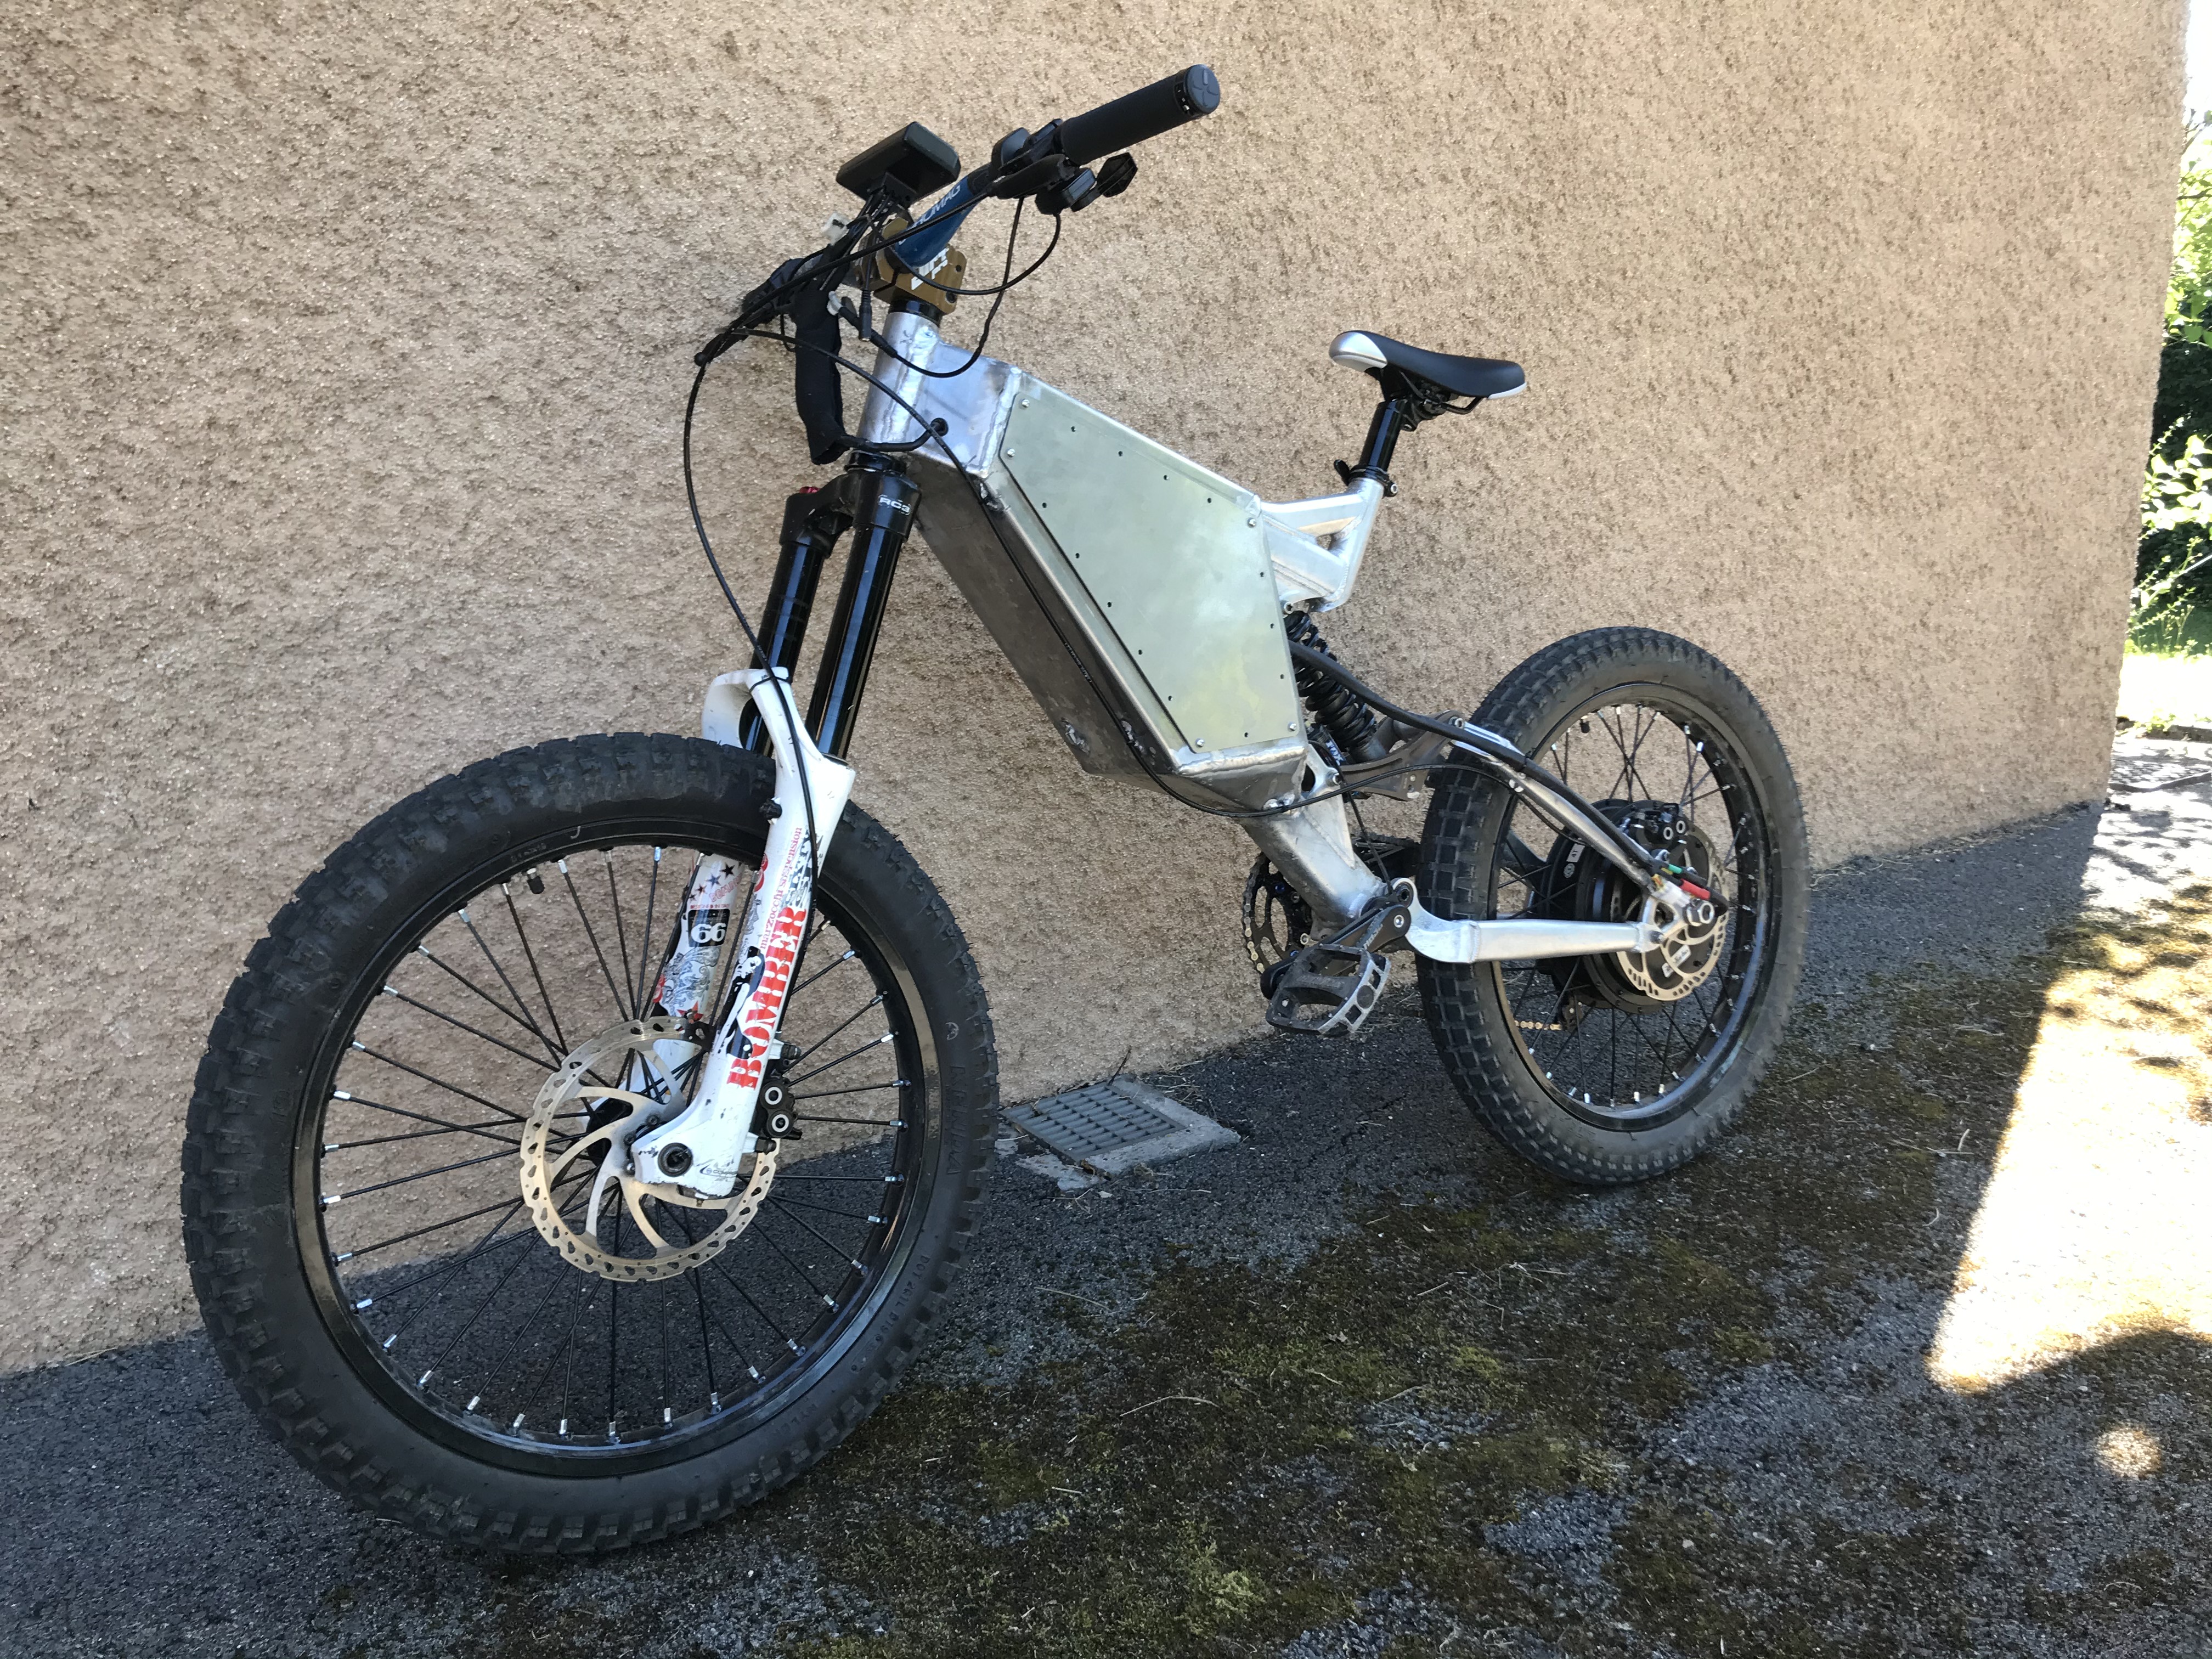
here is the bike
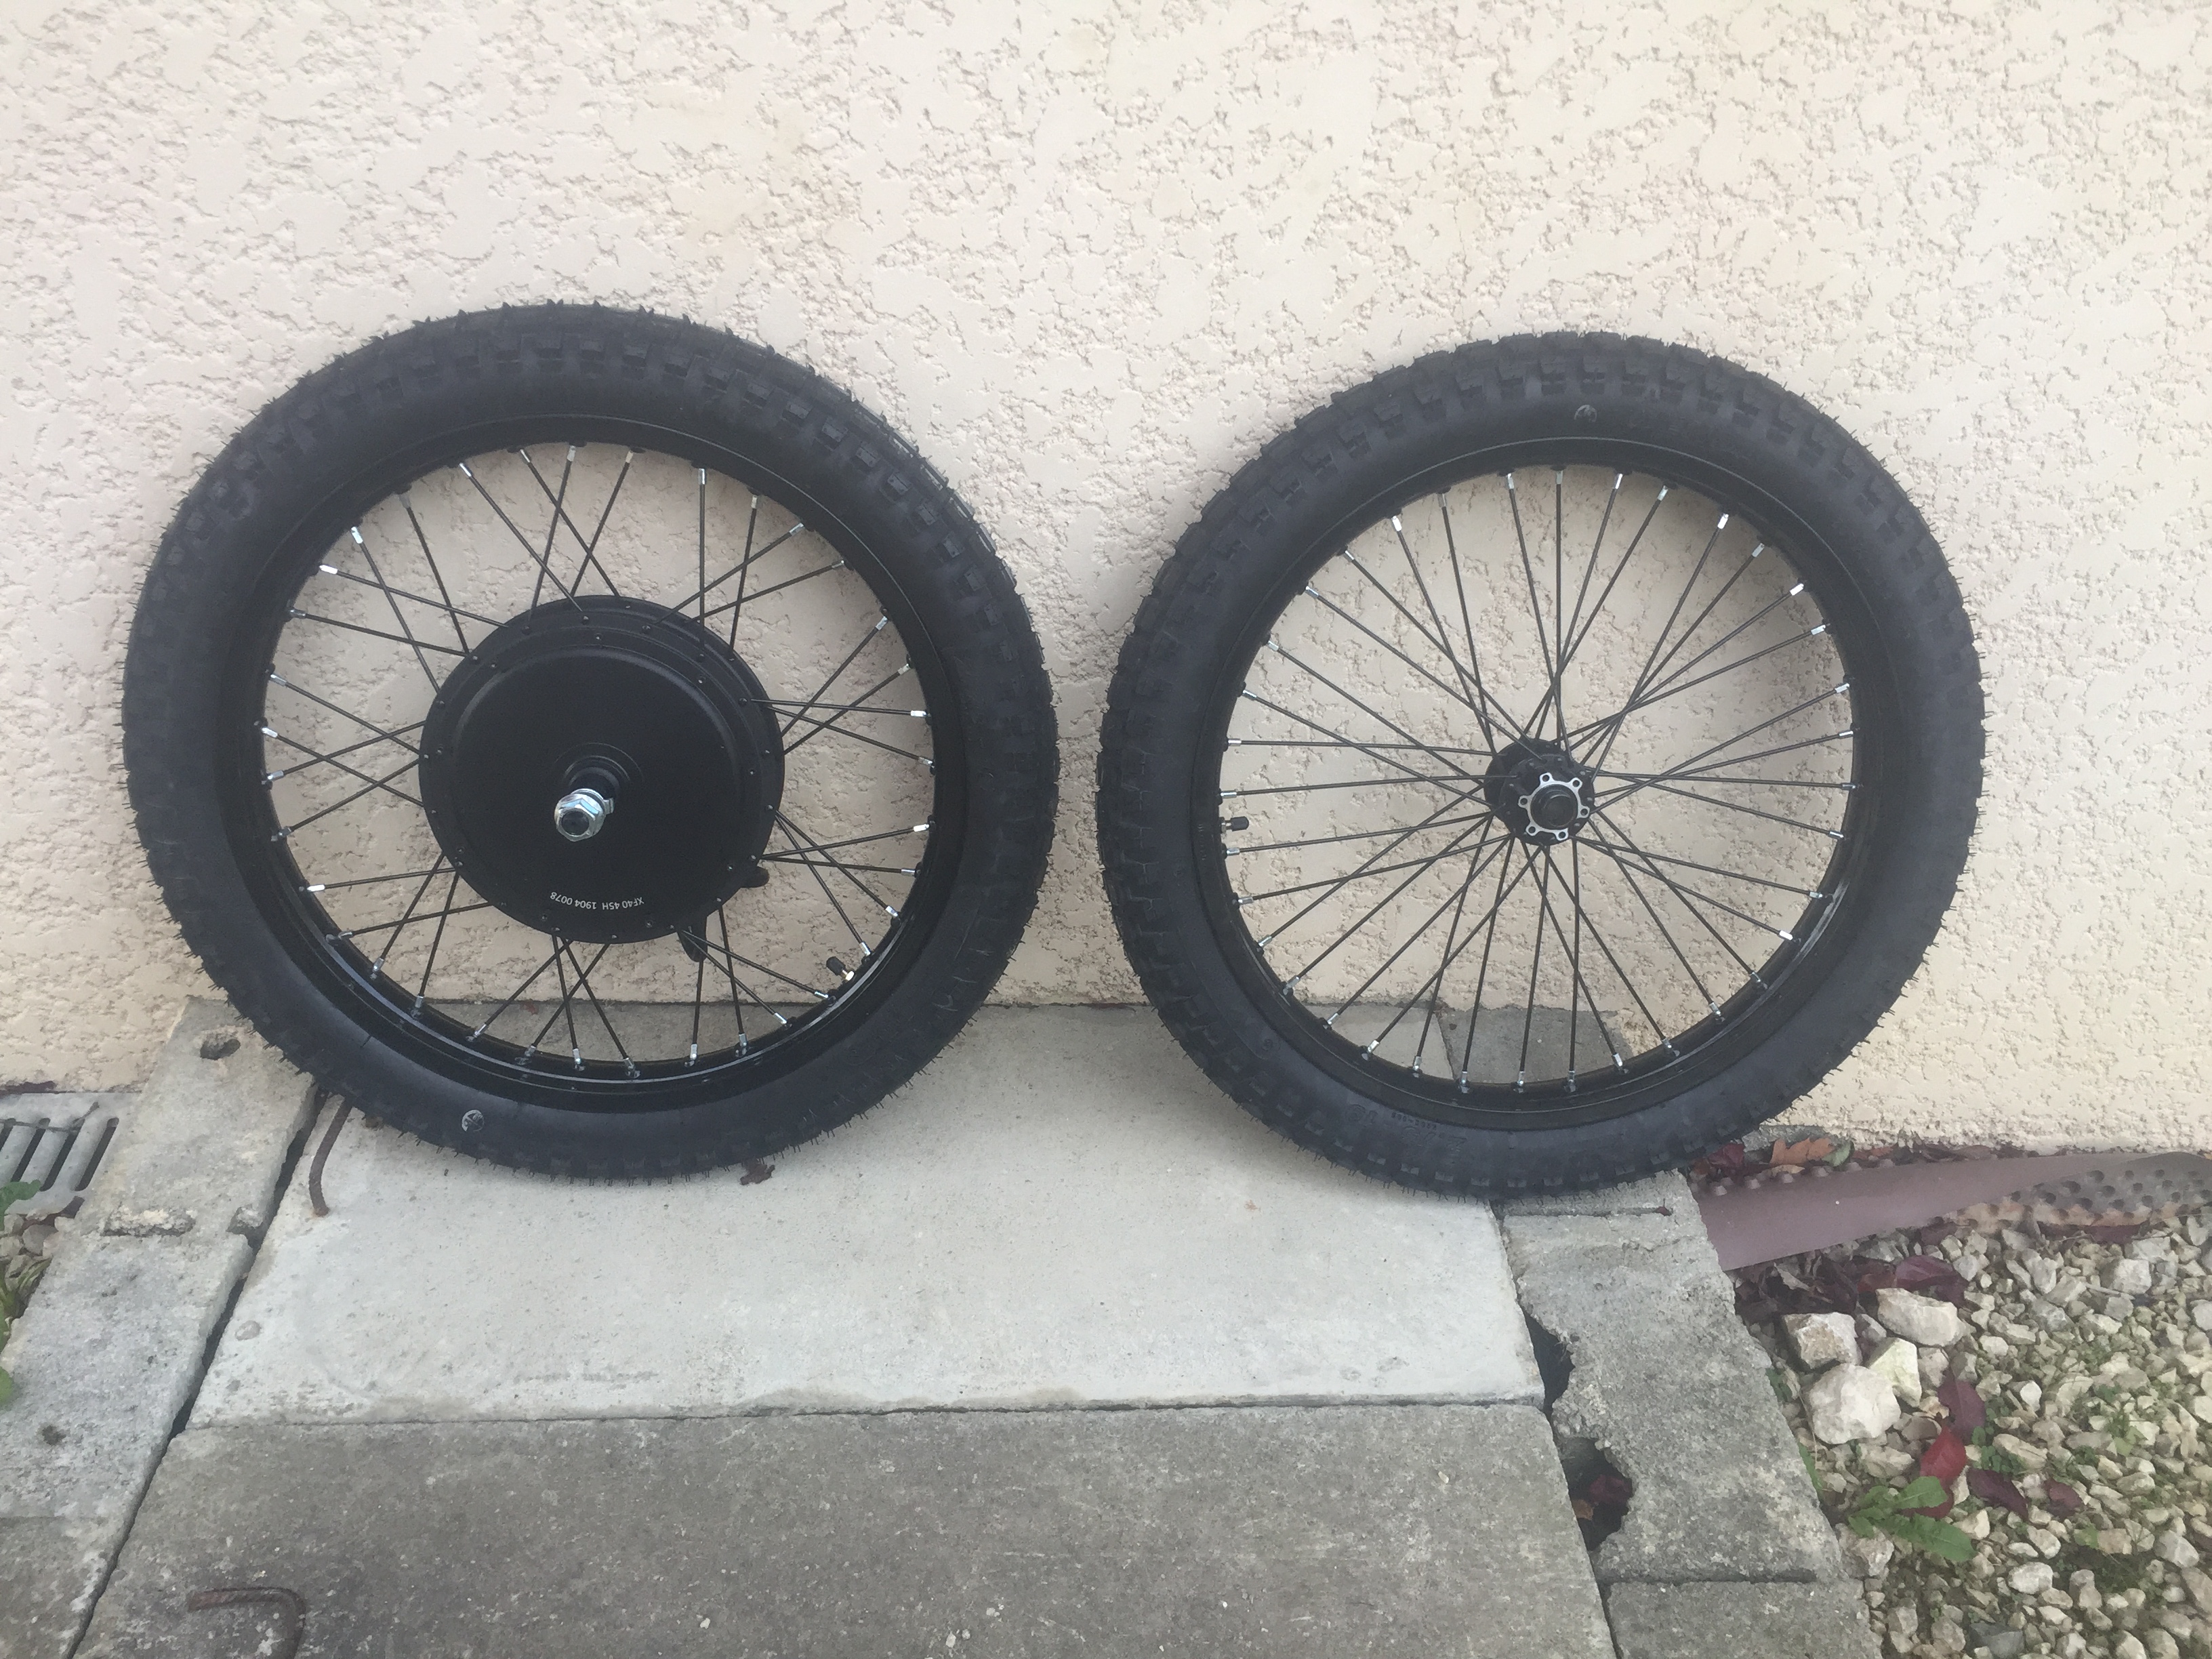
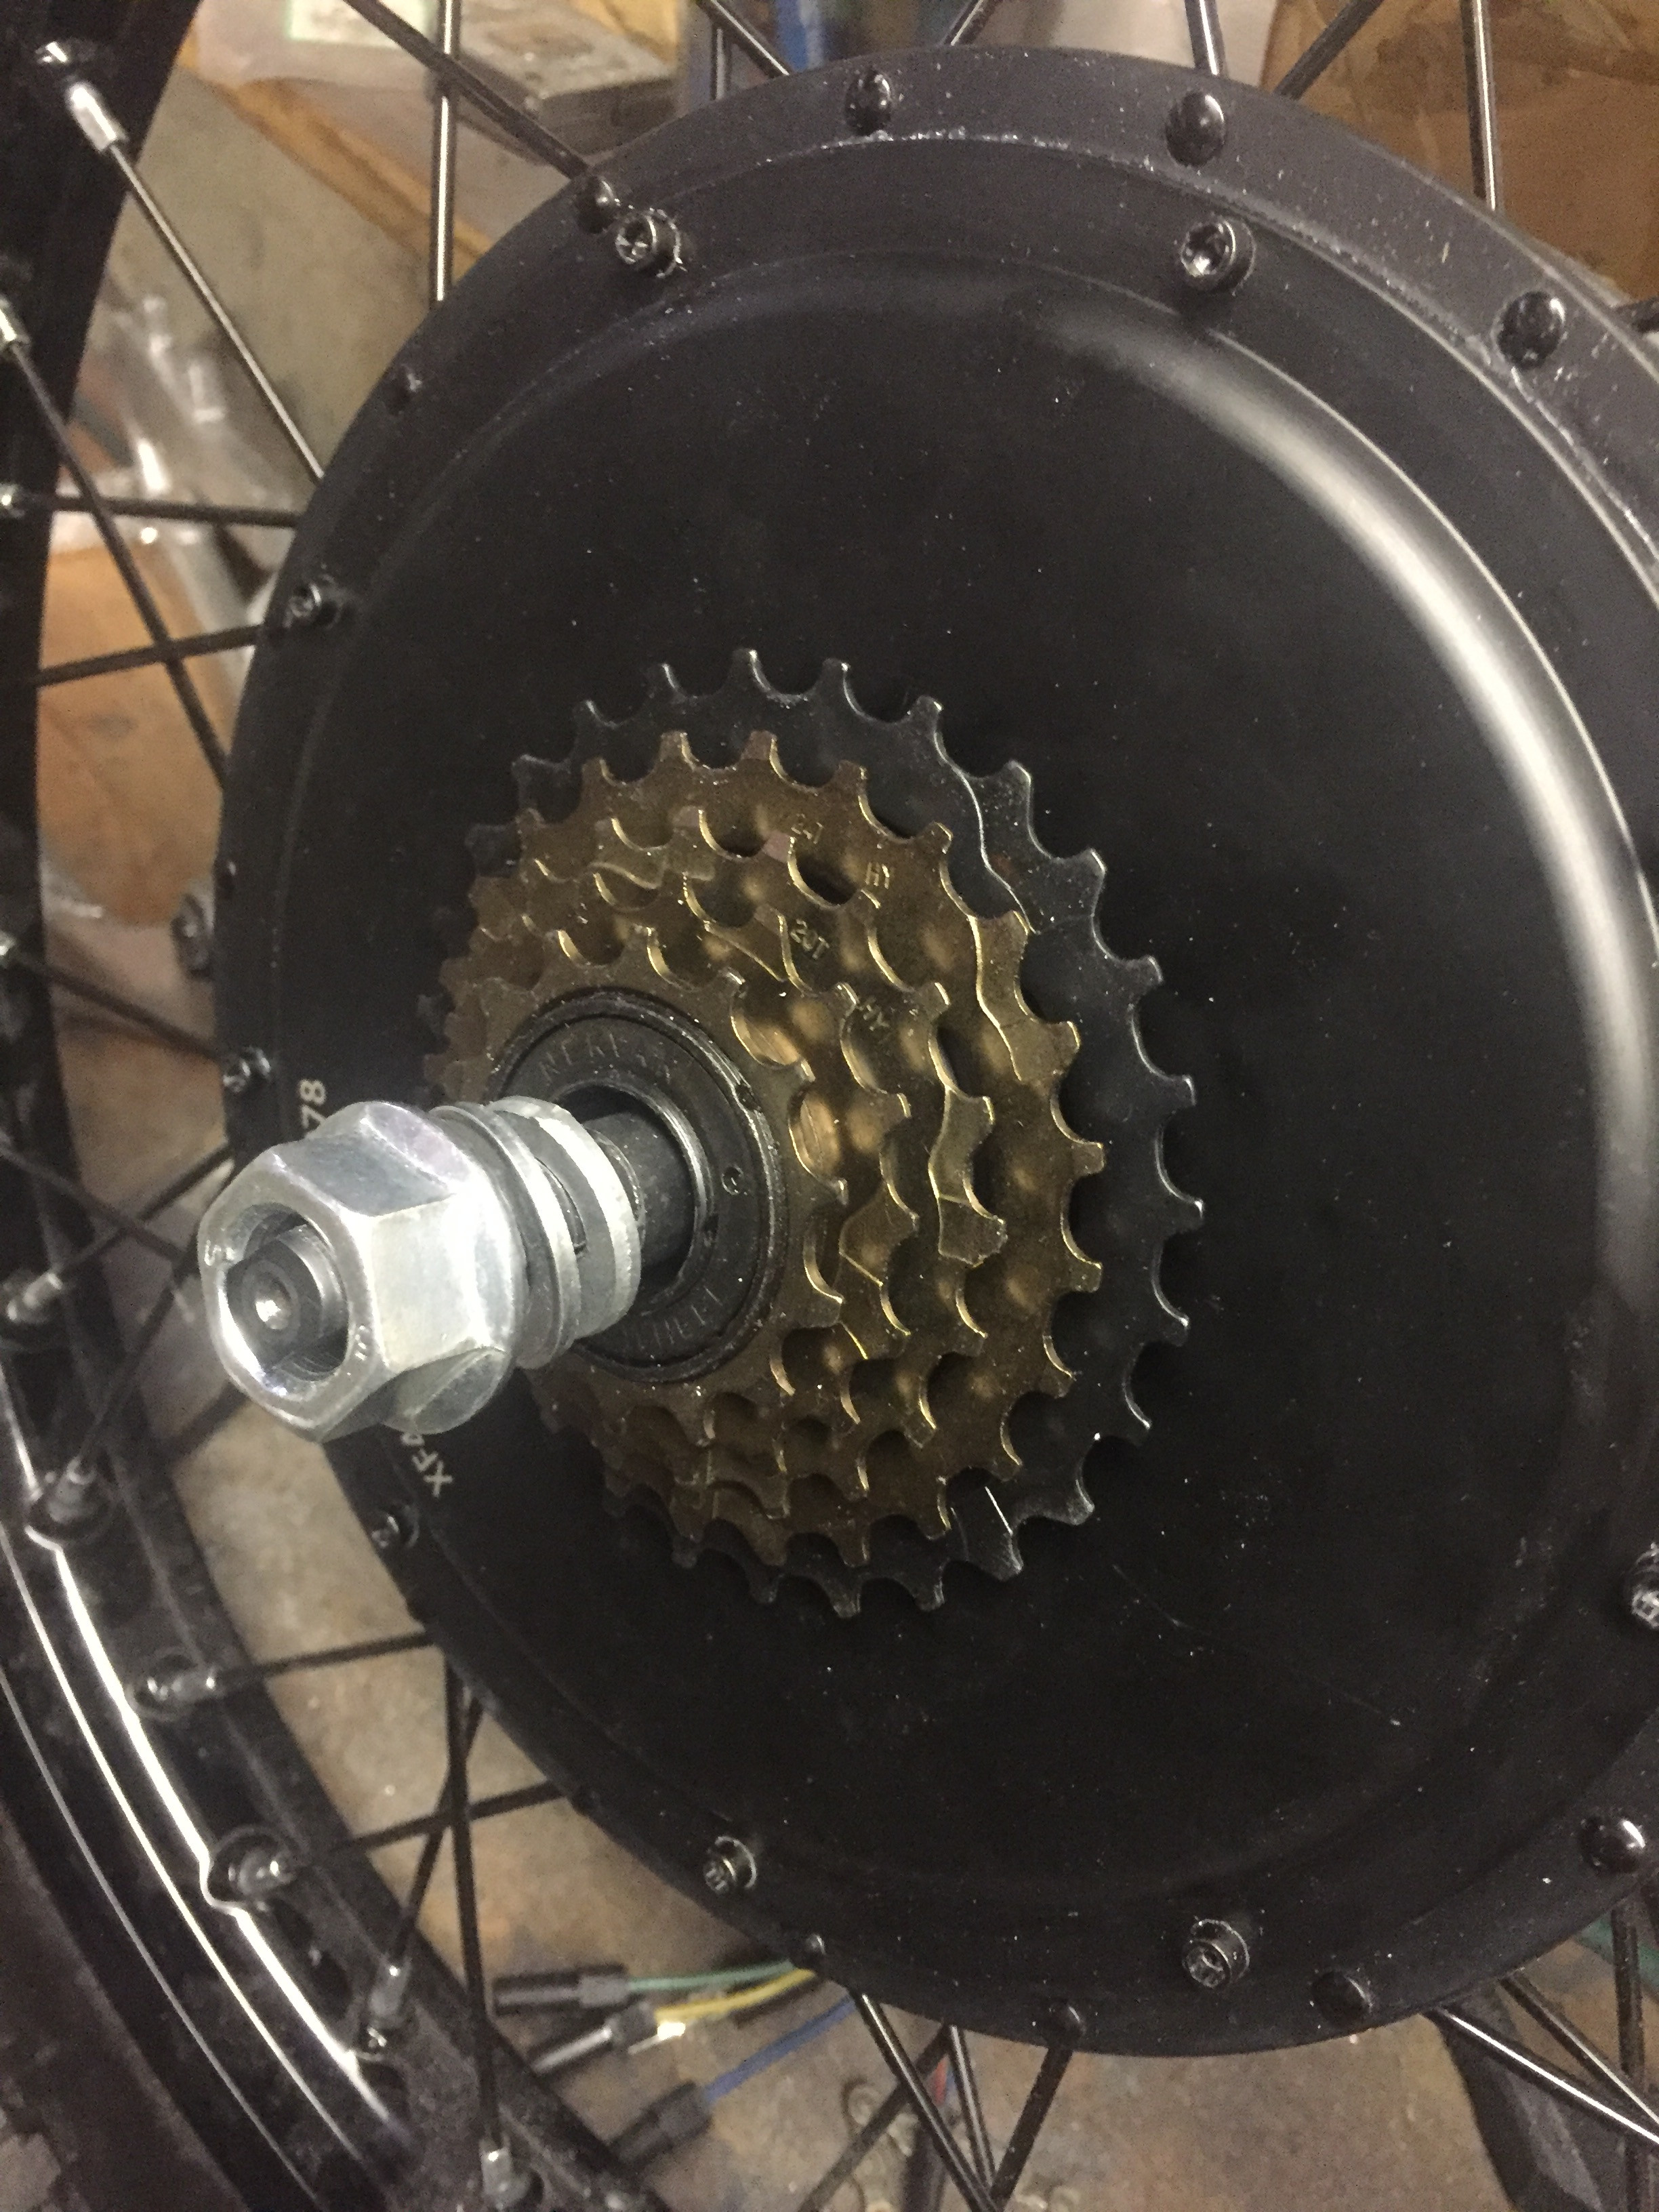
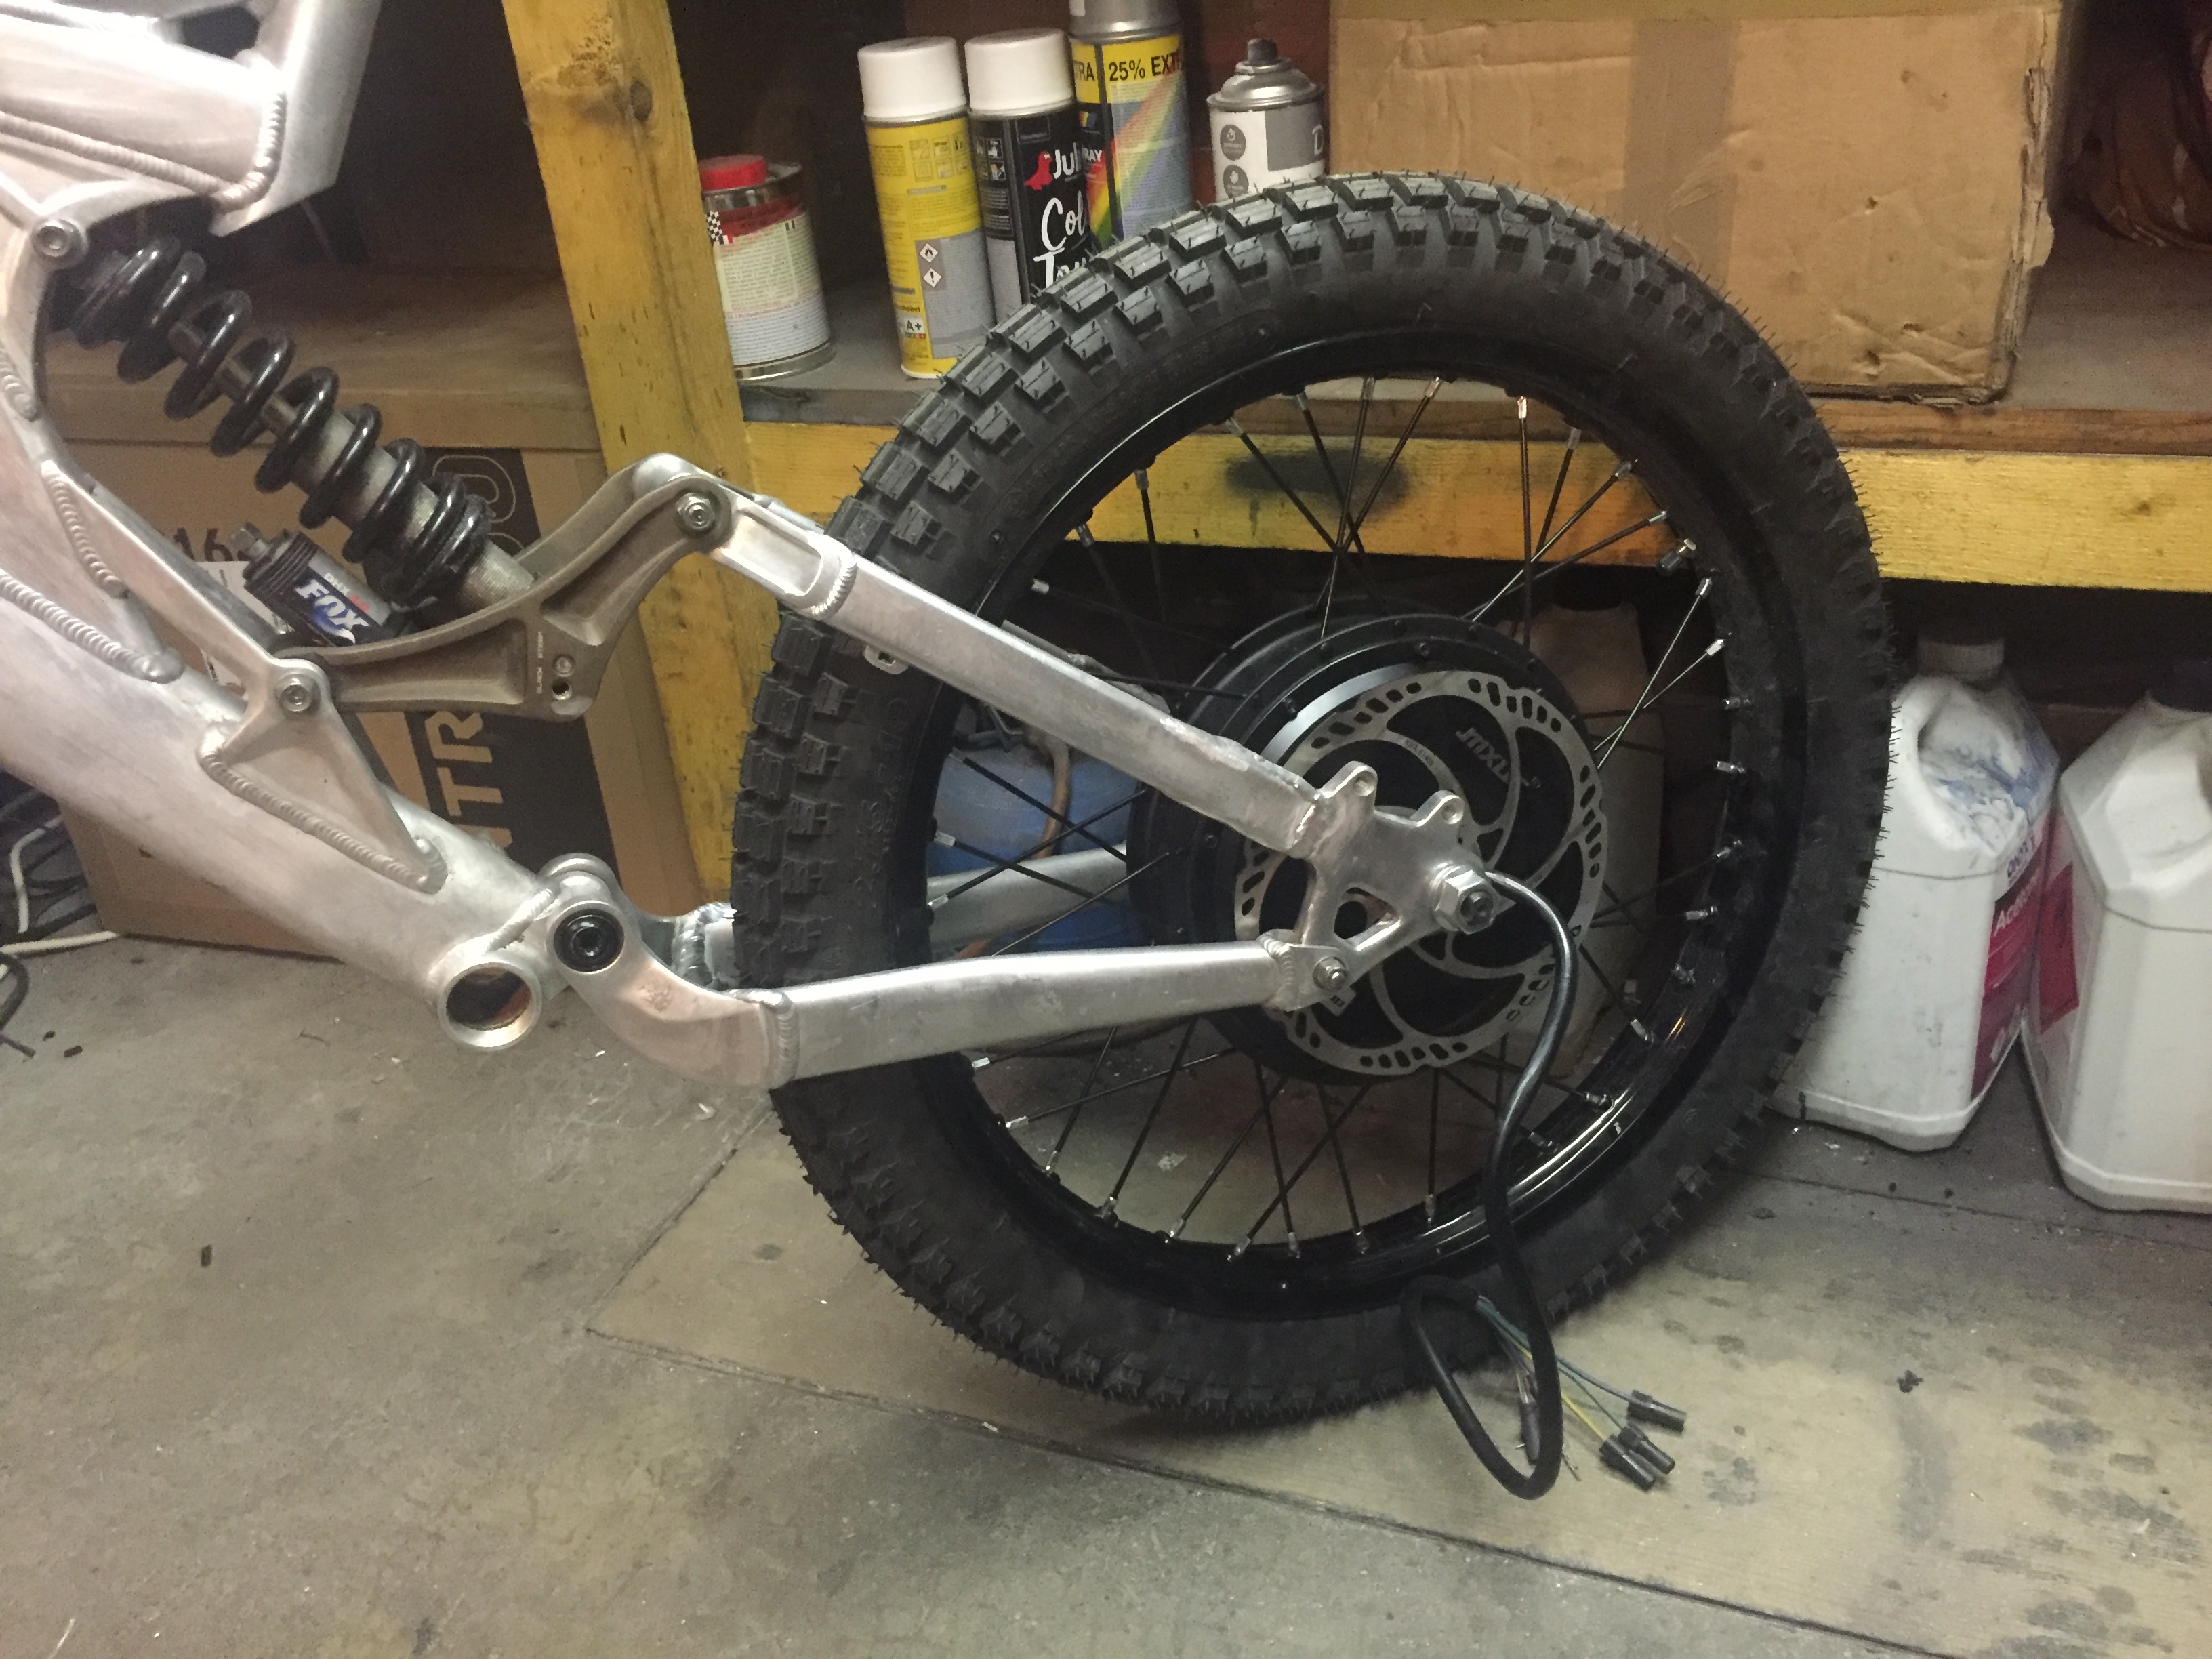
I bought theses wheels, 19" bike rims mounted on a MXUS 3k turbo (4T) and the same on a bicycle hub for the front. With shinko 2.75" tires.
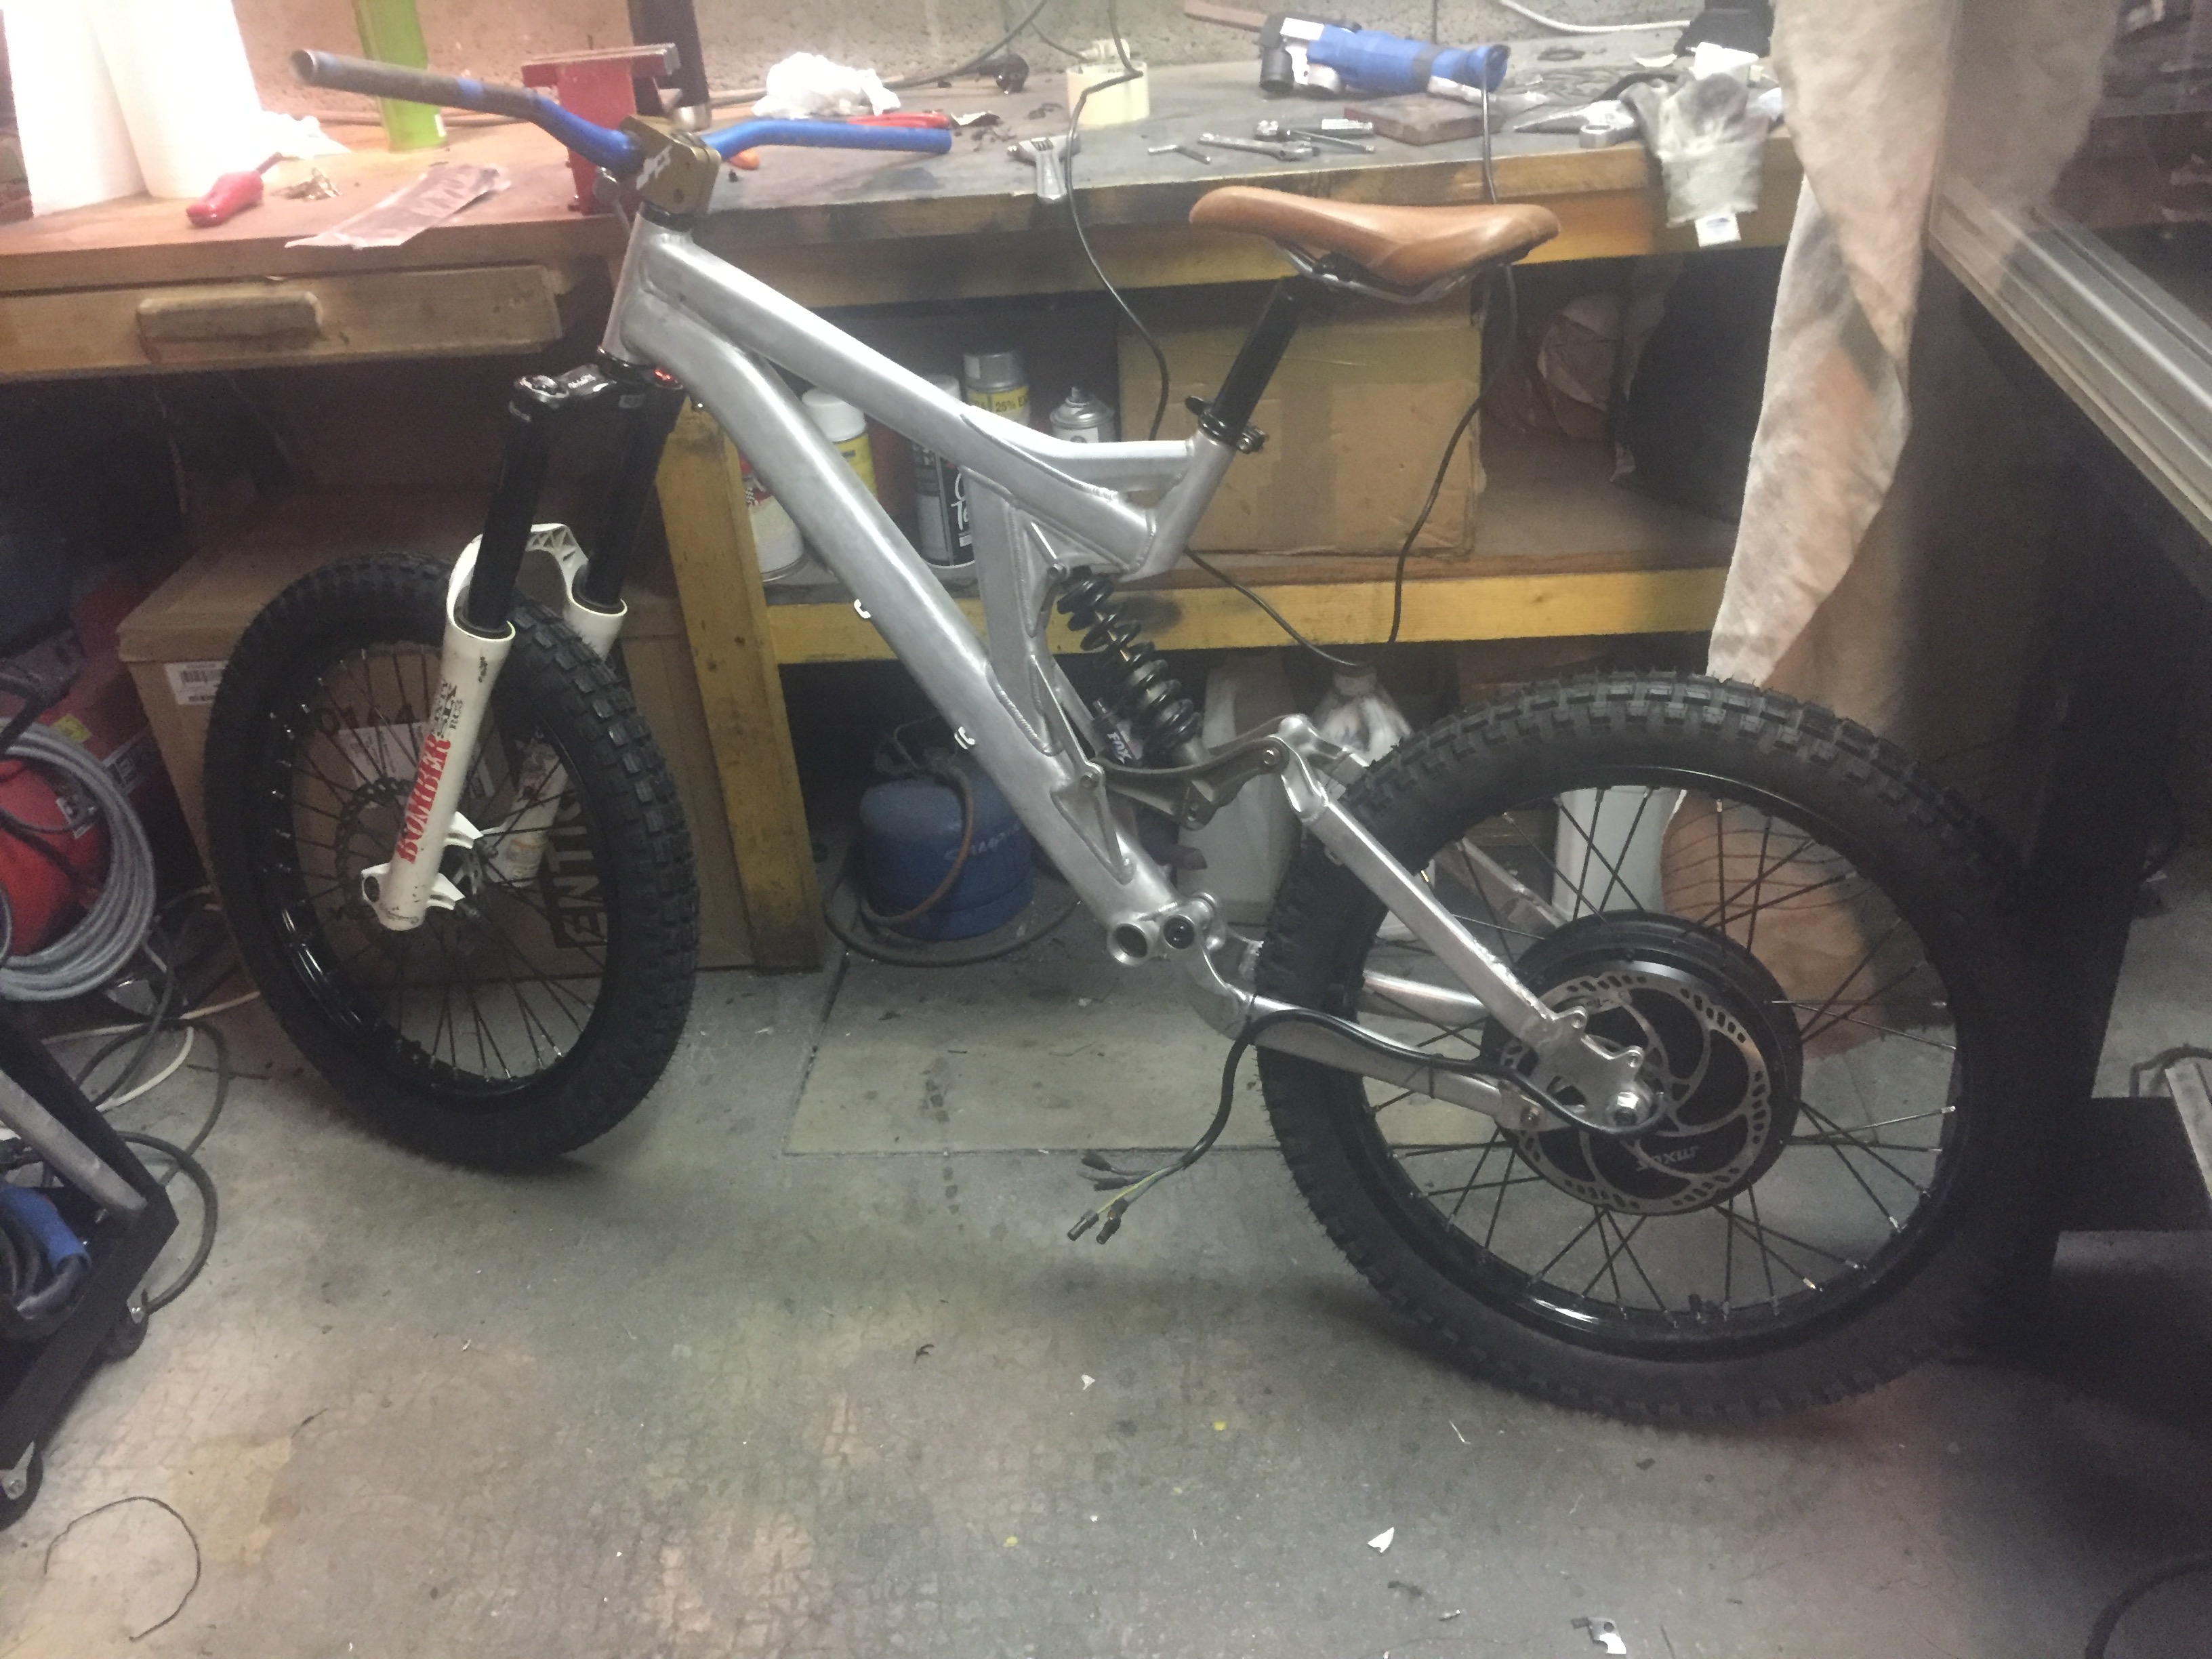
the first step was to disassemble the bike and remove all the actual paint :
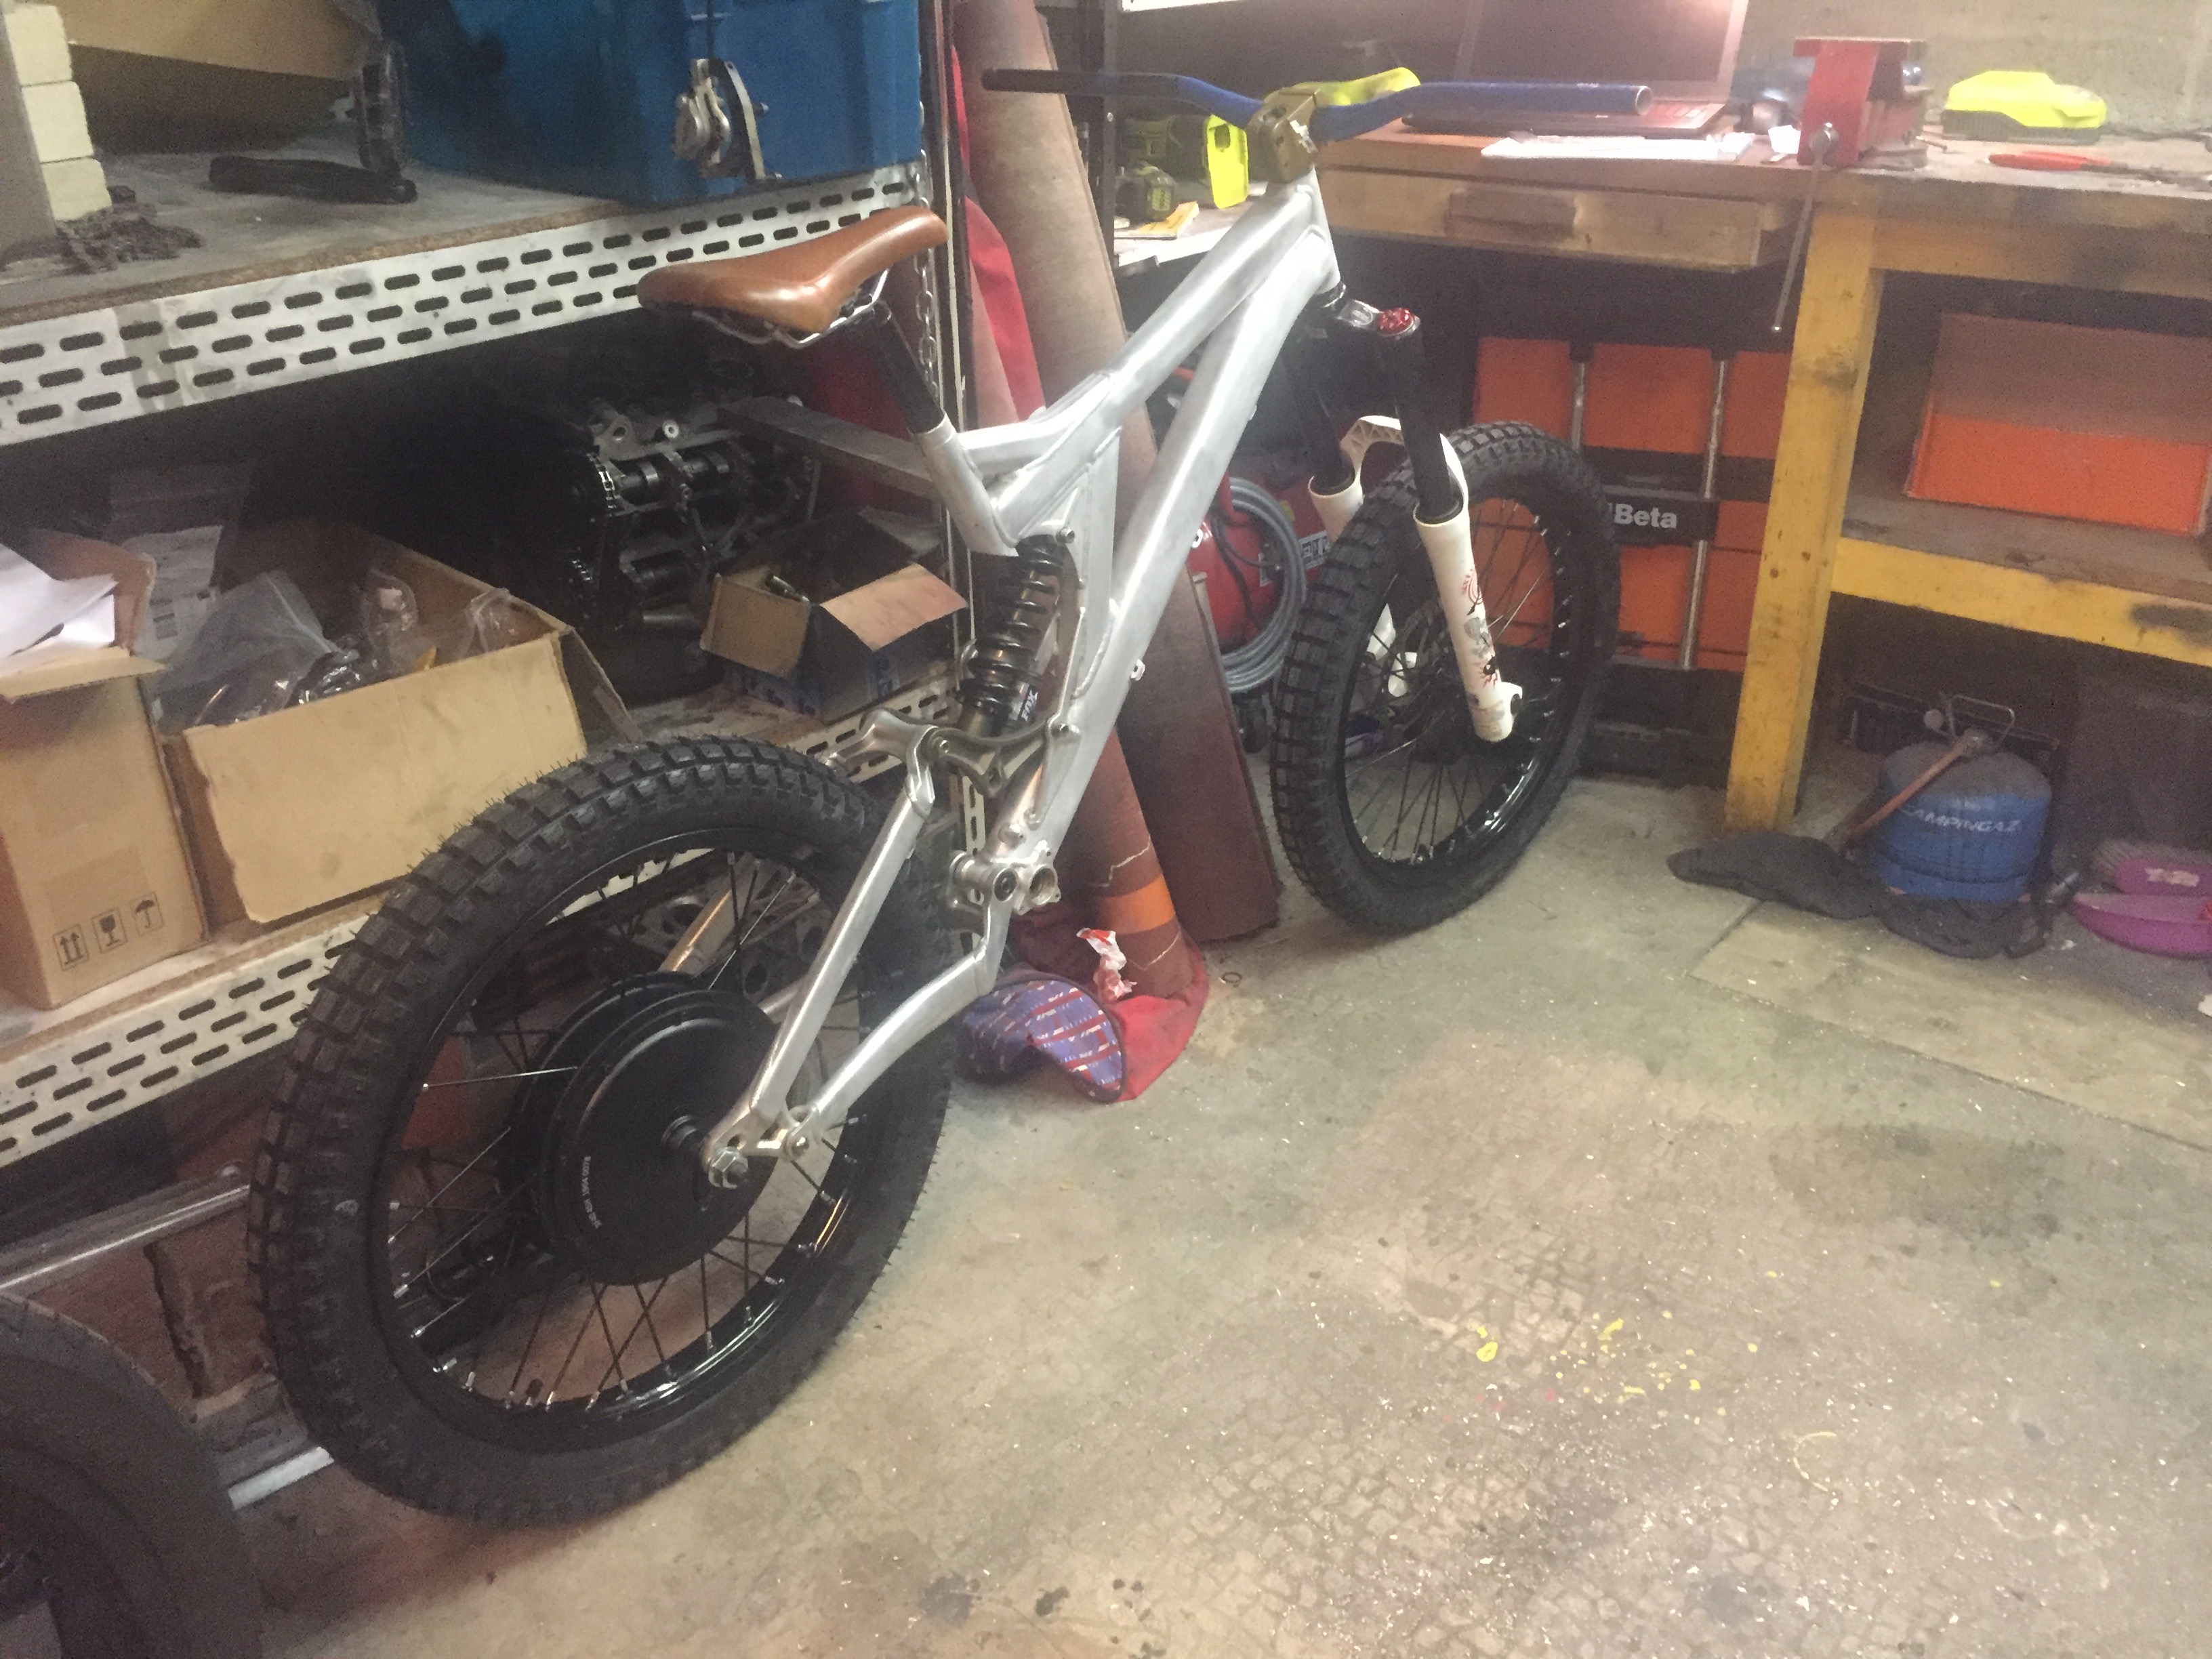
here is an assembly test
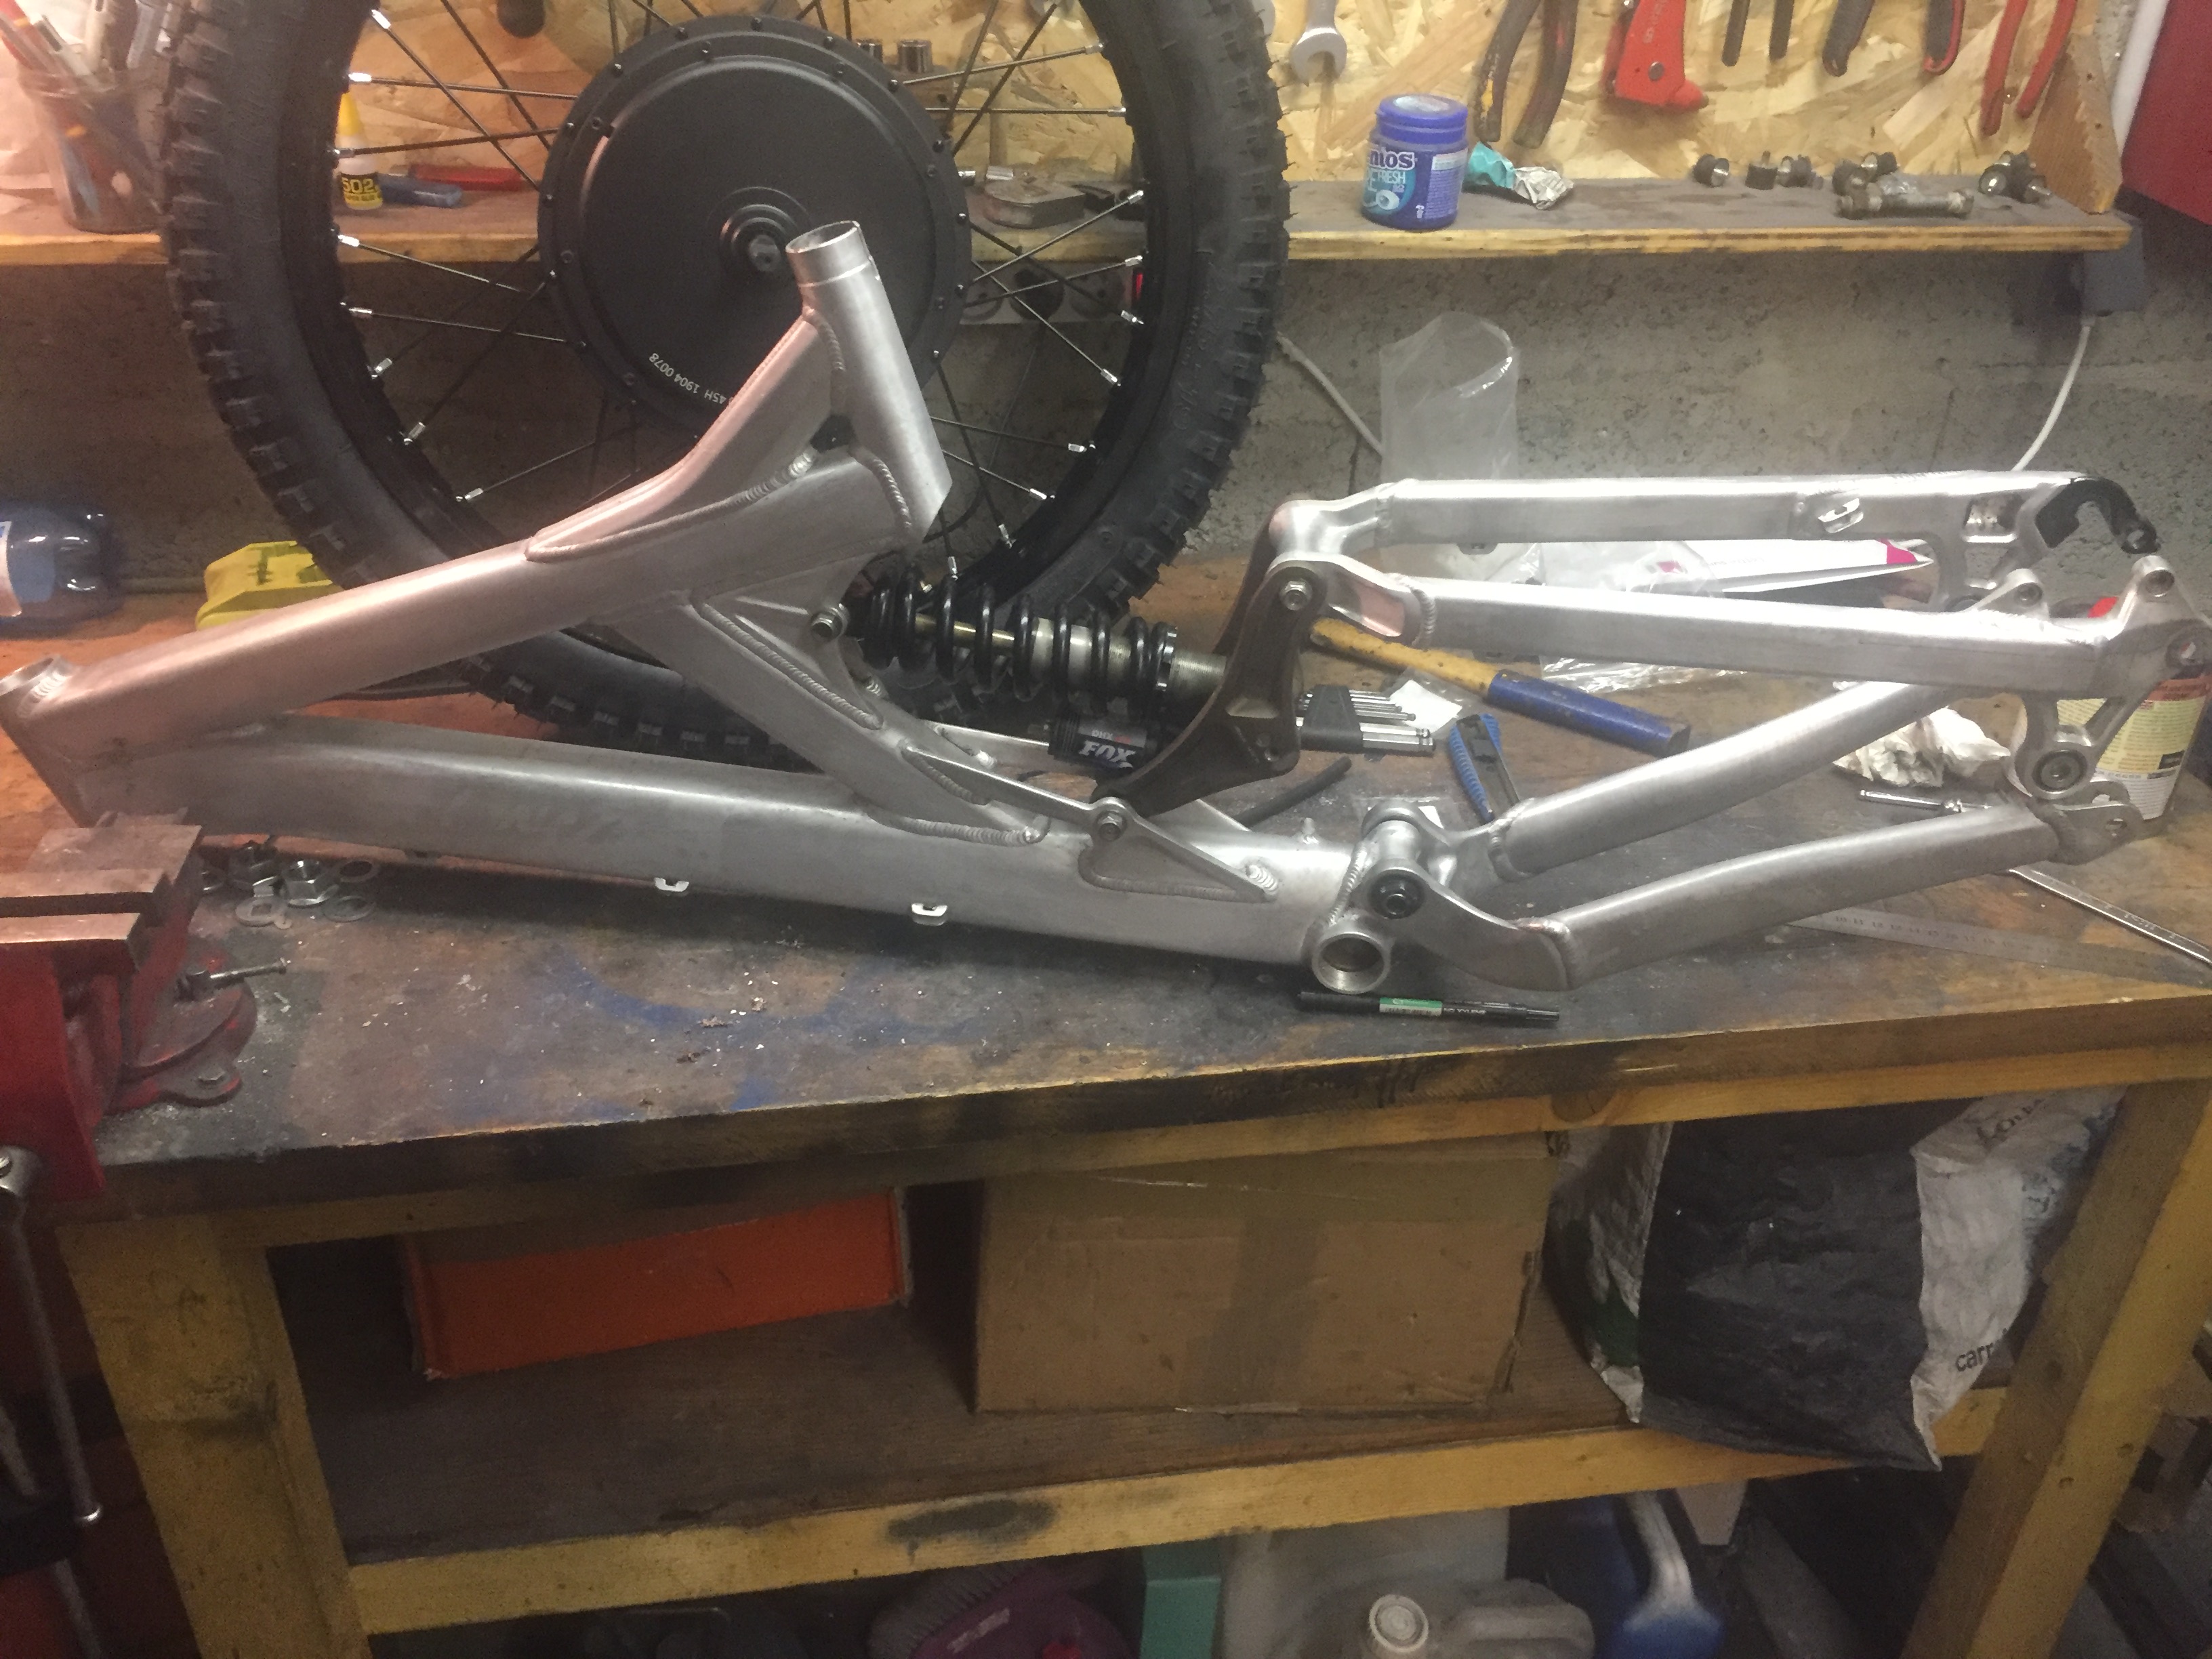
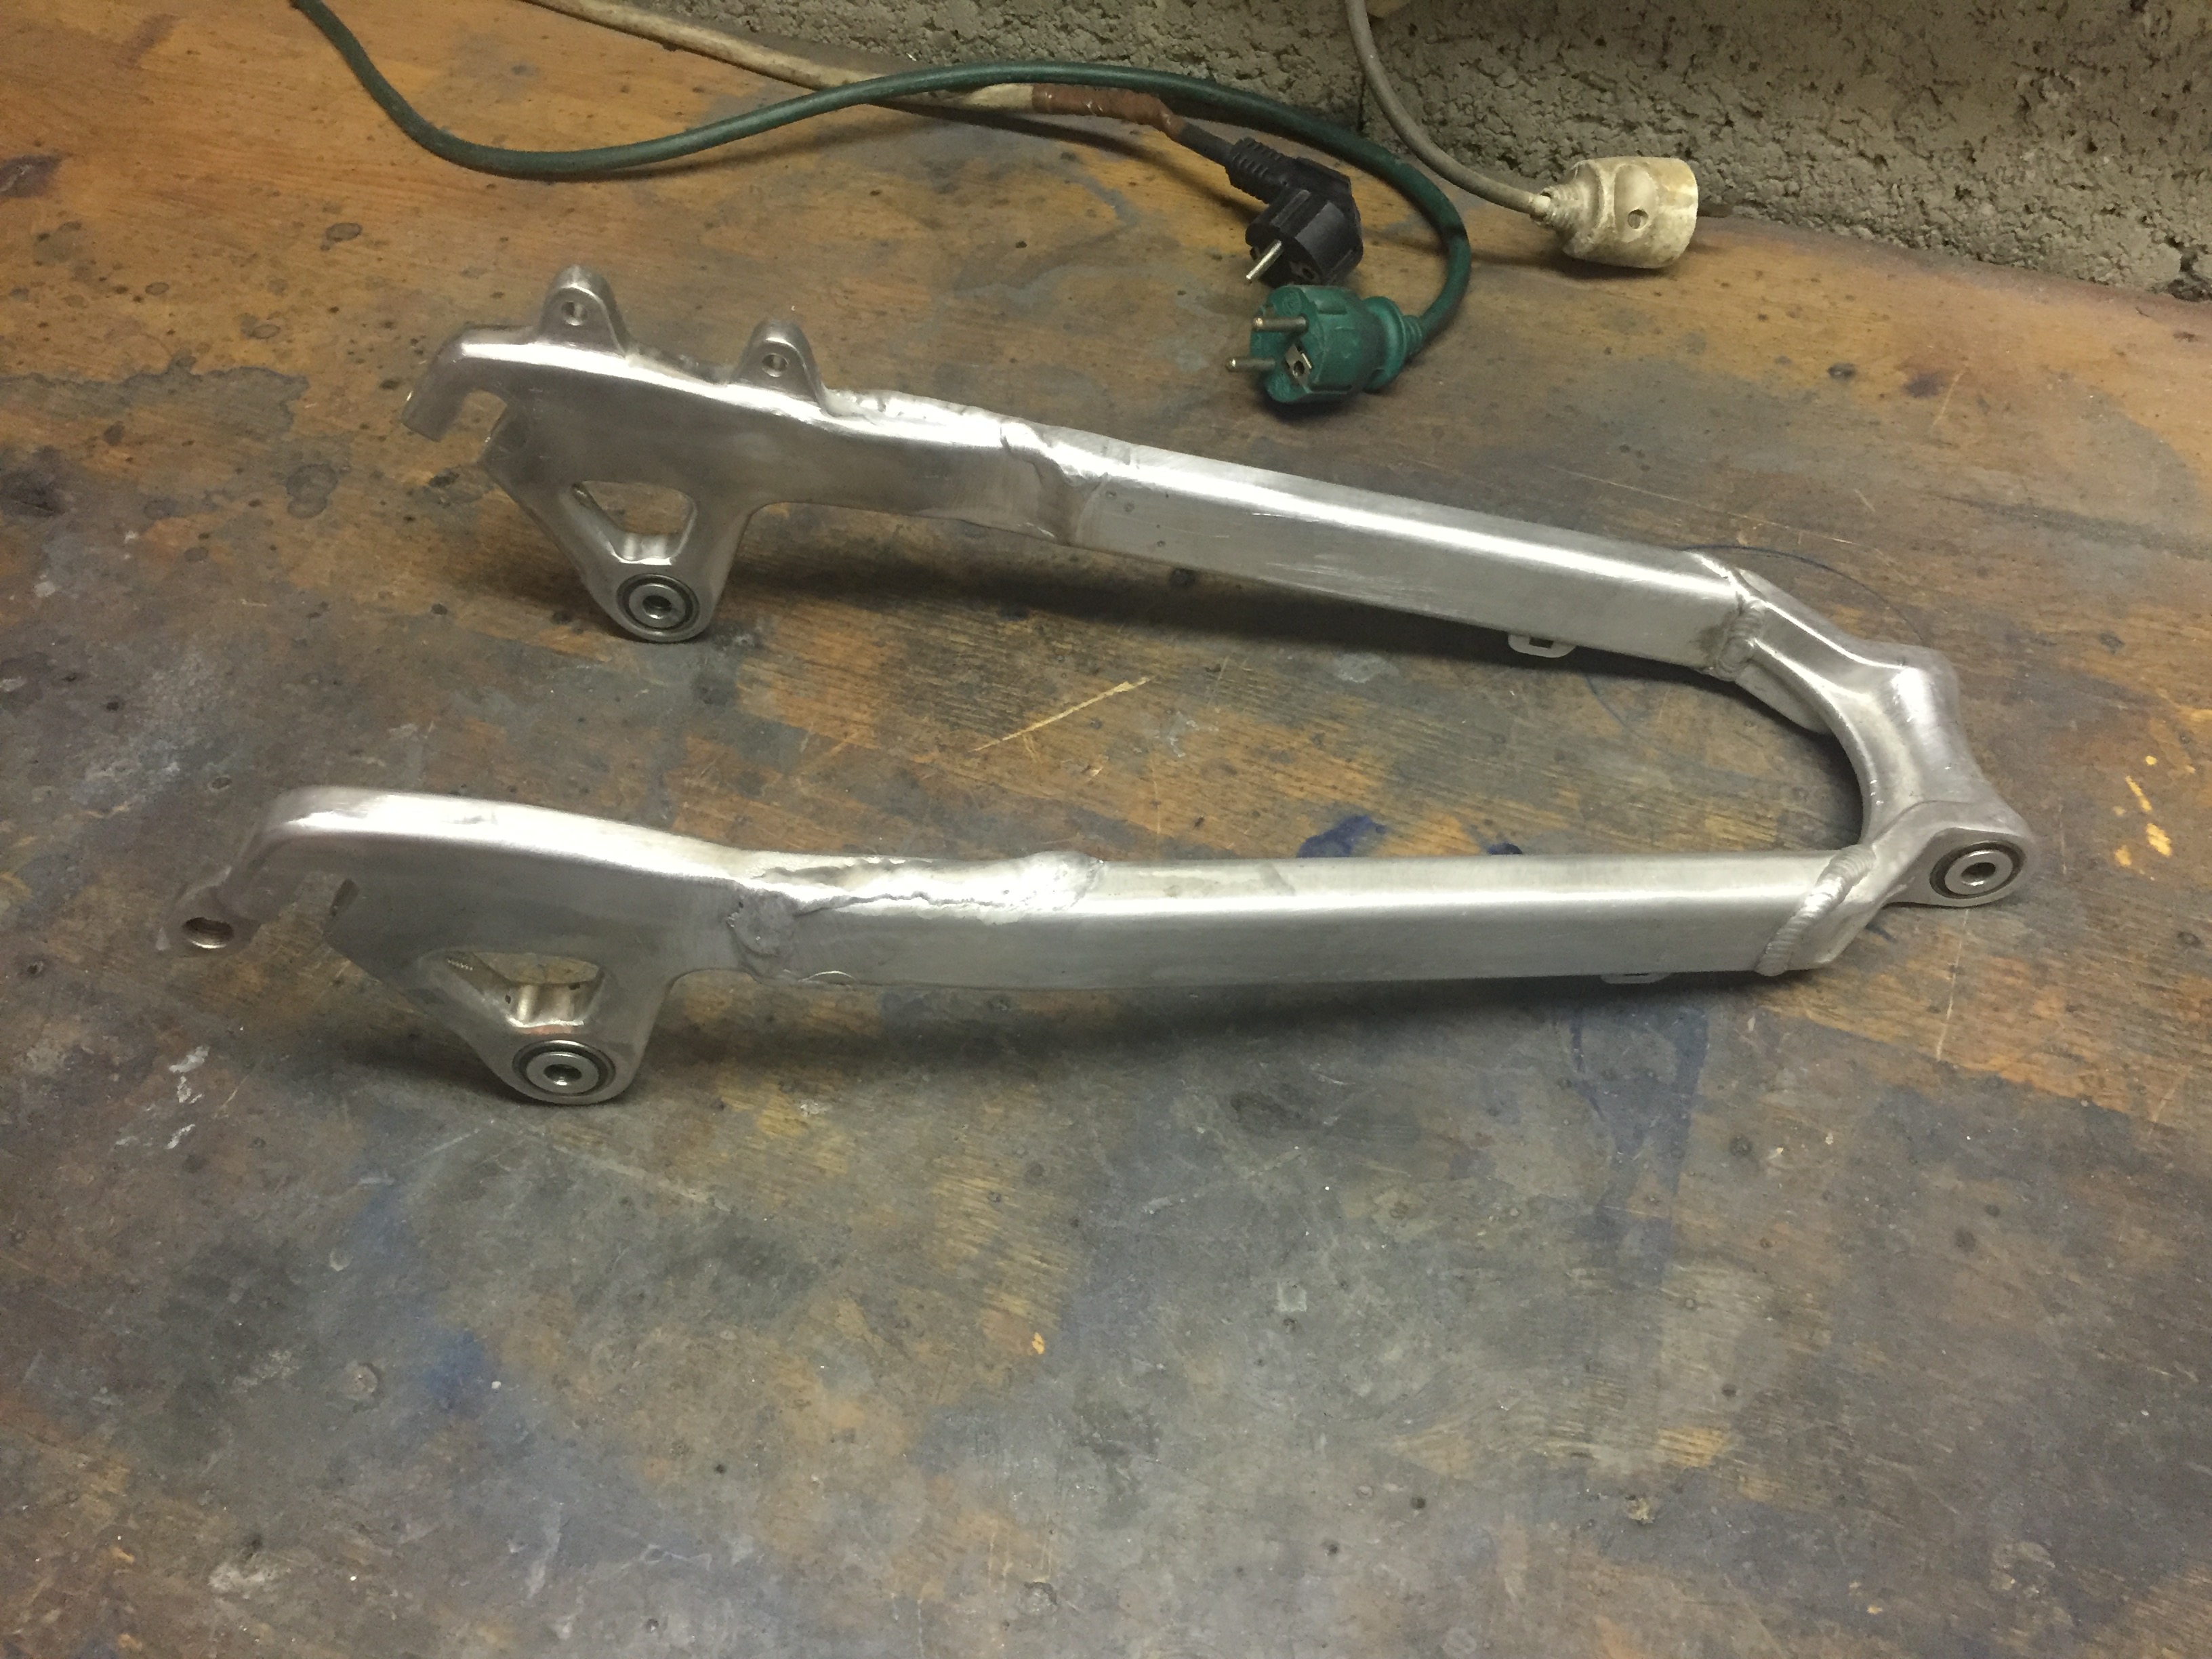
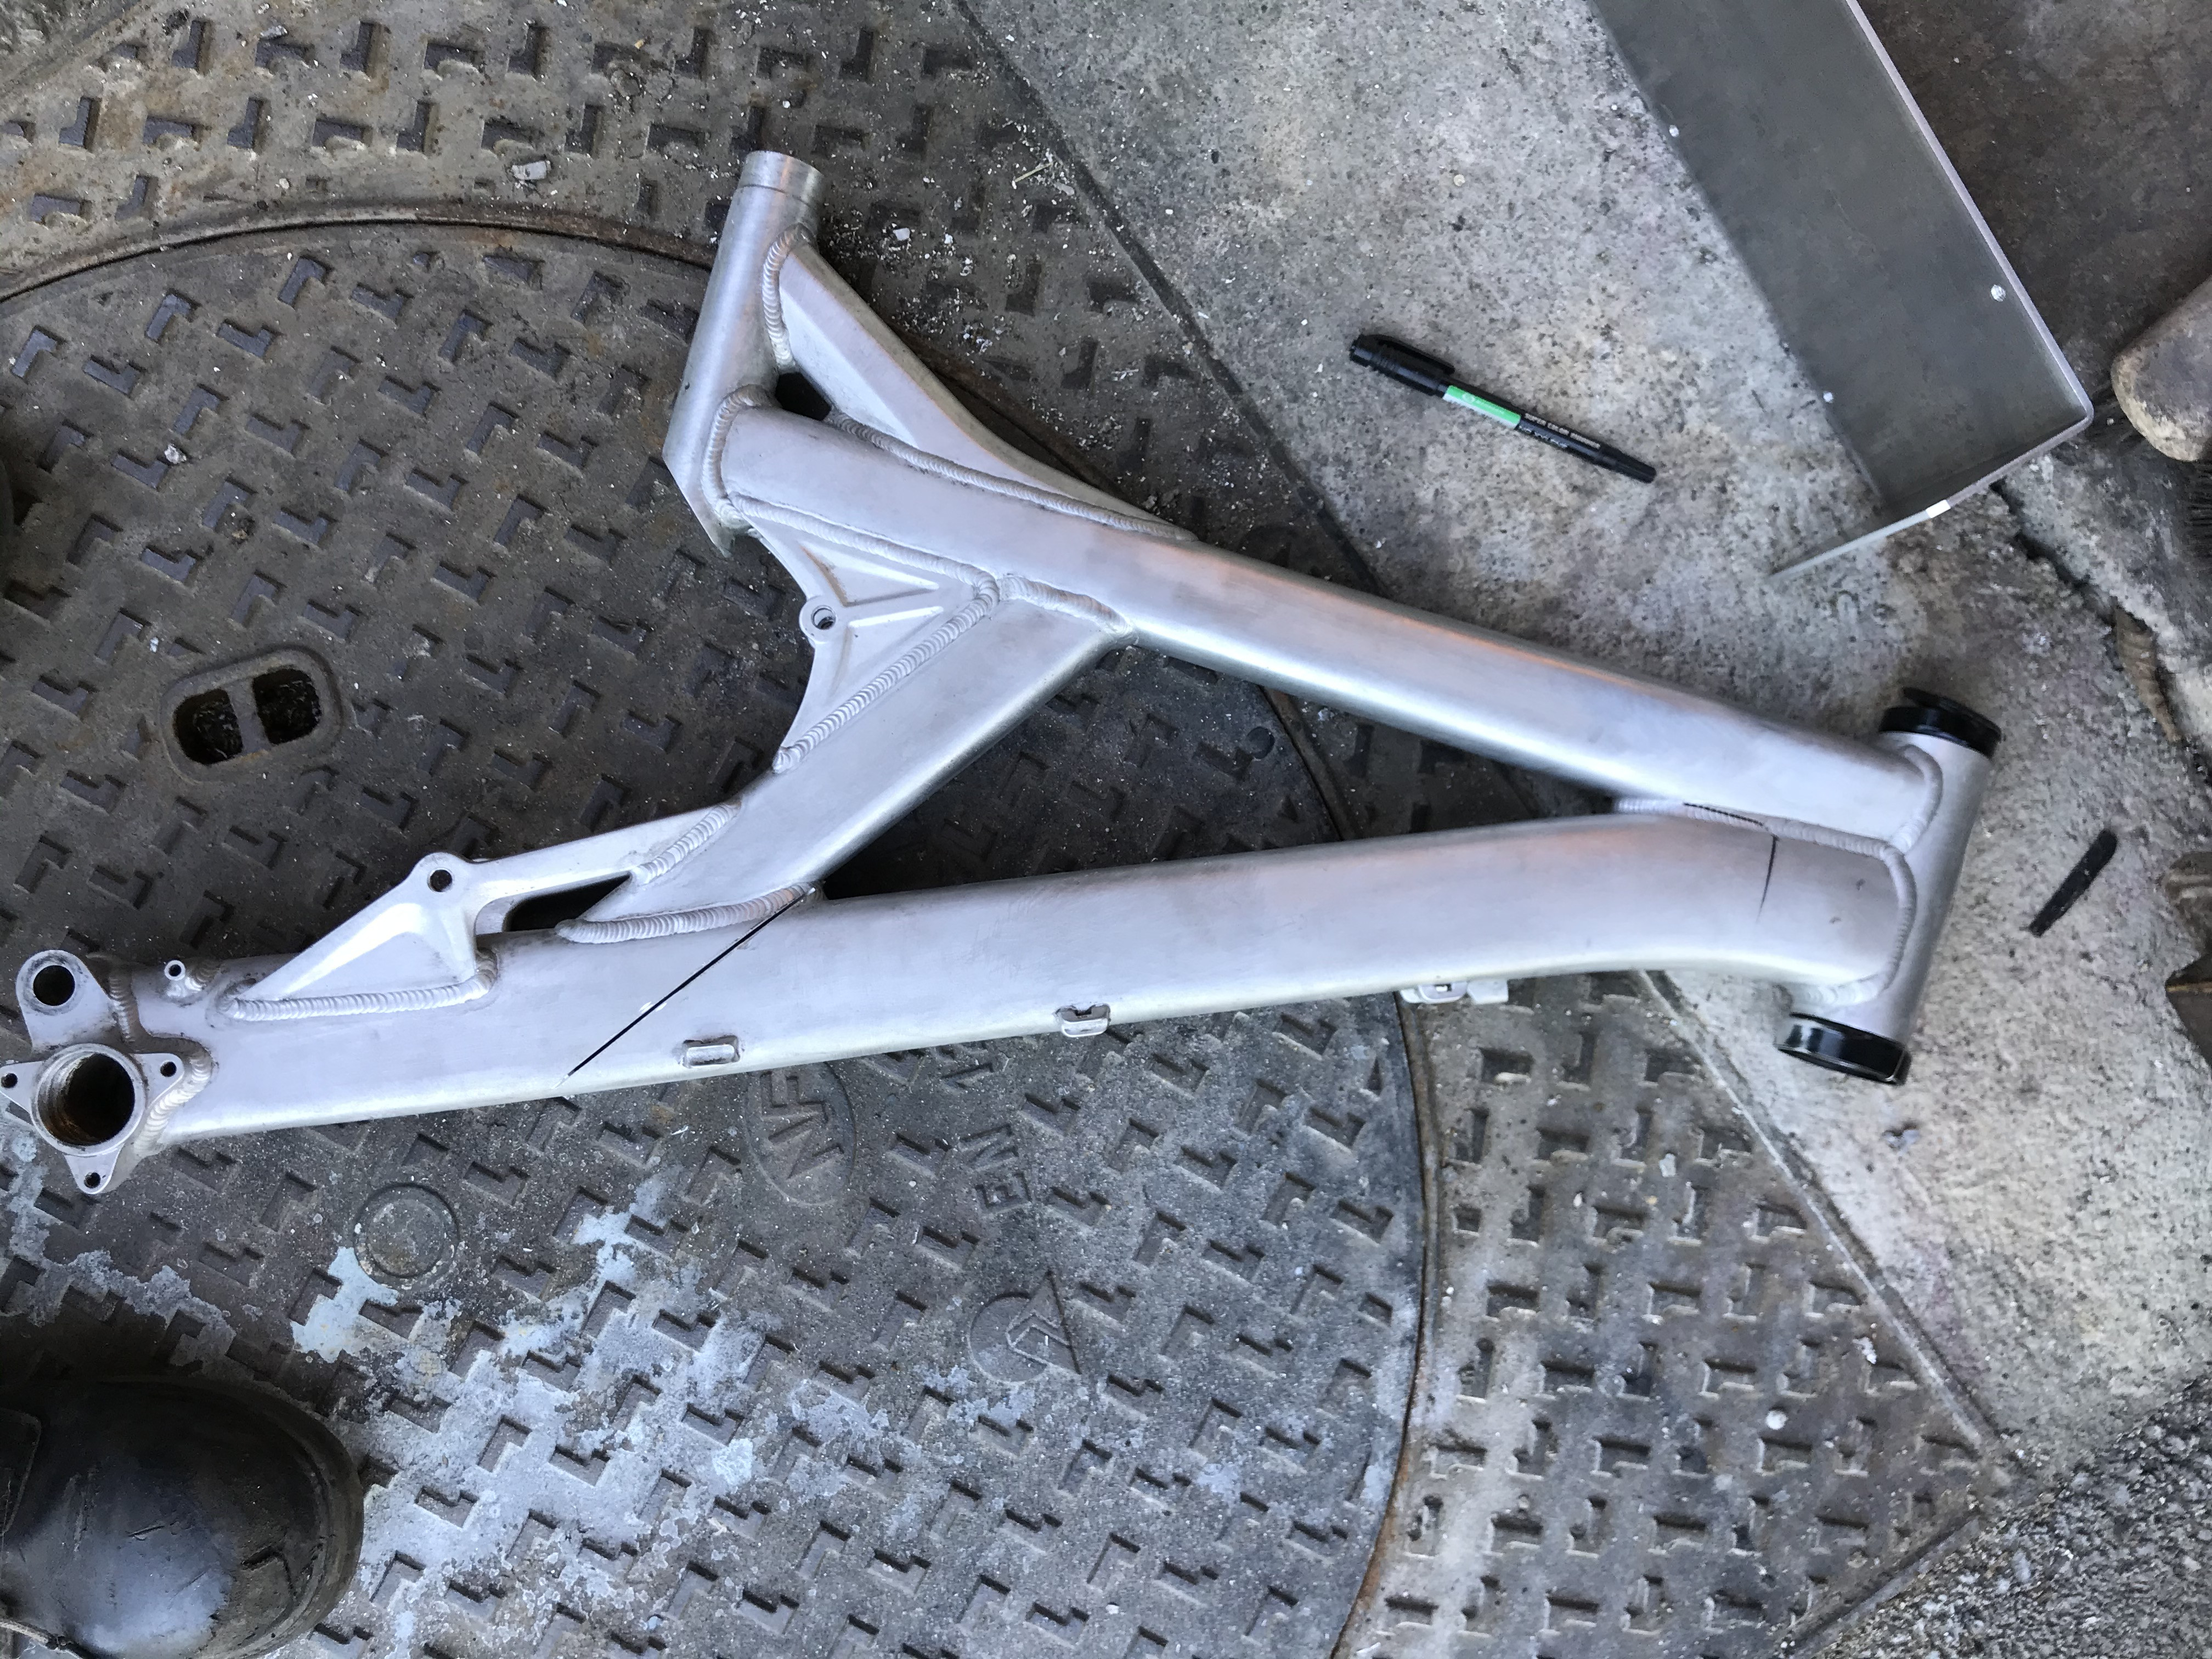
First problem, the actual frame dropout will not handle the motor torque nicely.
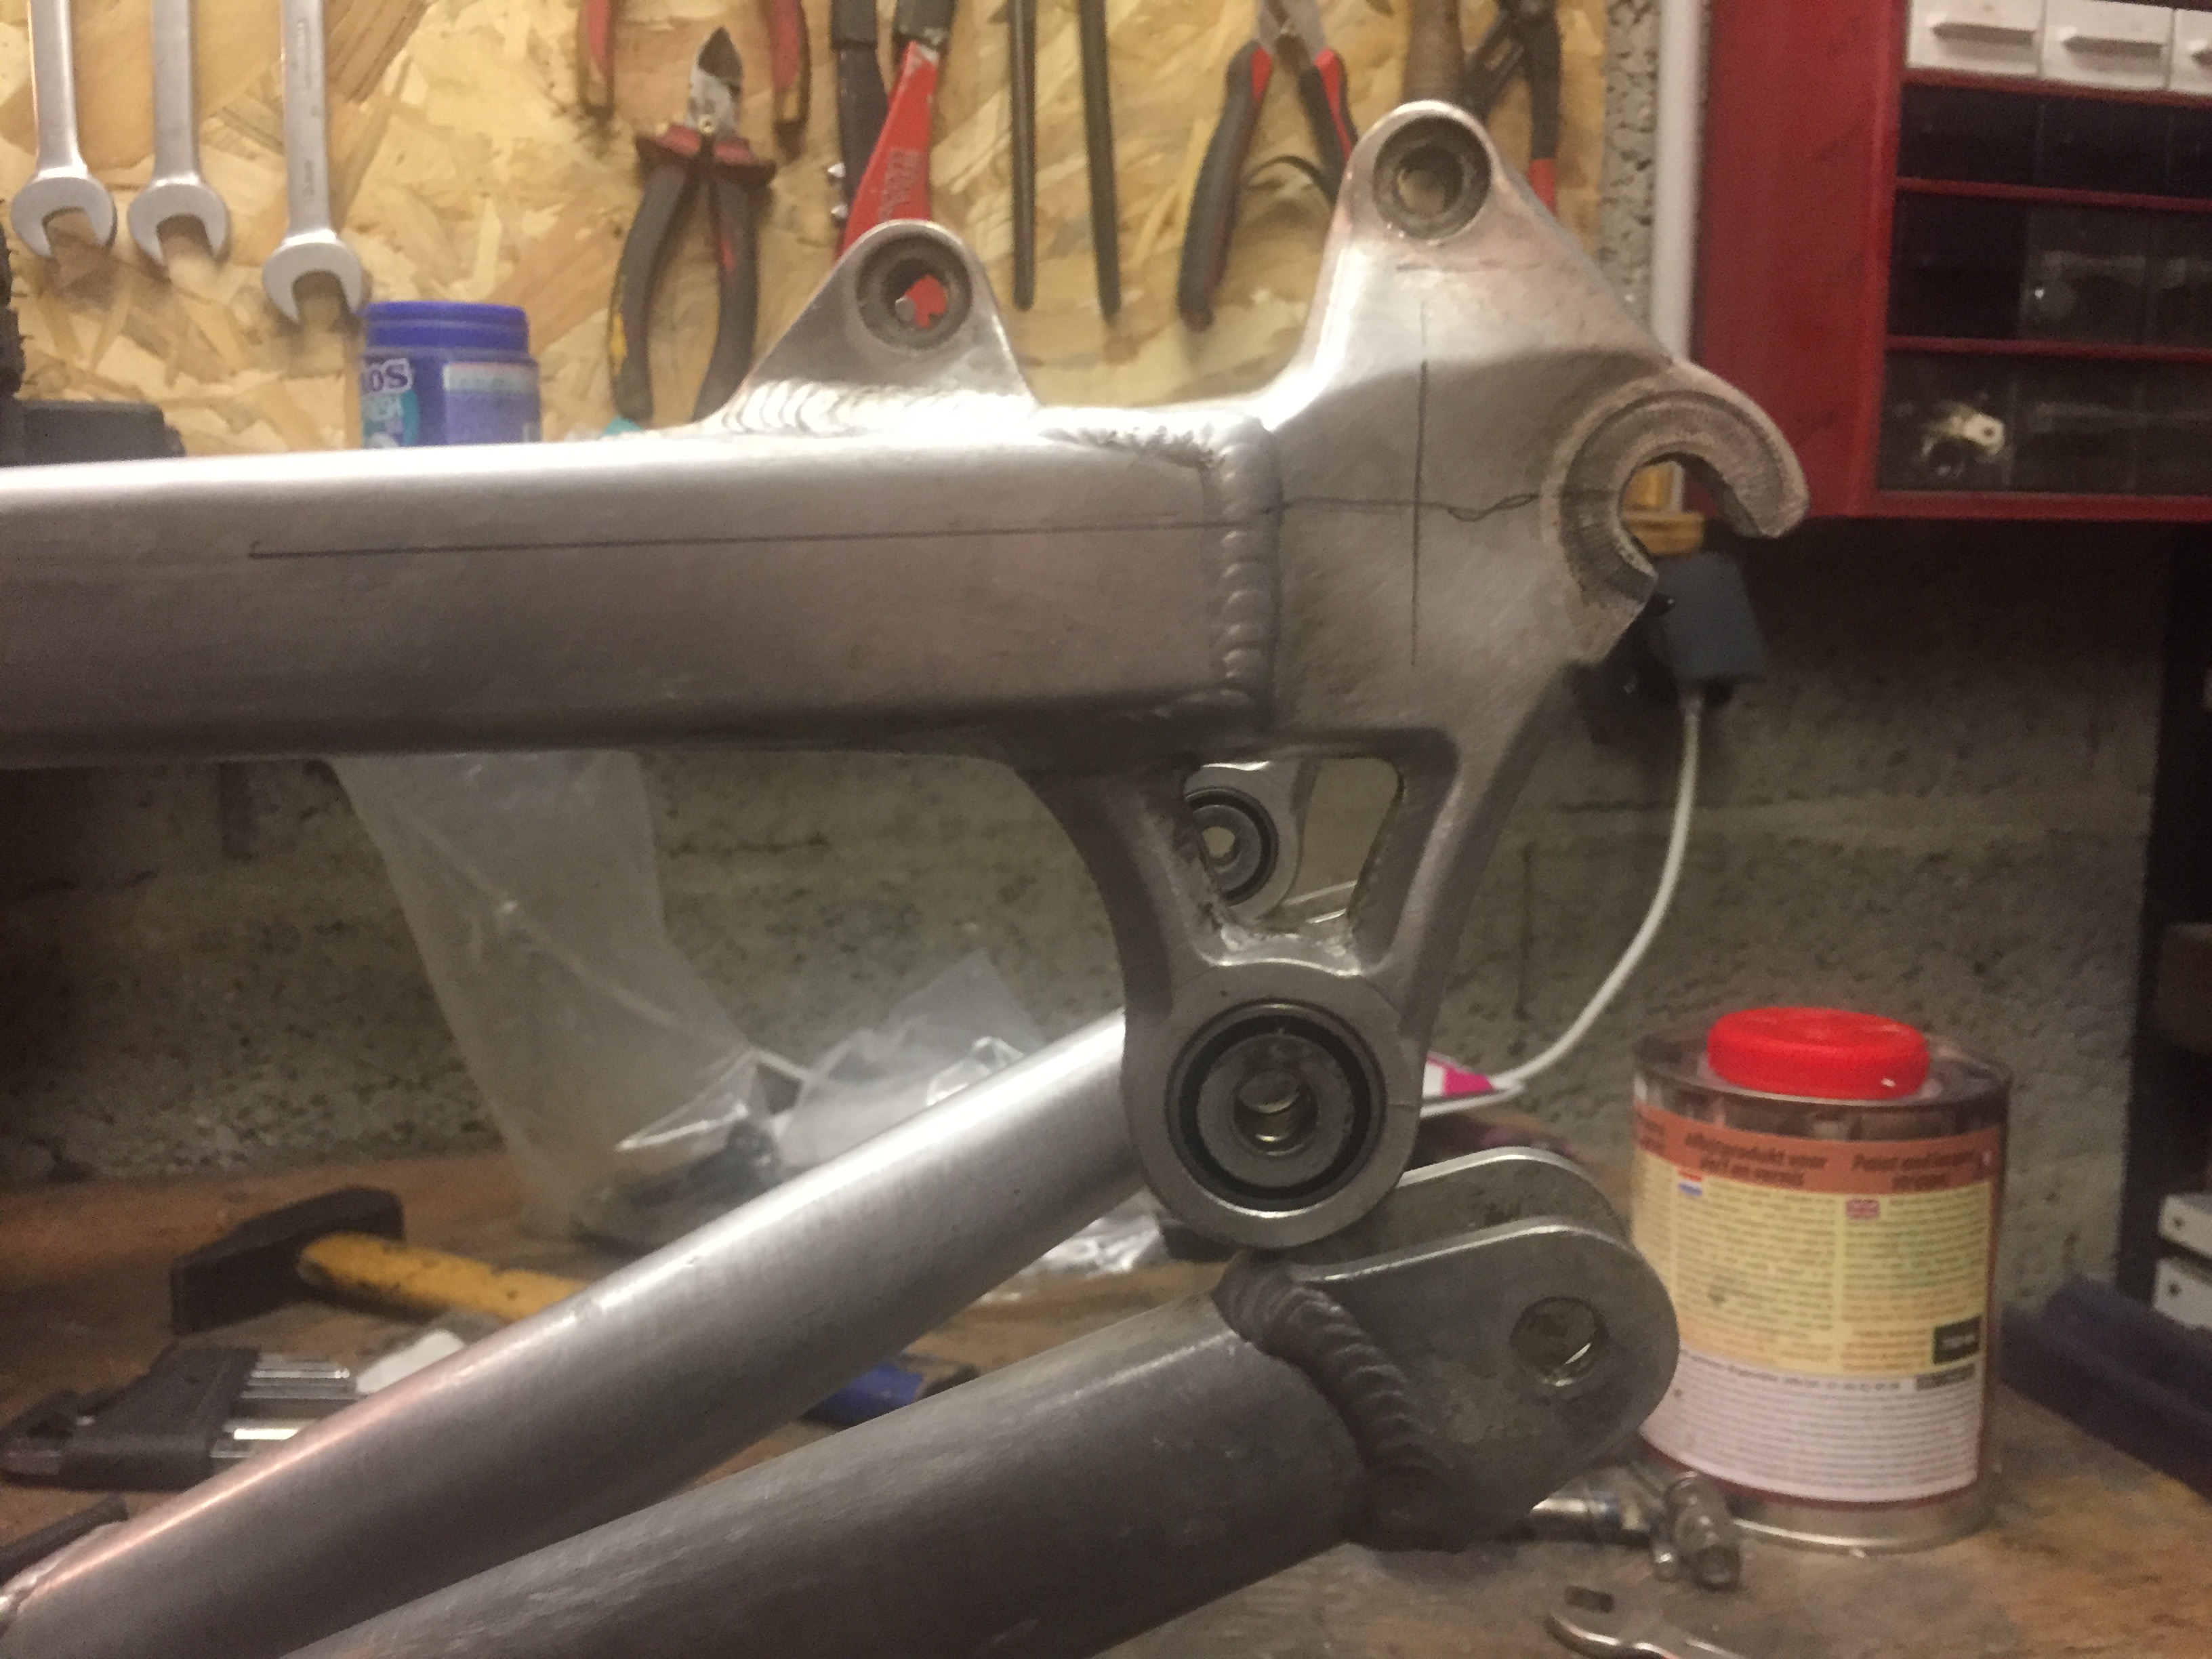
The second is there's no clearance between the motor and the actual caliper.
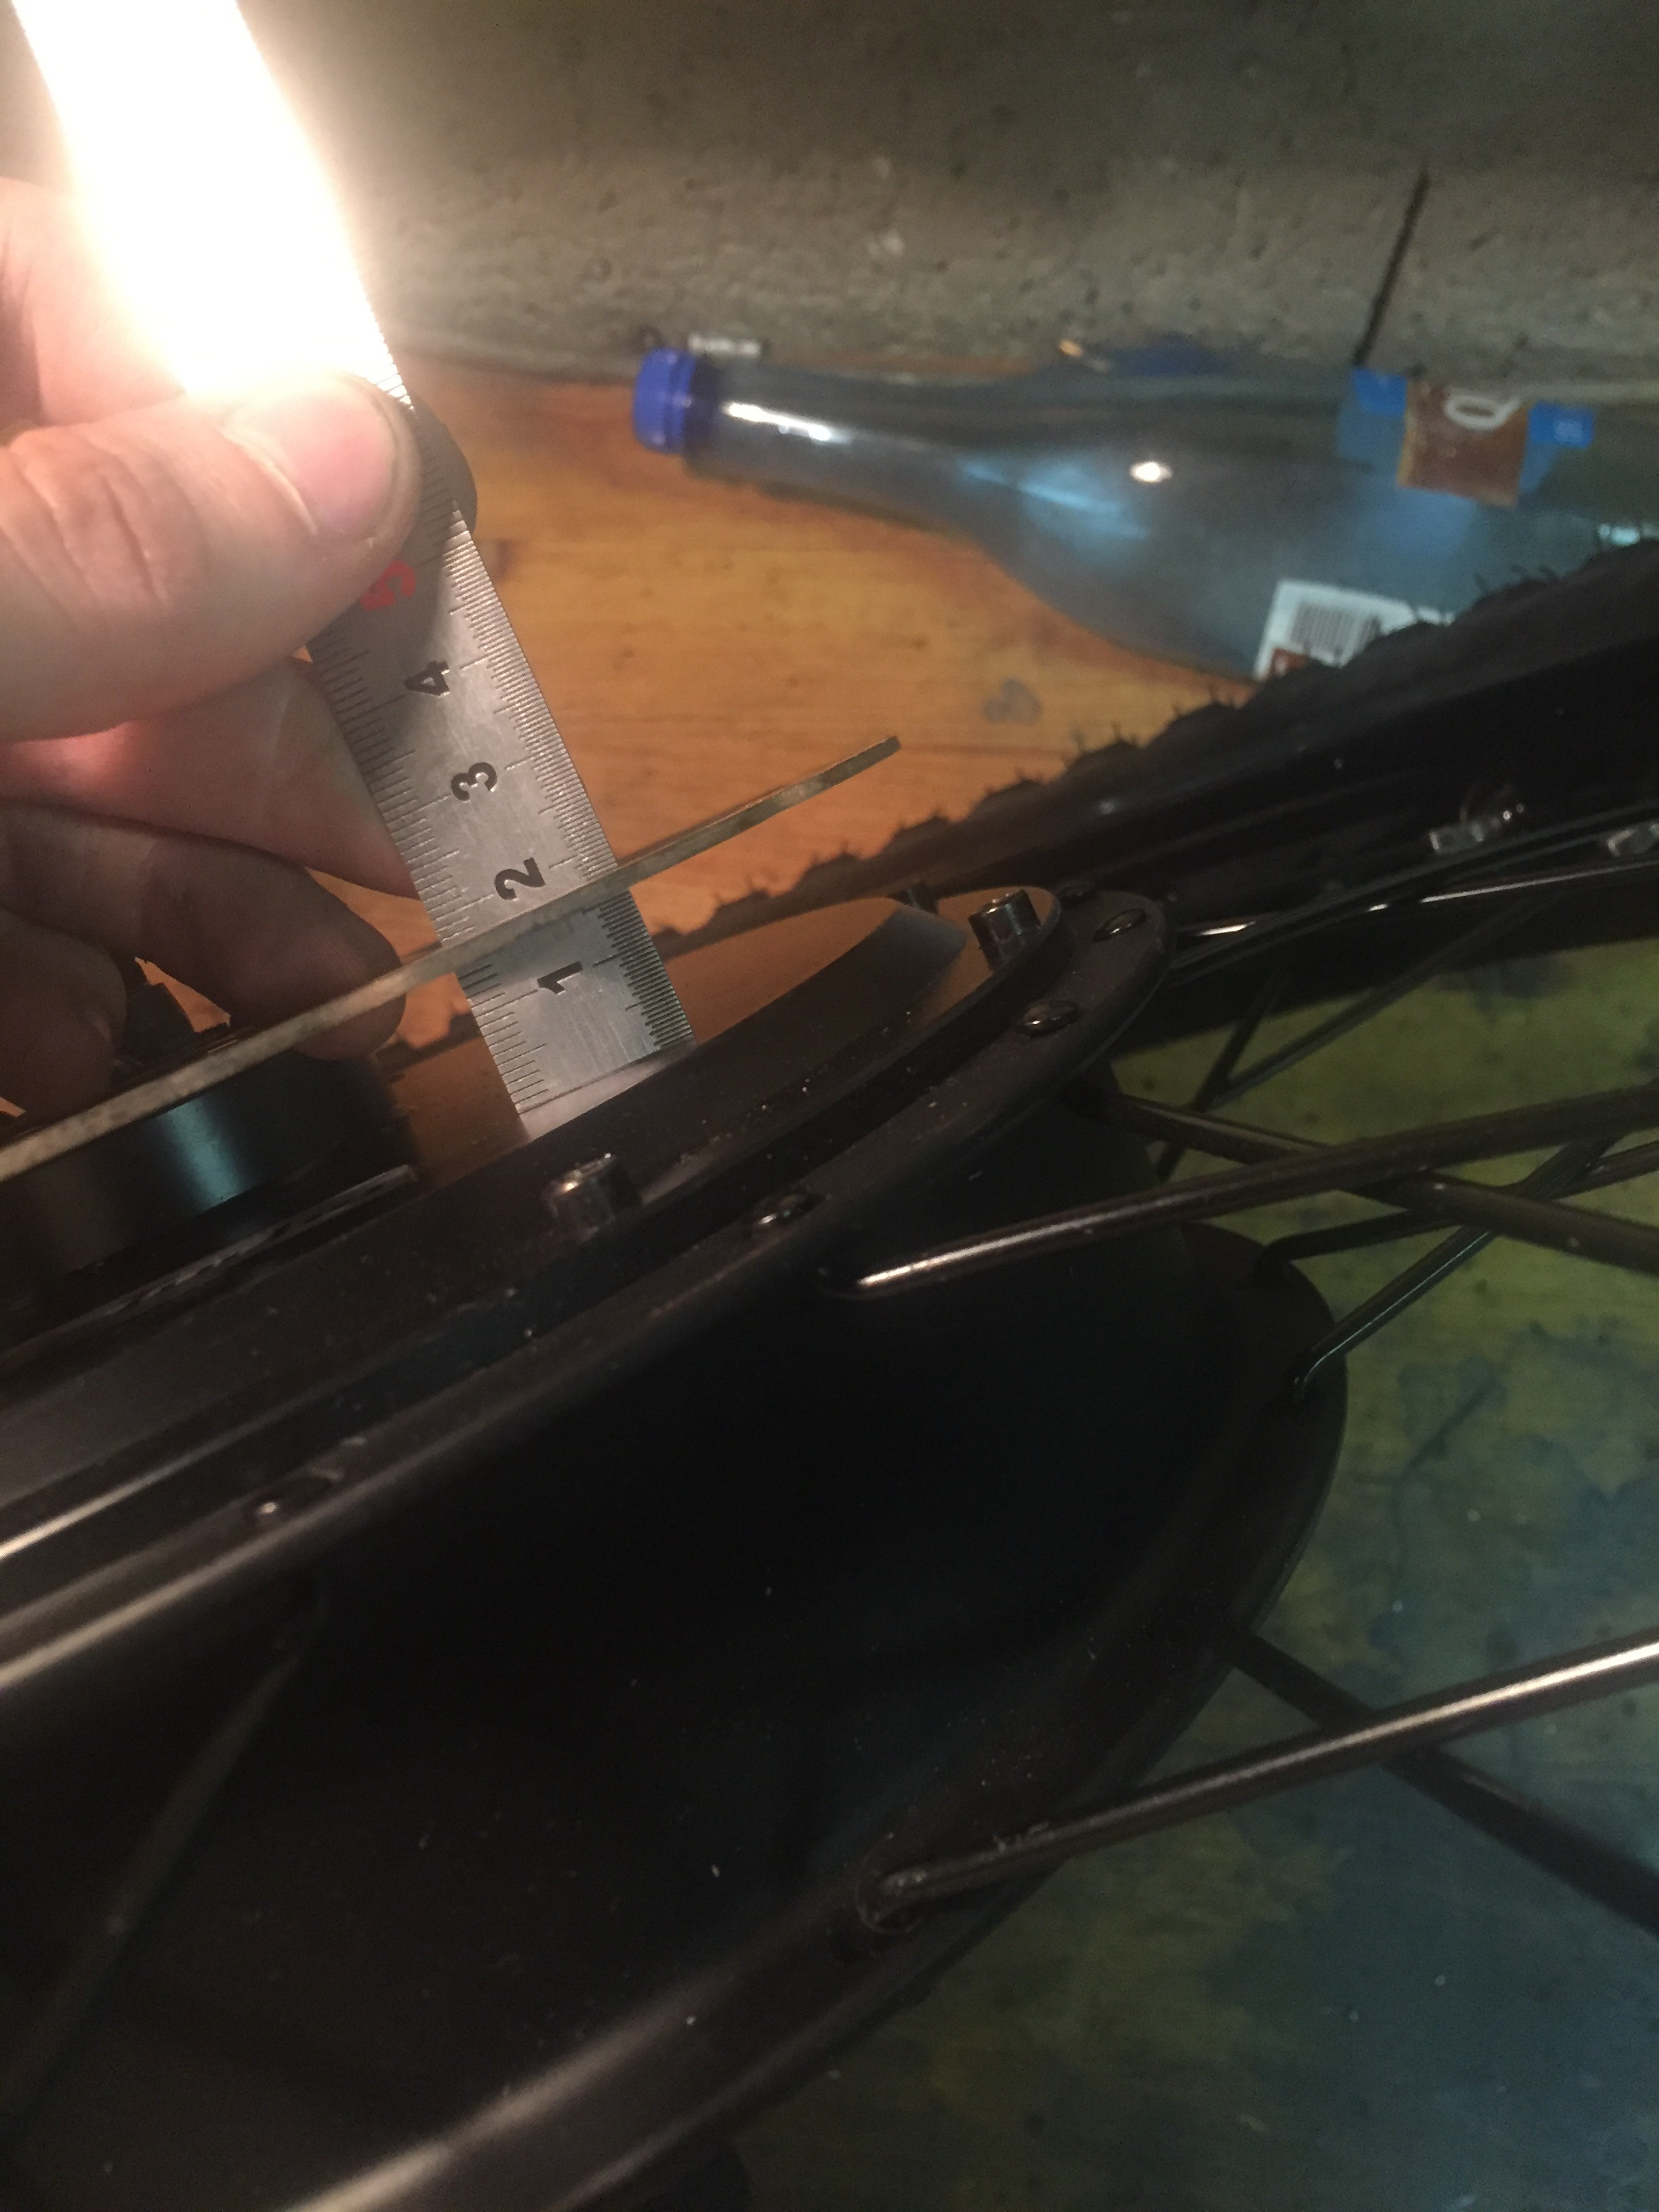
maybe it will be ok with a 5mm spacer...
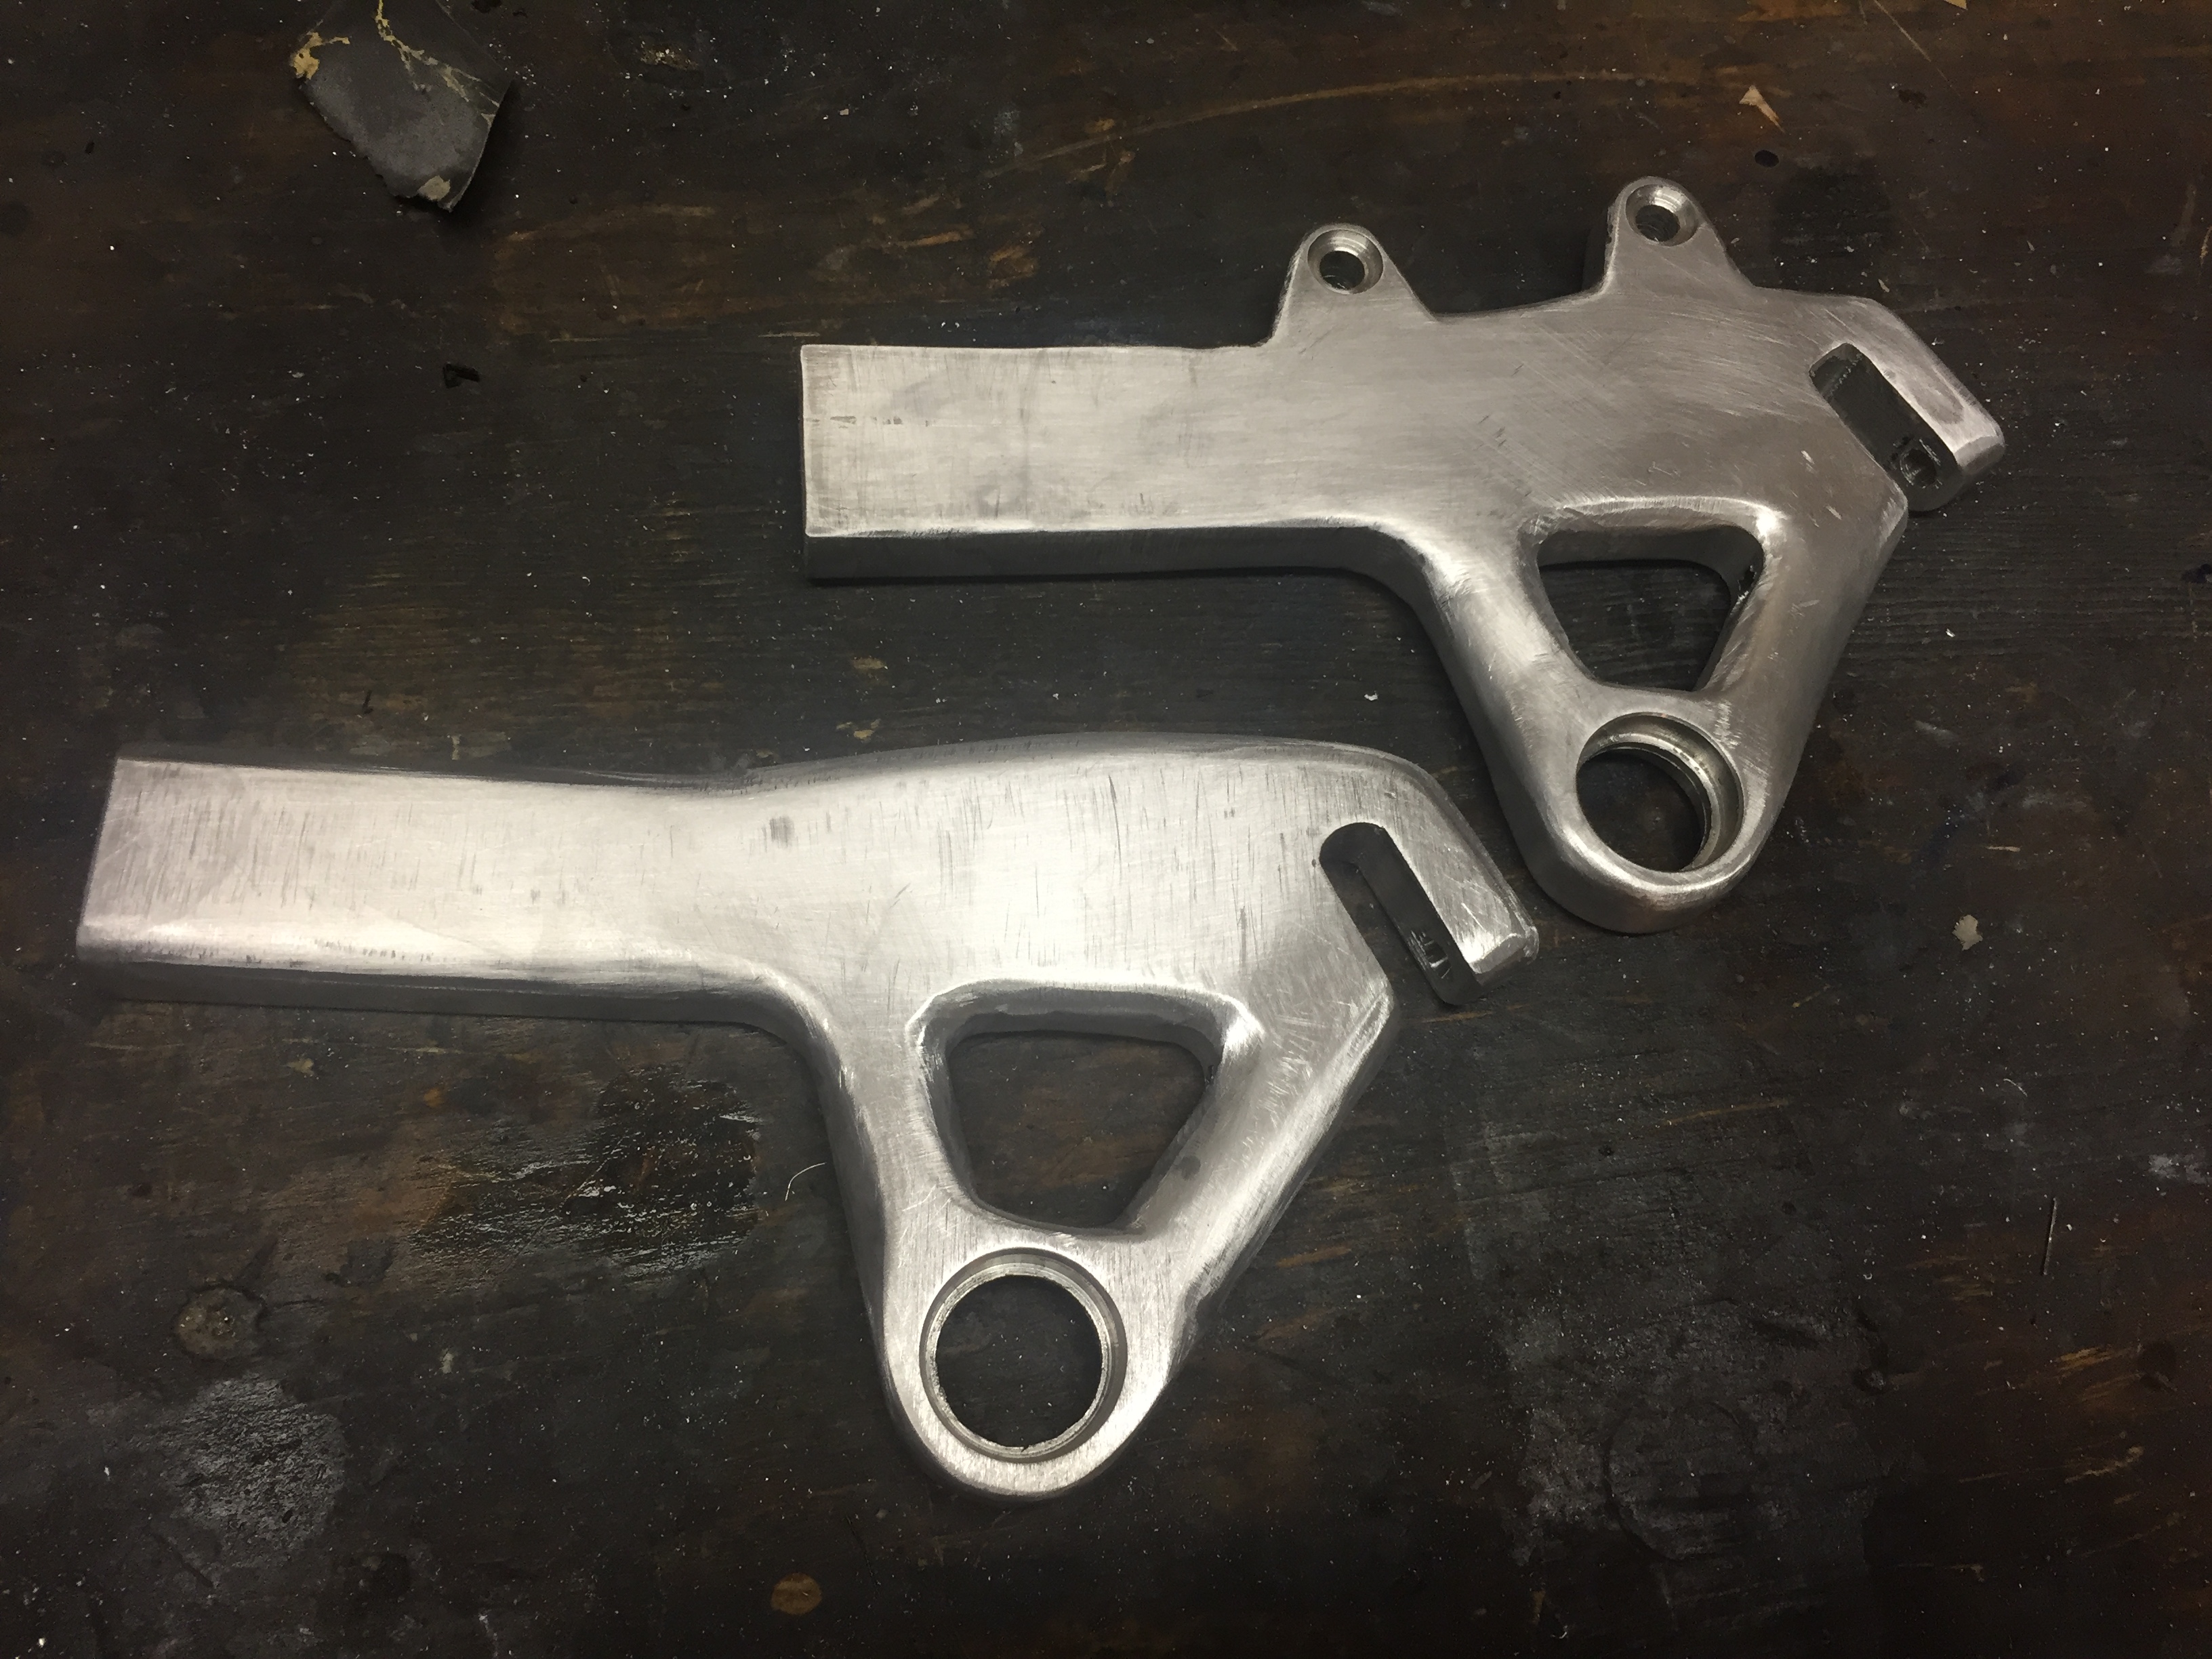
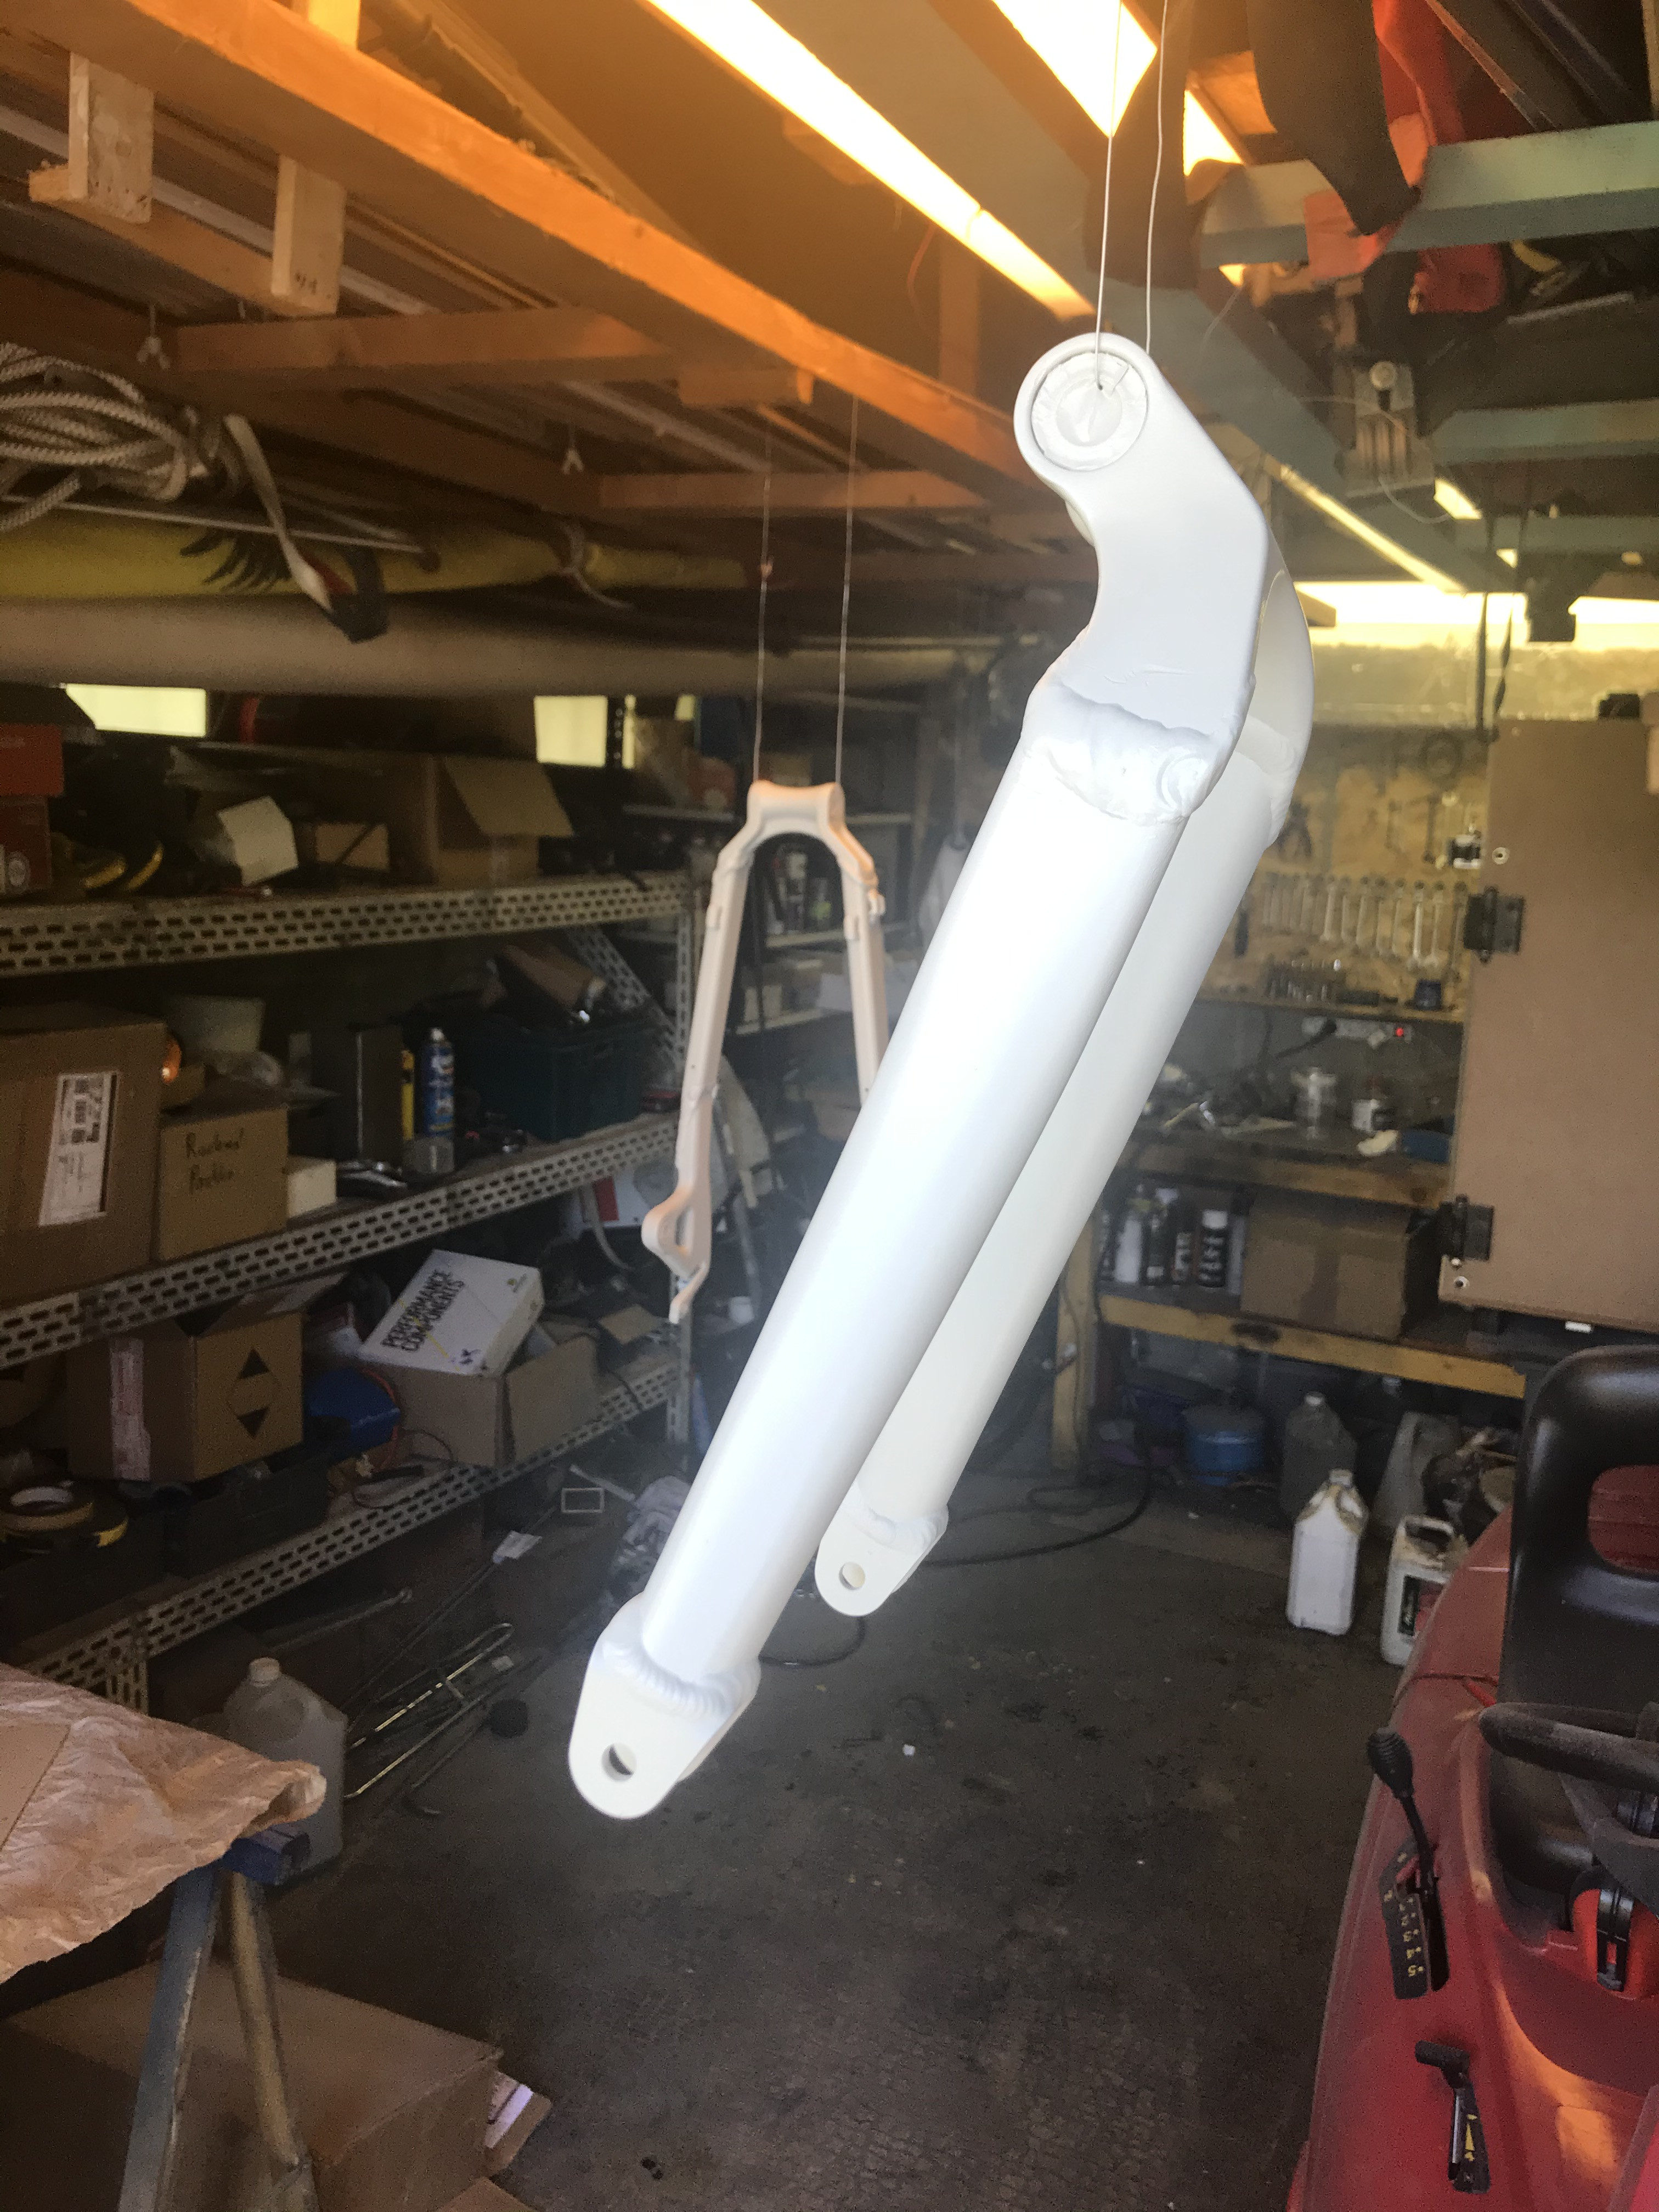
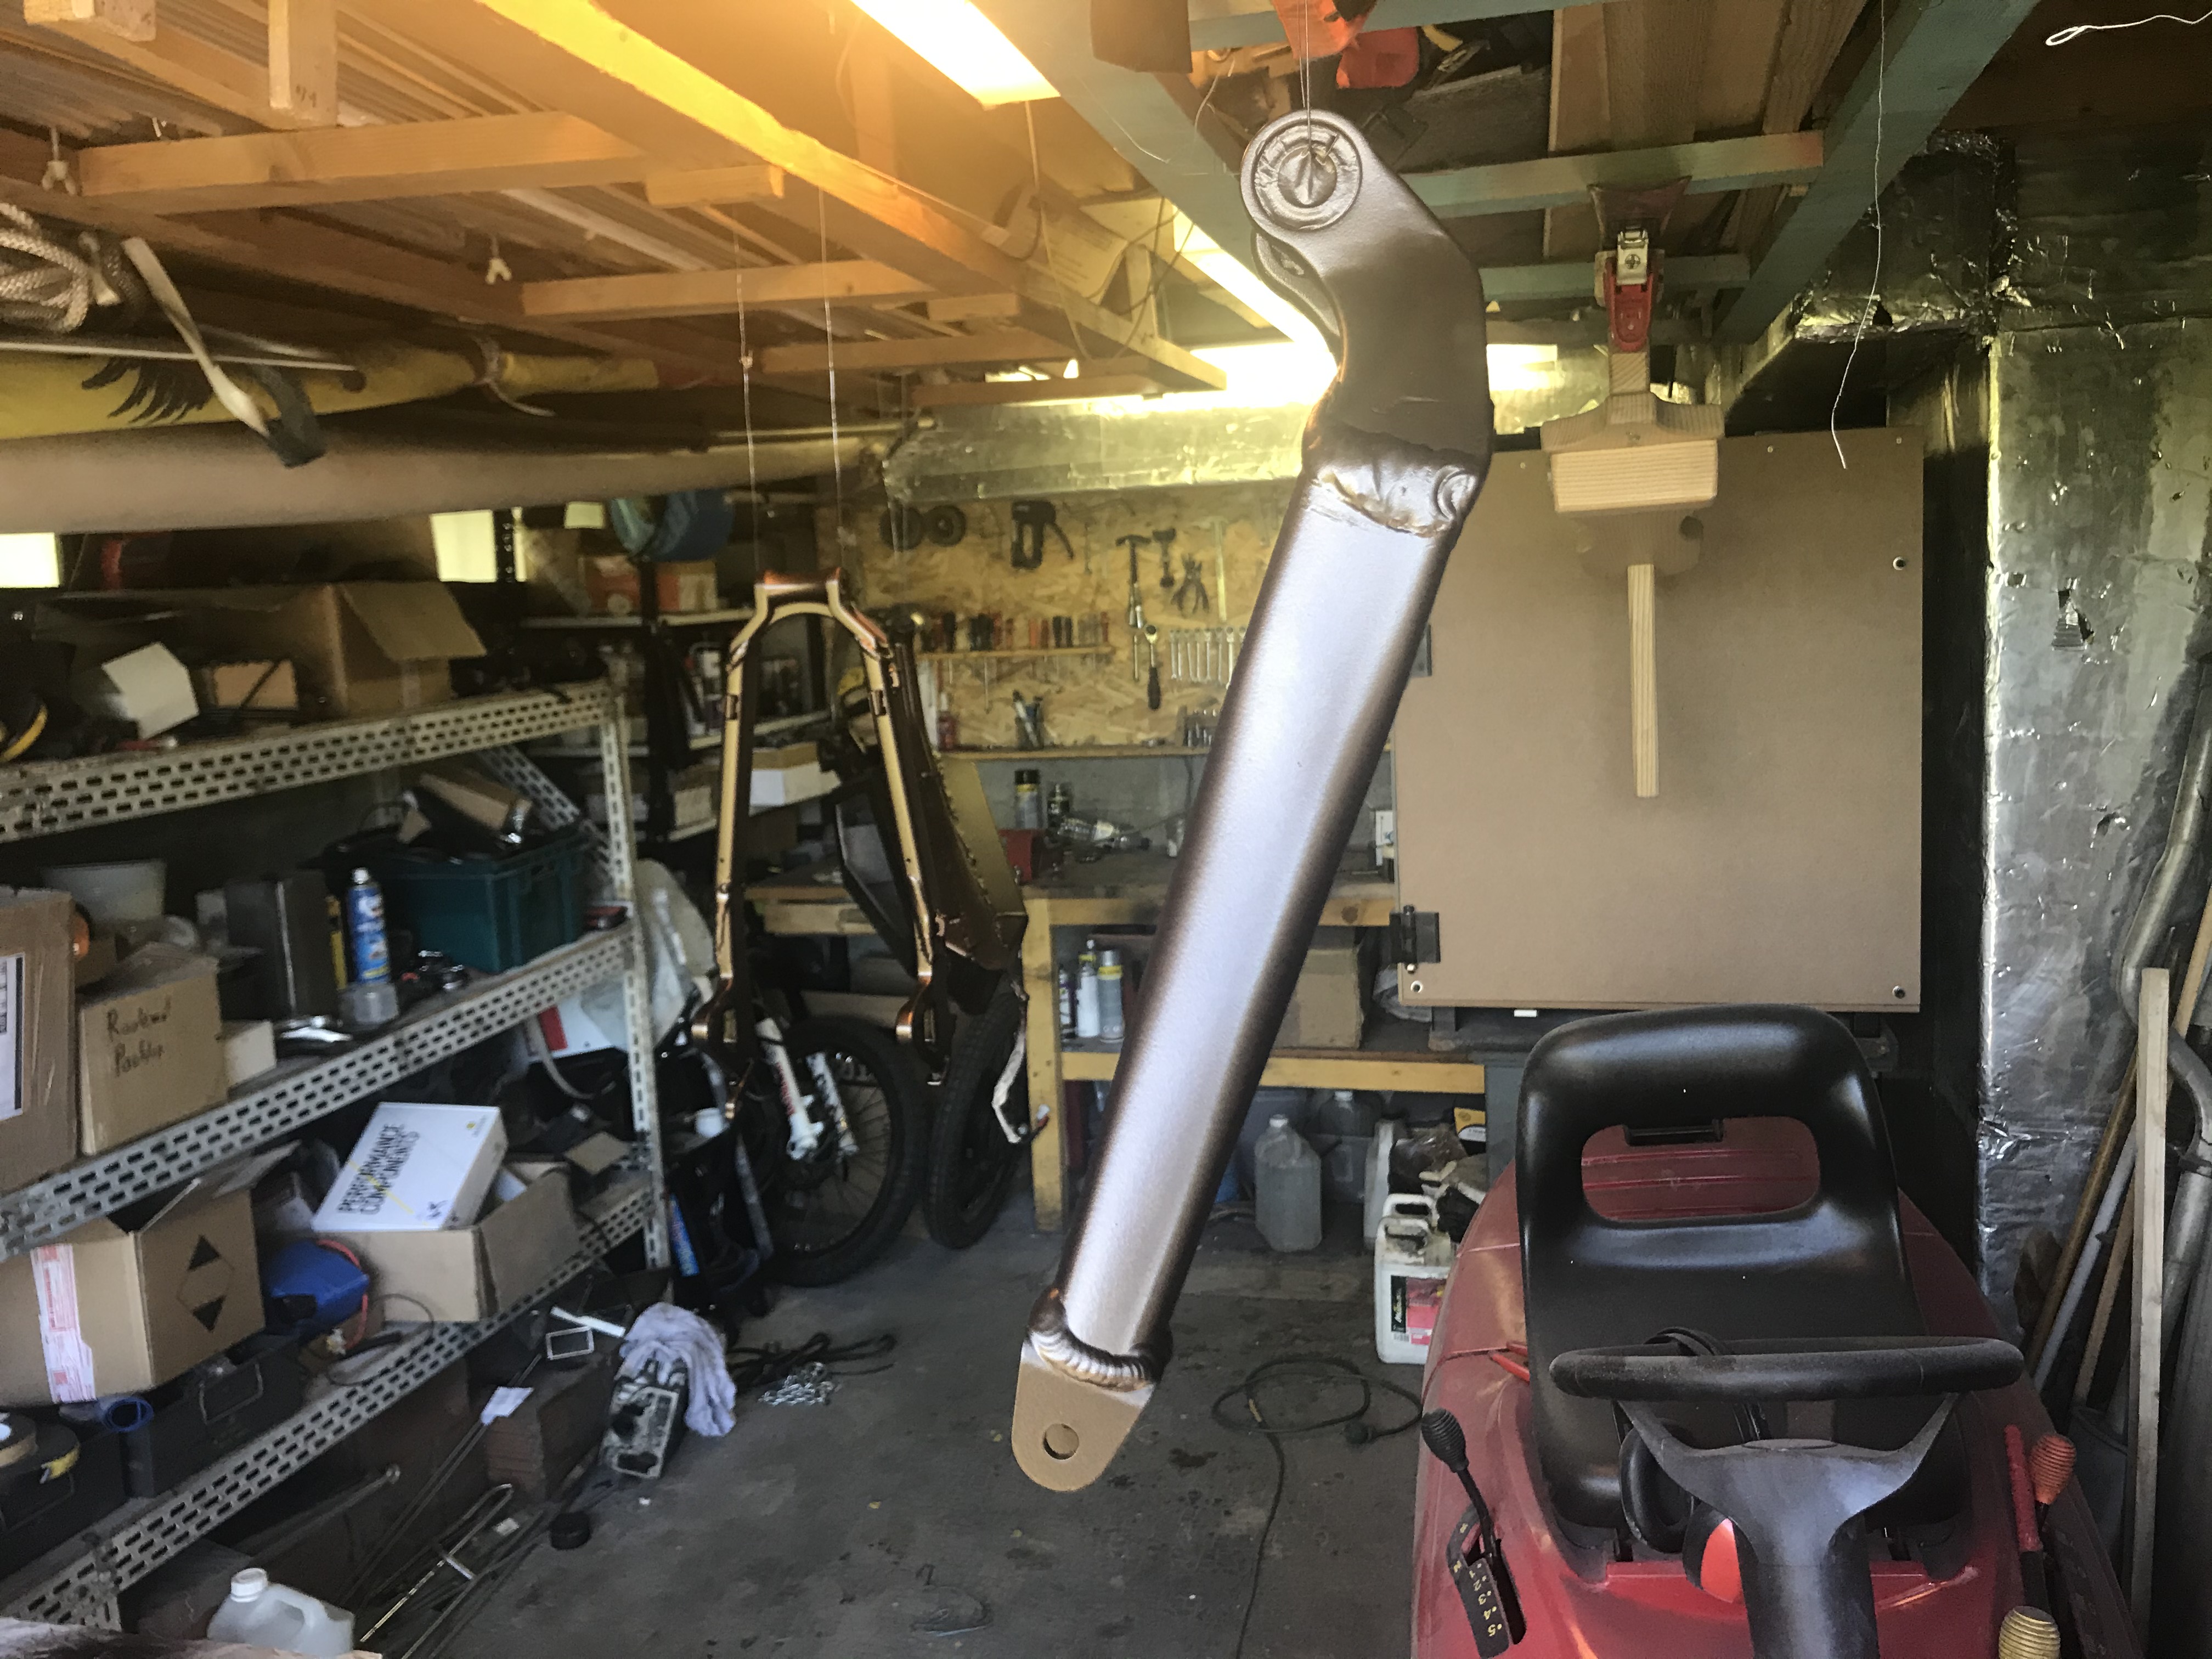
The cleanest solution is to rebuilt the frame dropout. It will be stronger, more reliable, and no need for torque arms
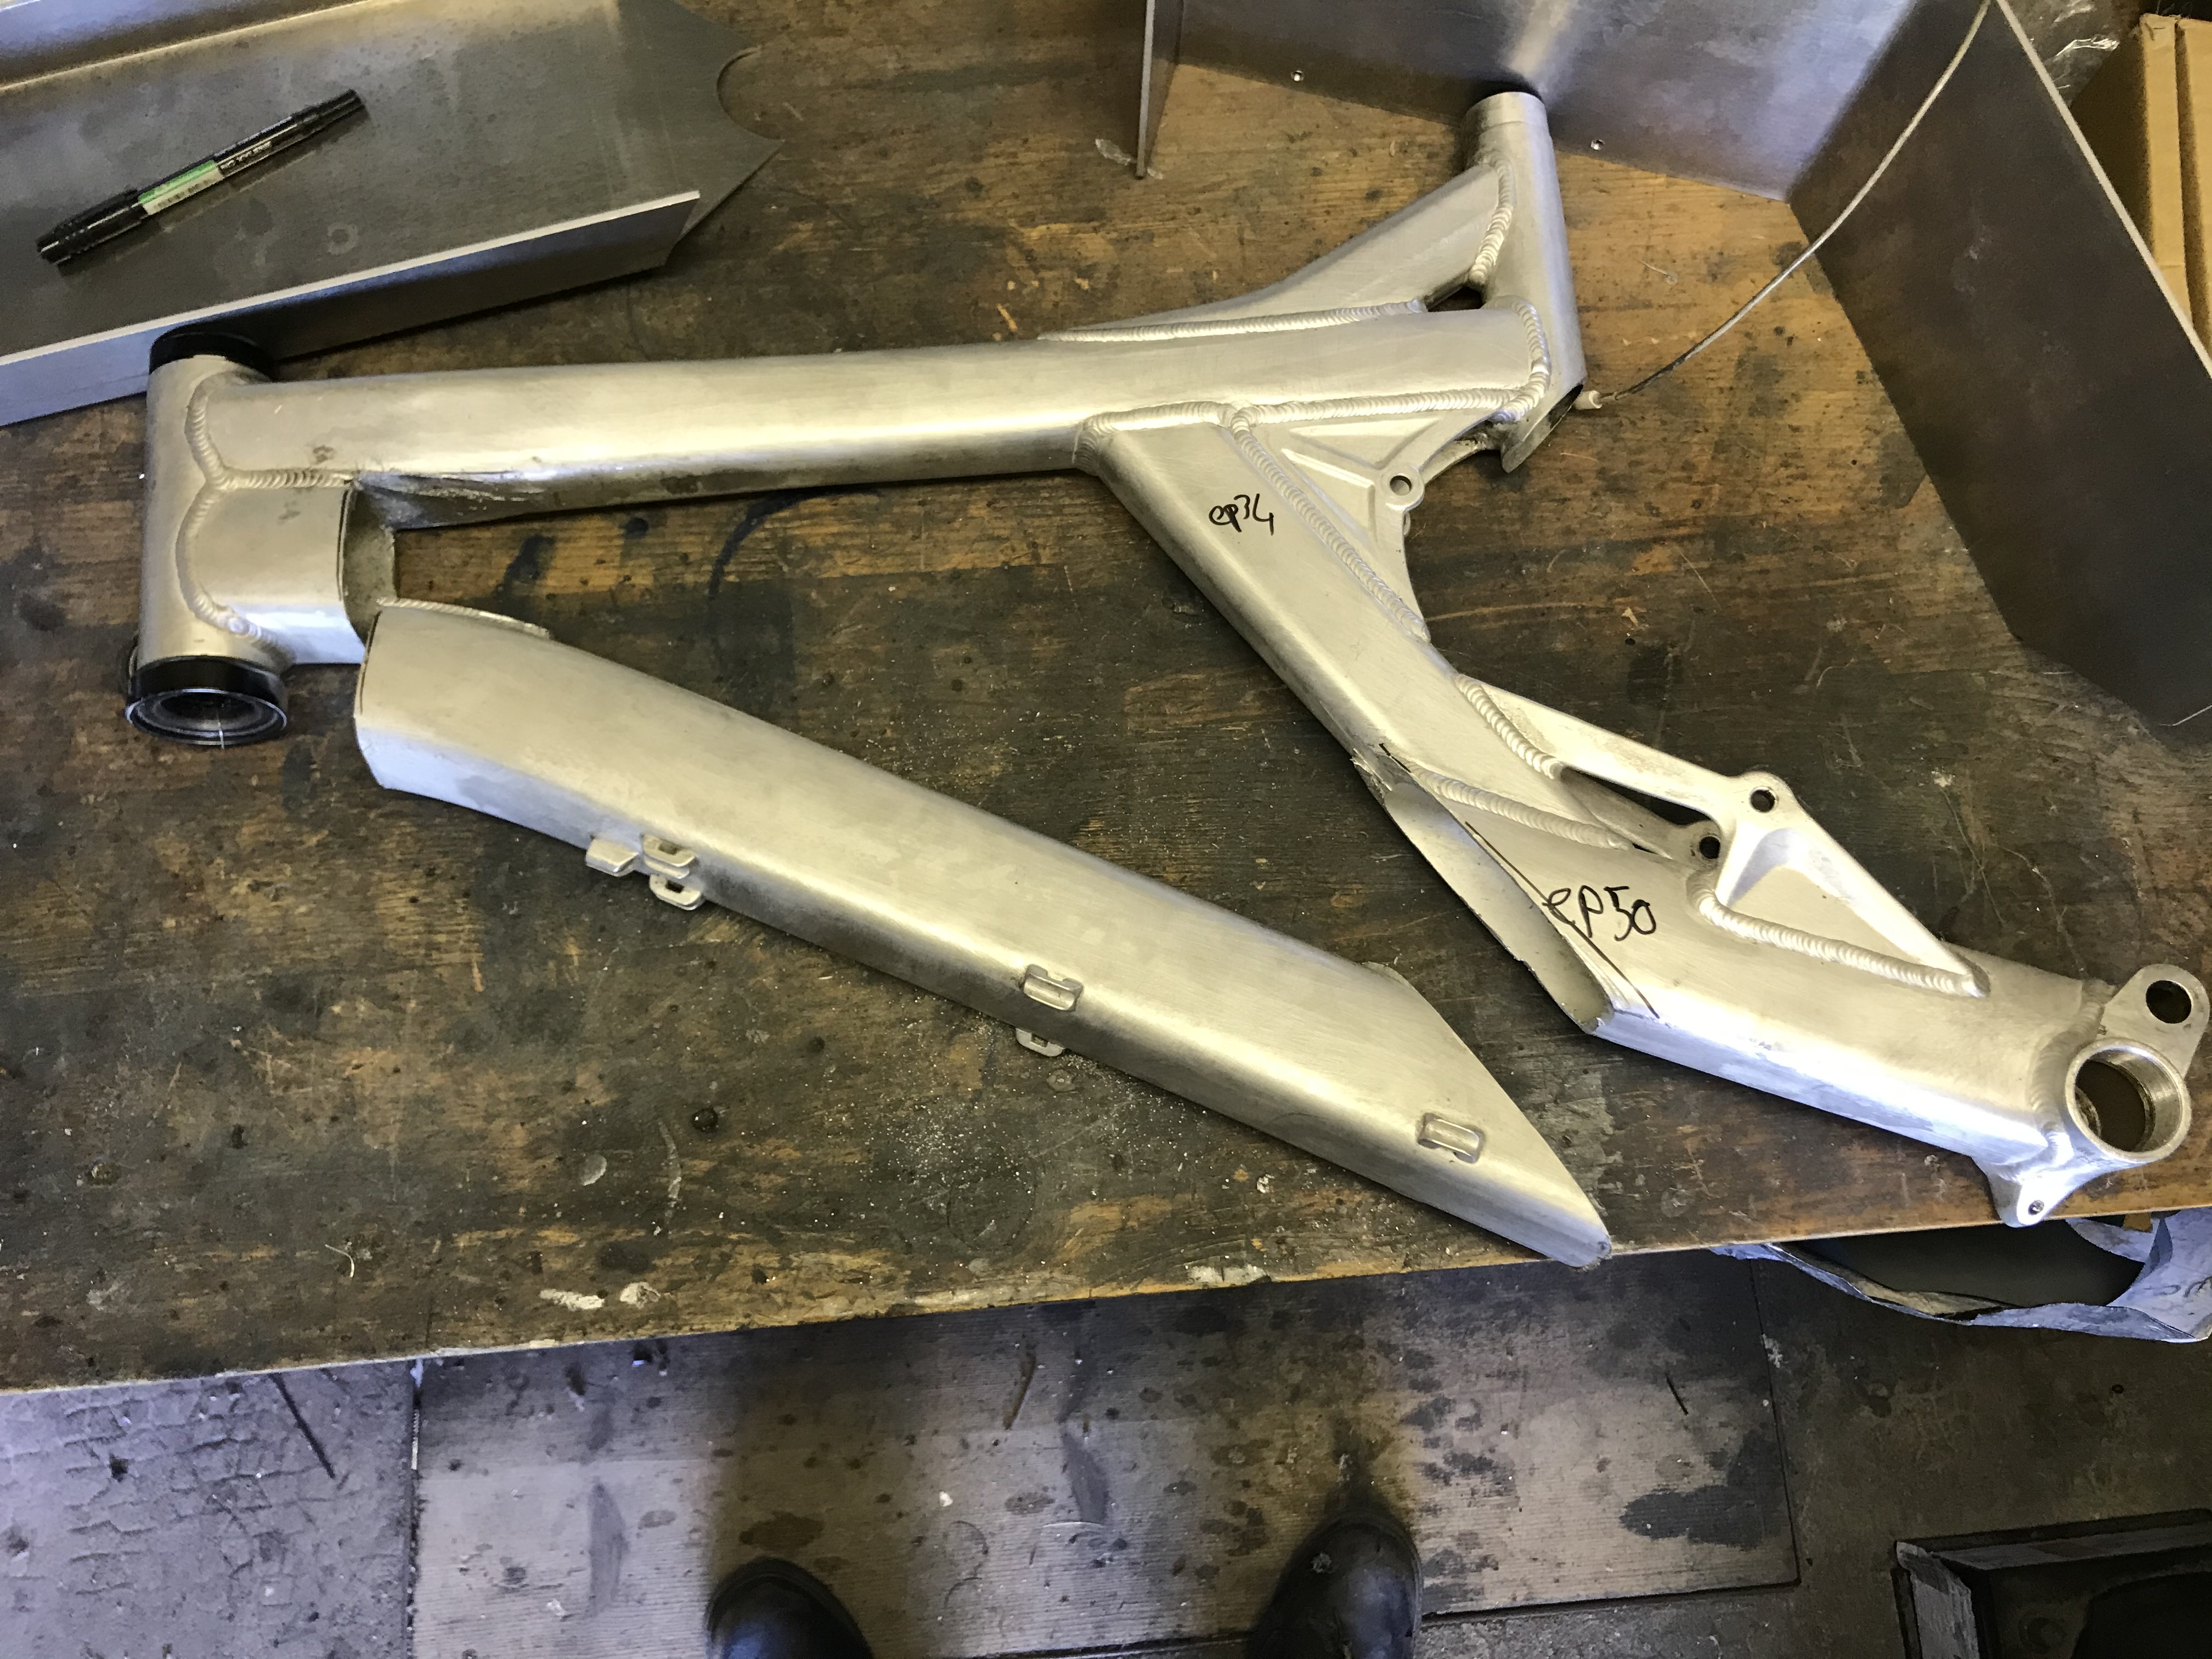
First try with a 3d printed part
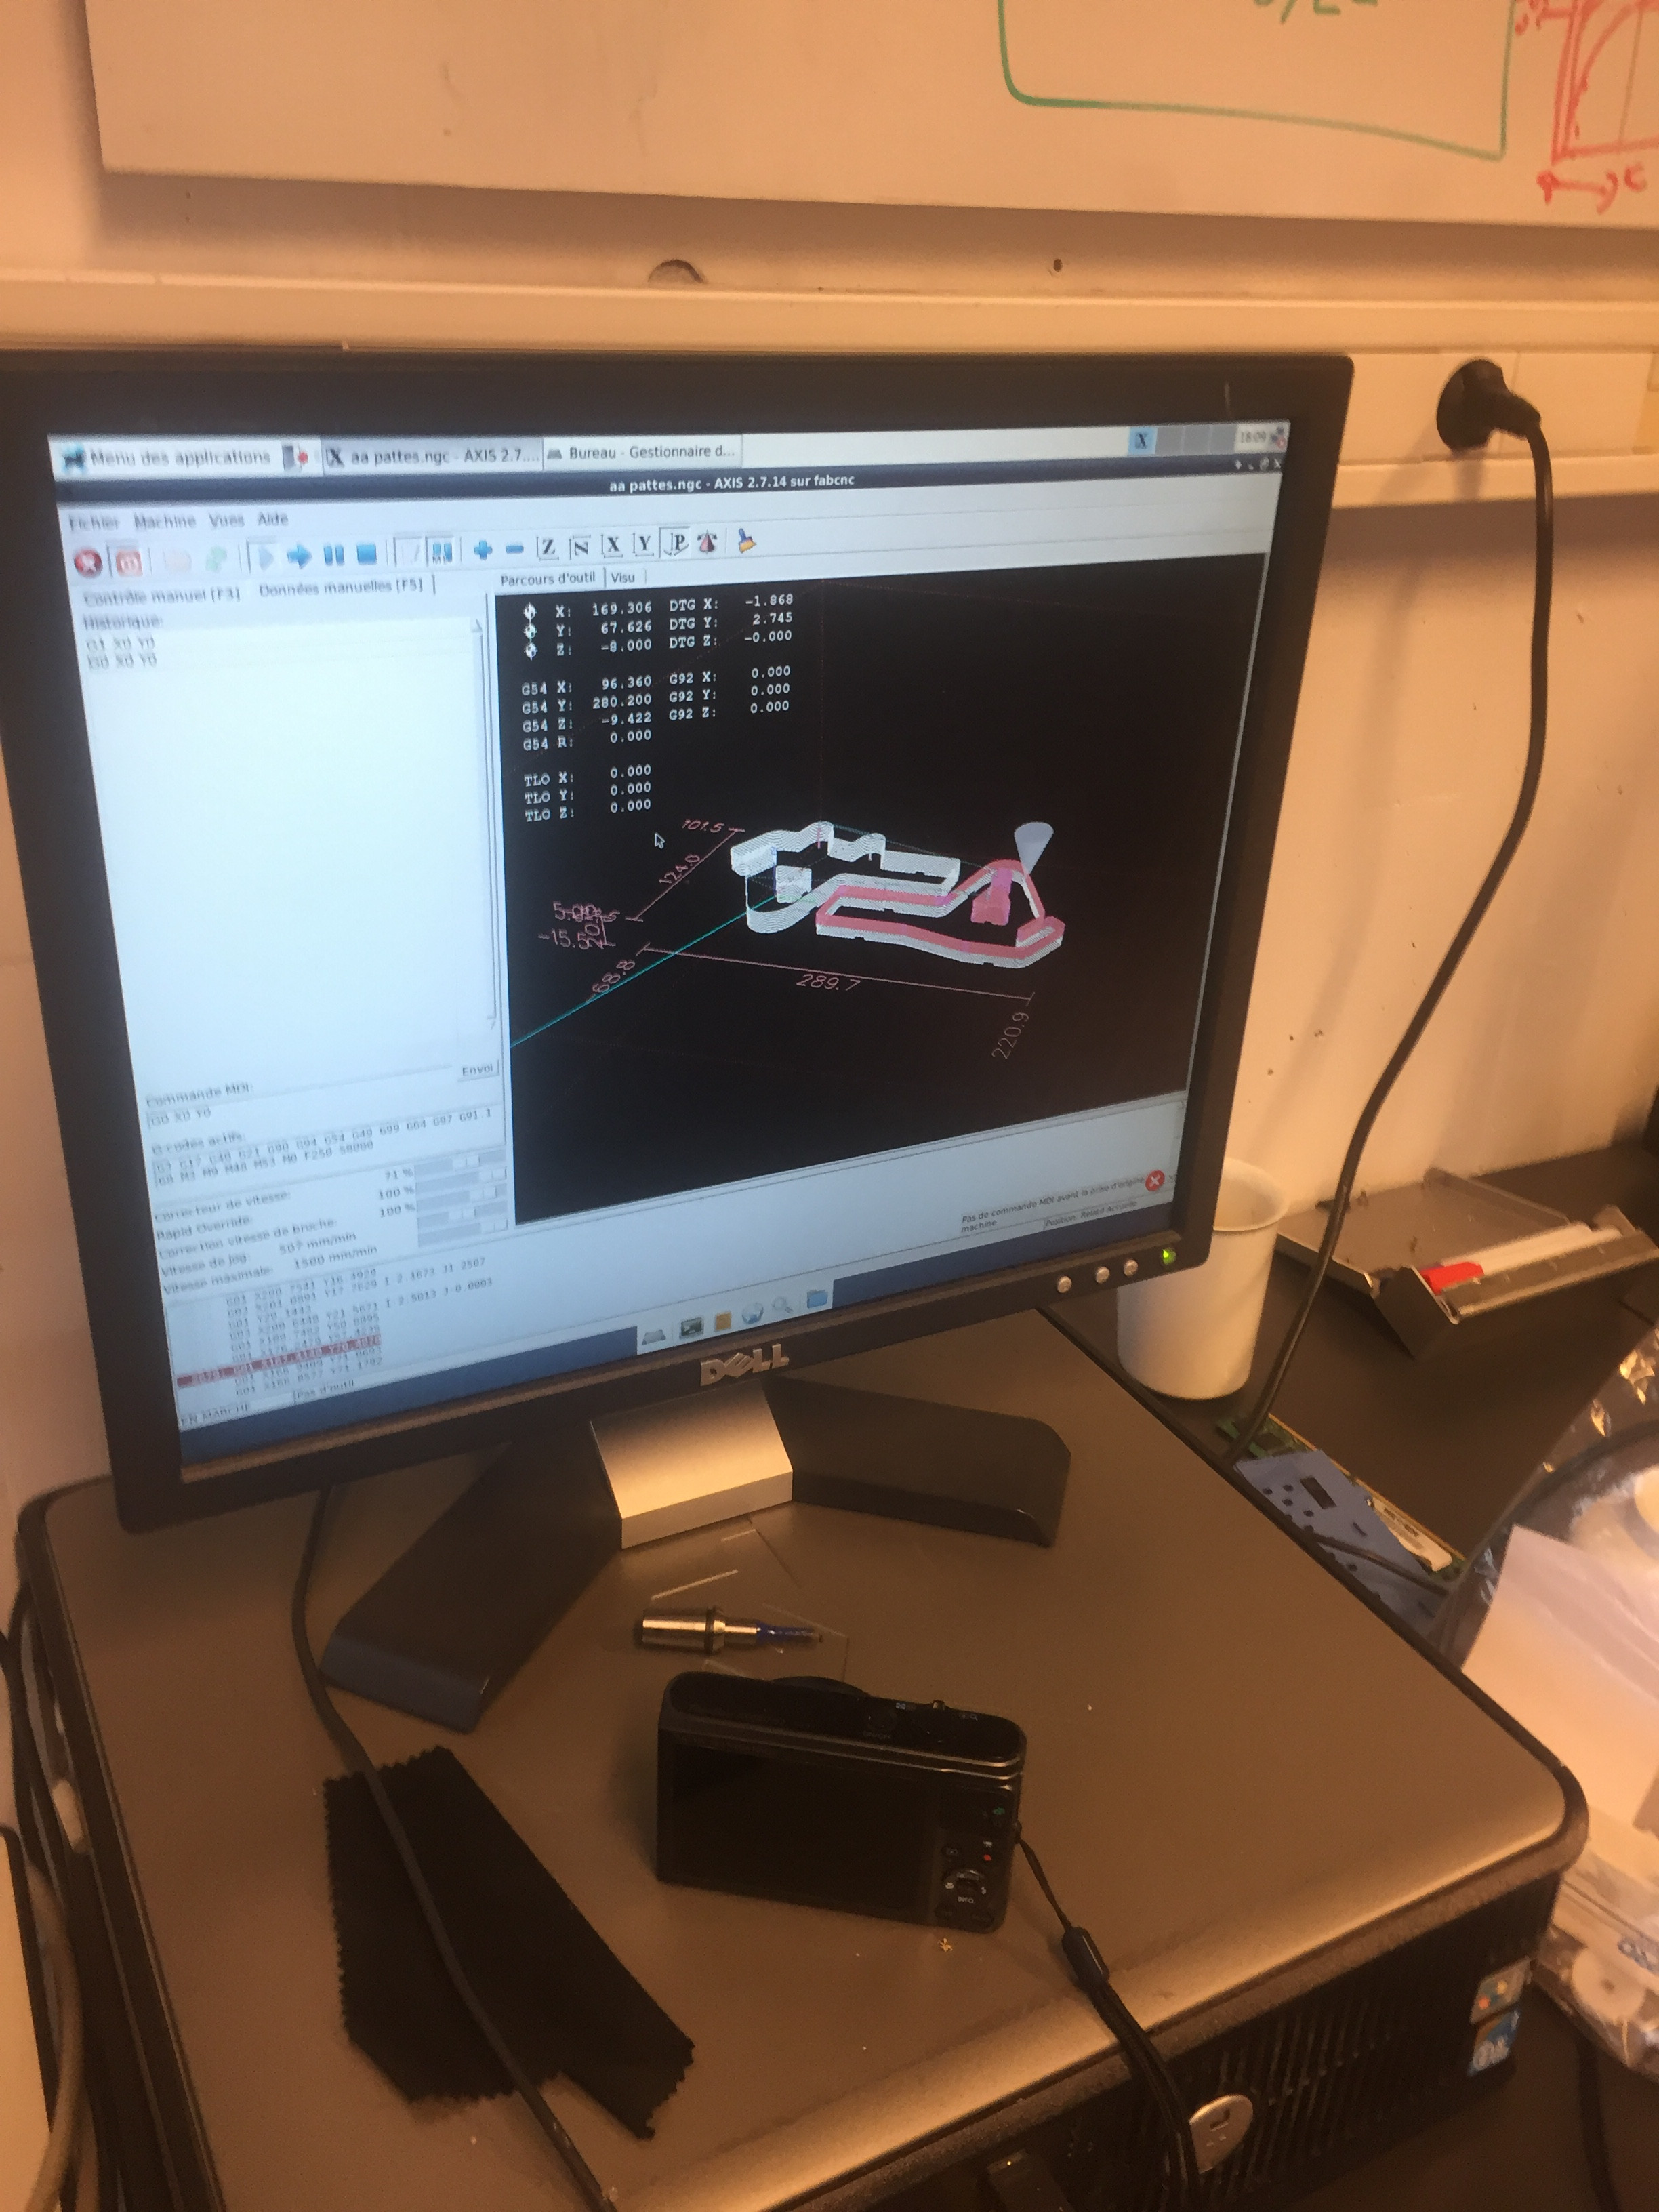
Second with a 6082 T6 aluminum part machined on a homemade CNC drill (a friend of mine made it)

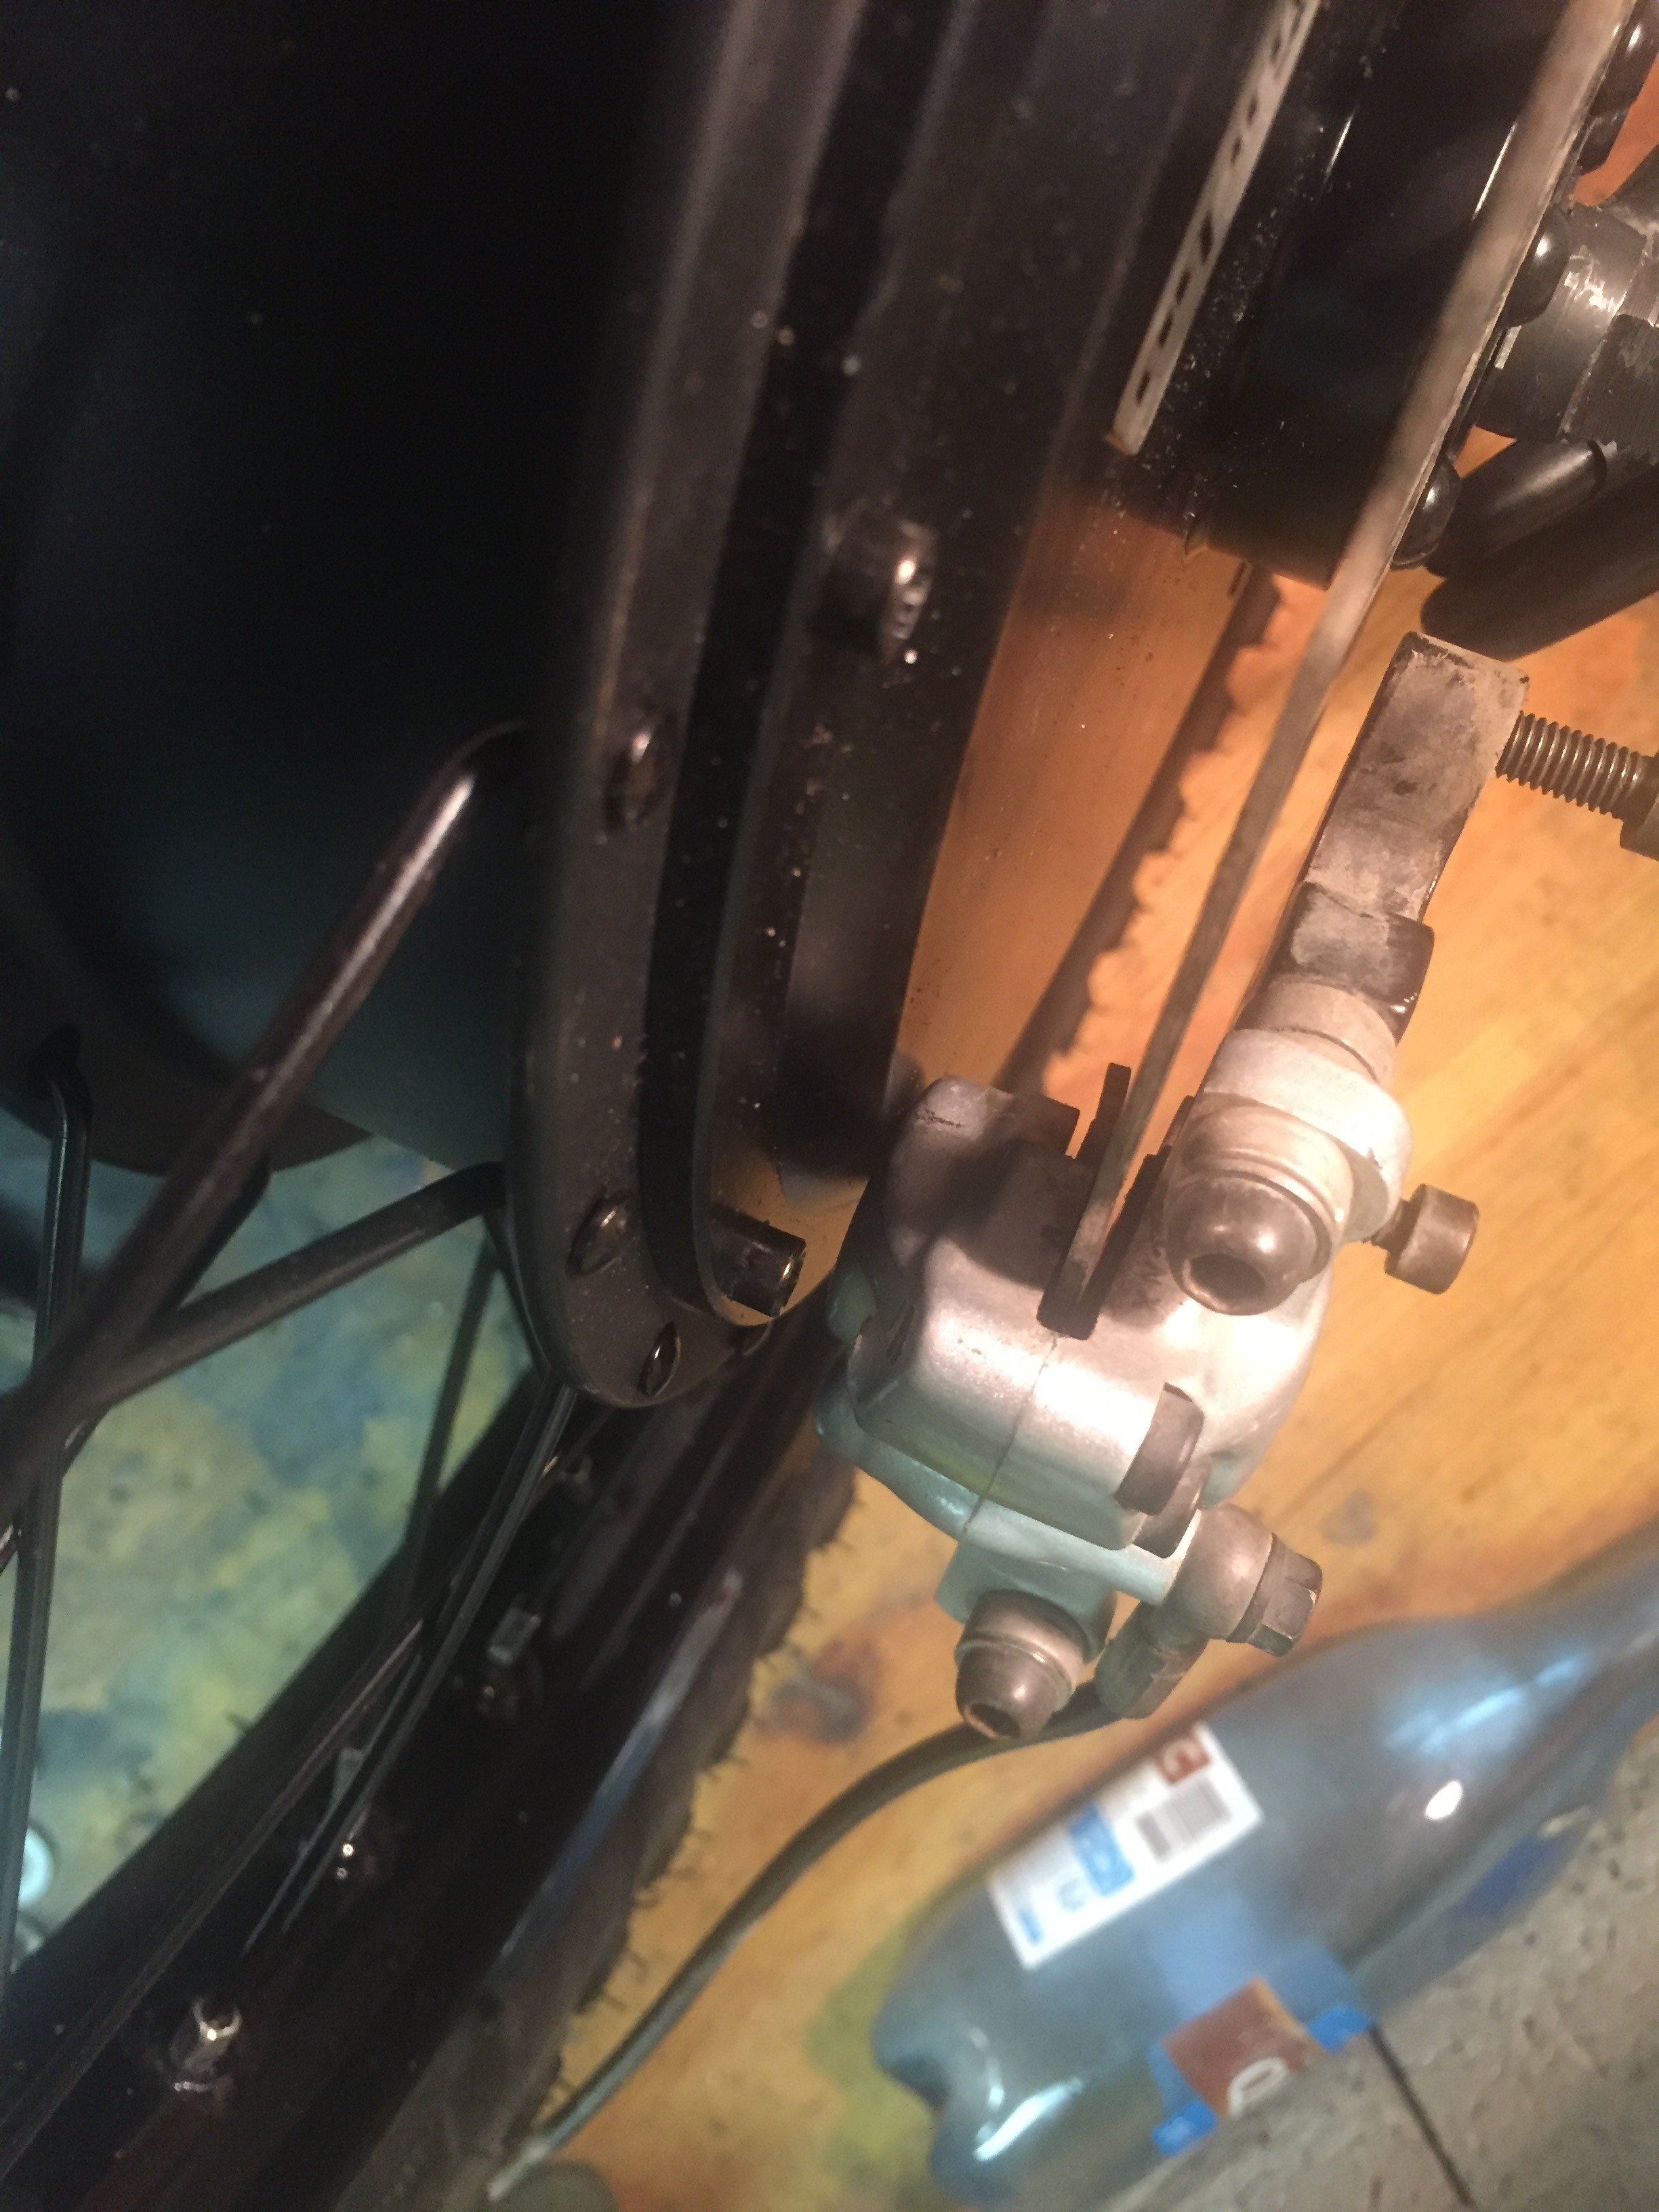
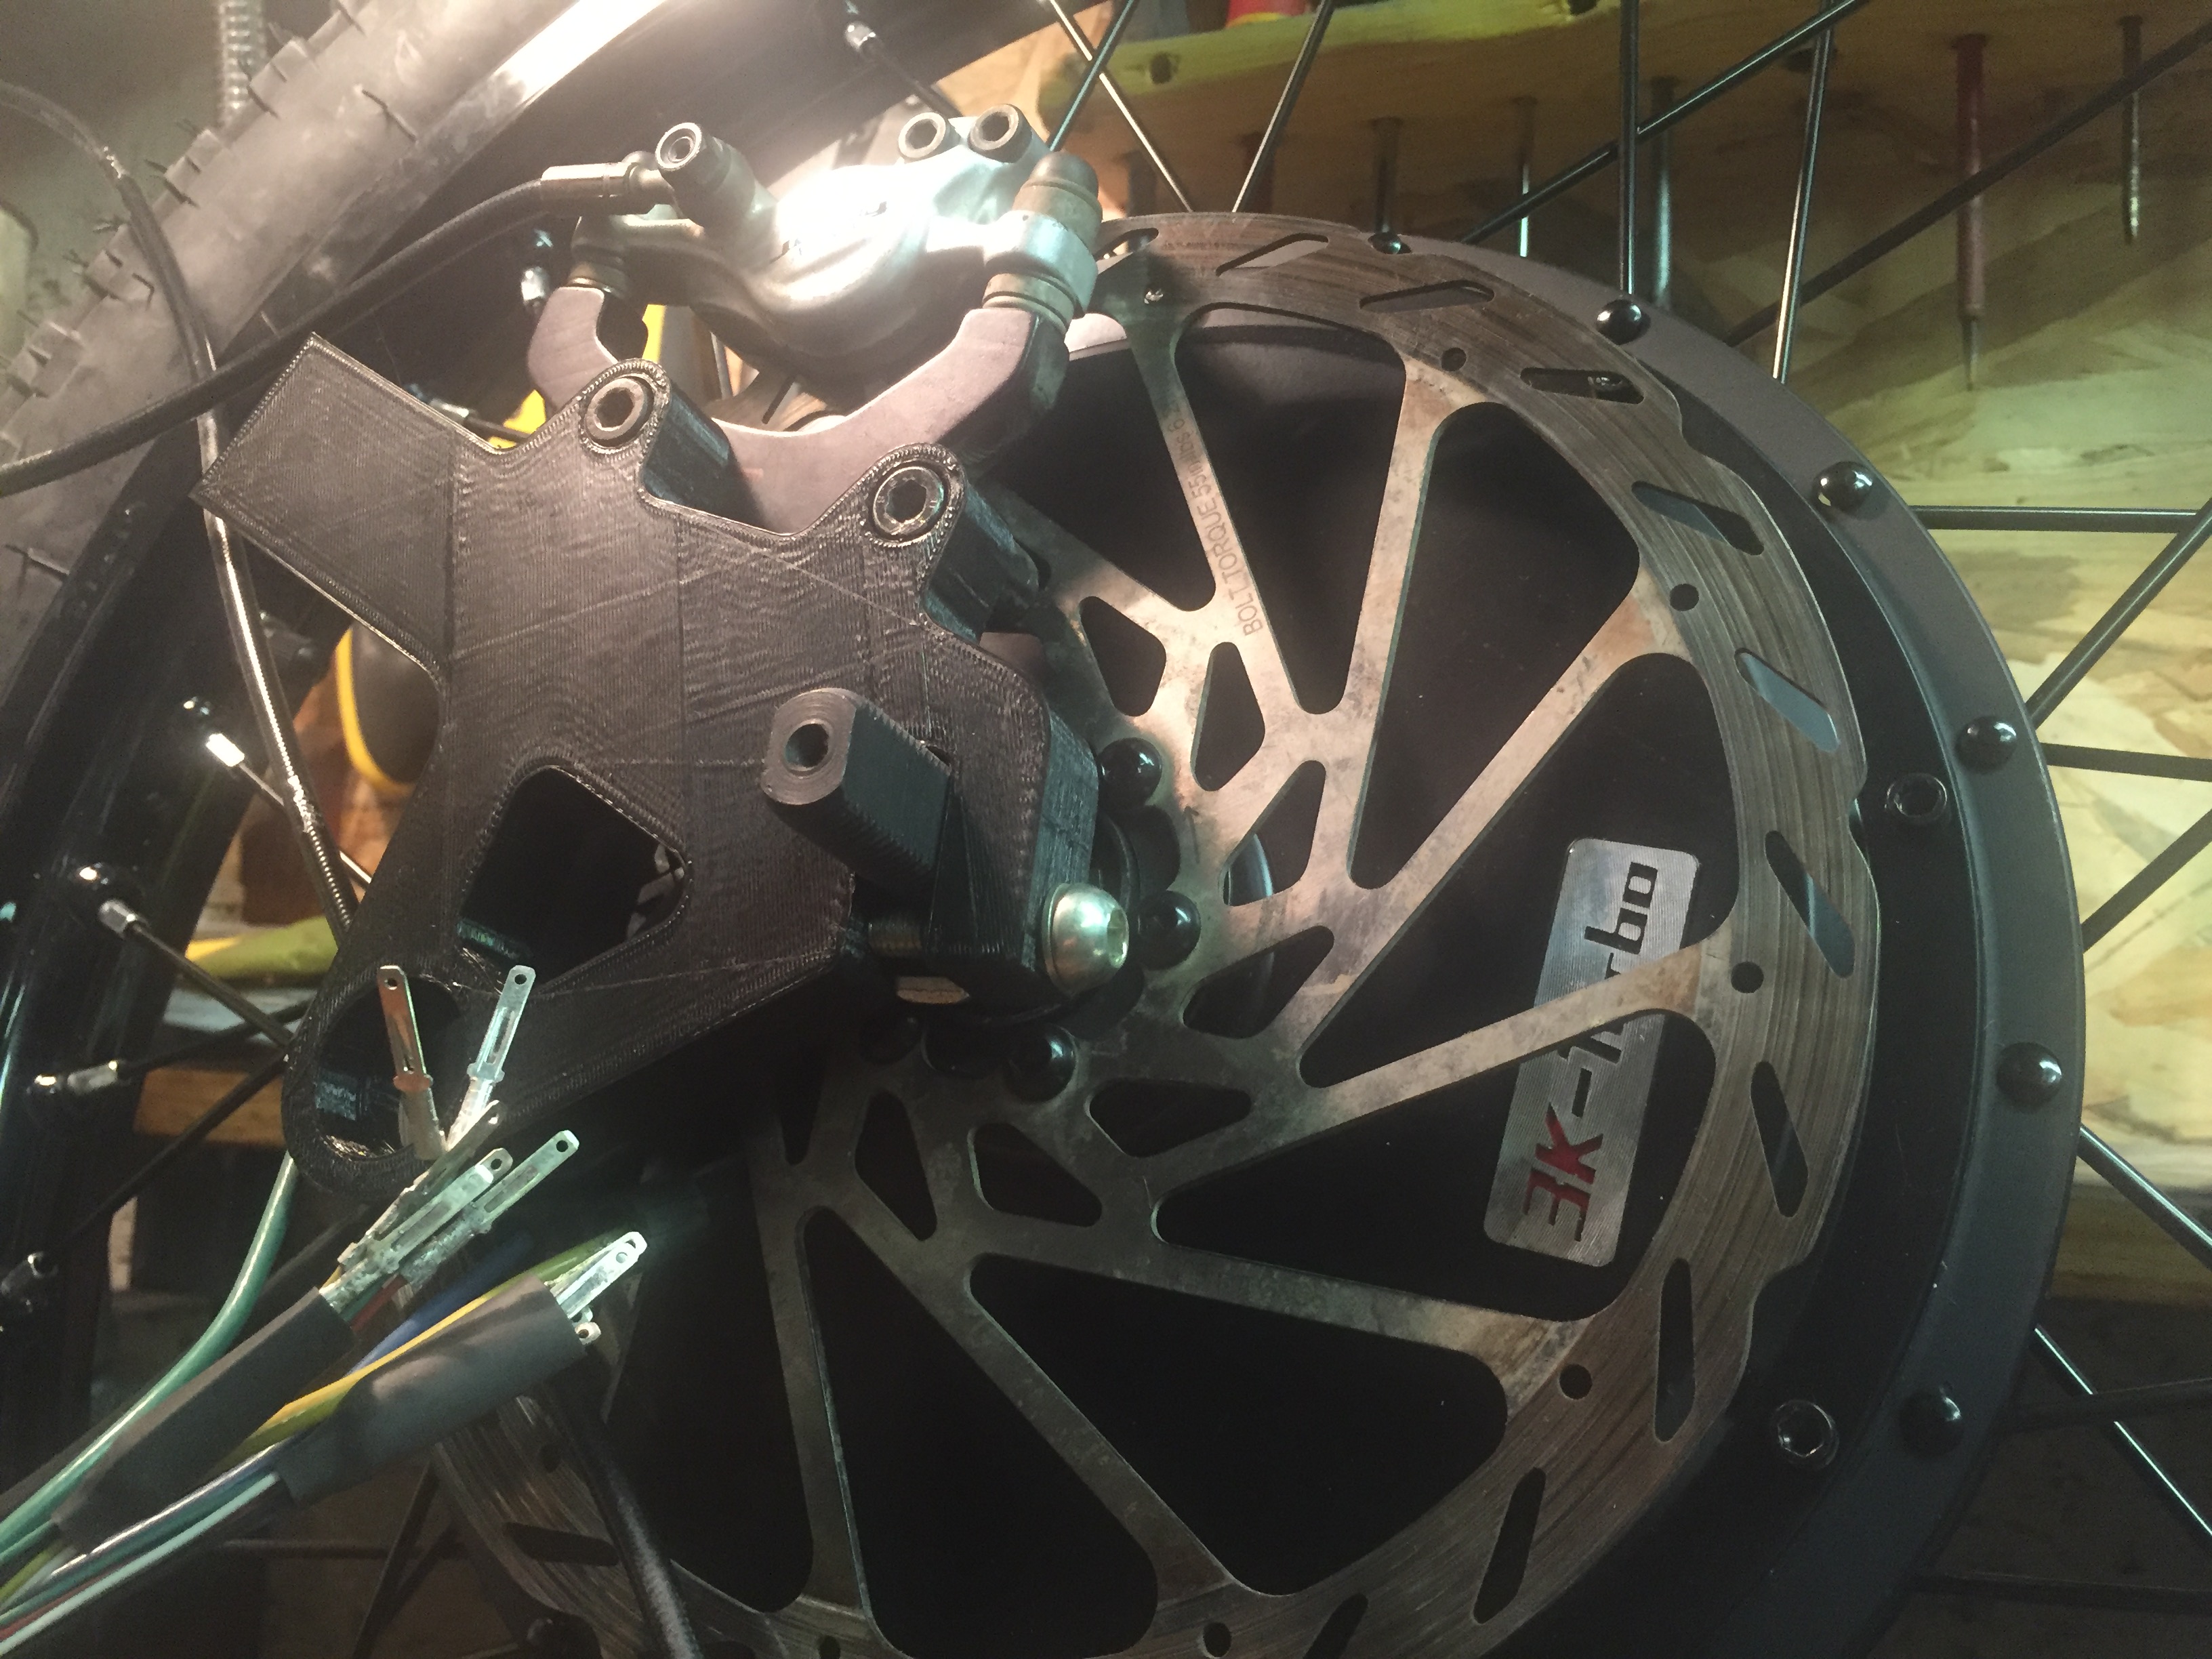
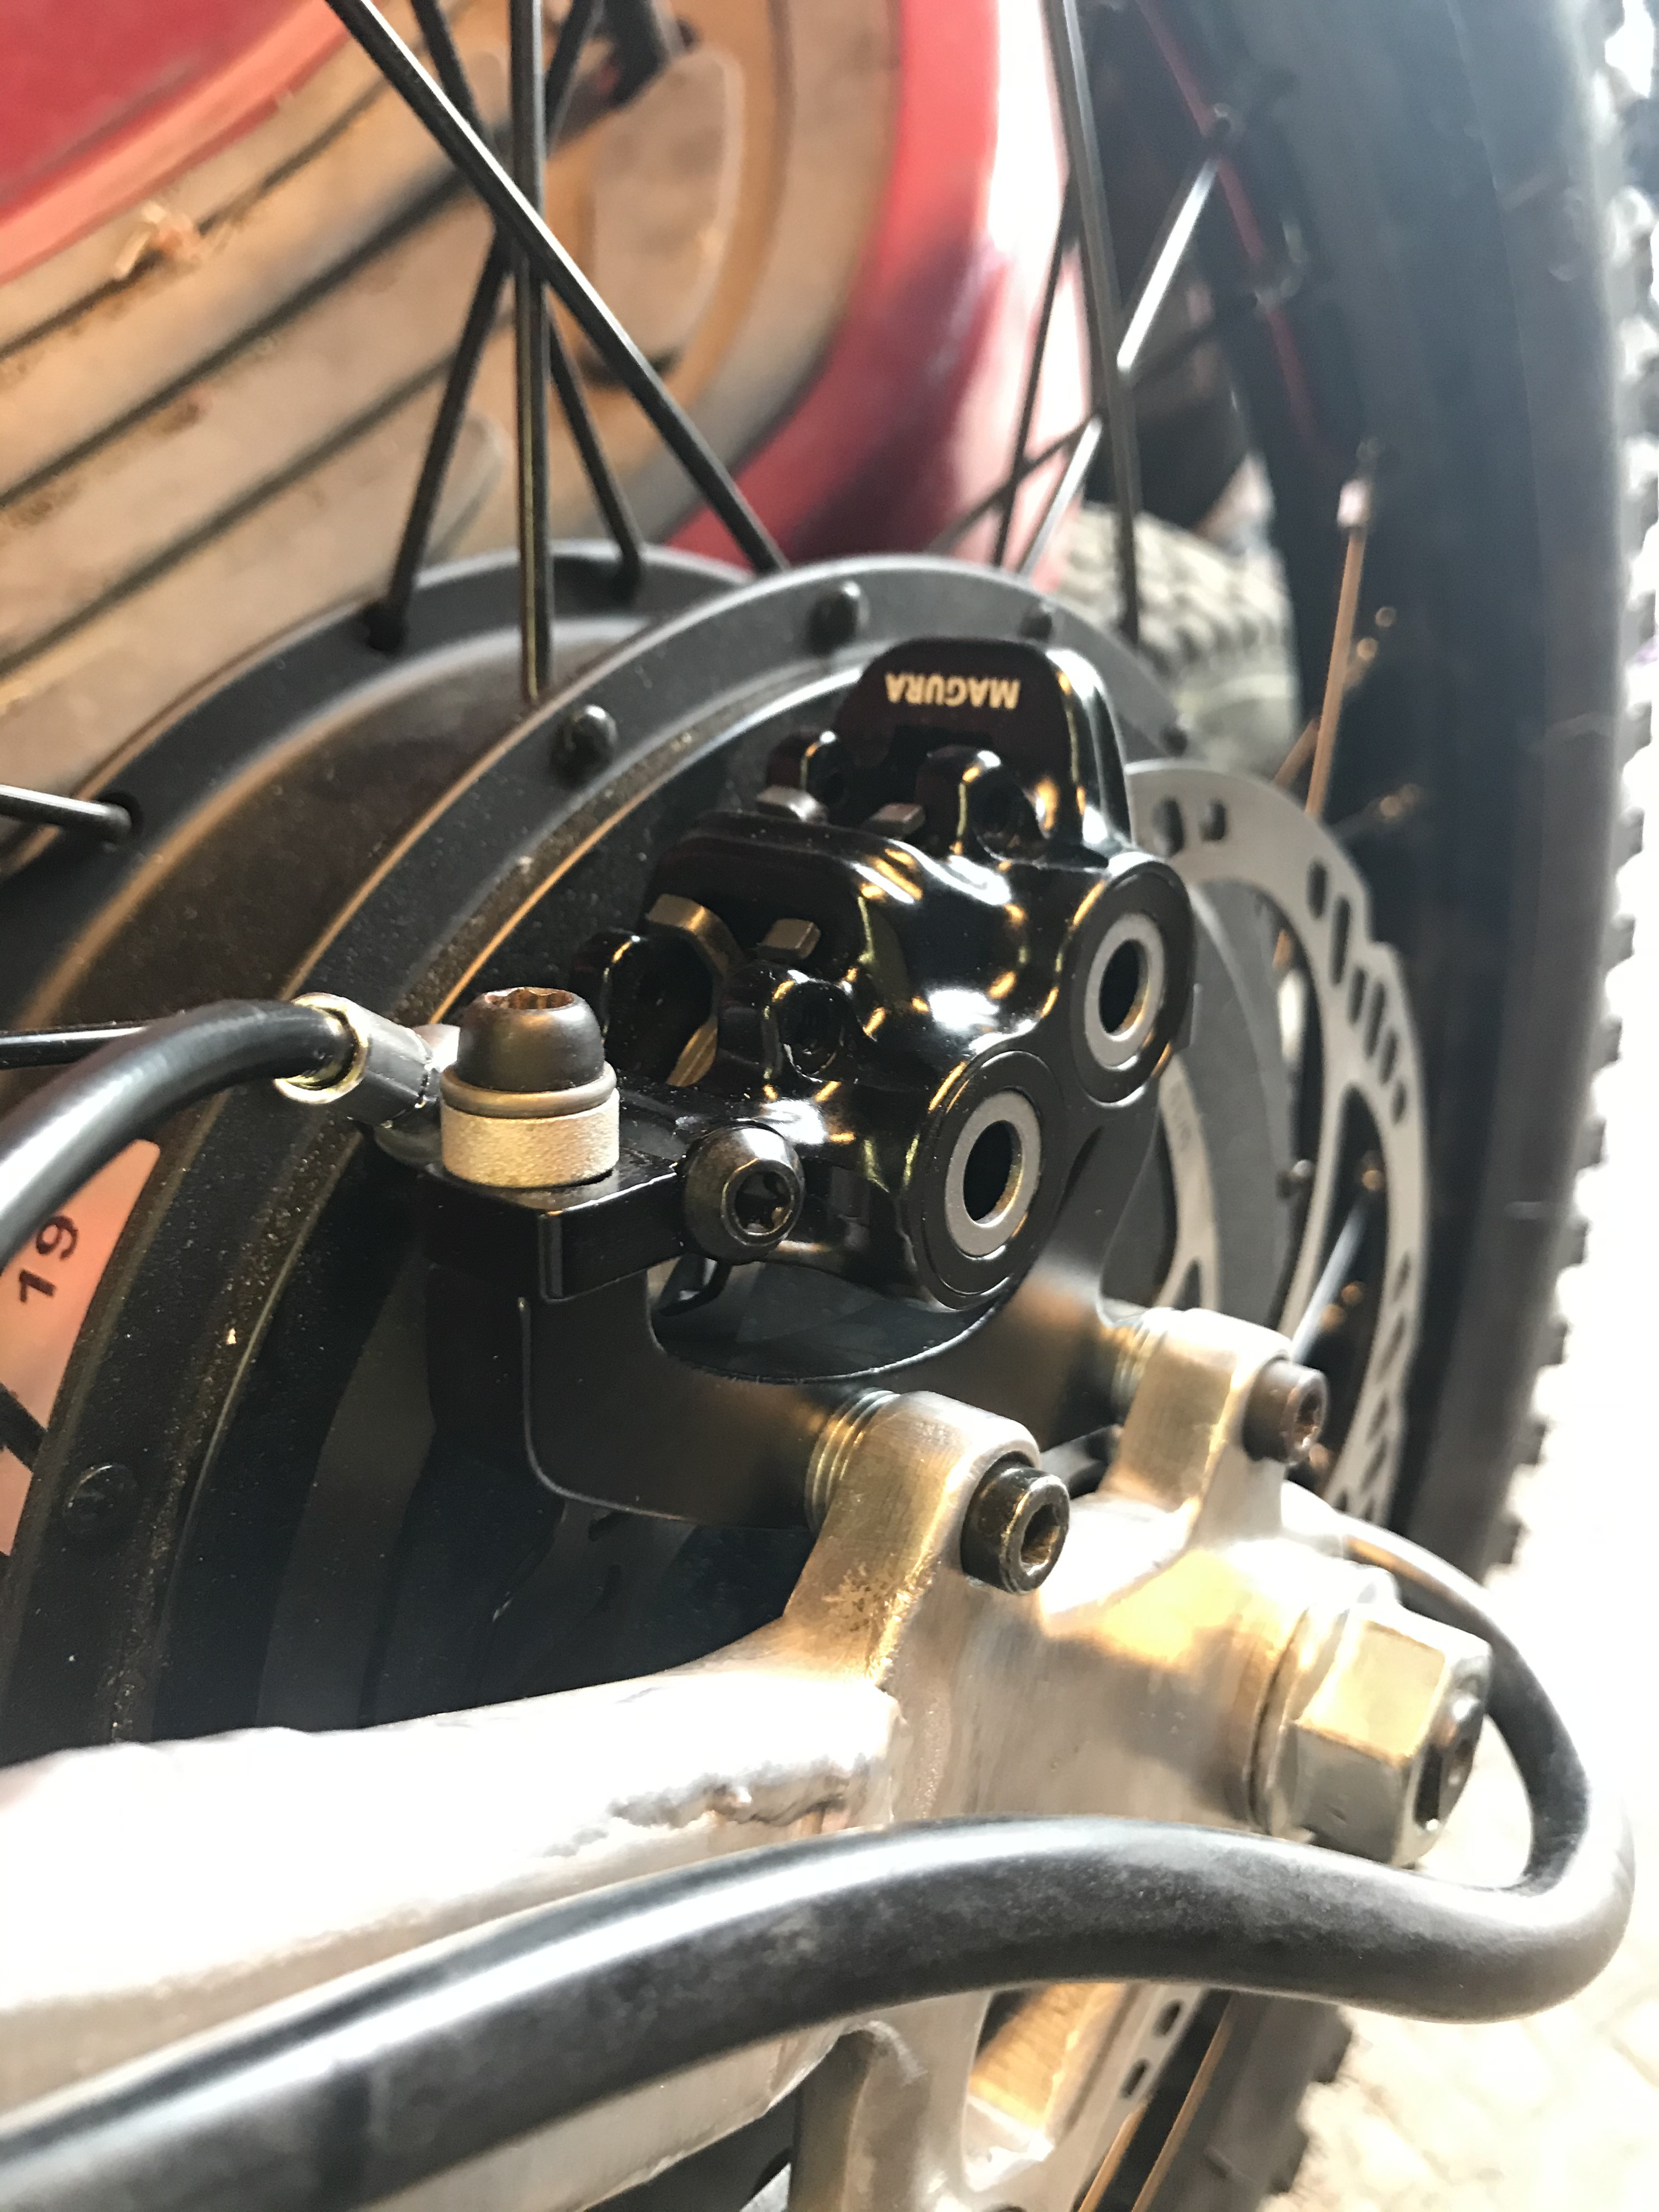
With the magura MT5 caliper
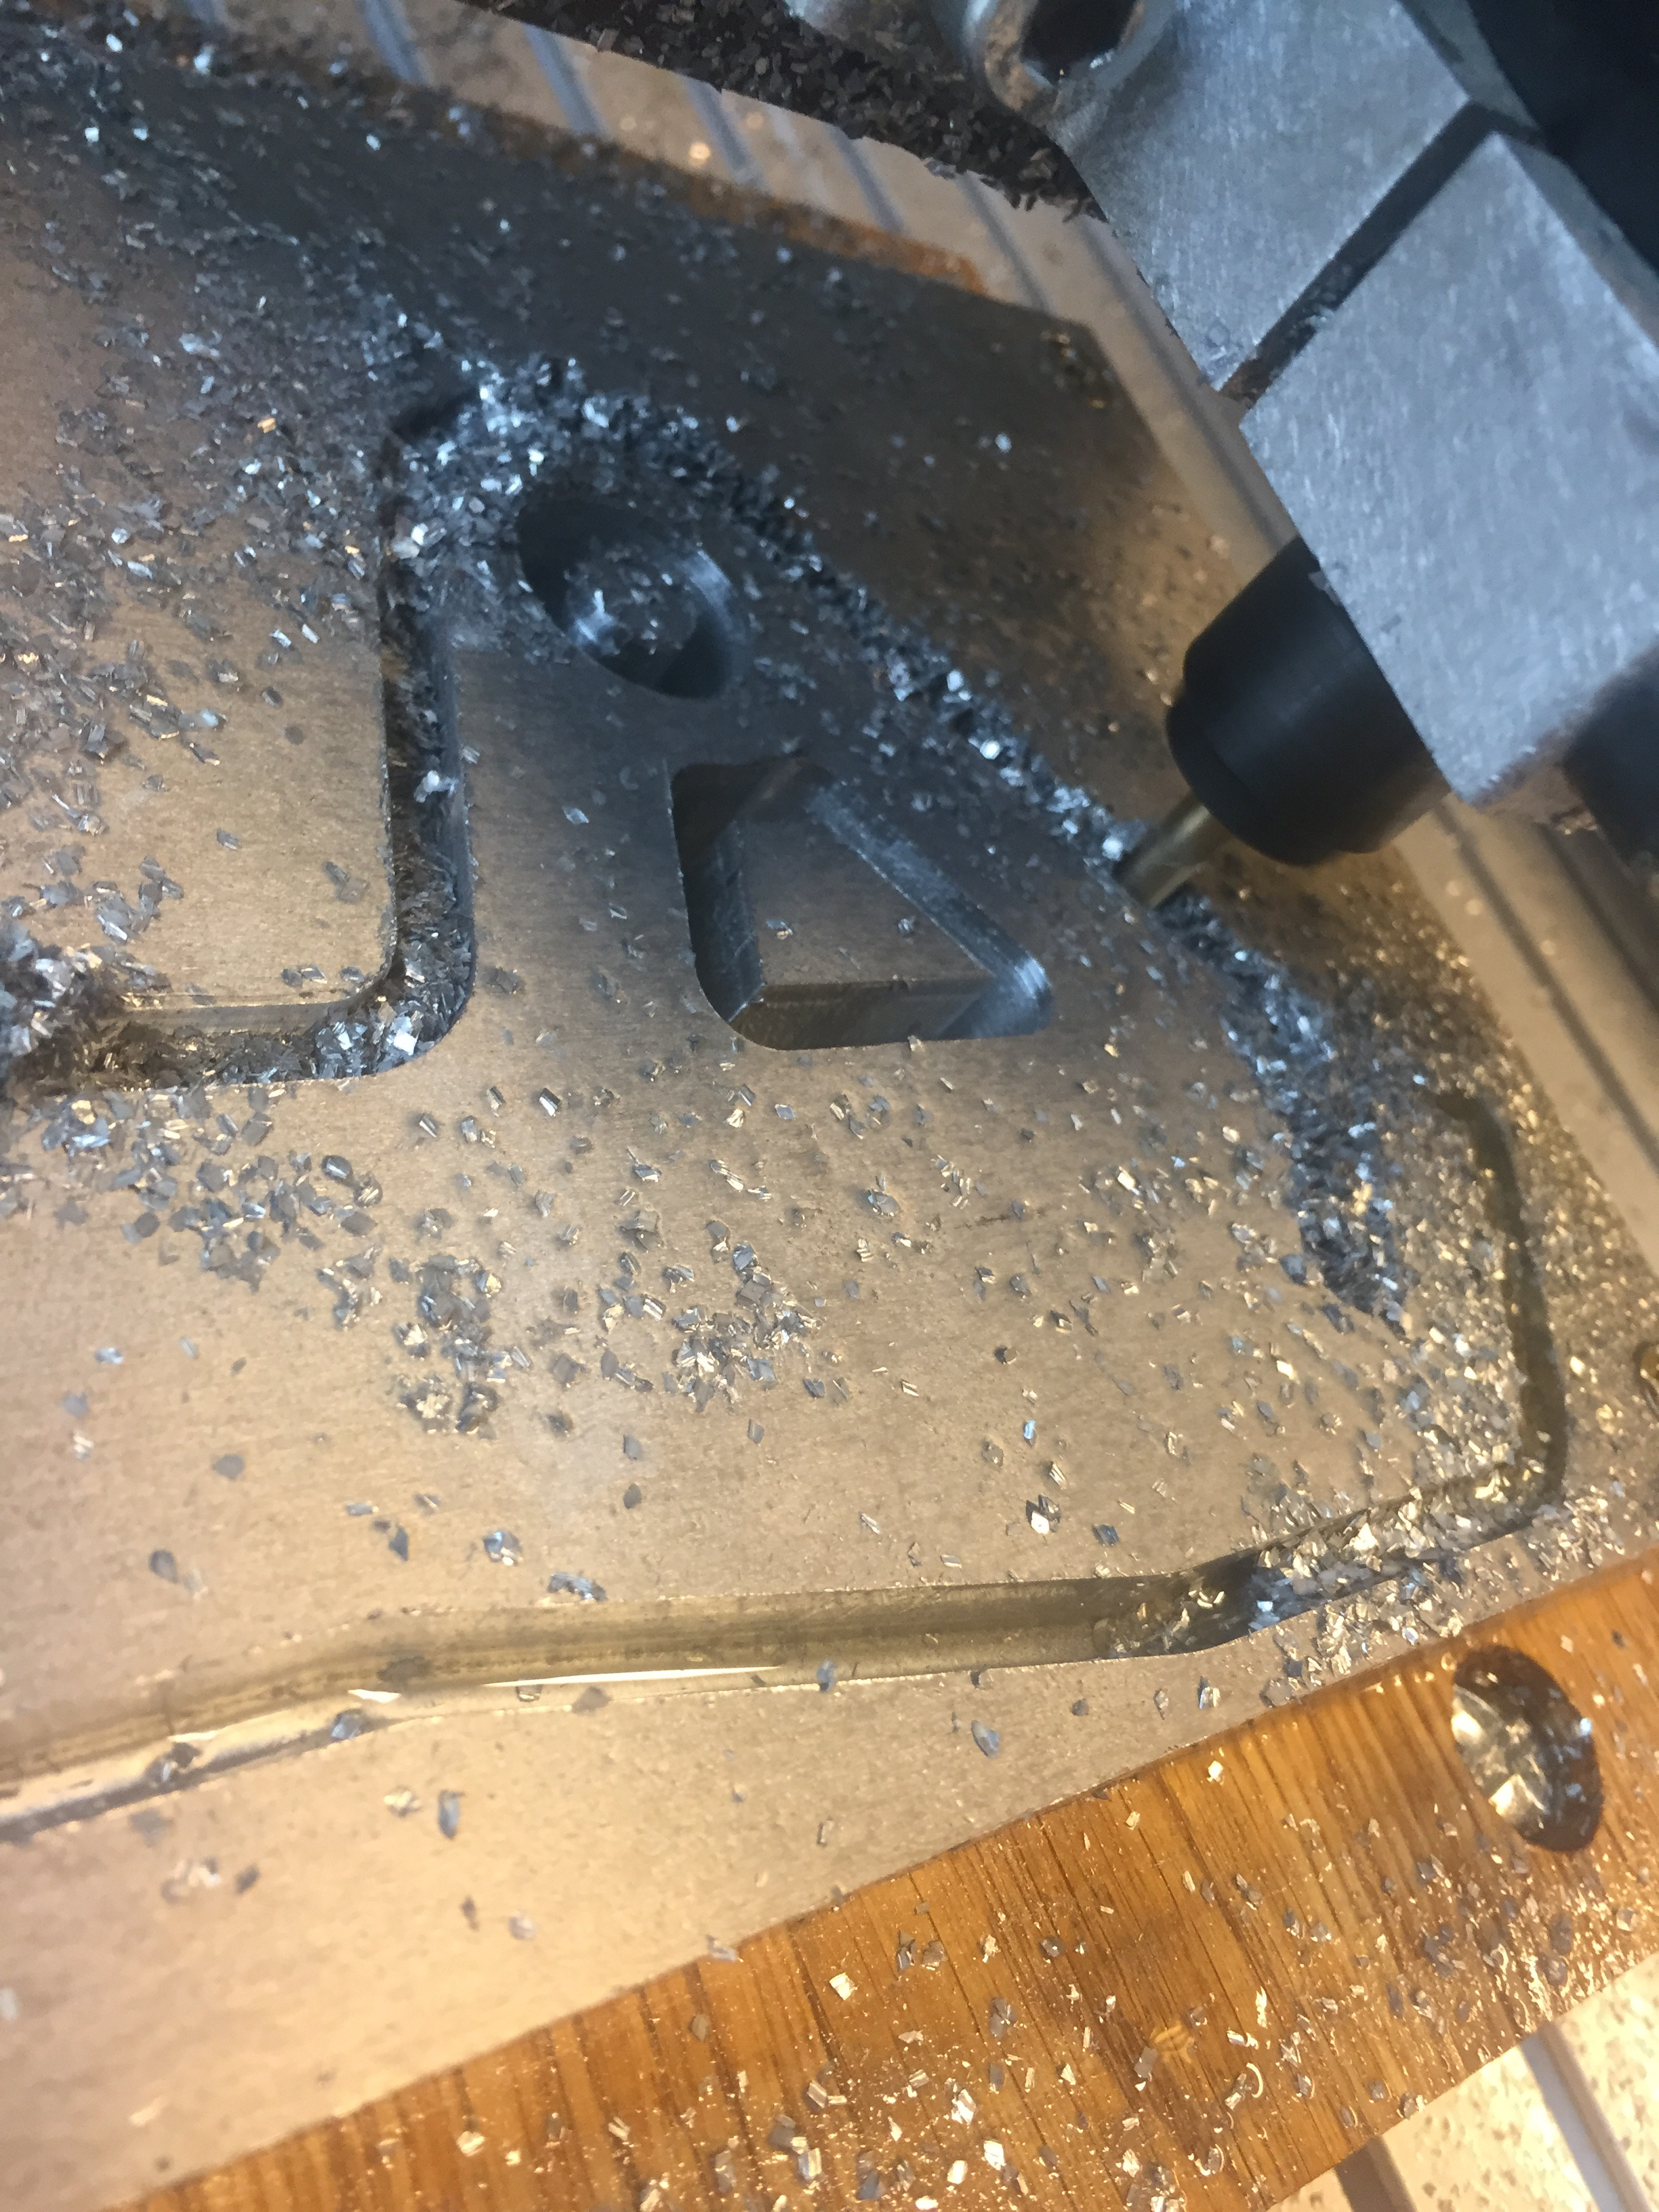
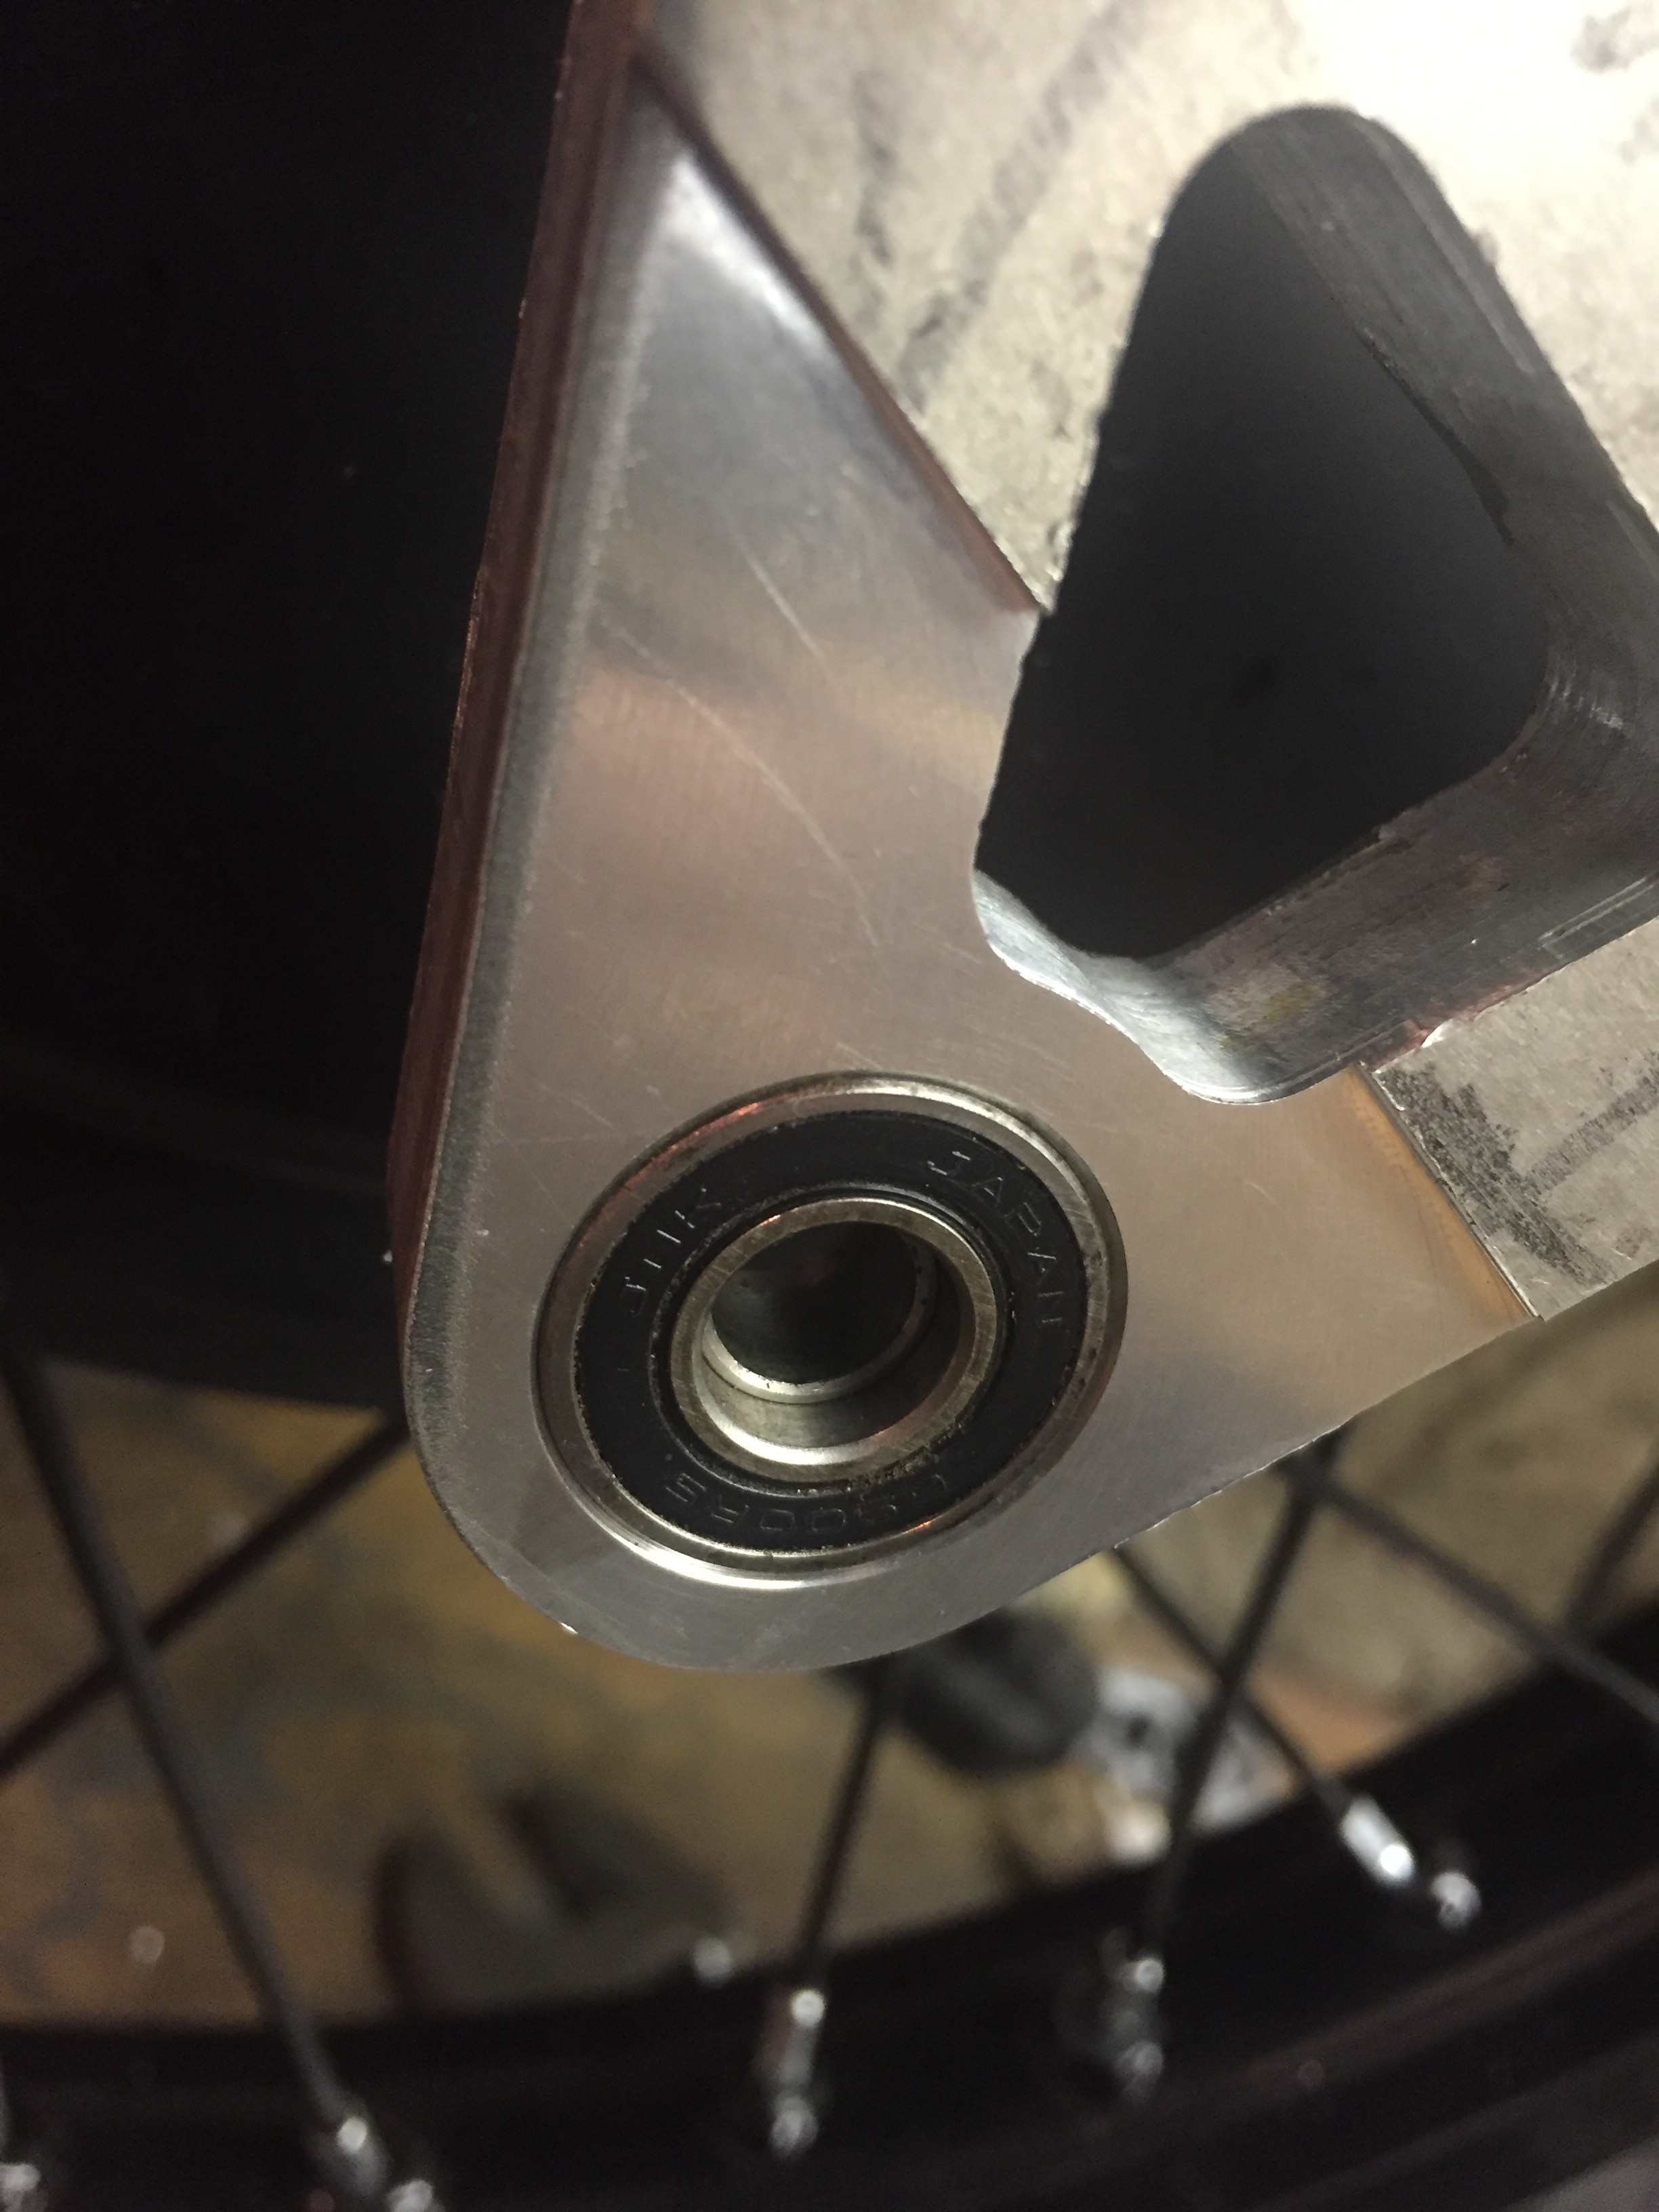
And then I had to machine the bearings housings on both sides of the parts
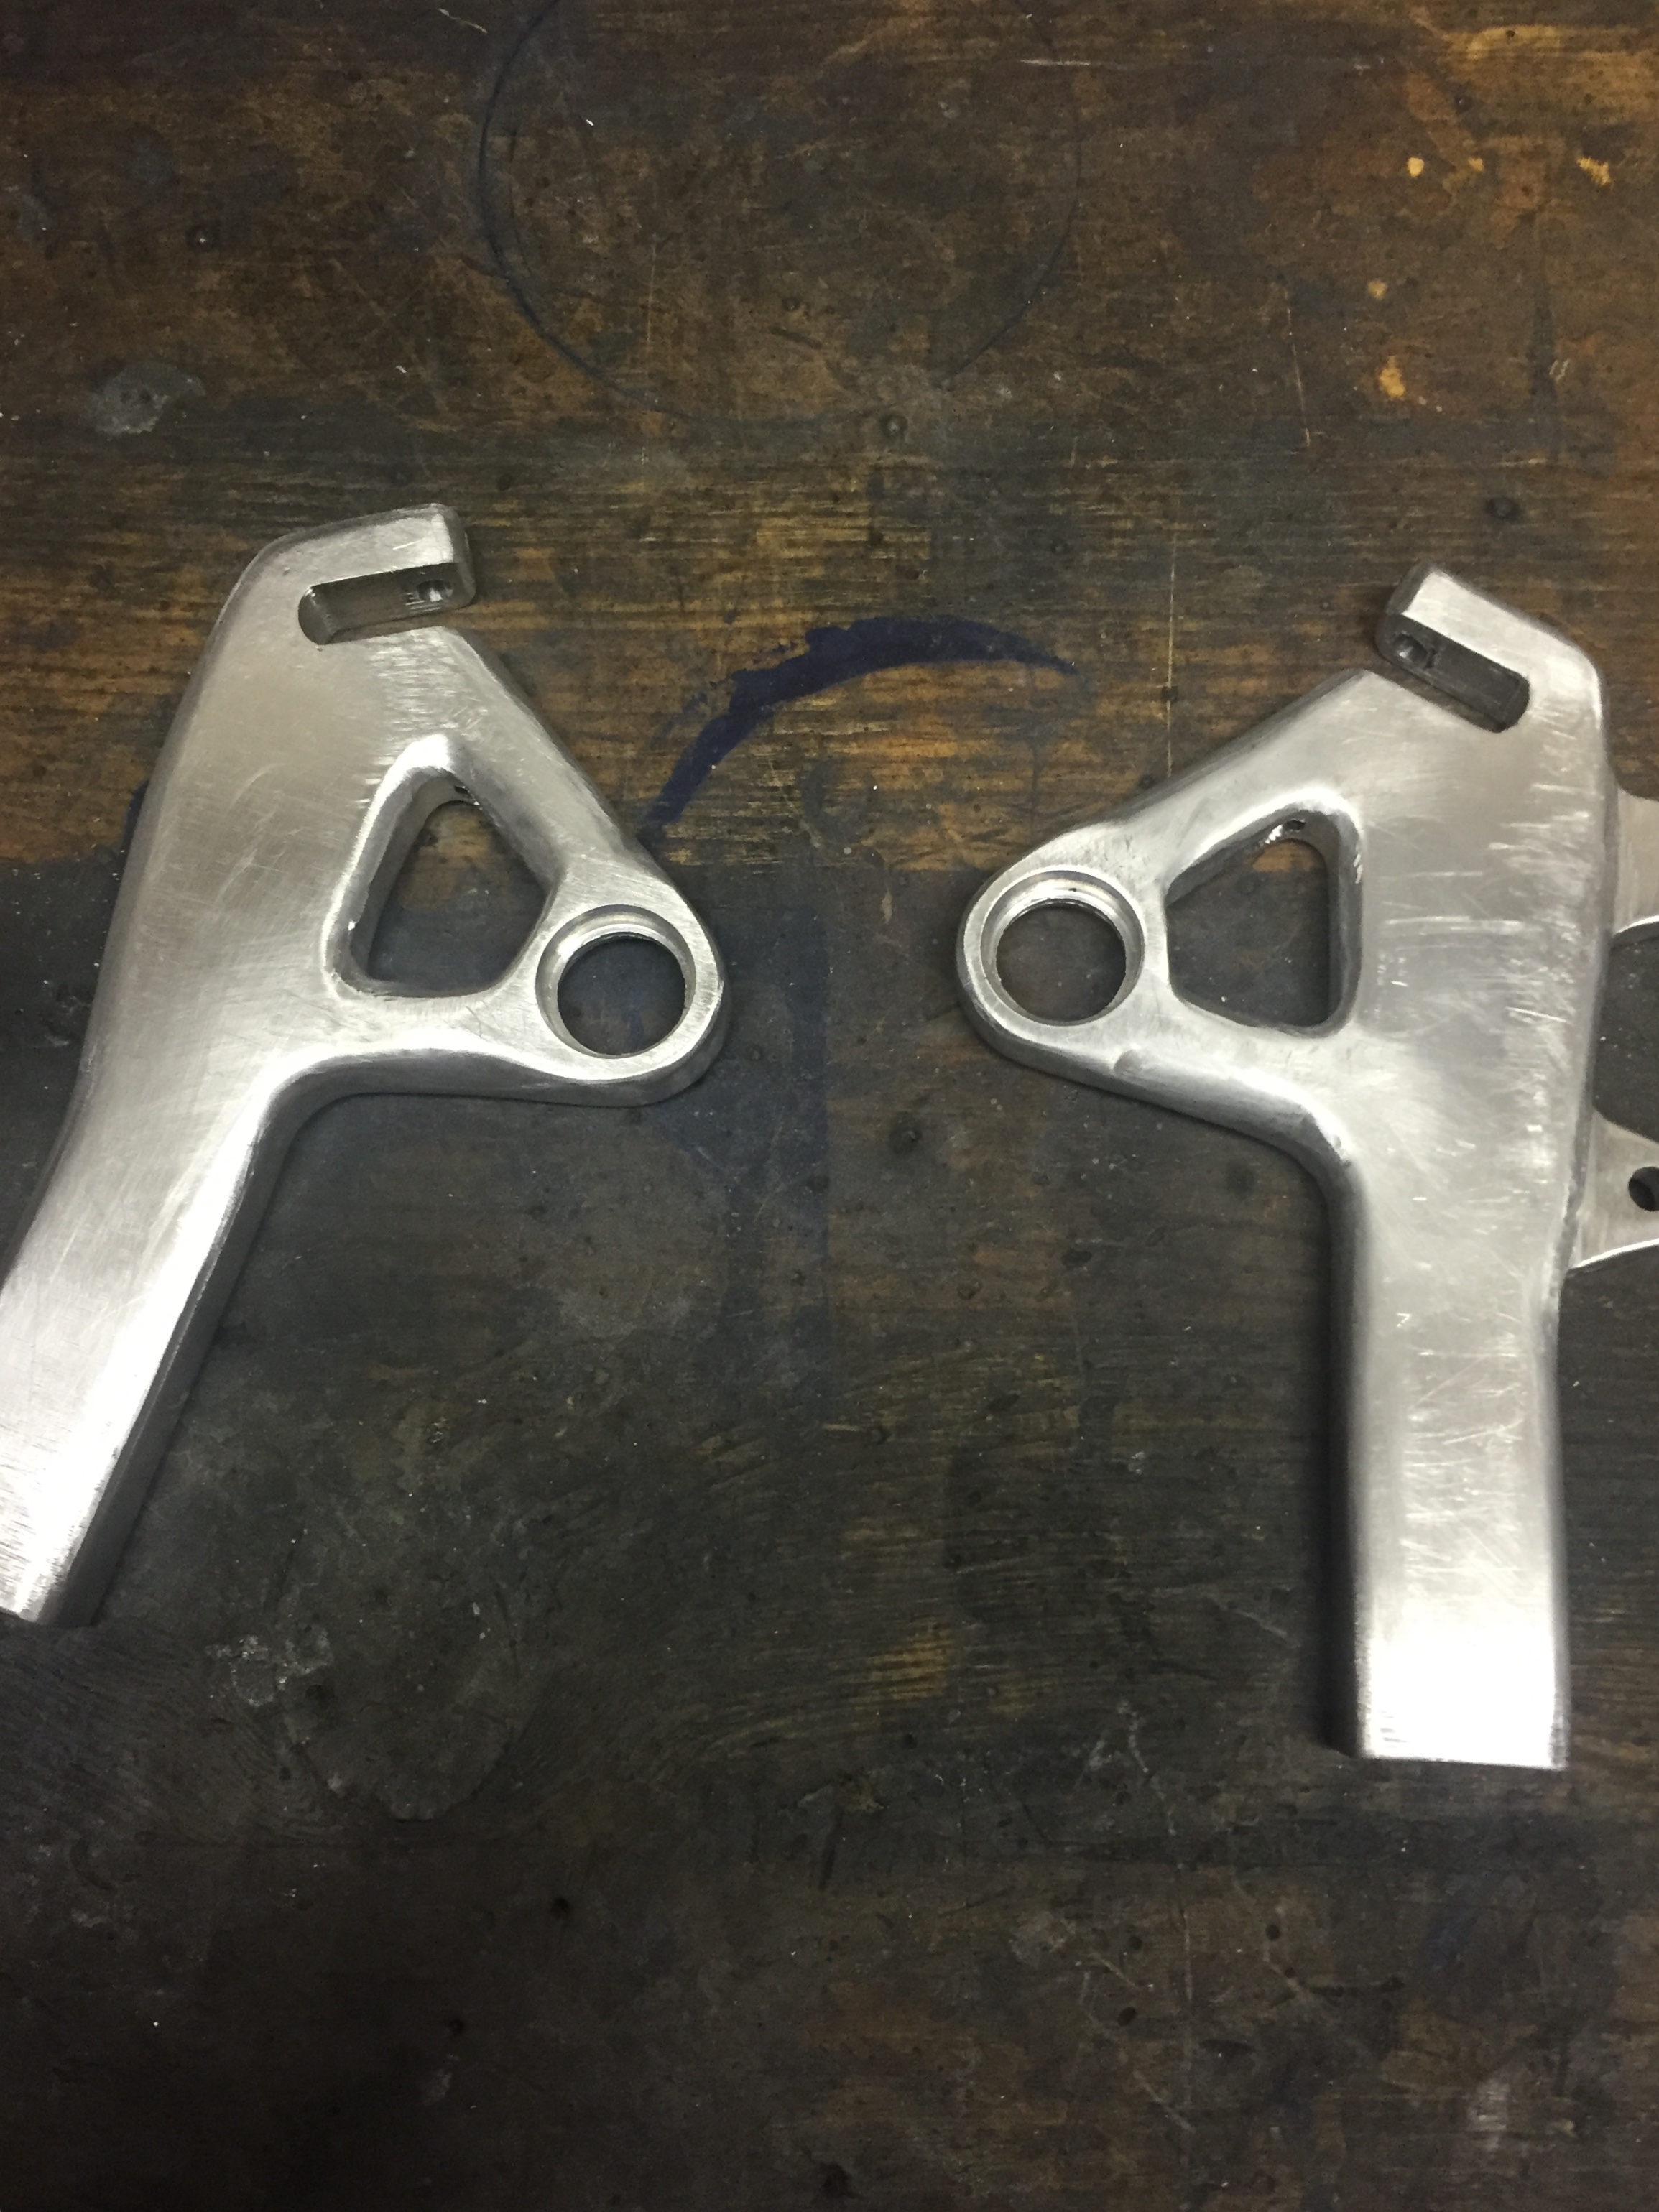
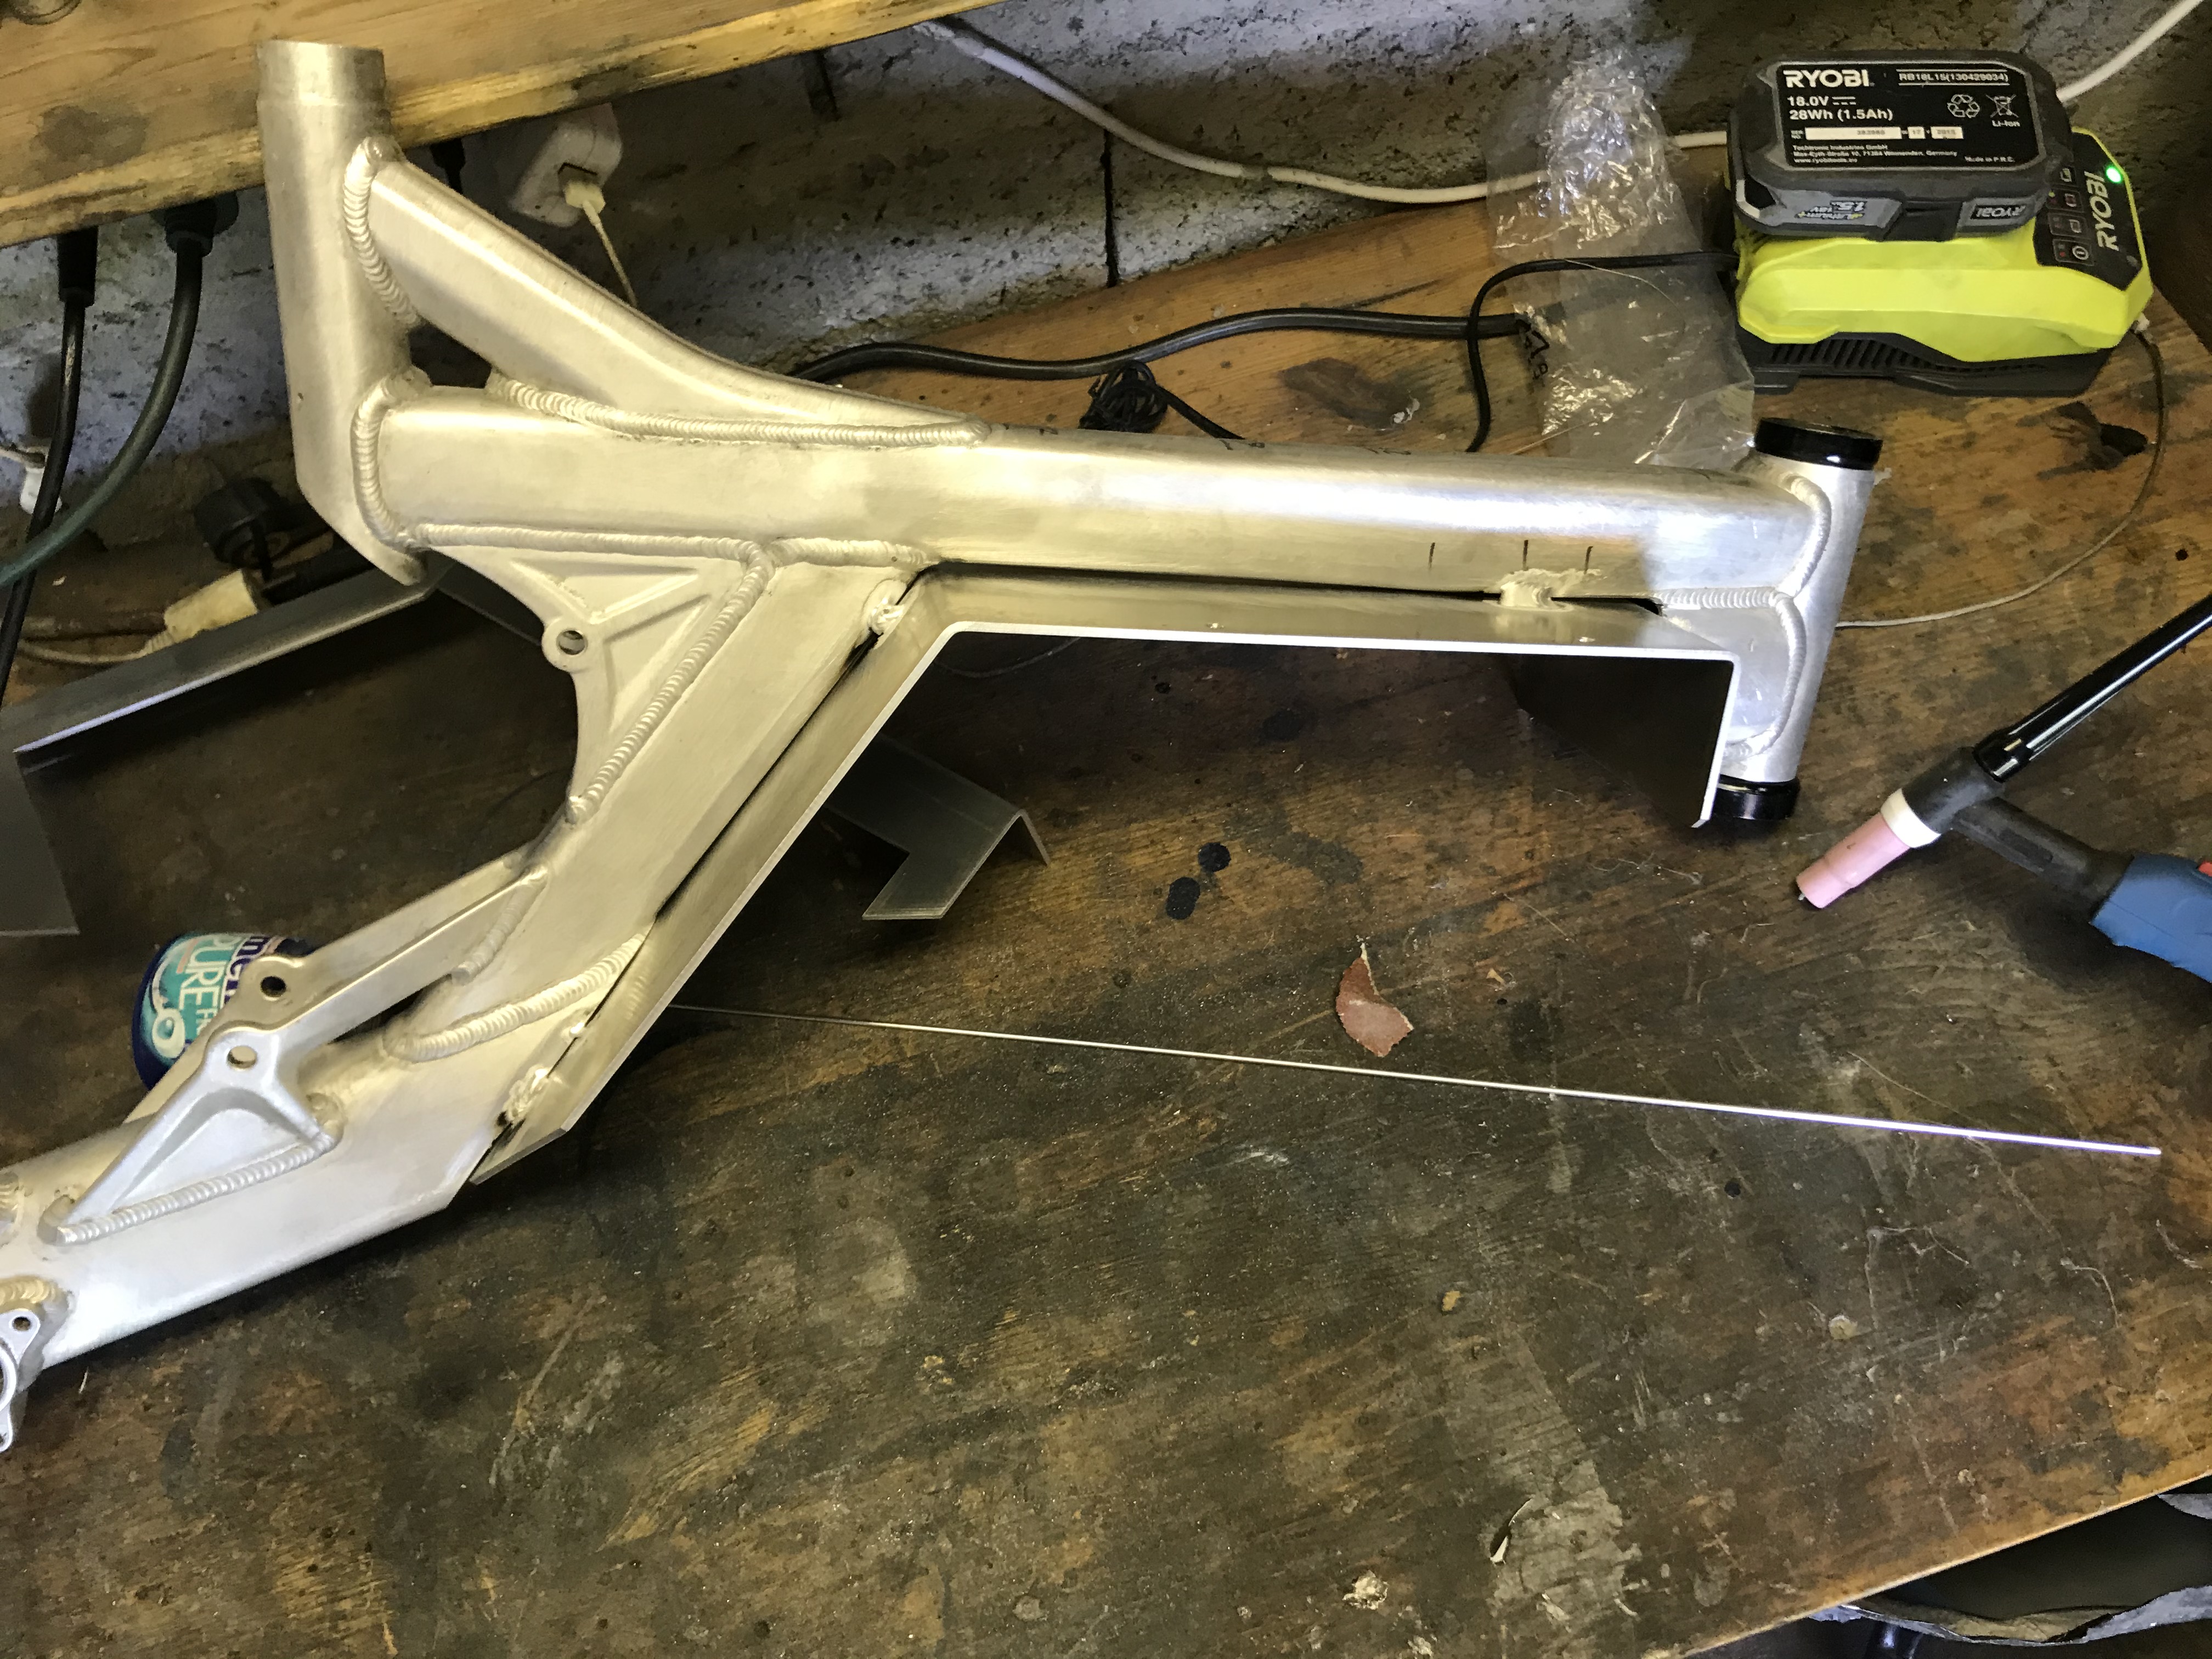
A bit of sanding
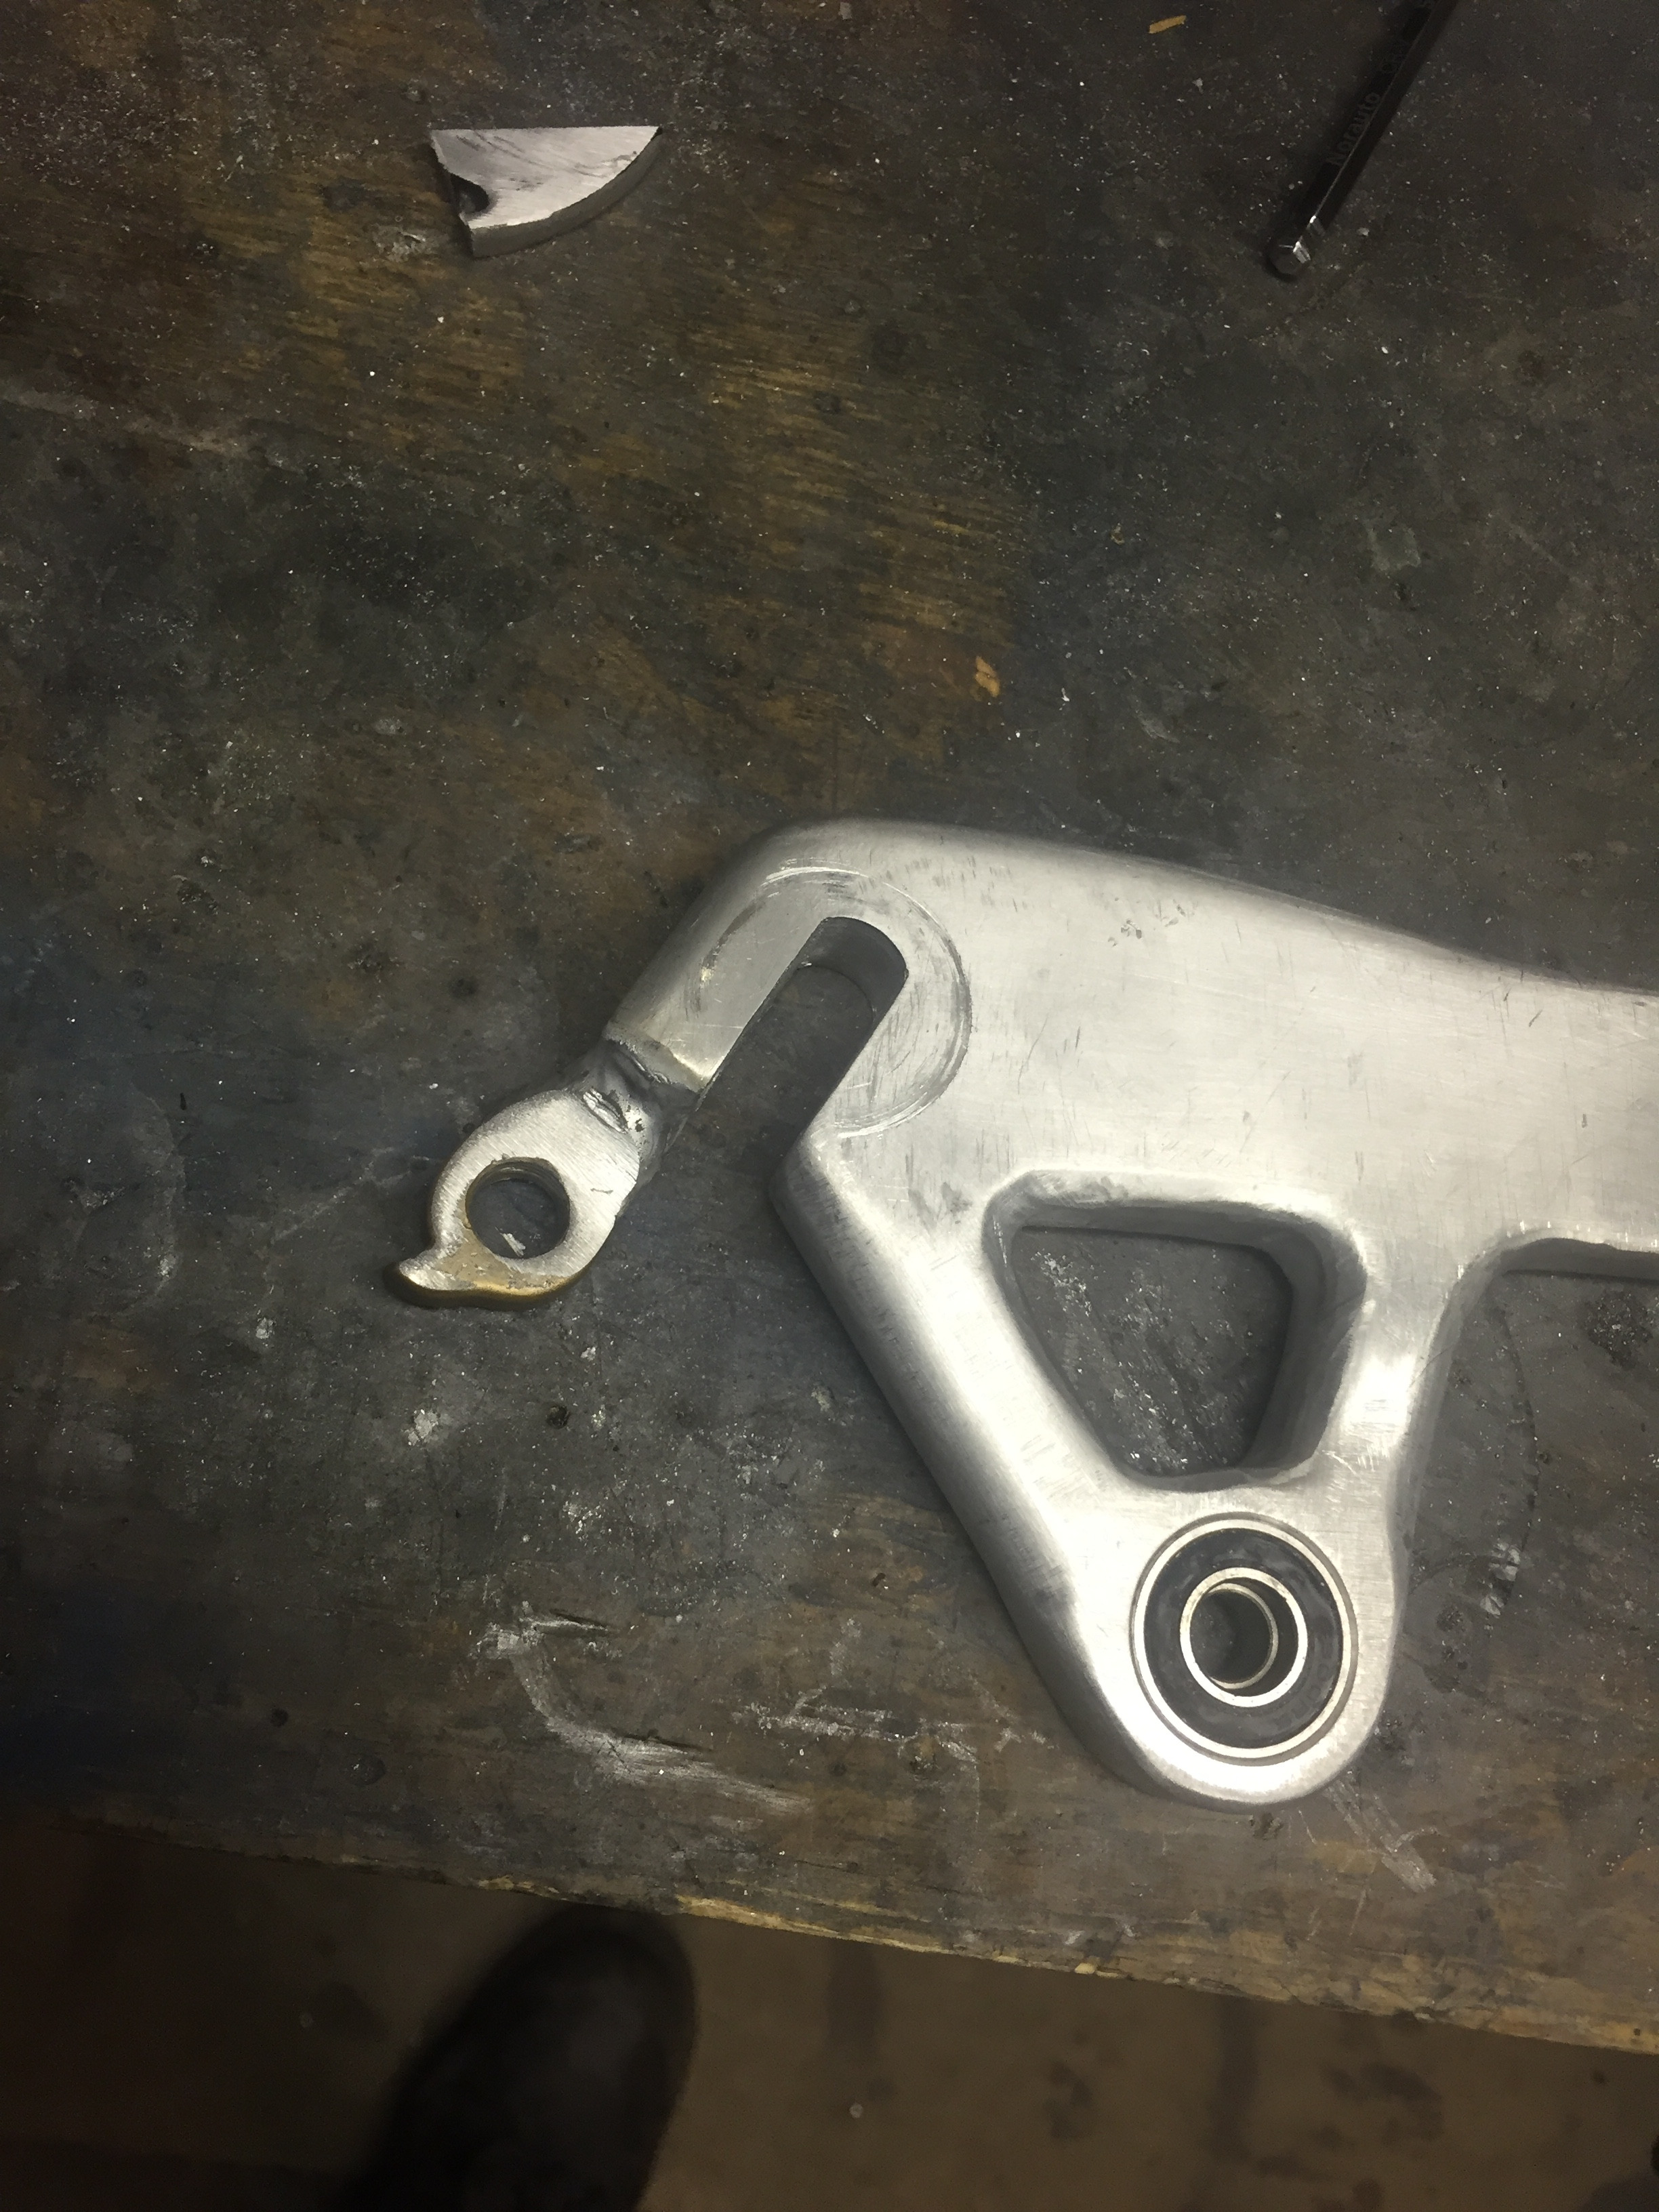
Add the derailleur fitting to the part
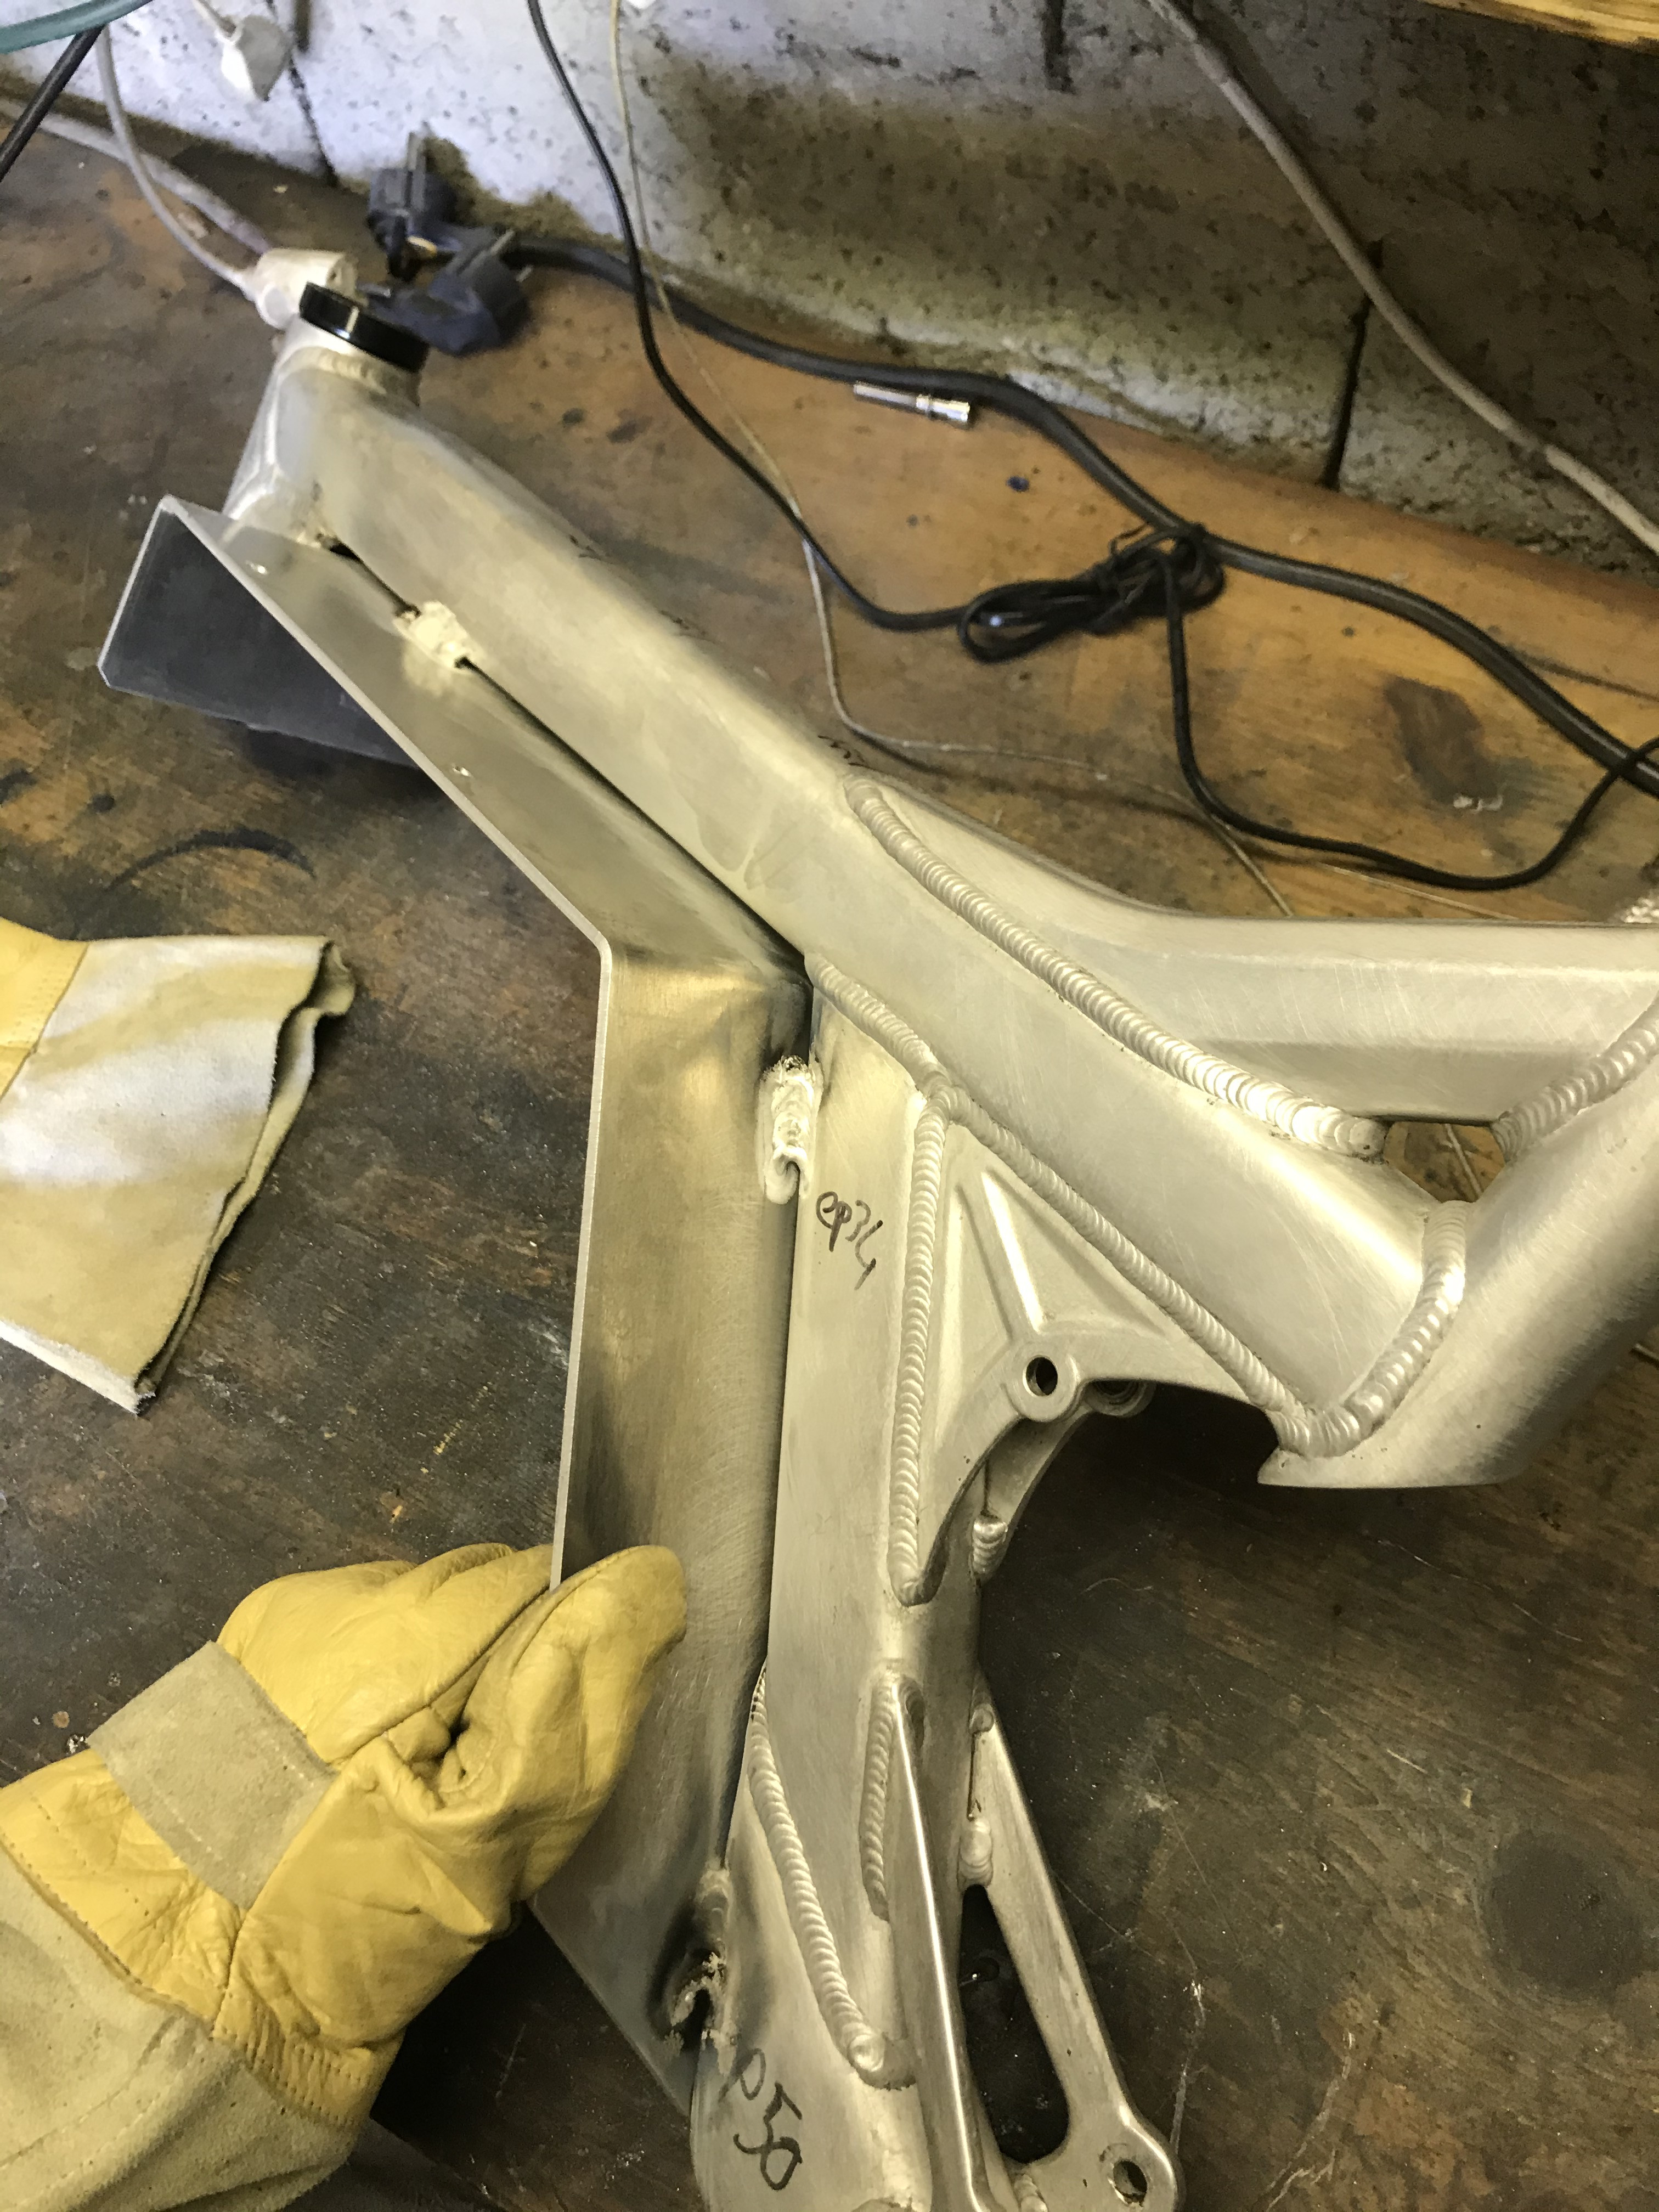
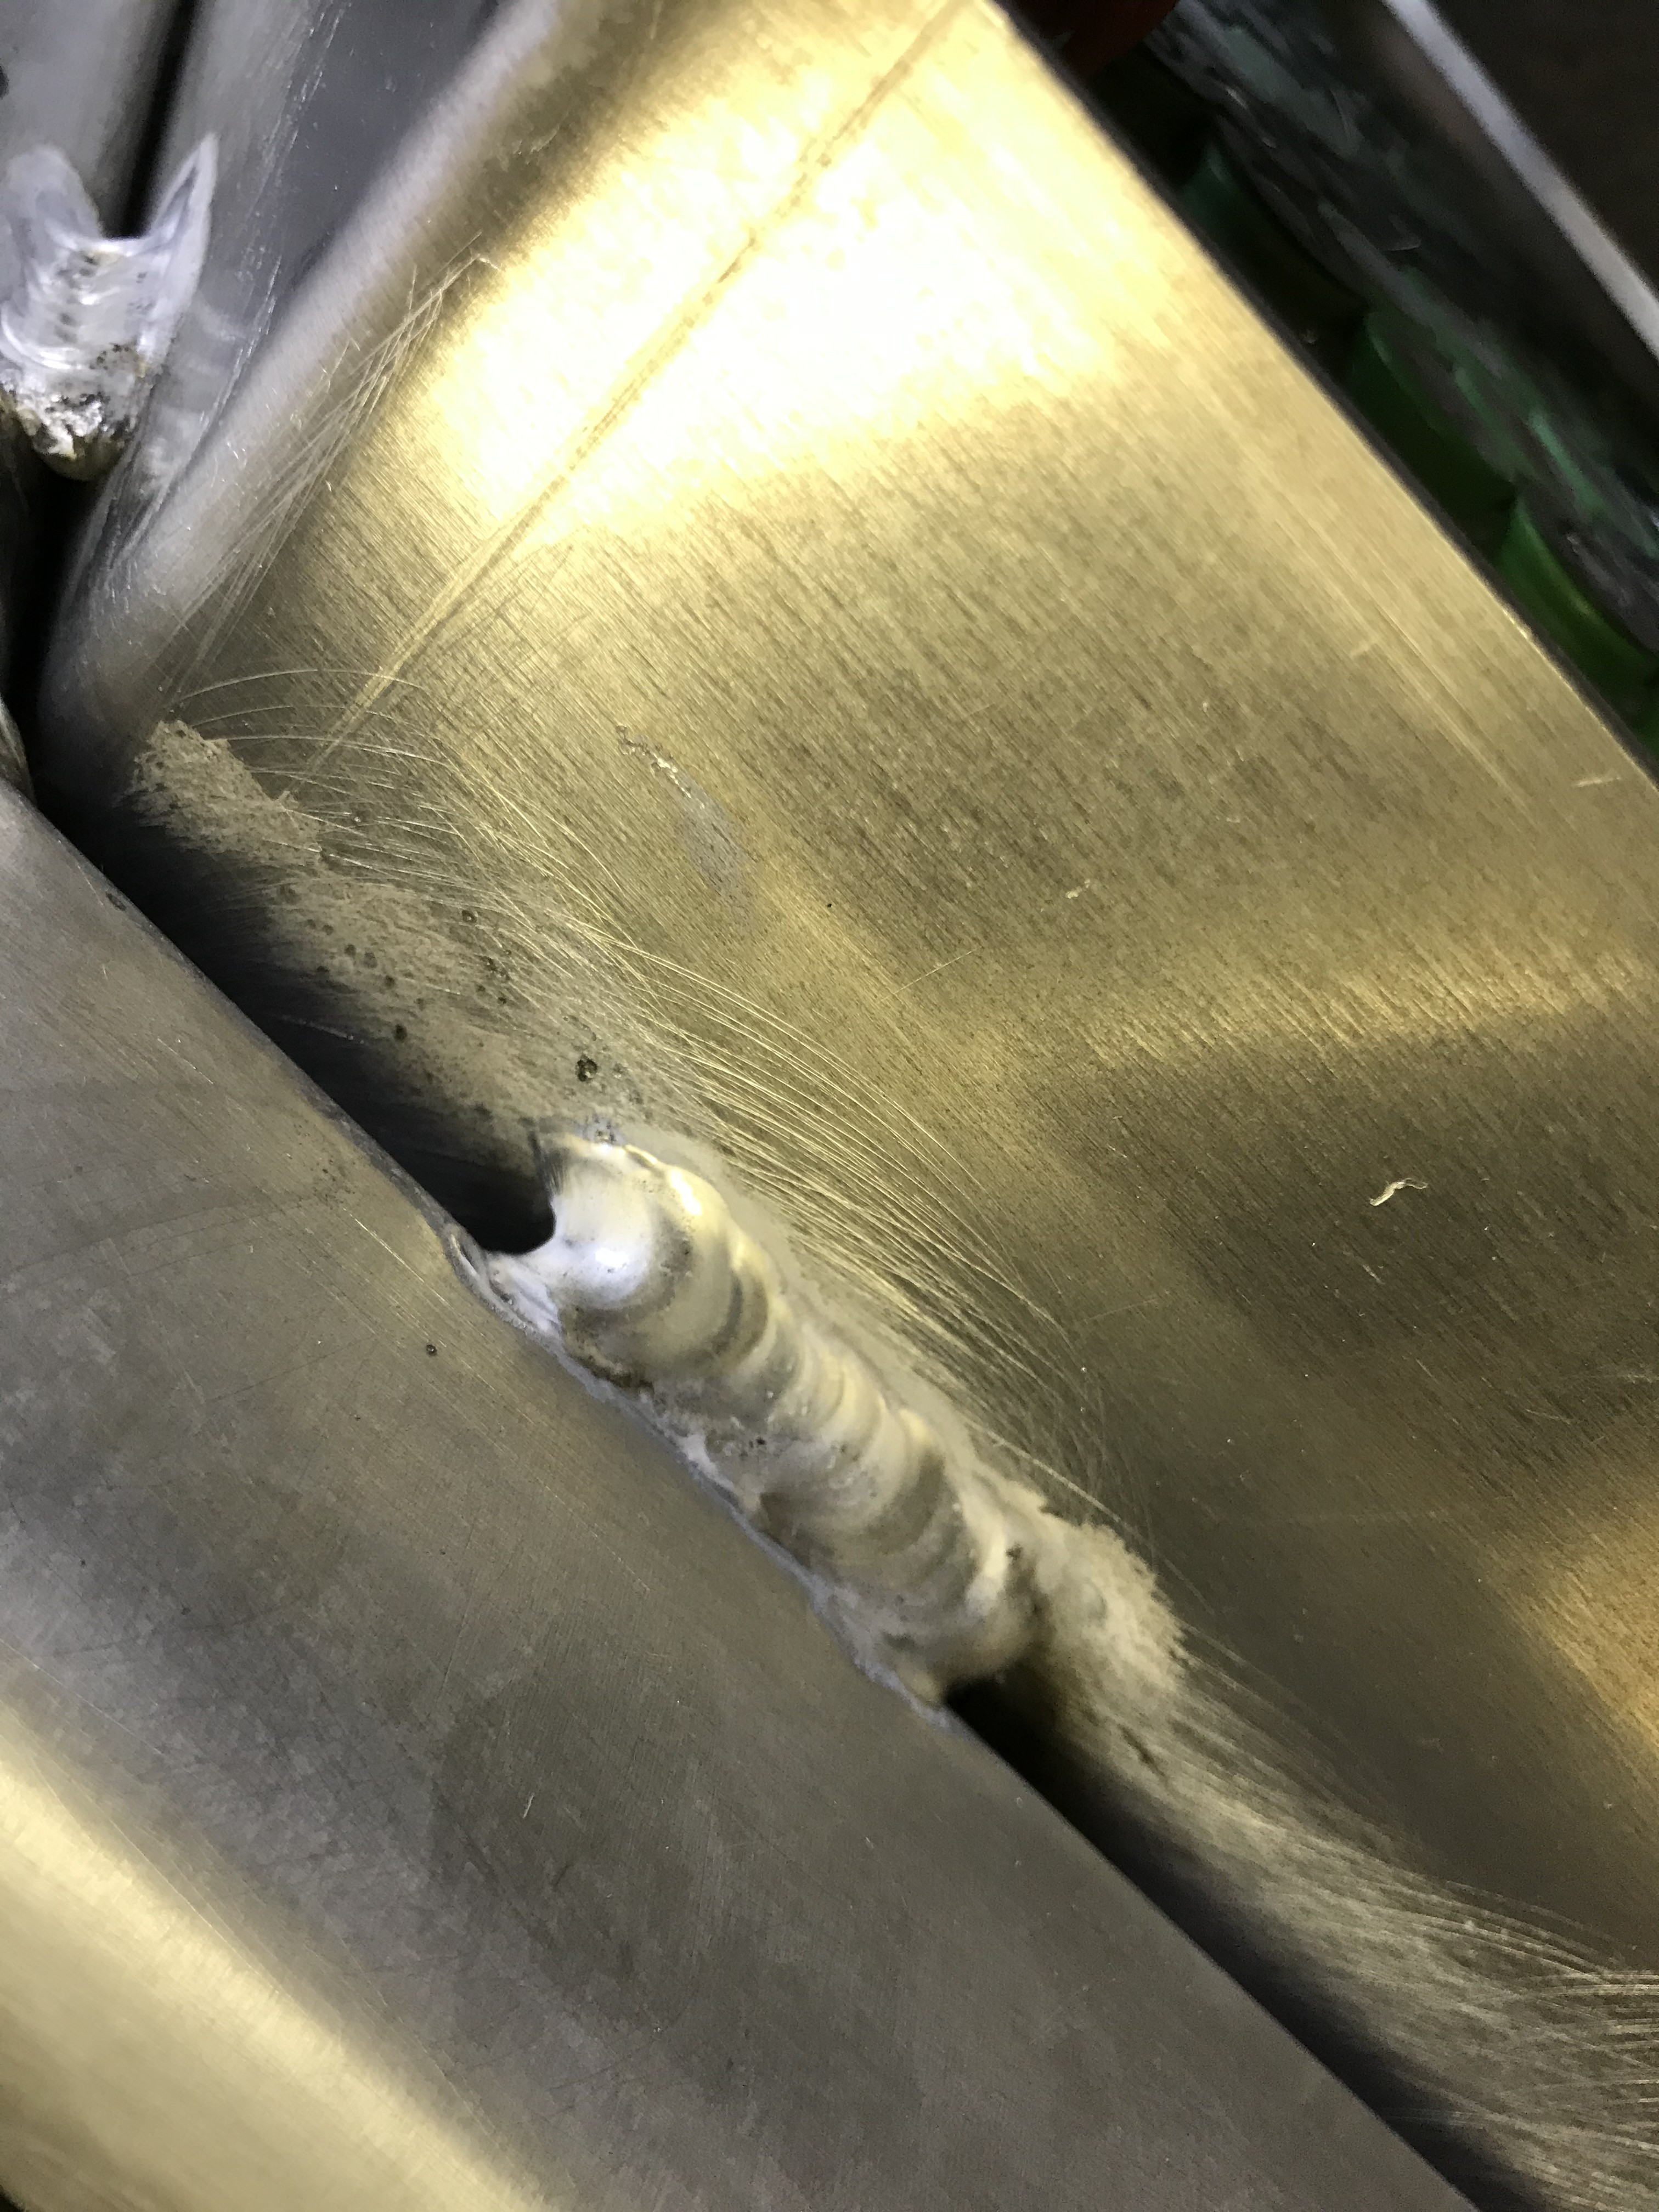
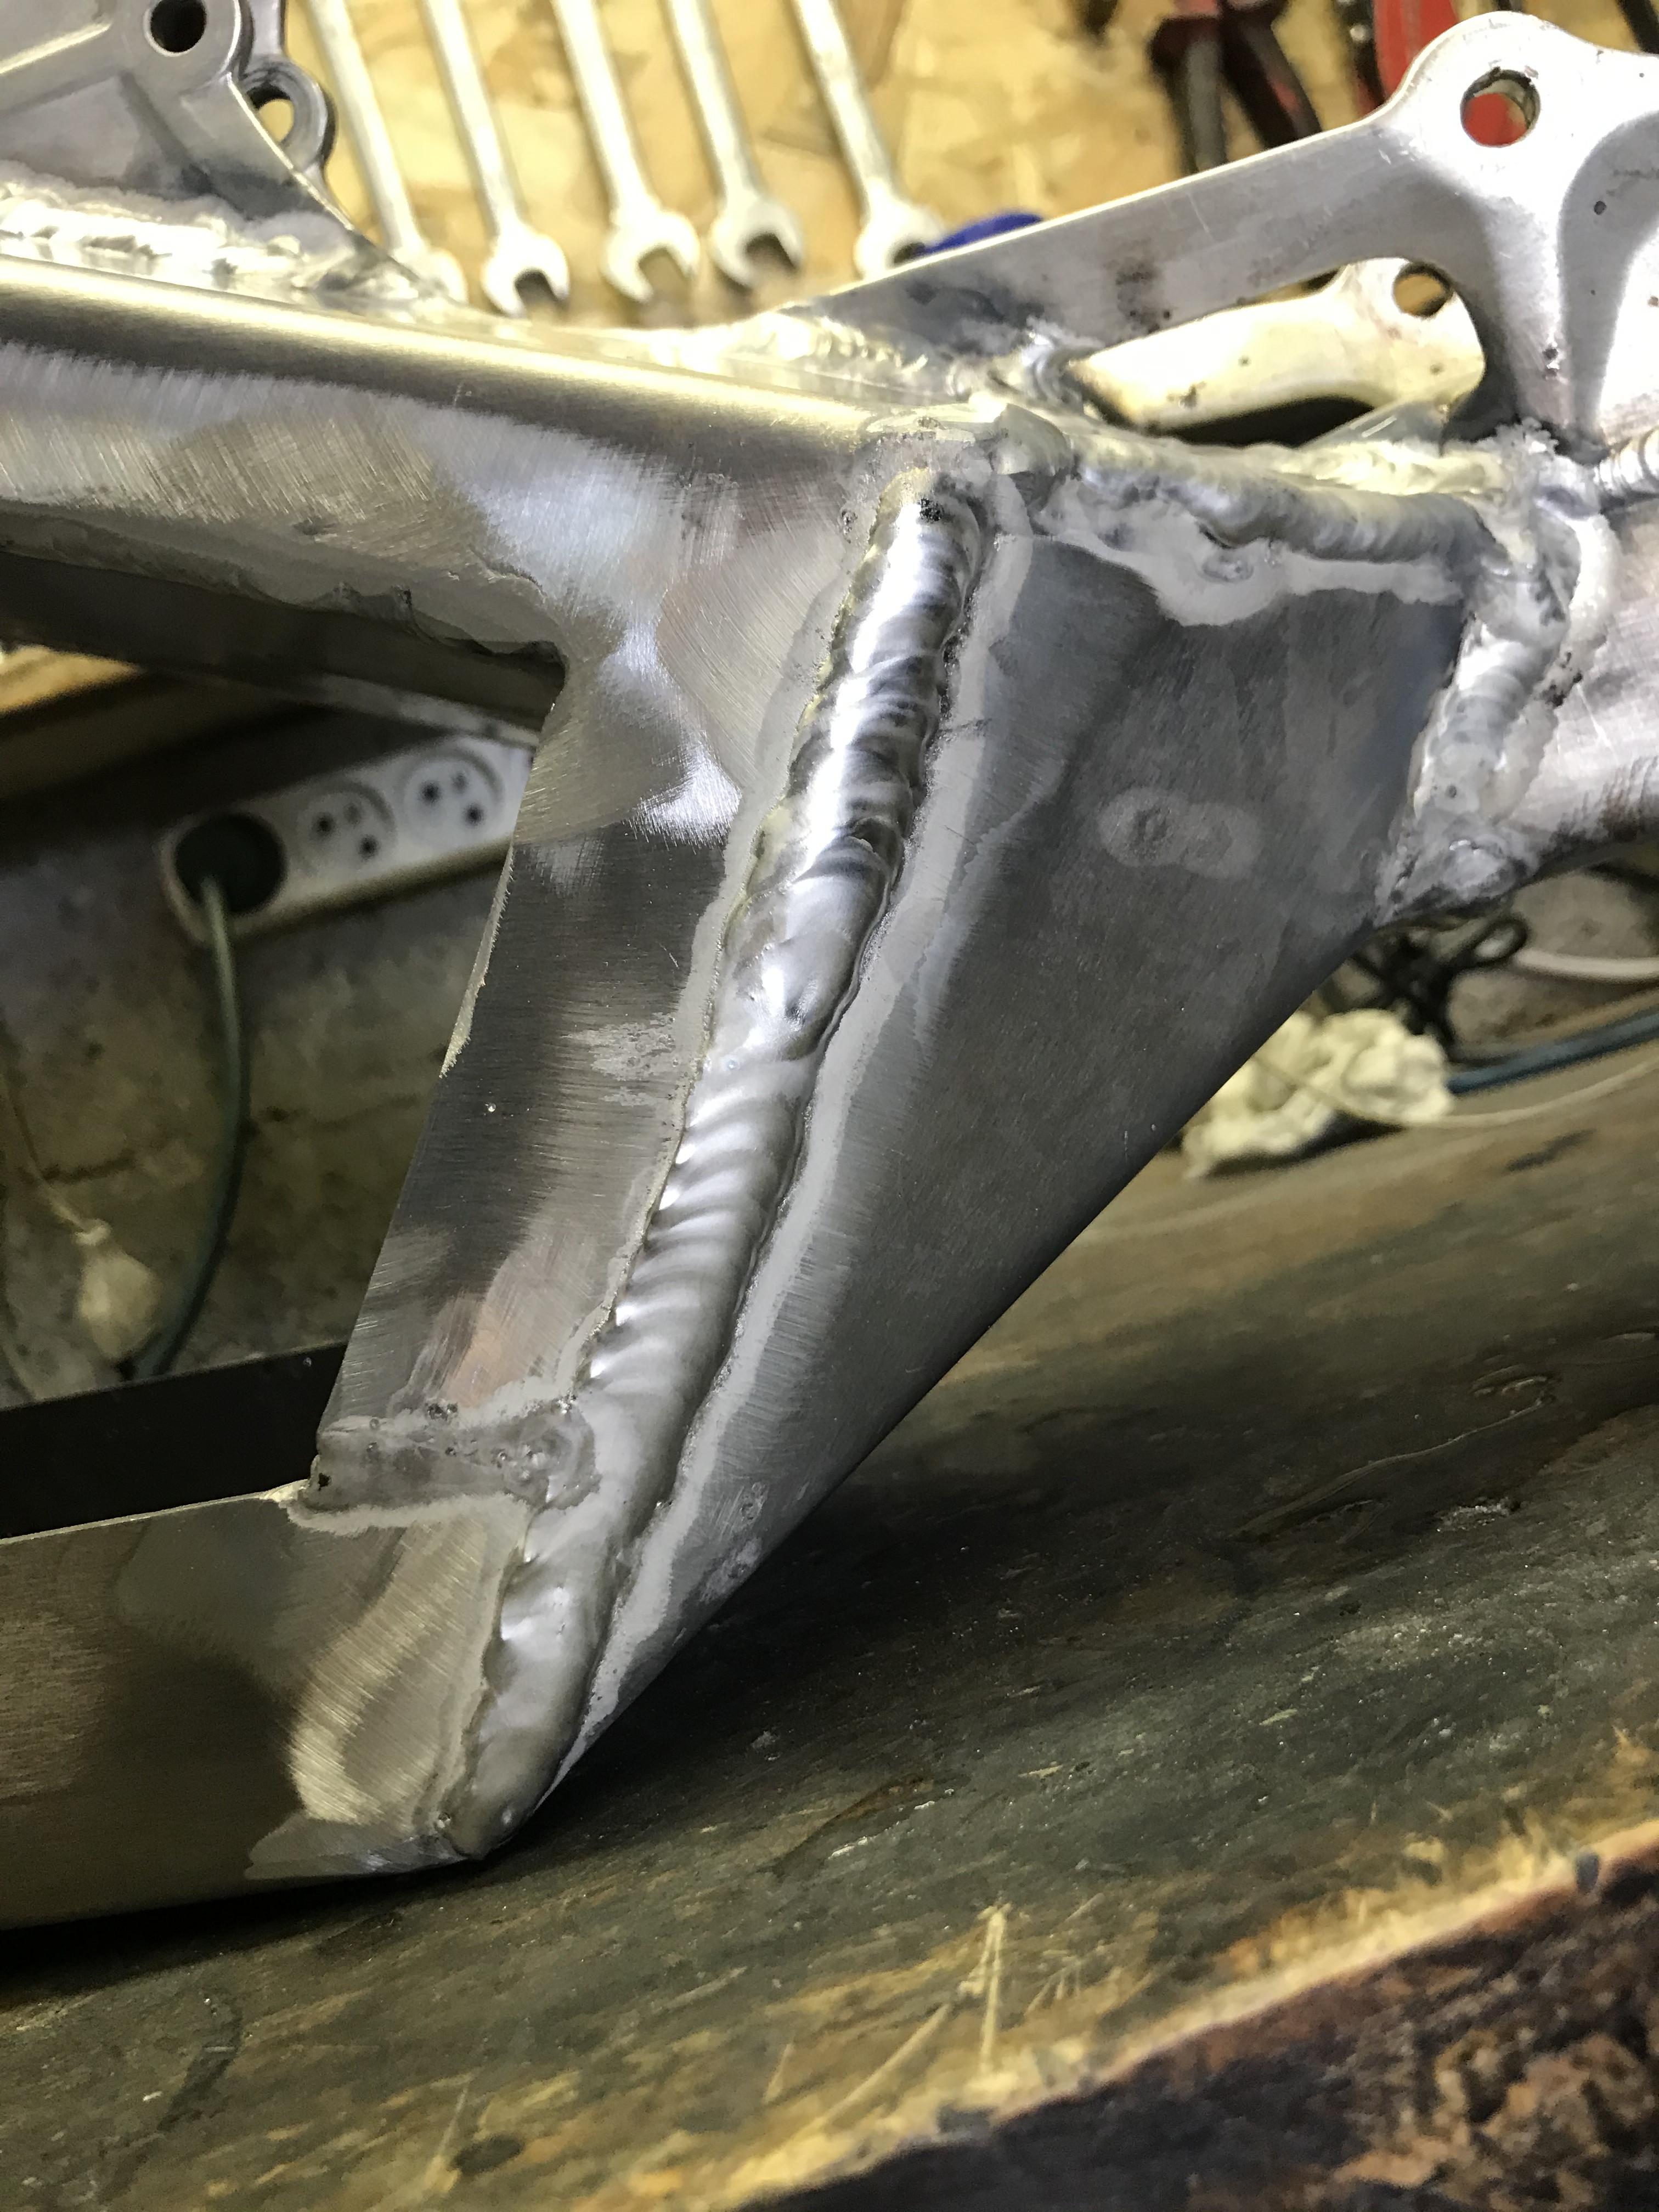
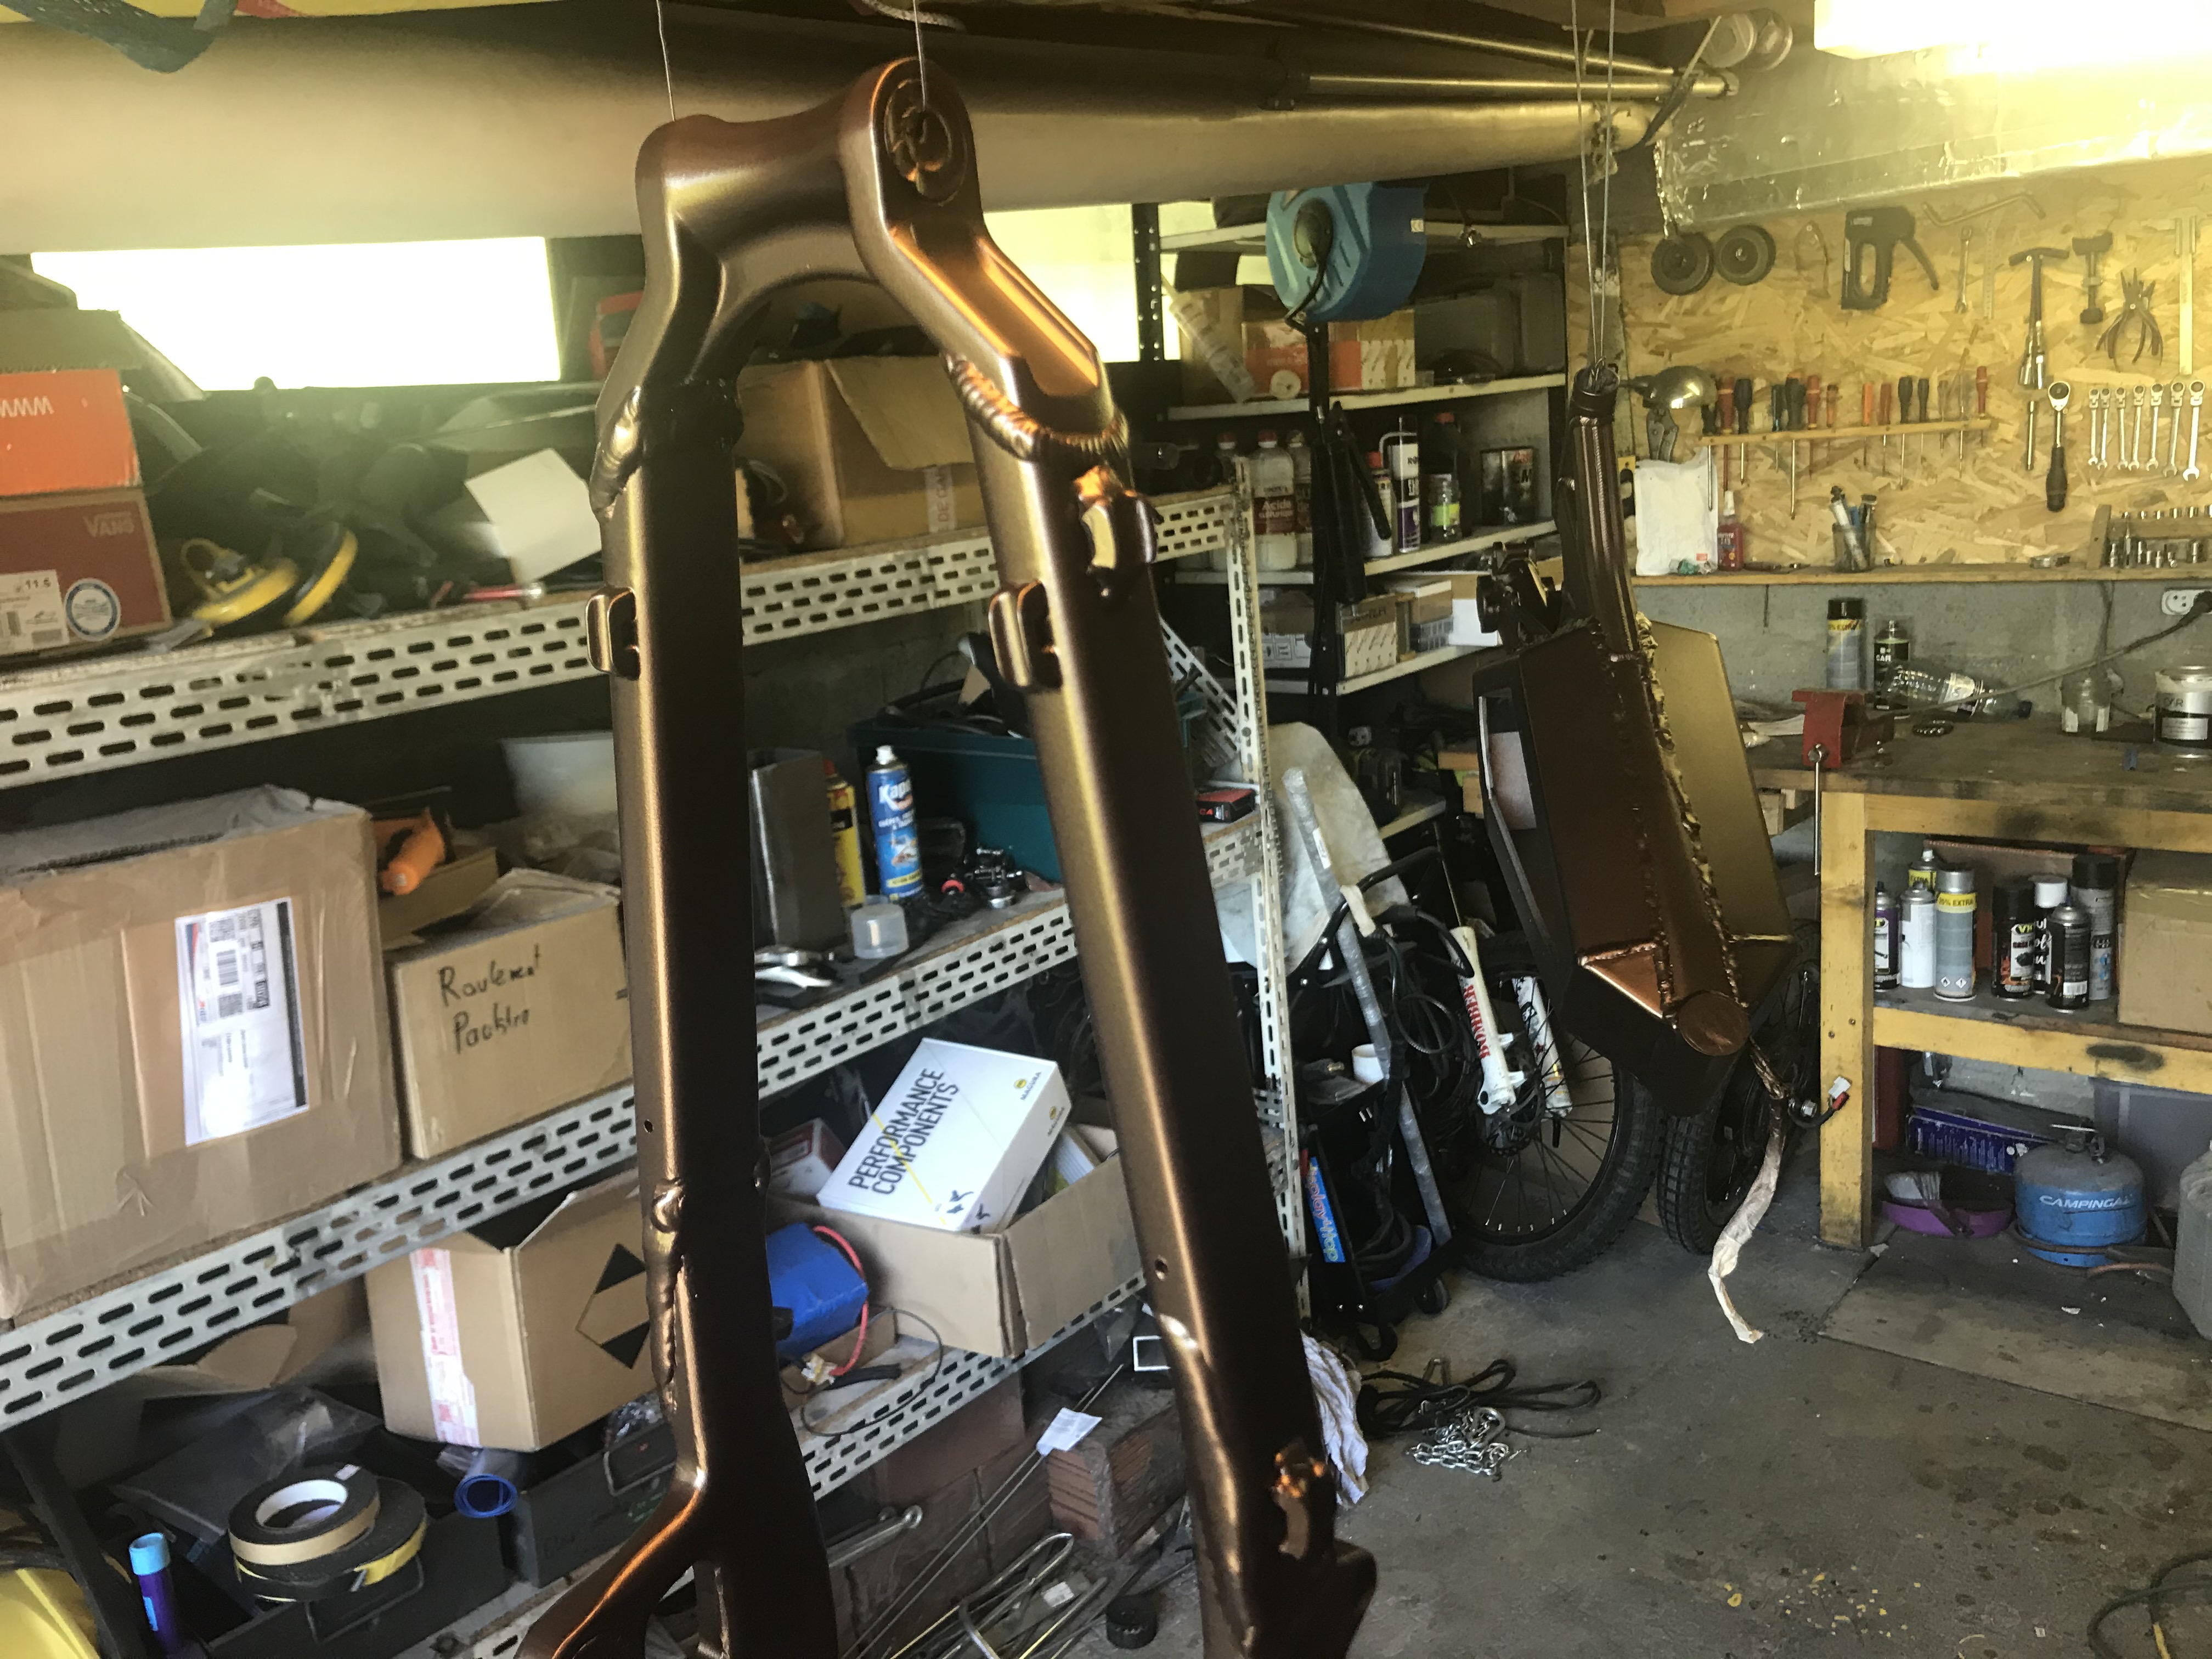
after some big welds

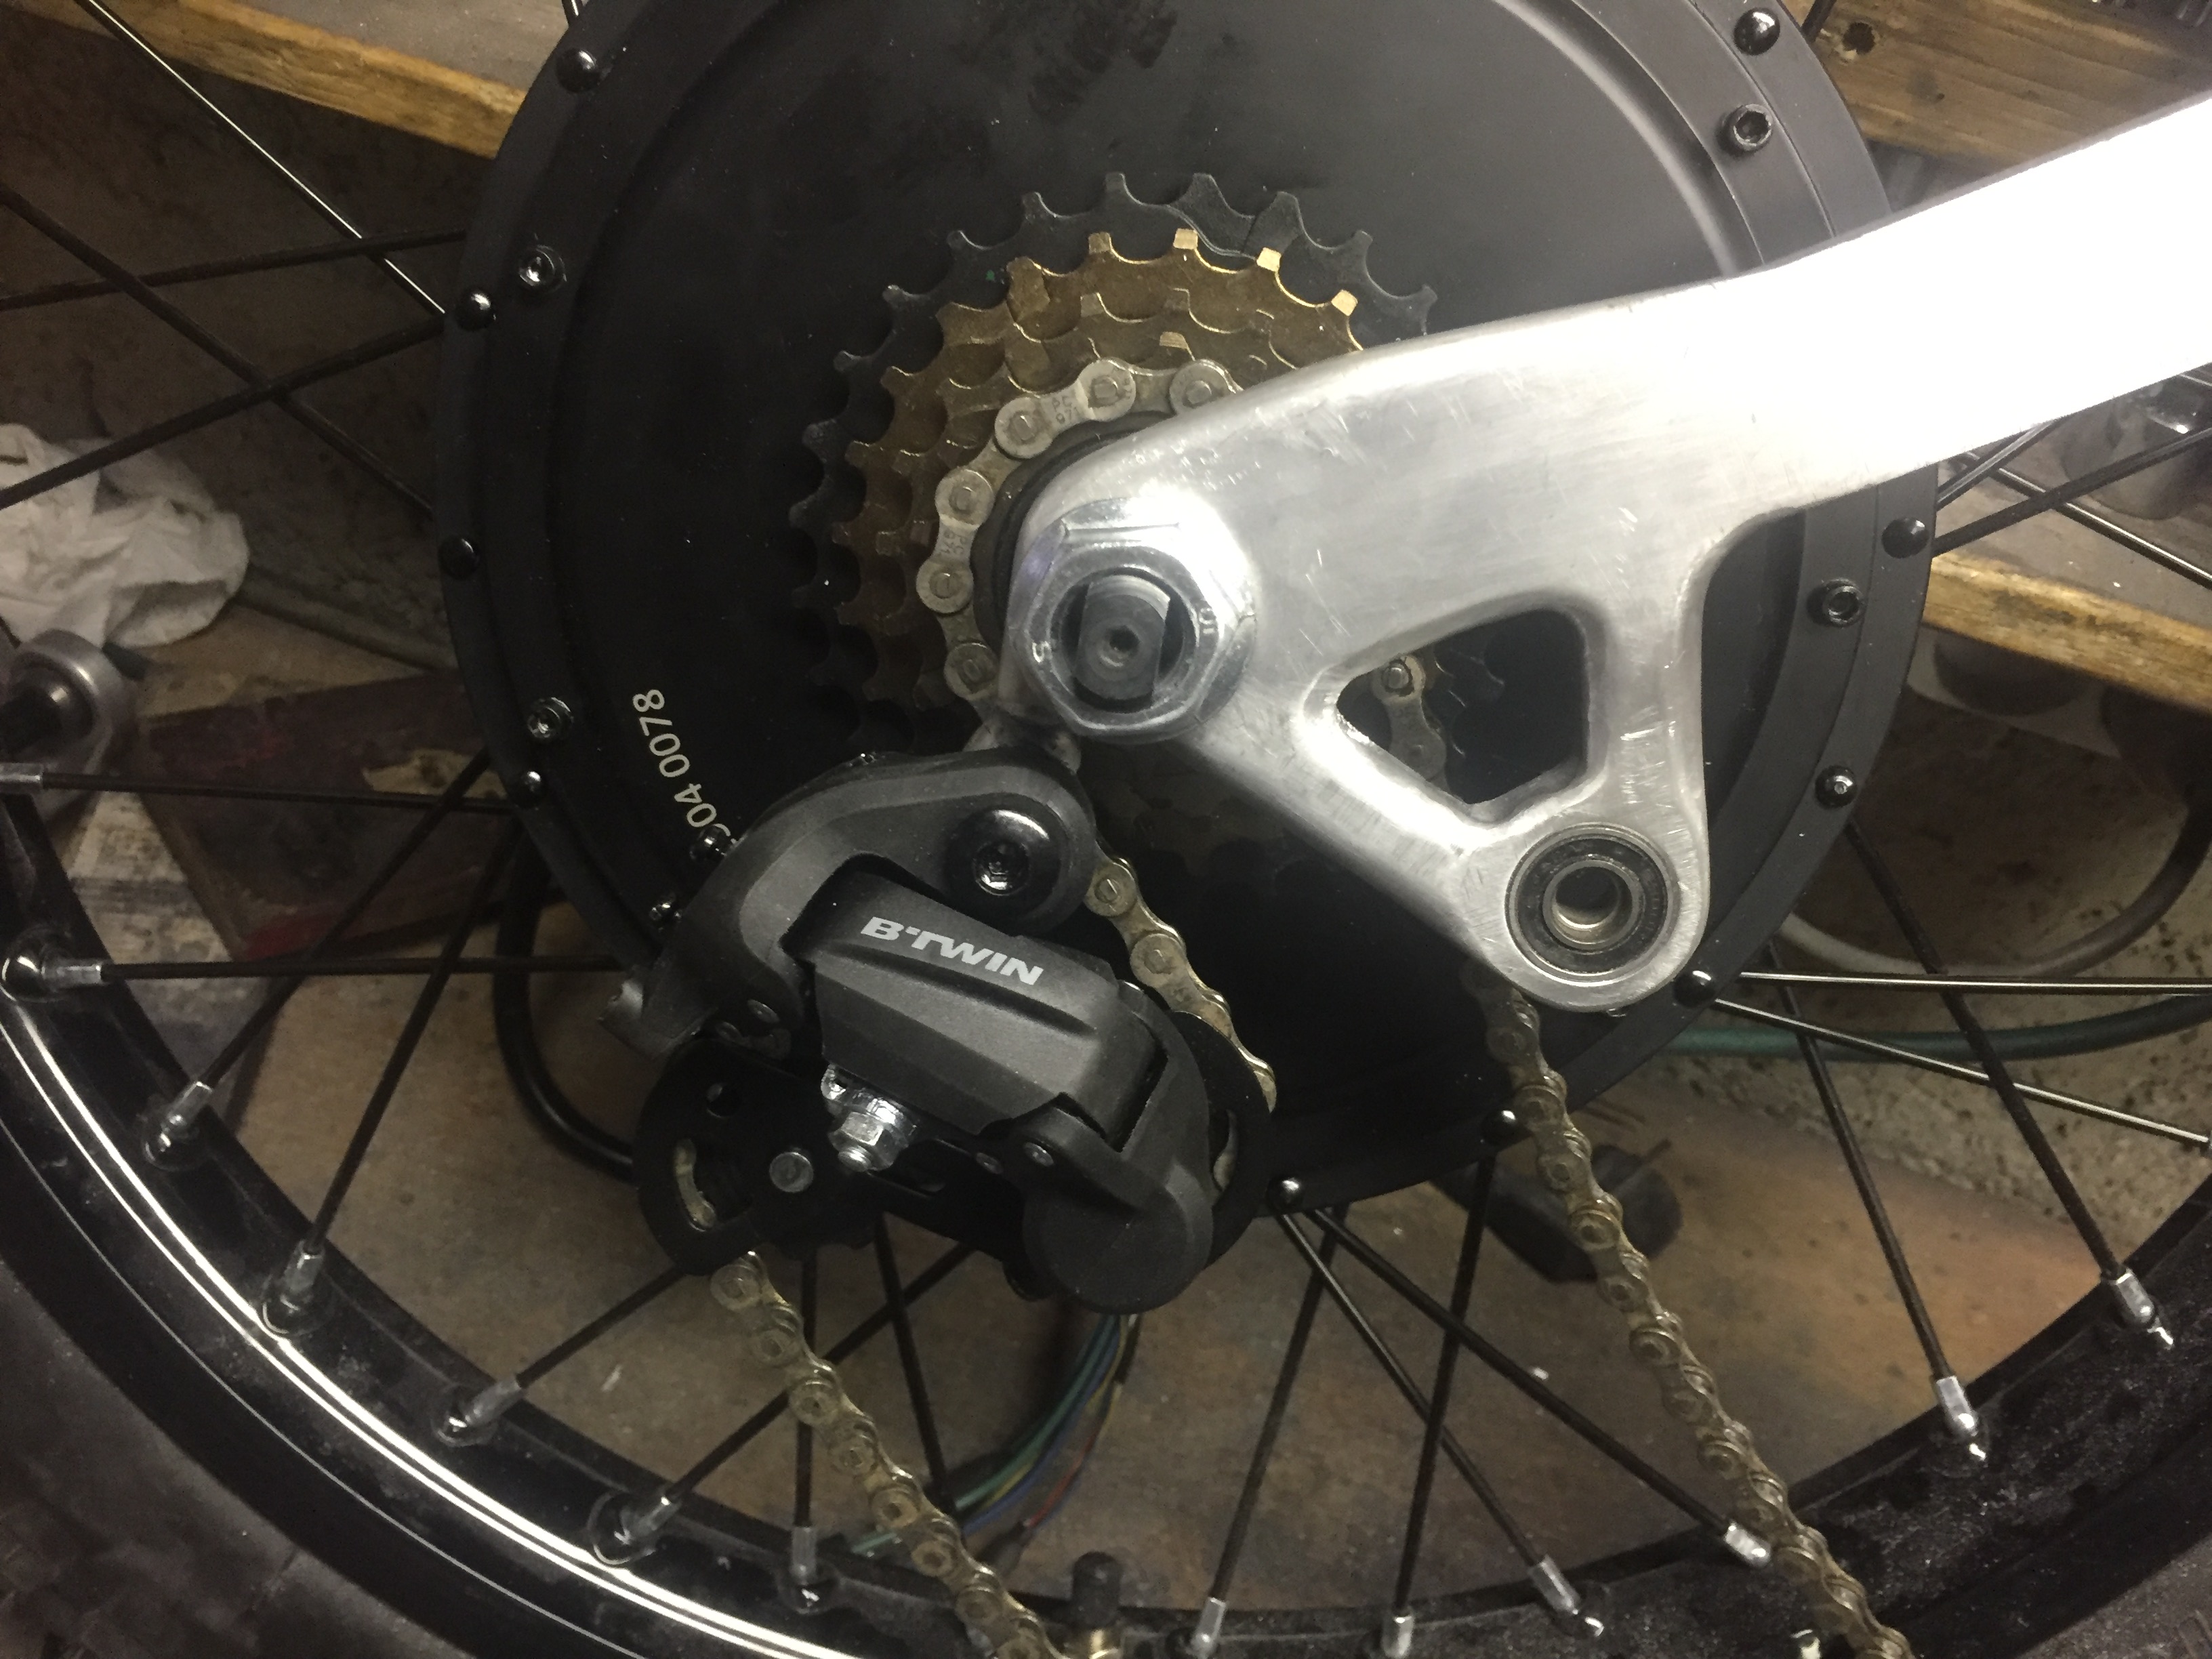
with the rear wheel mounted
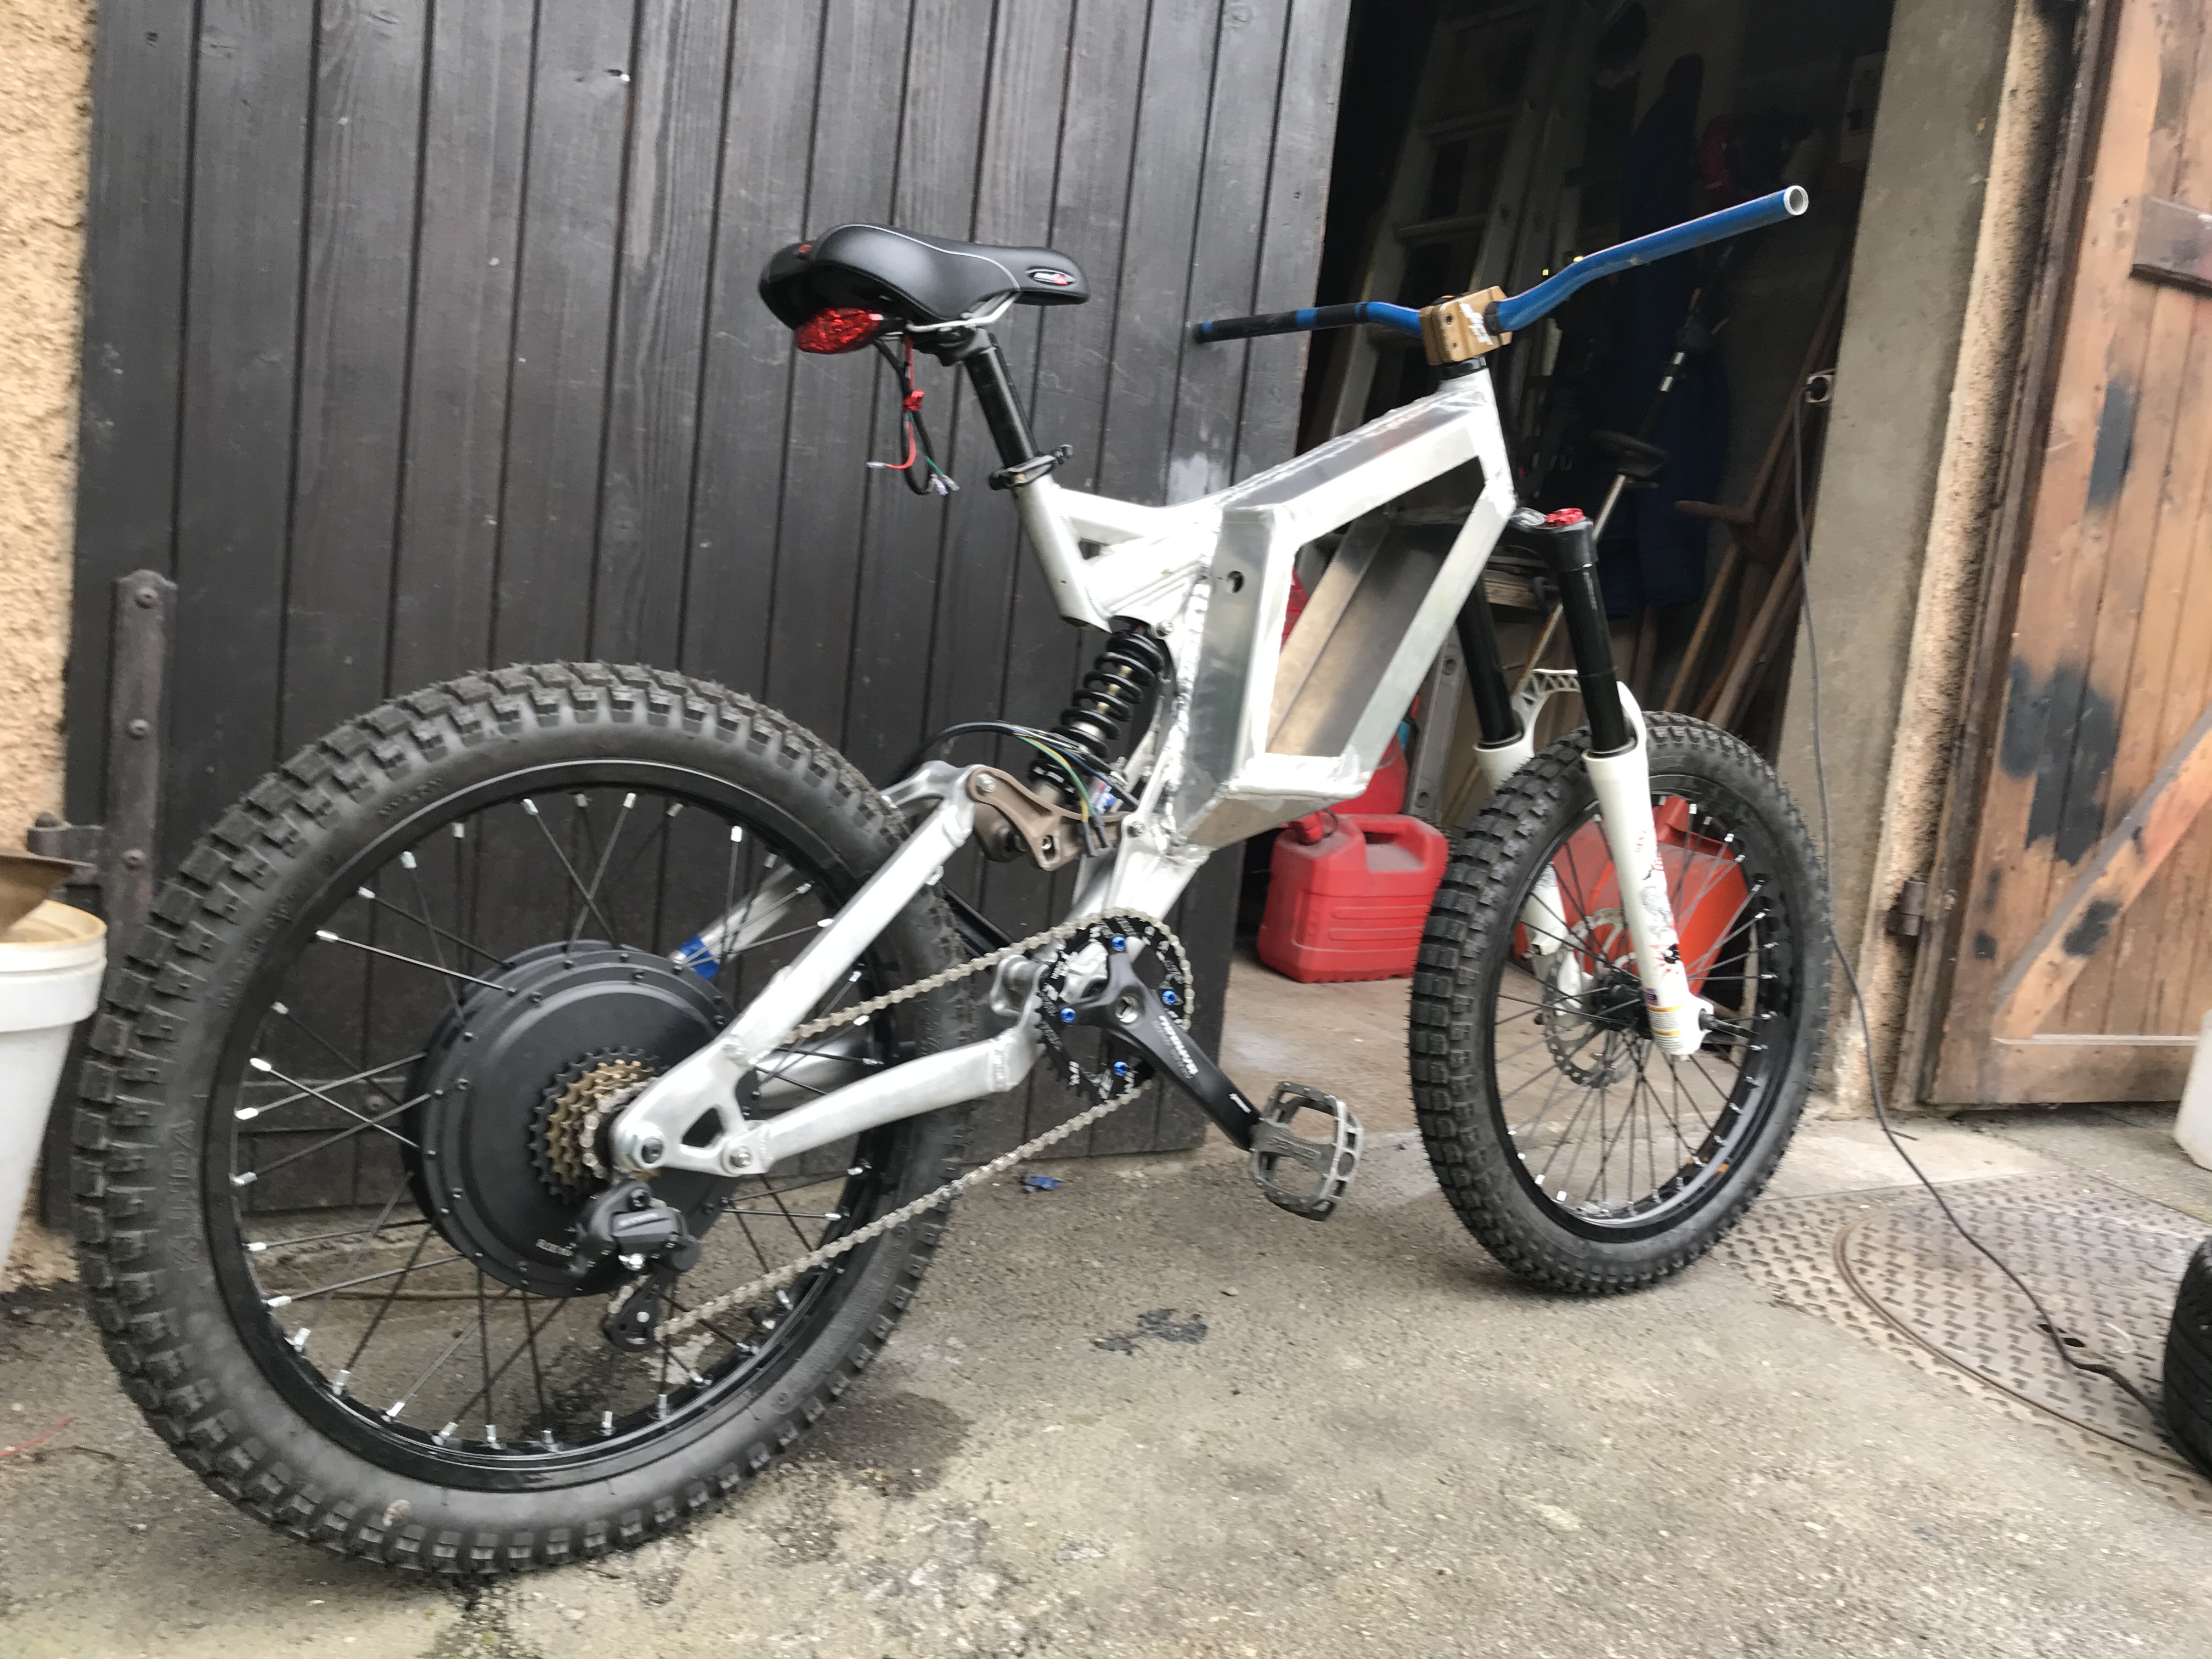
Now we're good !
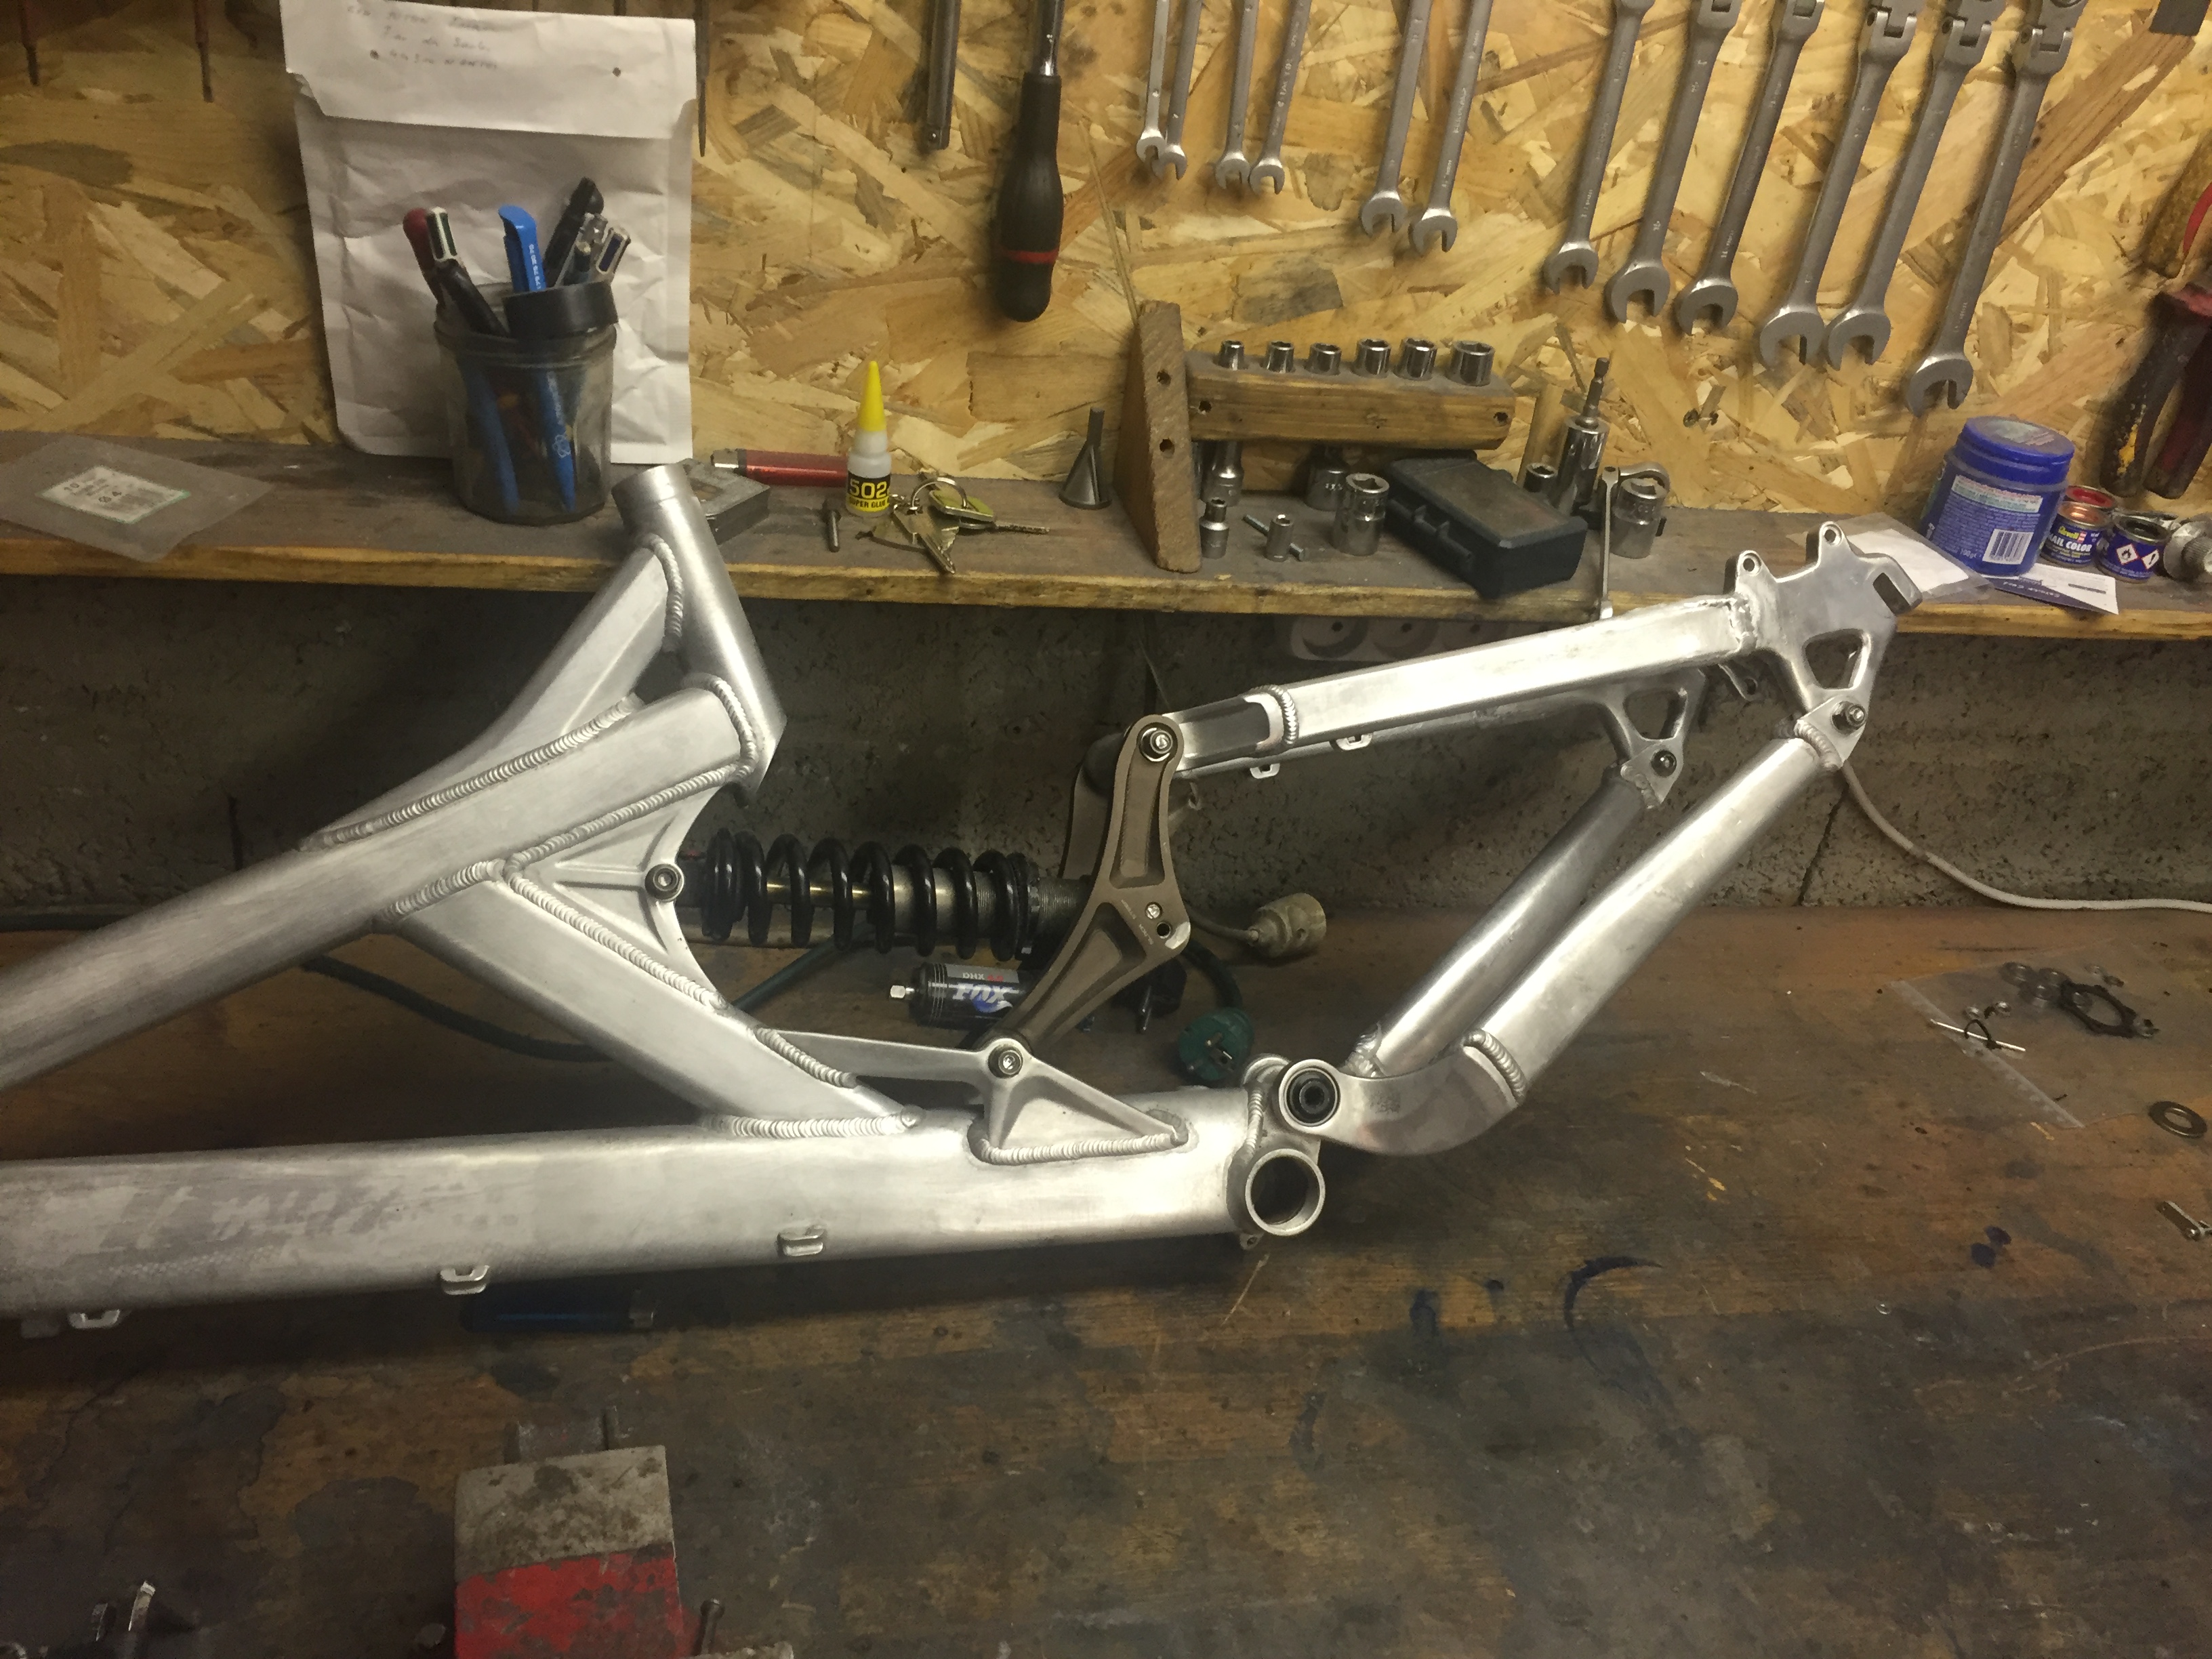
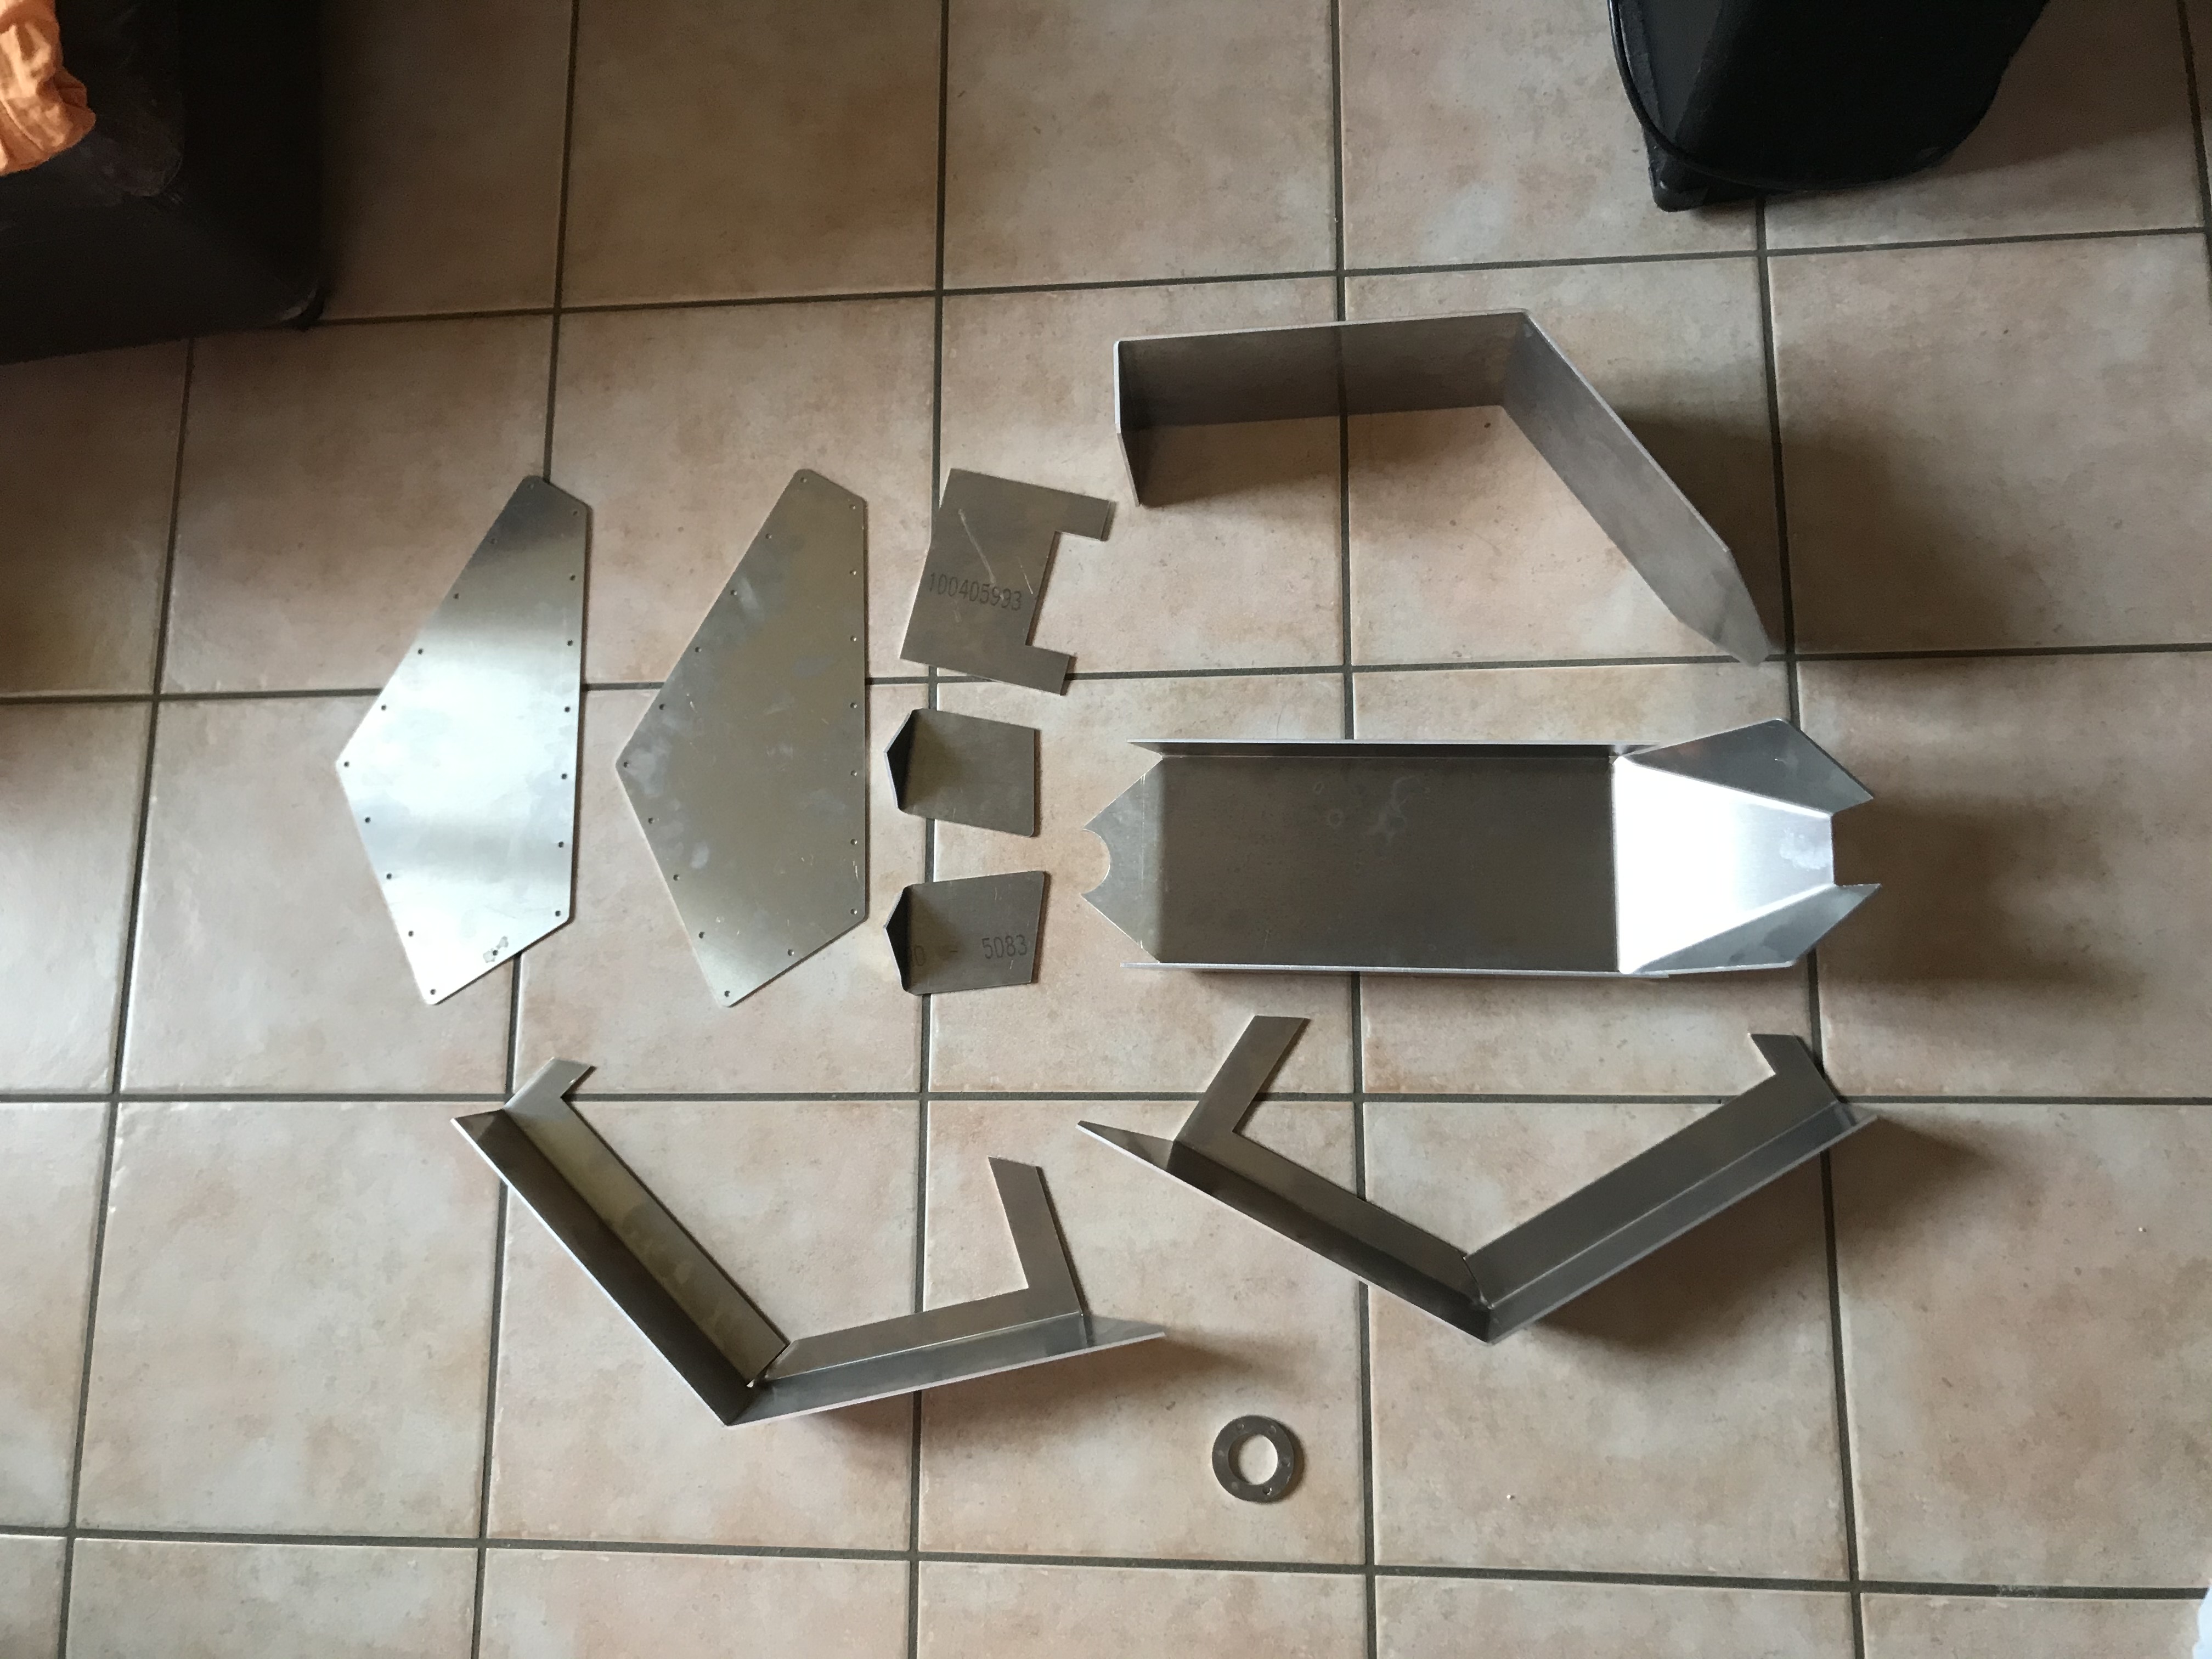
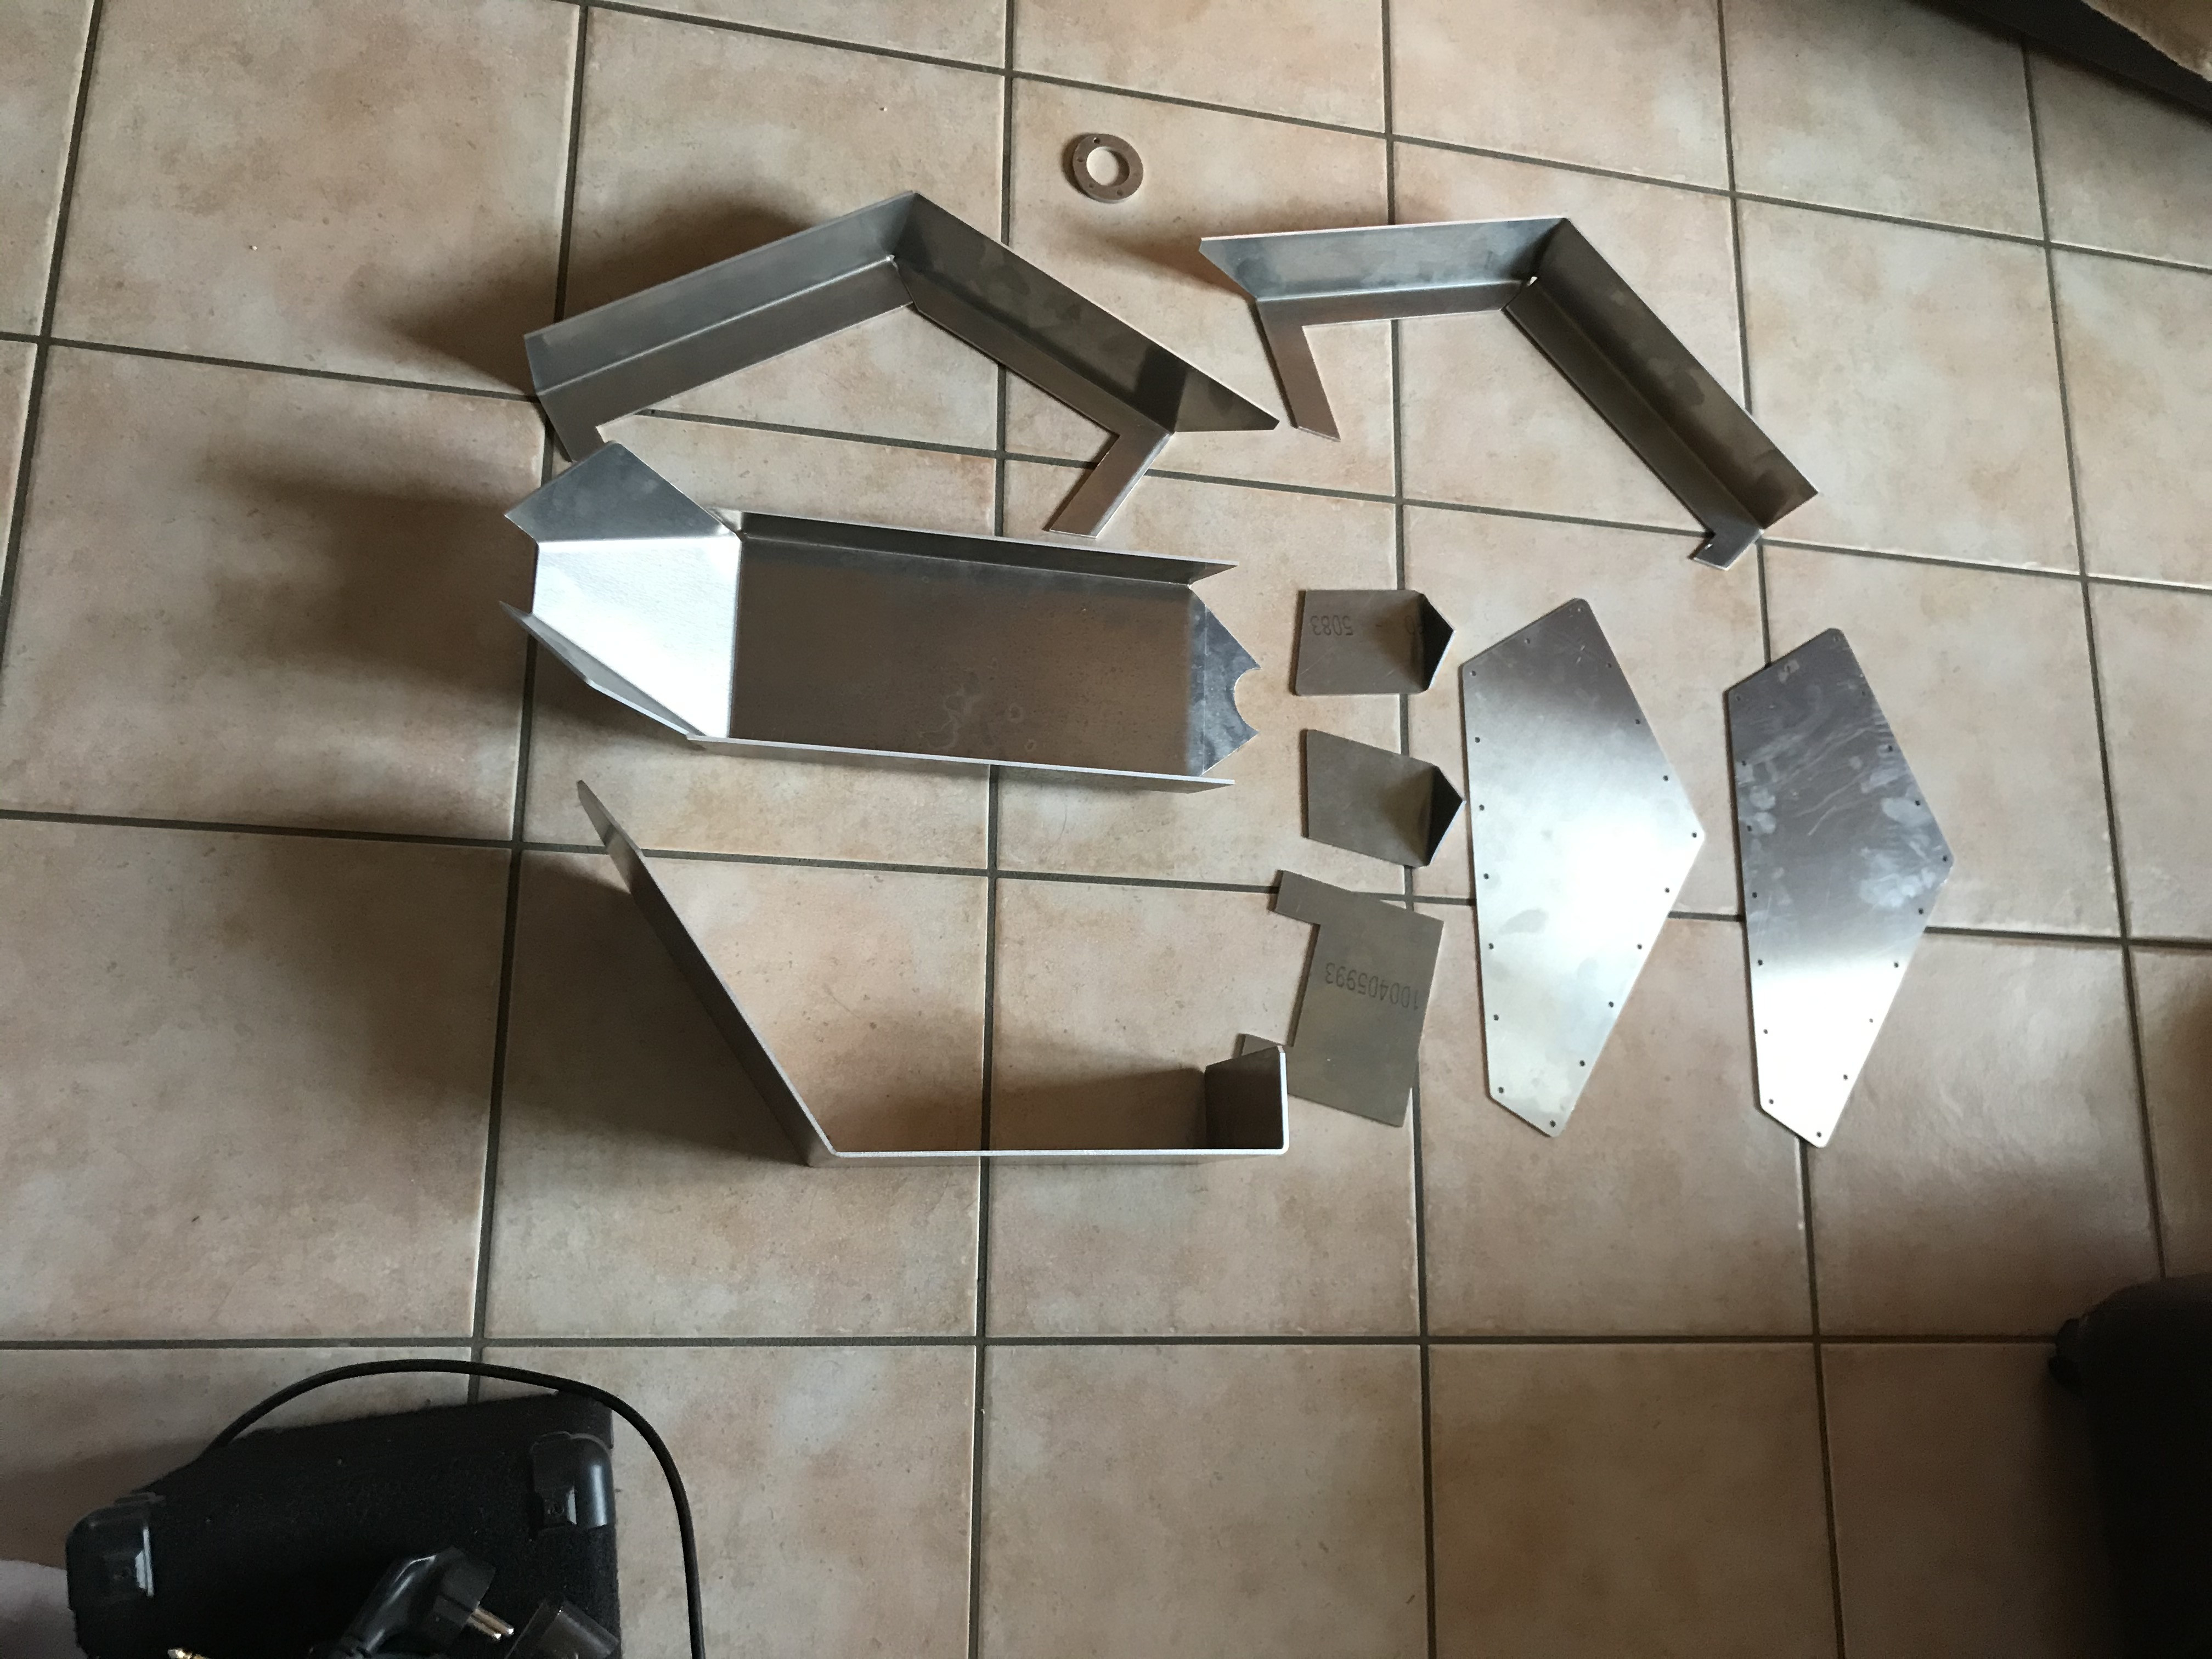
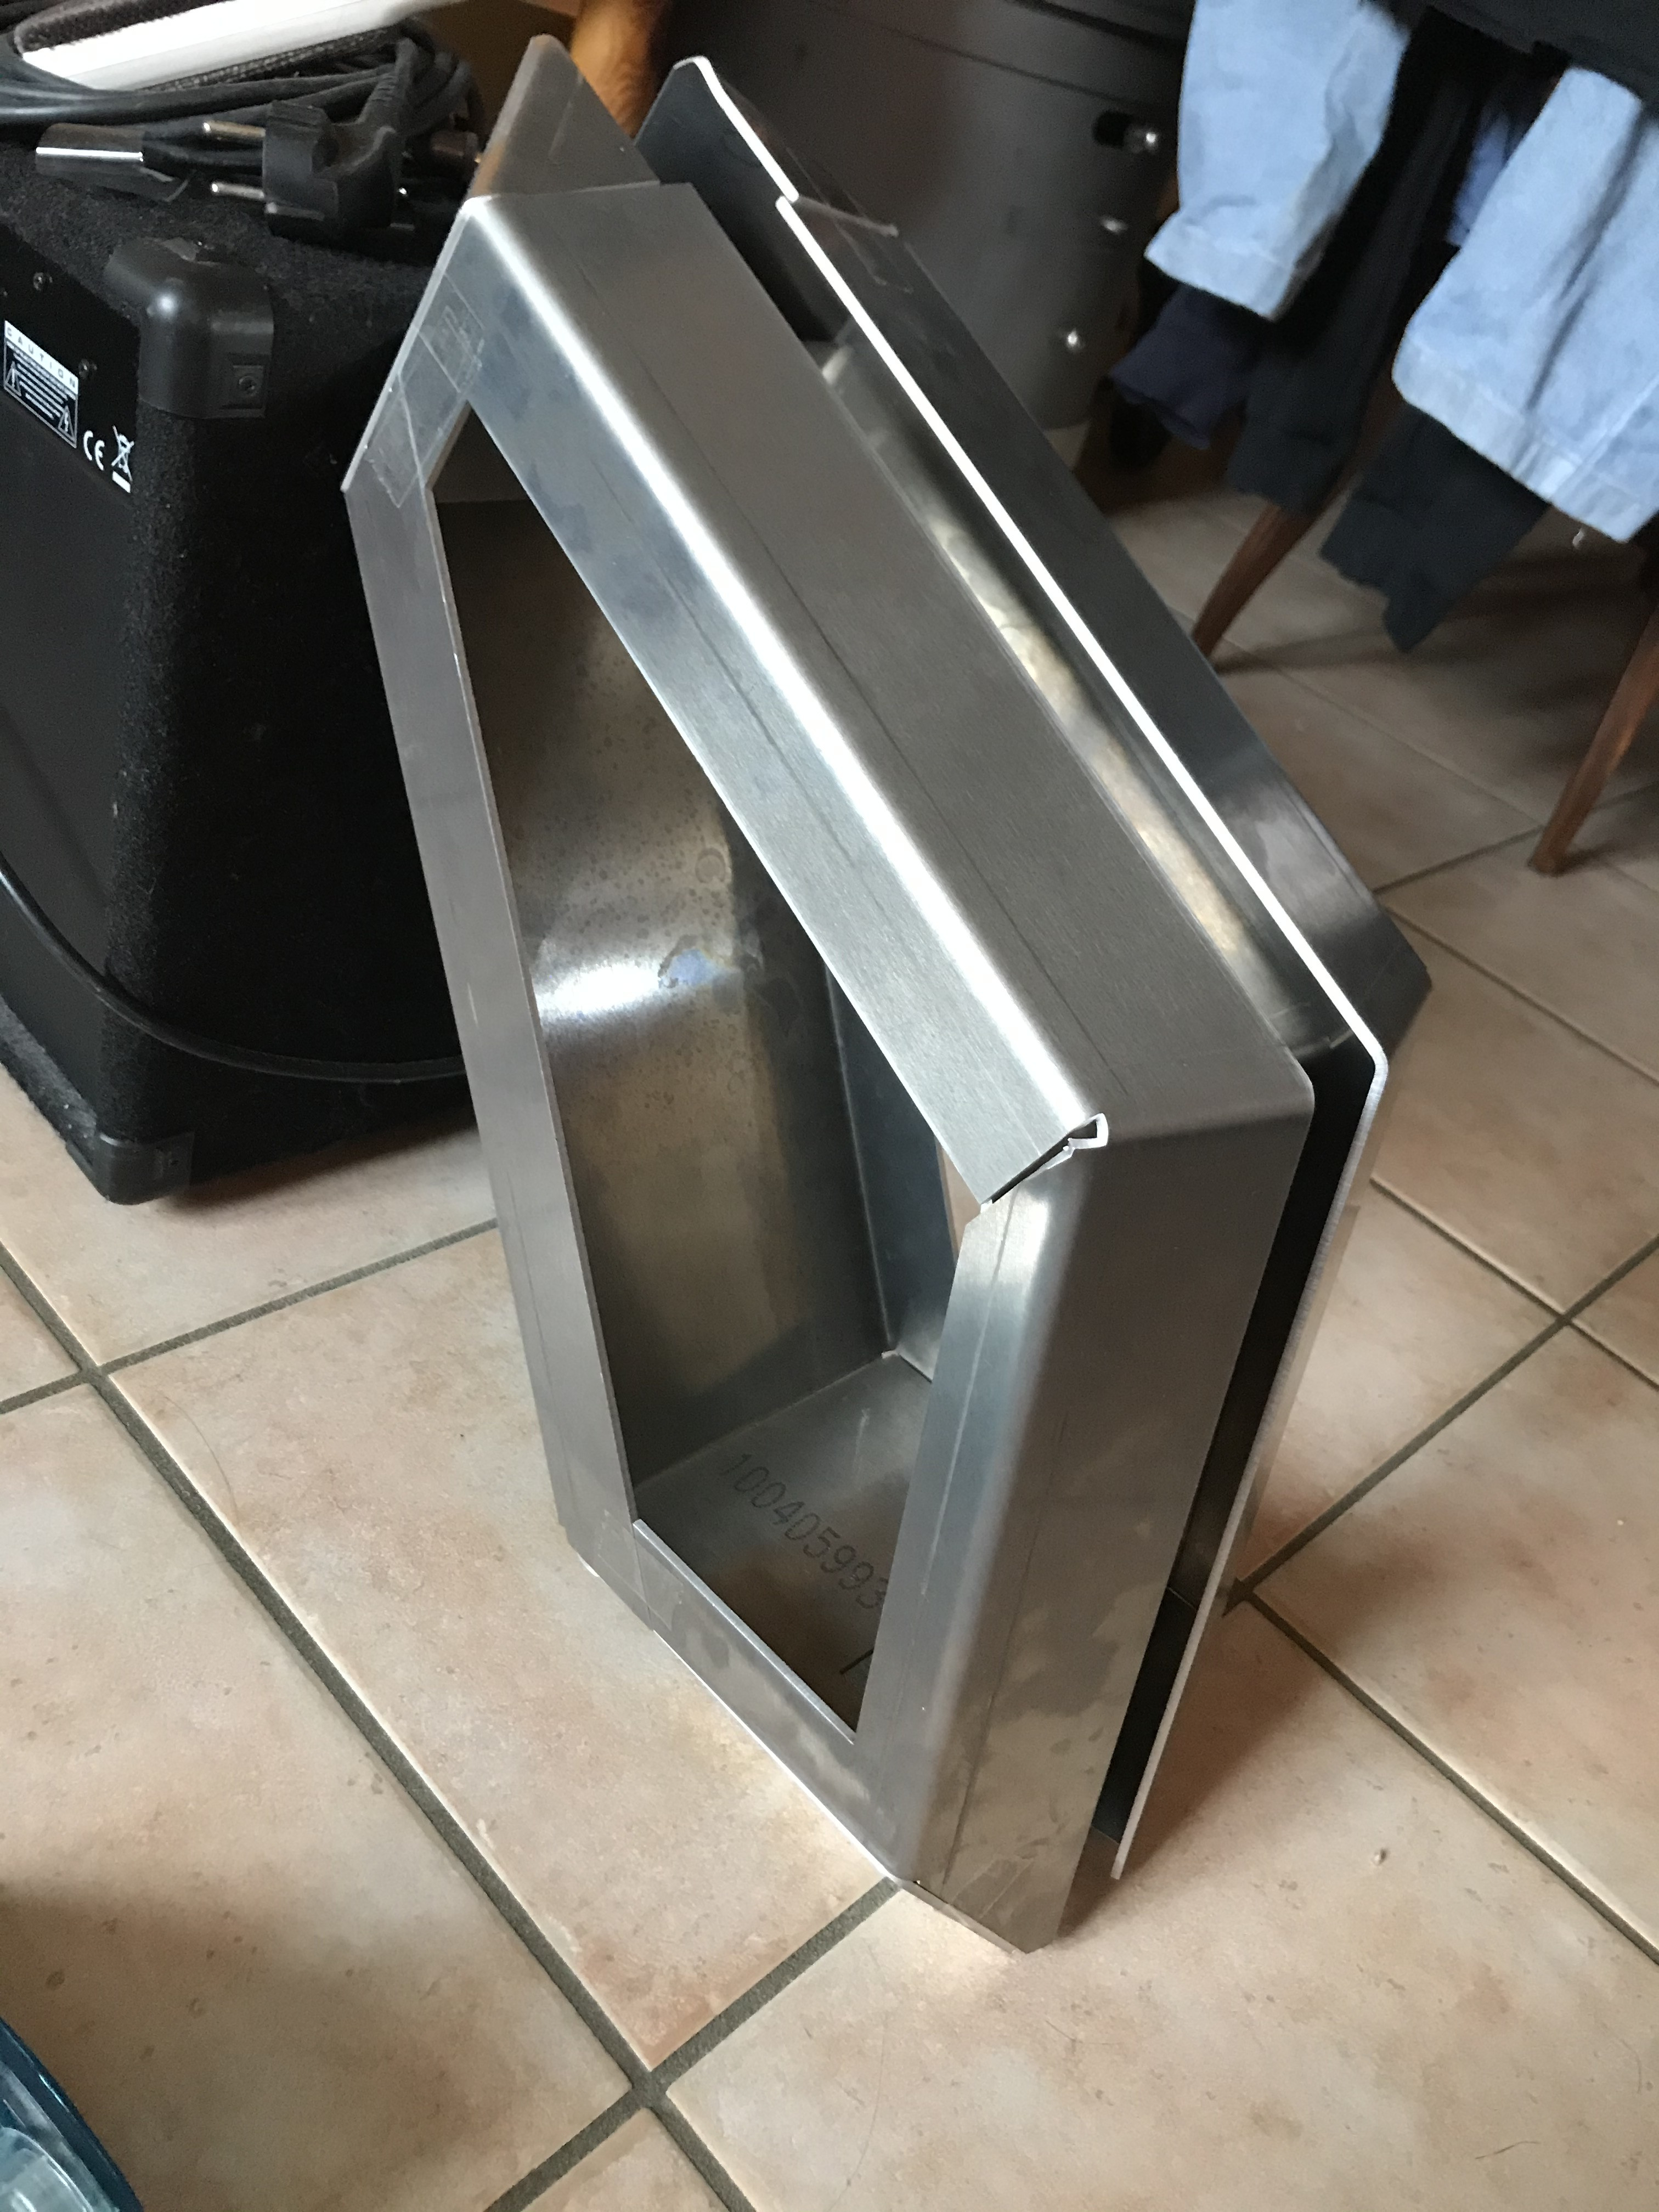
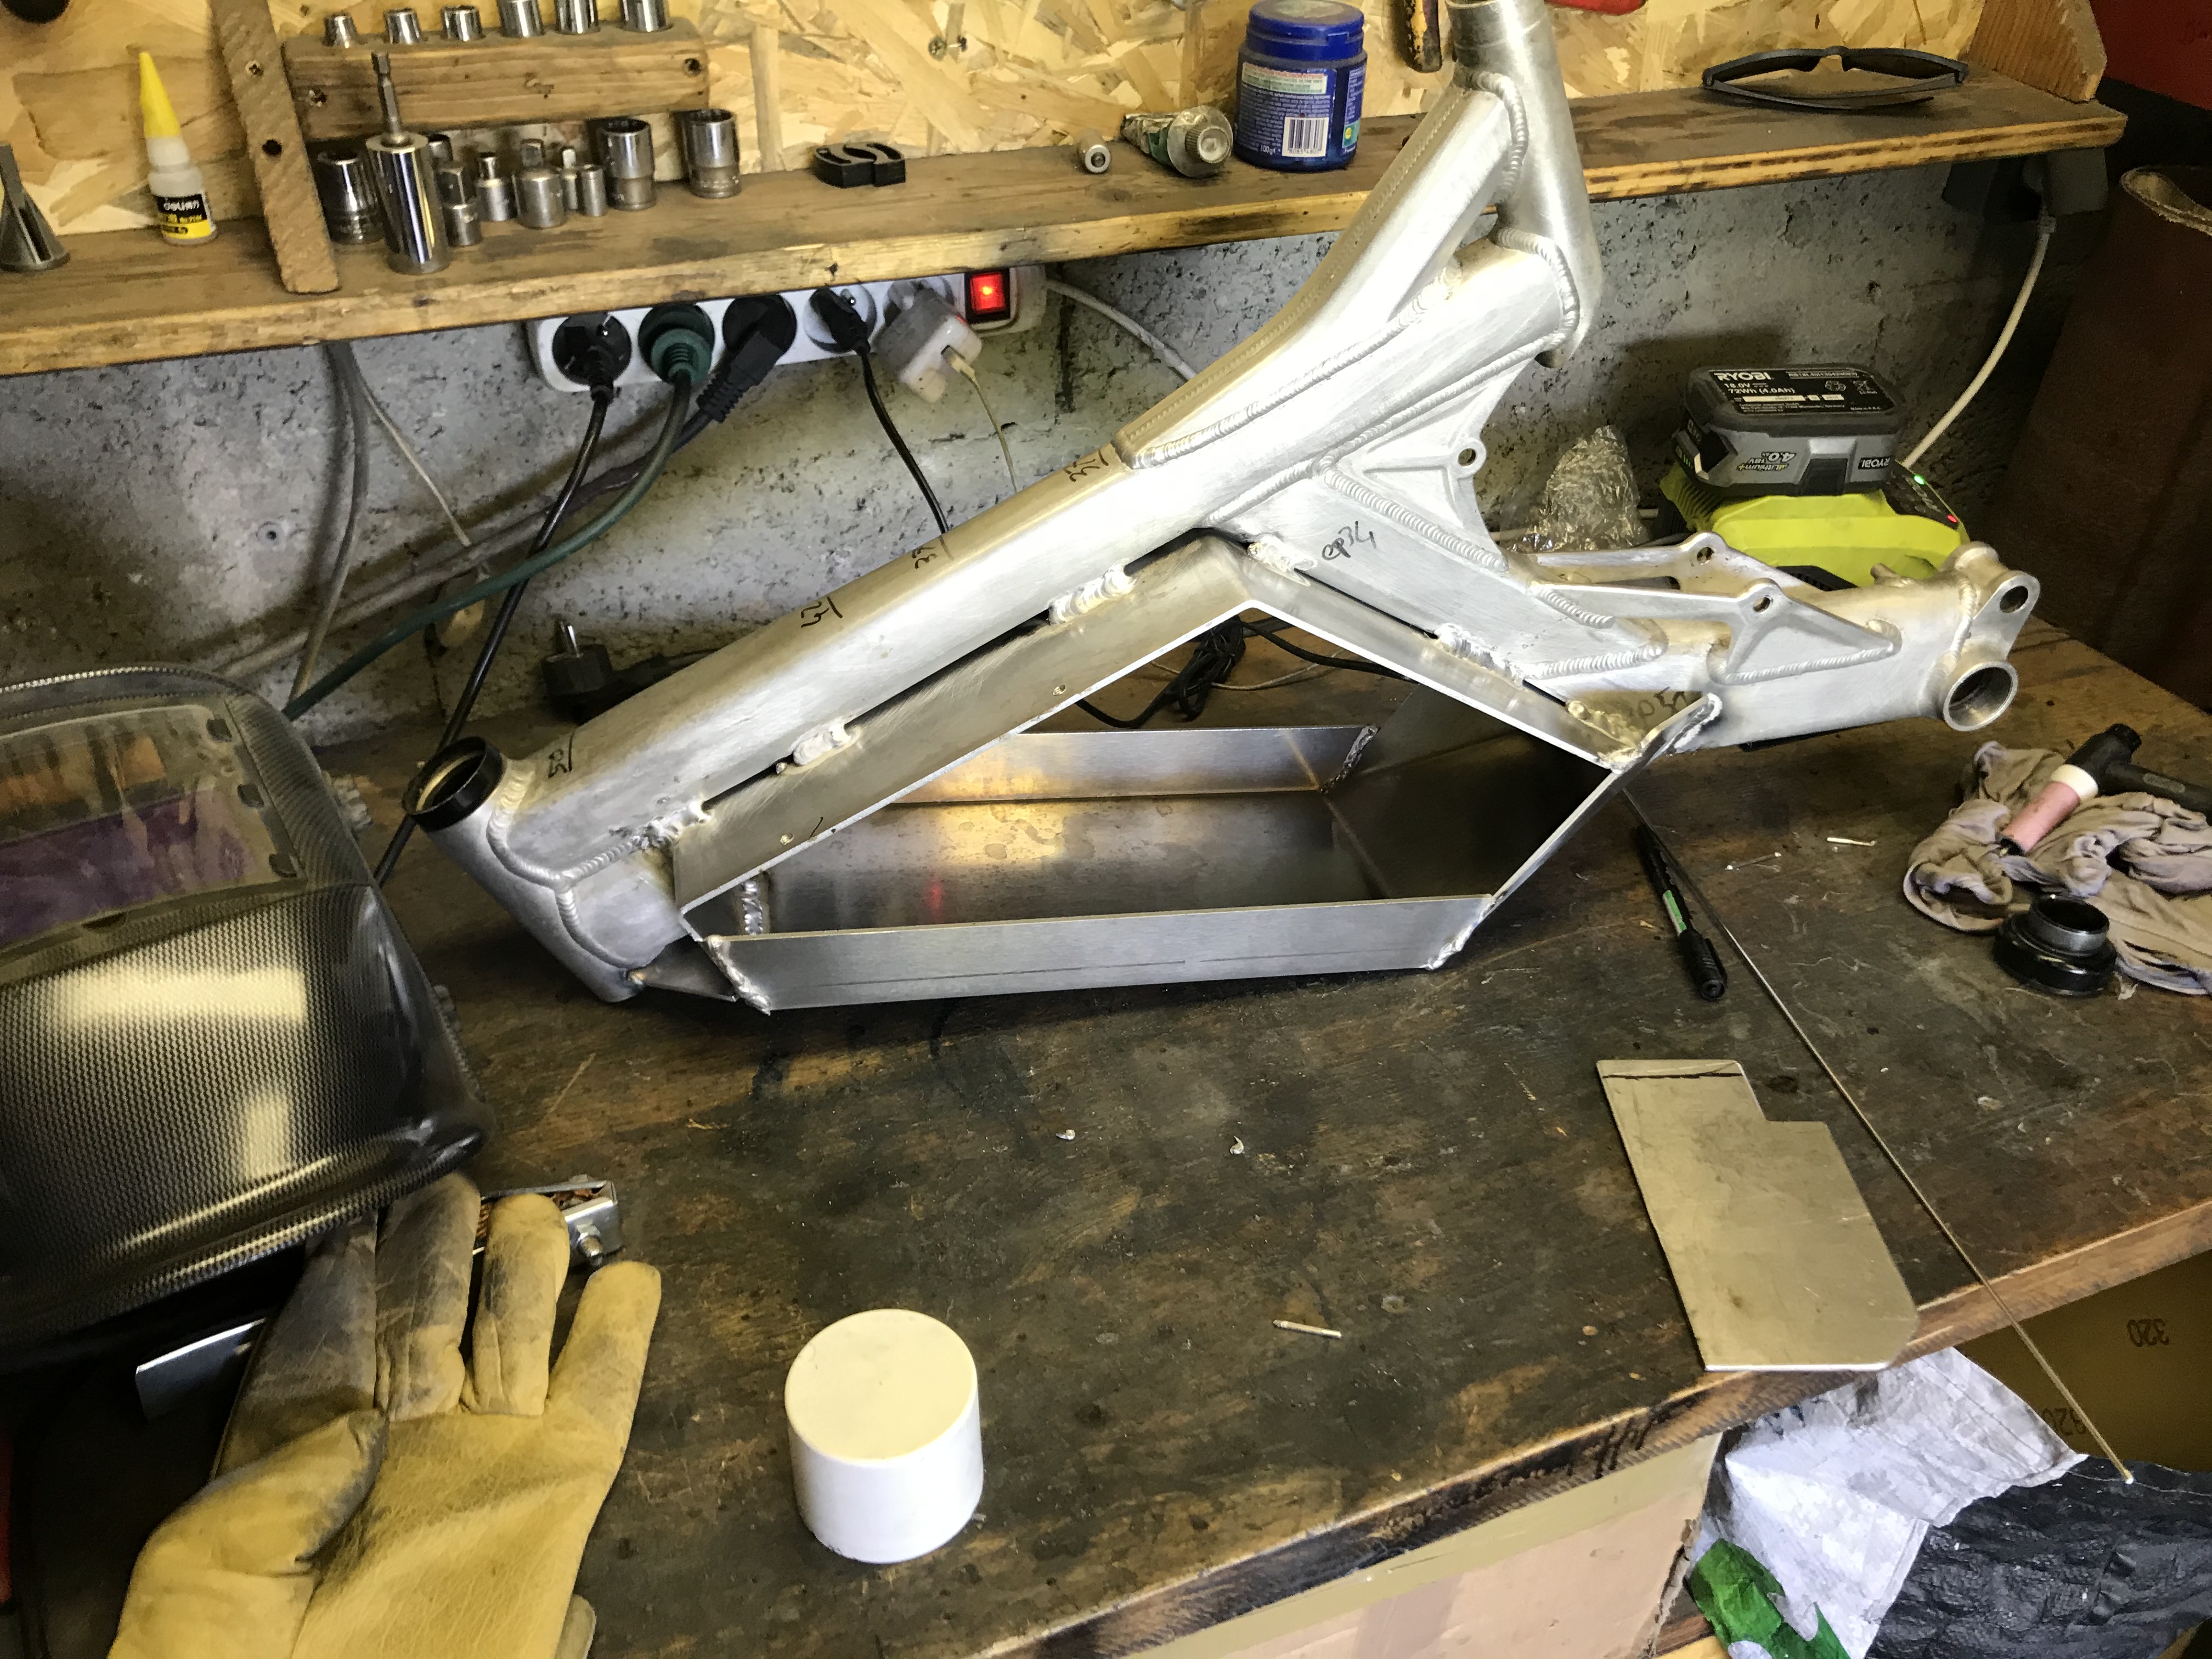
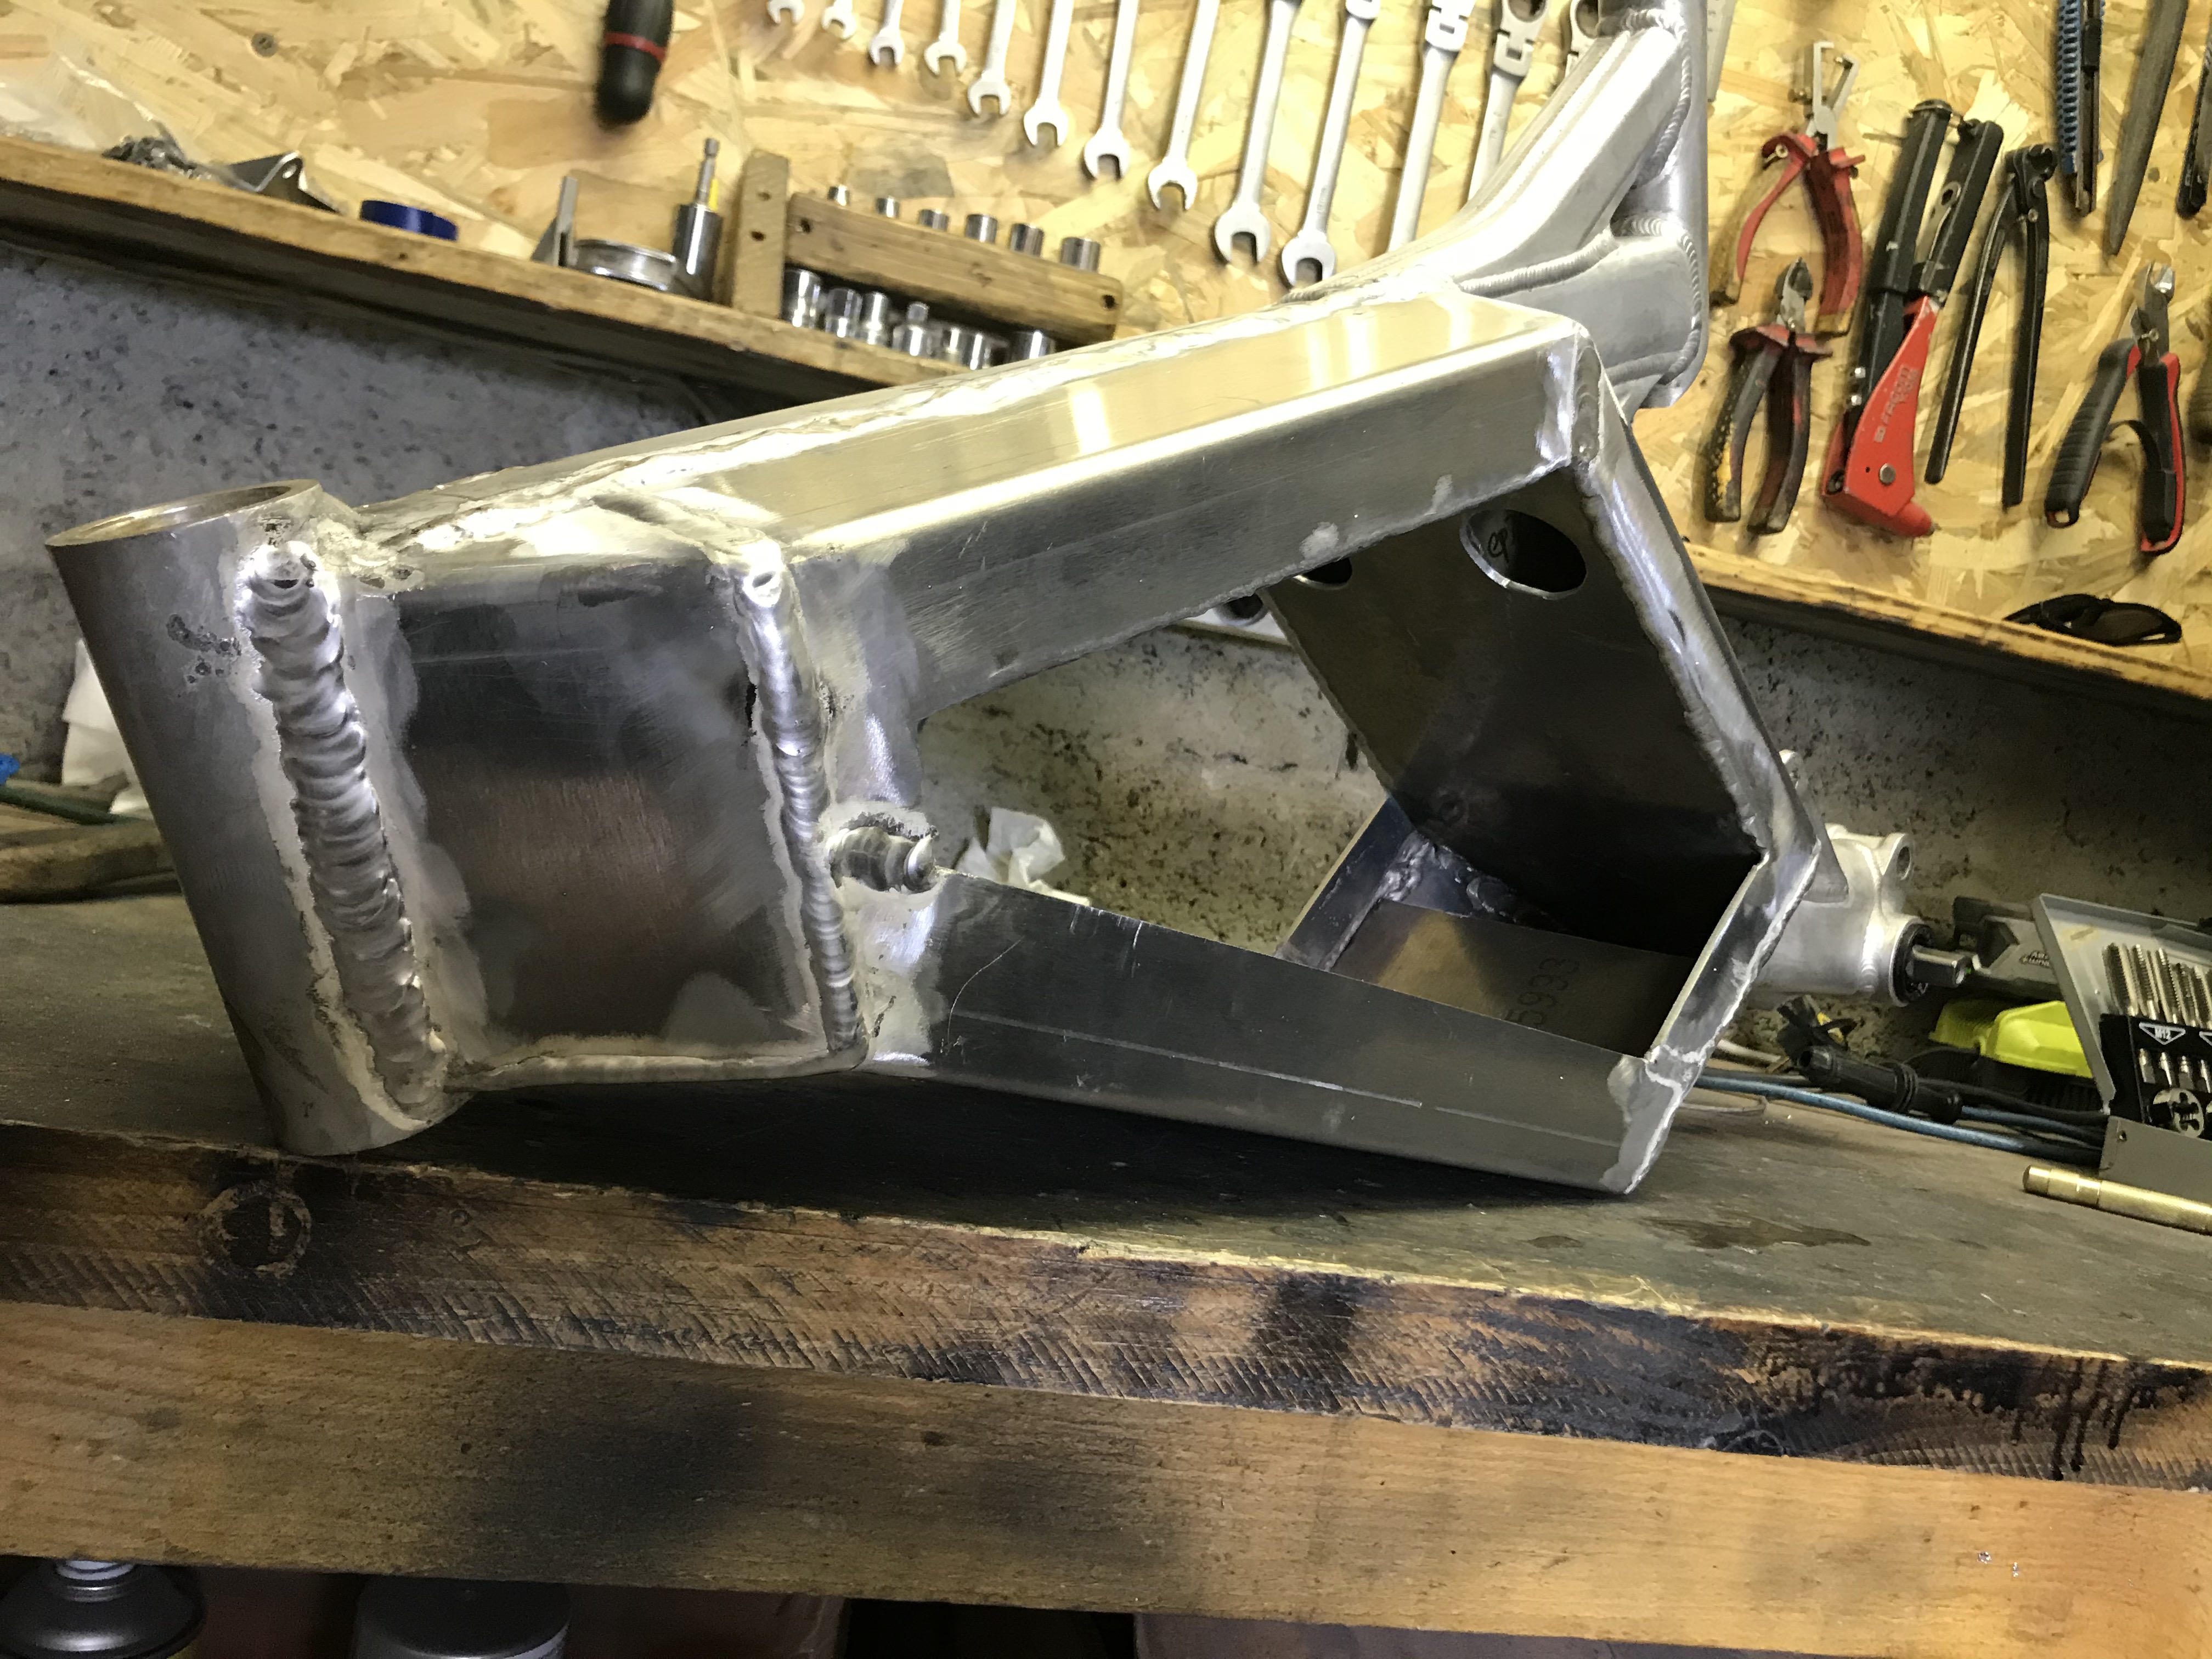
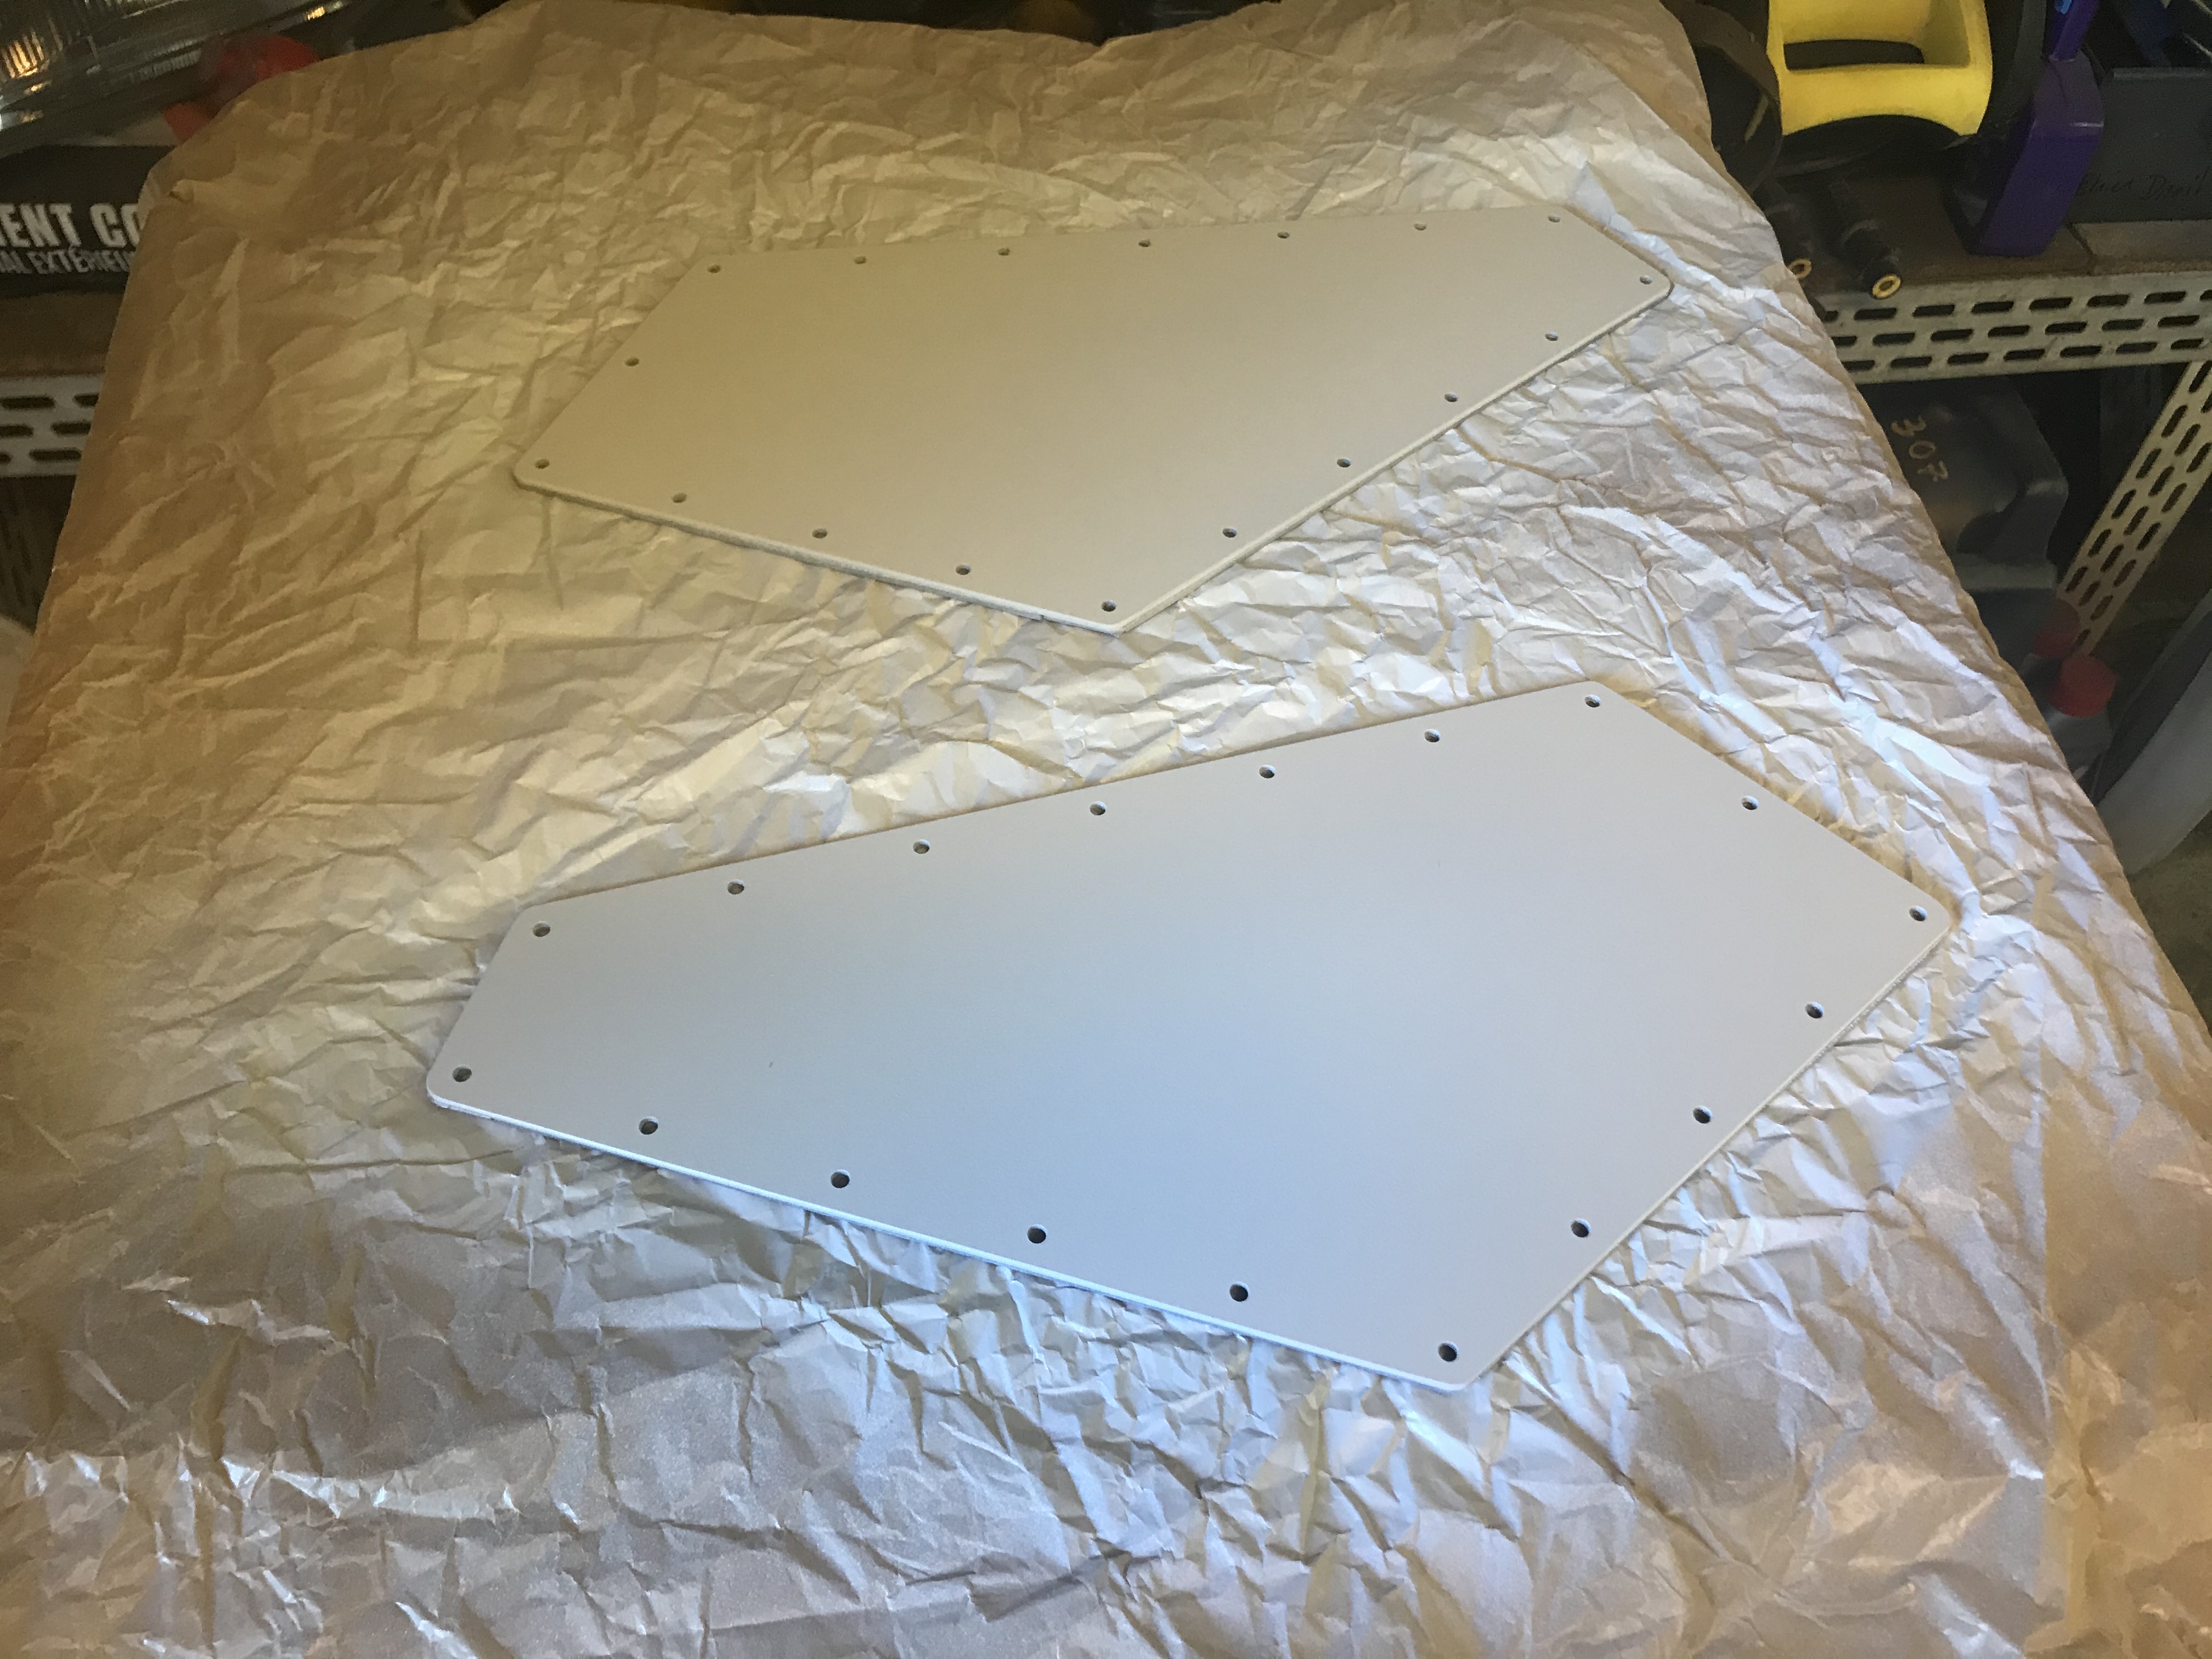
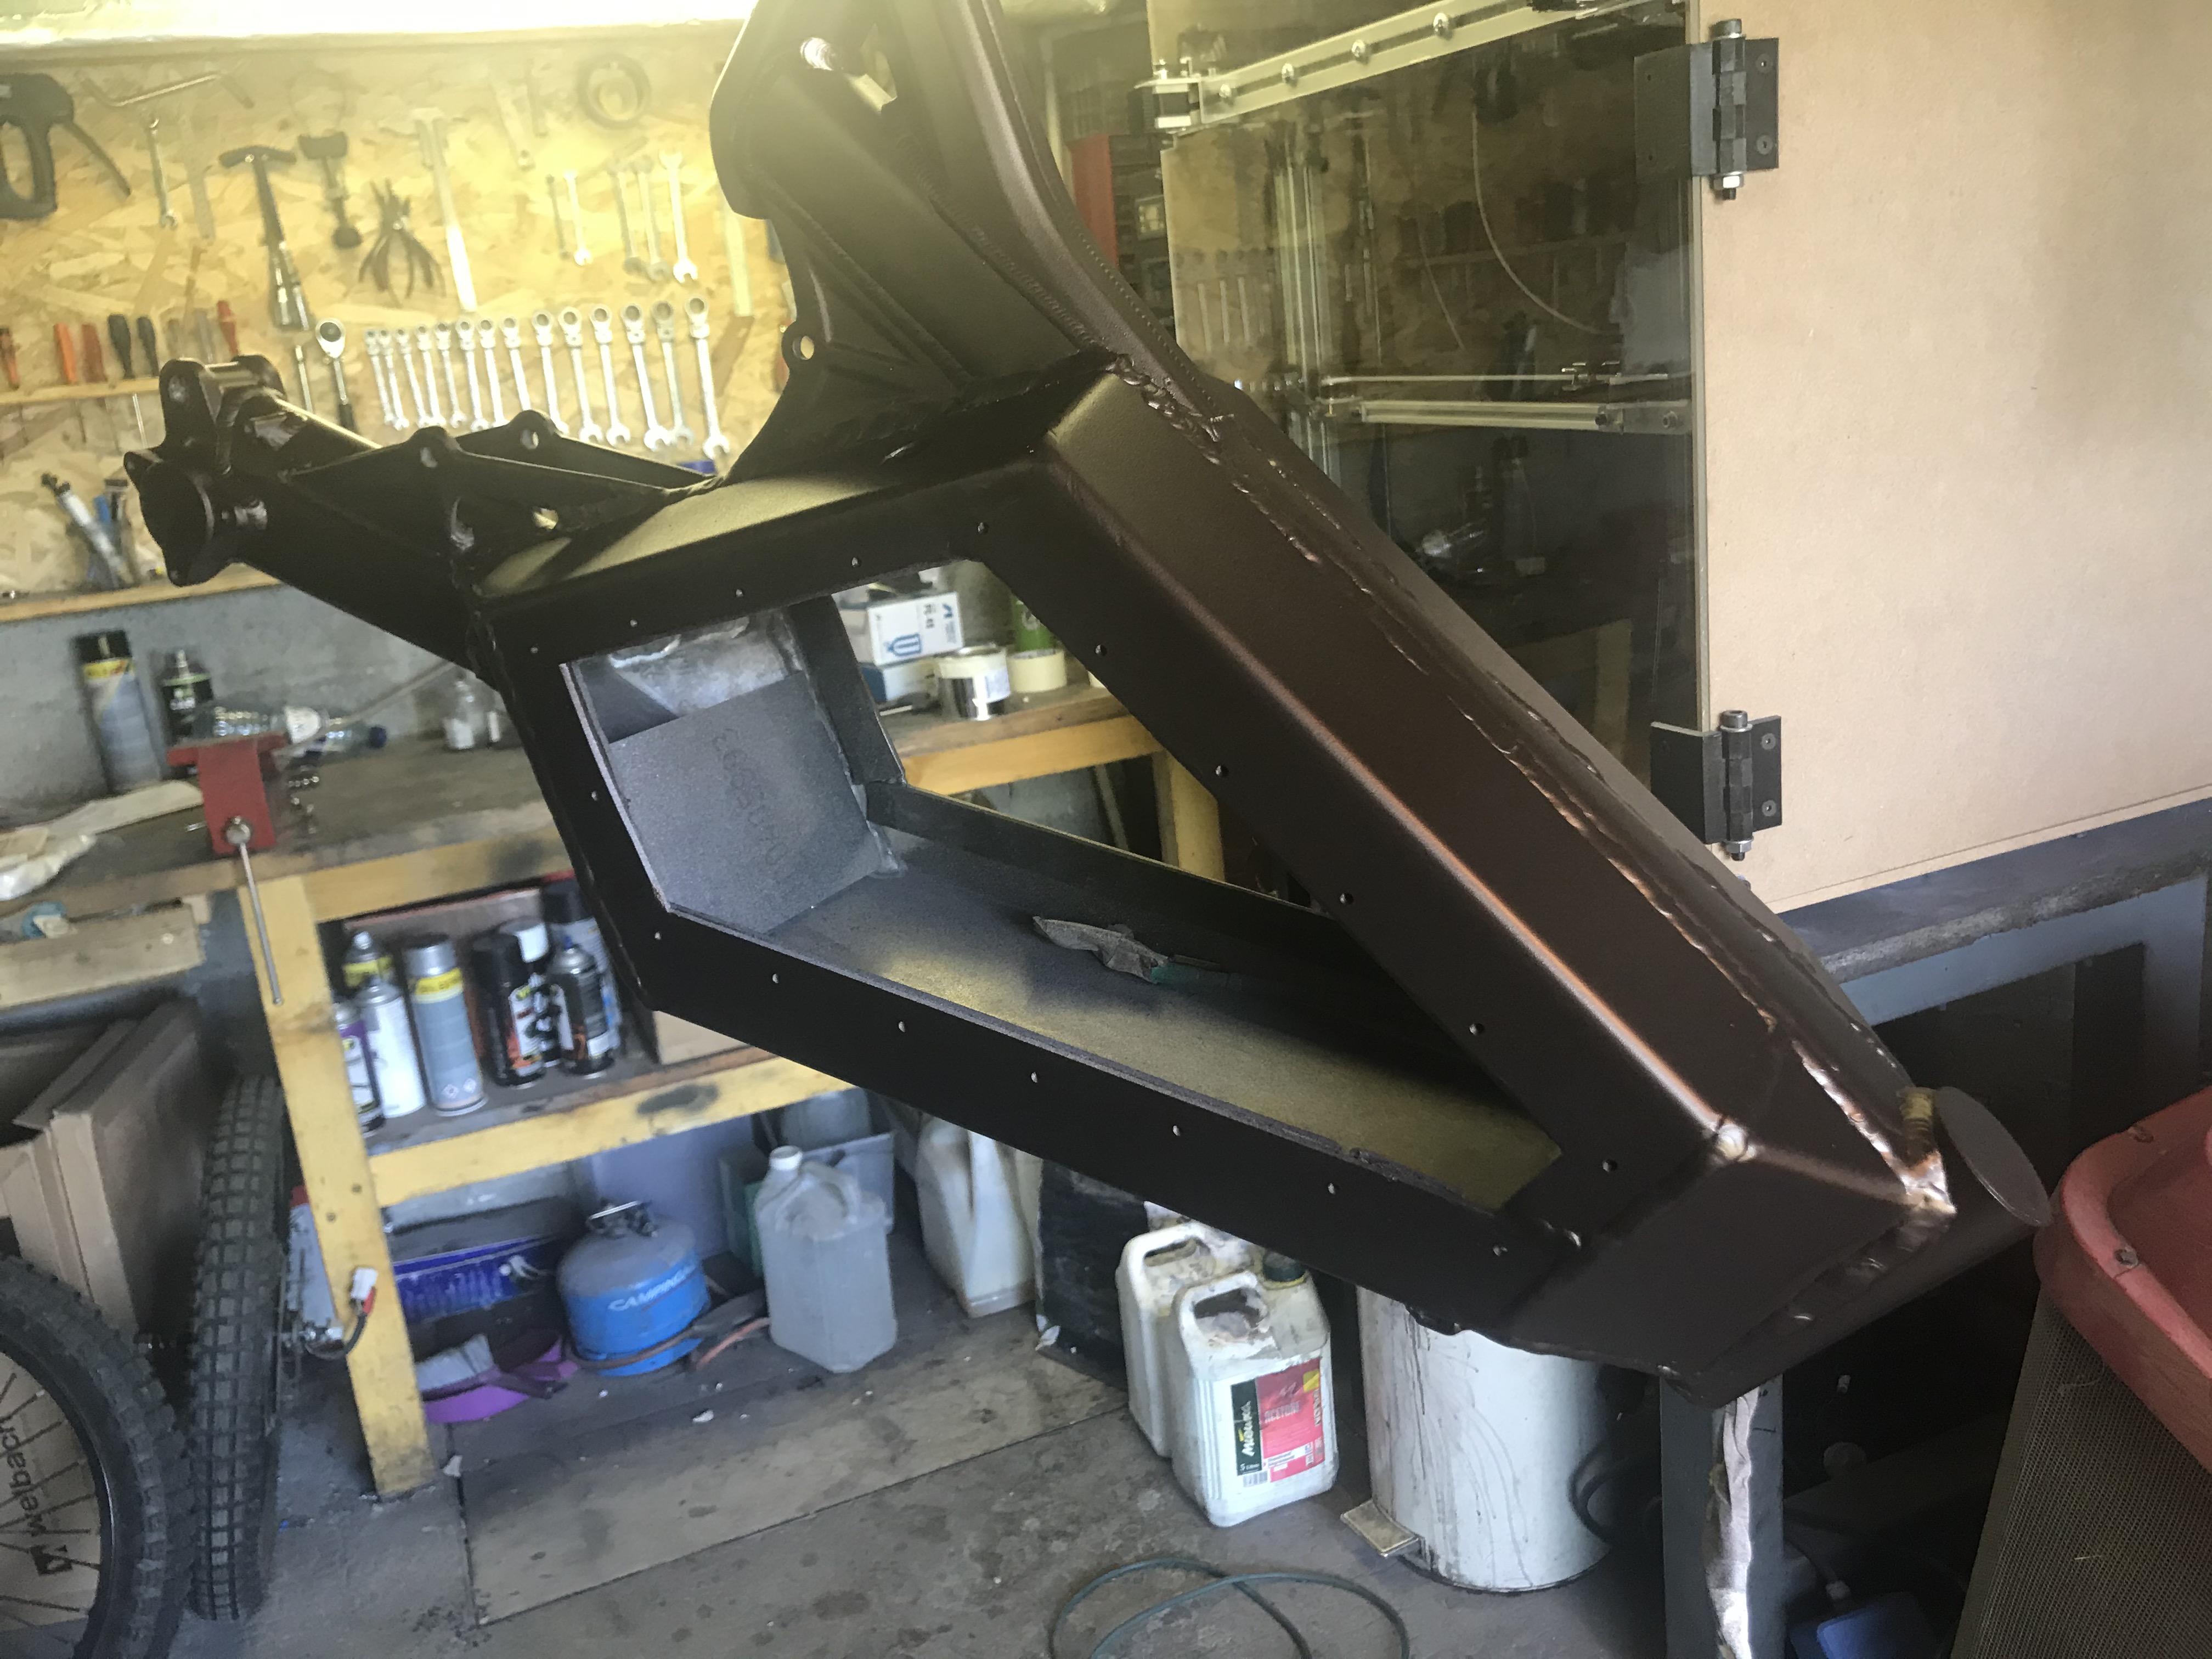
Next big step, the battery and controller housing. All parts were 3d designed and laser cut in 5754 aluminum sheets (3mm thick).
Now we have to assemble this on the frame...
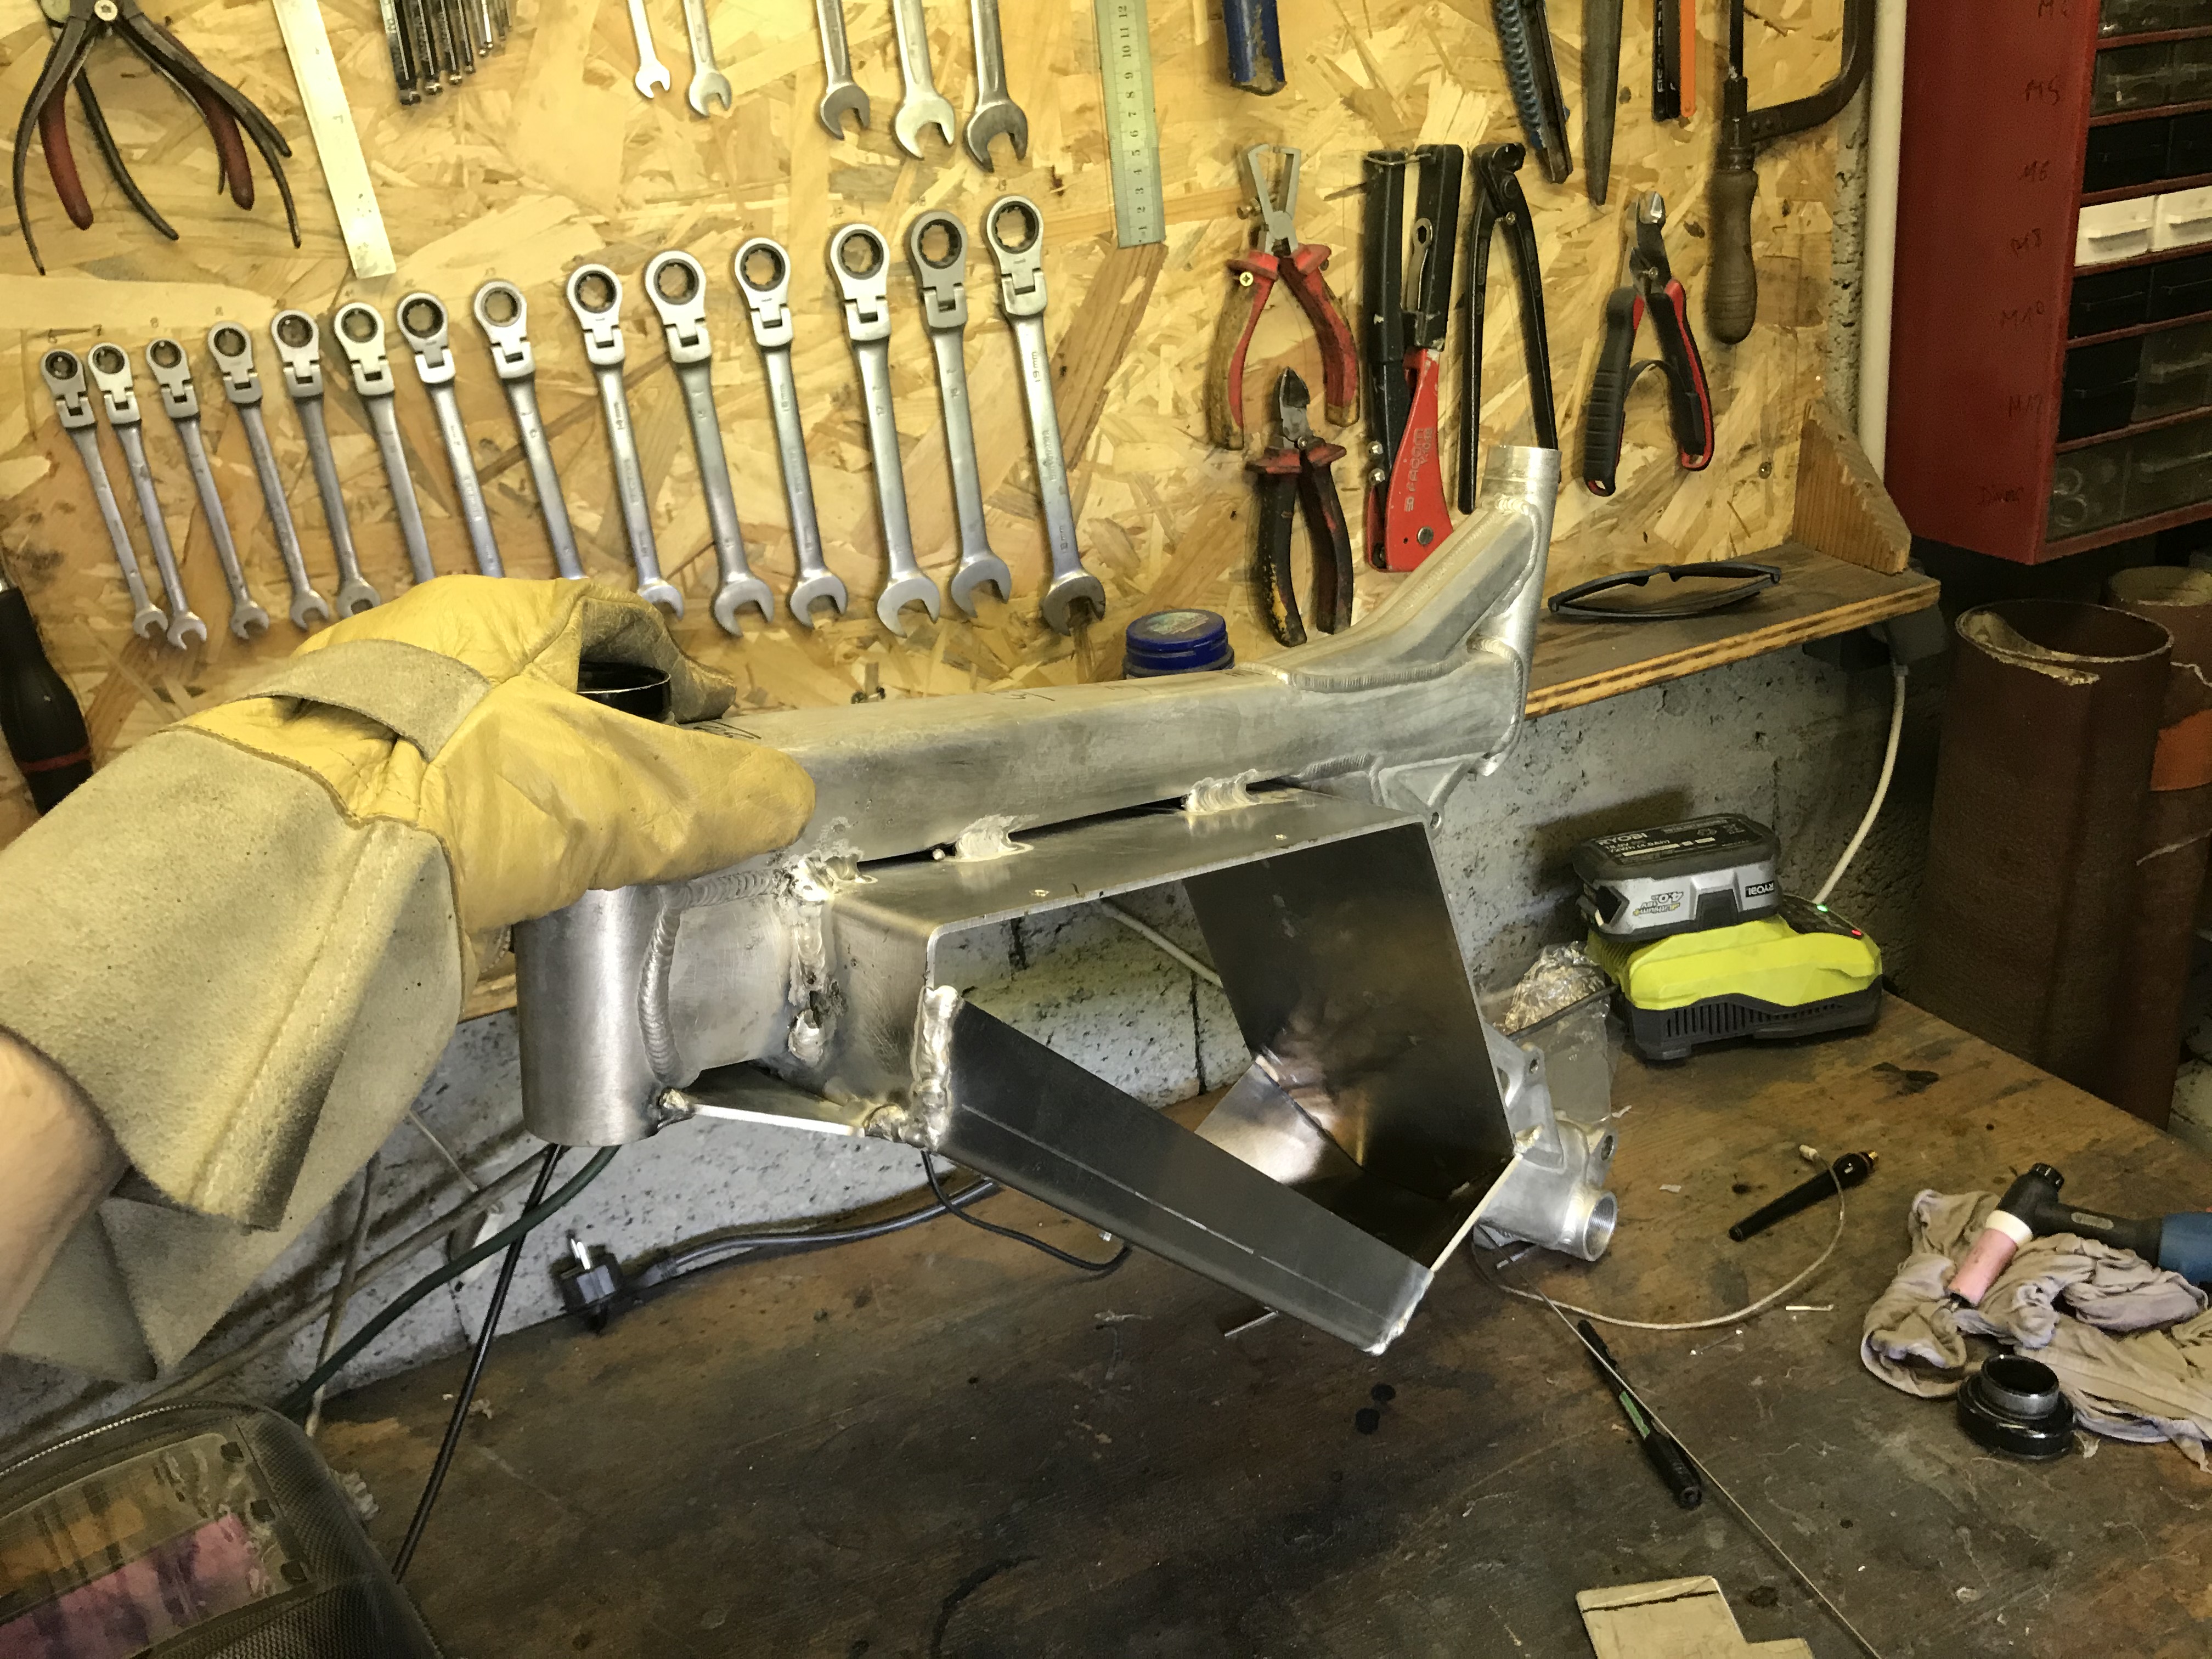
make some space by removing some useless thing... :lol:
Tig weld the first parts
and the rest
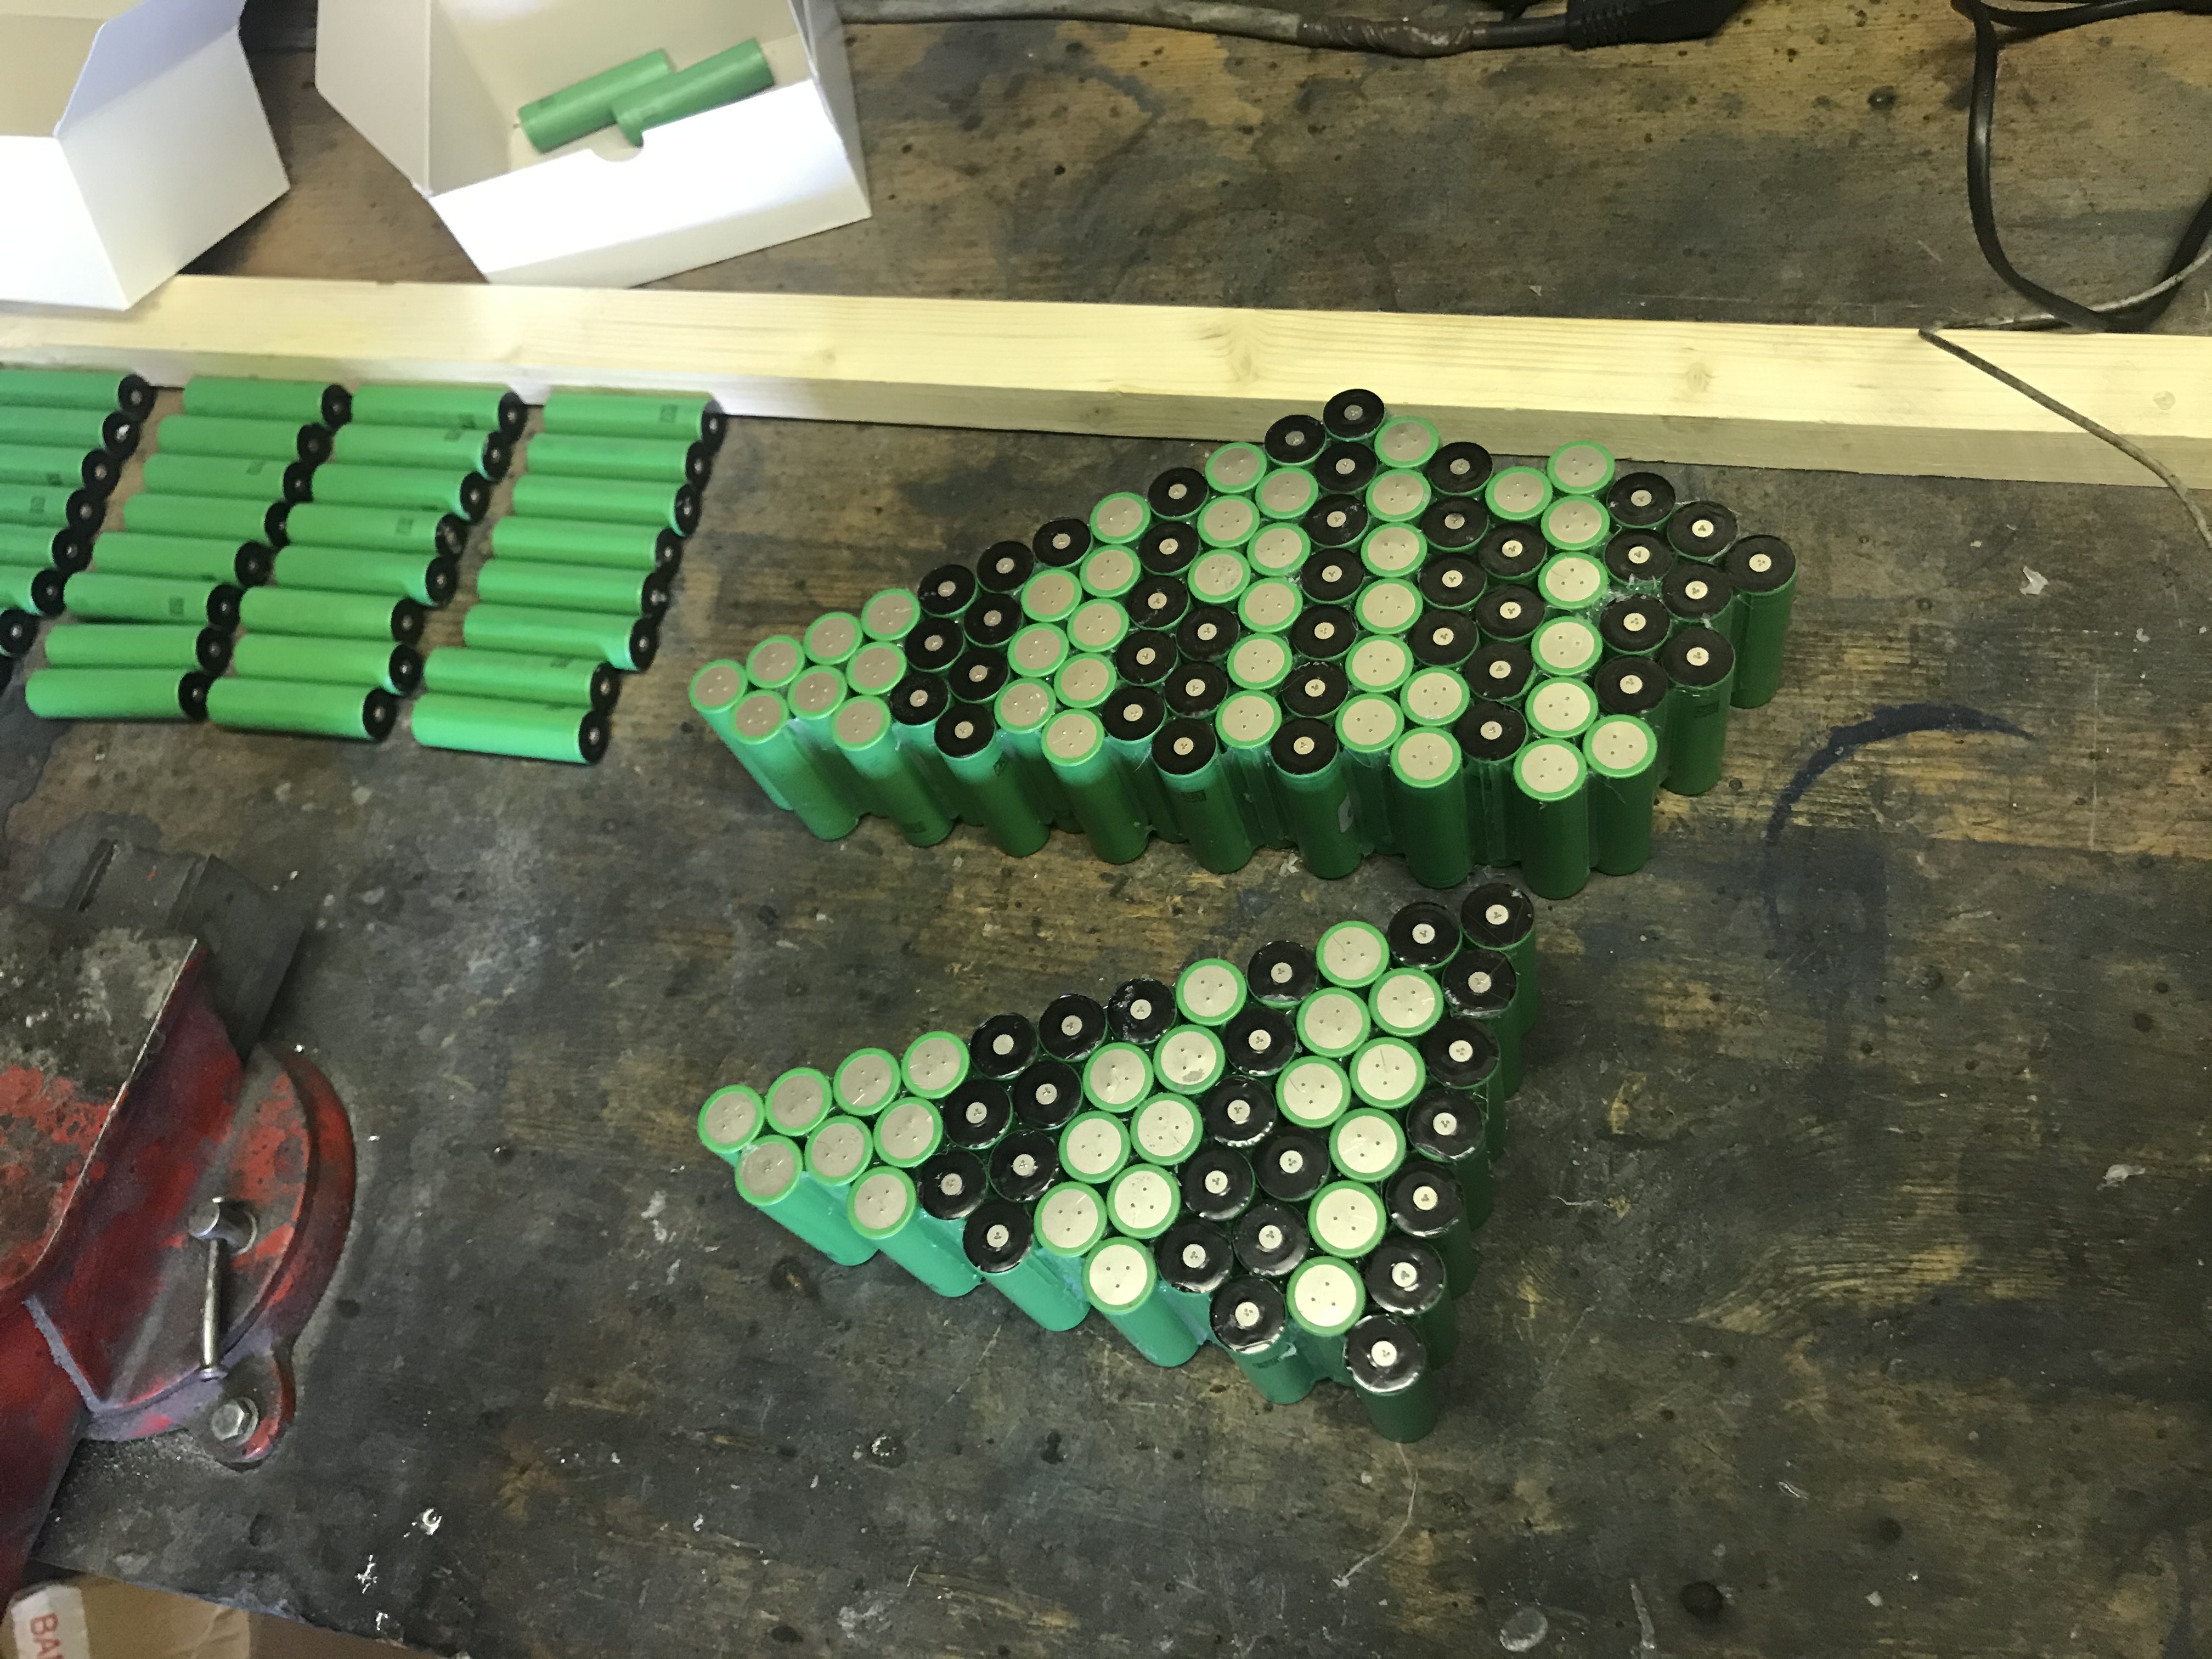
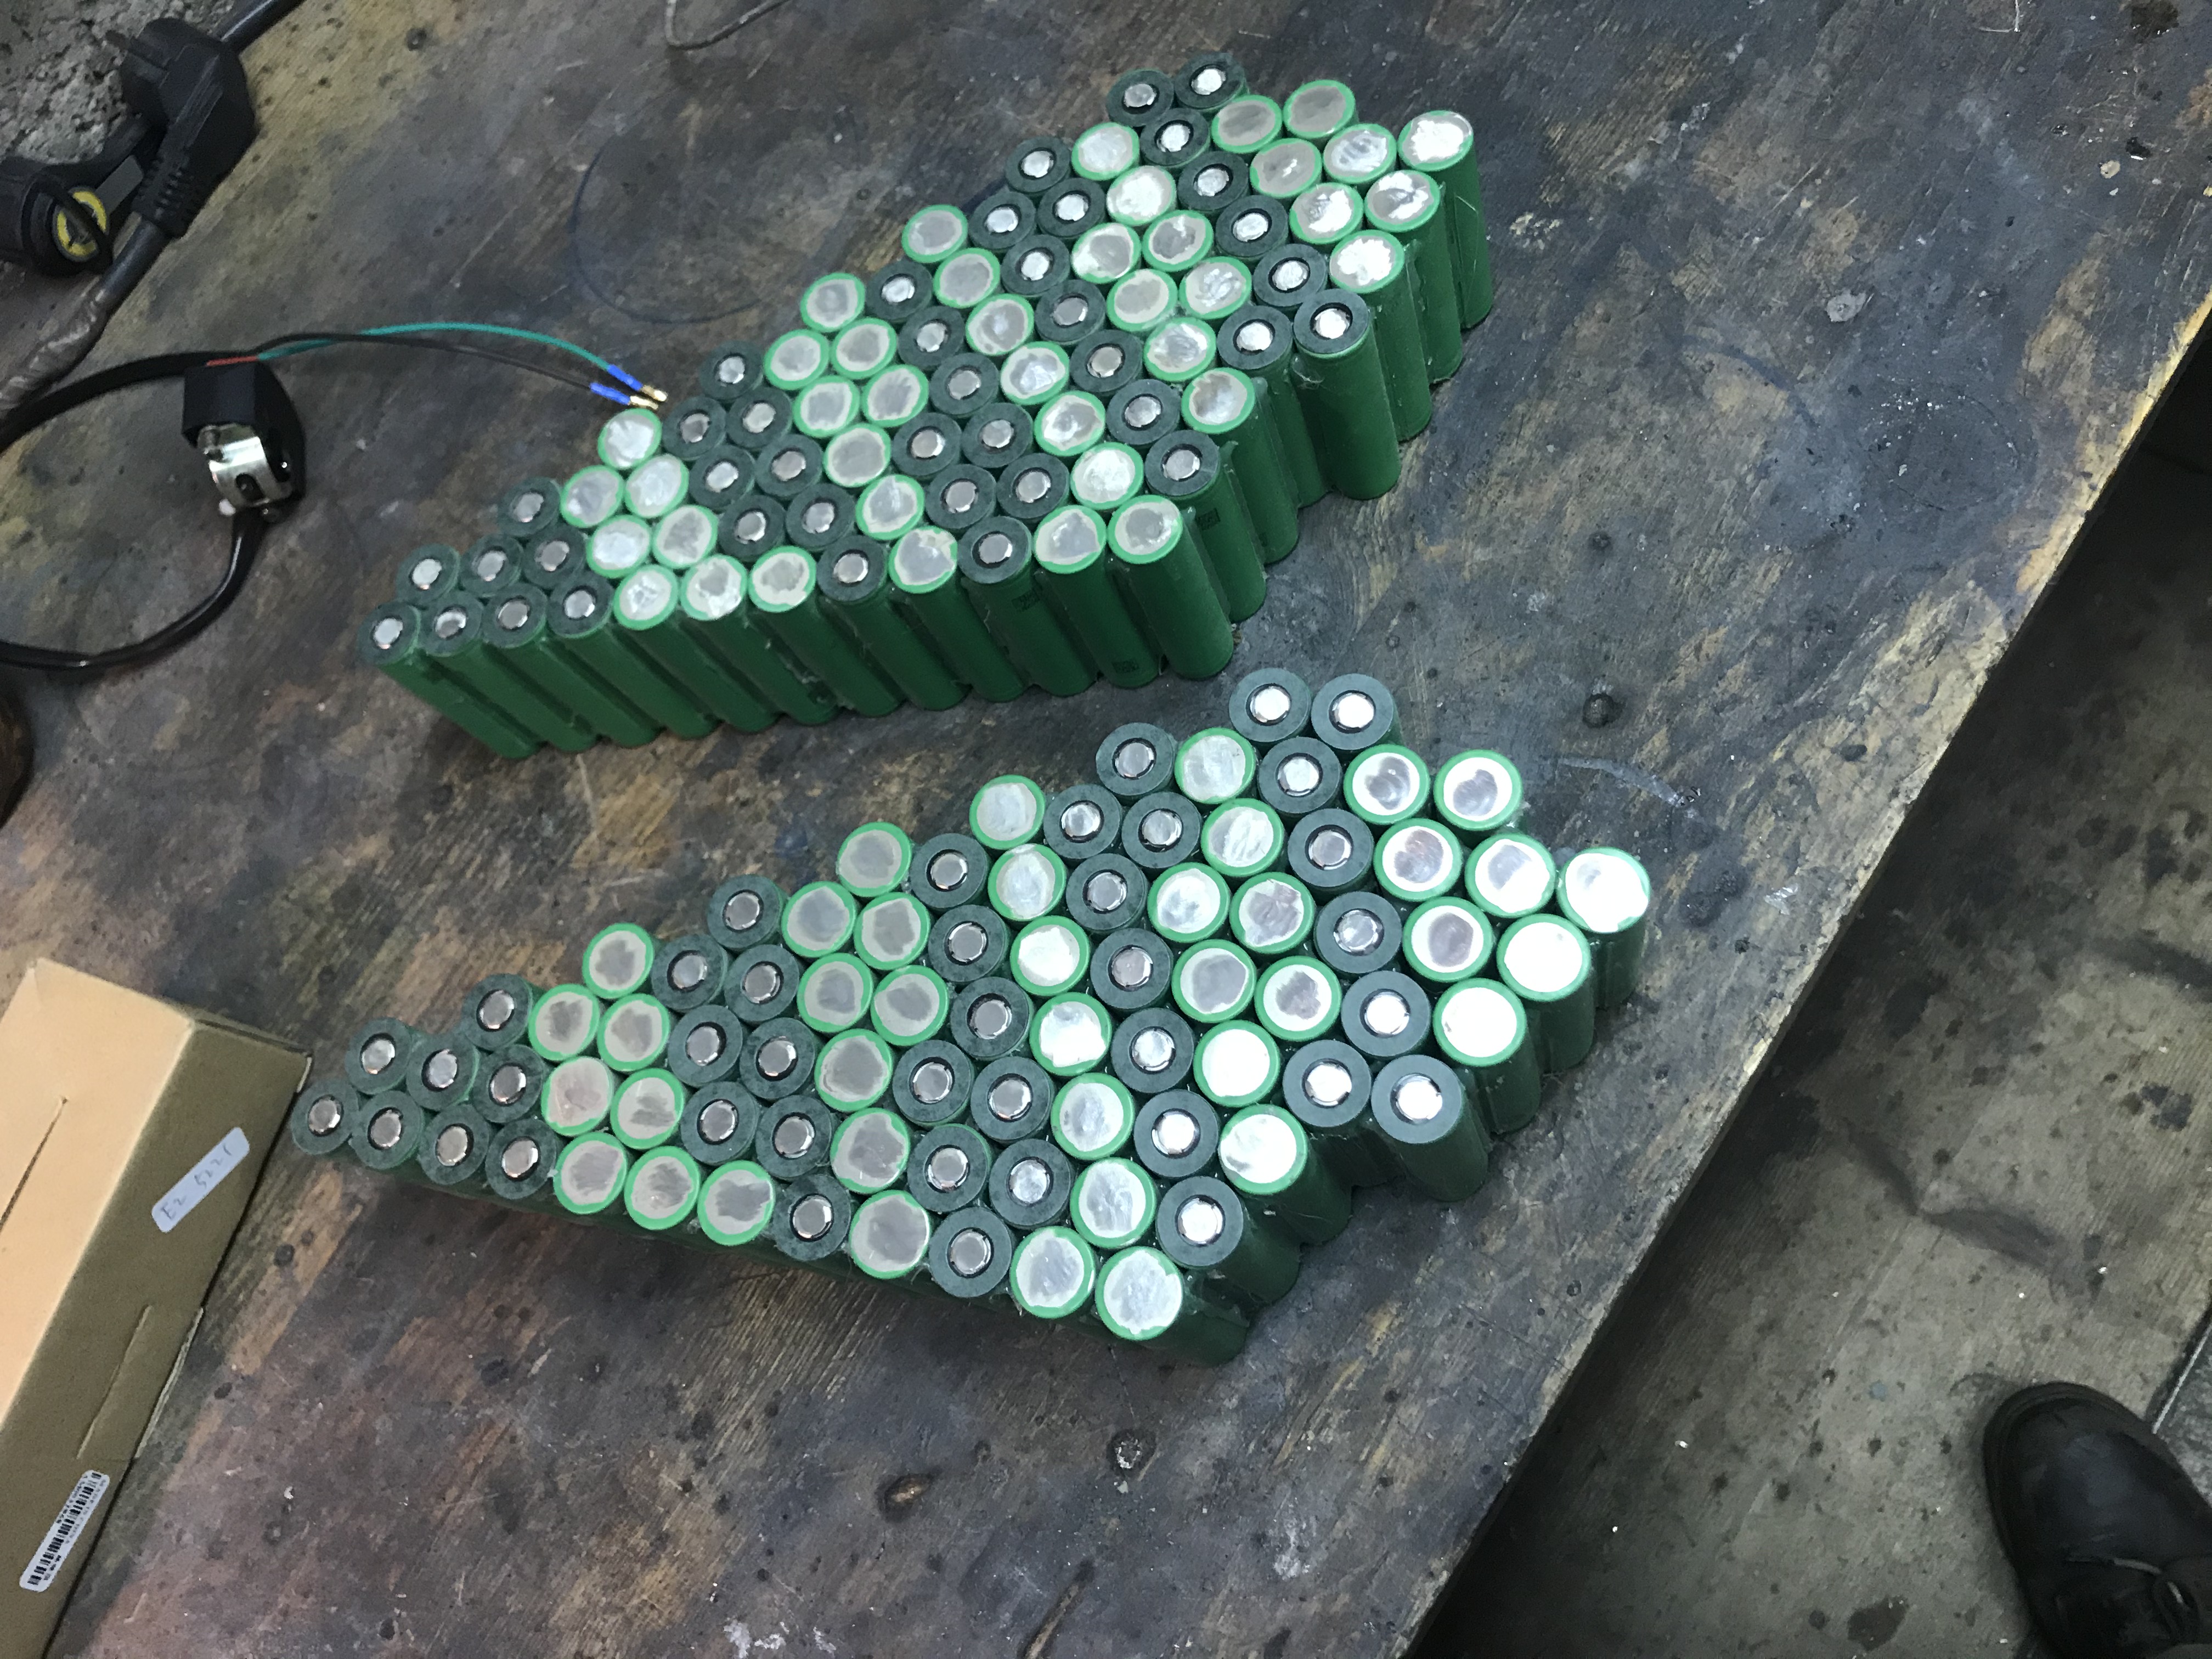
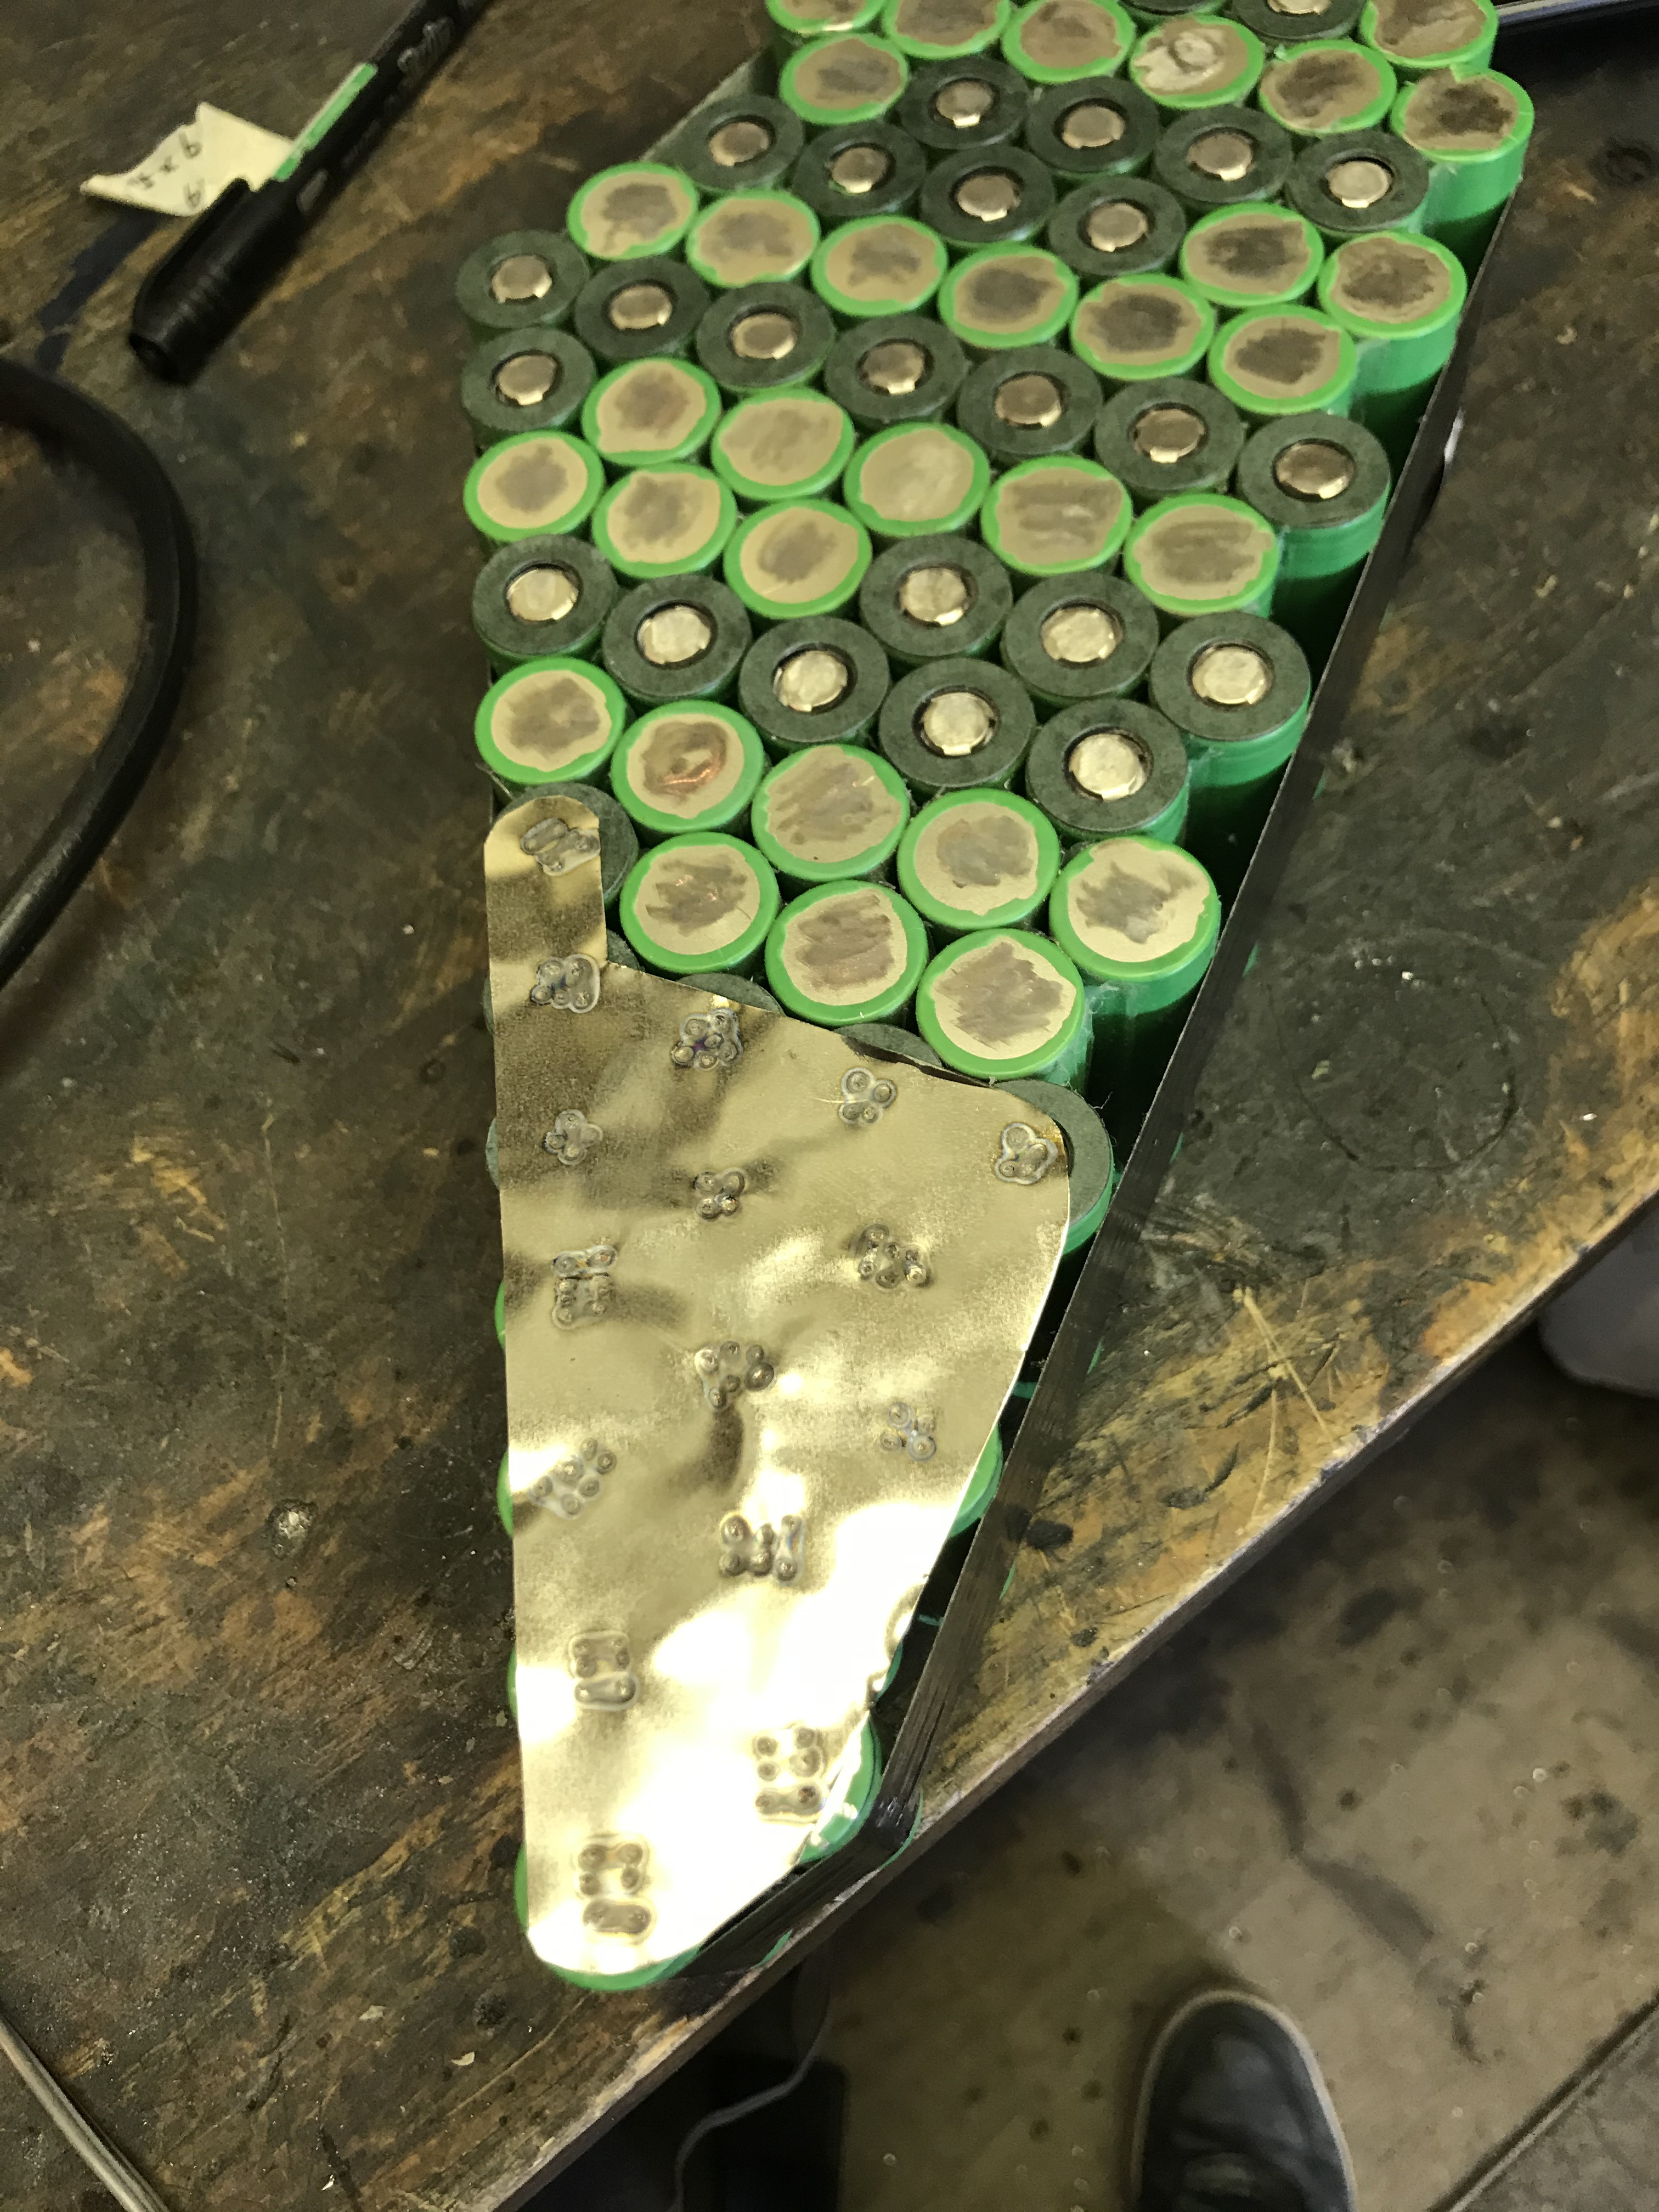
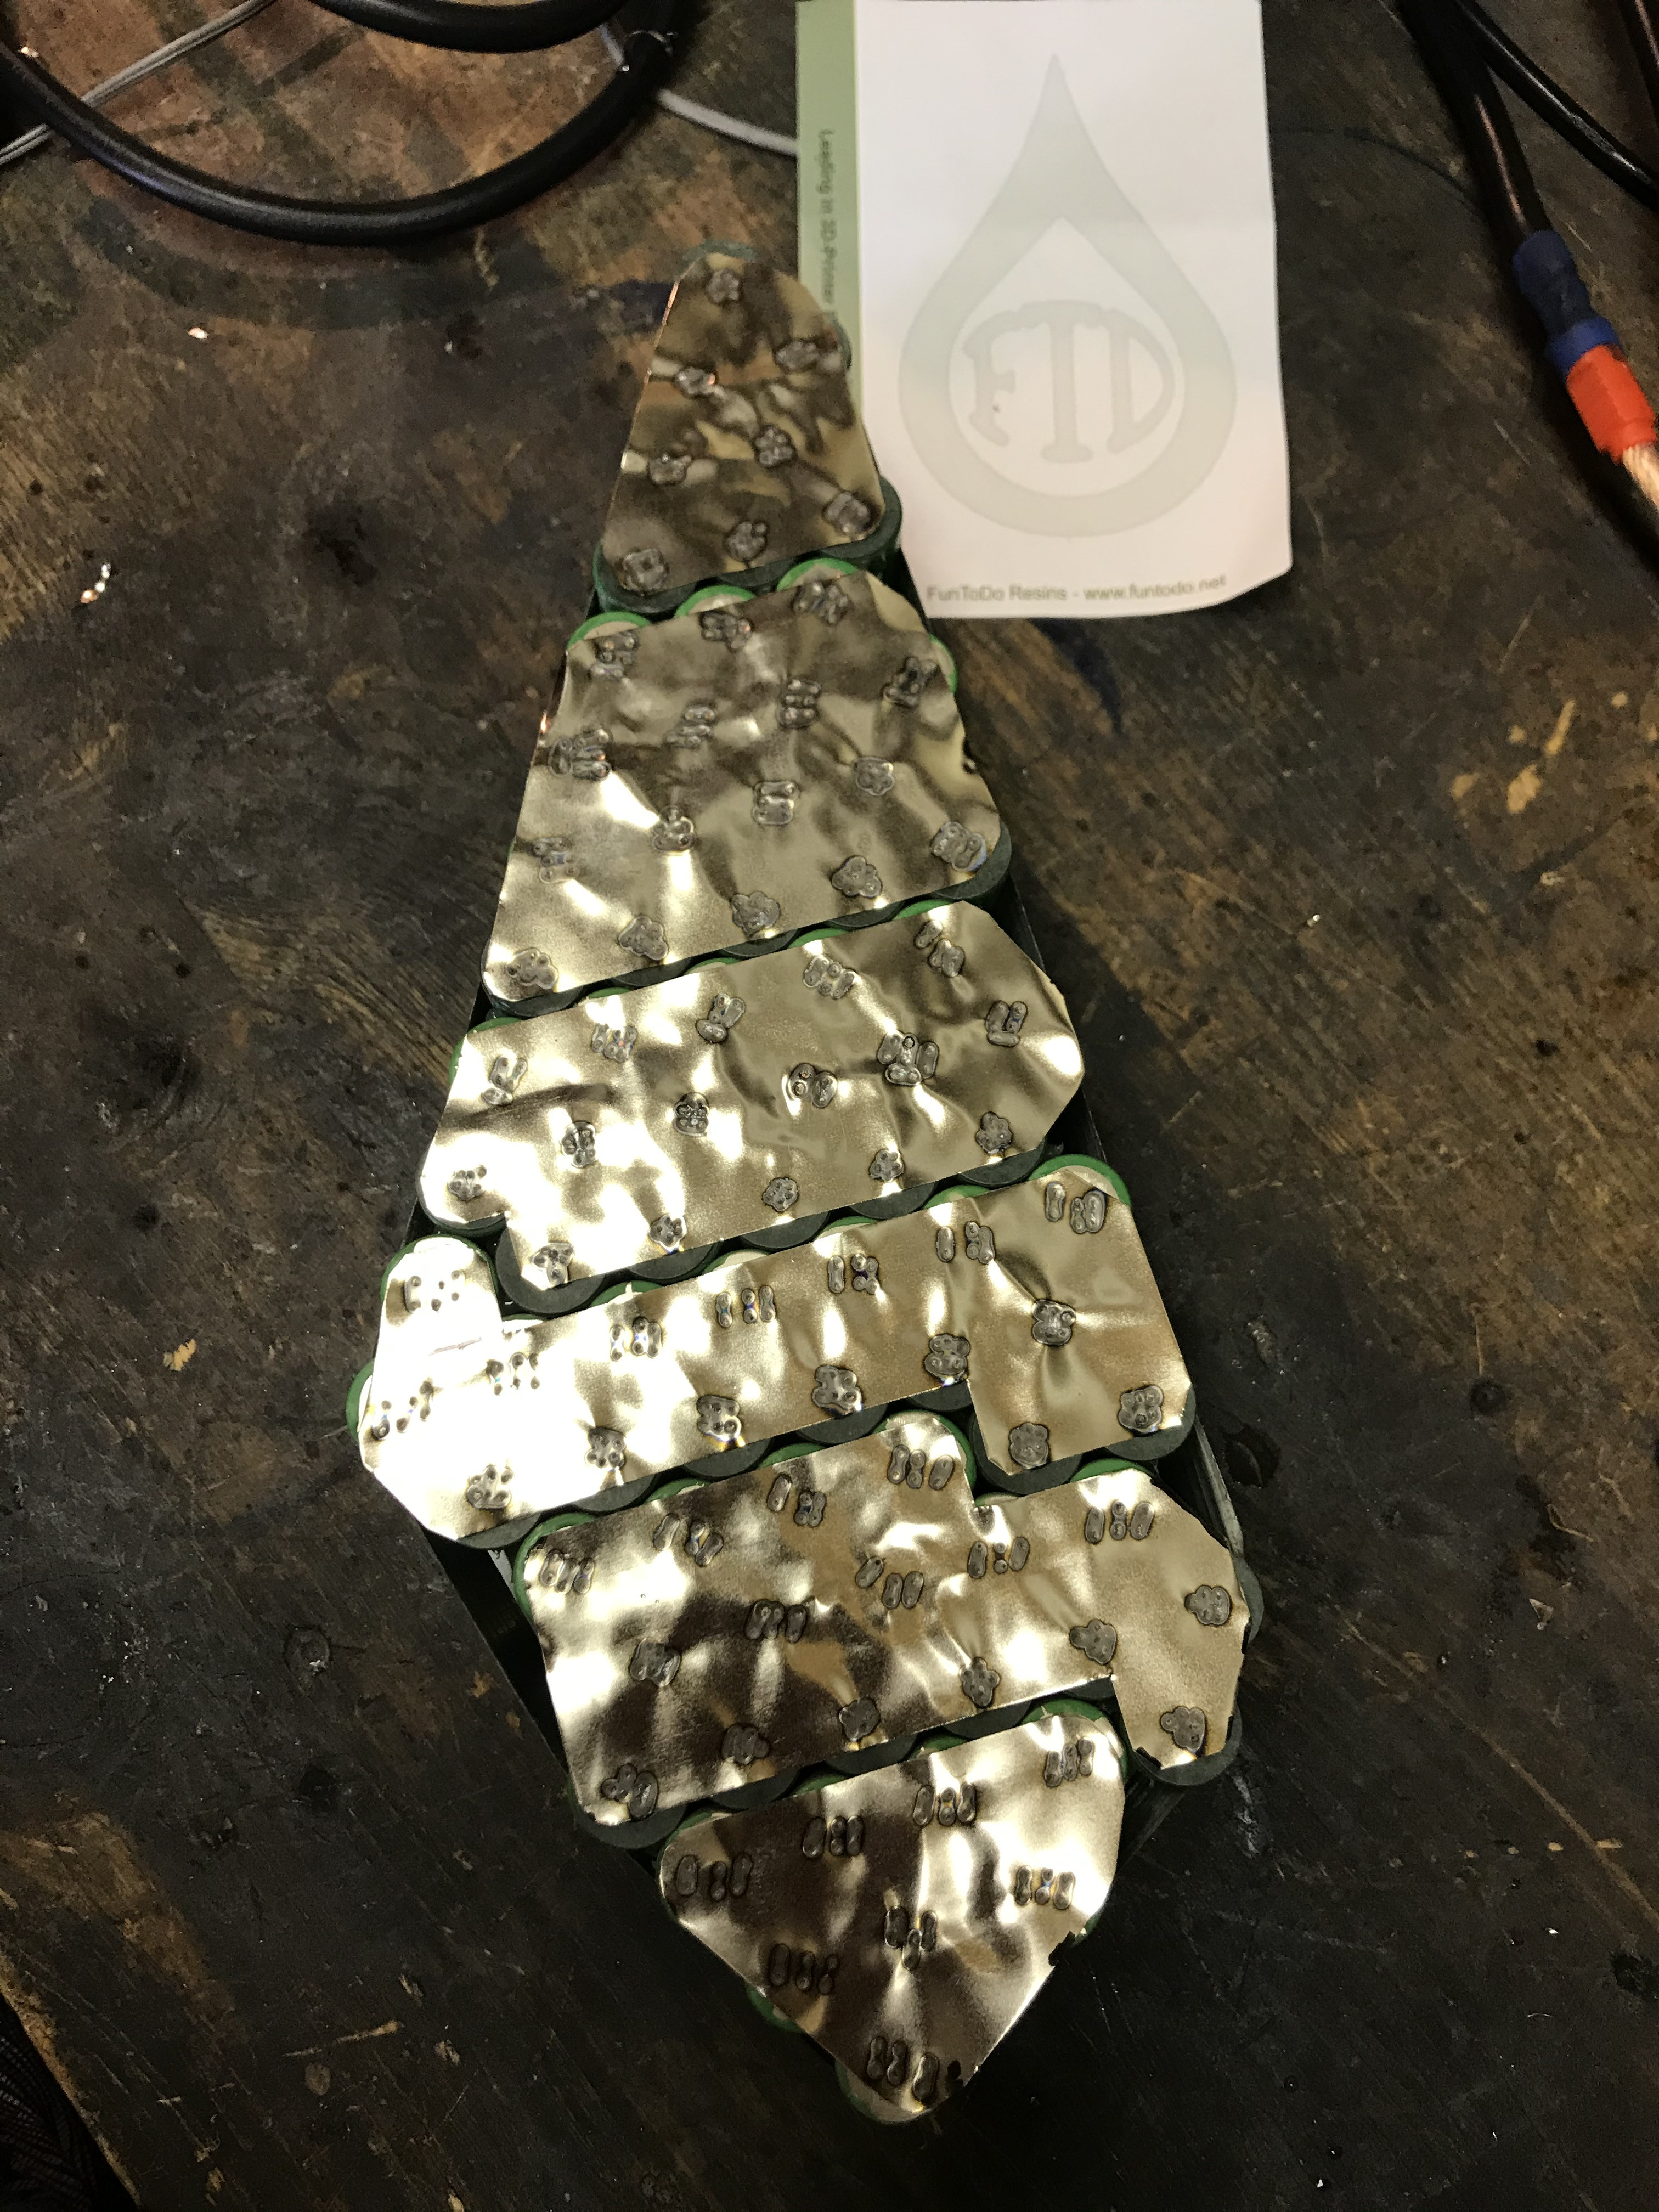
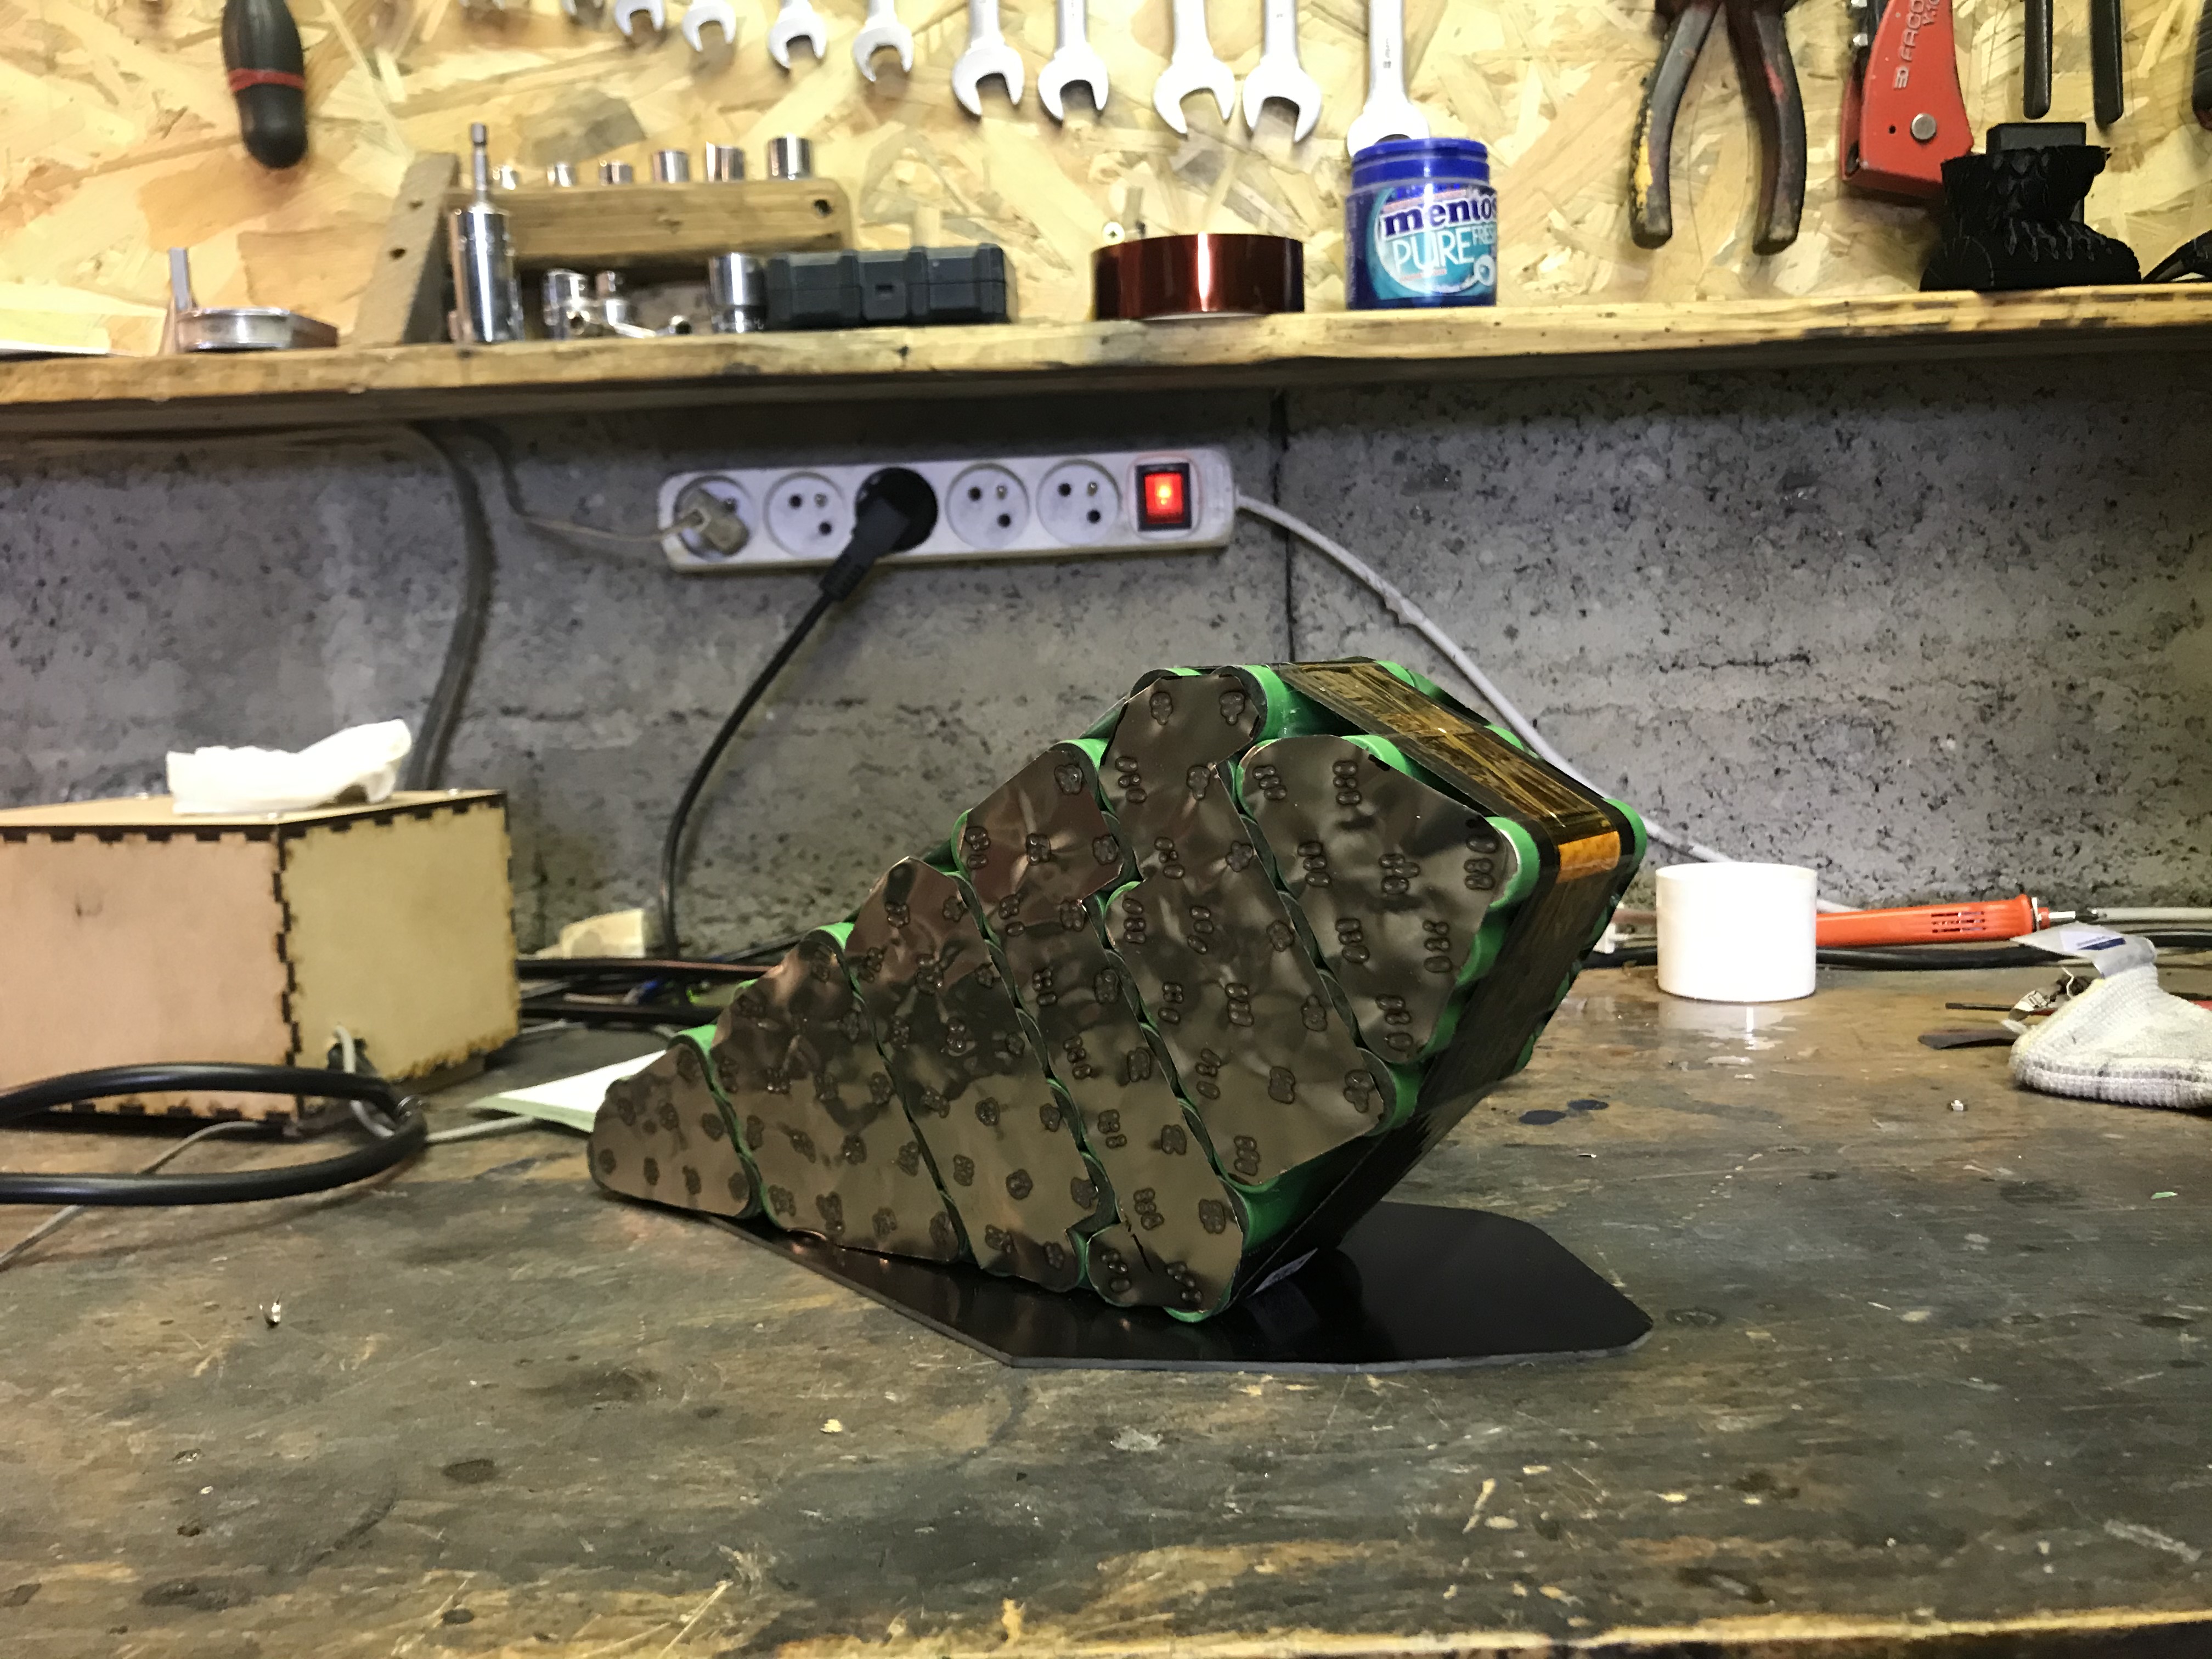
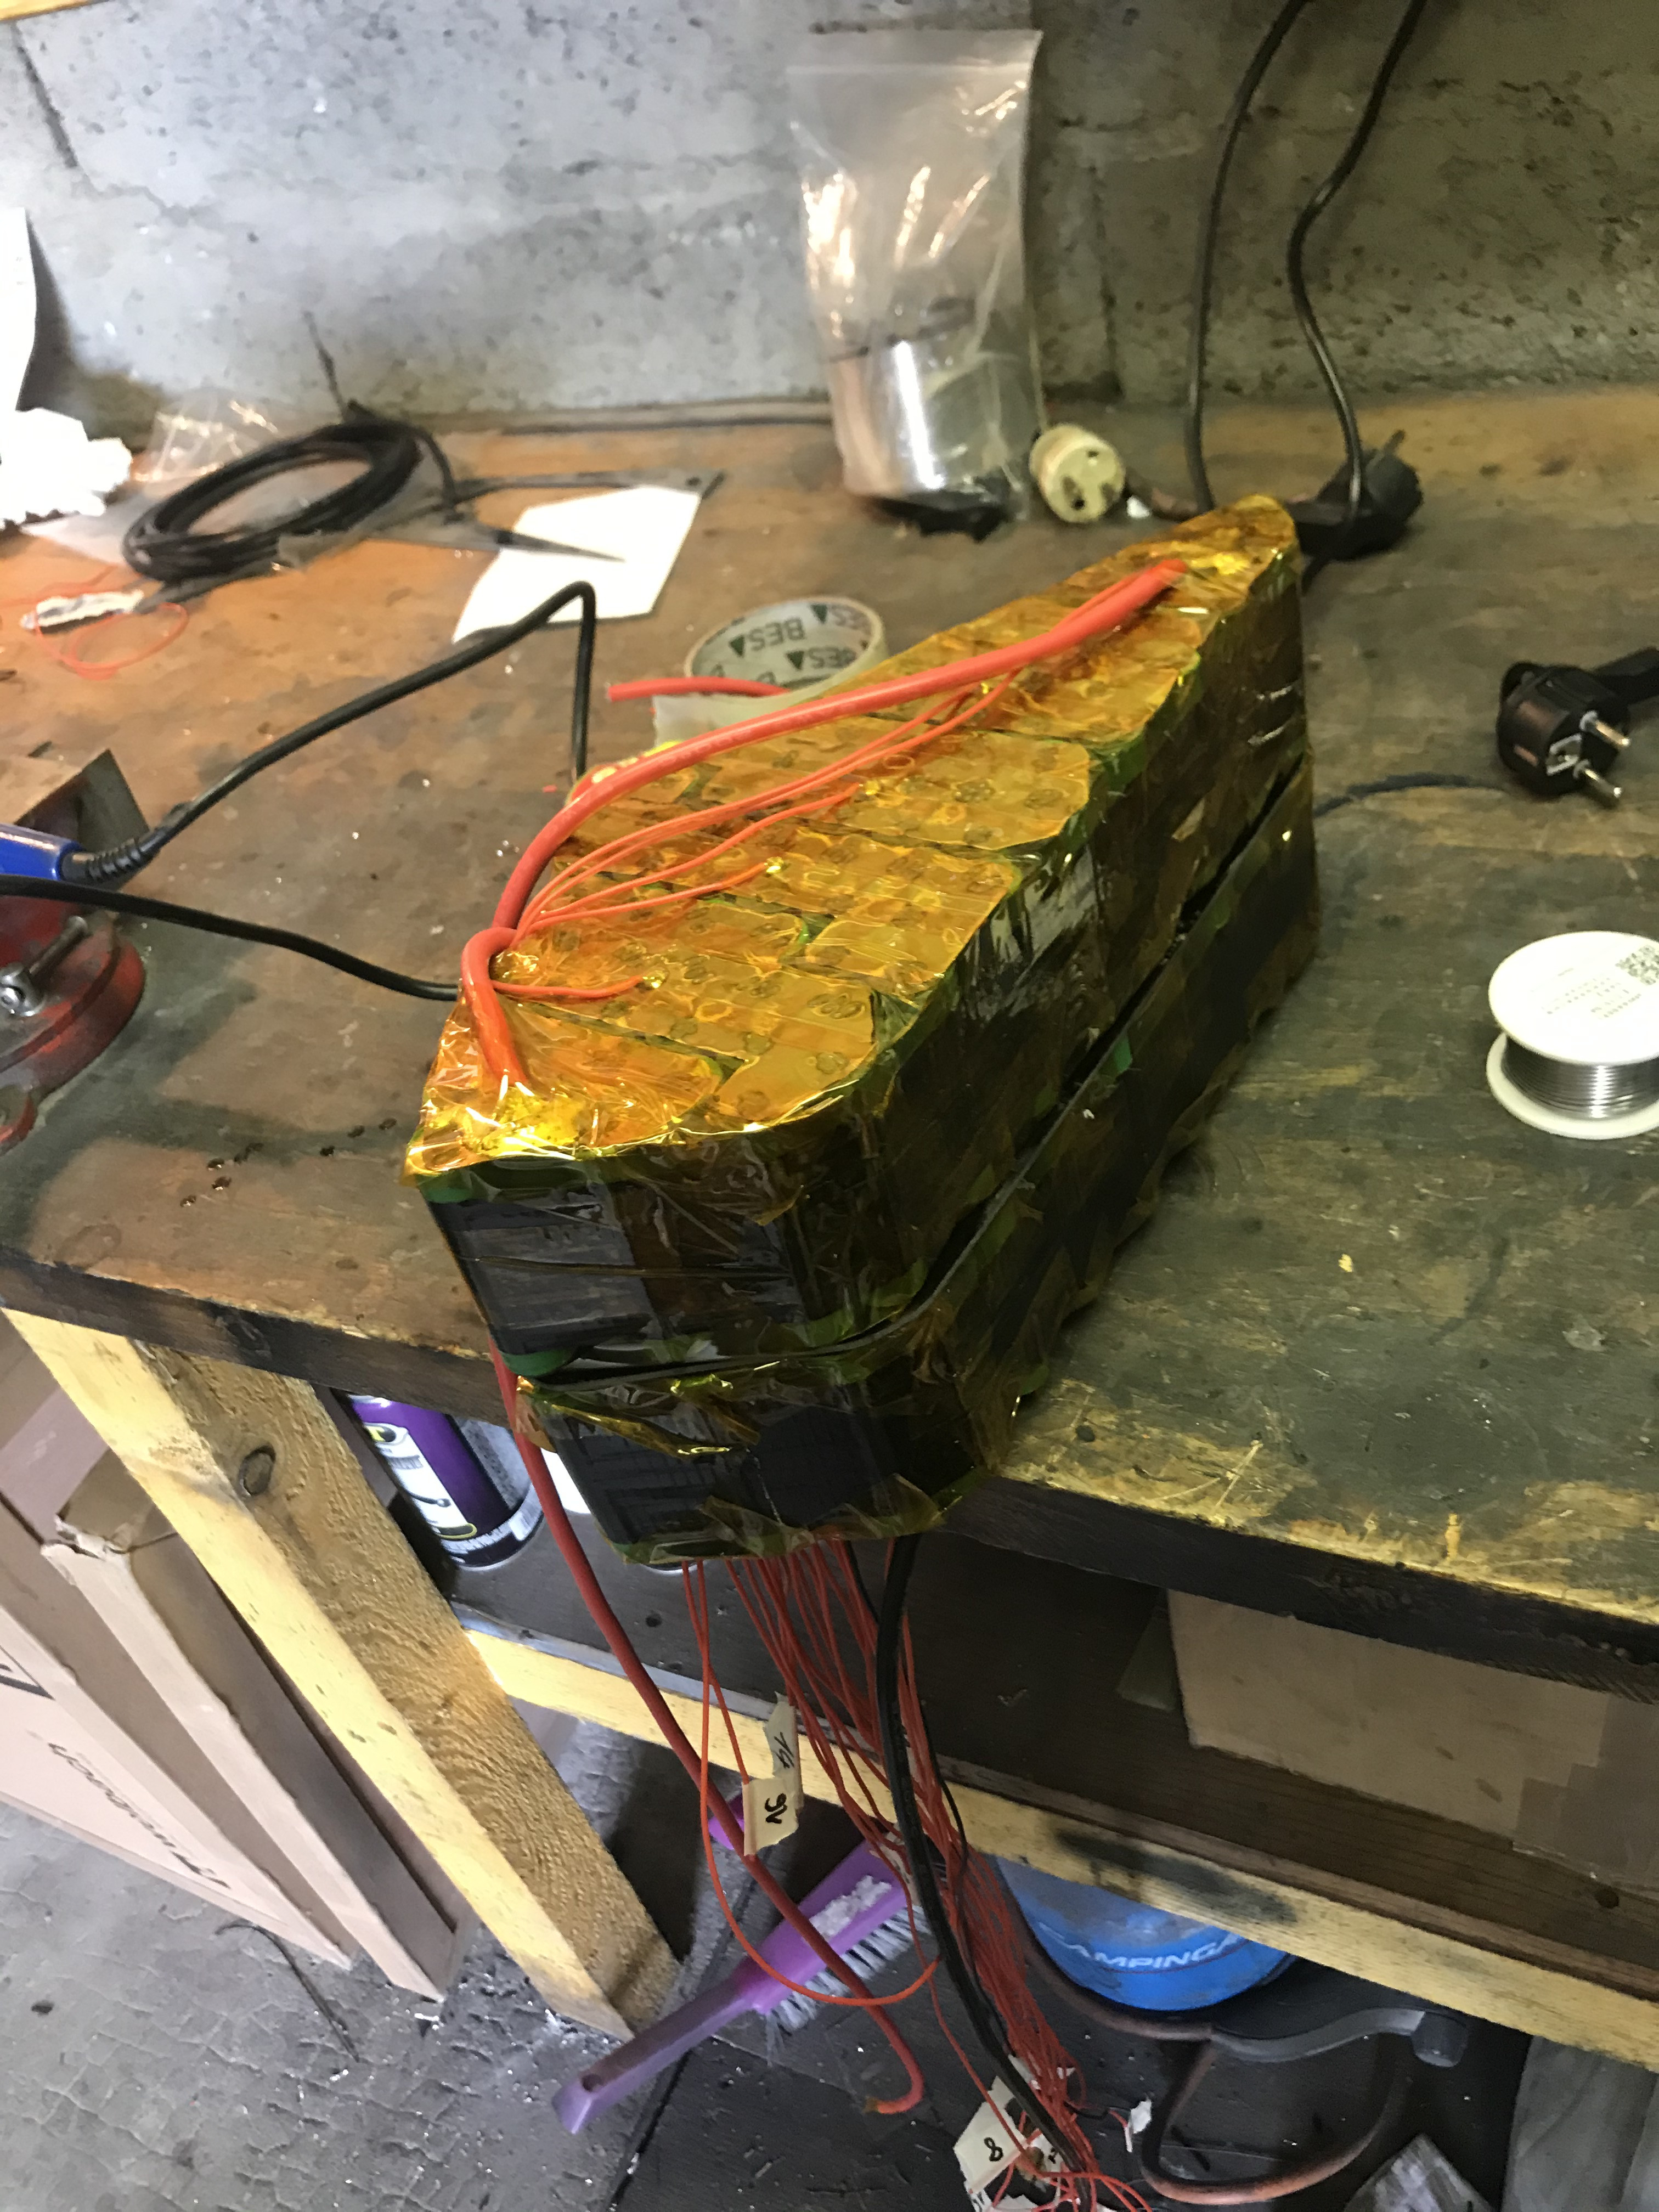
Now the battery assembly ! It's a custom 20s 8P pack made with vtc5a cells
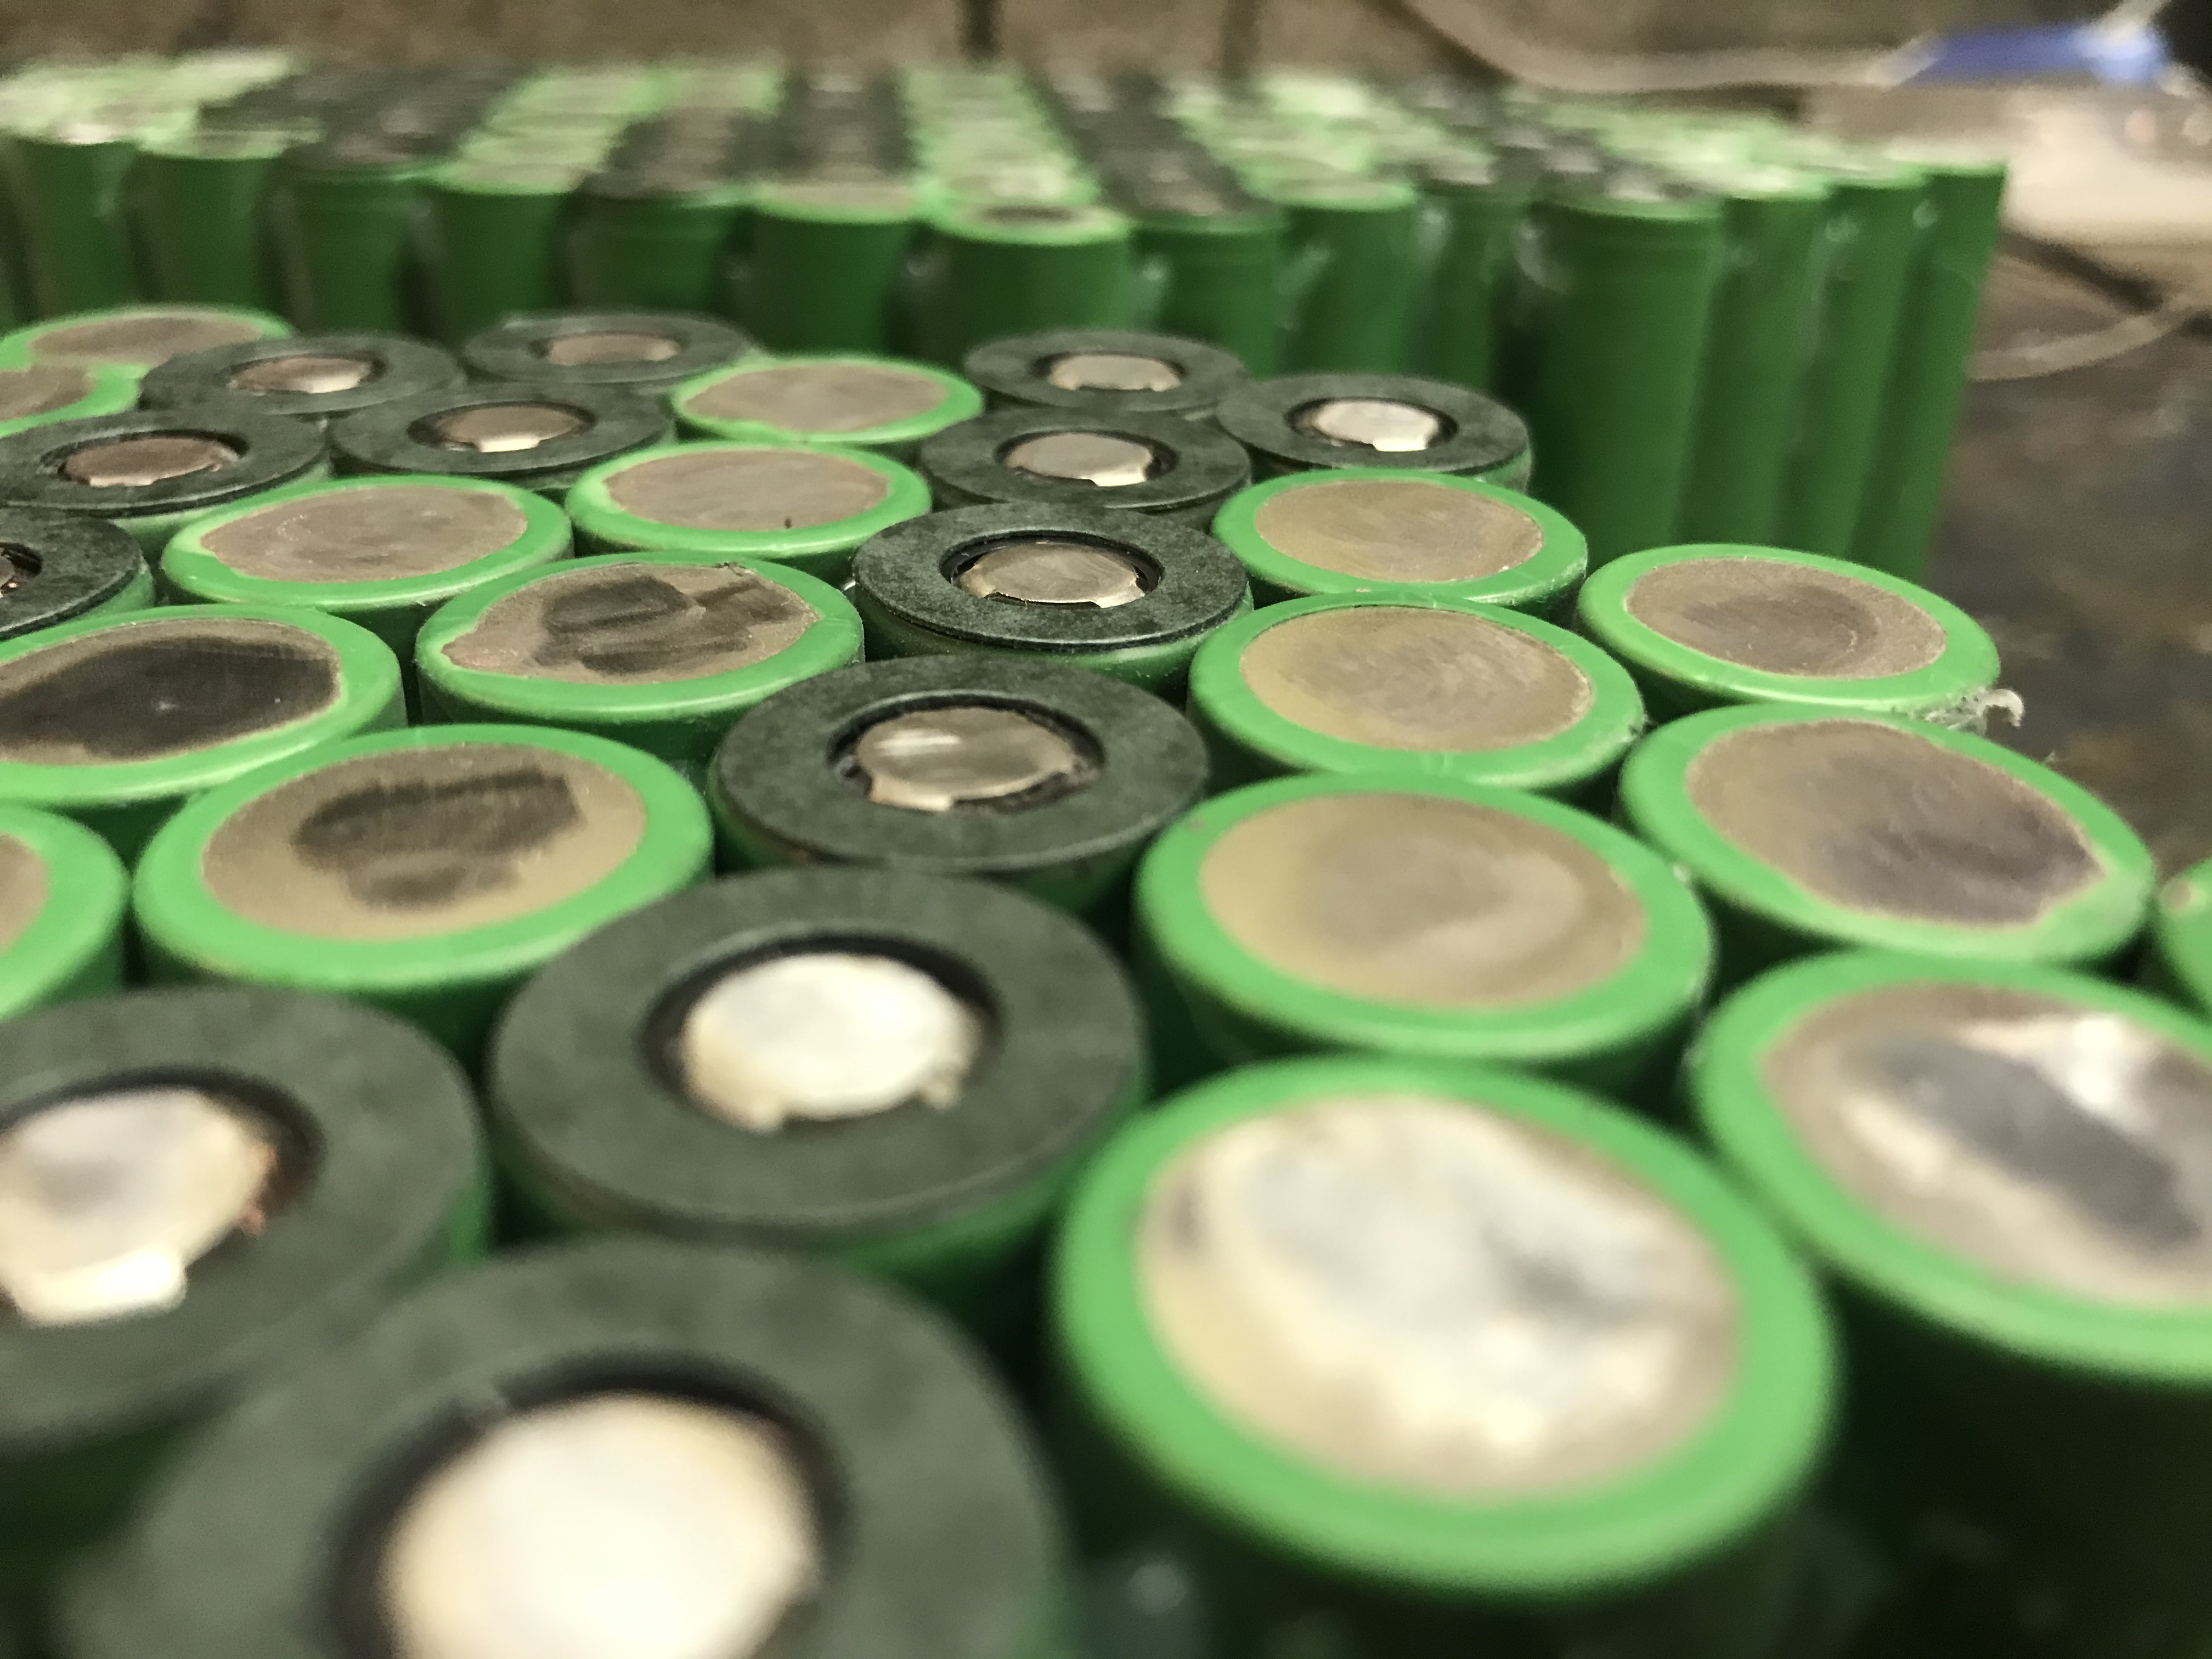
removing the olds spotwelds marks
Assembly test with the sabvoton and the 150A BMS
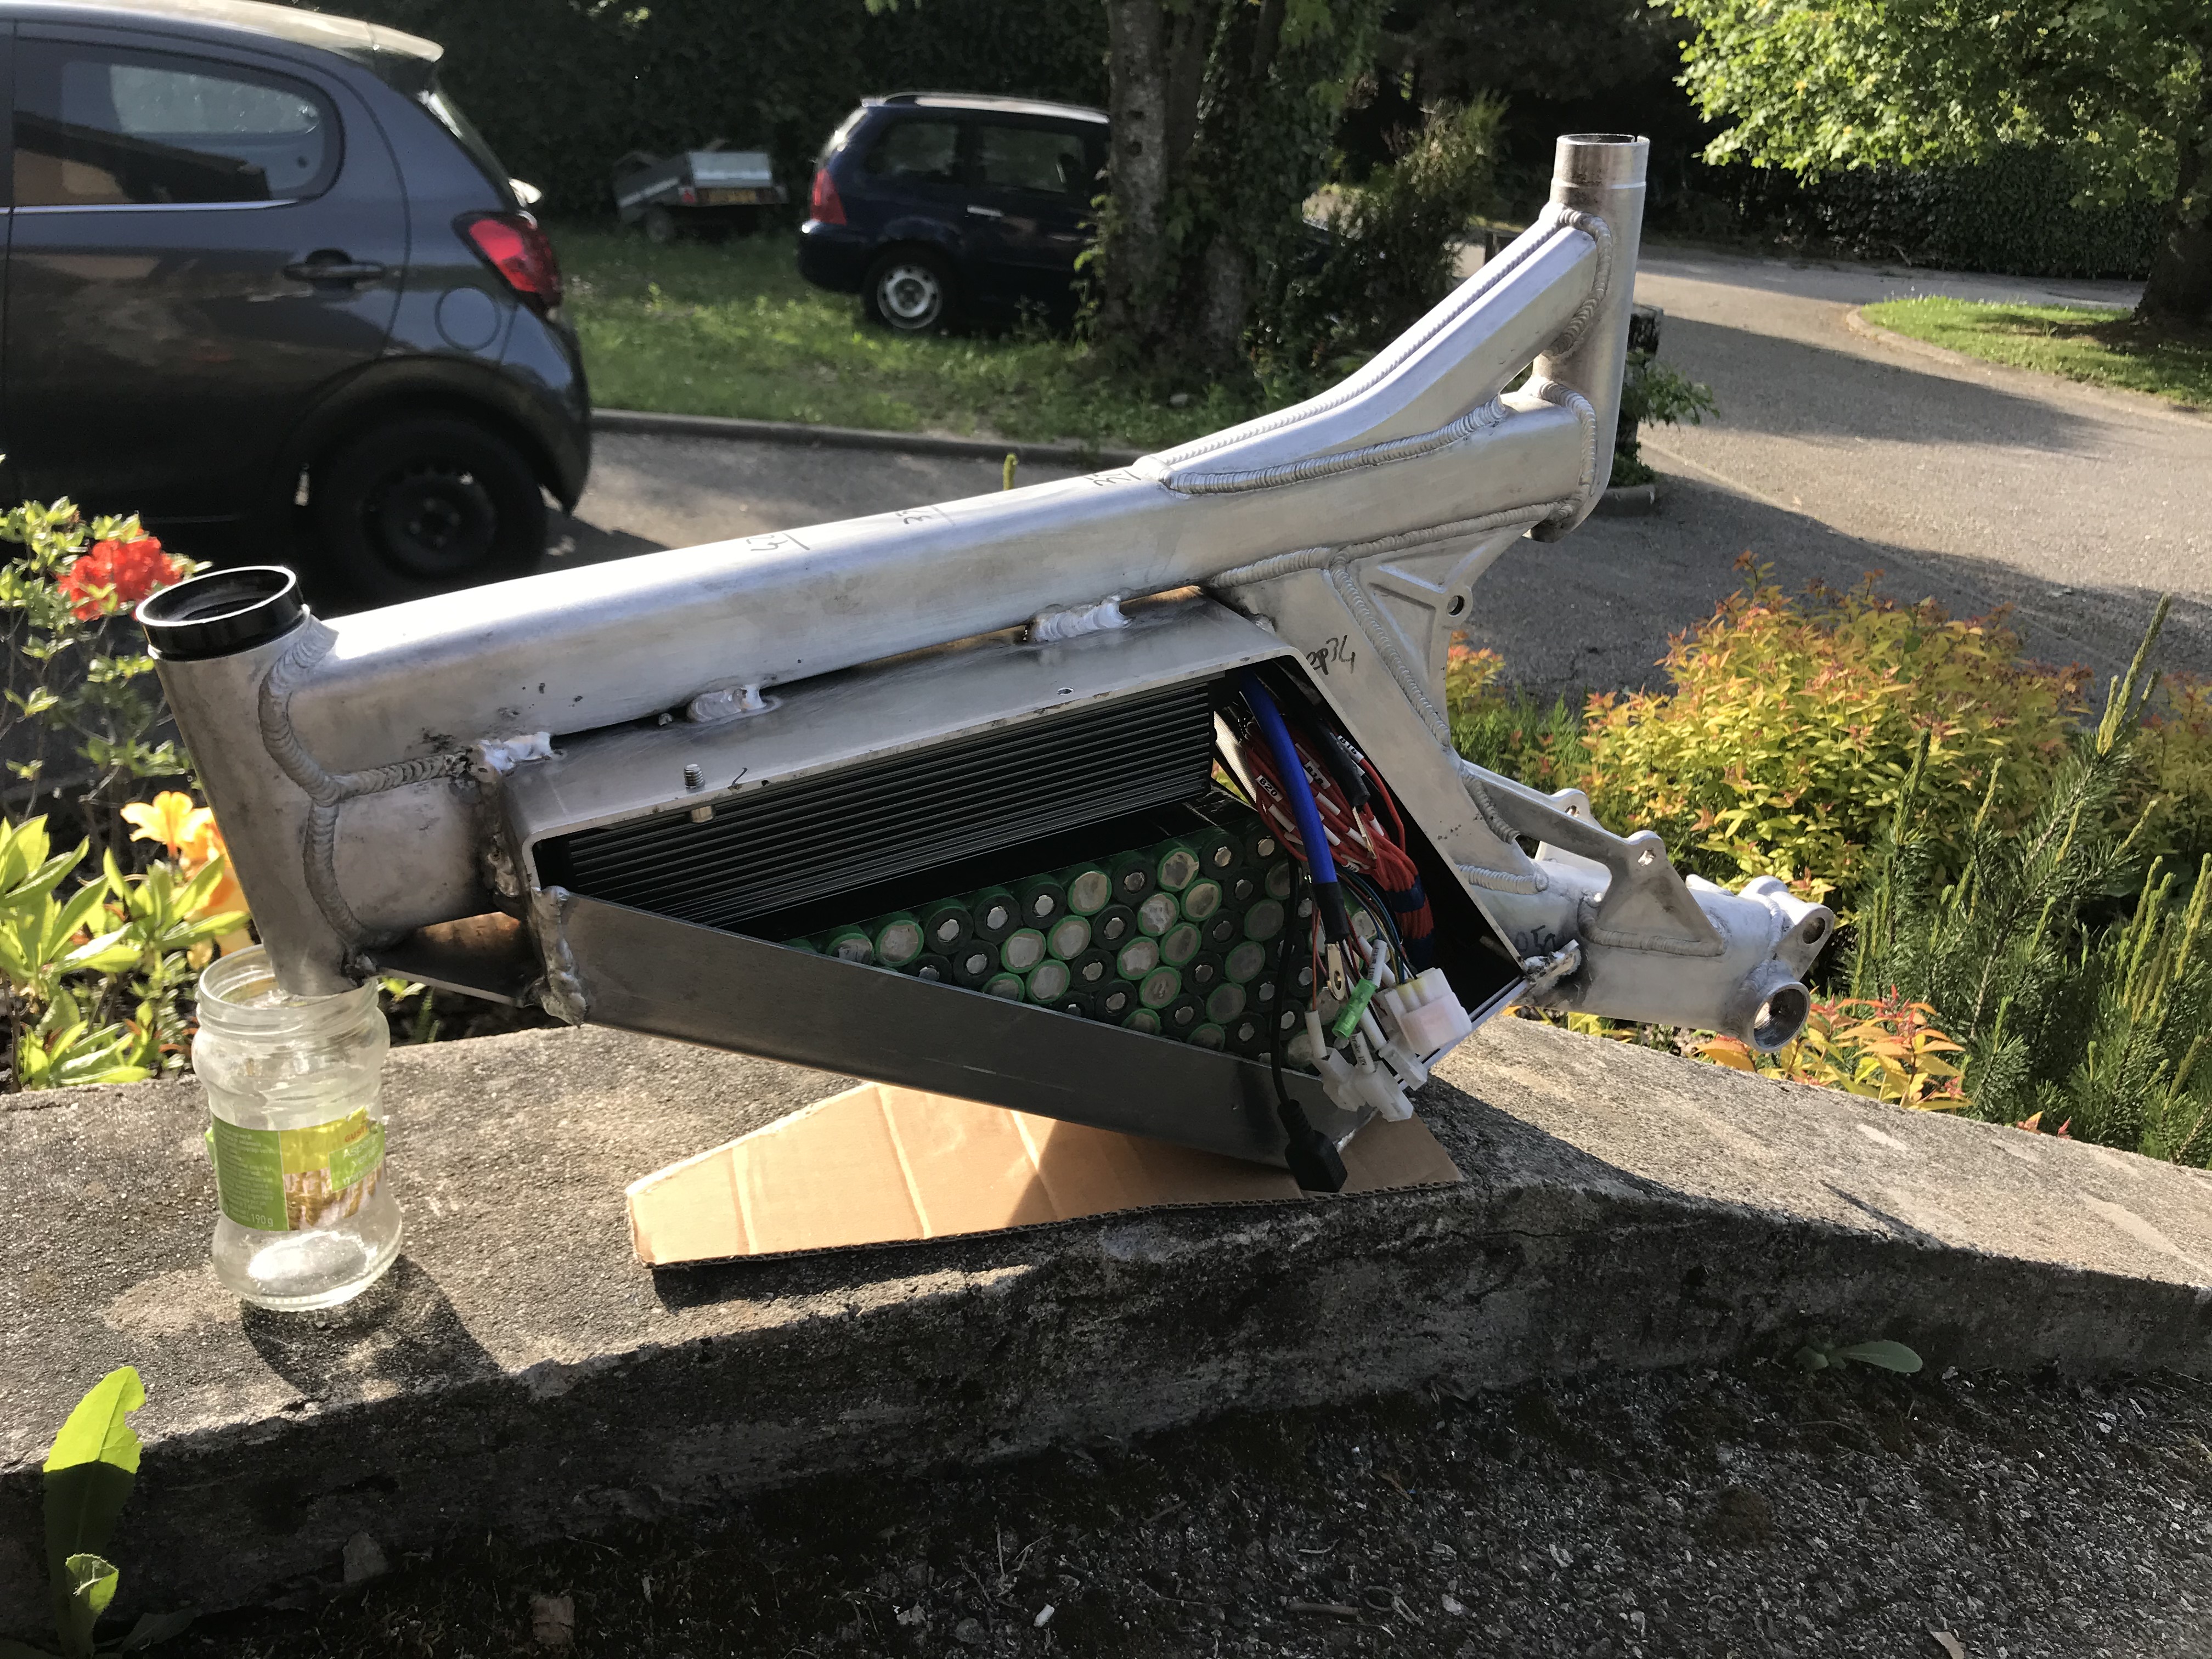
Ok that's tight but it fits
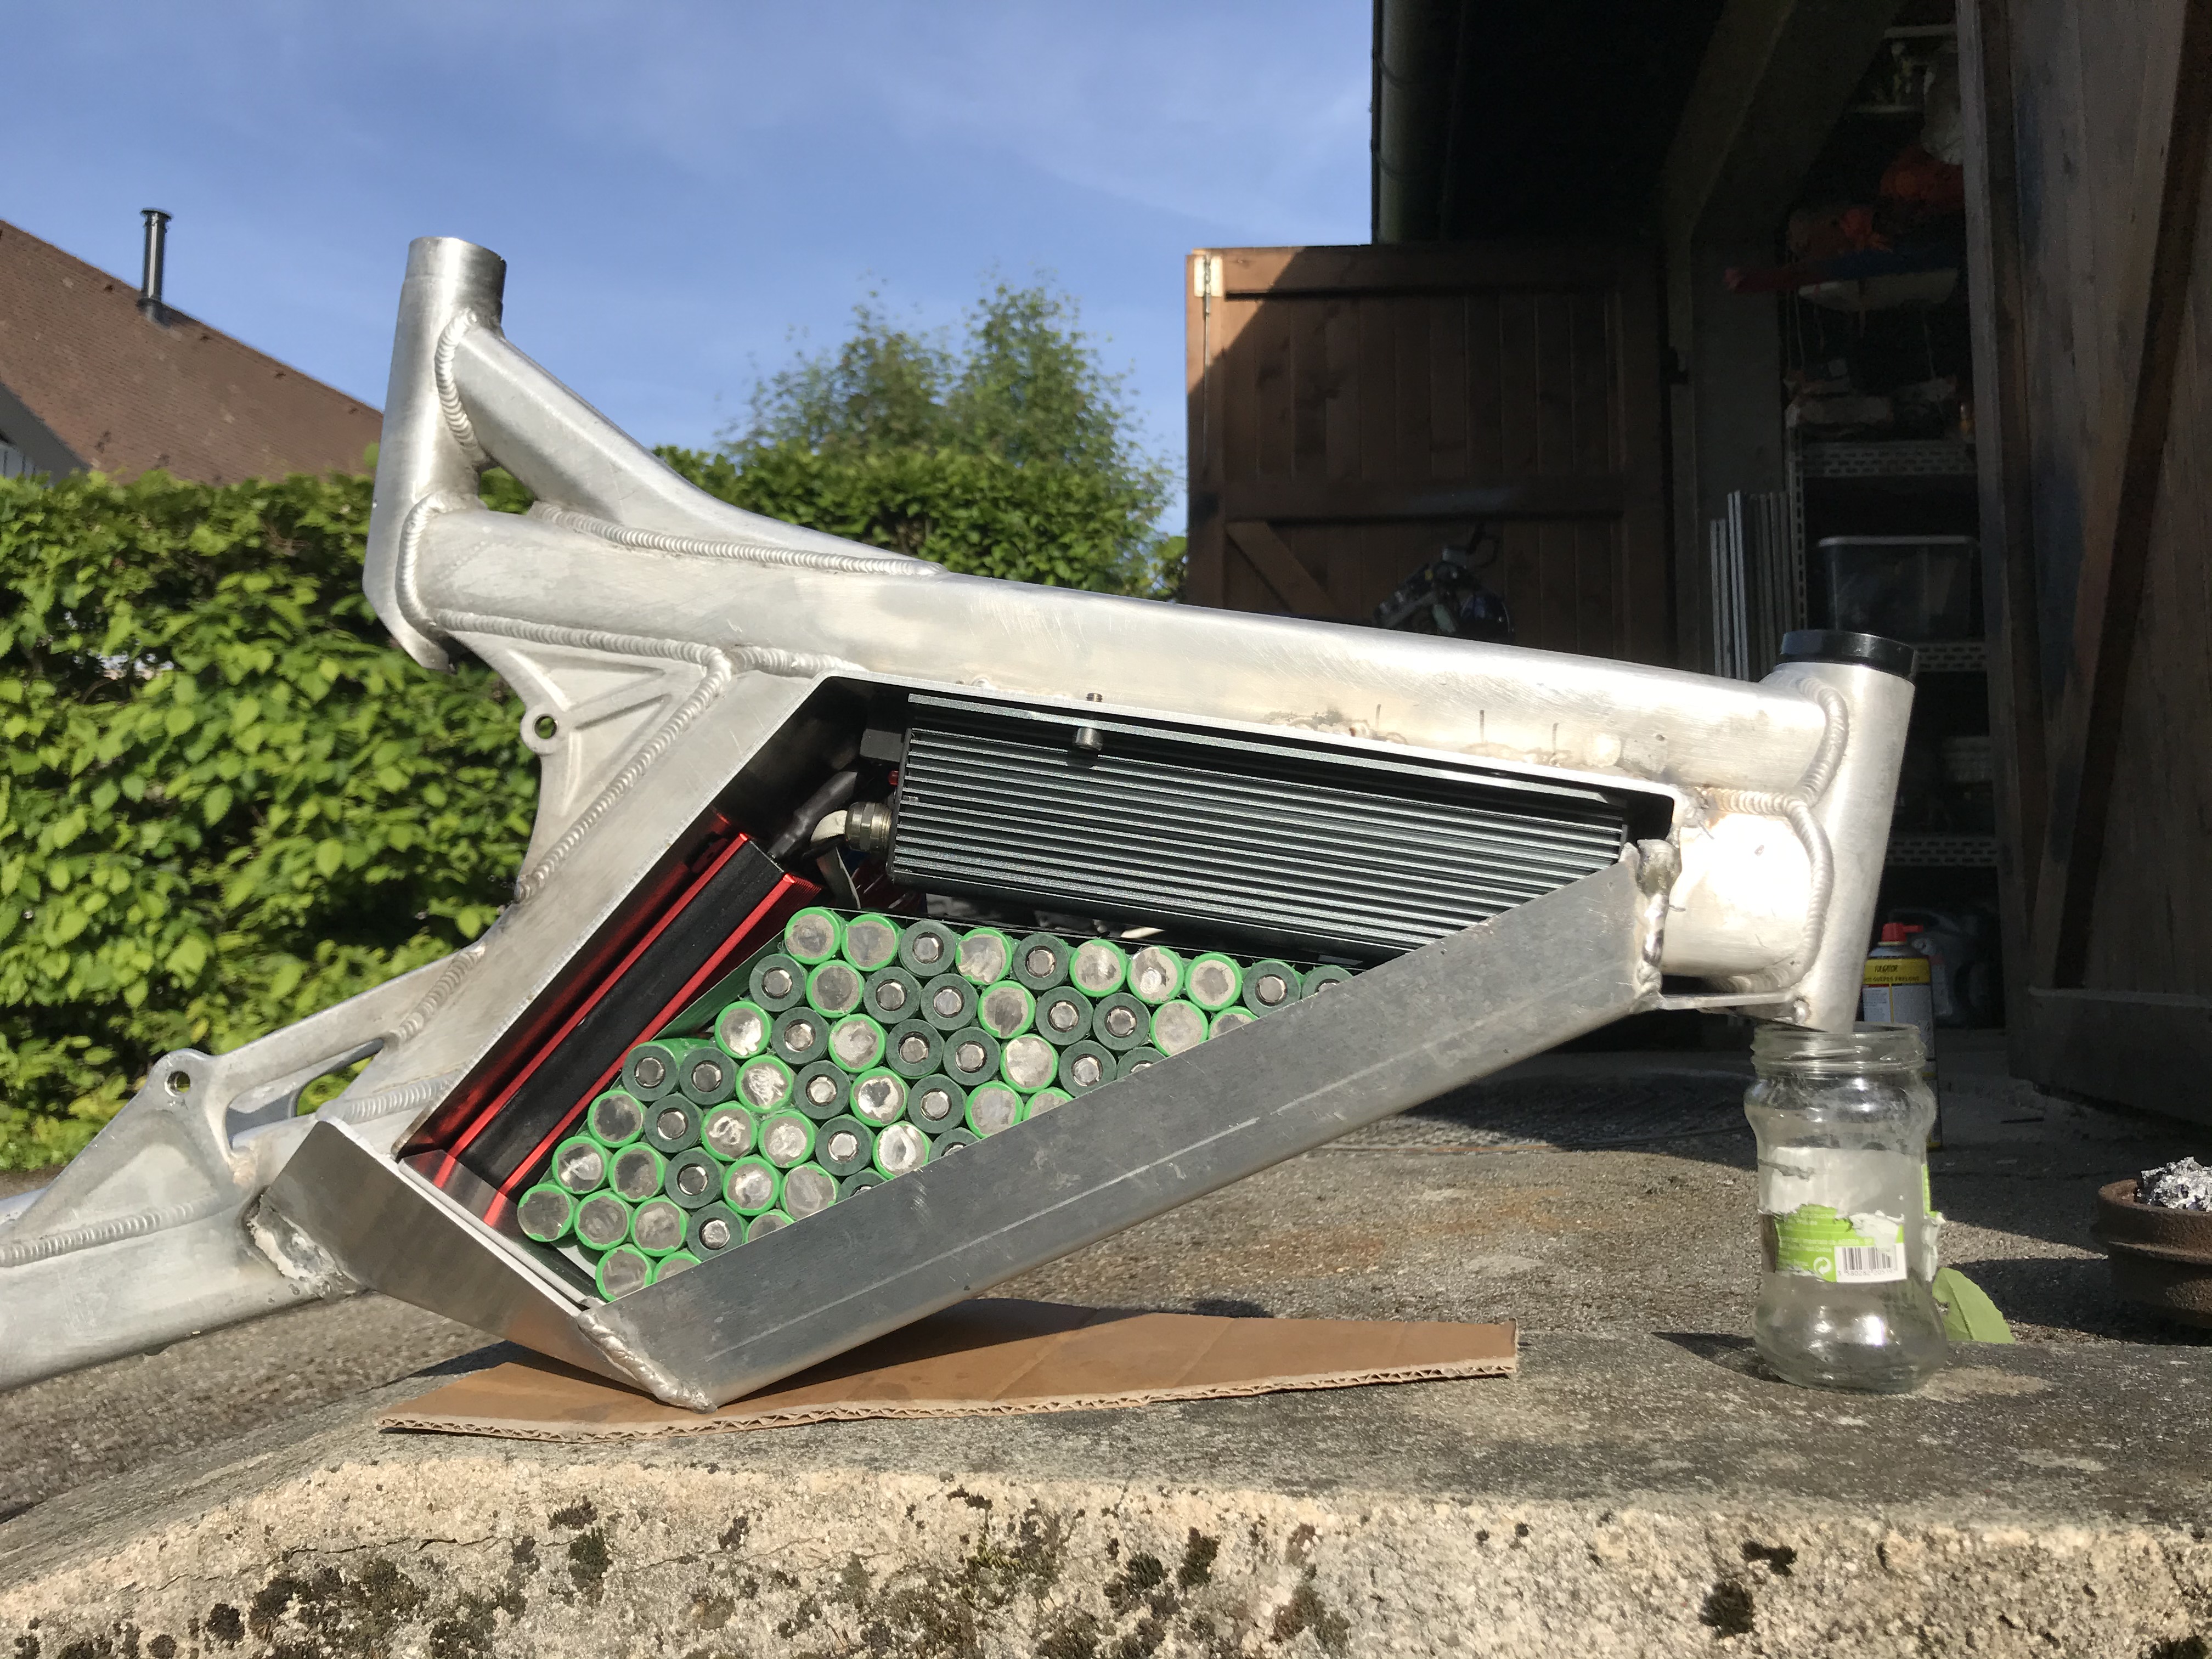
finish all welds
and new assembly test
and with the 2mm side covers
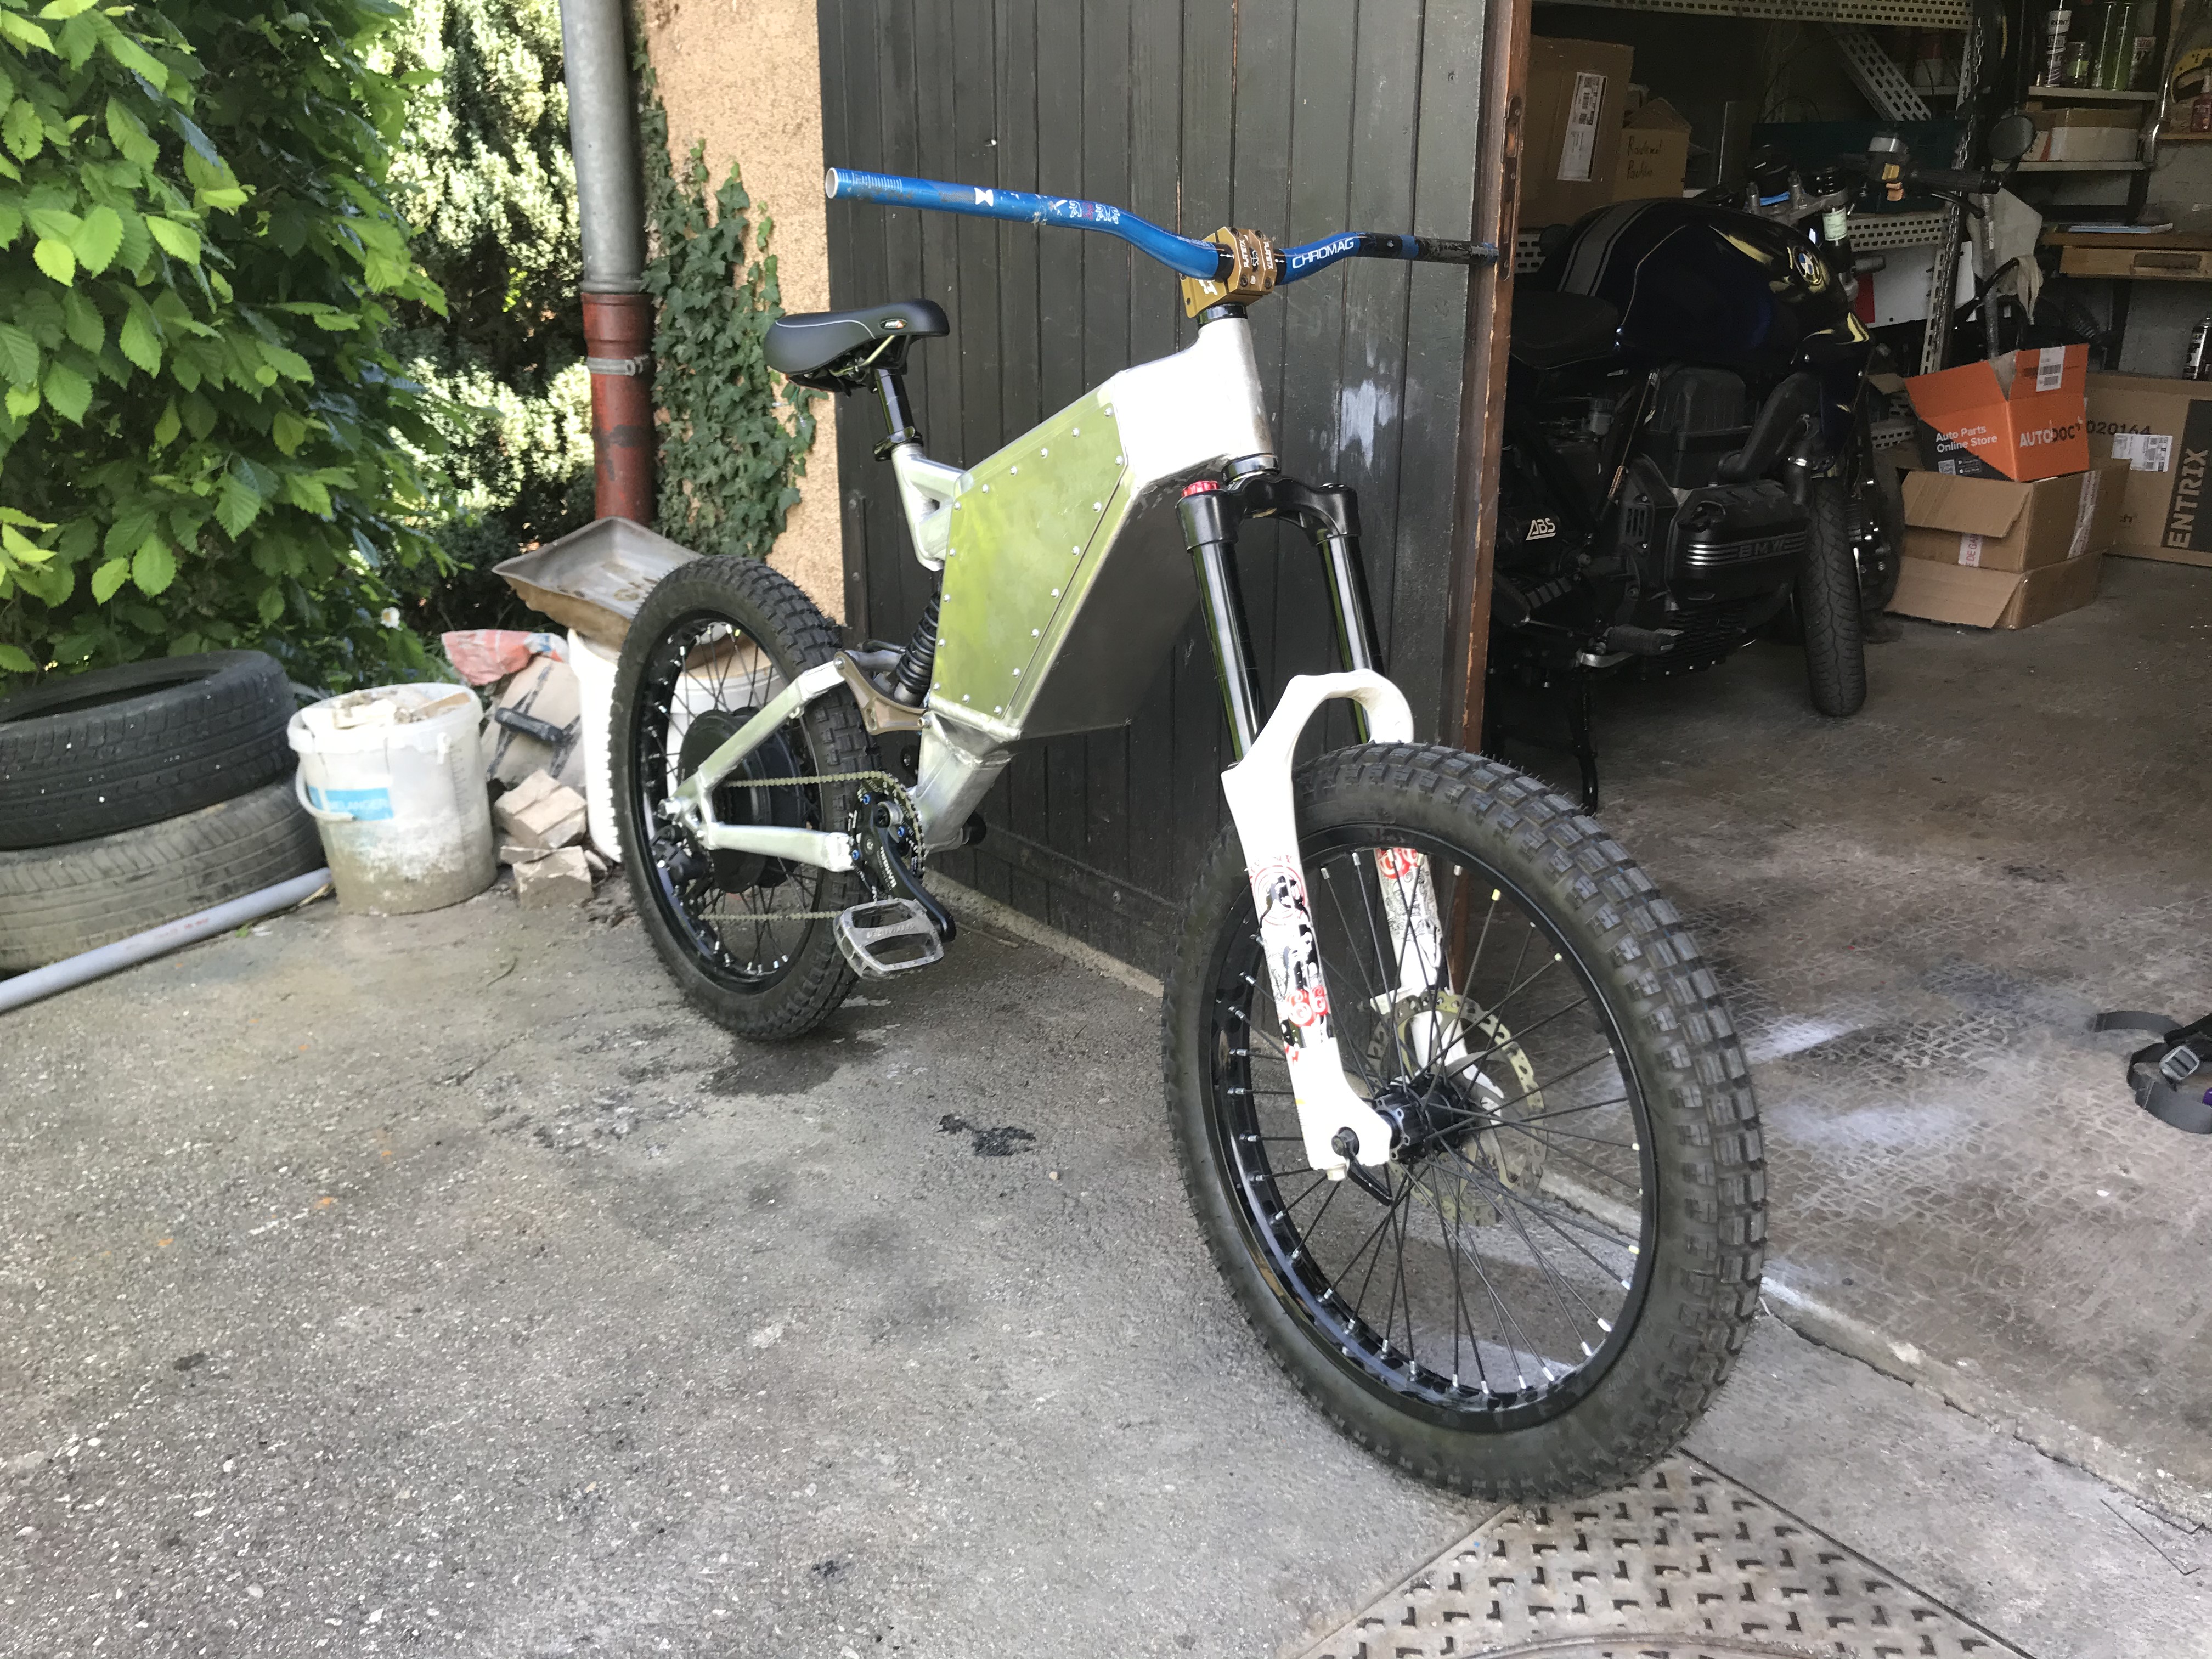
So coooool 8)
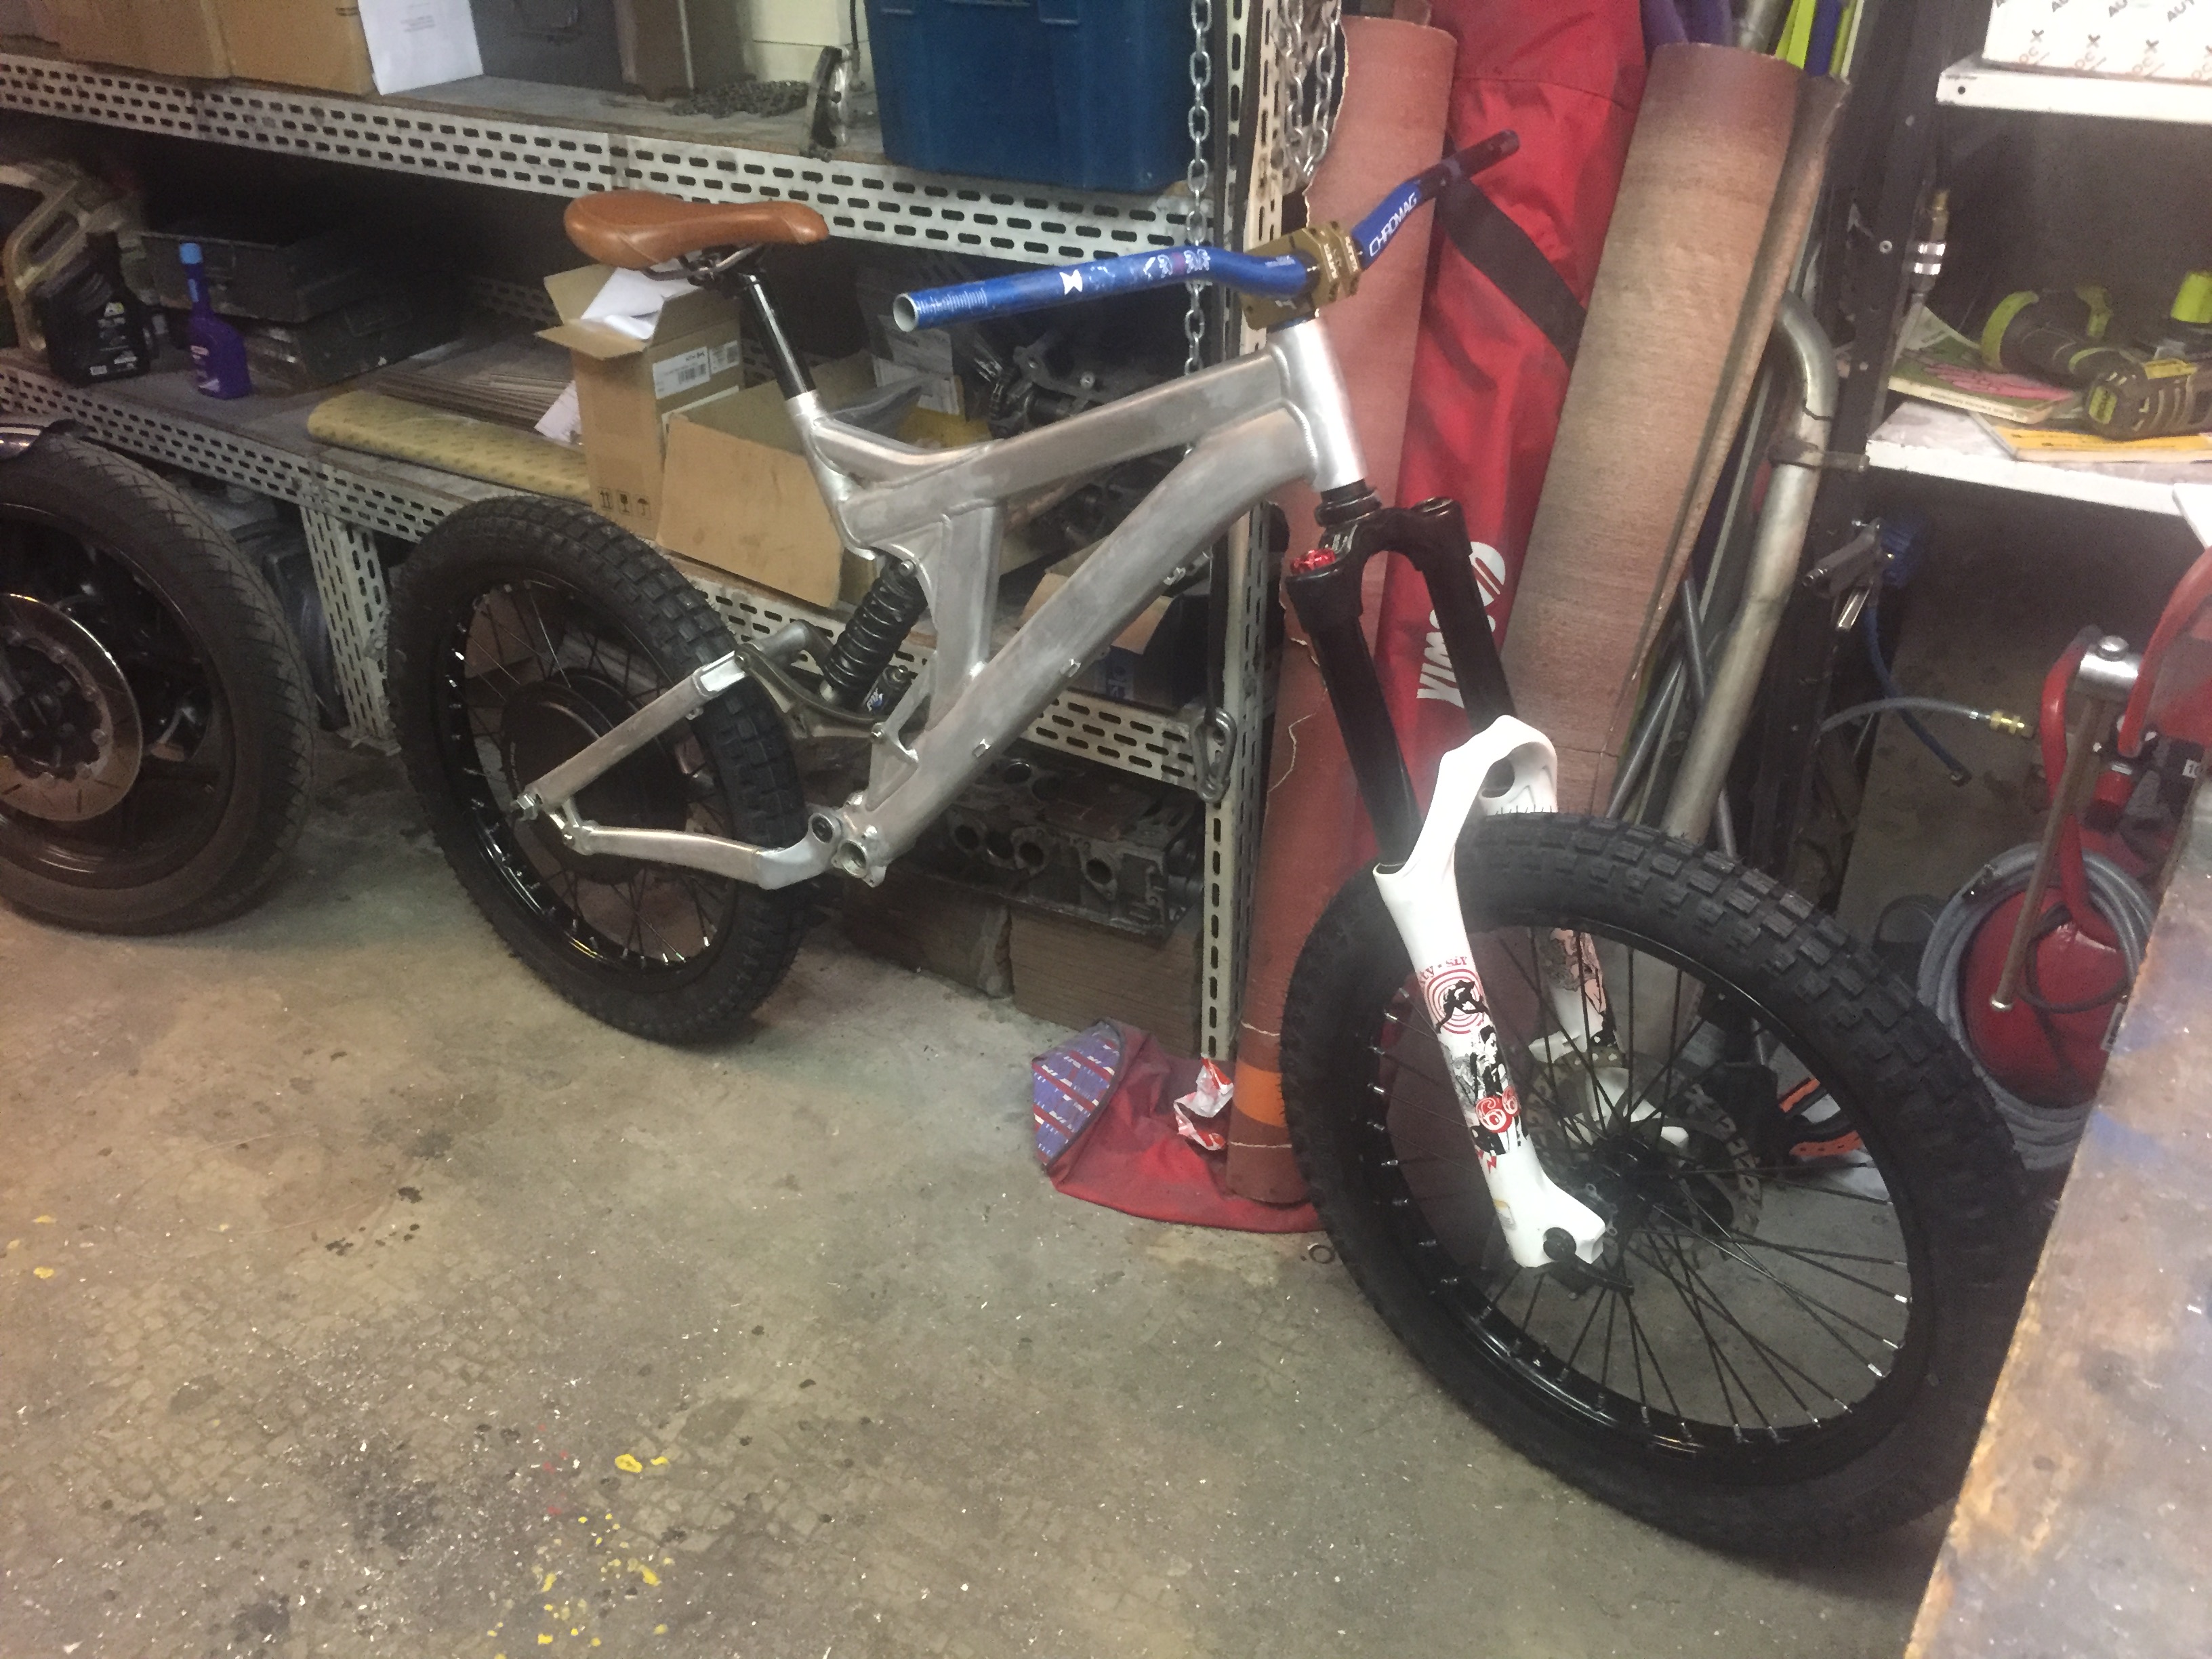
magura MT5 fitting test ok
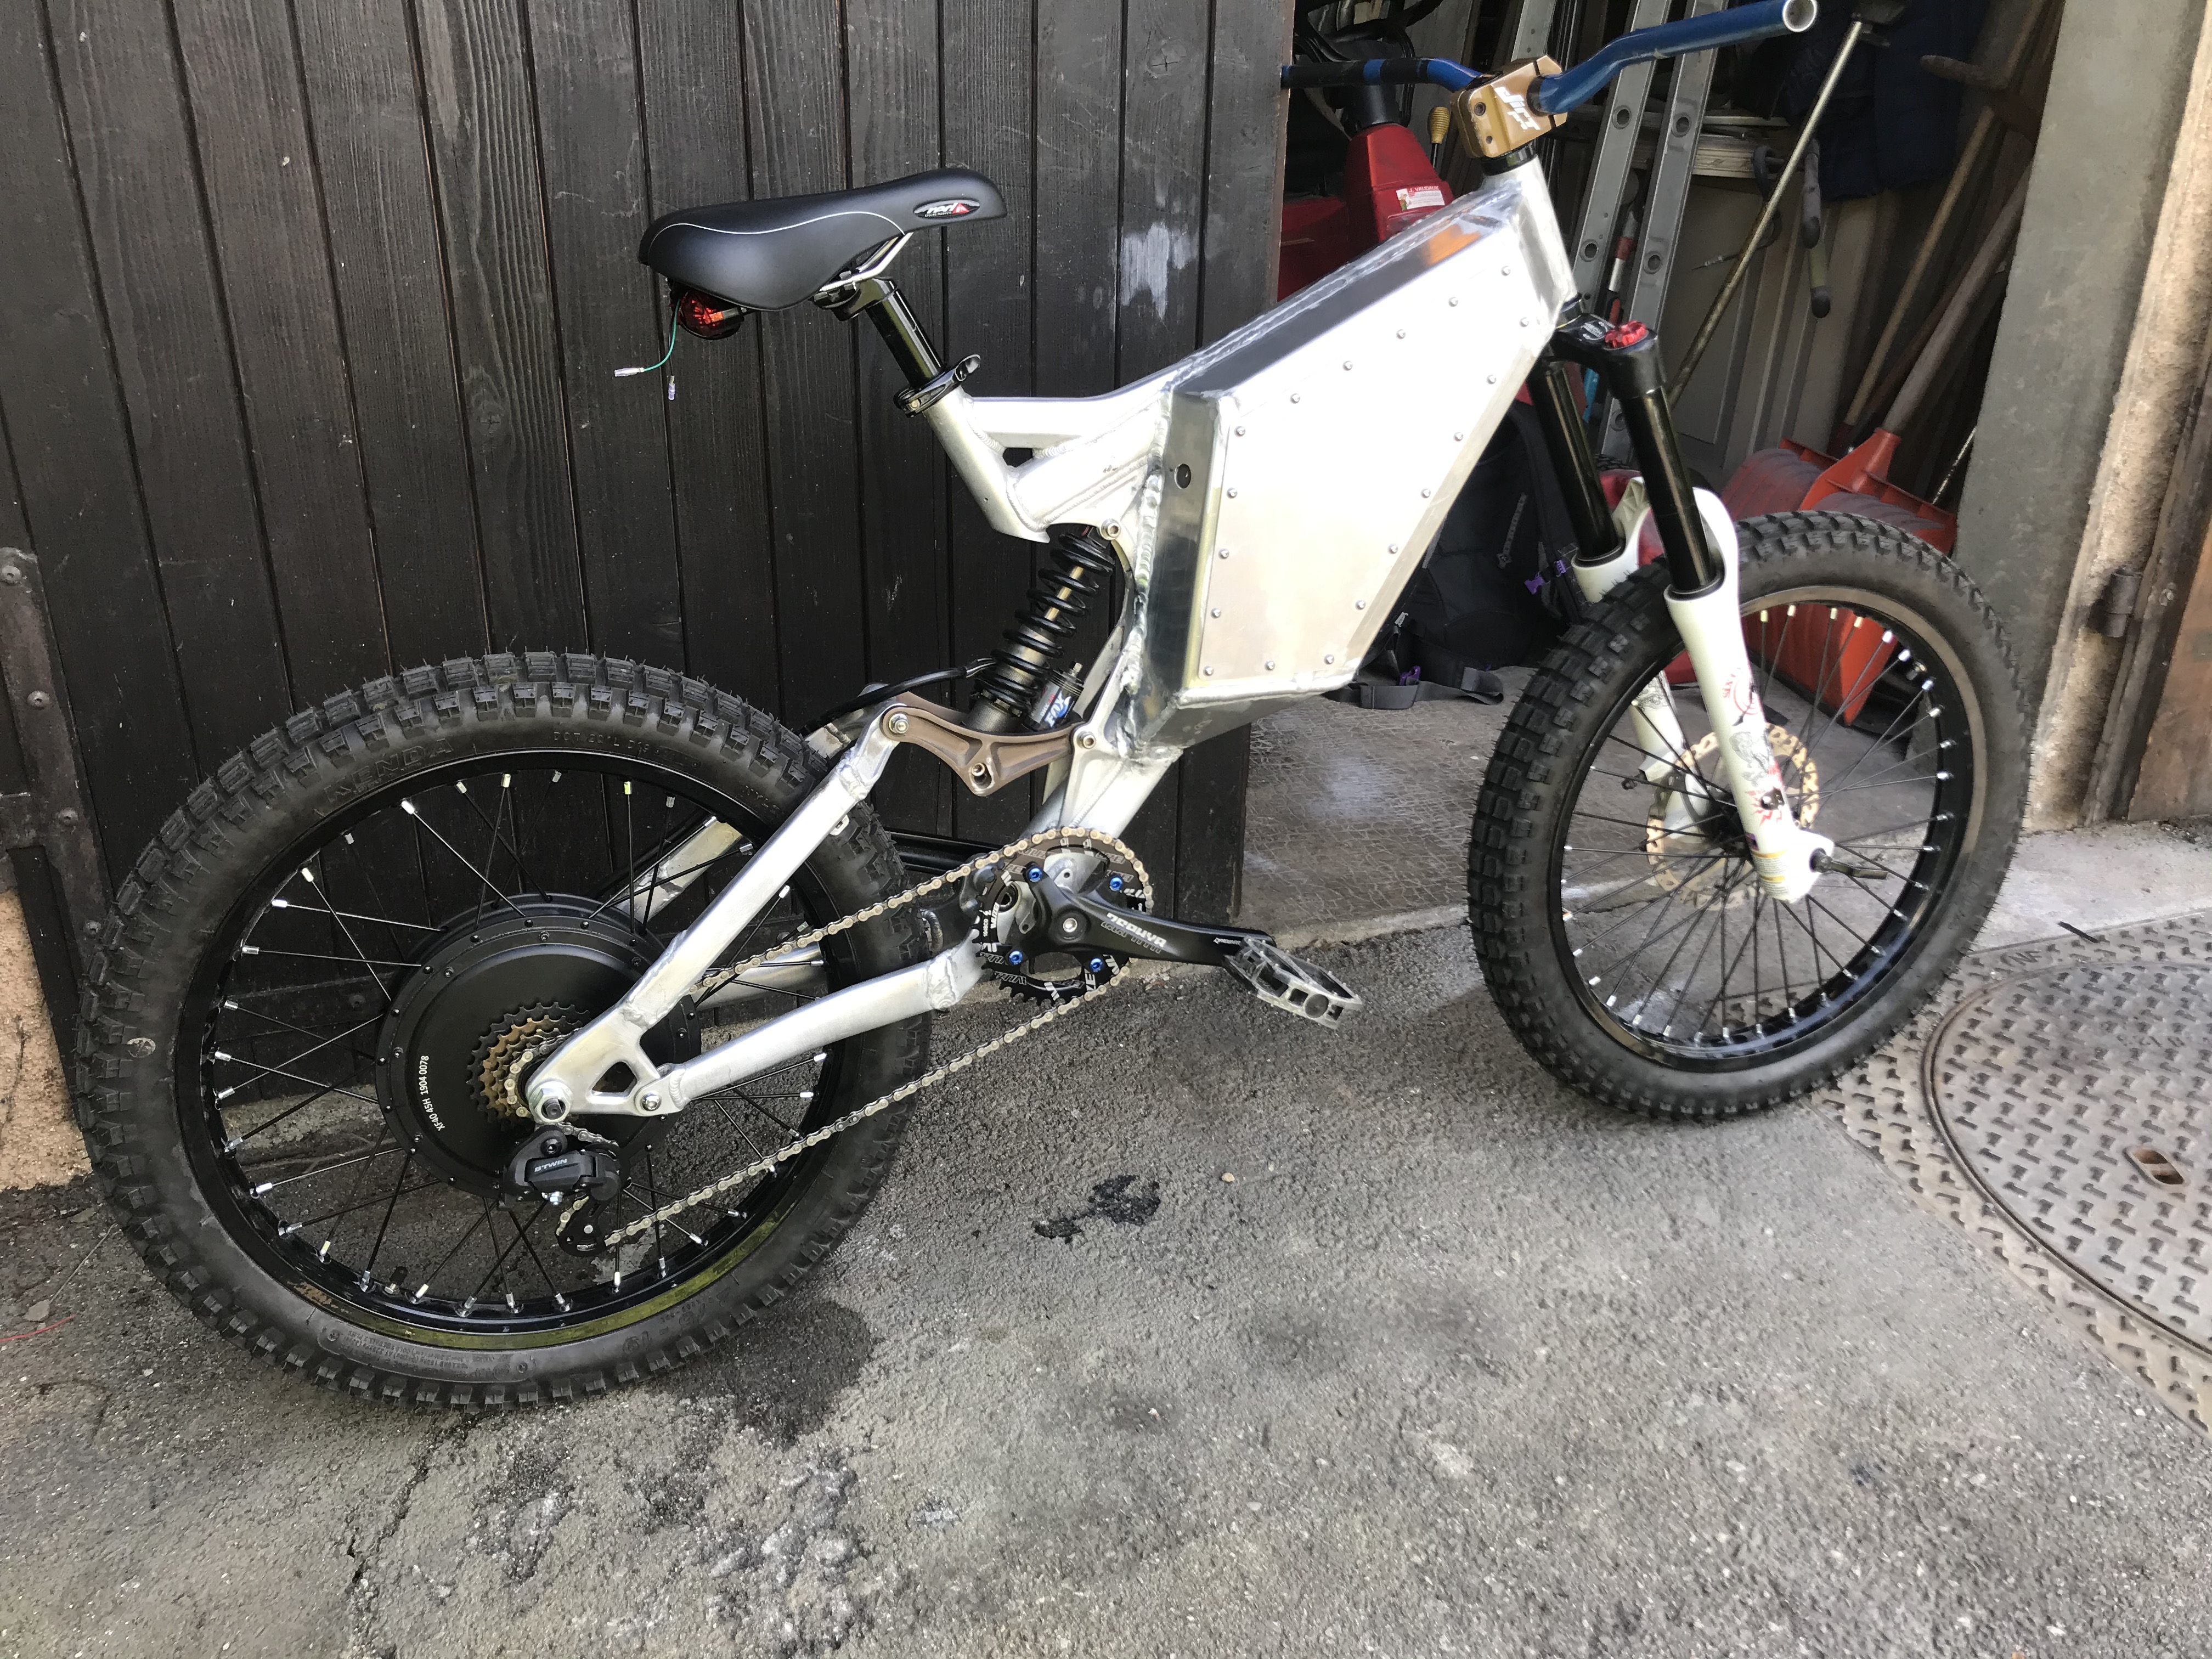
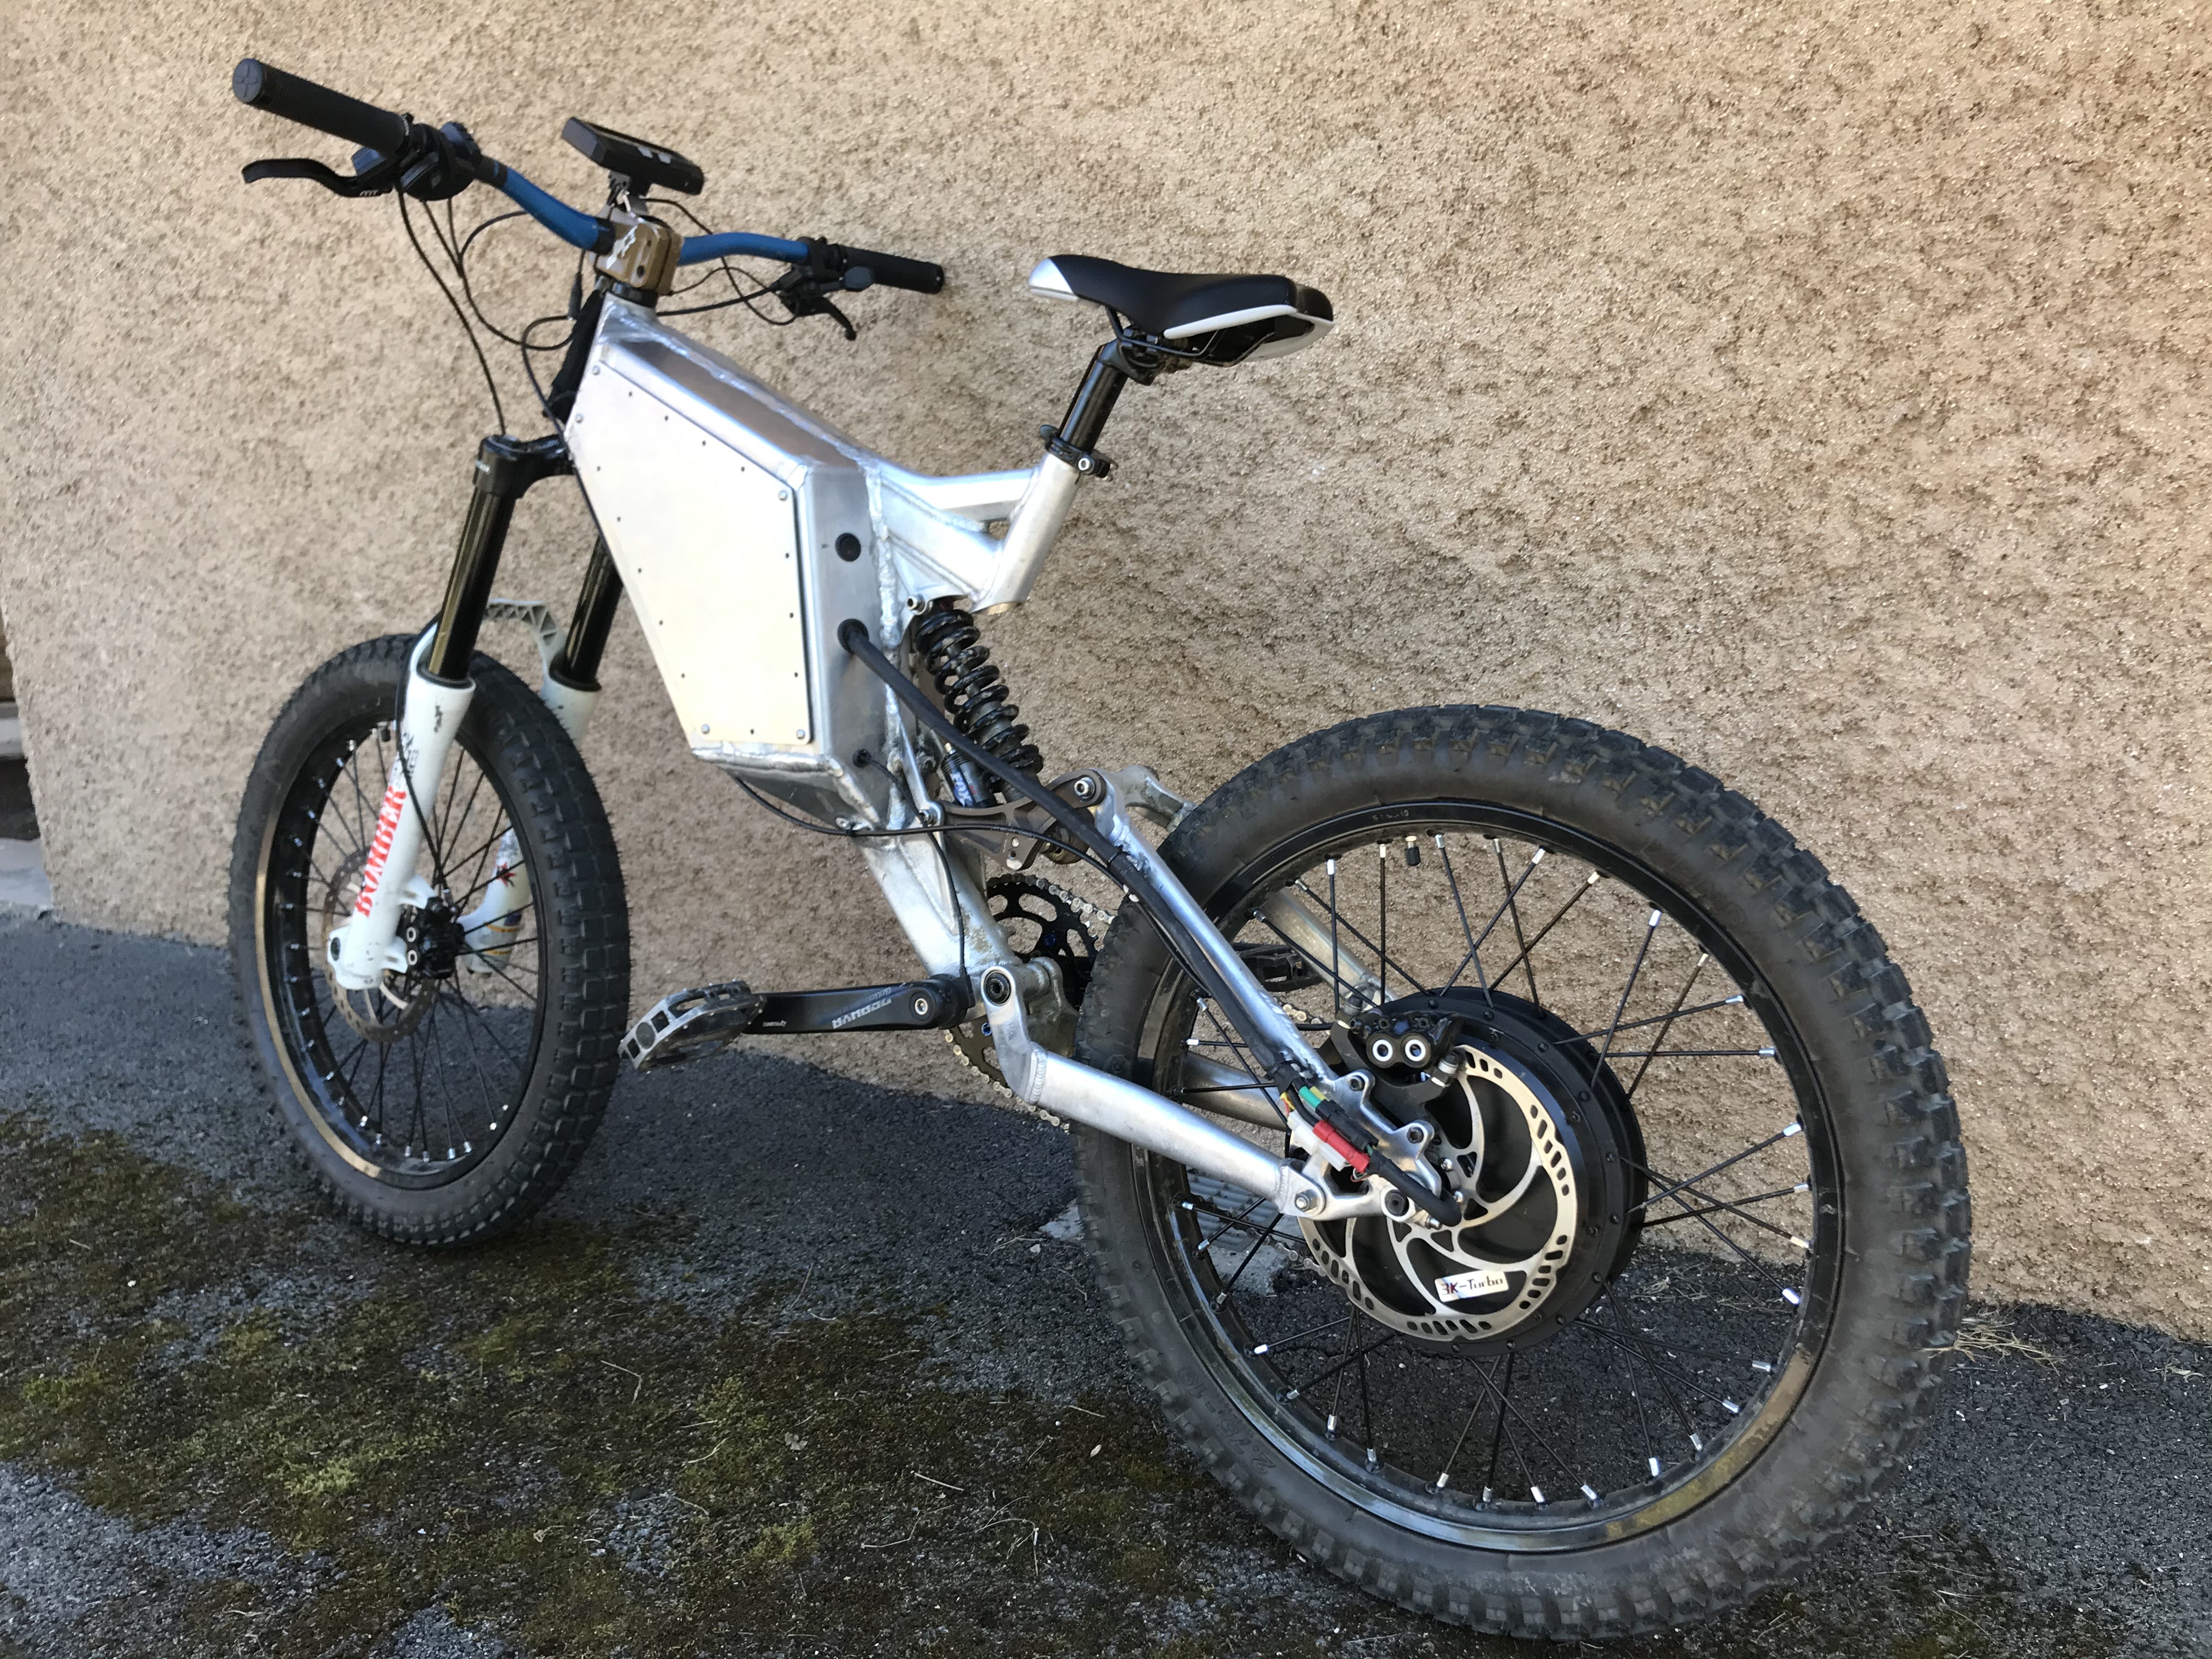
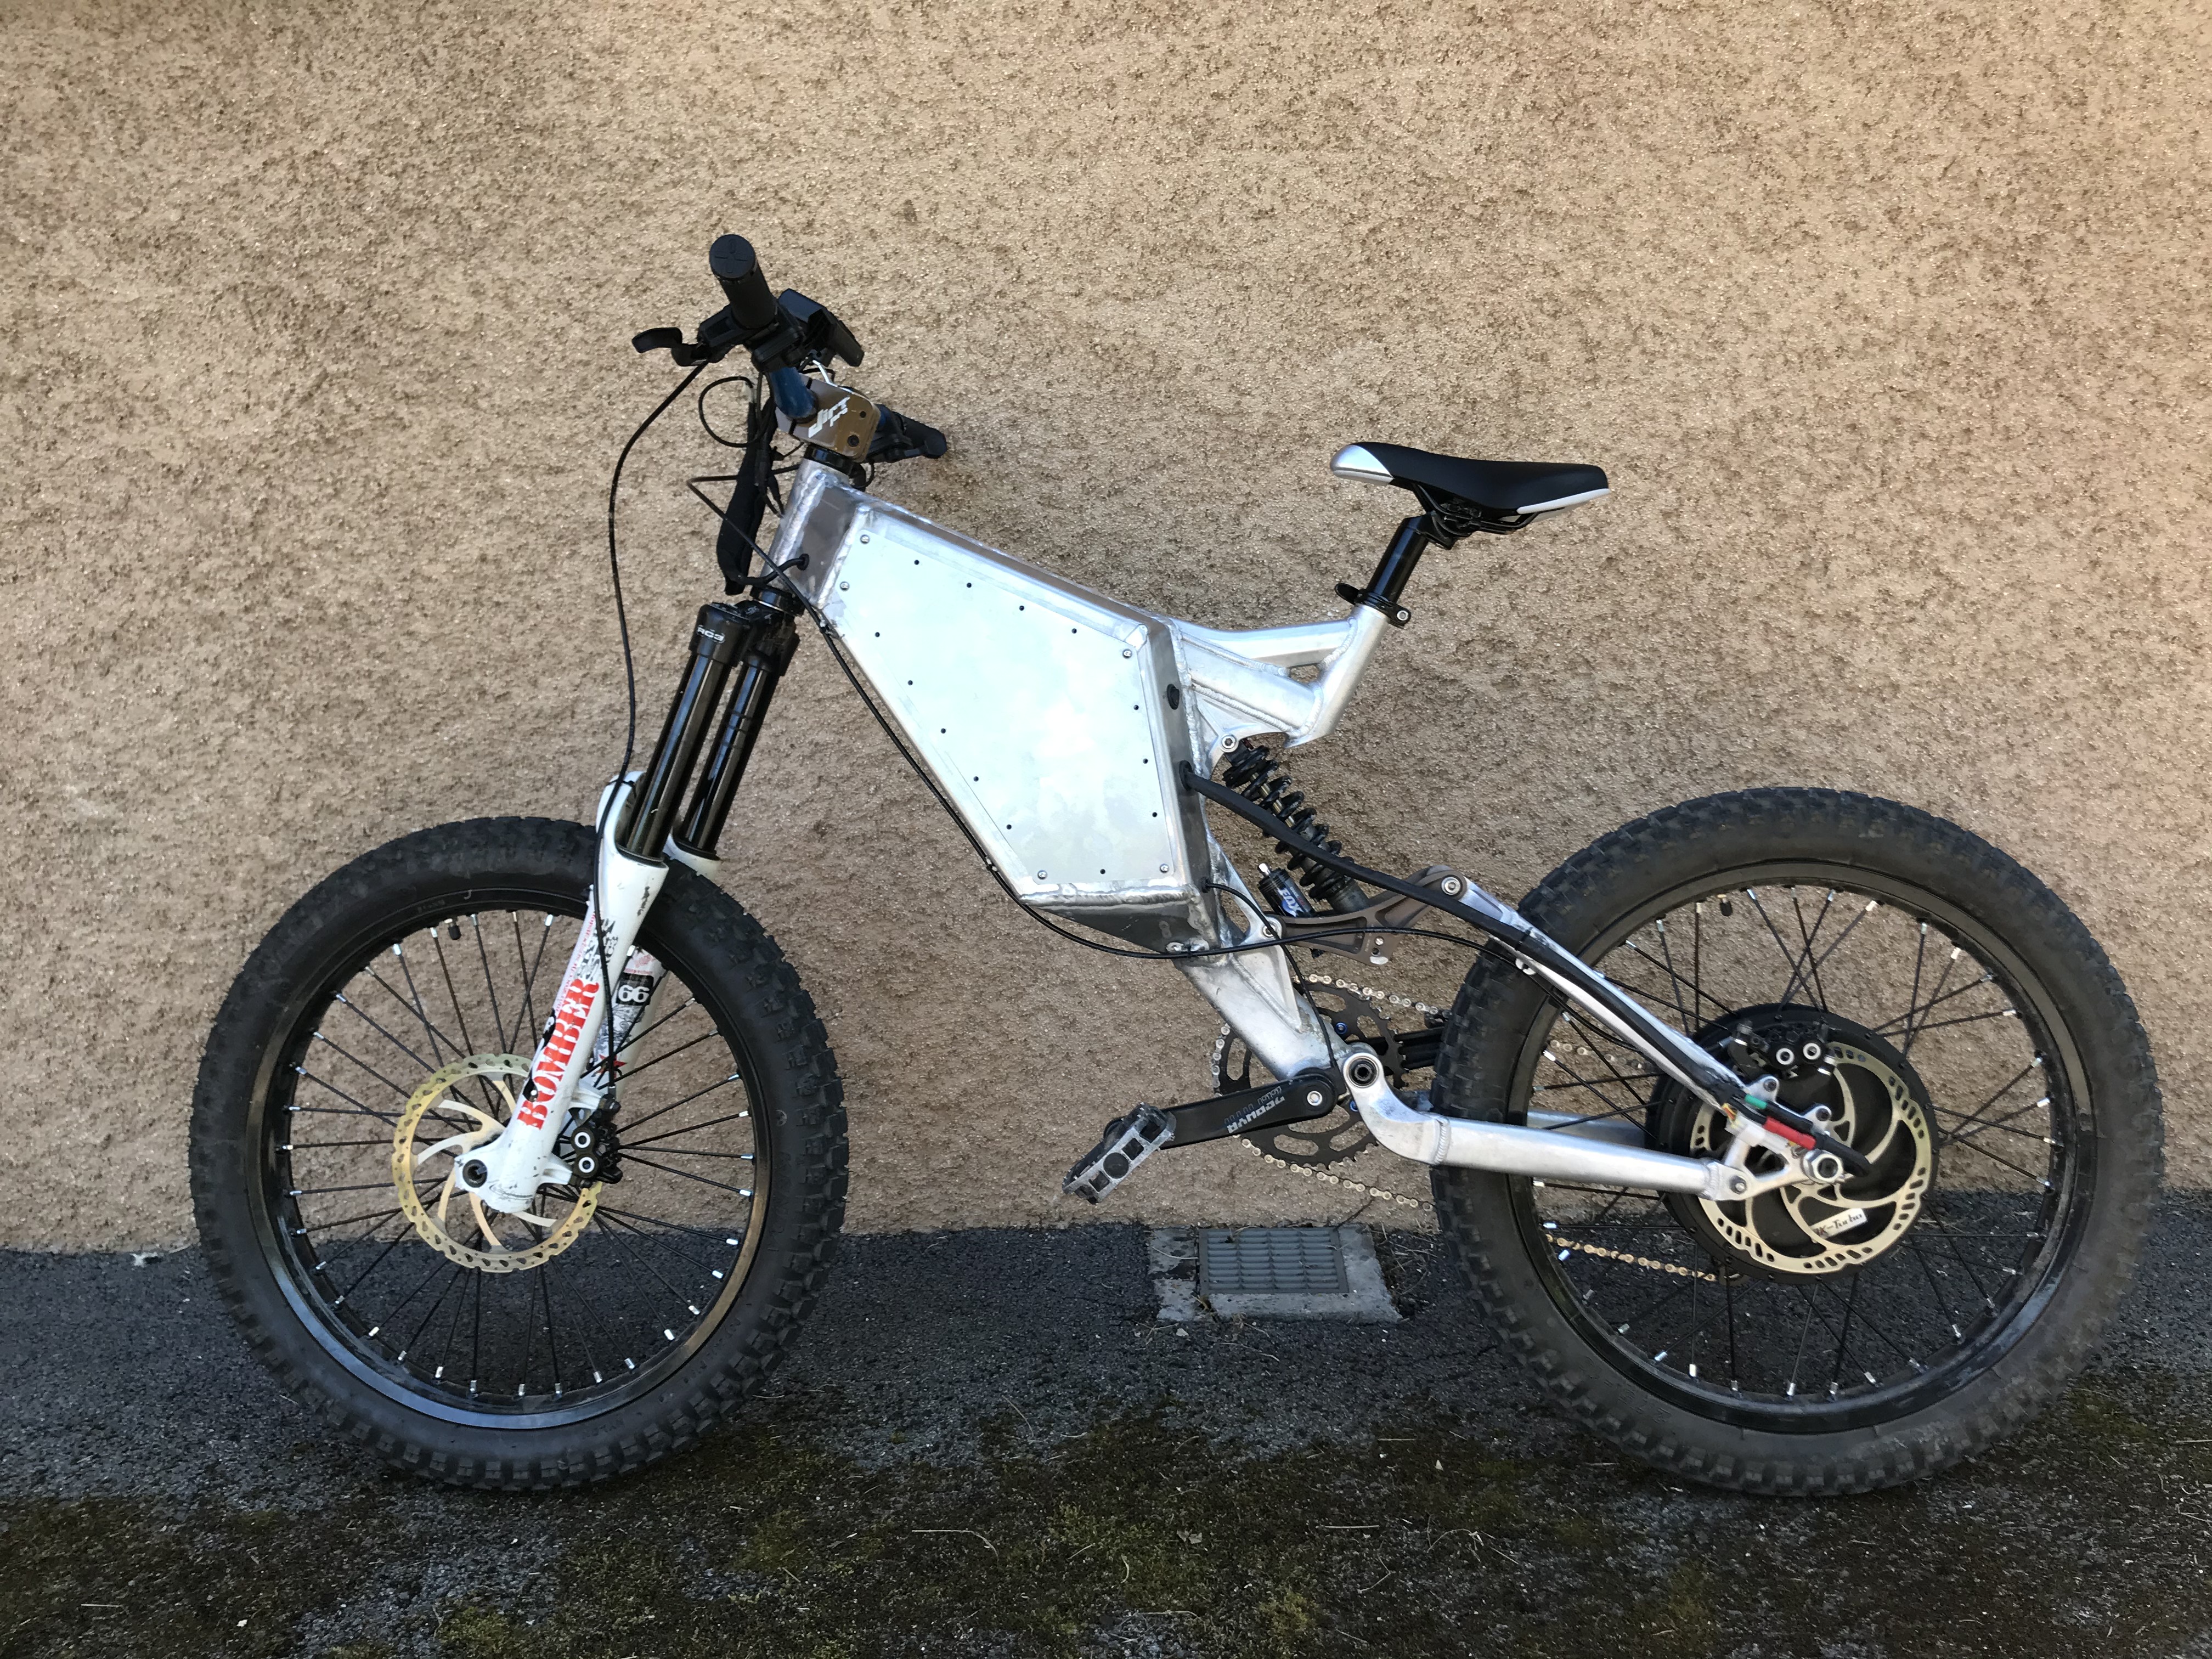
Now the frame is finished ! Battery time
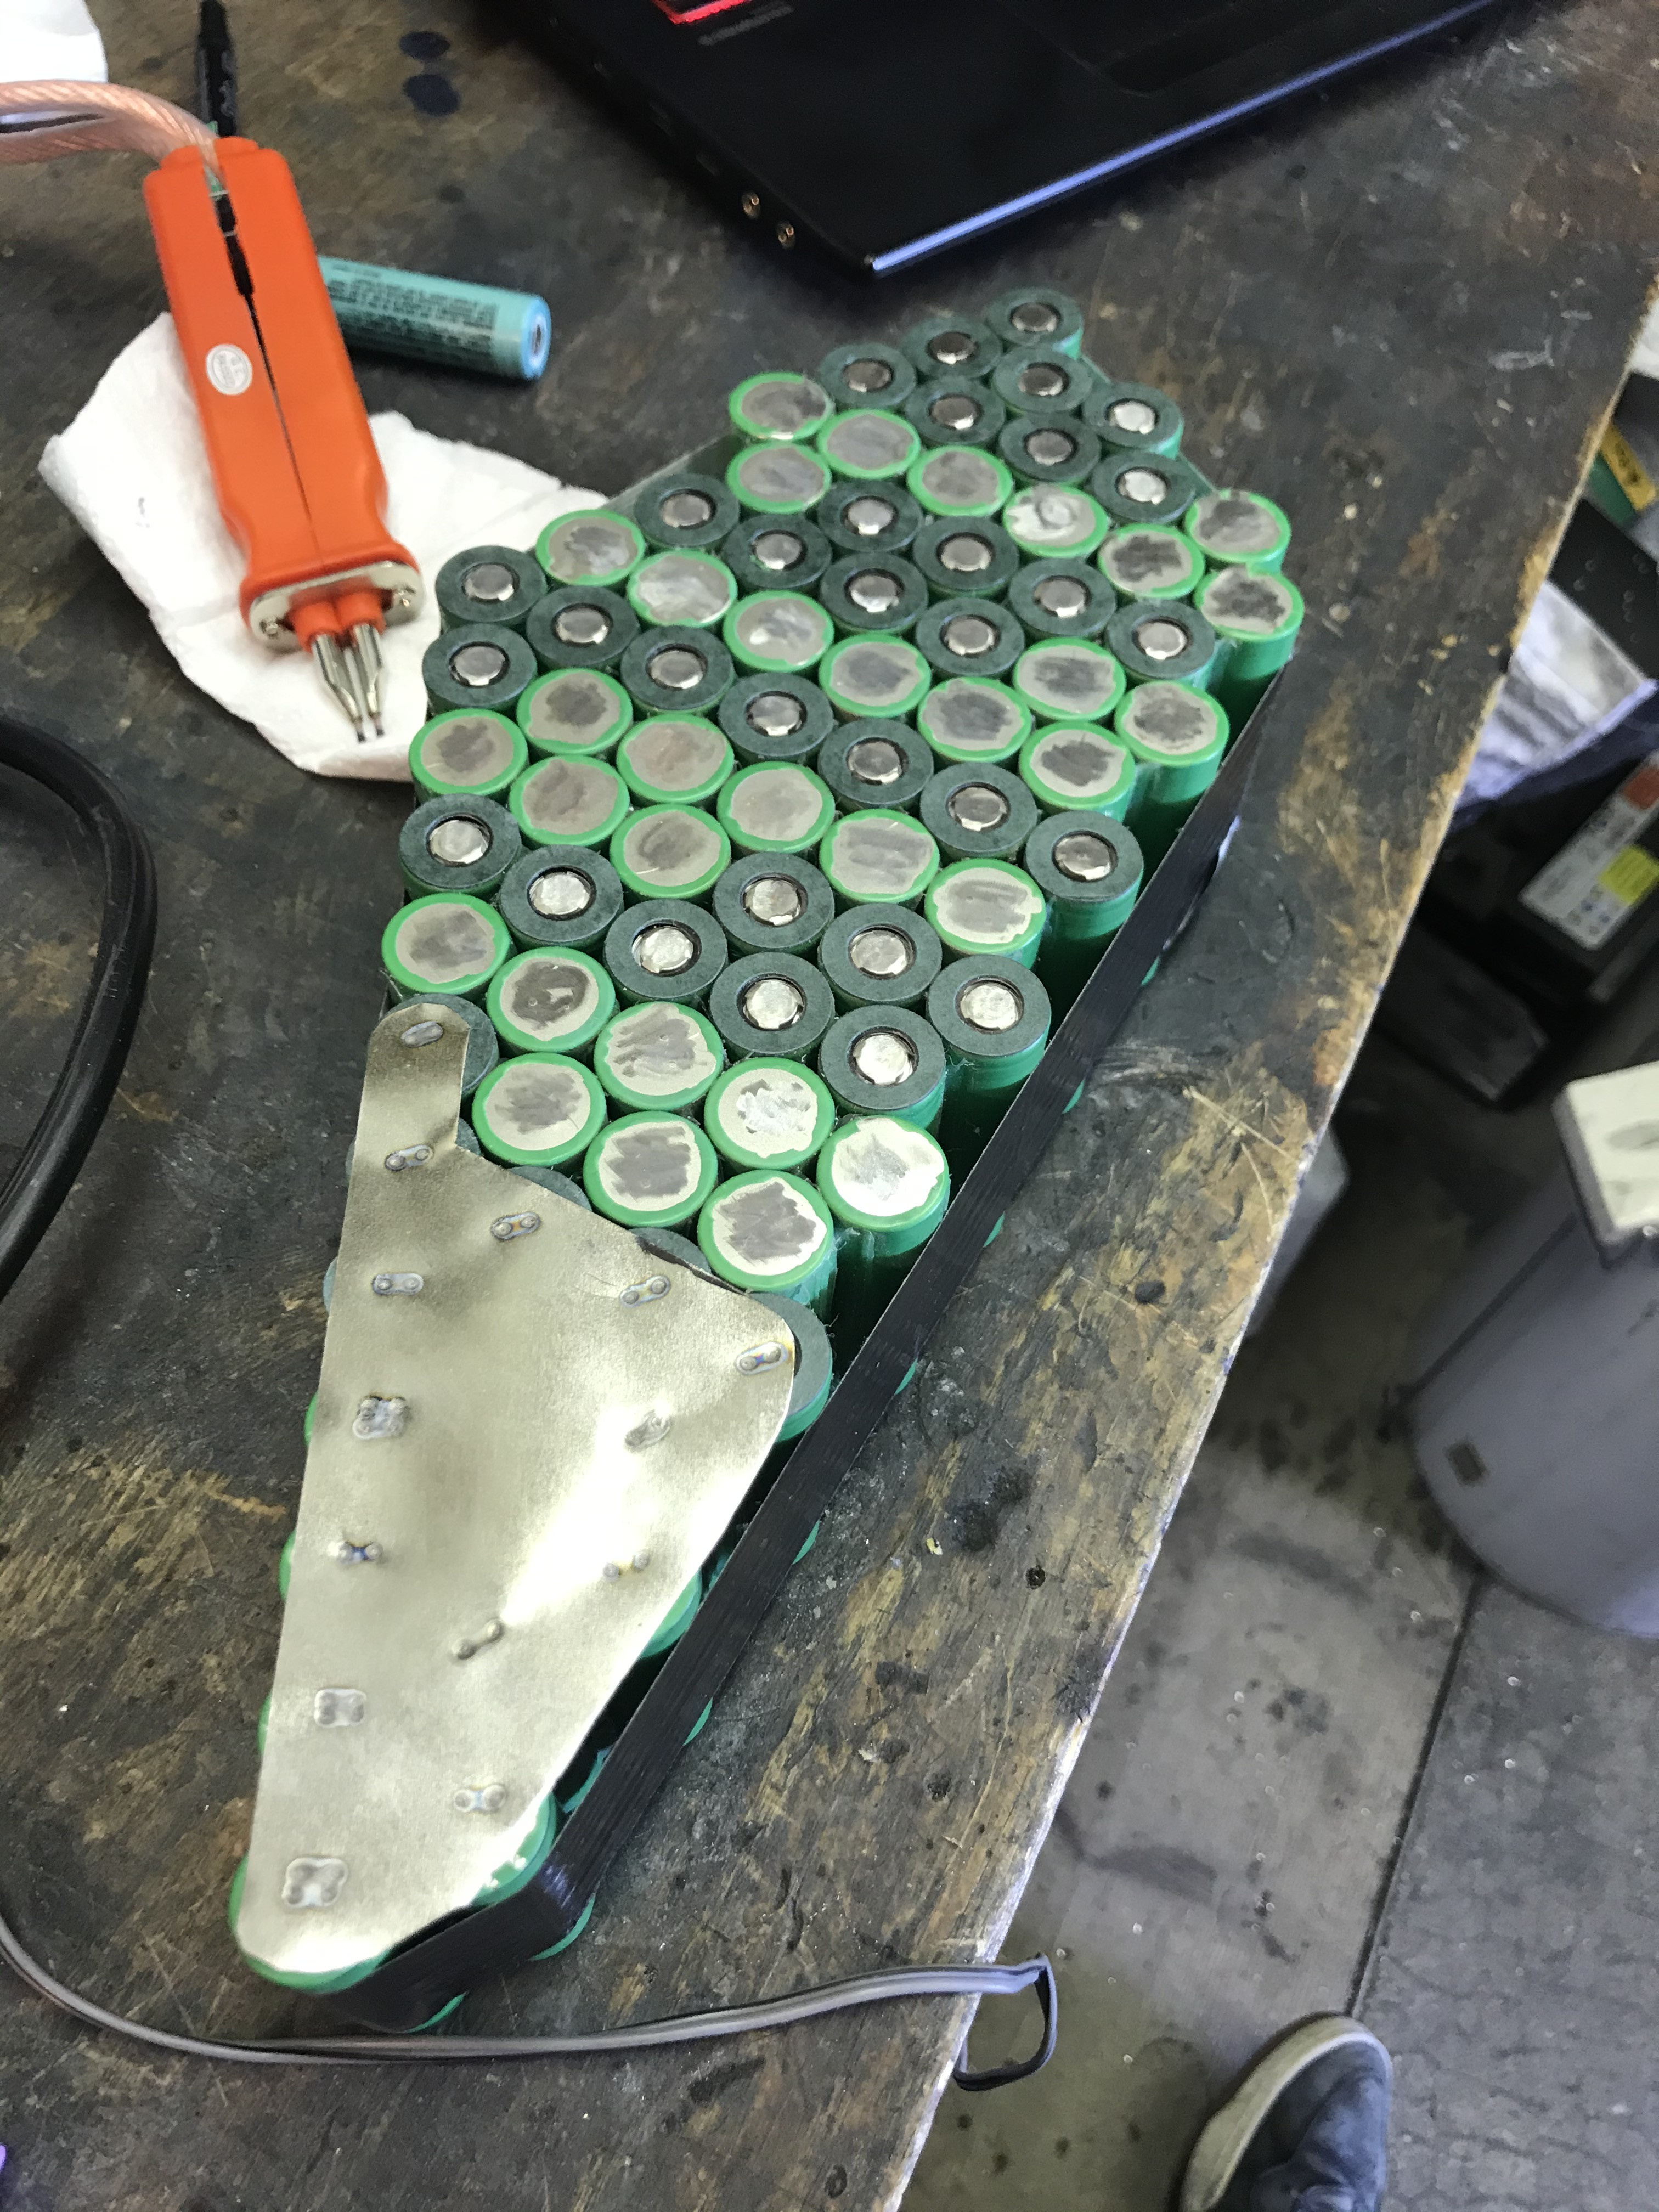
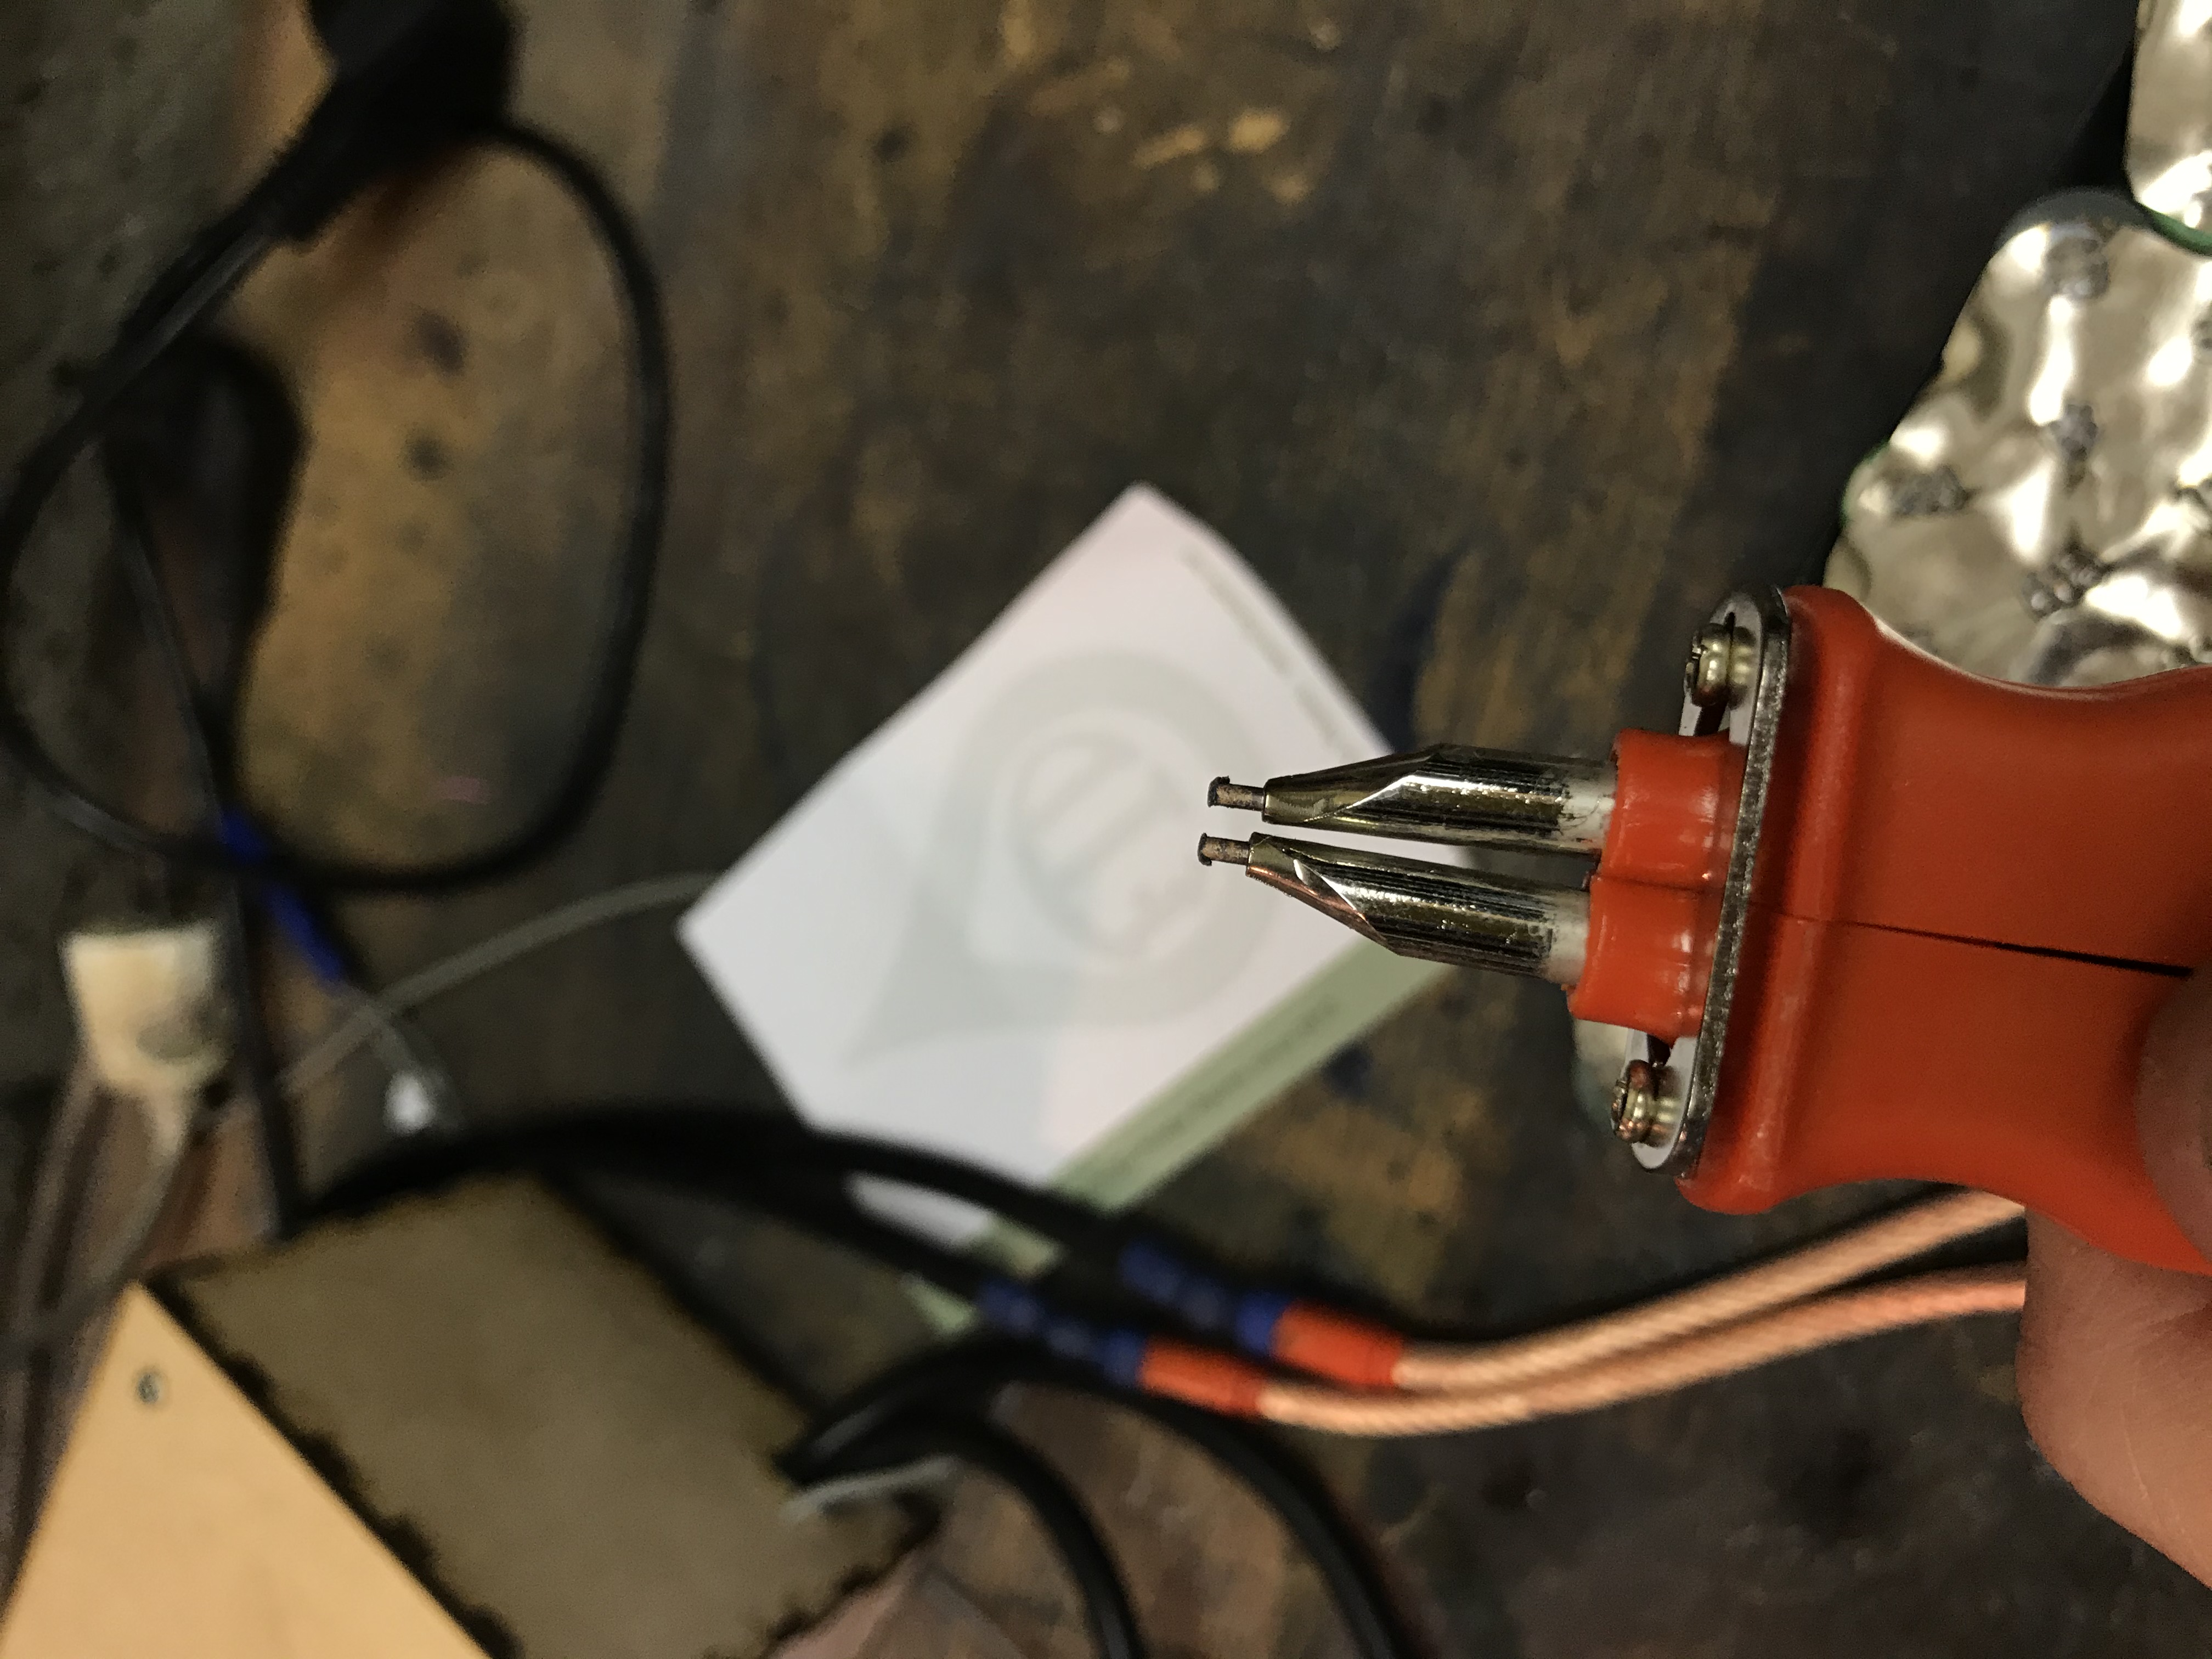
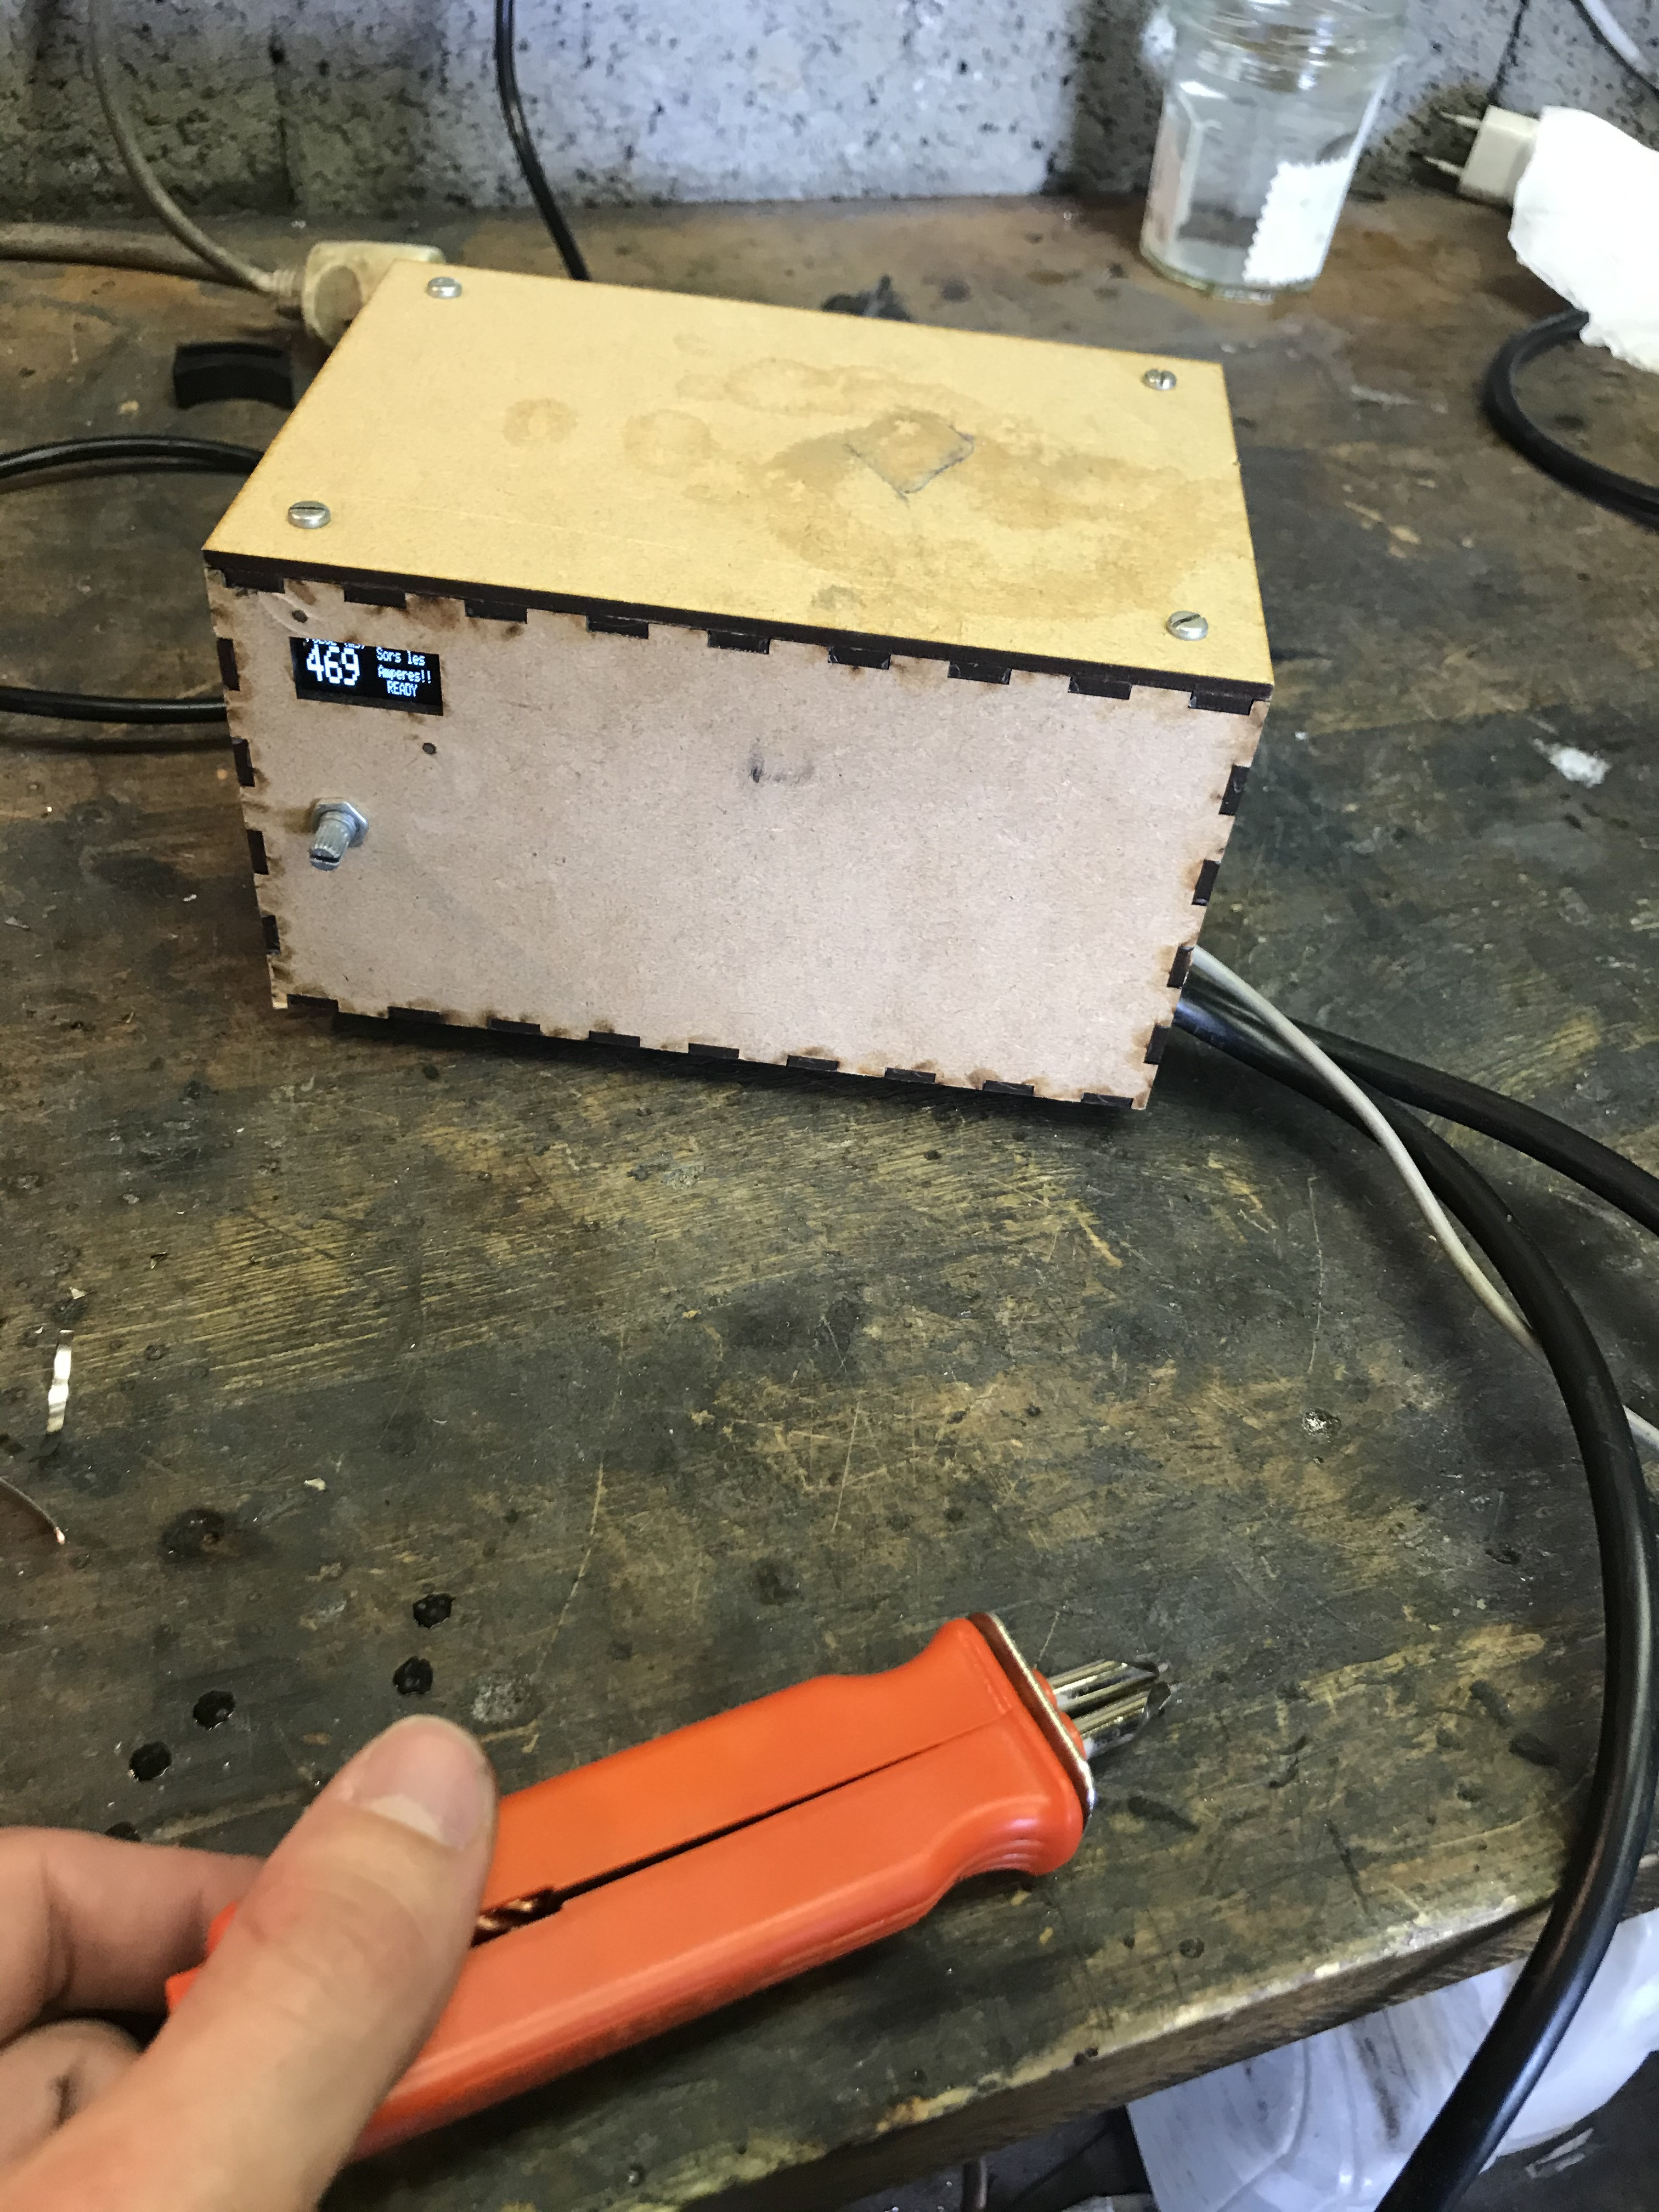
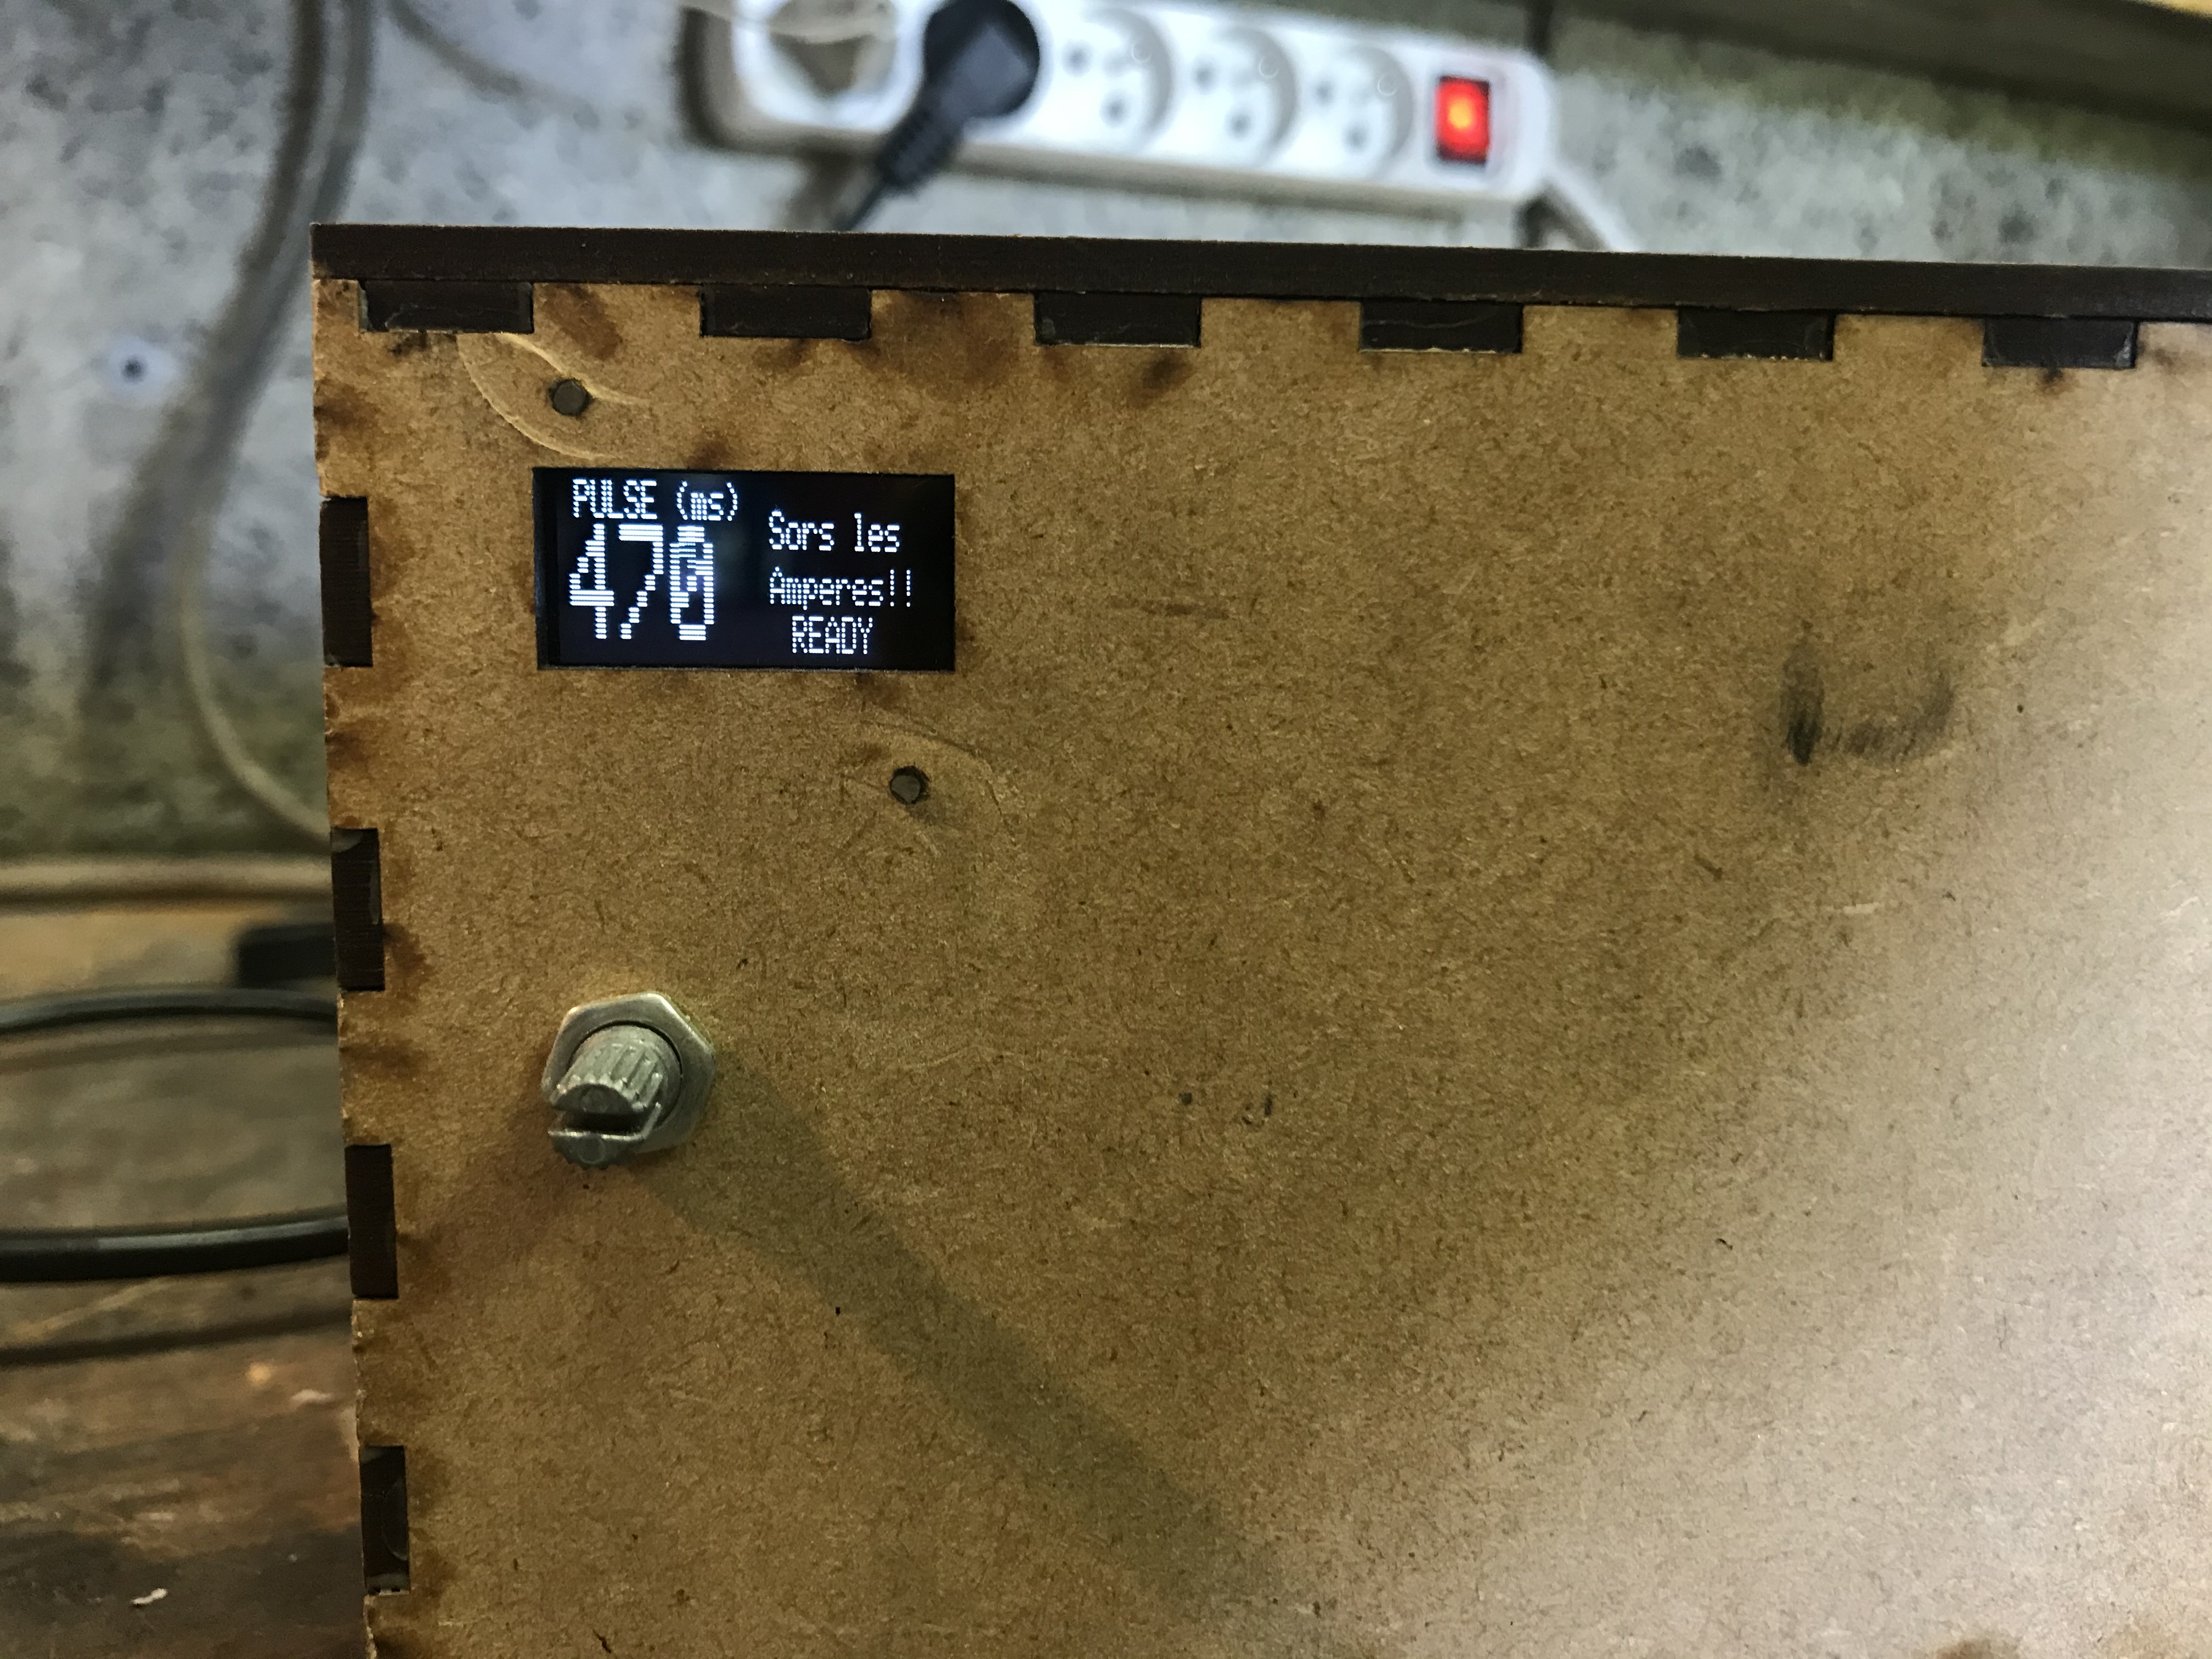
spot weld with the homemade microwave spotwelder
I used some wide nickel sheets
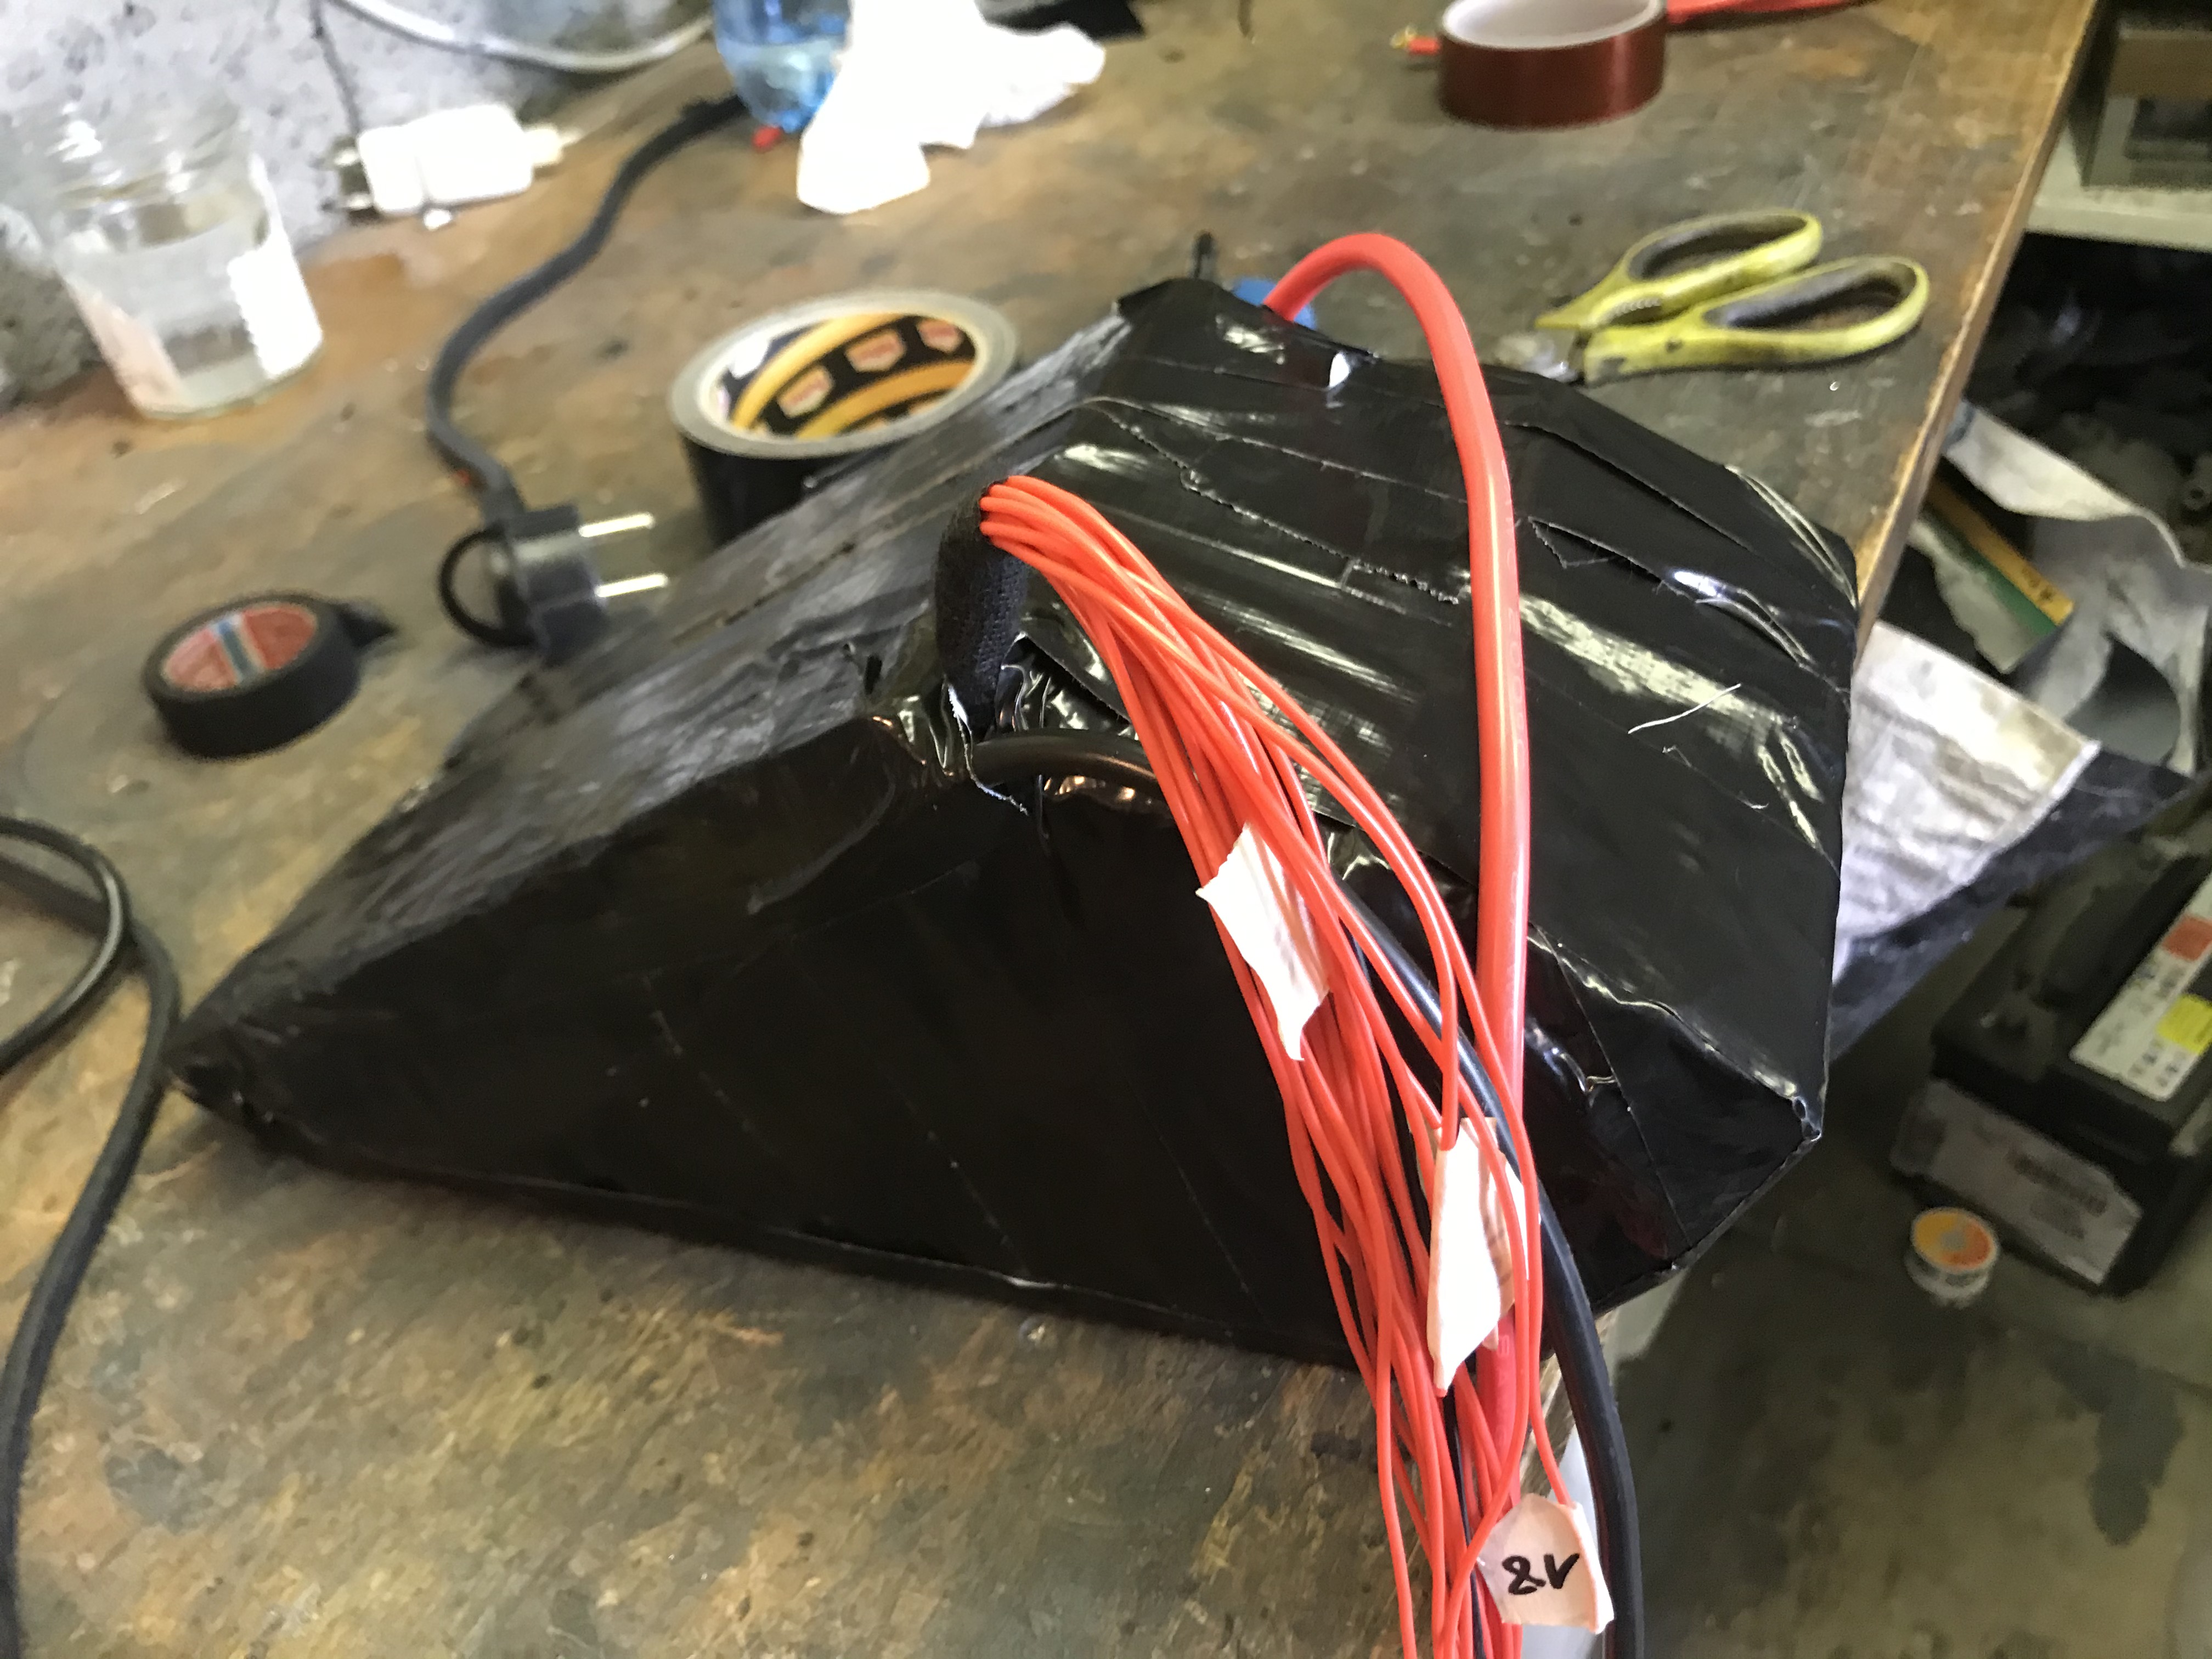
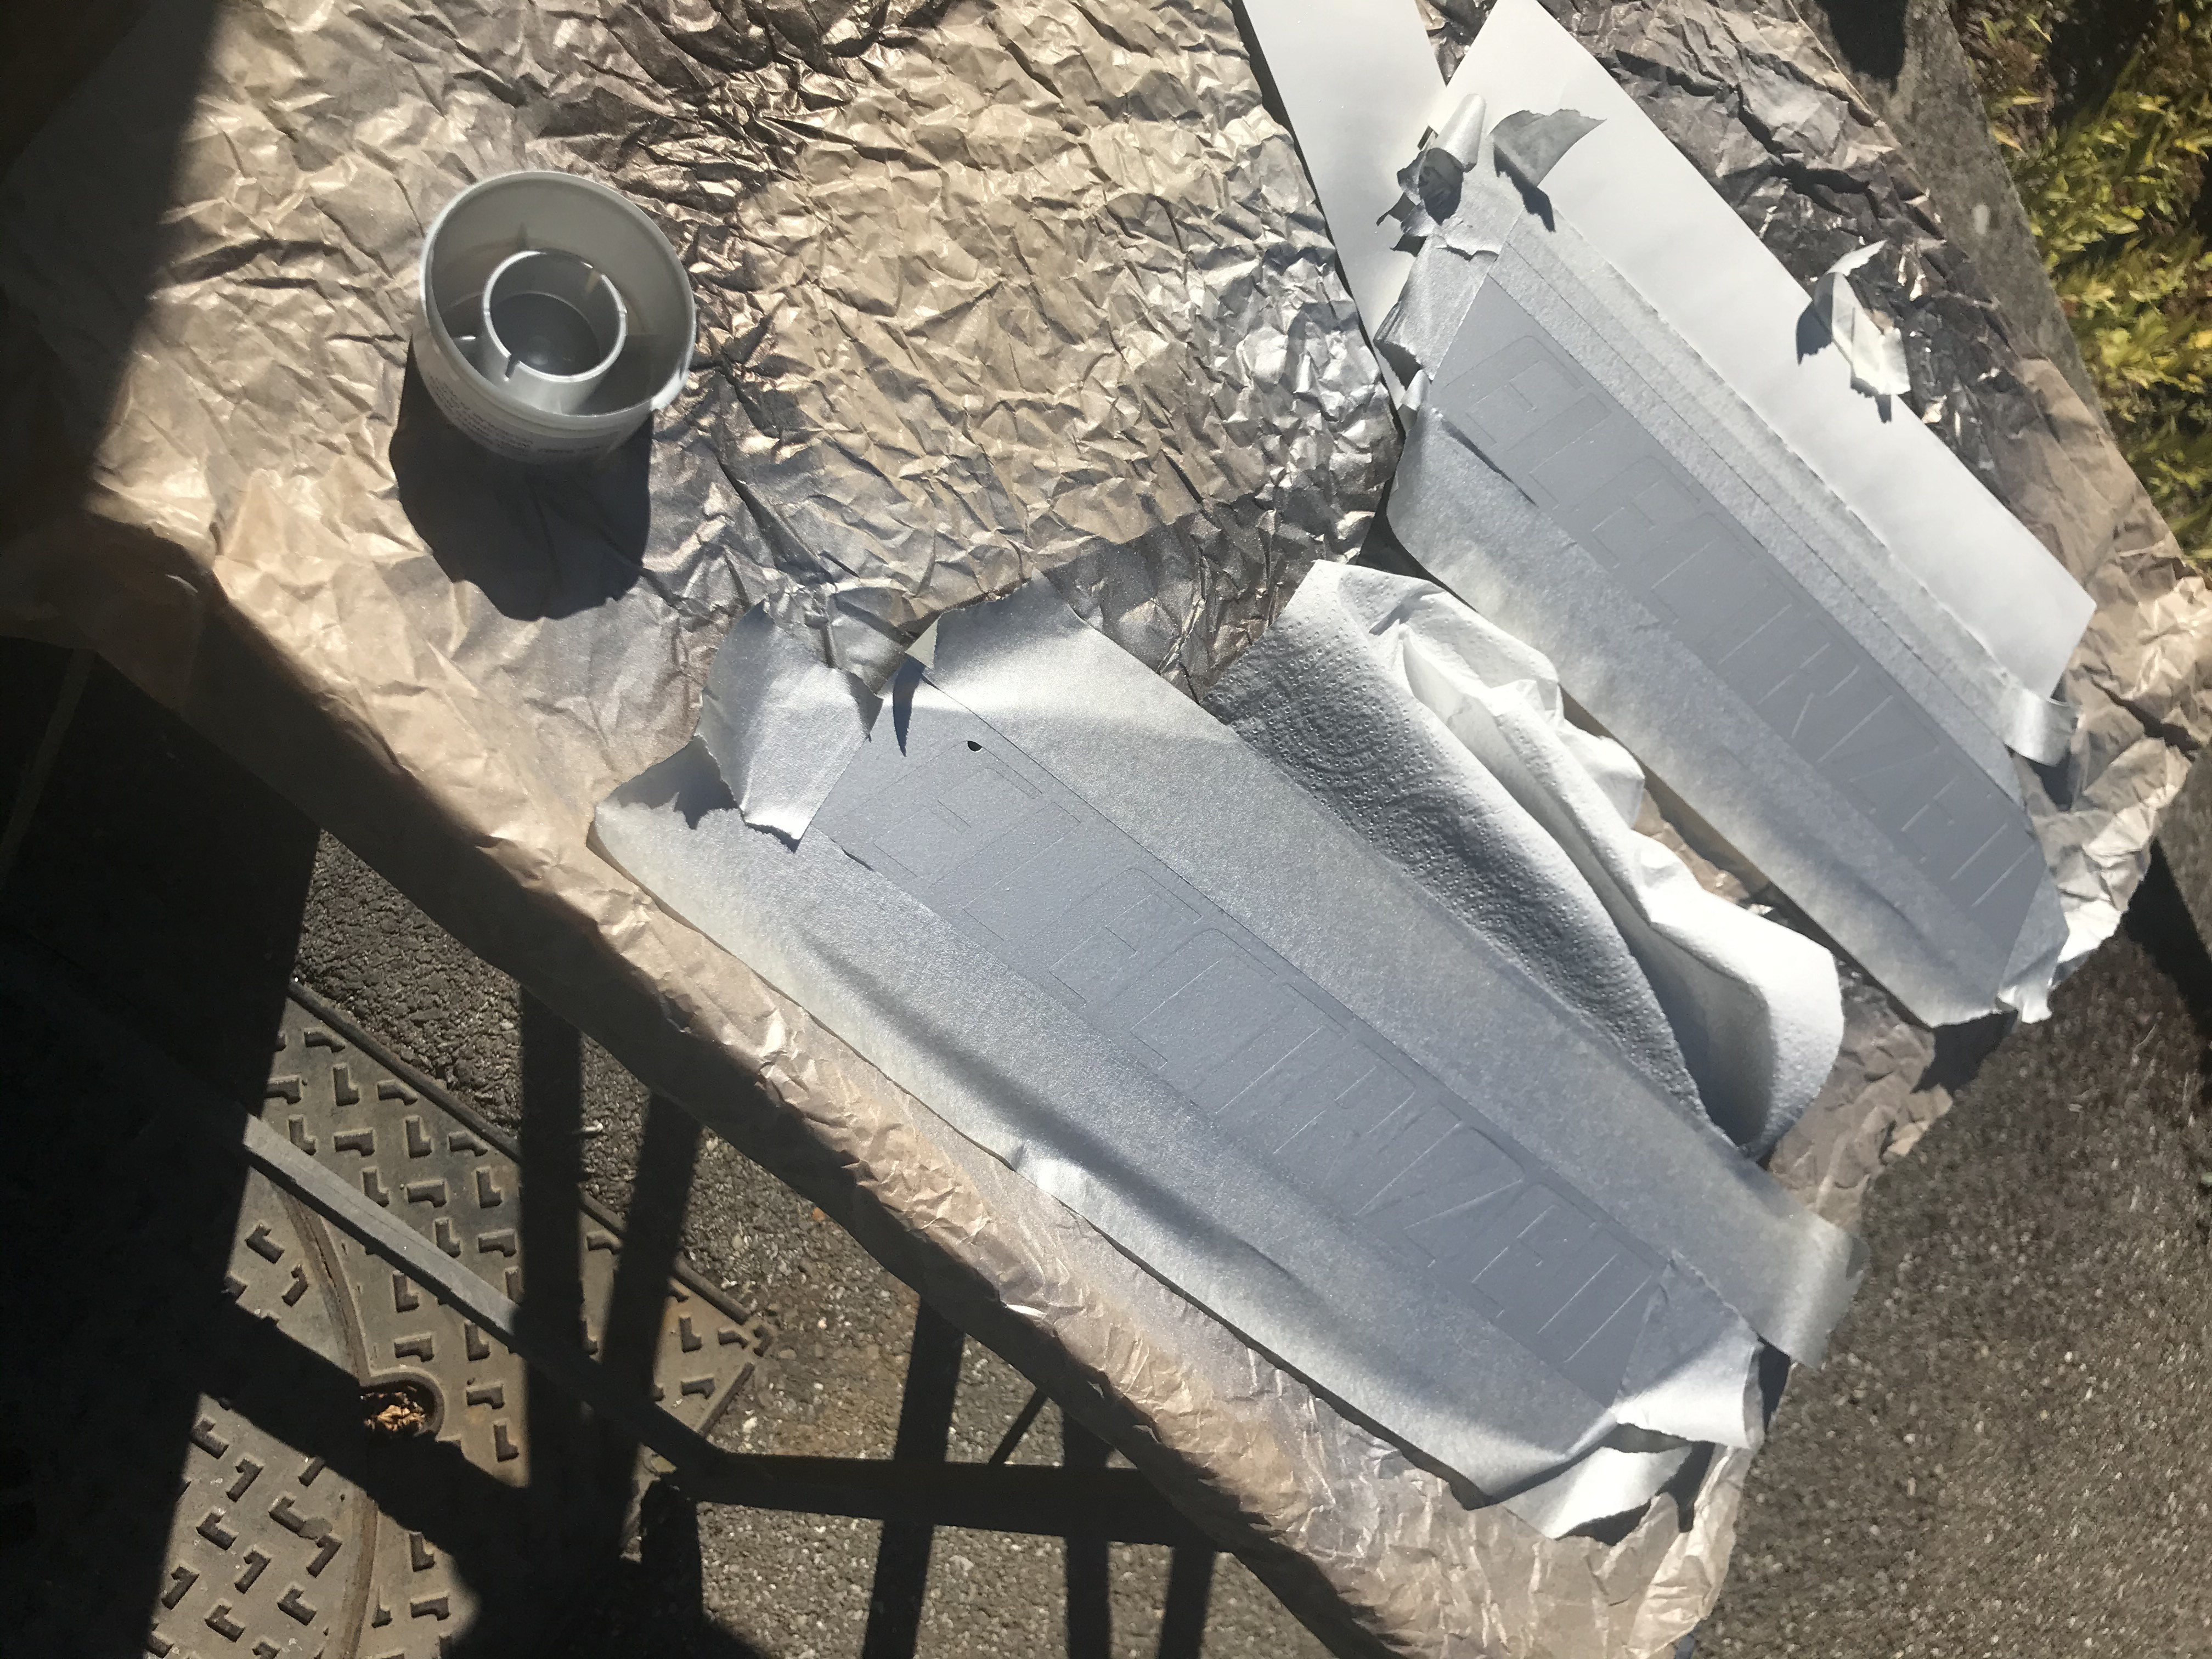
wiring for the BMS

some adhesive tape
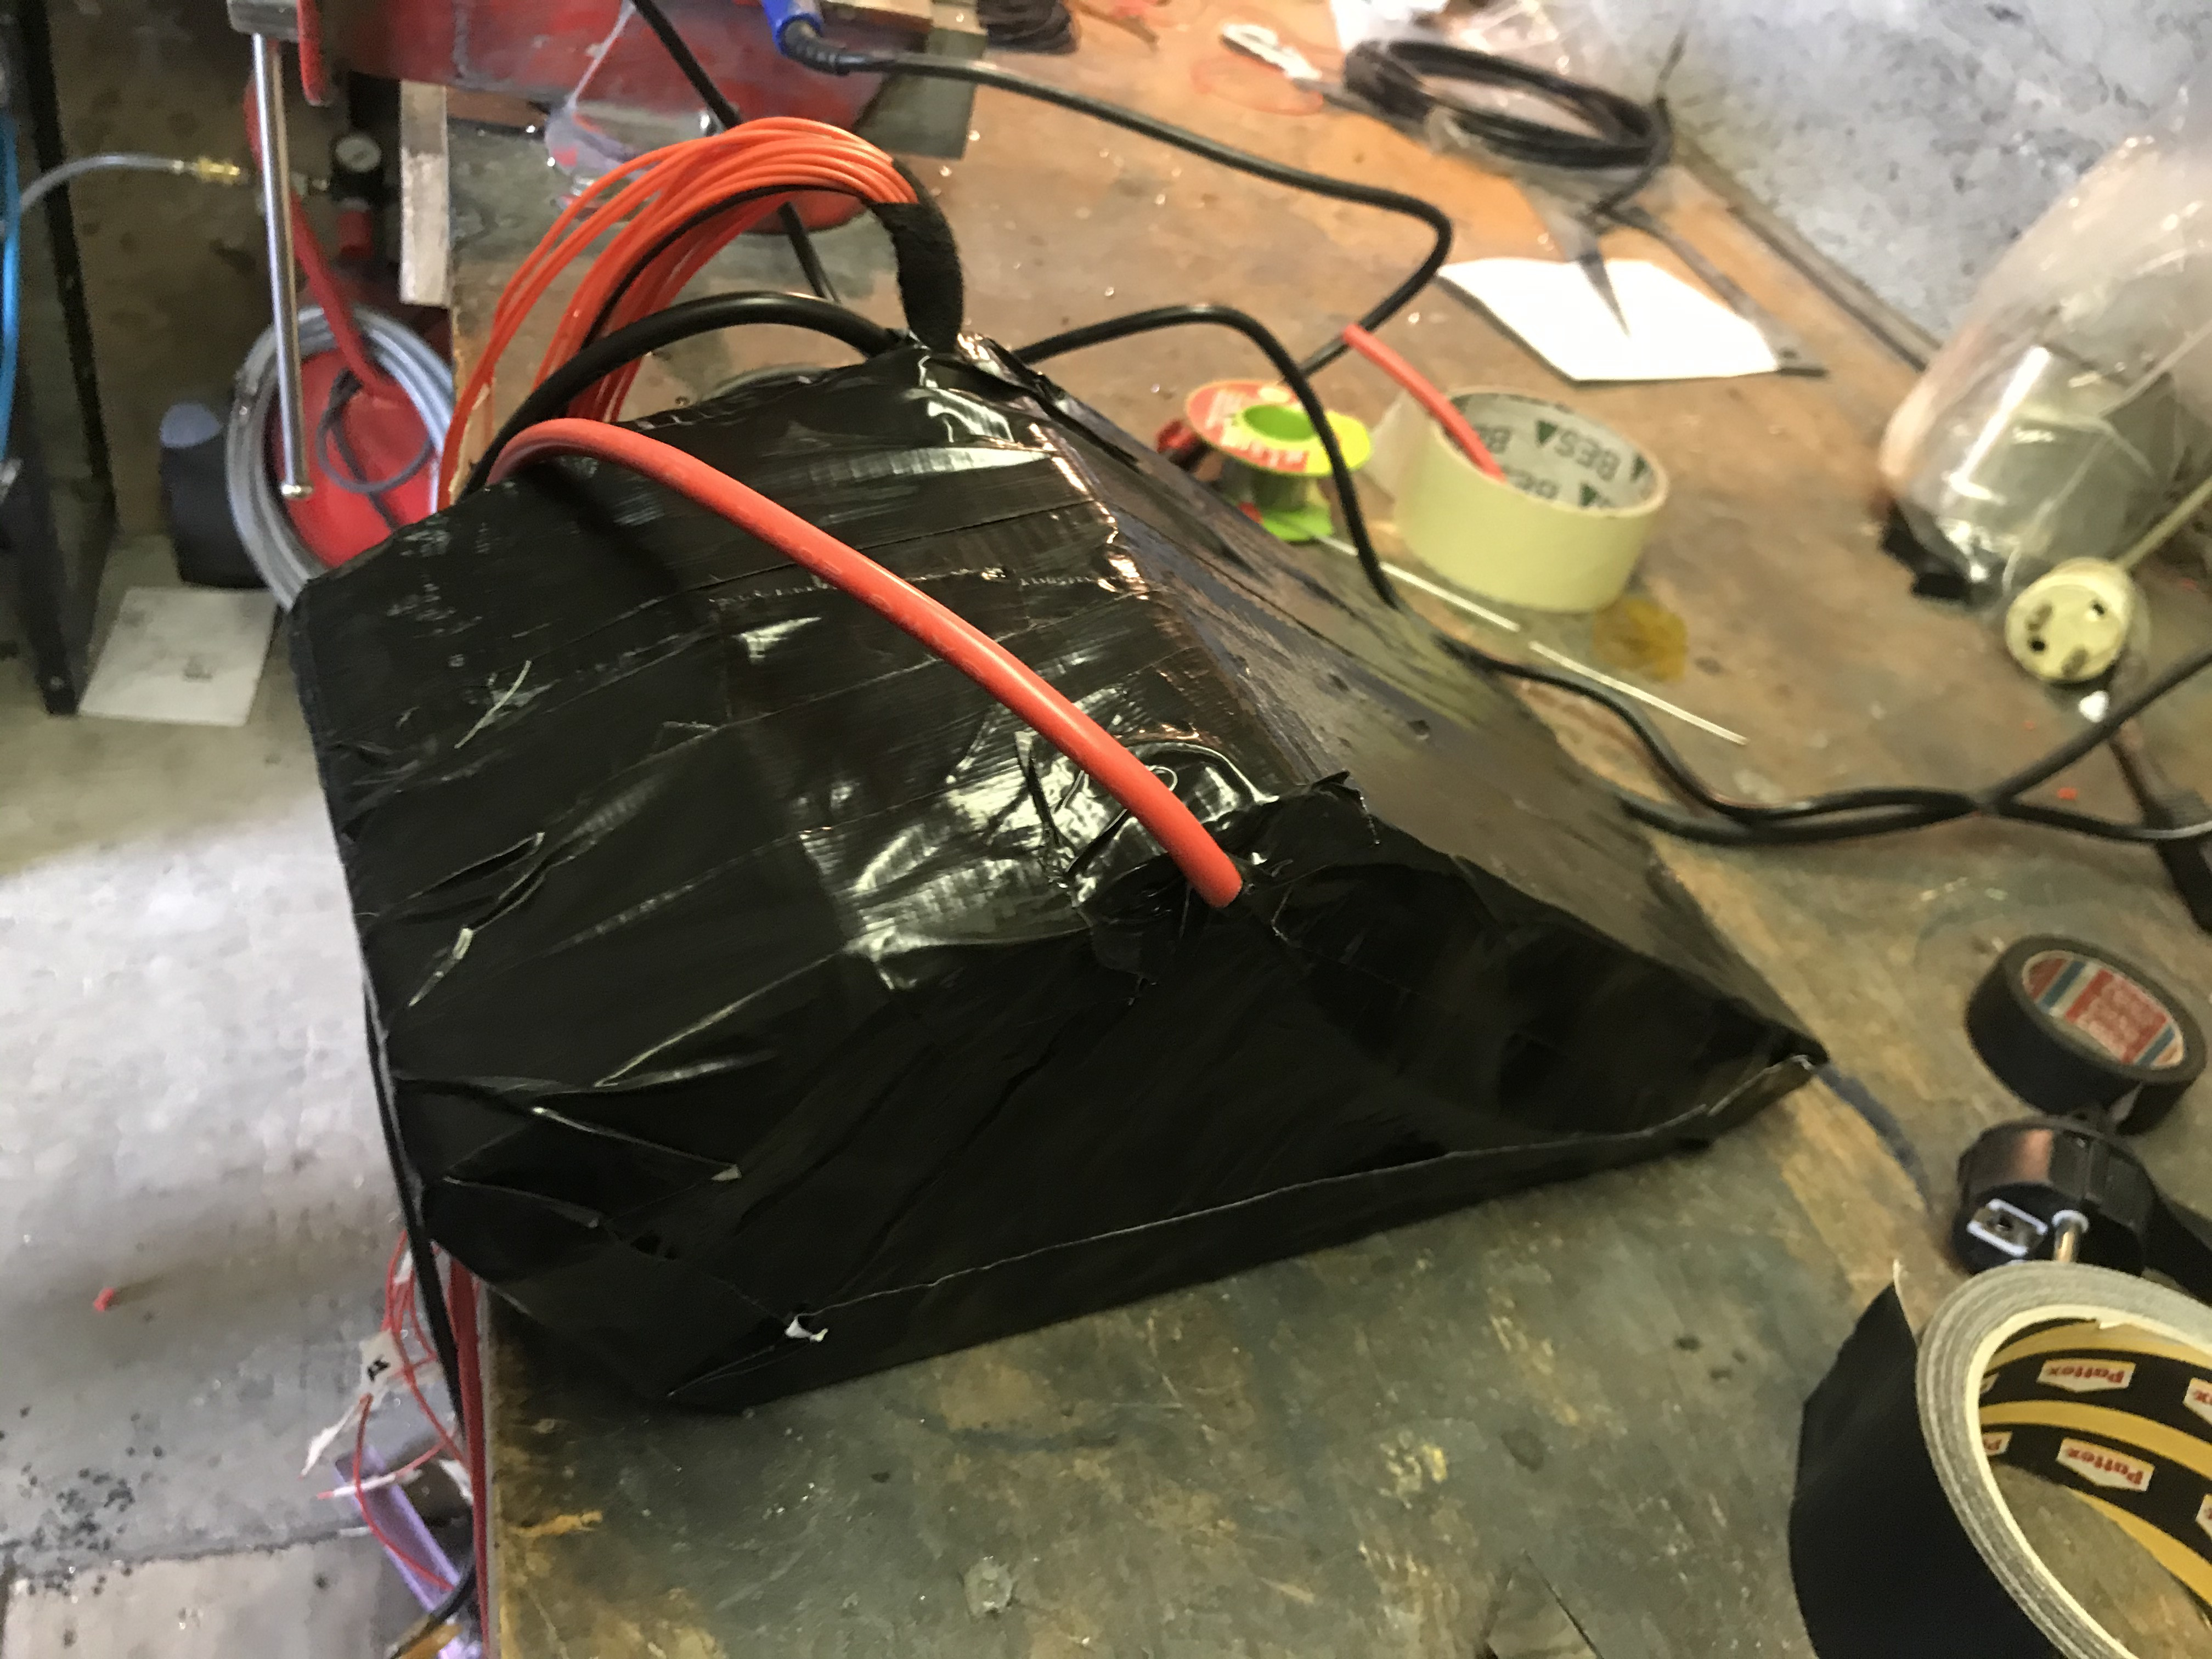
and PVC Heat Shrink Wrap
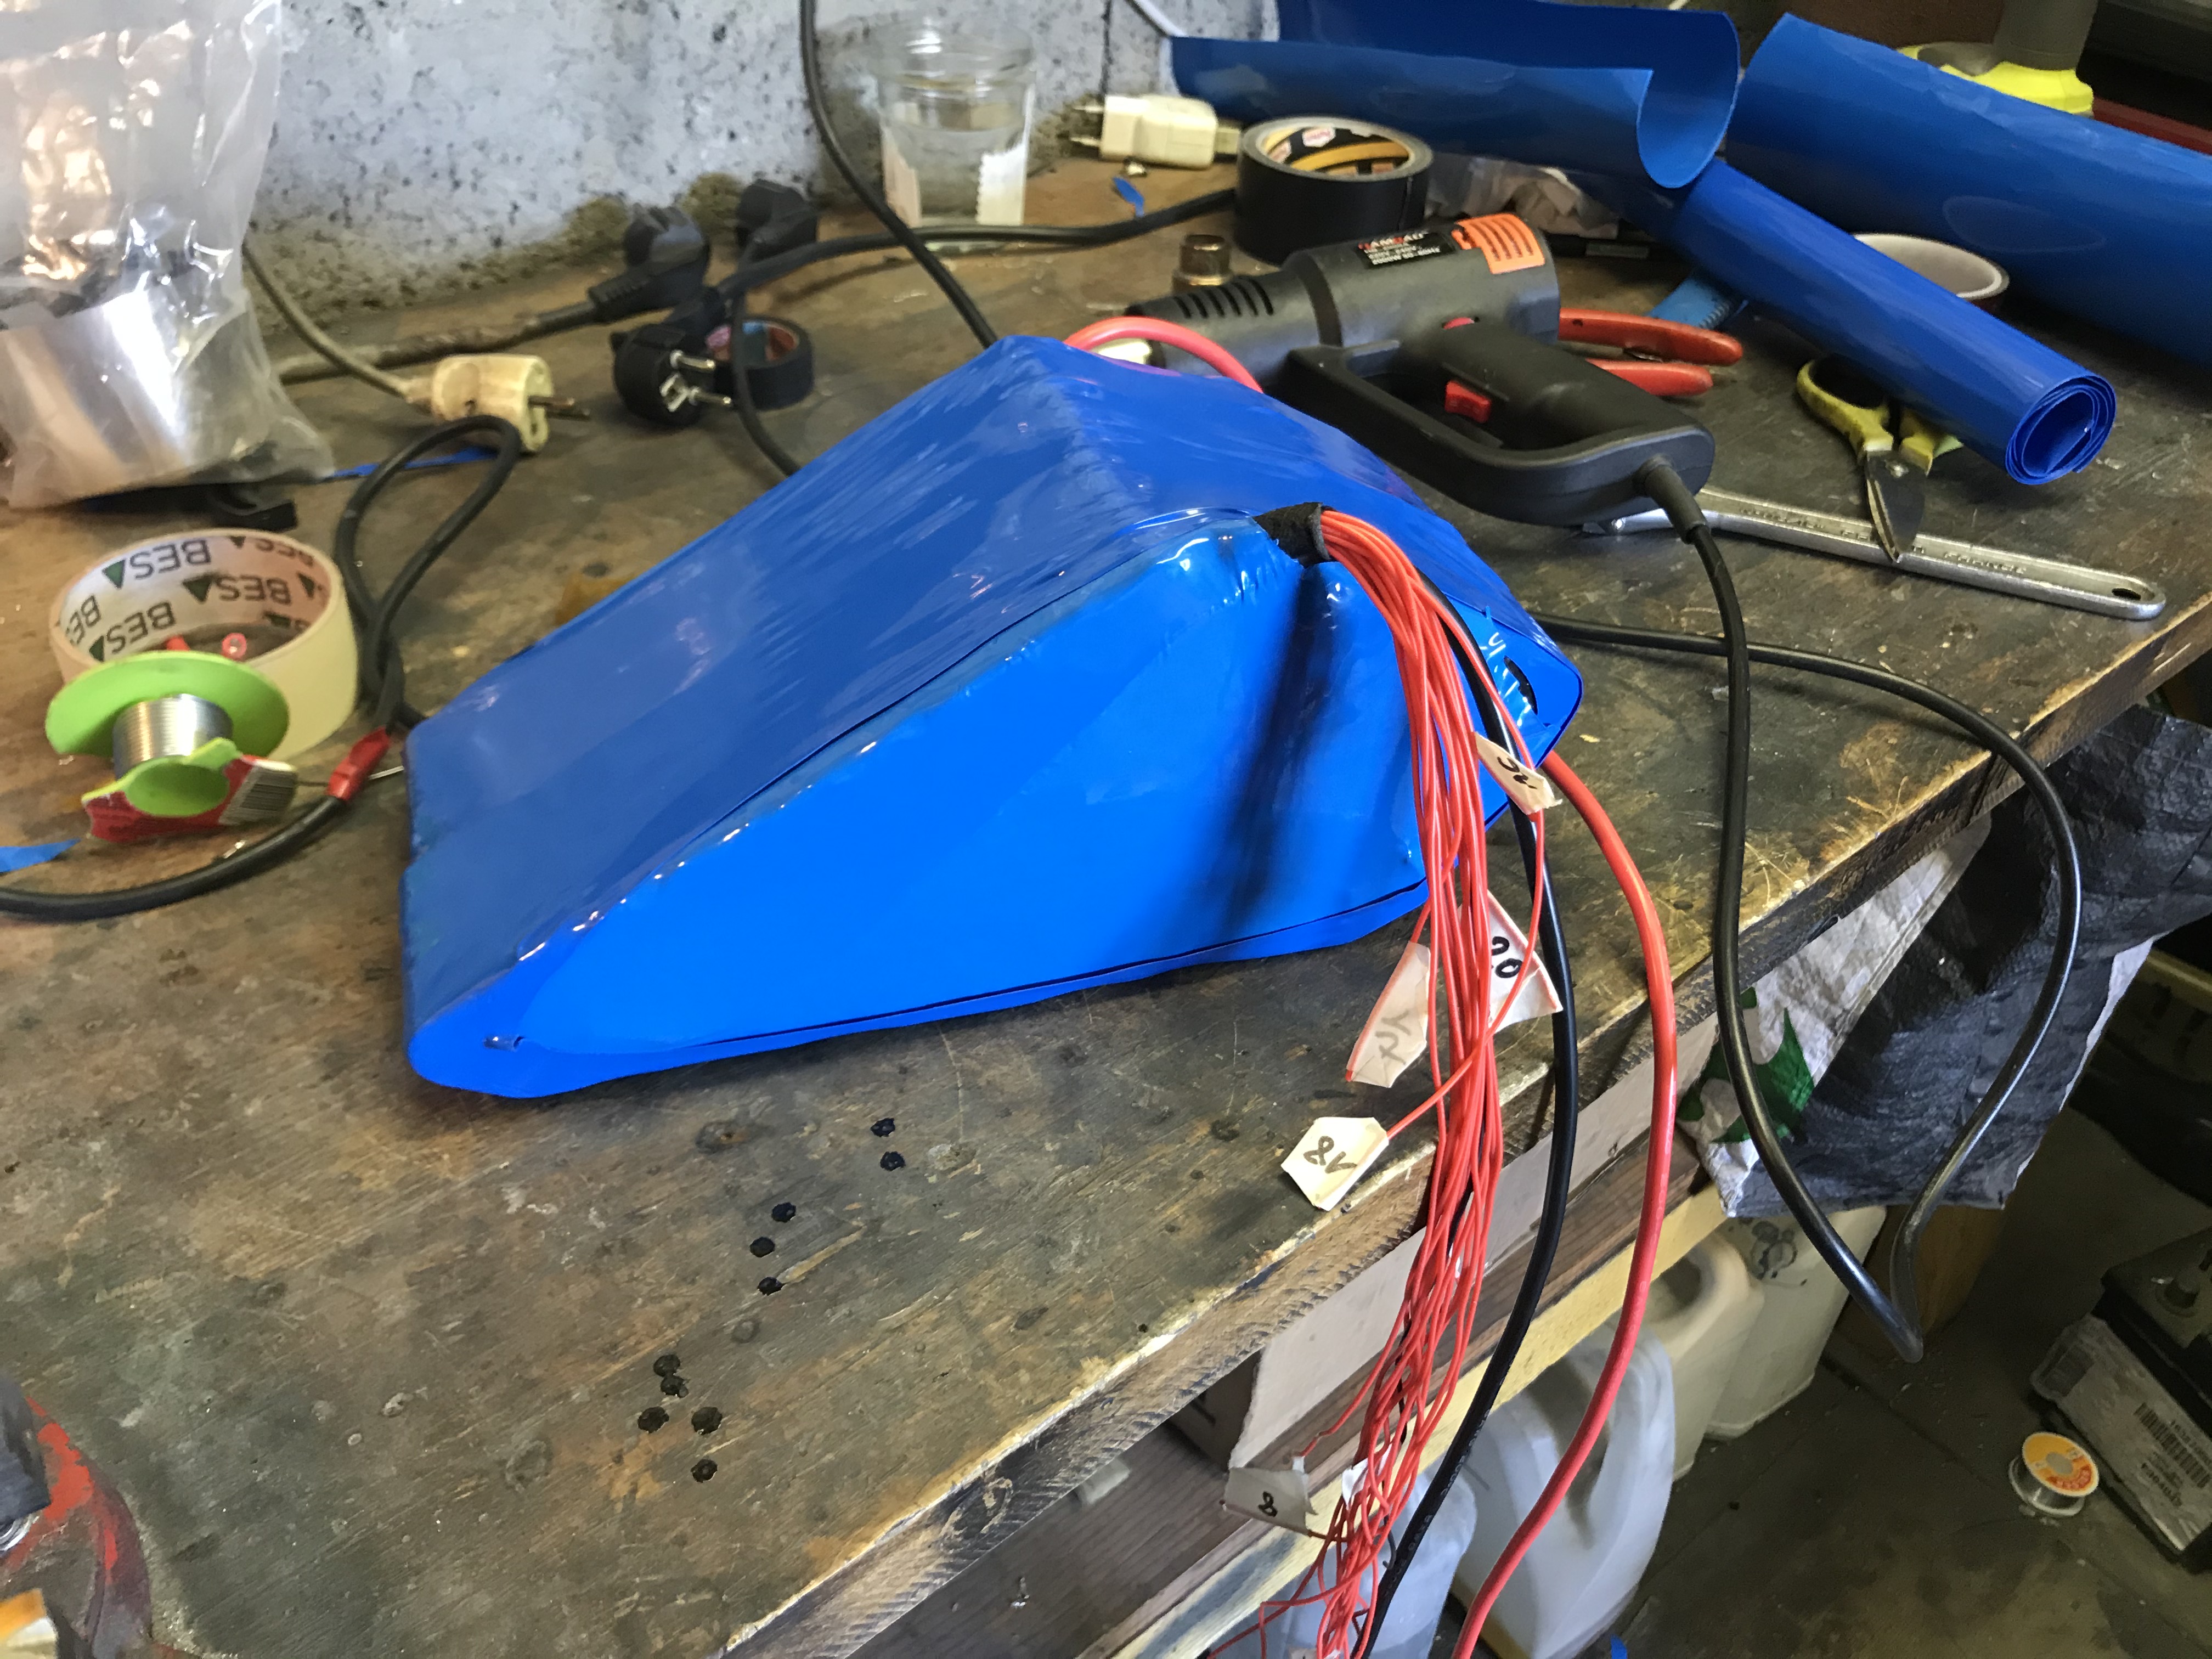
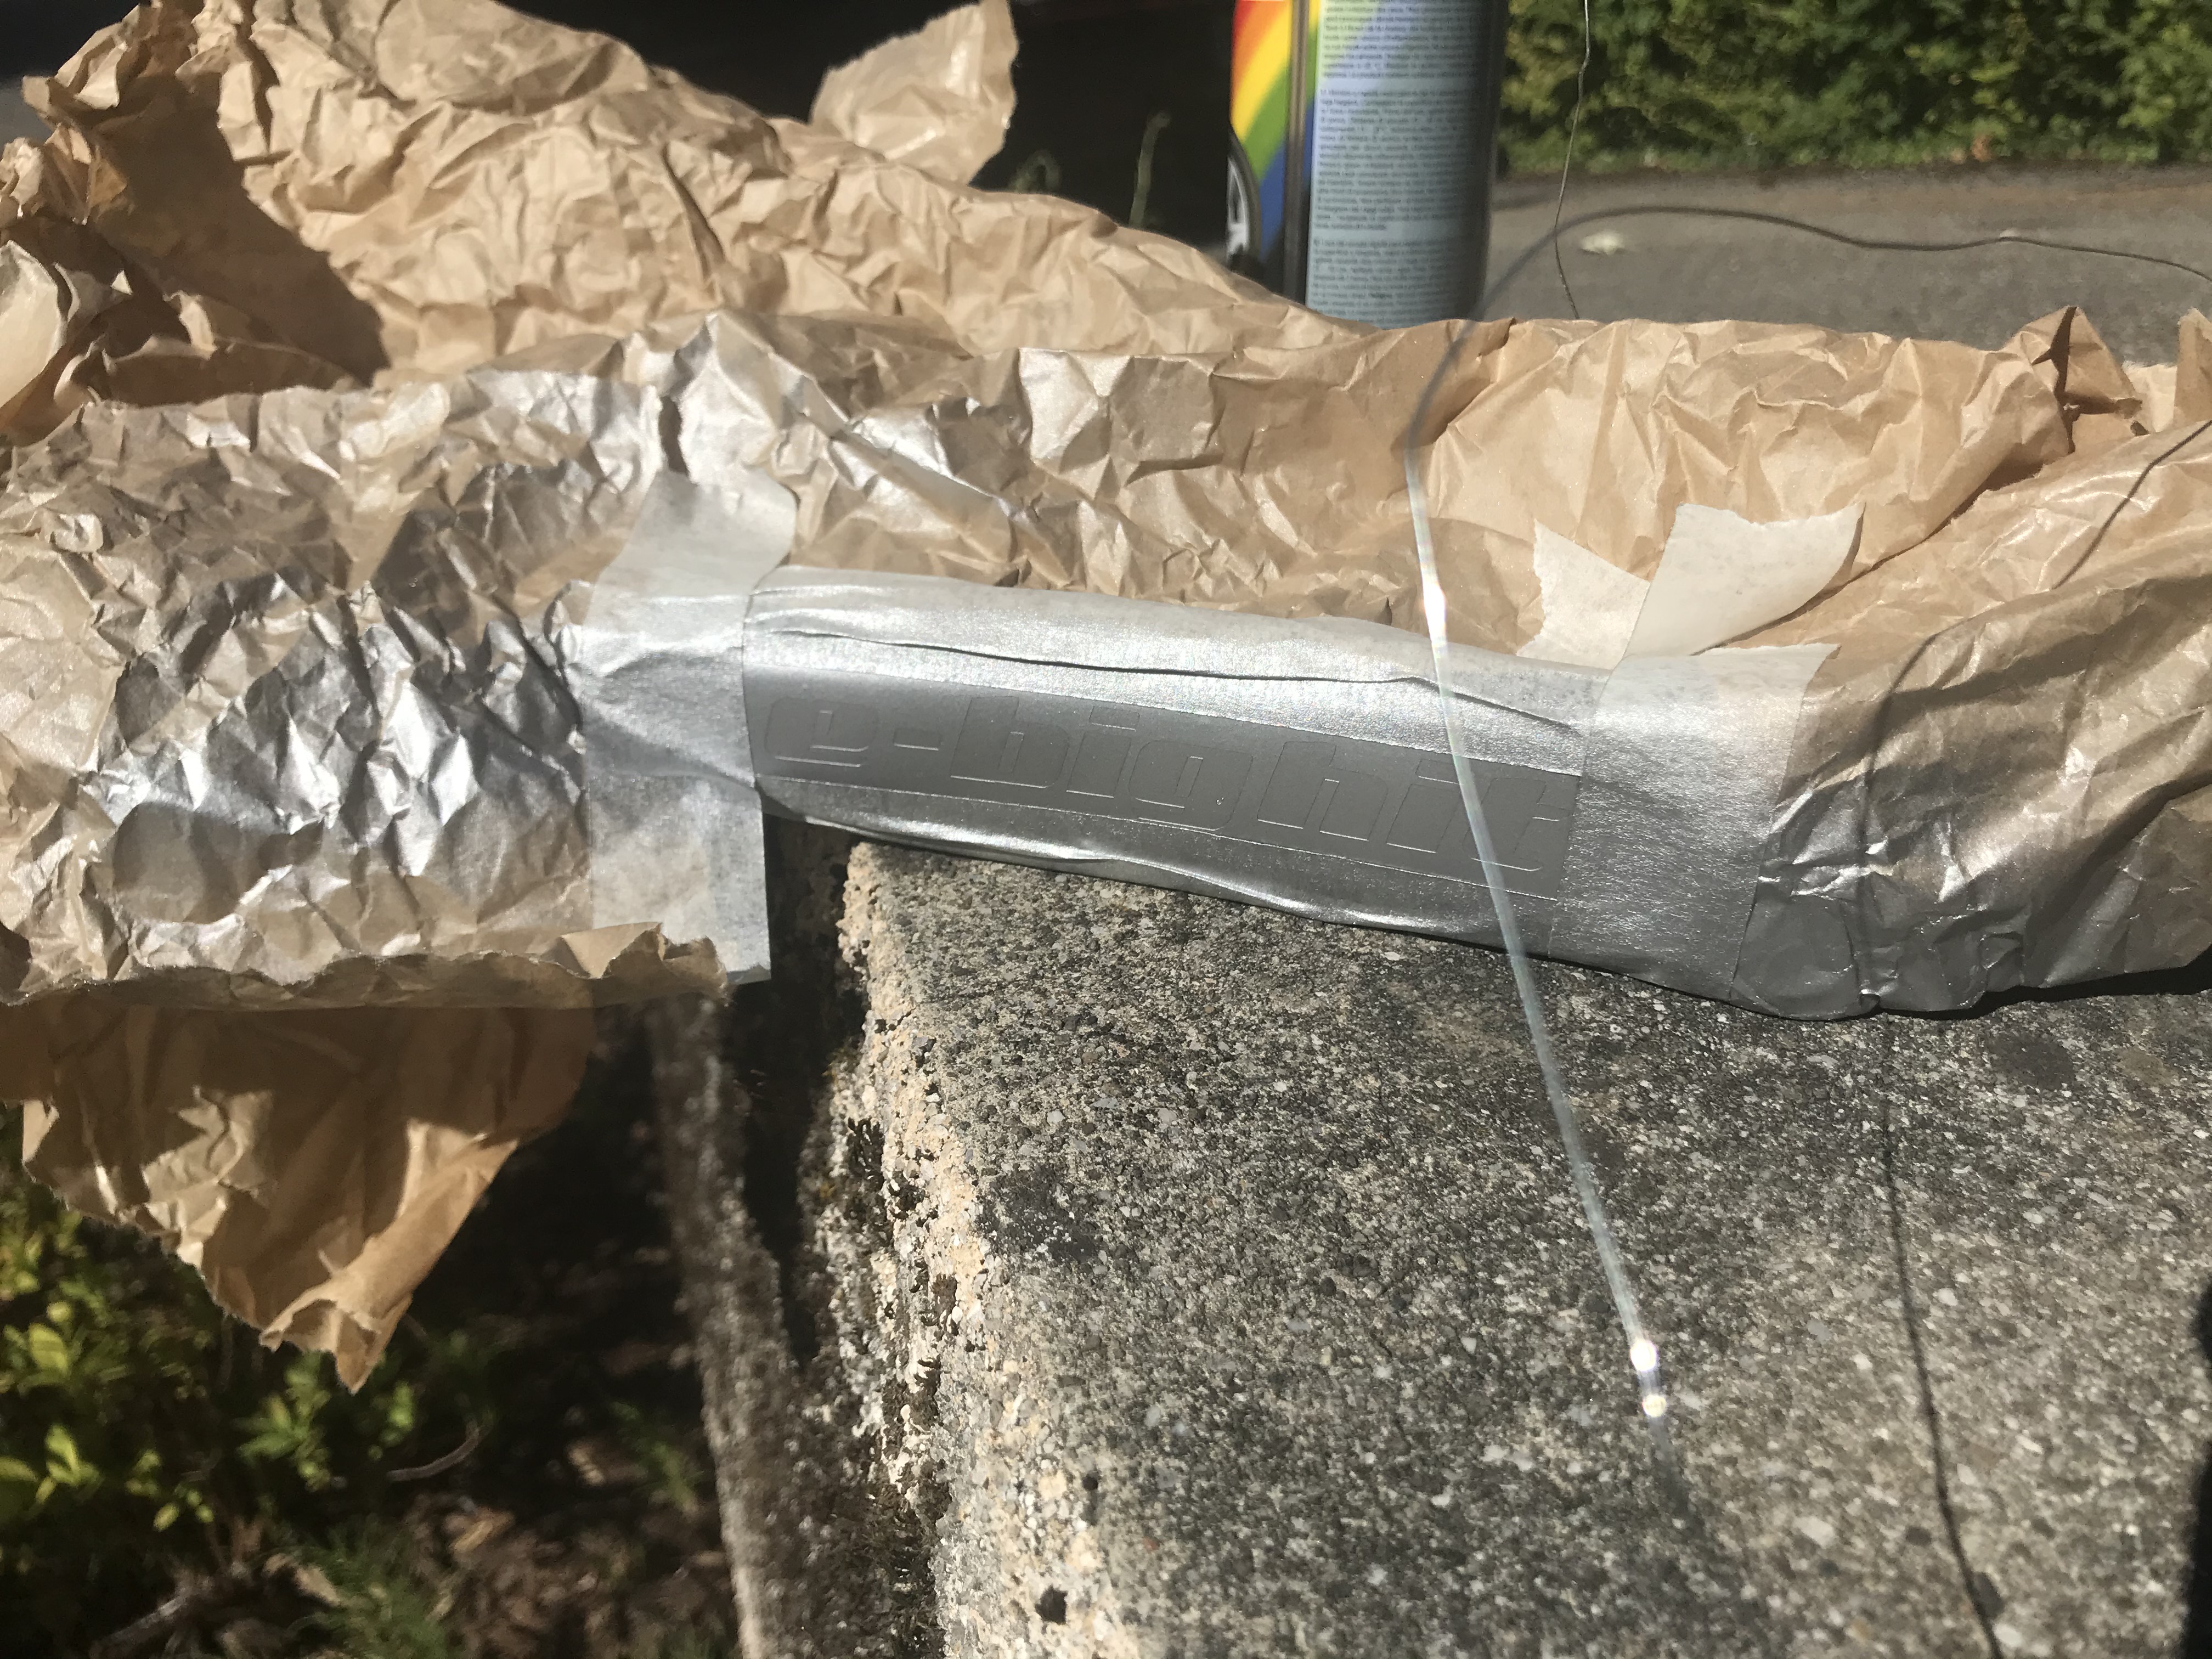
Battery is finished !
Time to put it into the frame
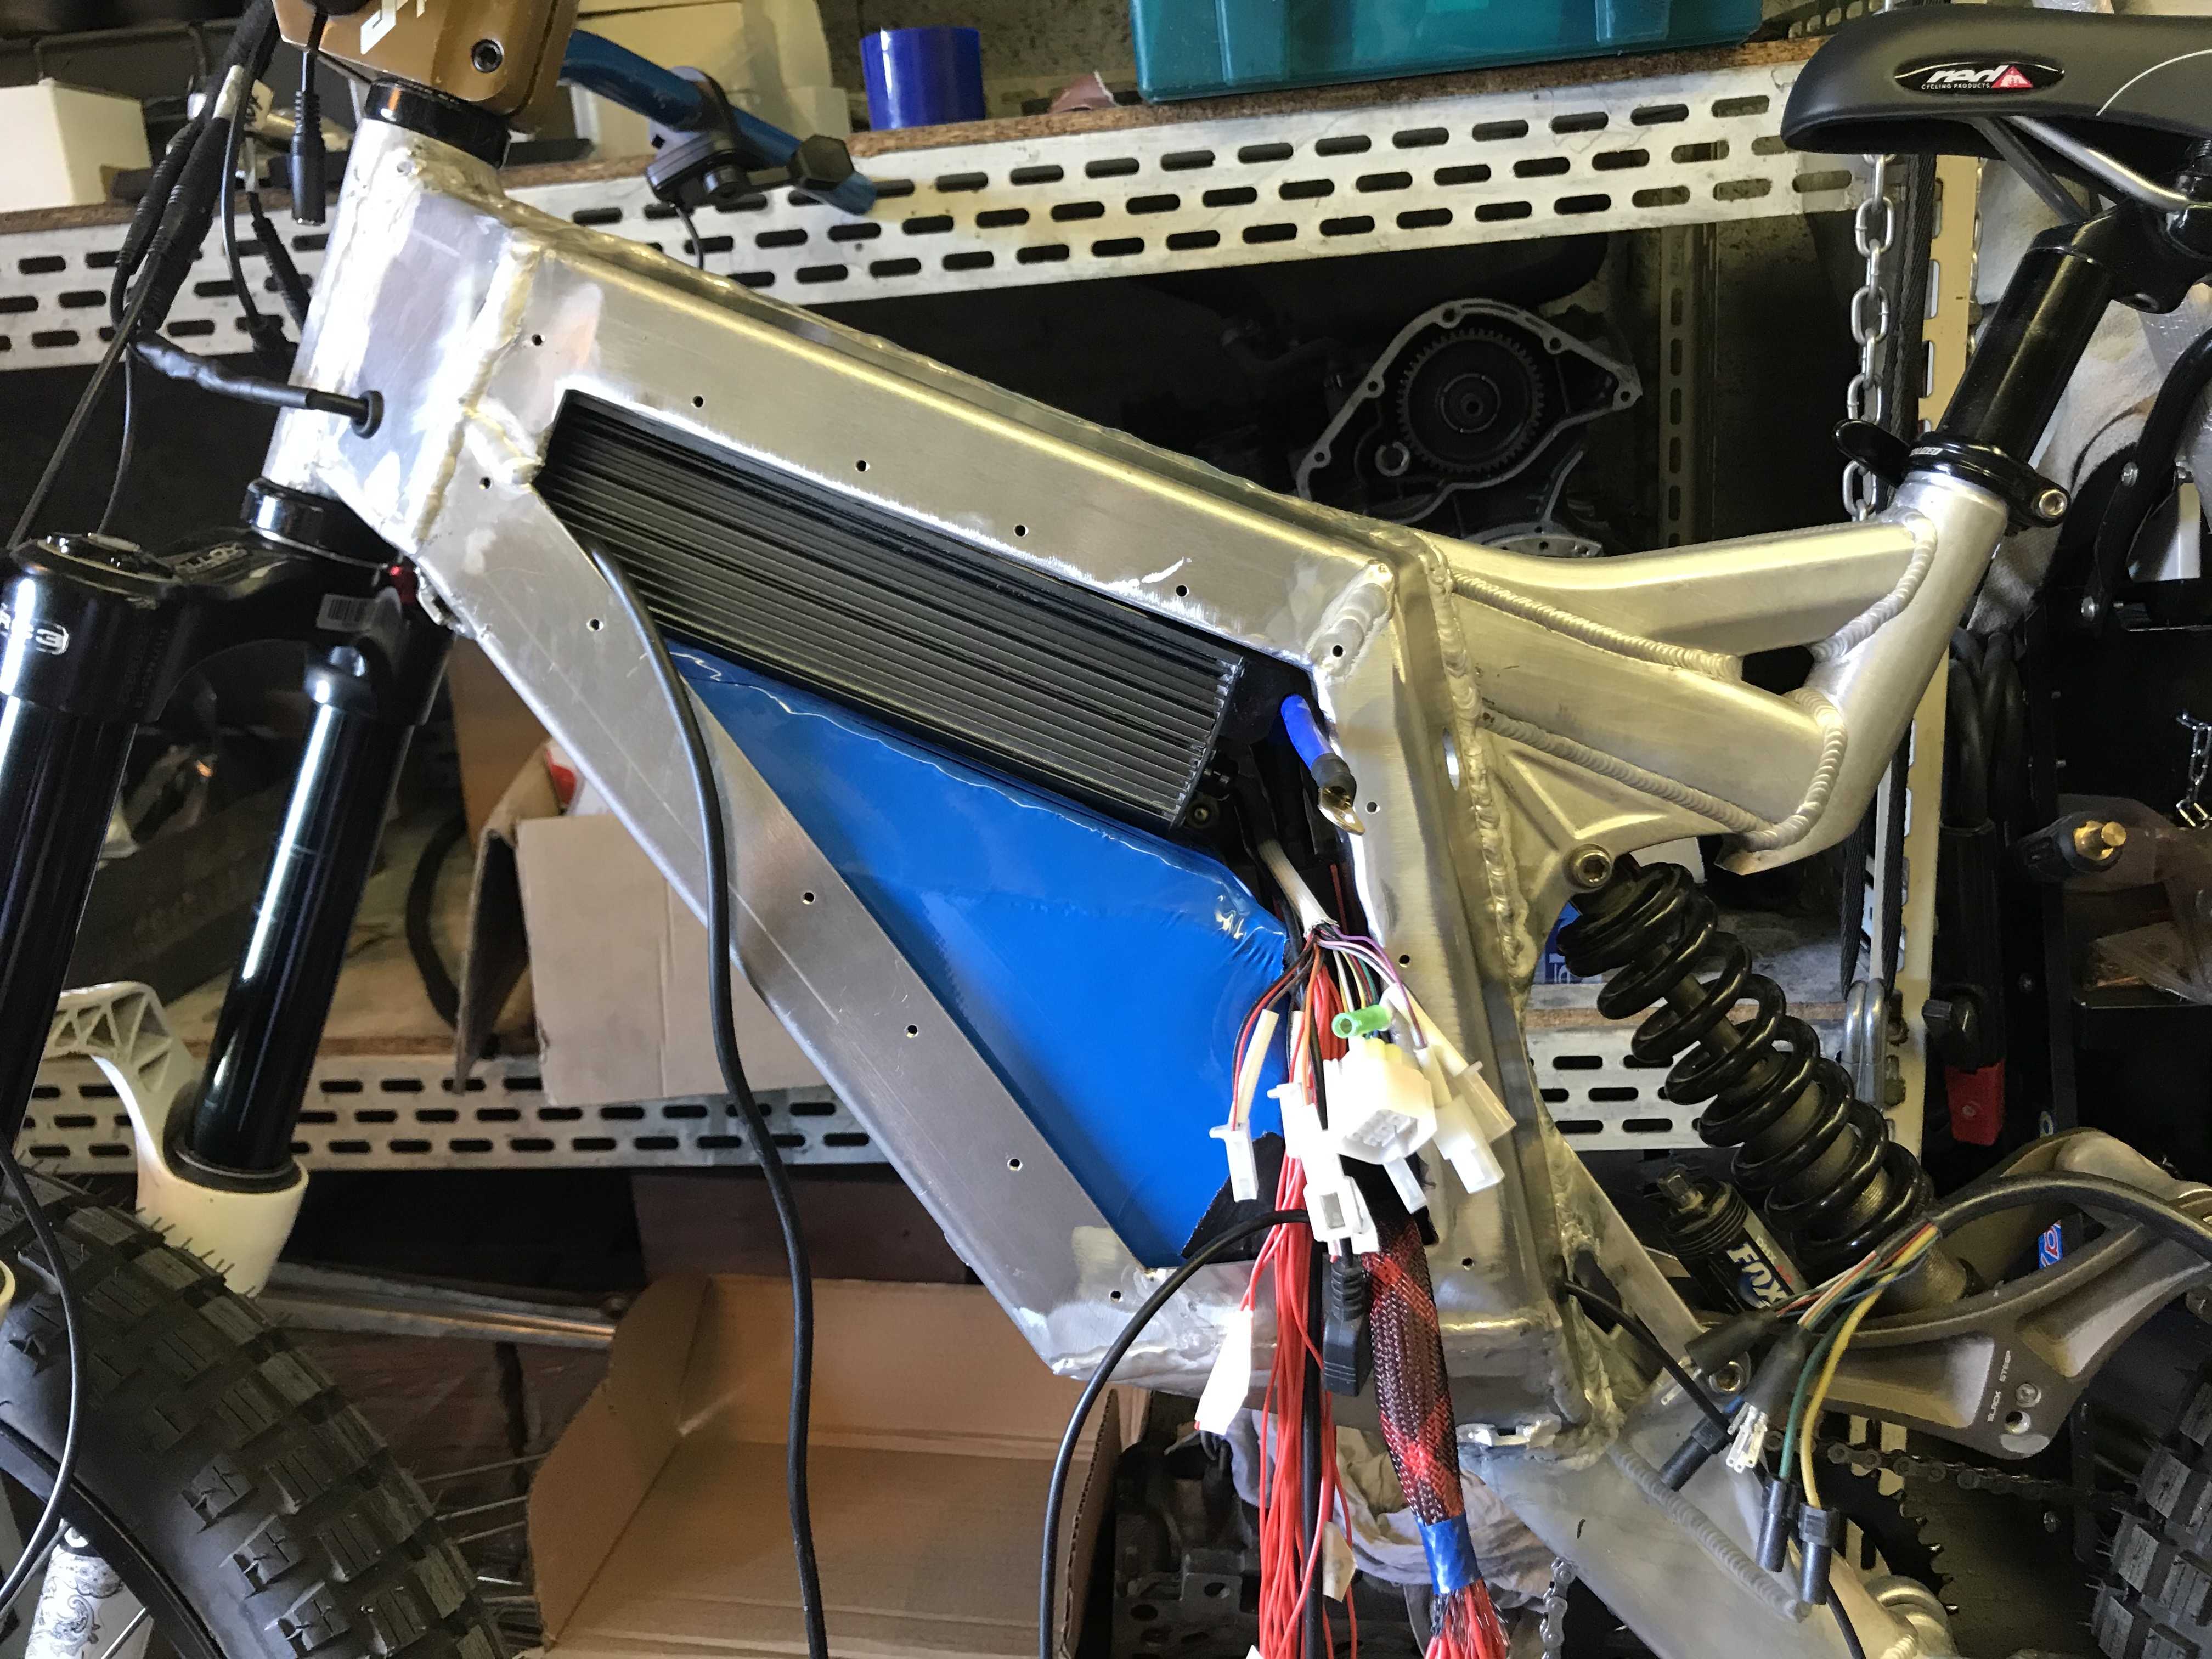
Wiring wiring and wiring...
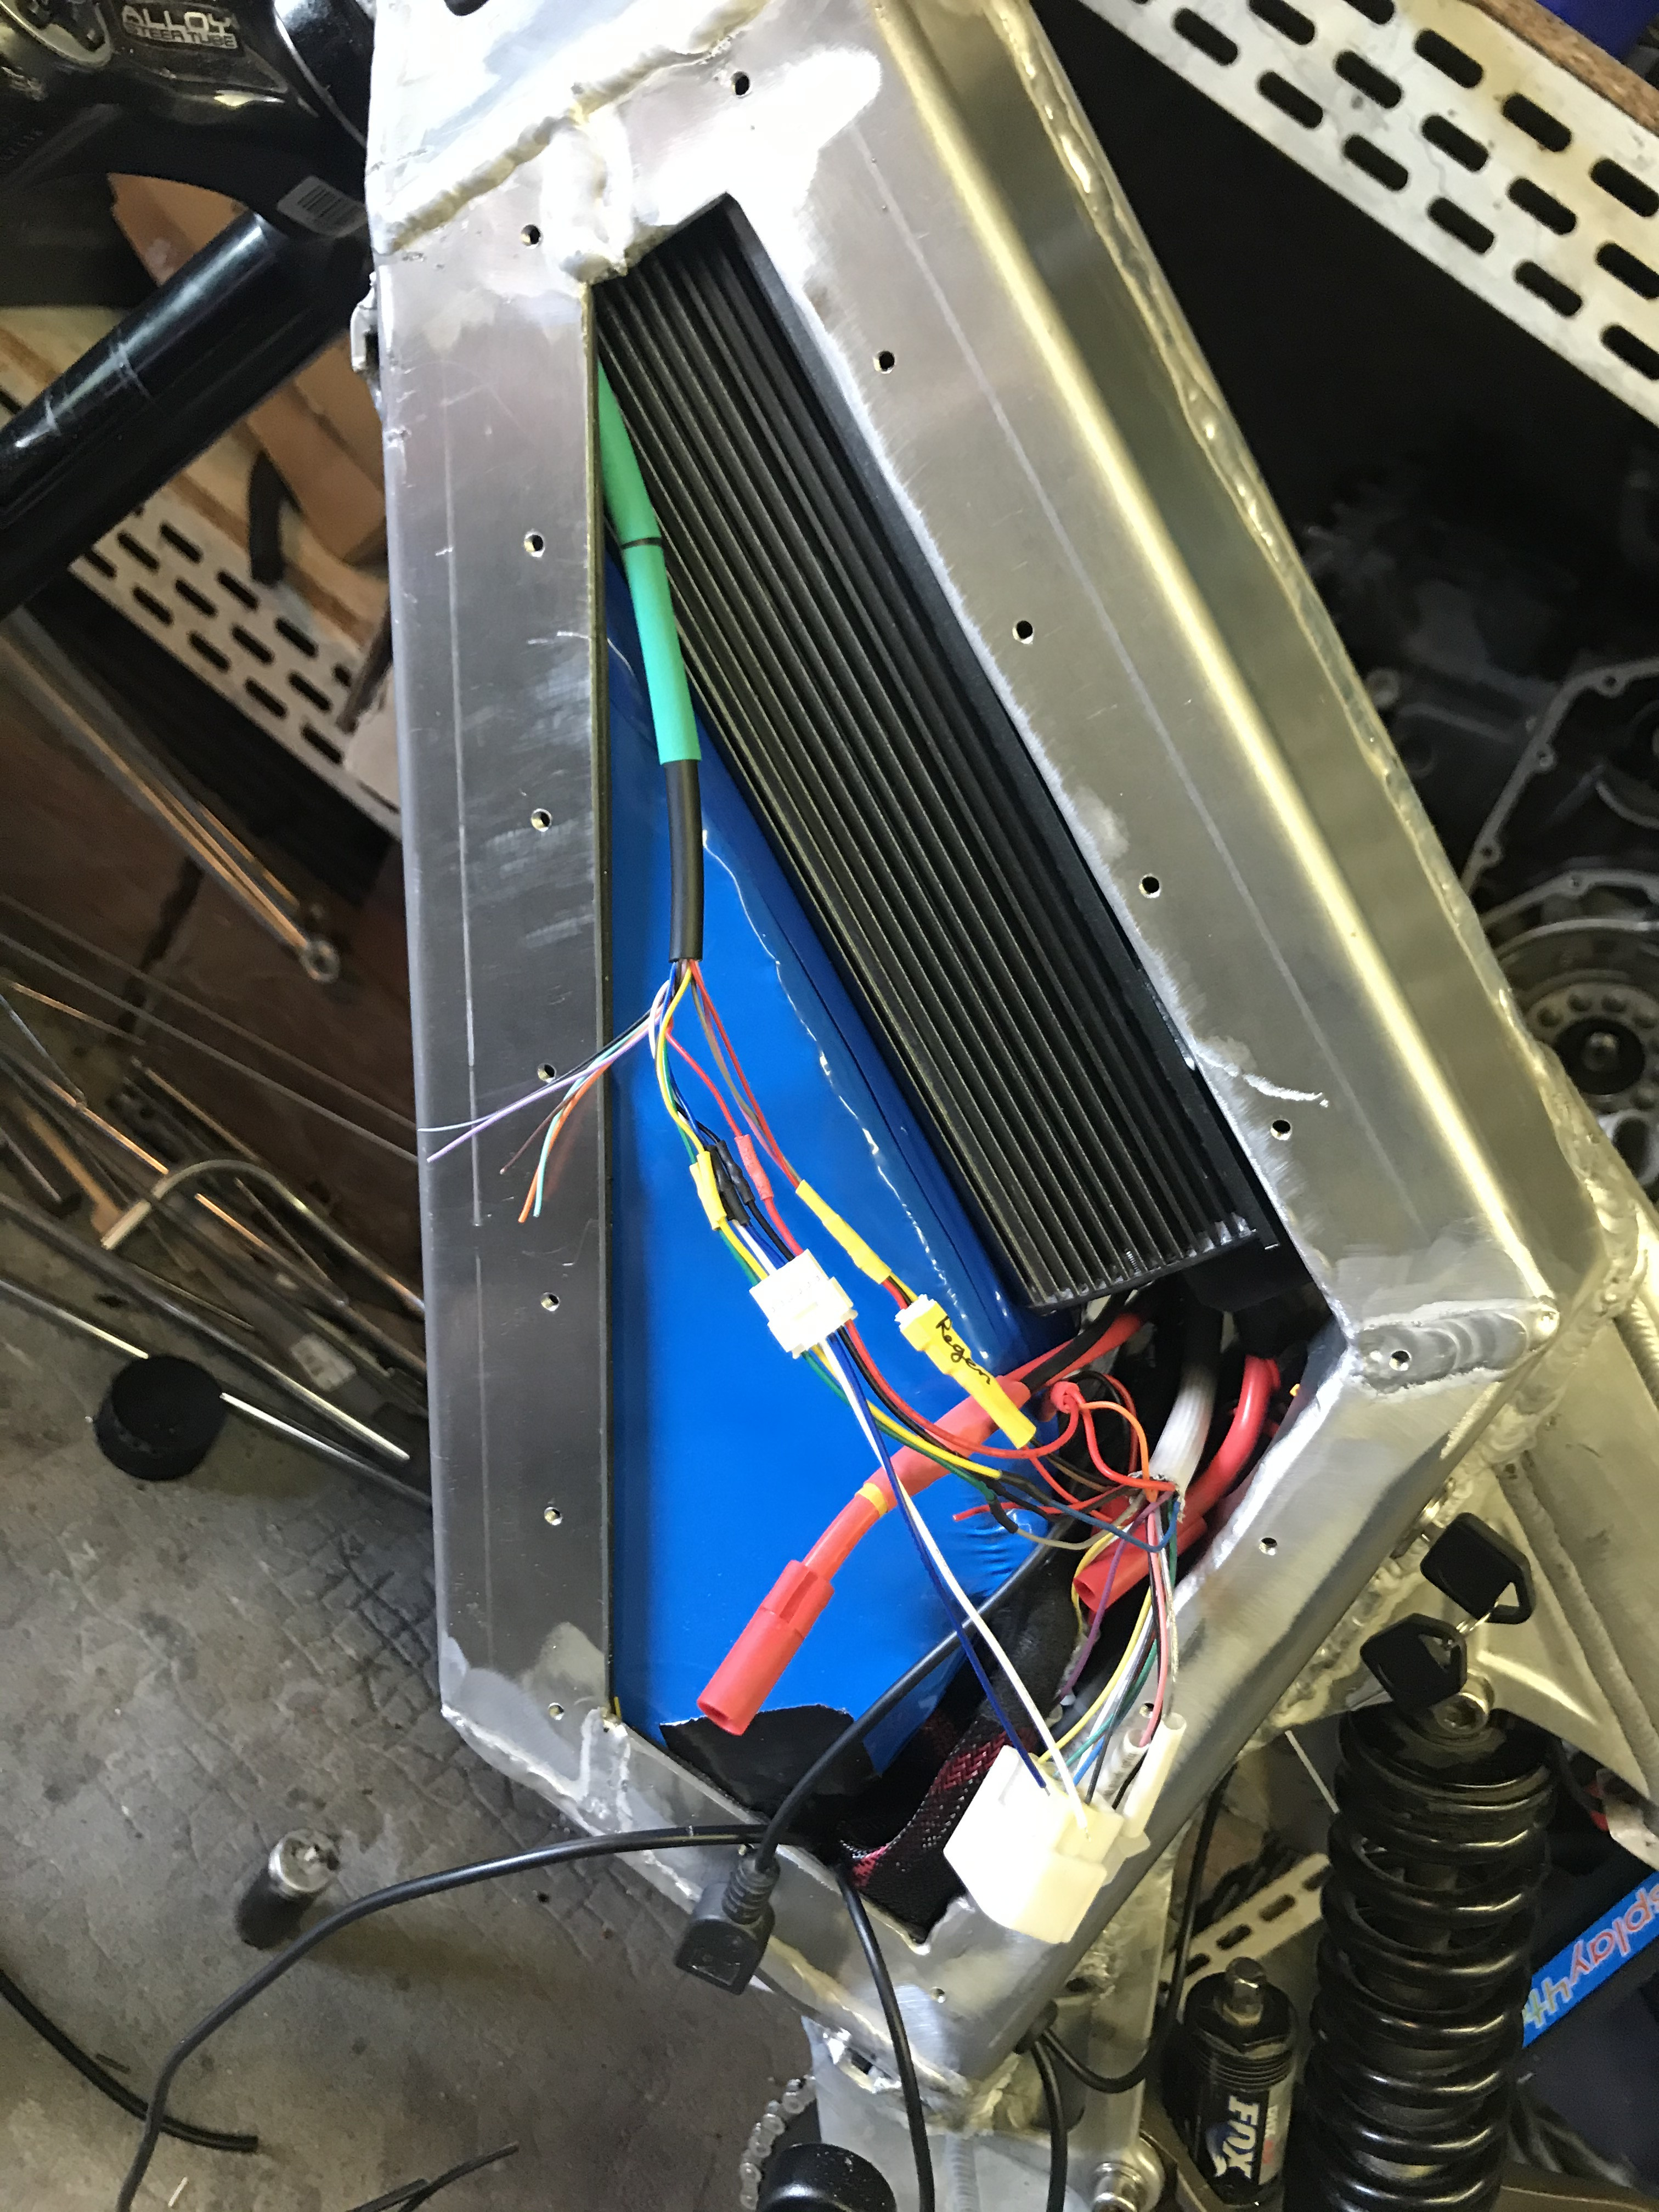
Charger plug
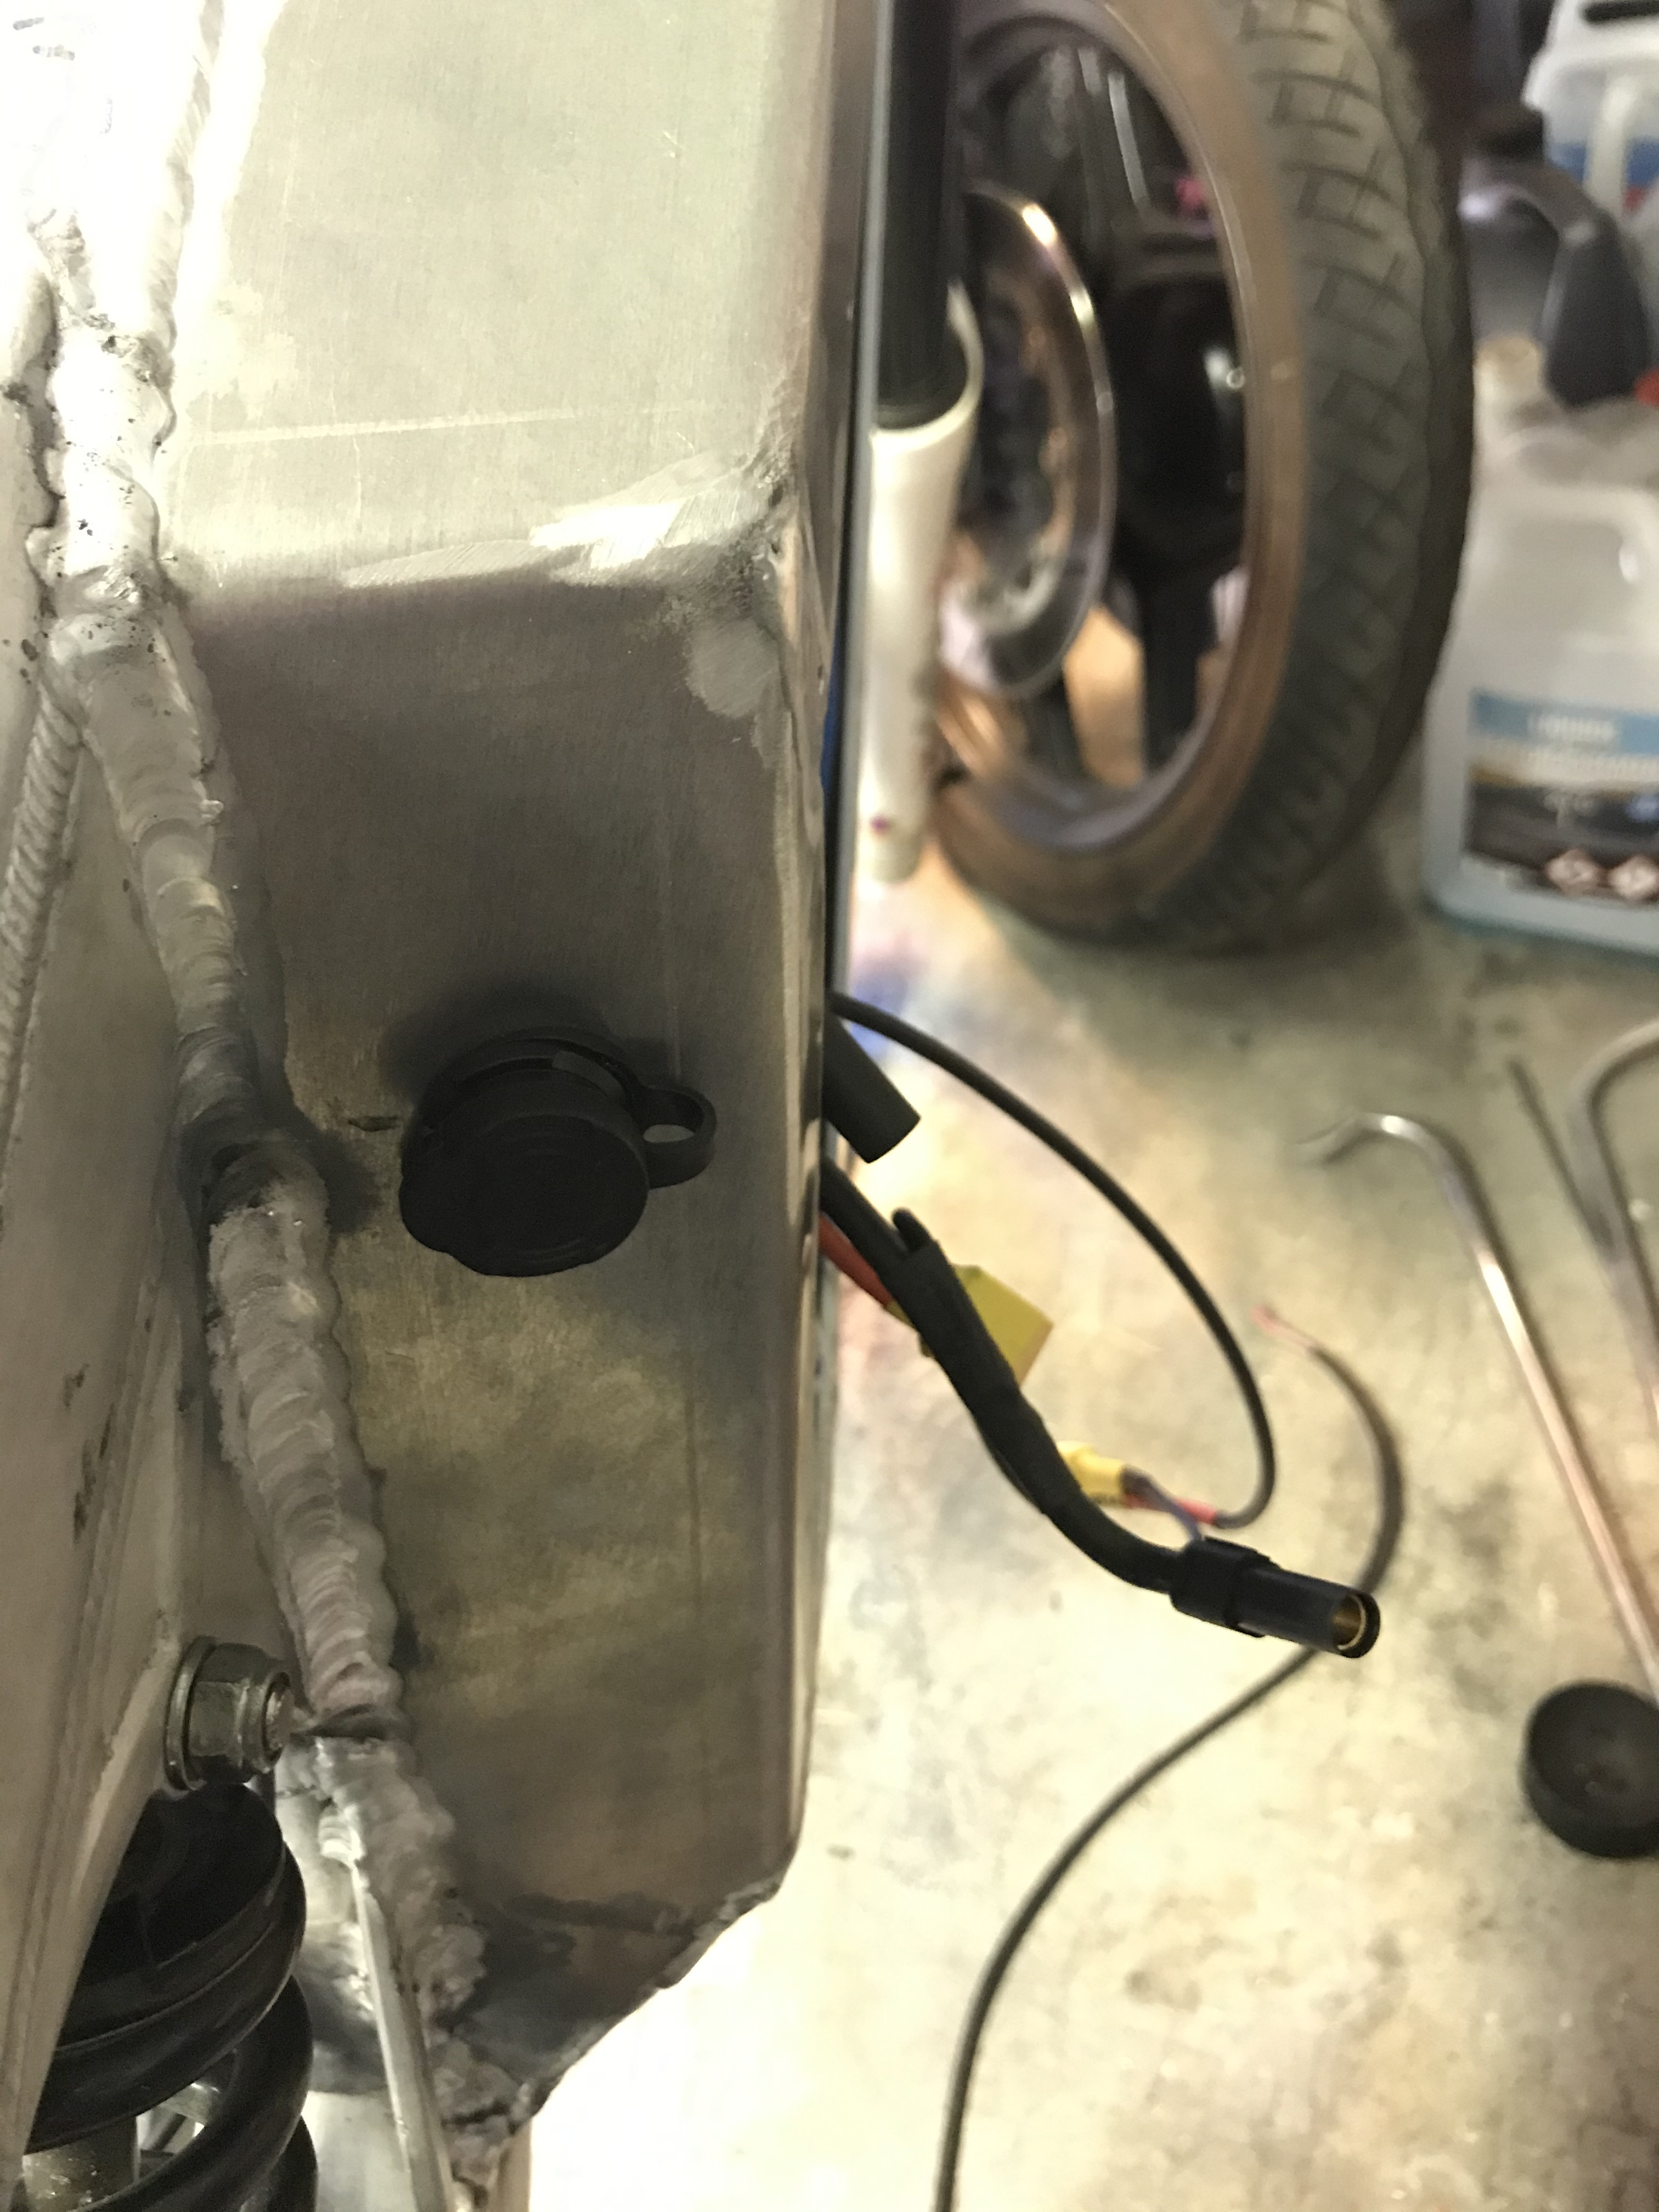
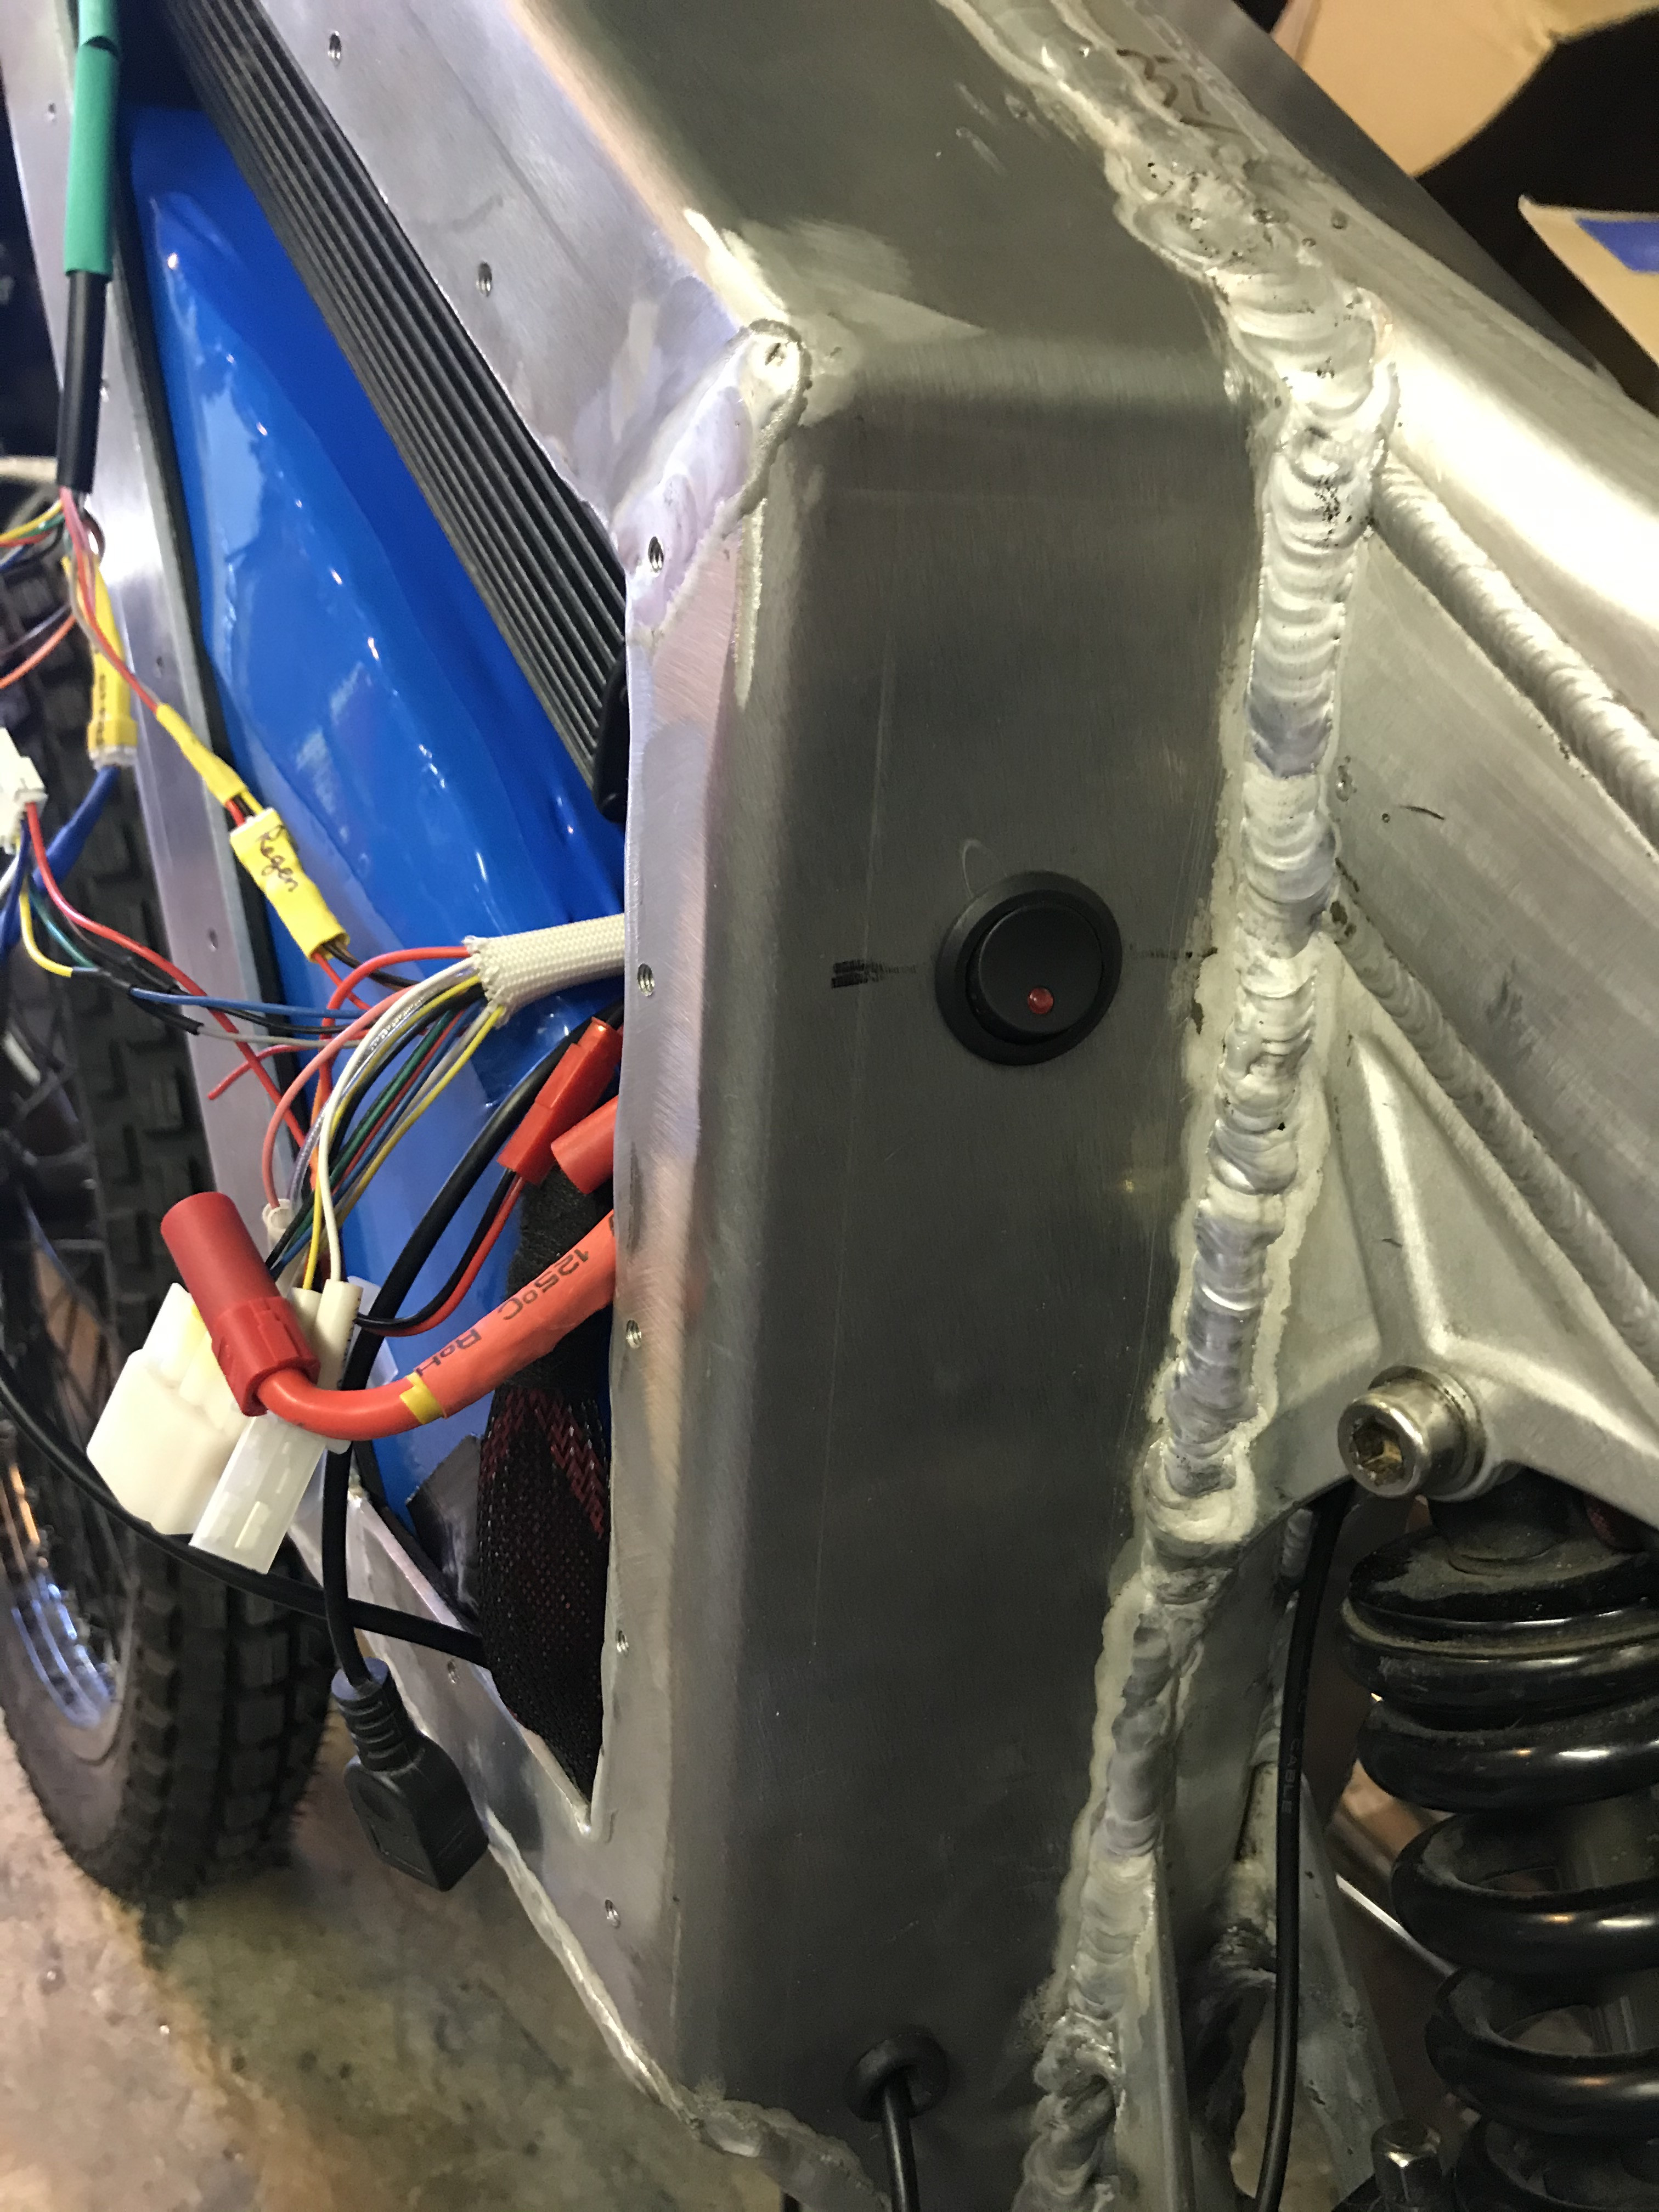
power button
and after some more wiring stuff... first test !
First impression, it's very powerful, a lot of torque a lot of fun 8)
But it can't stay like this. It needs some paint
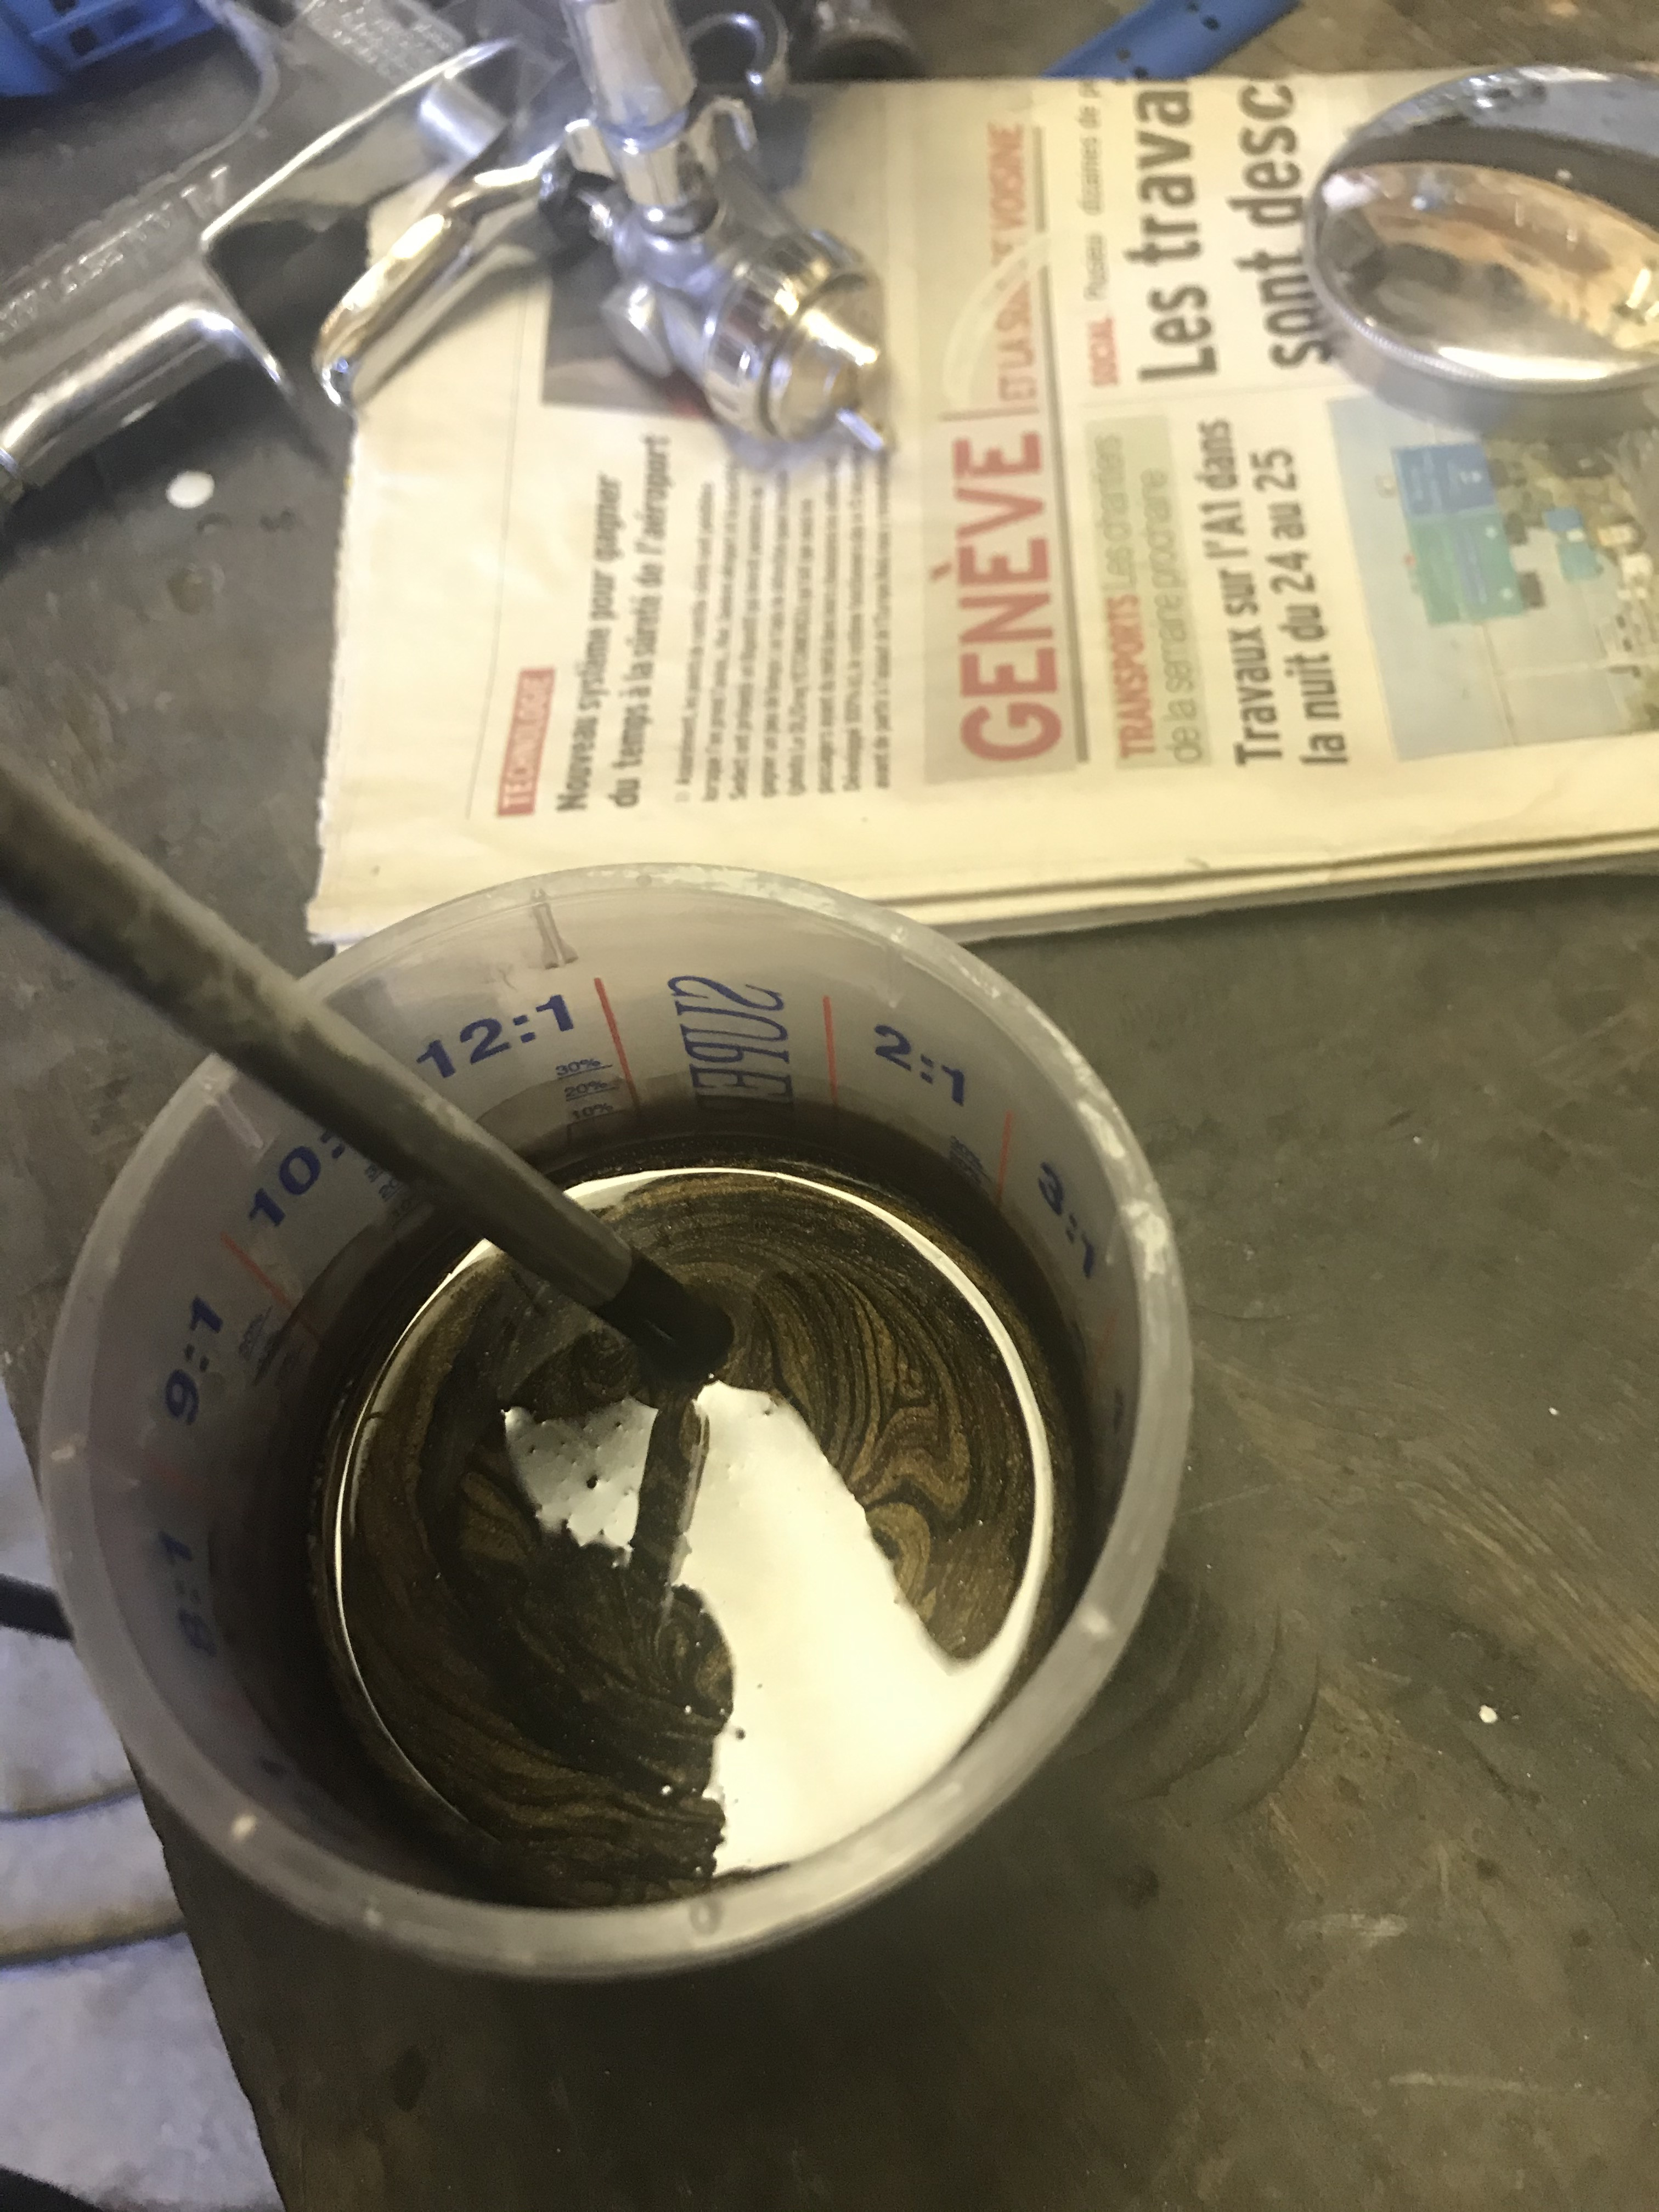
new disassemble and prepare it to receive it's new color
epoxy primer

Dacia duster color (CNA)
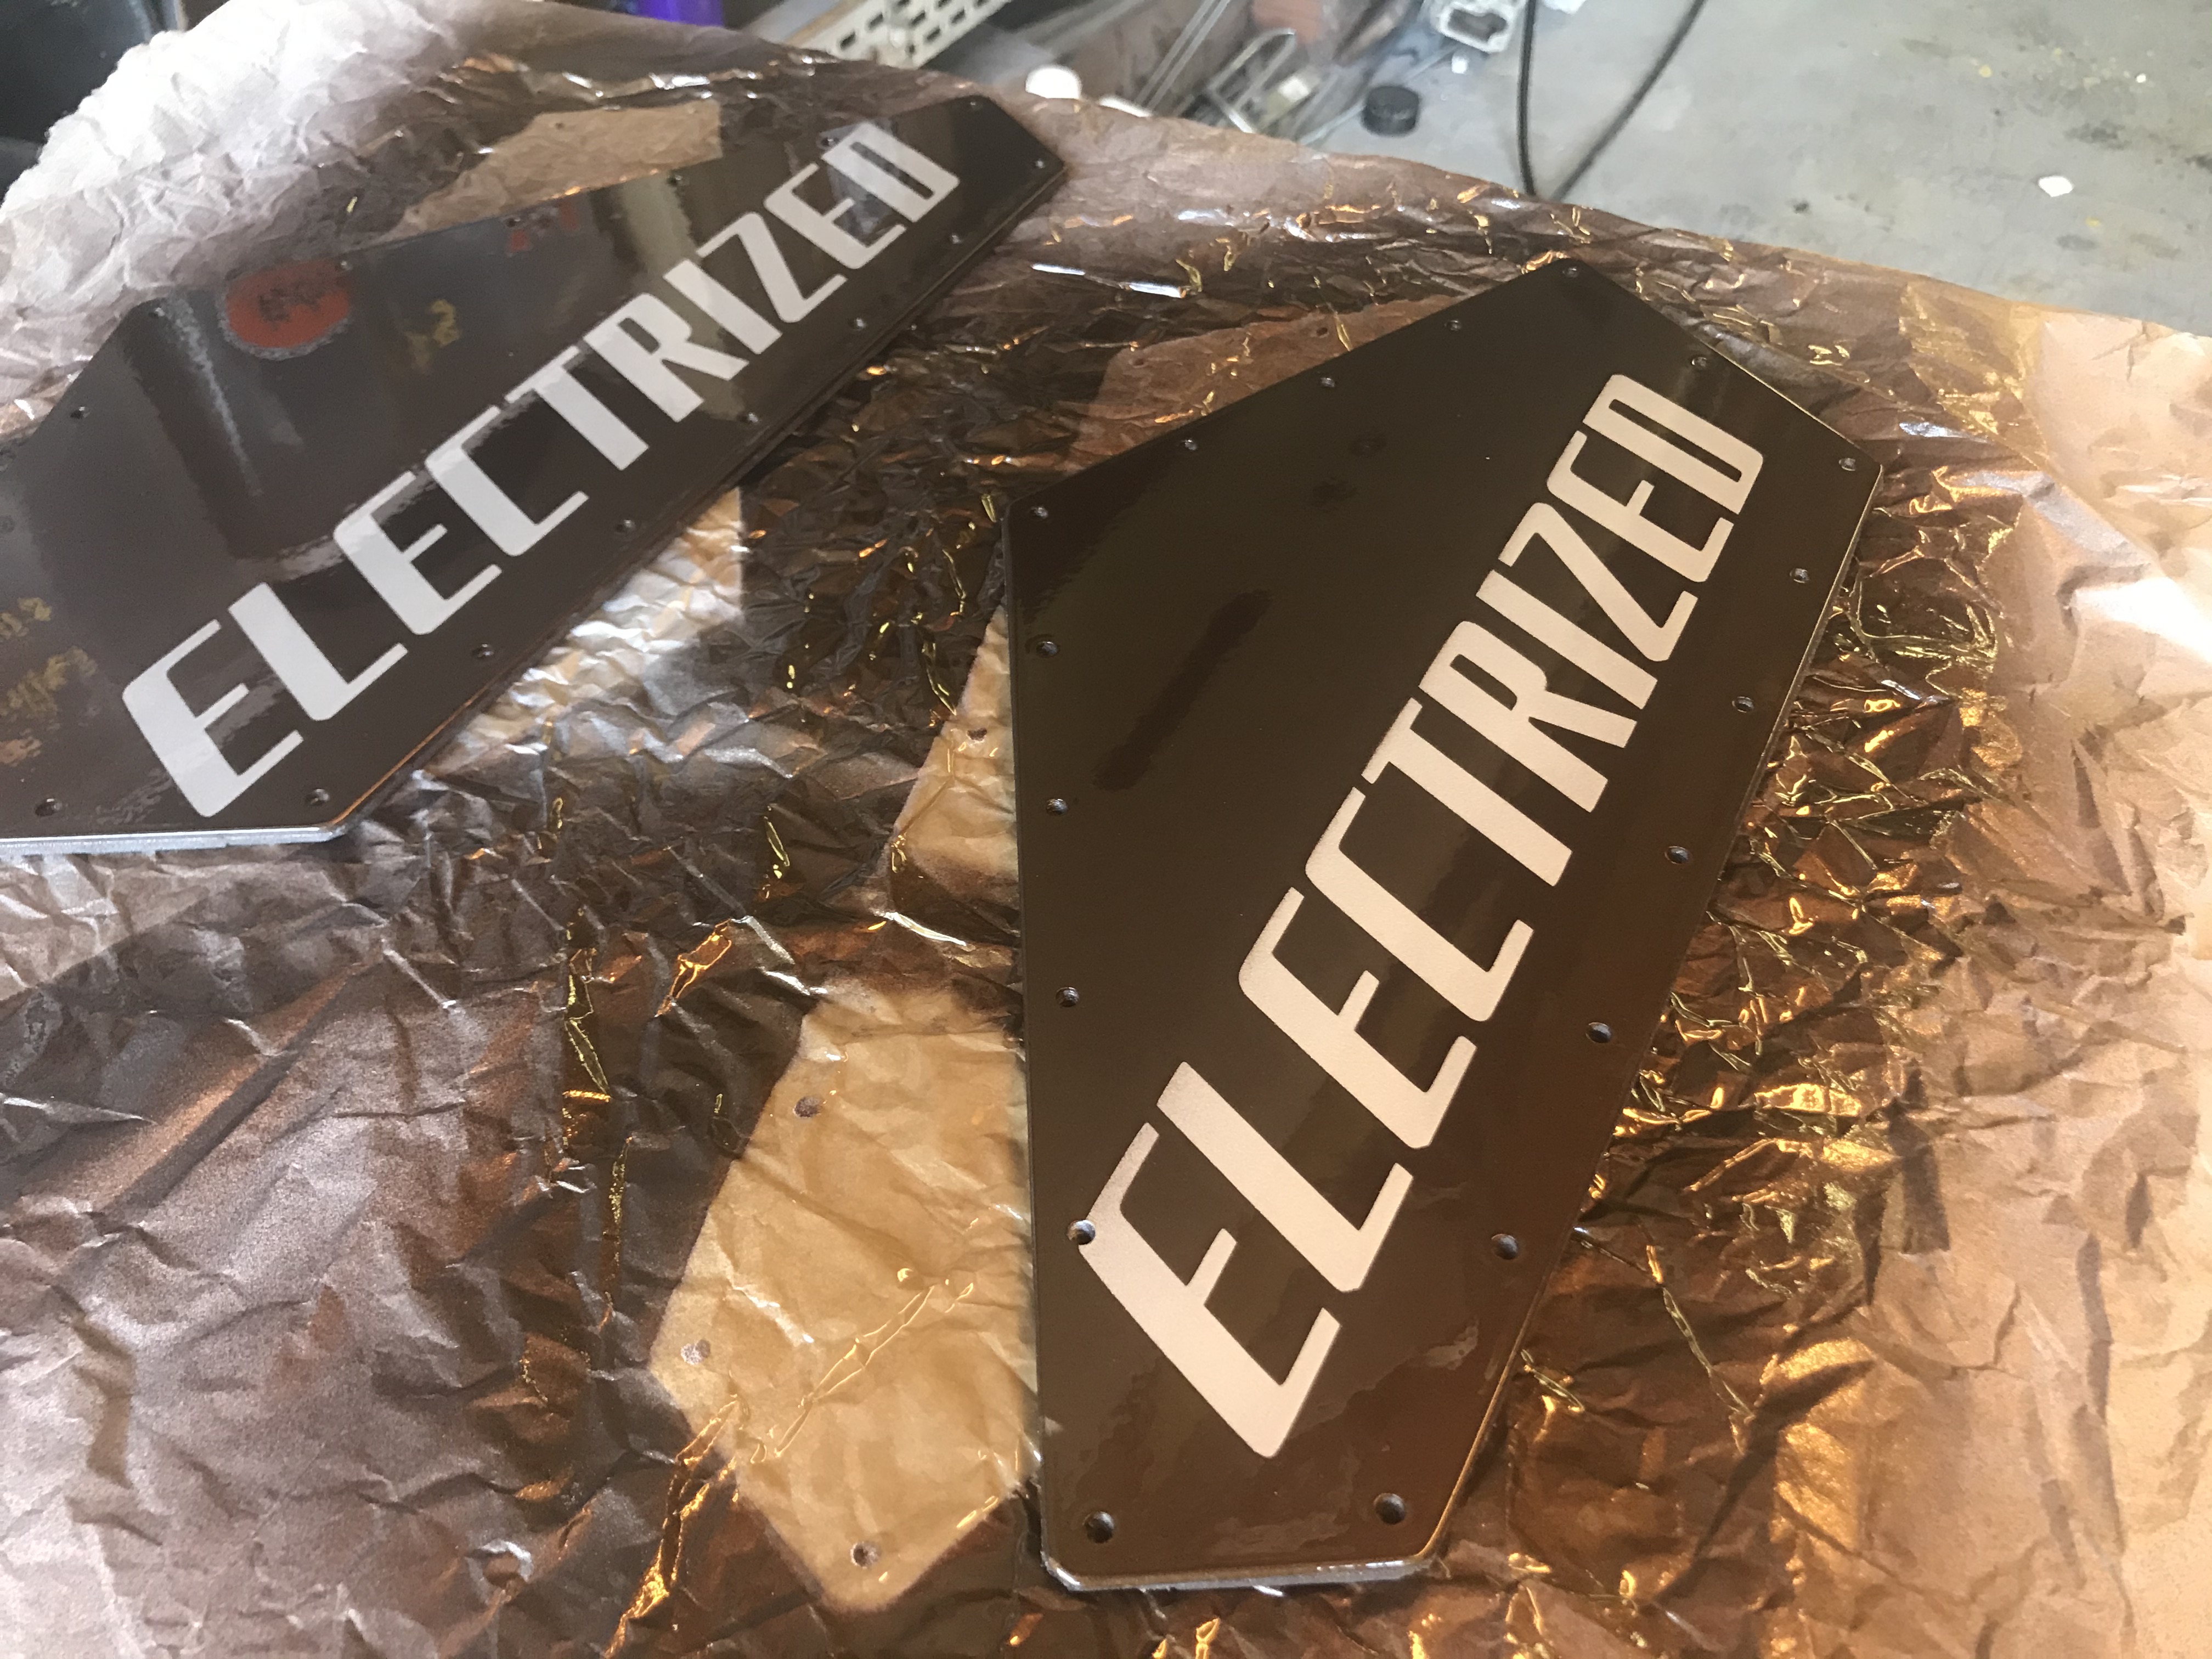
and then I used a stencil to paint the design on the rear frame and side covers
the final coat, the varnish

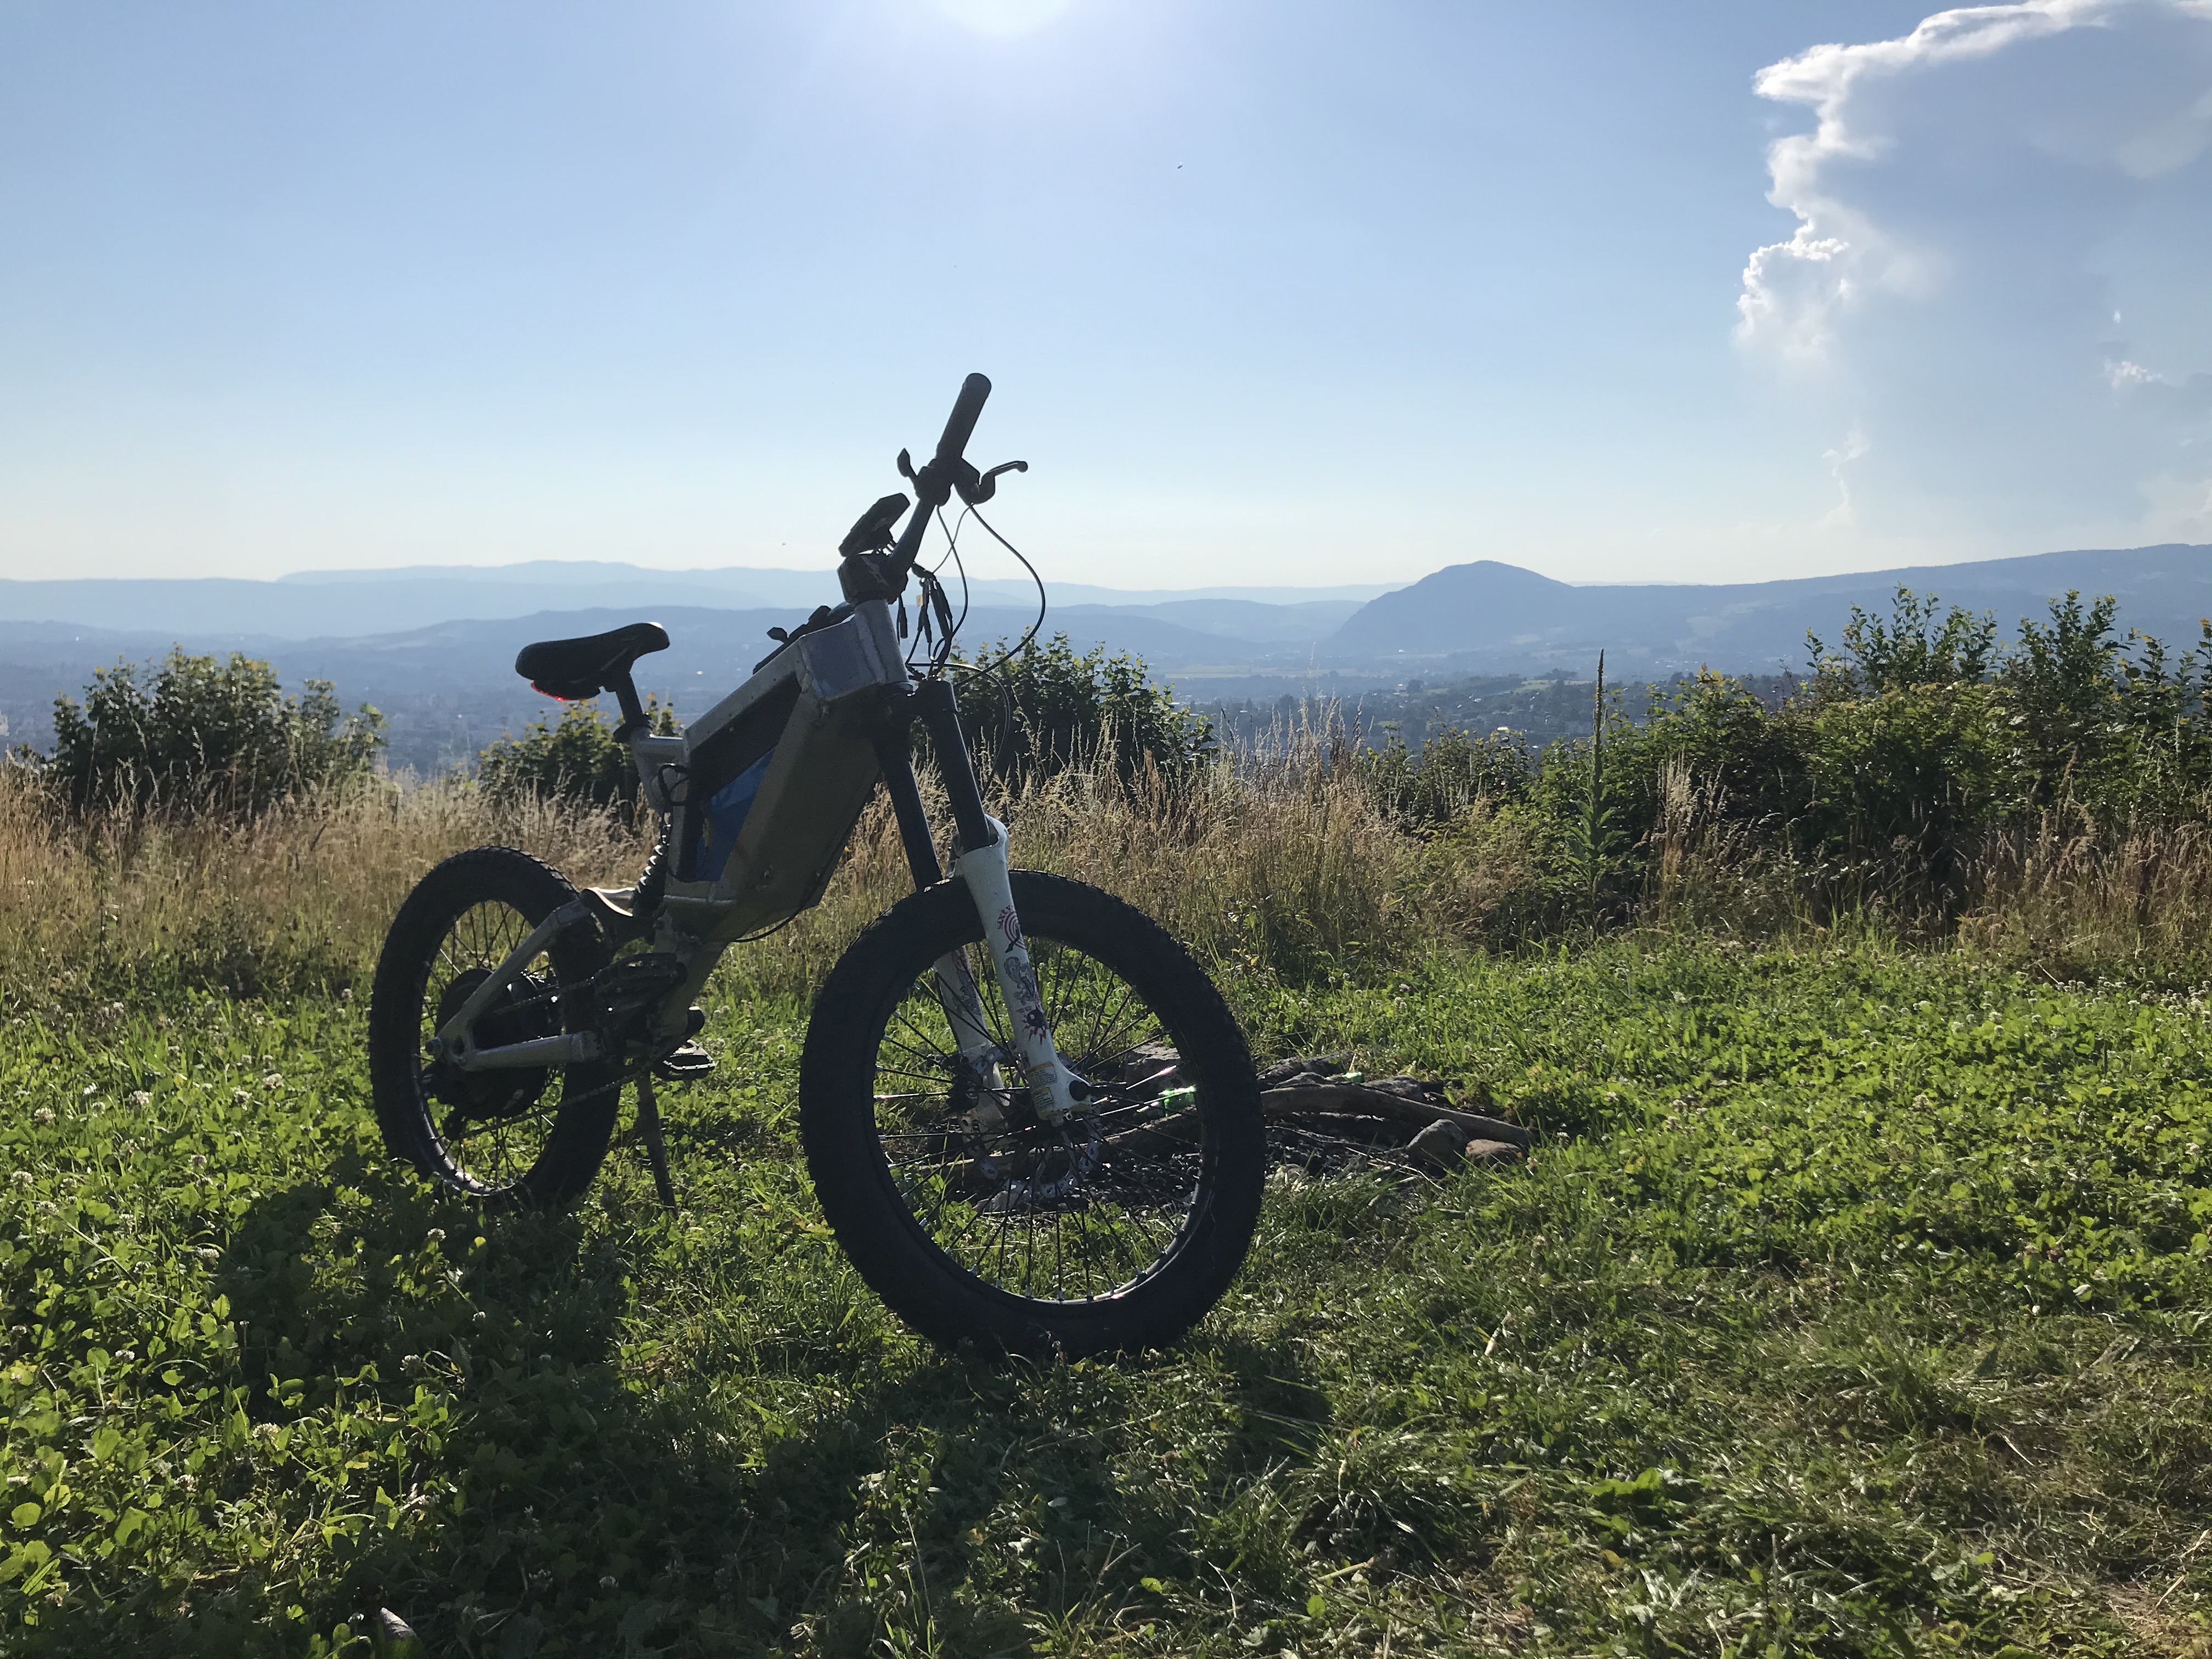
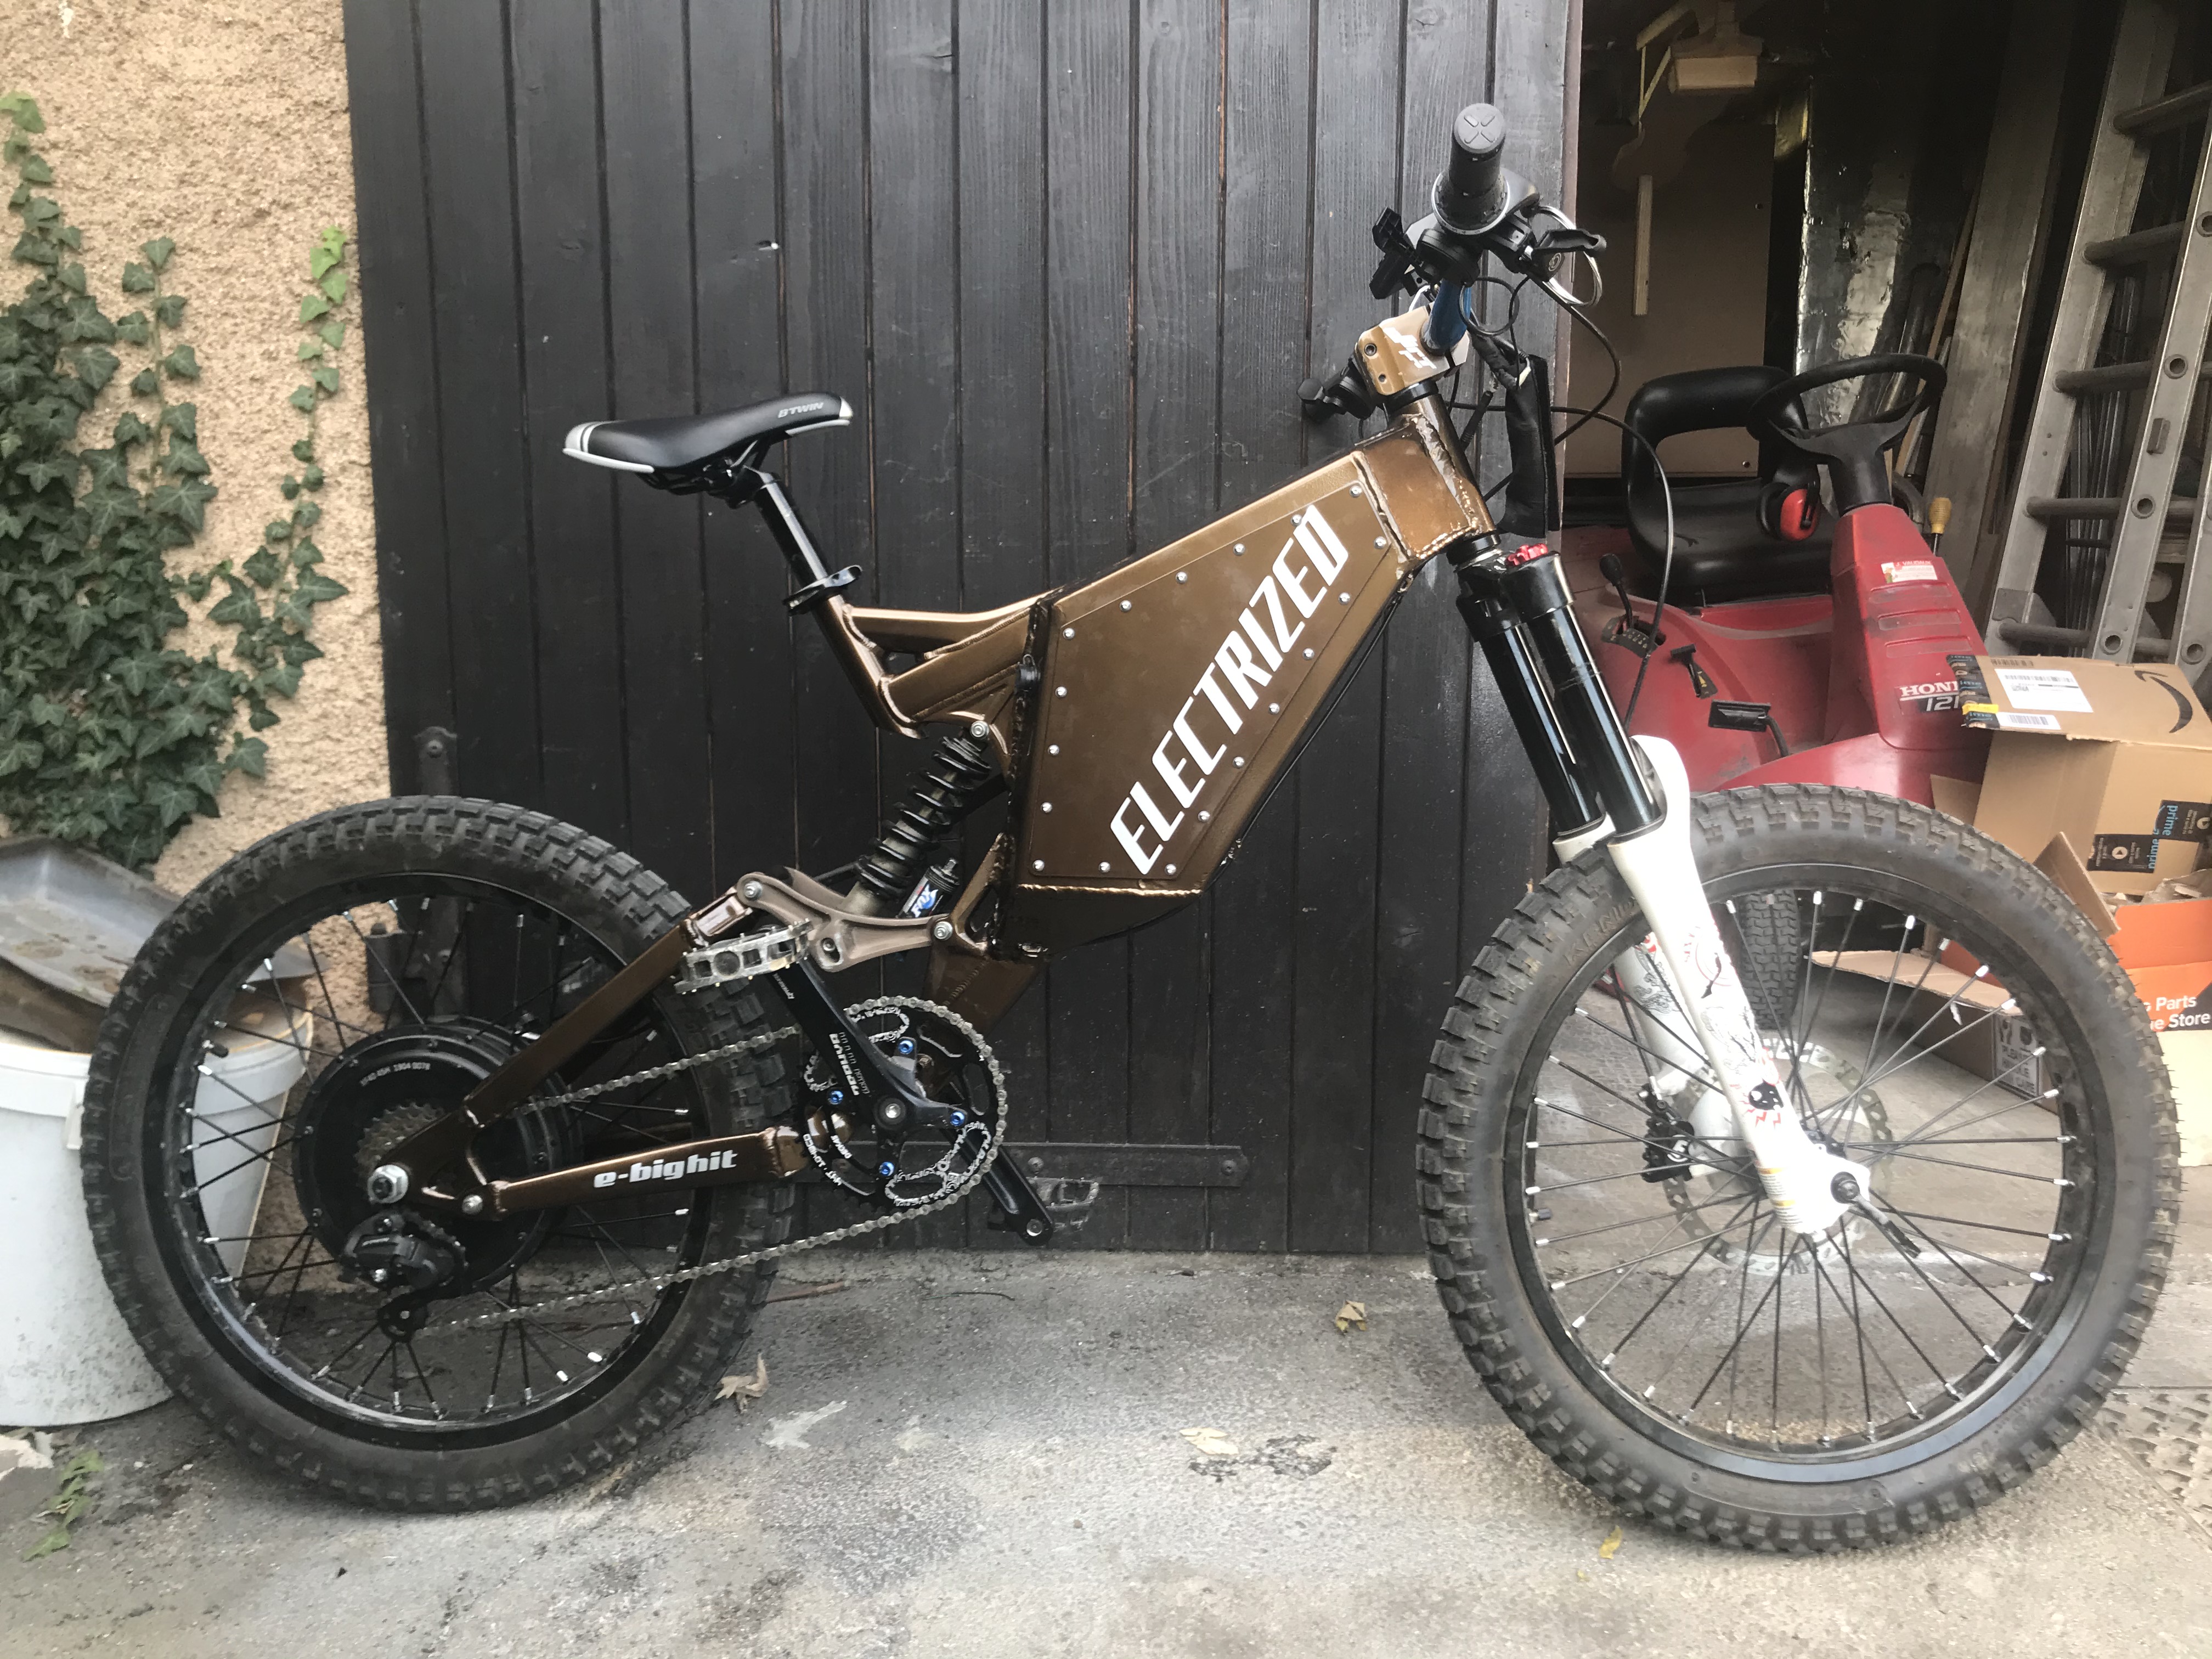
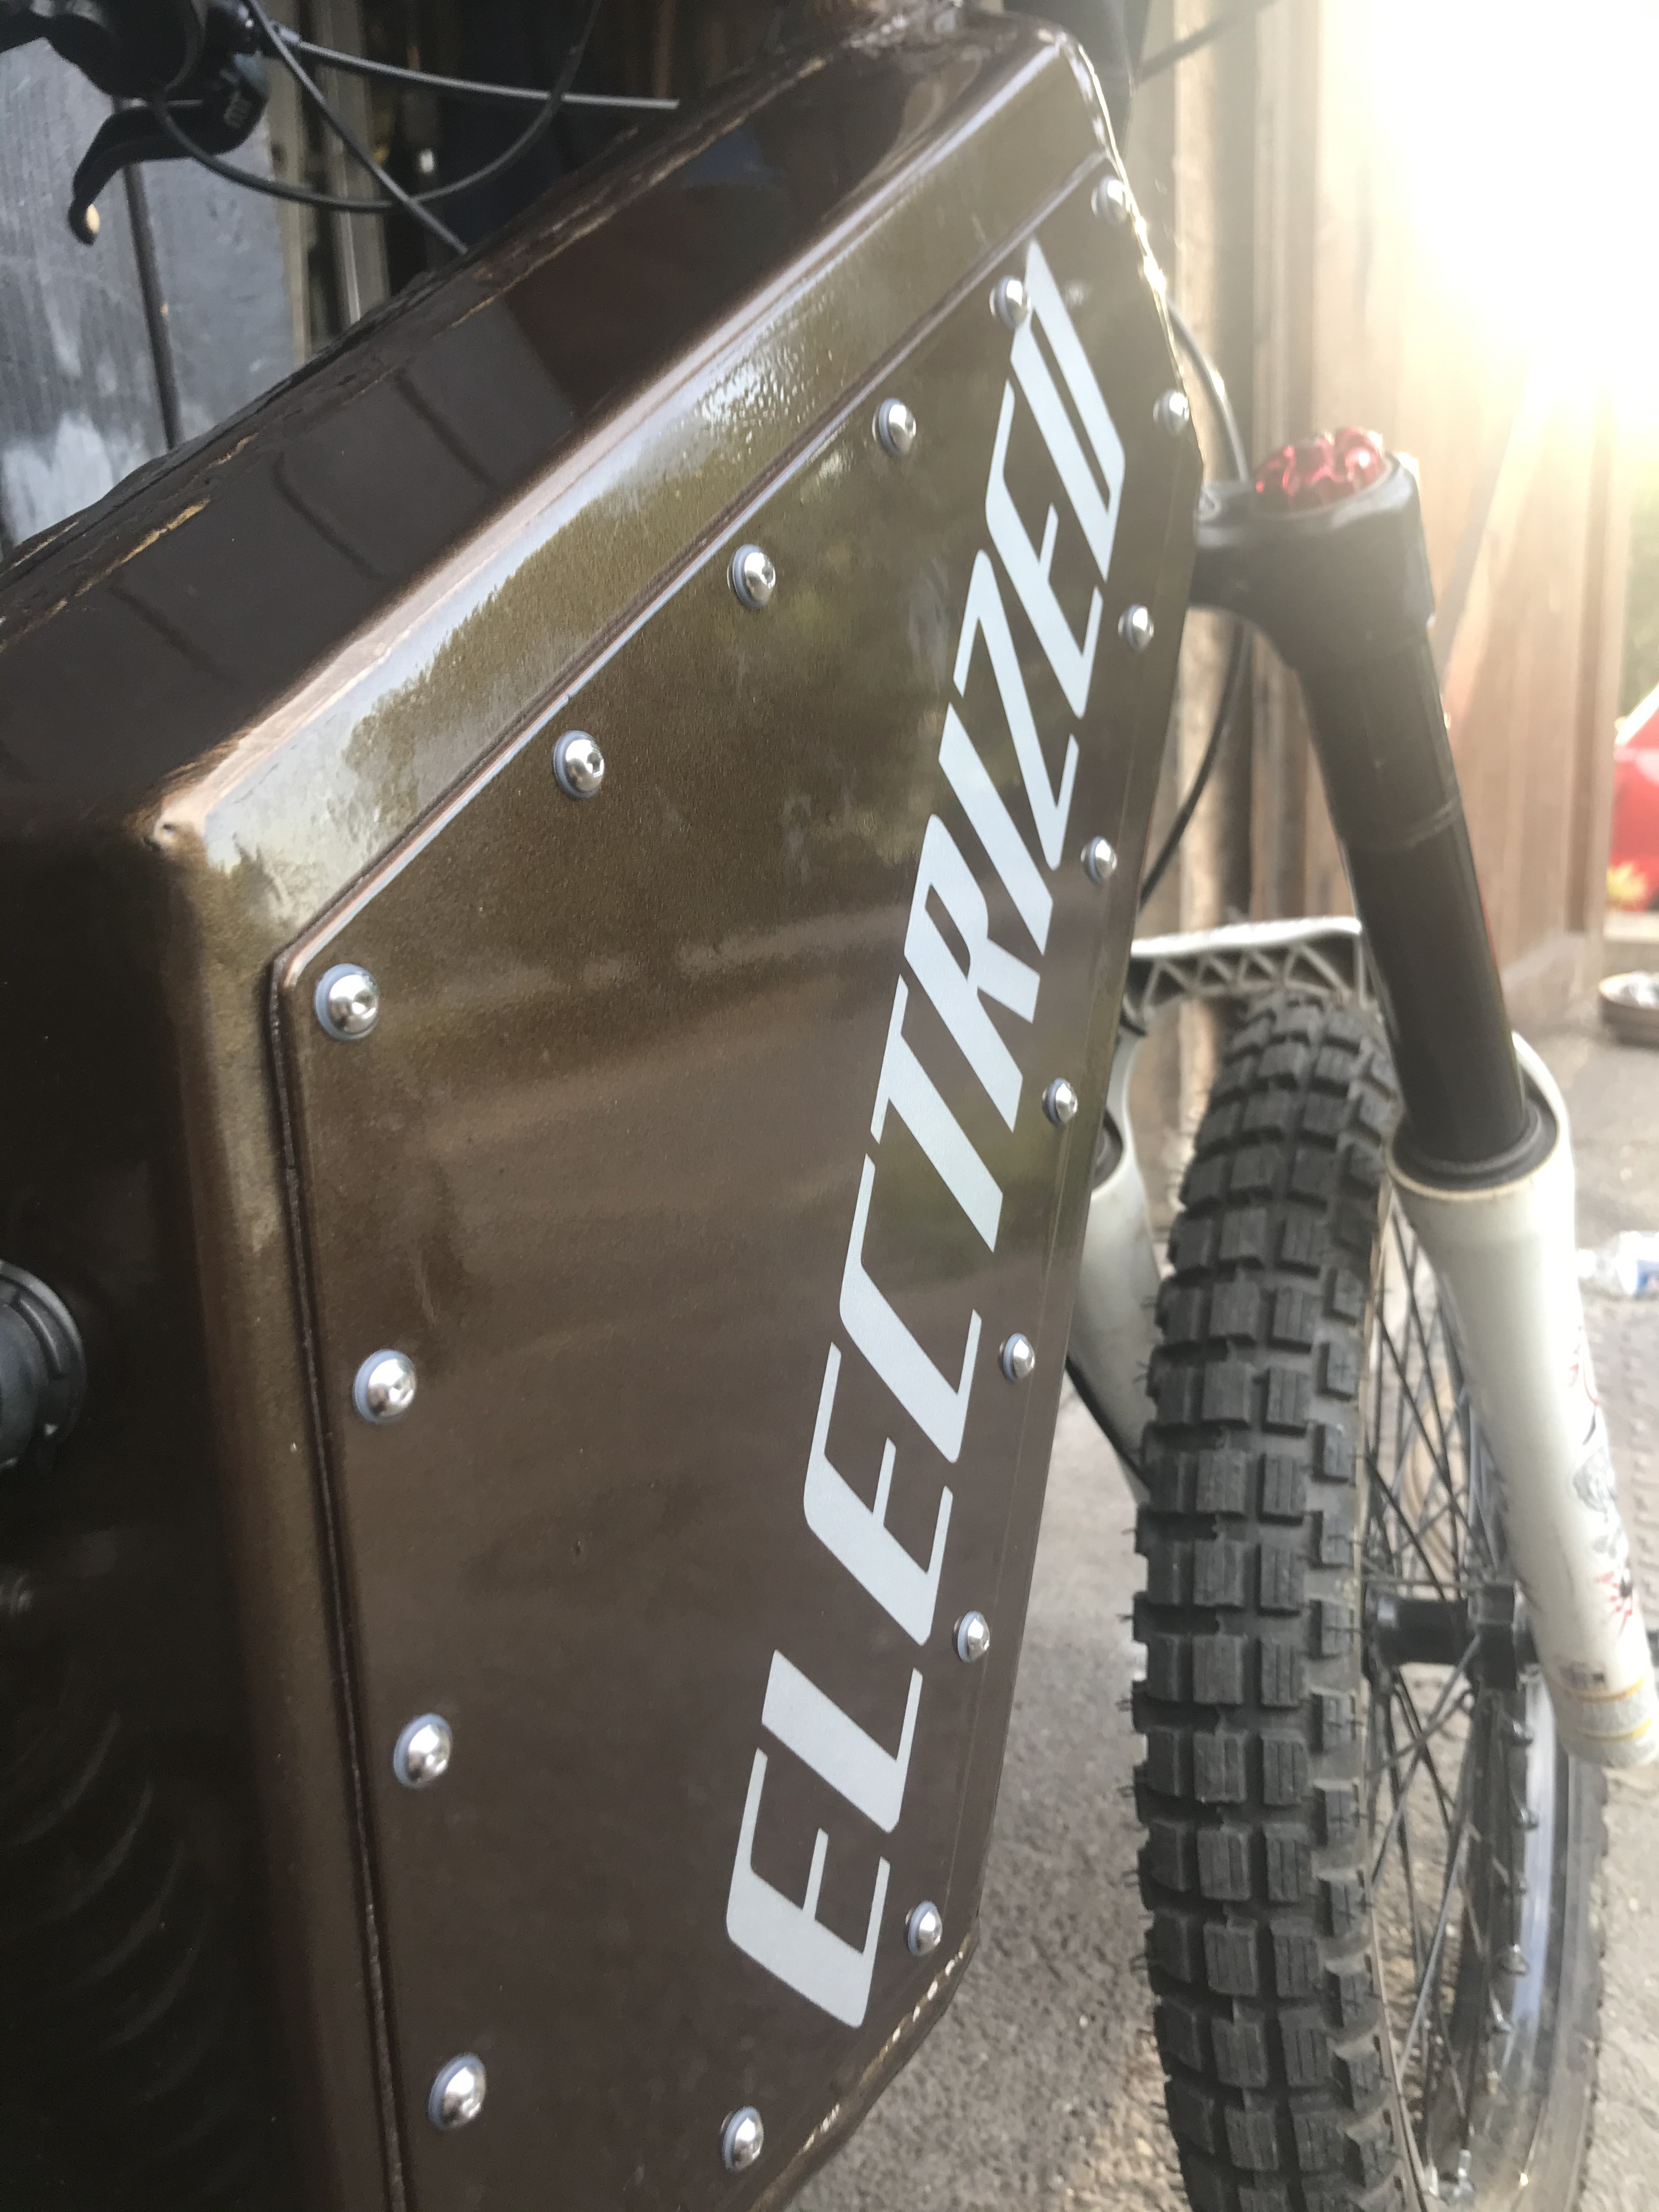
final result exactly like I wanted

and after some burnouts in the garden :lol:
That's all, I don't have more pictures
The bike has now some months of trying, and kilometers, some wires issues but still works fine without surprises
Hope you enjoyed read it :wink:
I wanted to show you my built ! A big electric bike made from a Specialized big Hit
Electrized with a MXUS 3K turbo, sabvoton 72150 and 20s8p battery (vtc5a cells)
here is the bike
I bought theses wheels, 19" bike rims mounted on a MXUS 3k turbo (4T) and the same on a bicycle hub for the front. With shinko 2.75" tires.
the first step was to disassemble the bike and remove all the actual paint :
here is an assembly test
First problem, the actual frame dropout will not handle the motor torque nicely.
The second is there's no clearance between the motor and the actual caliper.
maybe it will be ok with a 5mm spacer...
The cleanest solution is to rebuilt the frame dropout. It will be stronger, more reliable, and no need for torque arms
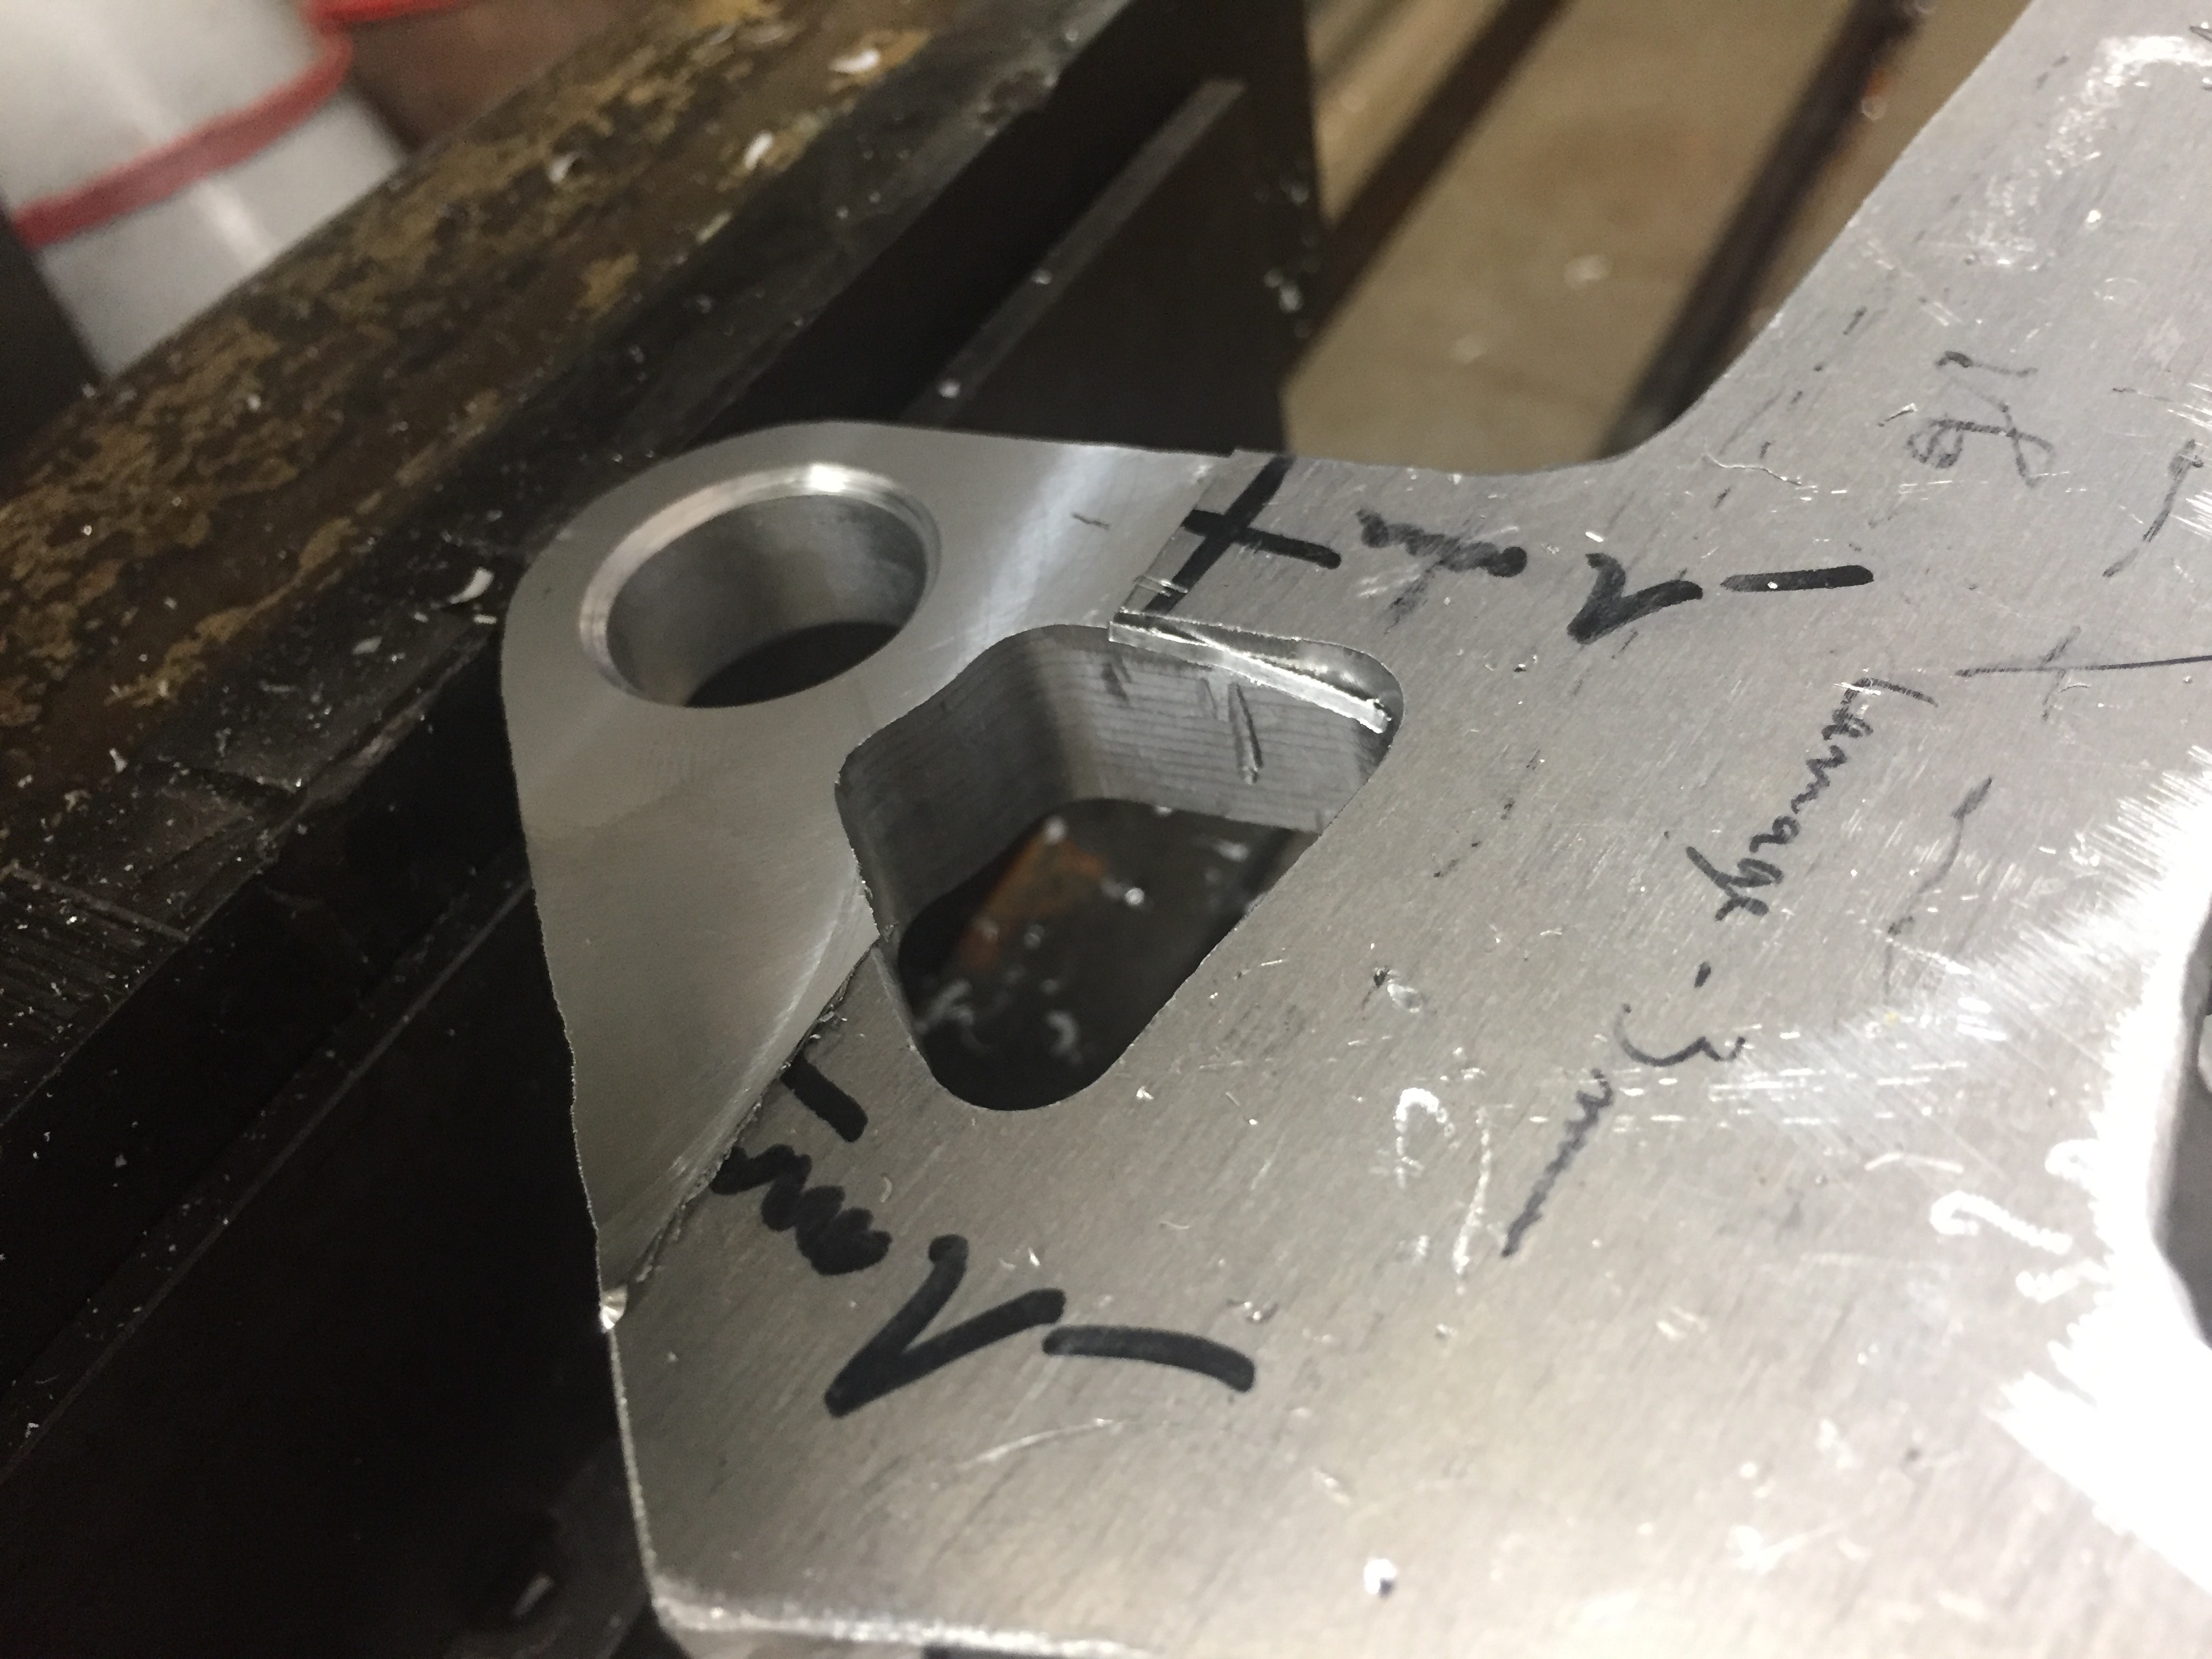
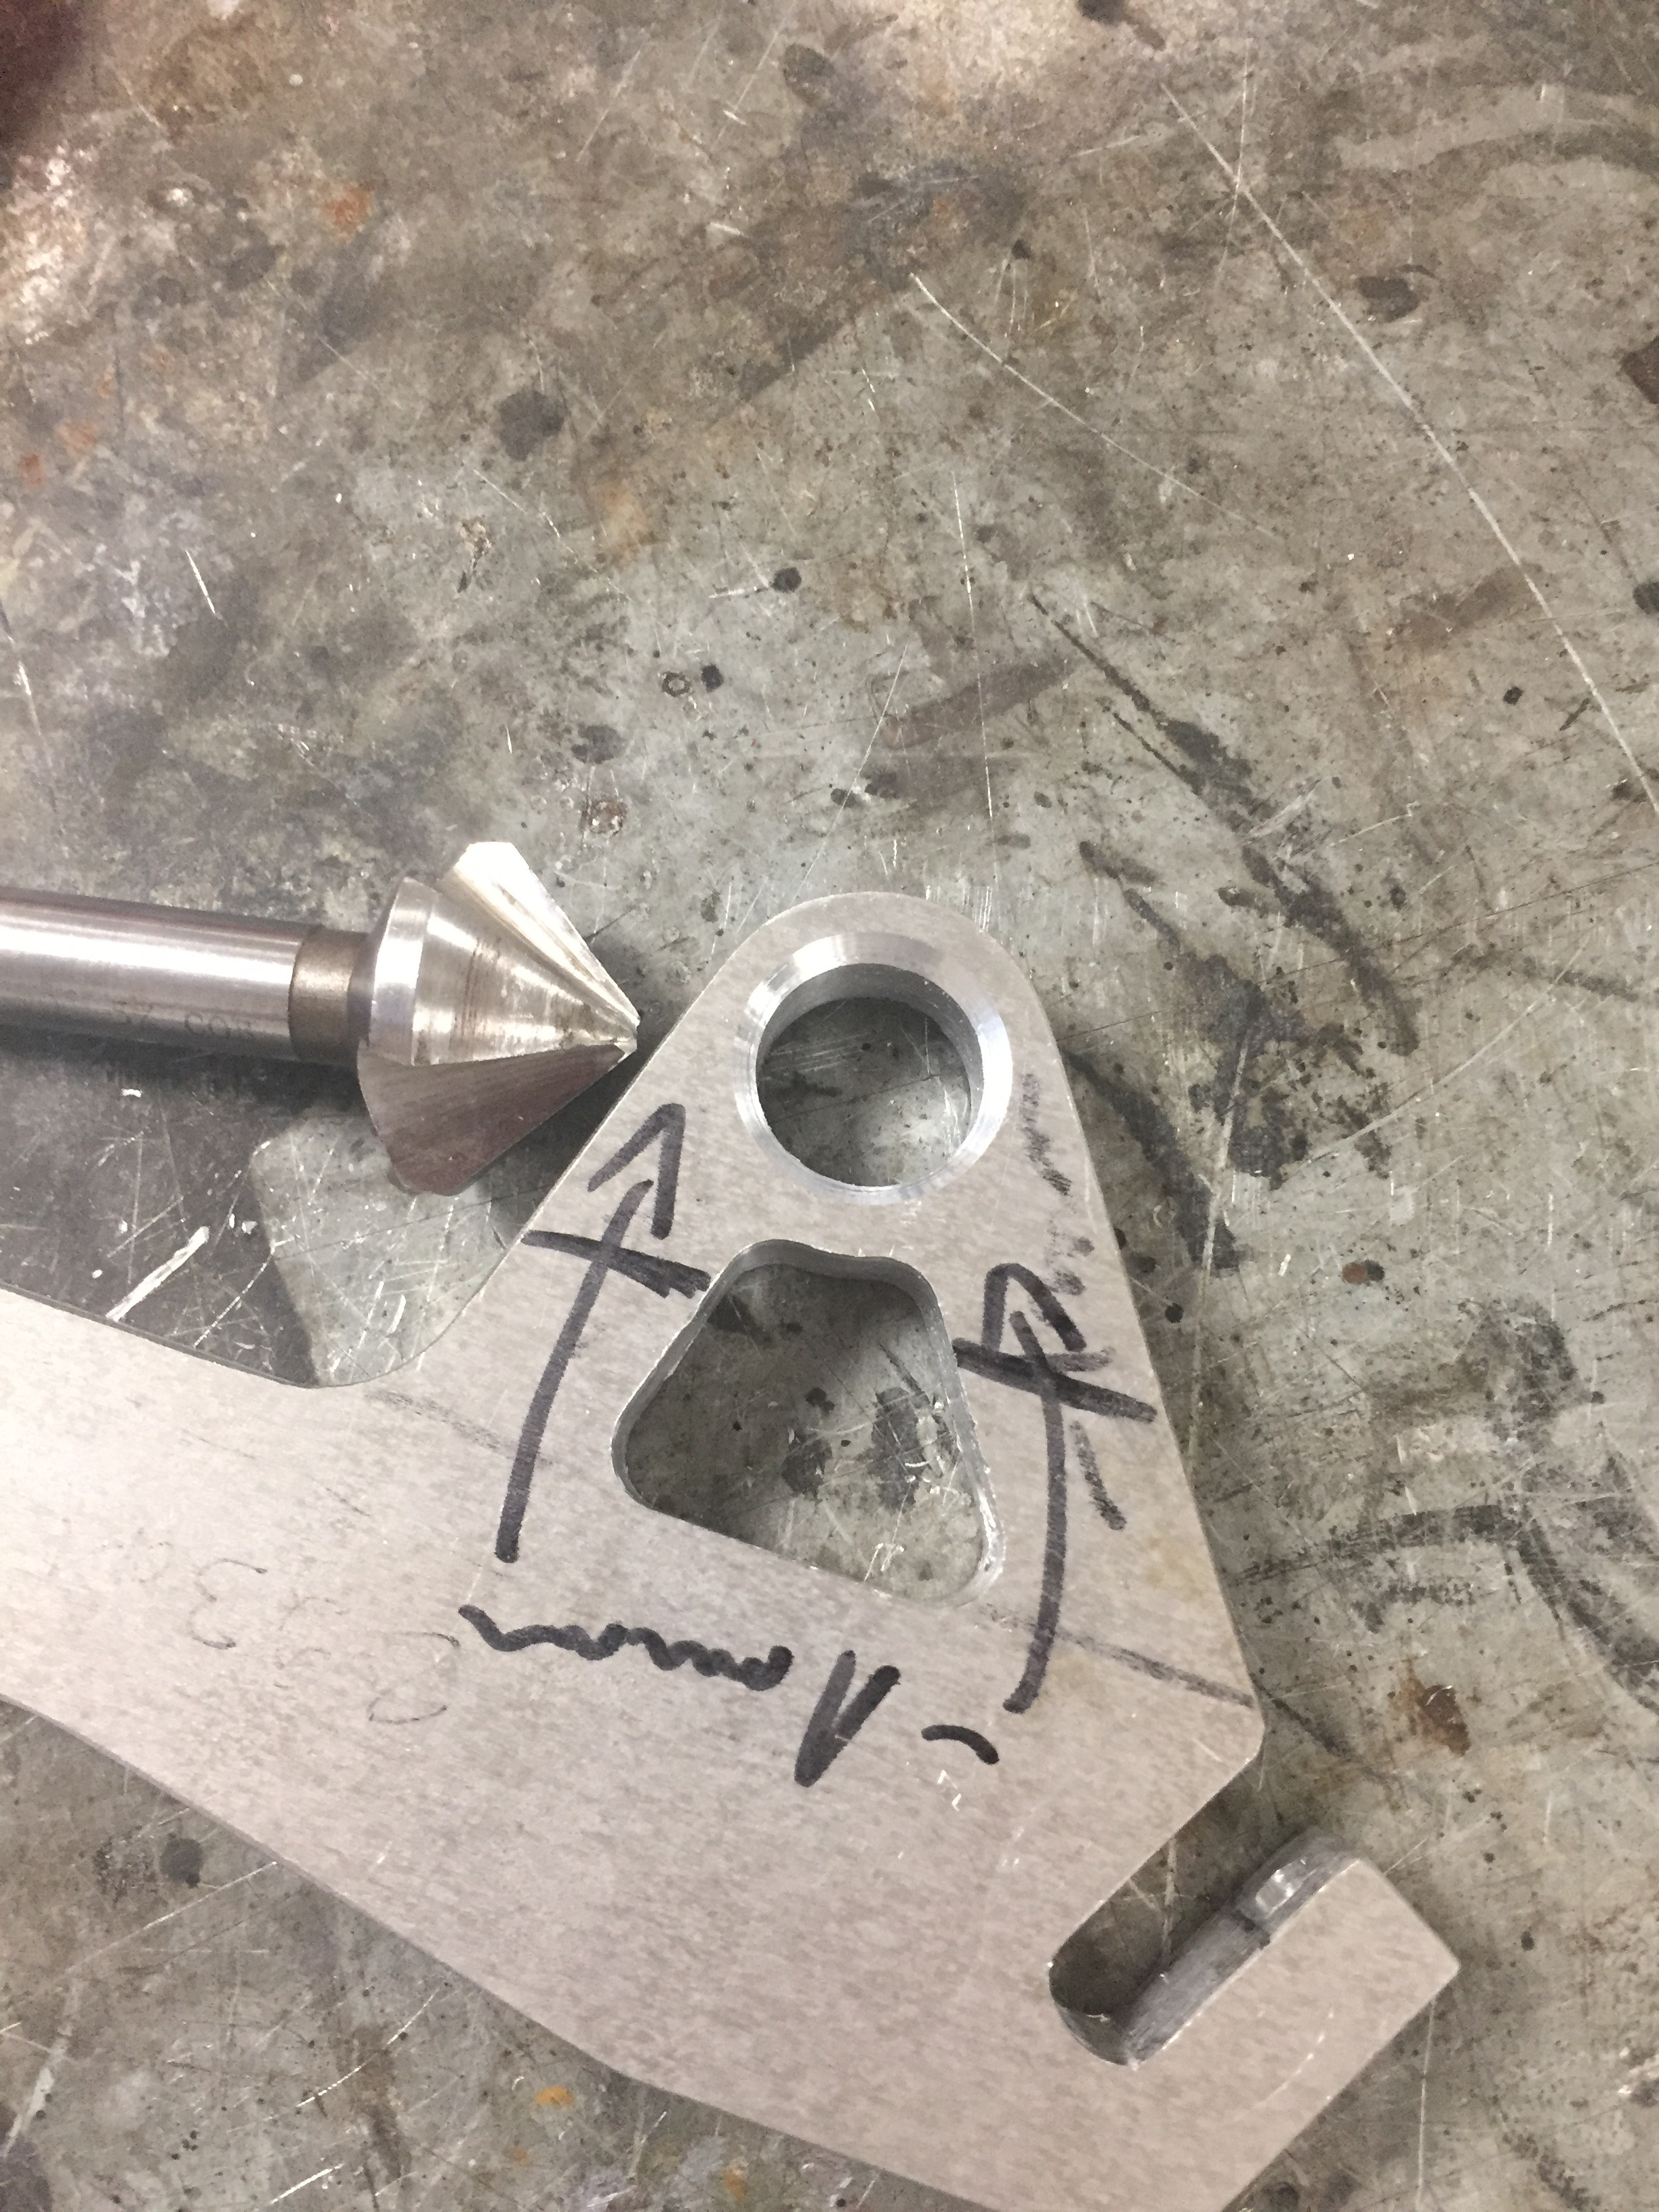
First try with a 3d printed part
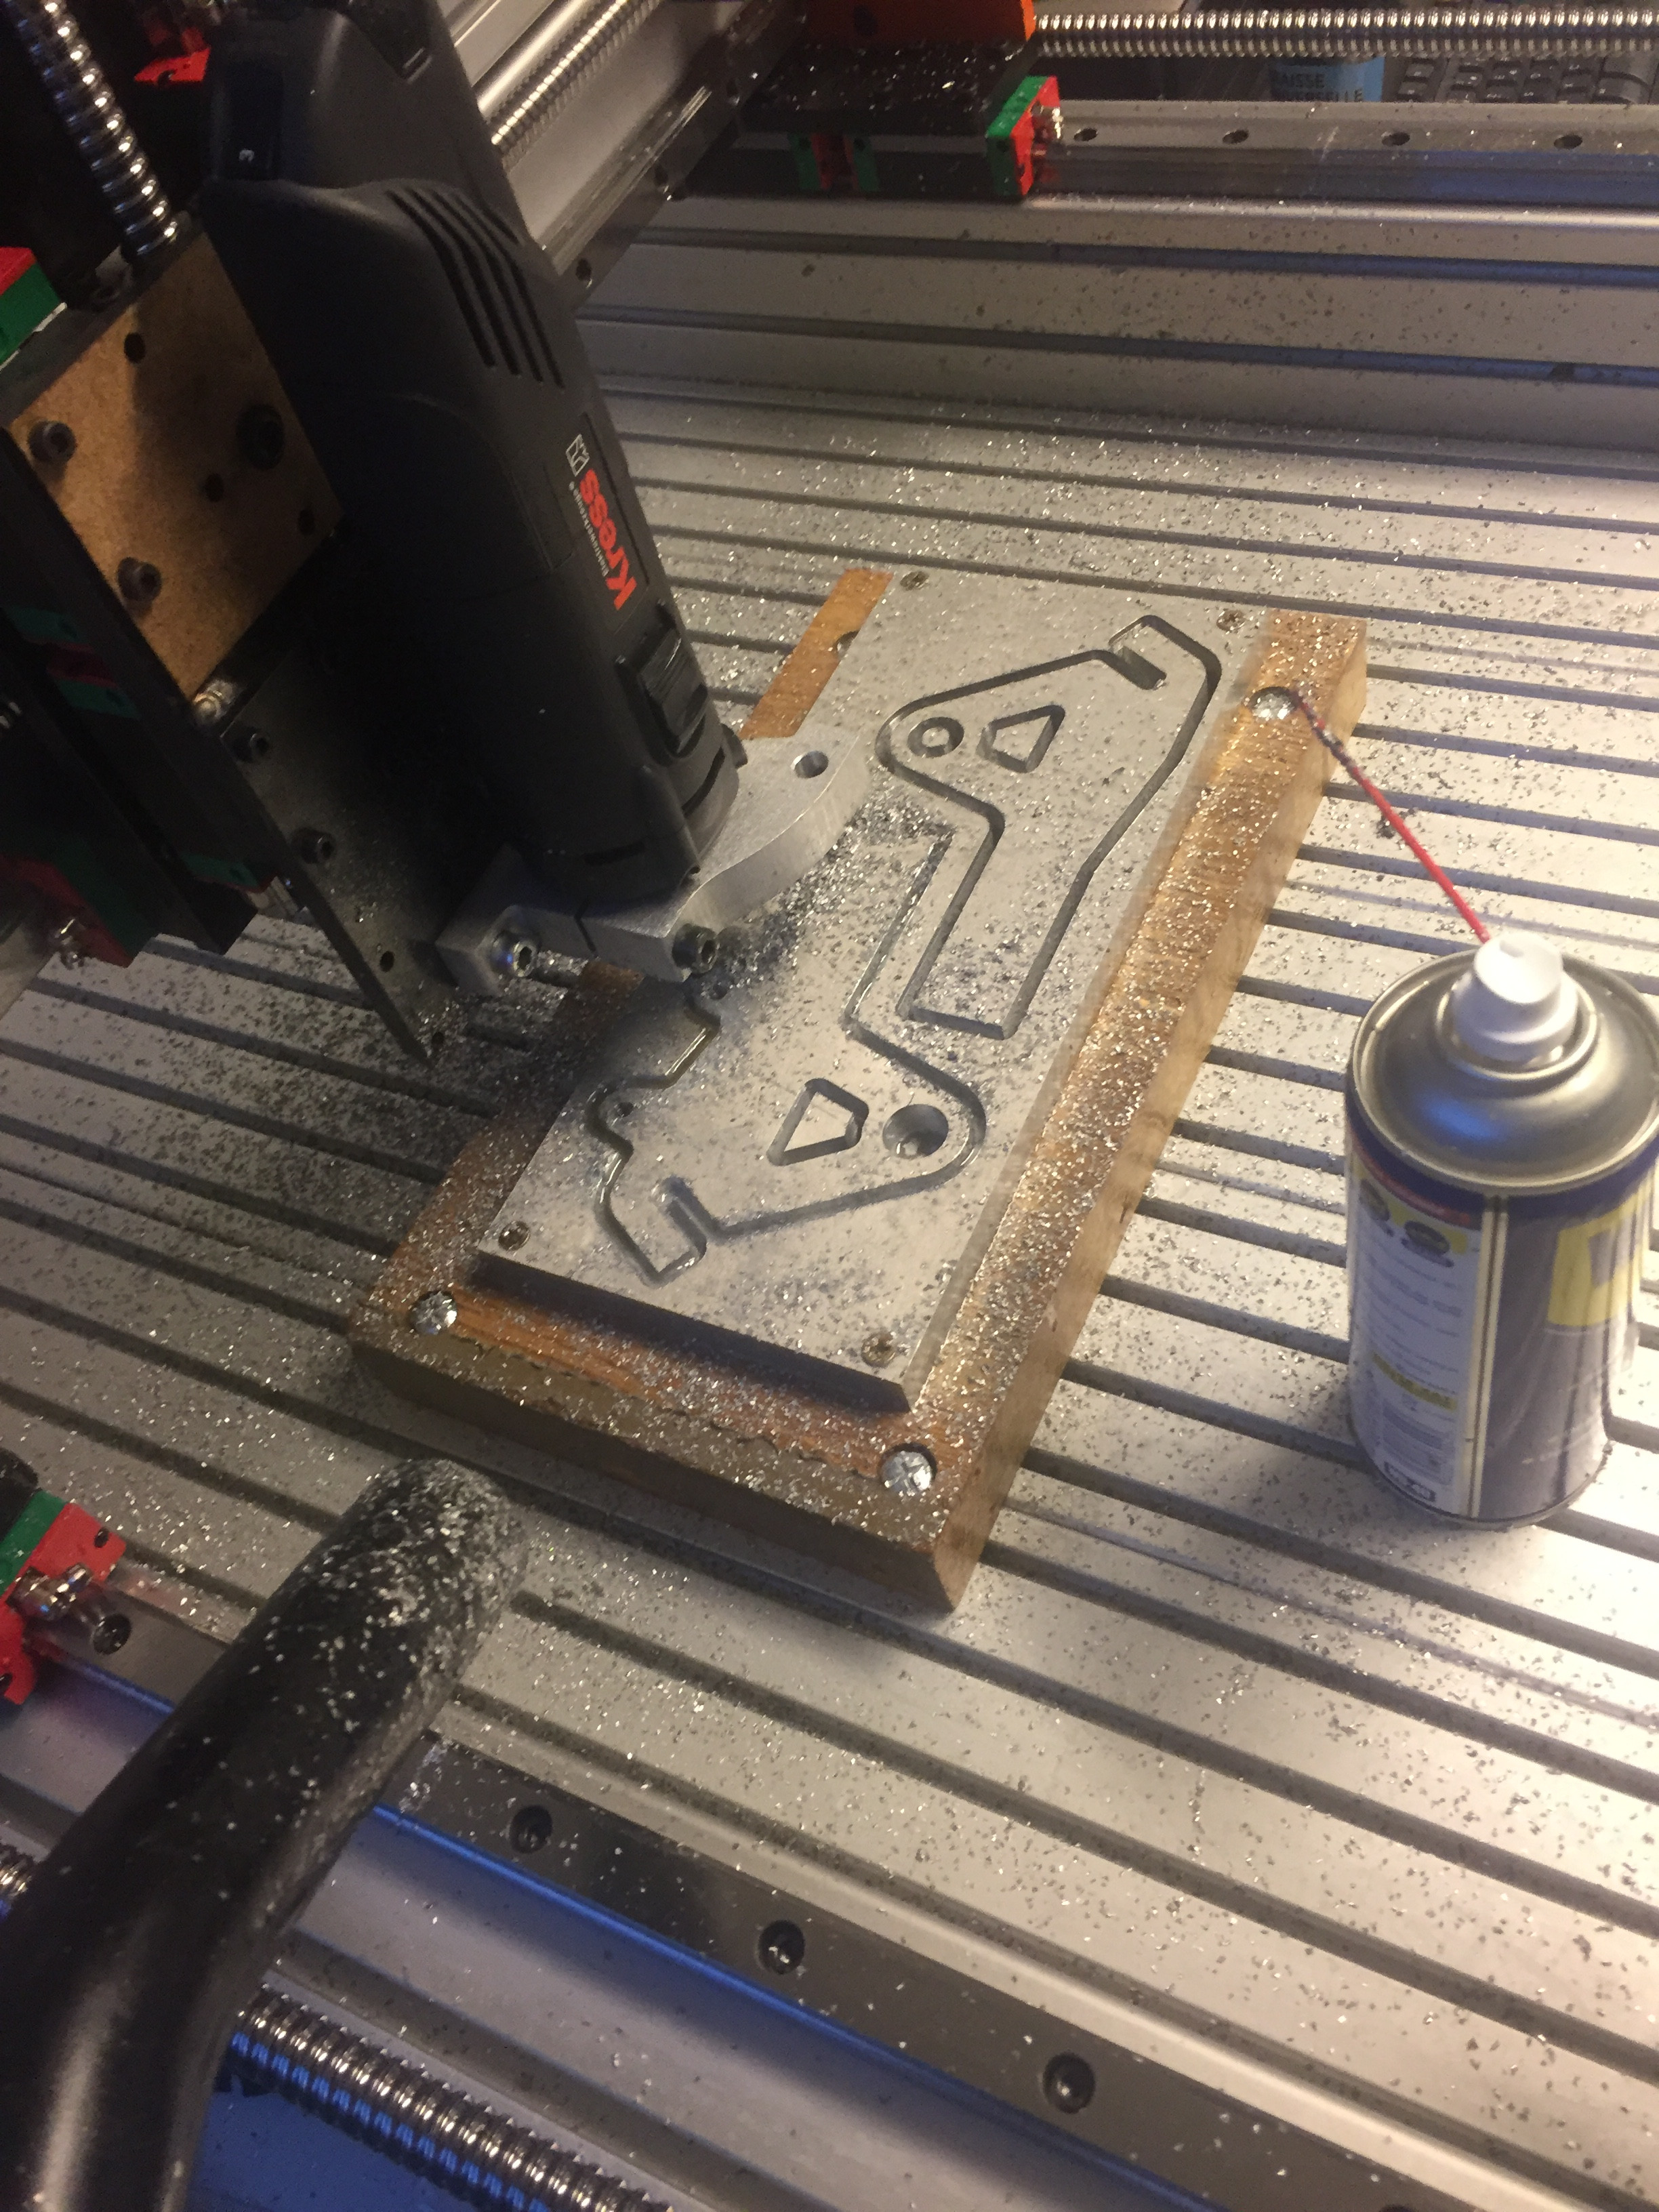
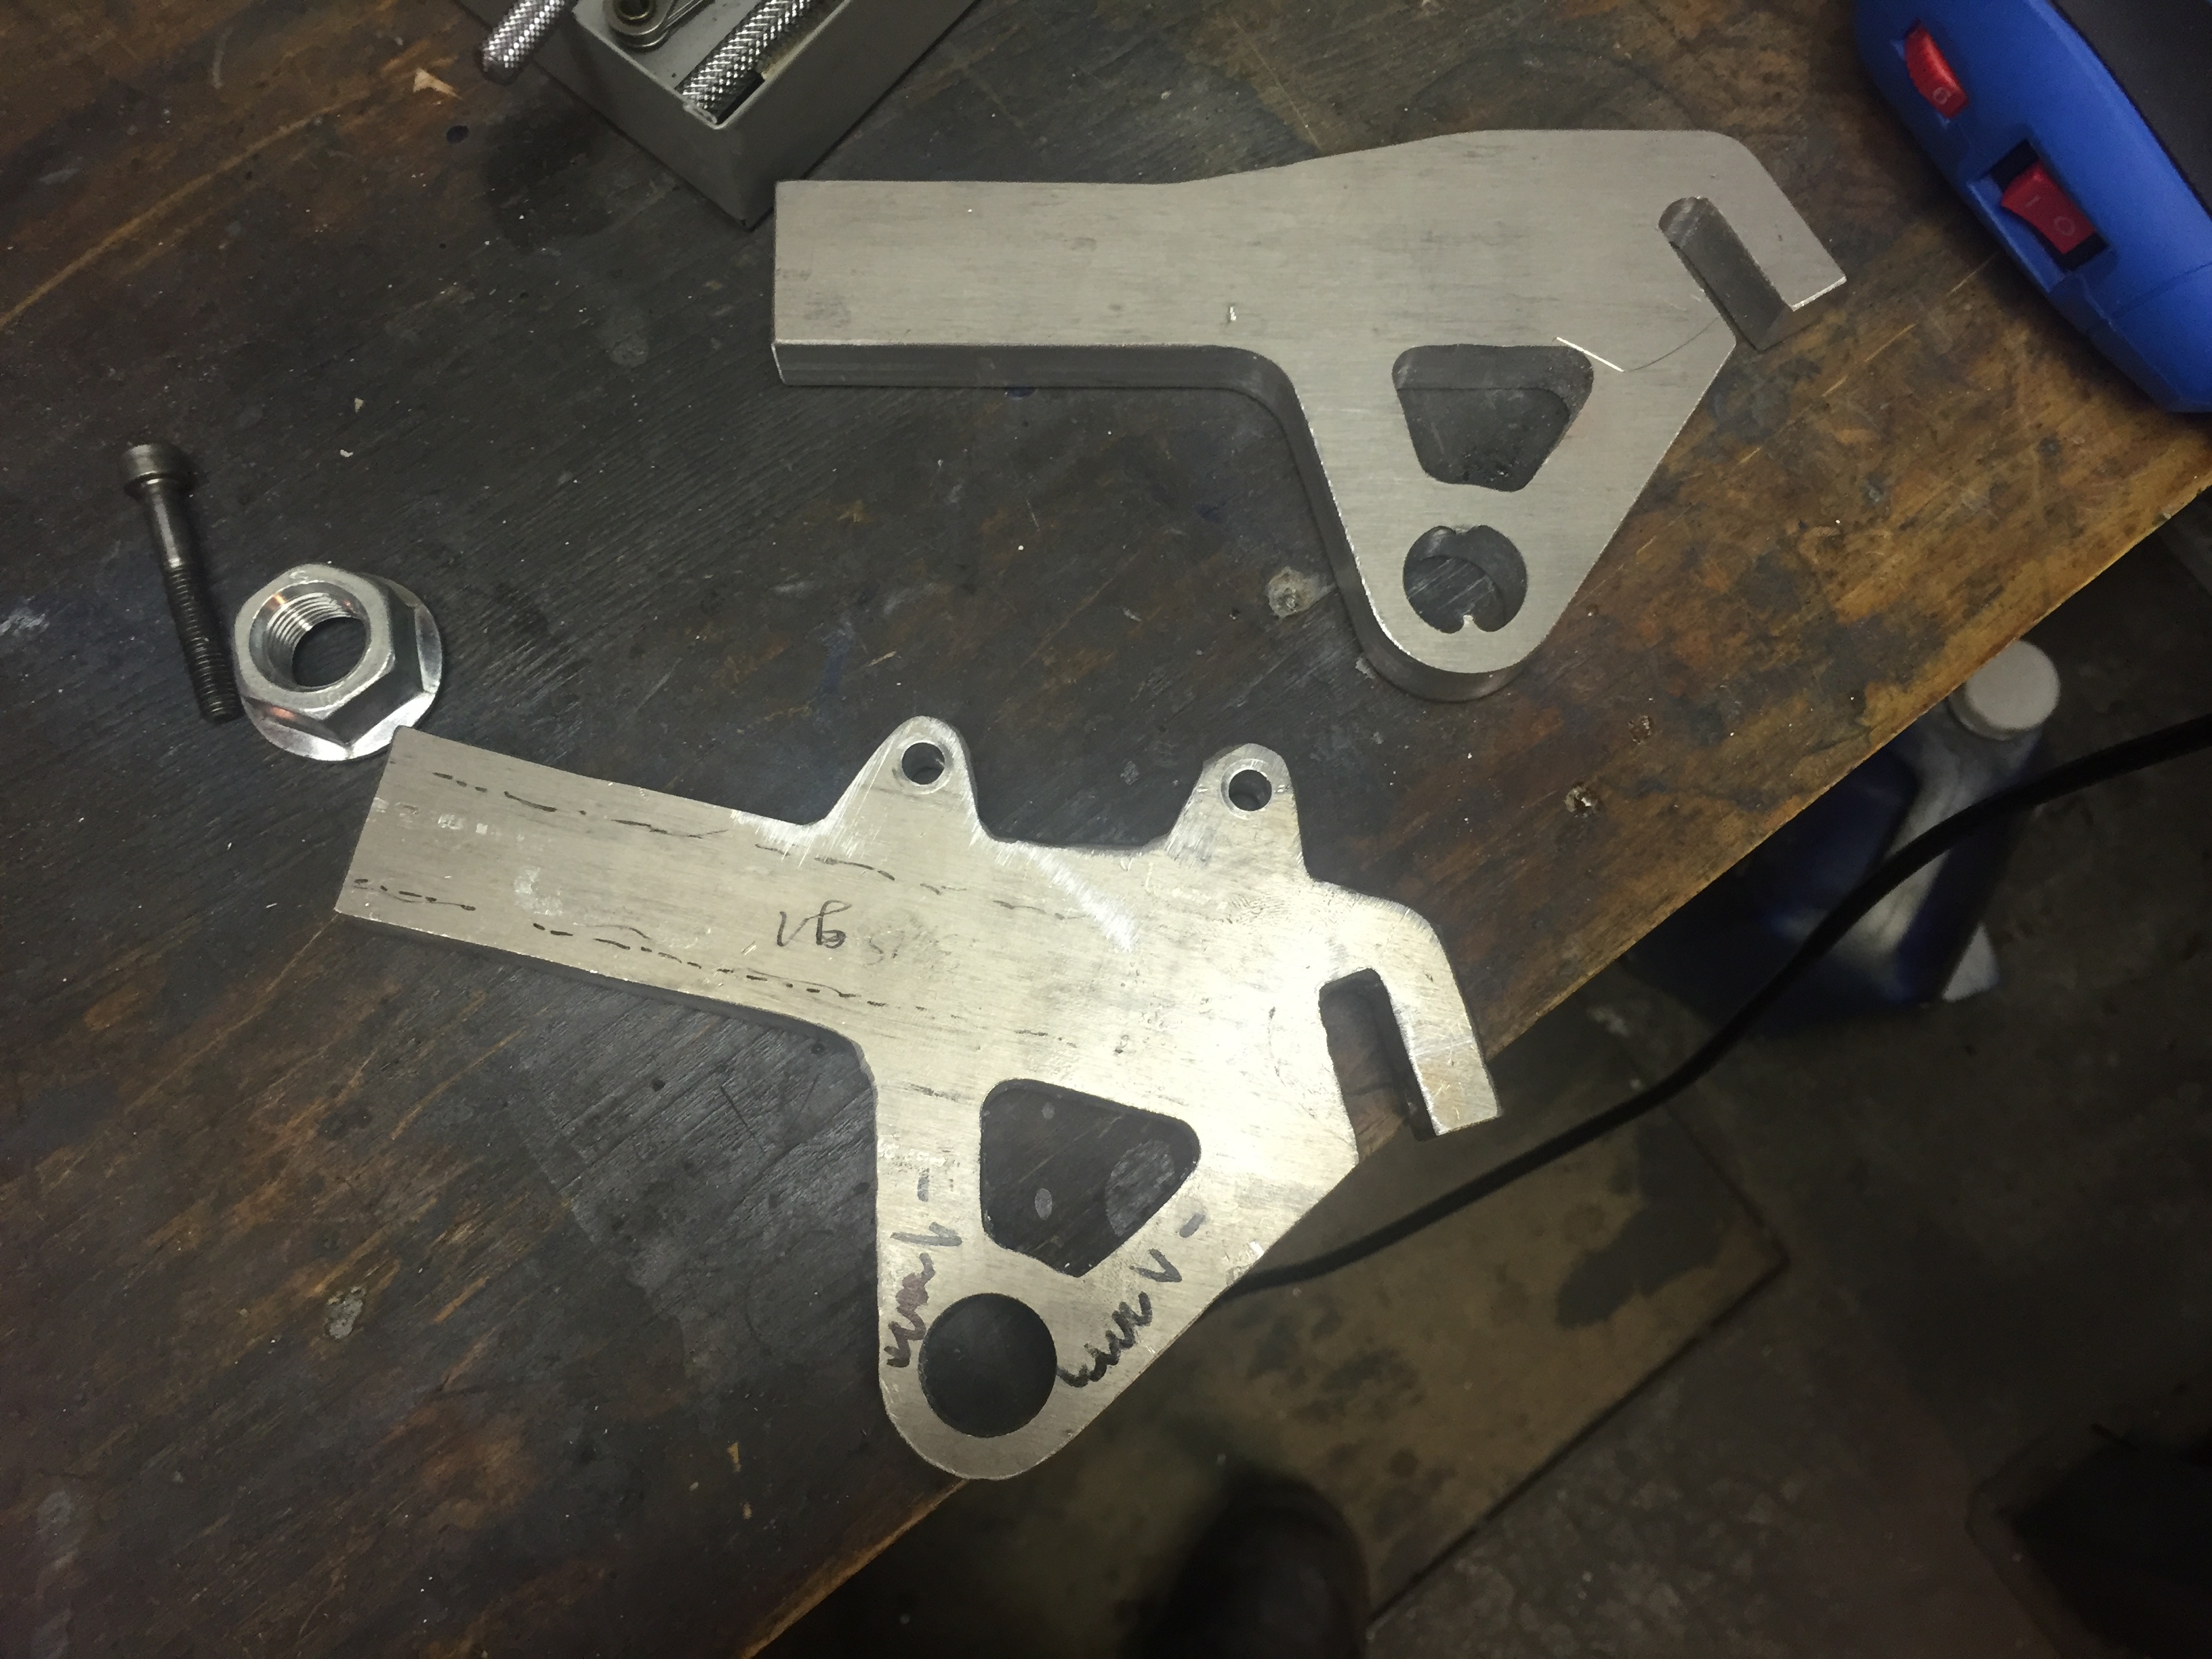
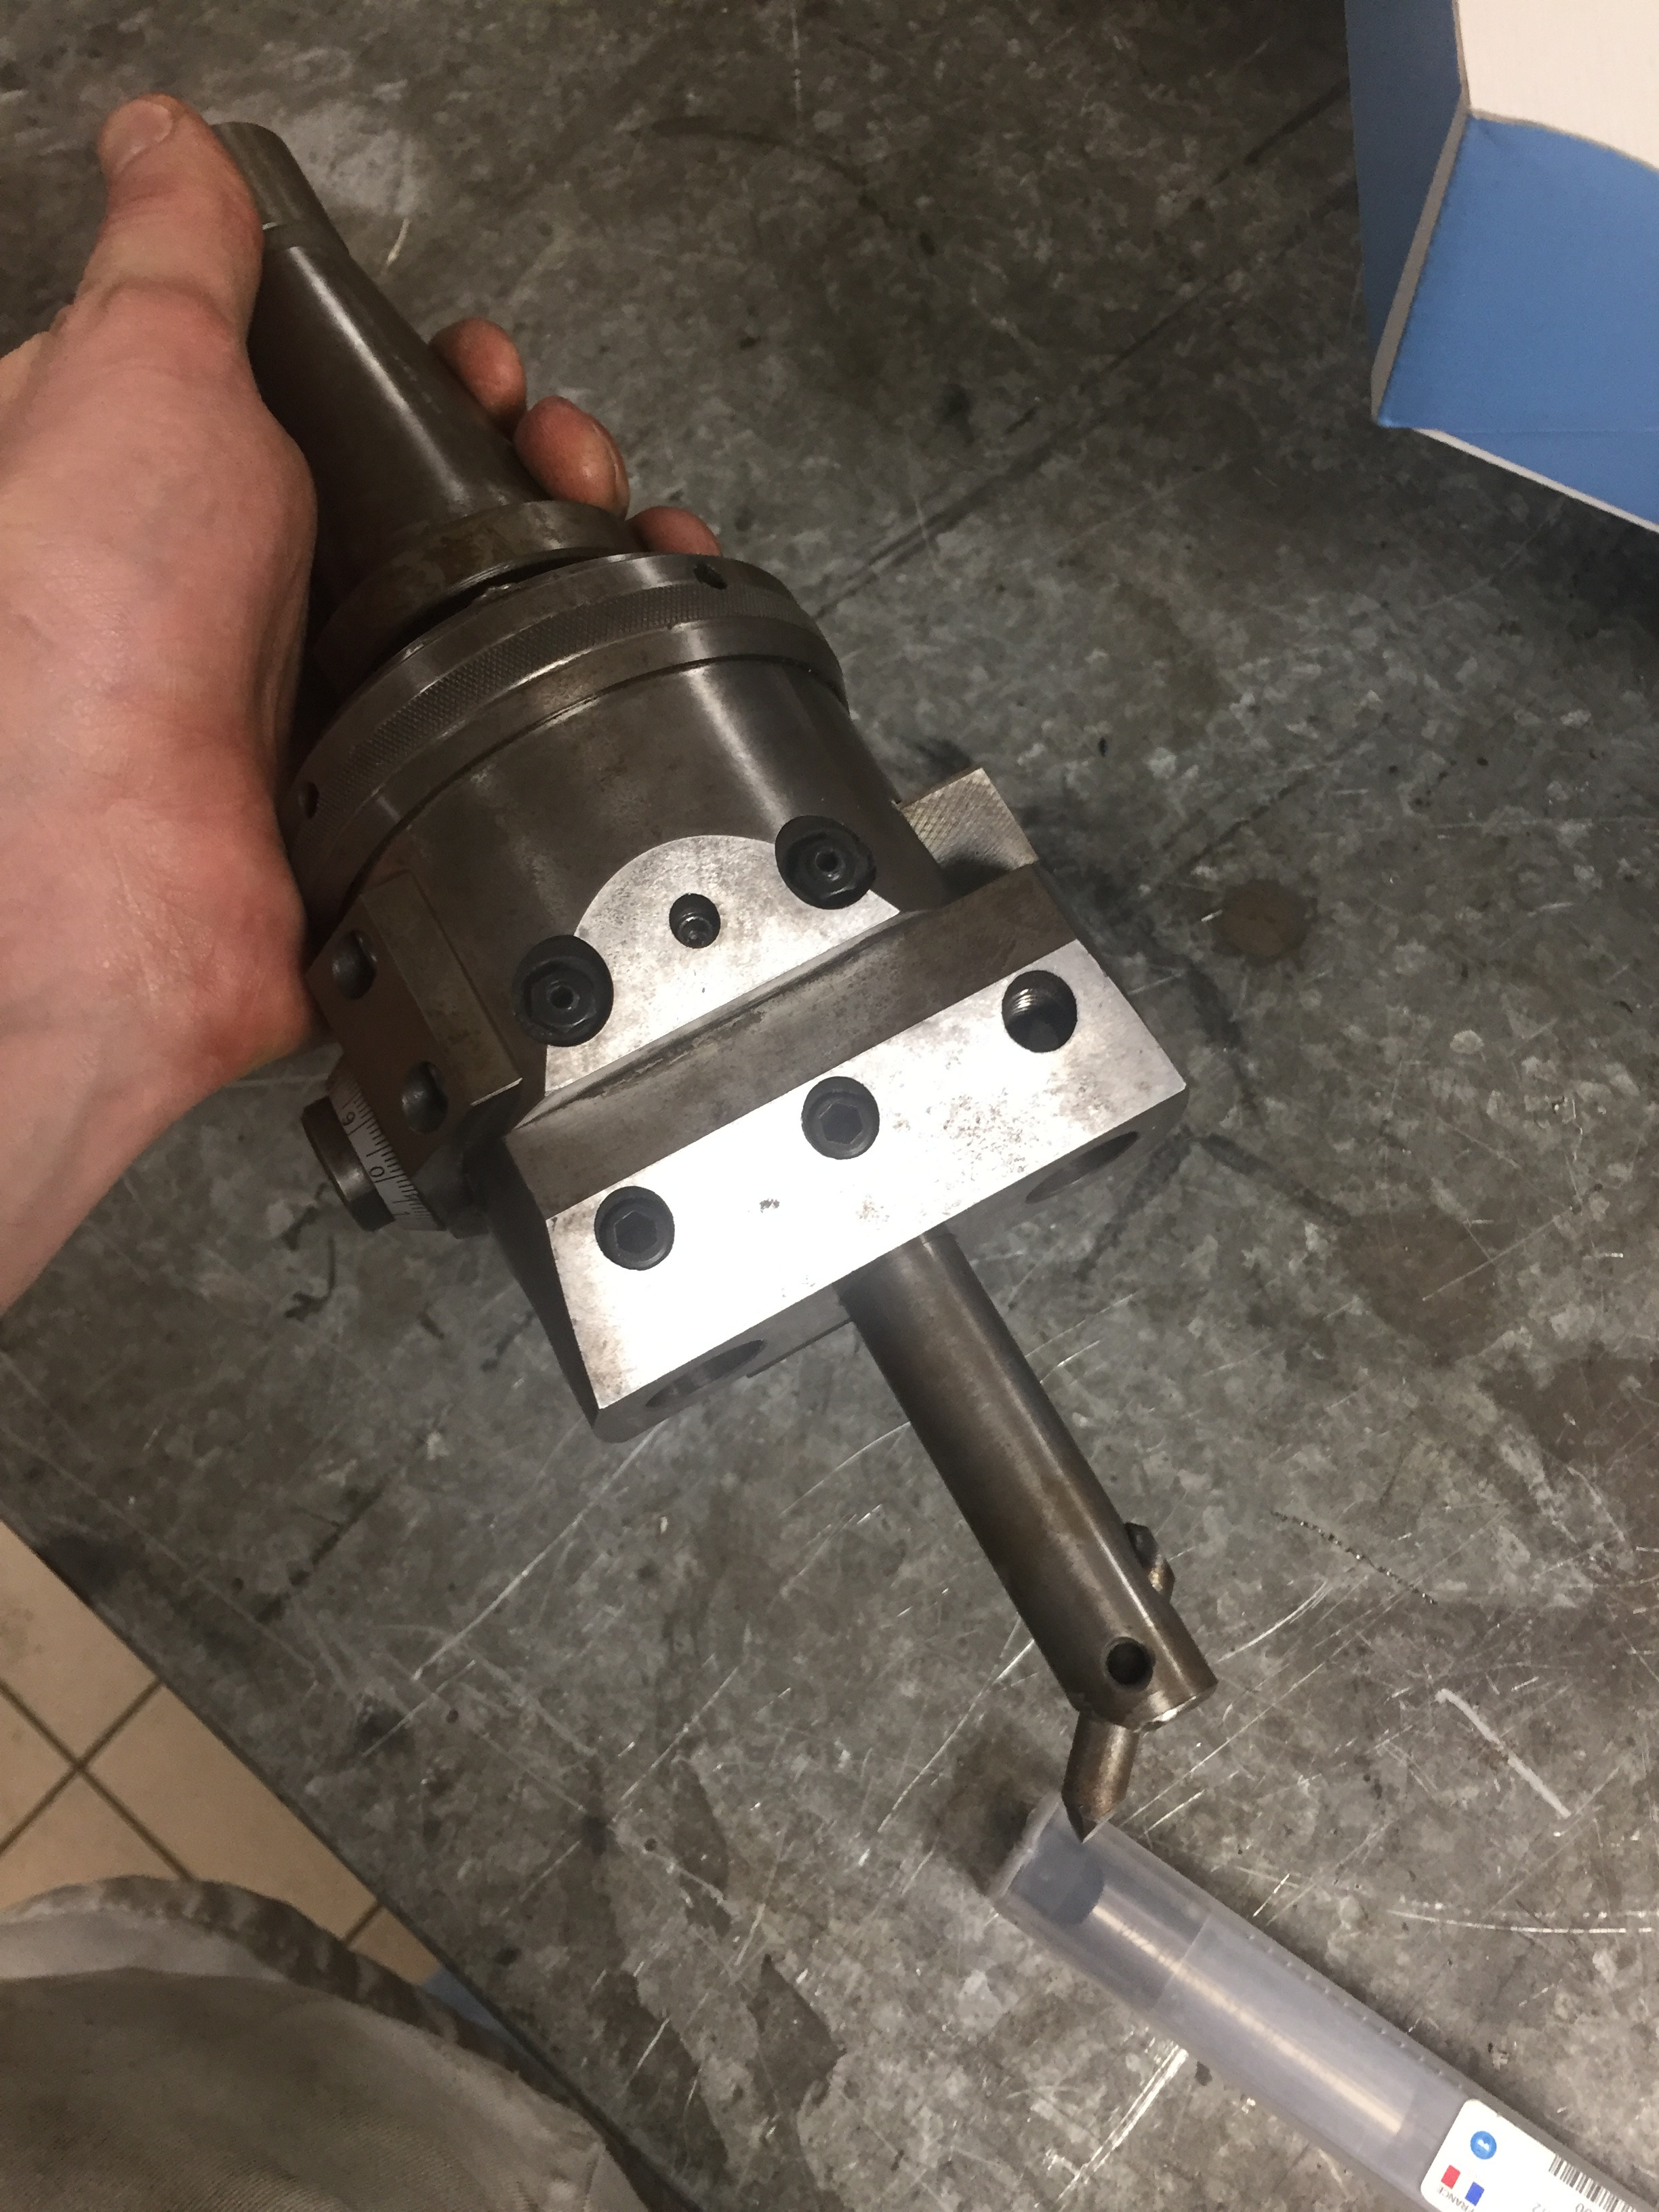
Second with a 6082 T6 aluminum part machined on a homemade CNC drill (a friend of mine made it)
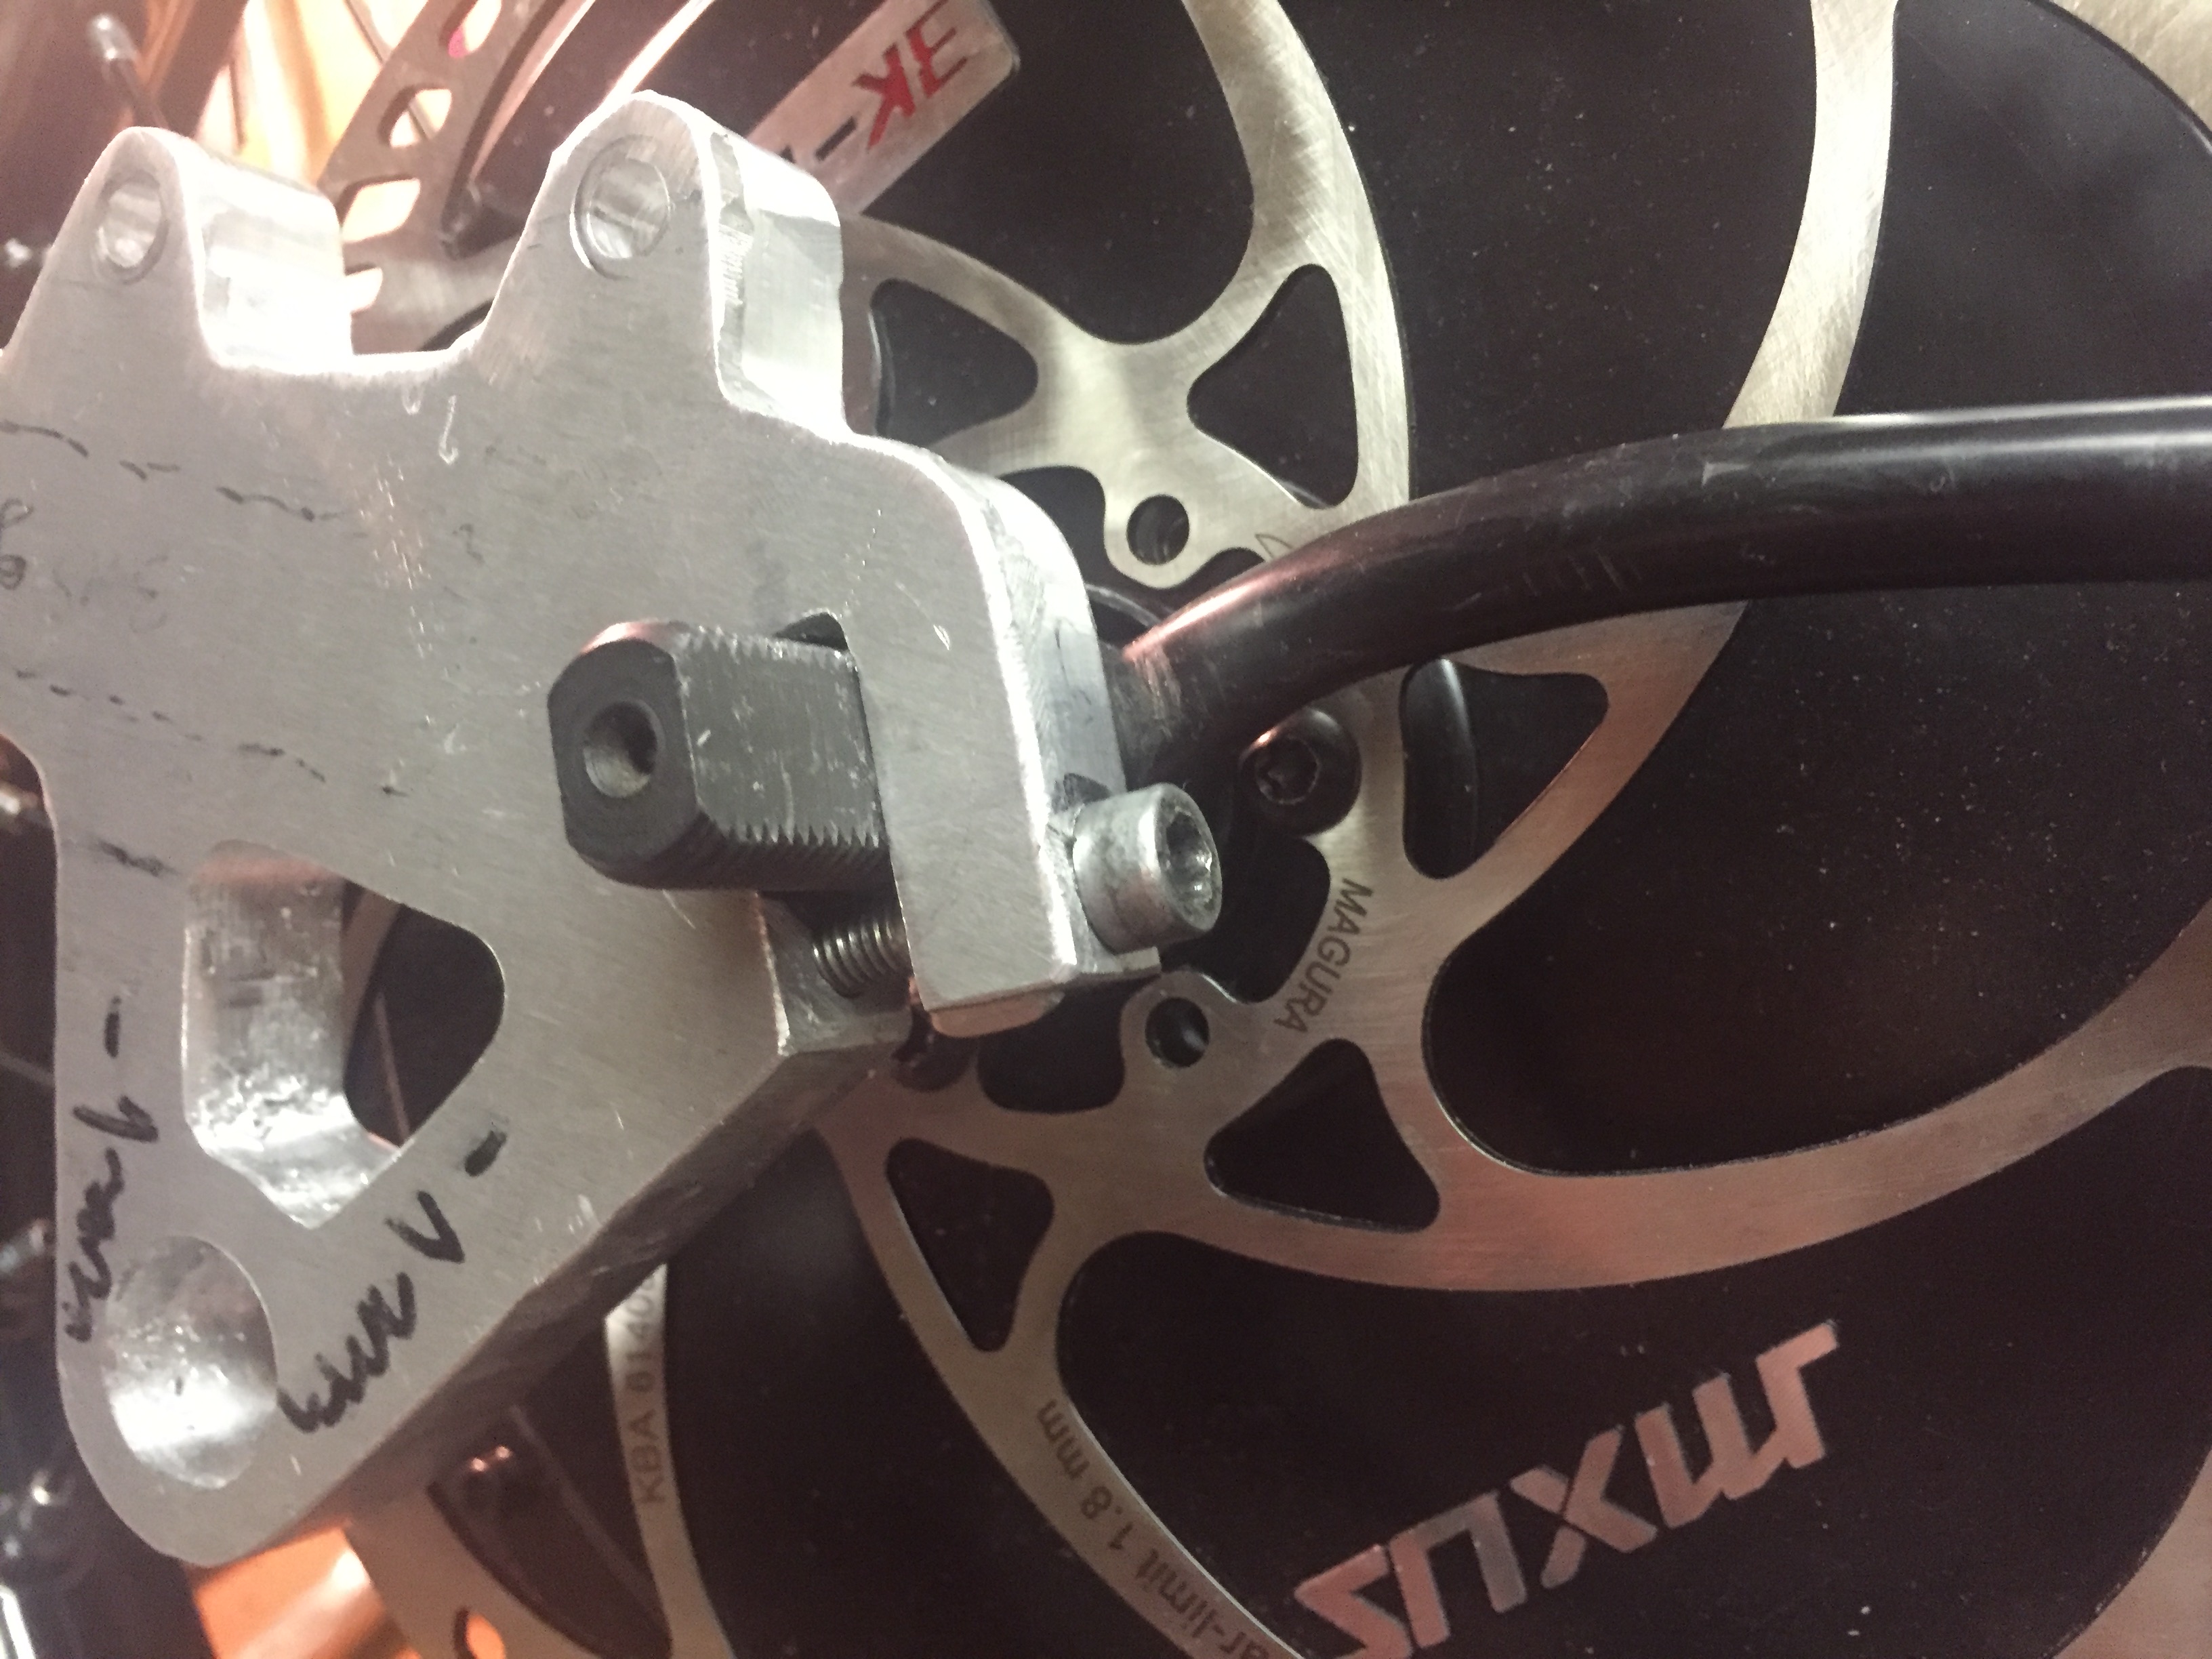
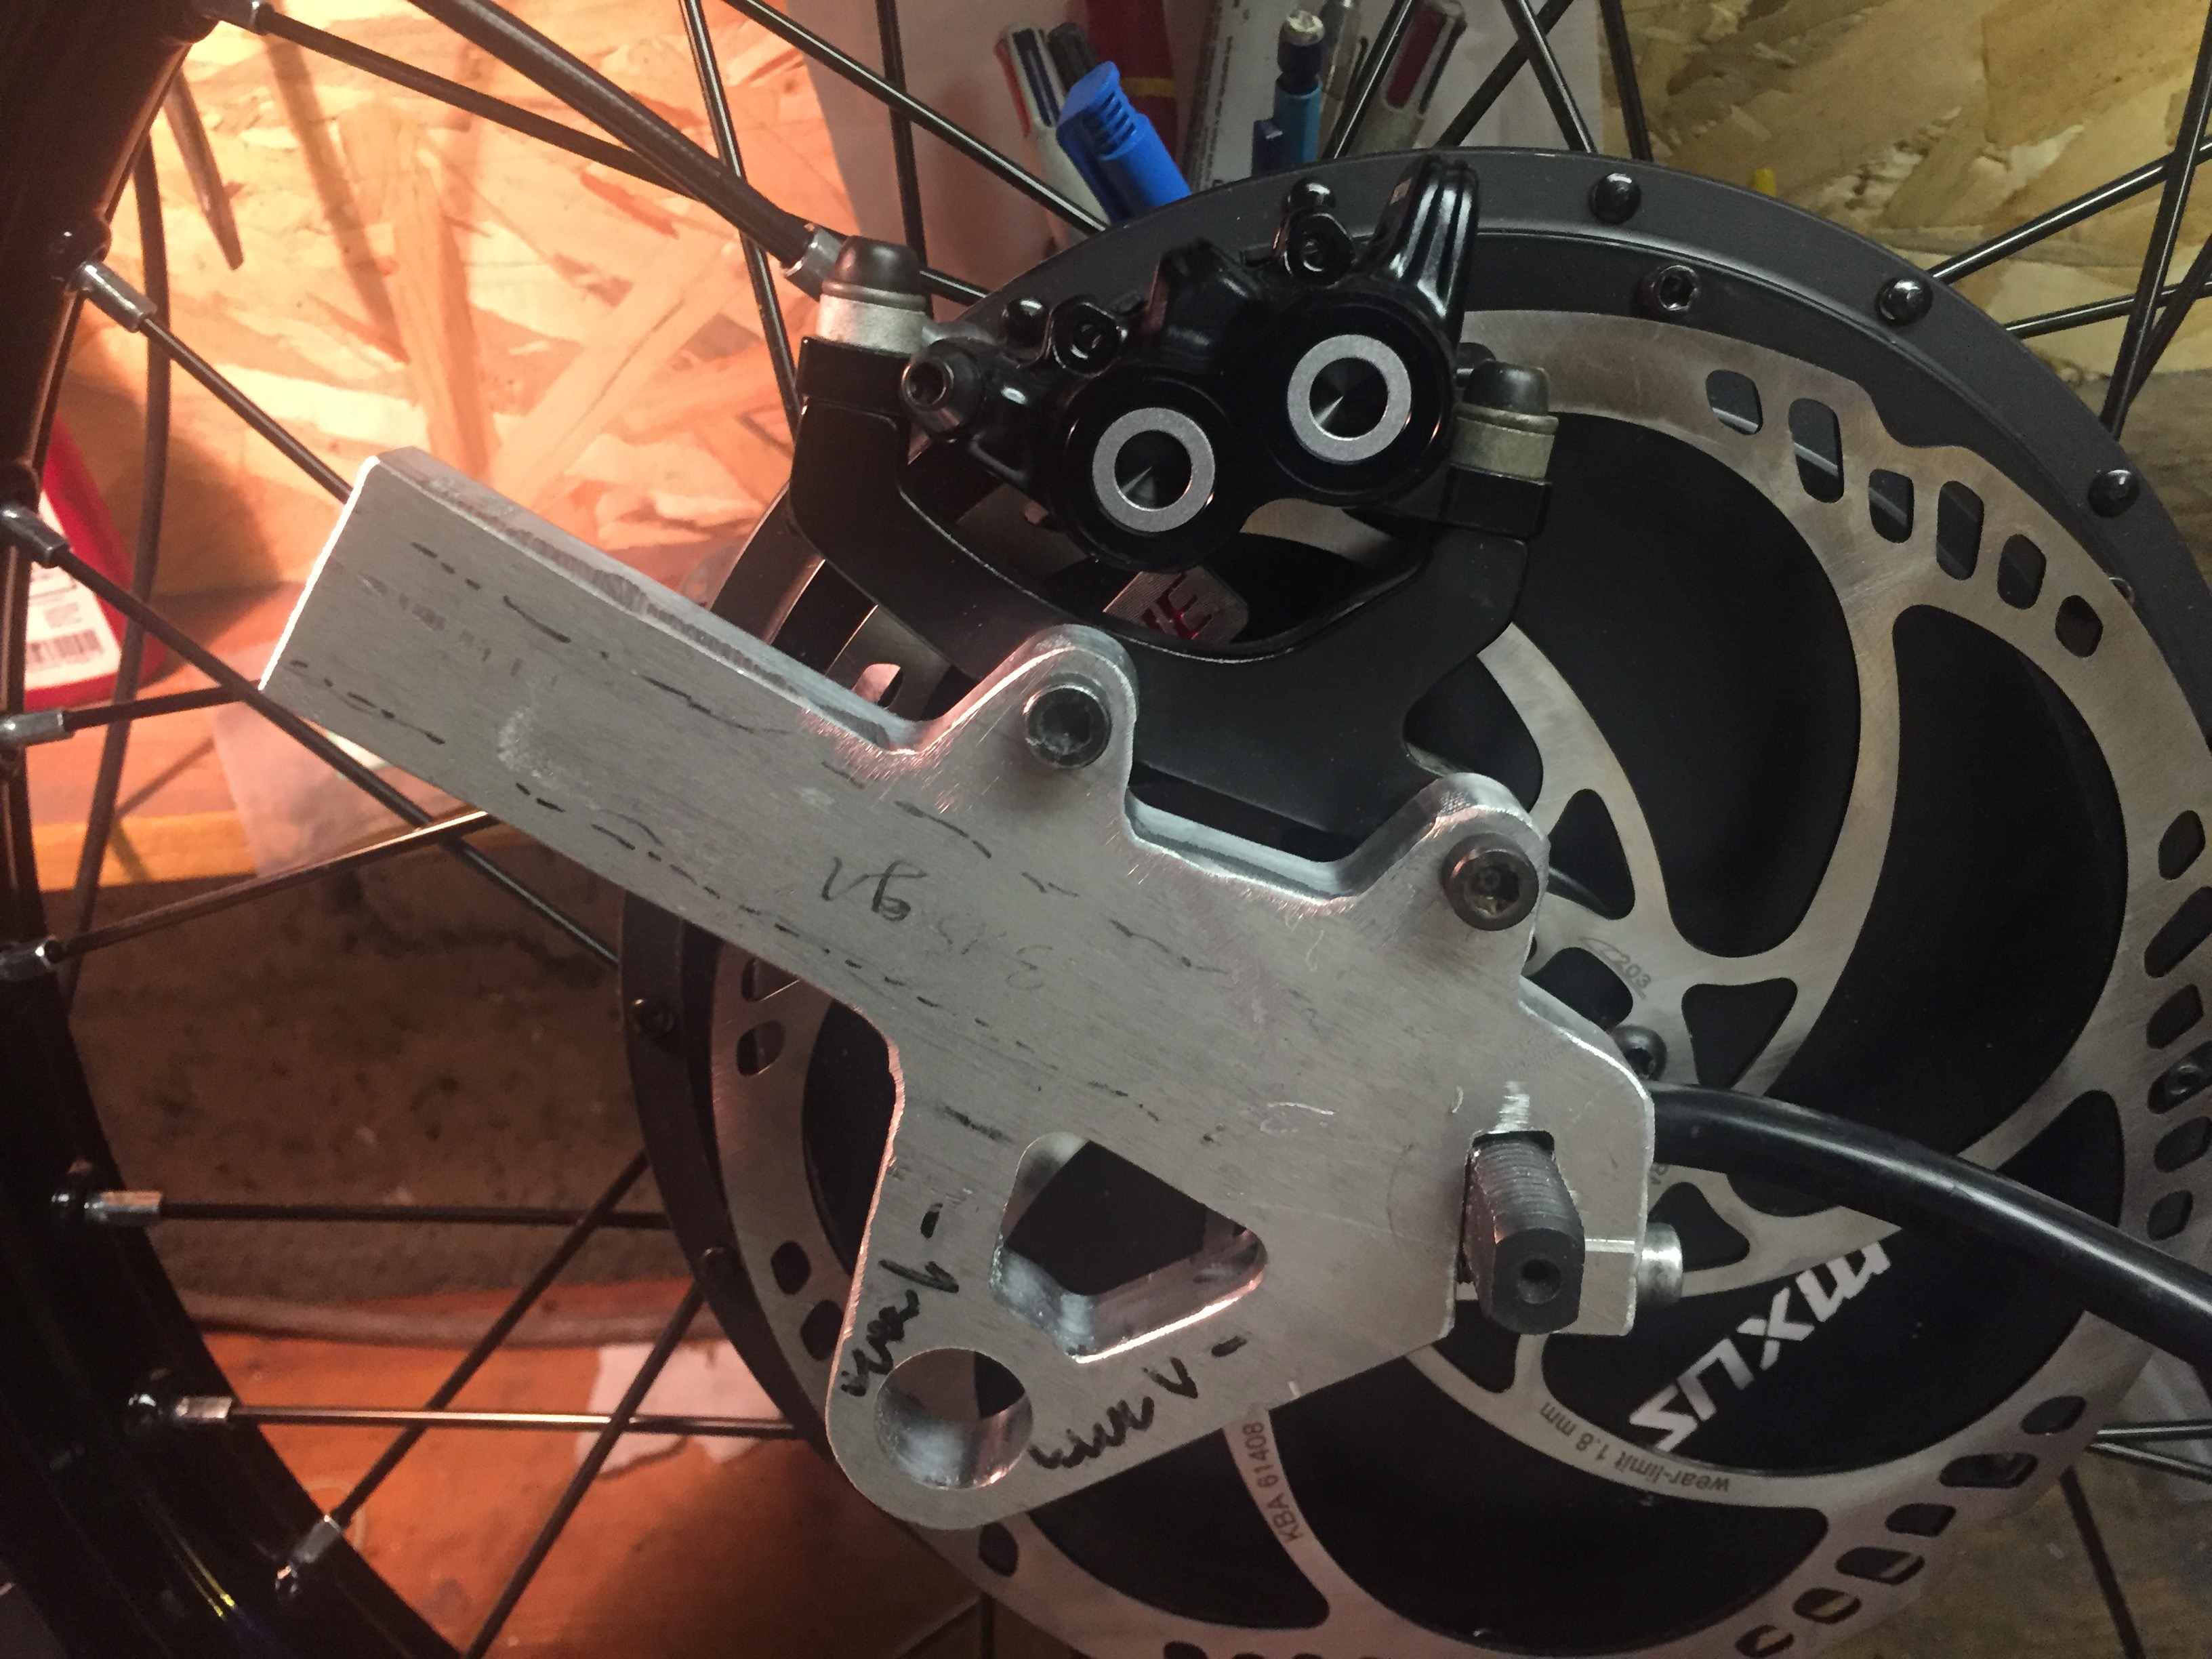
With the magura MT5 caliper
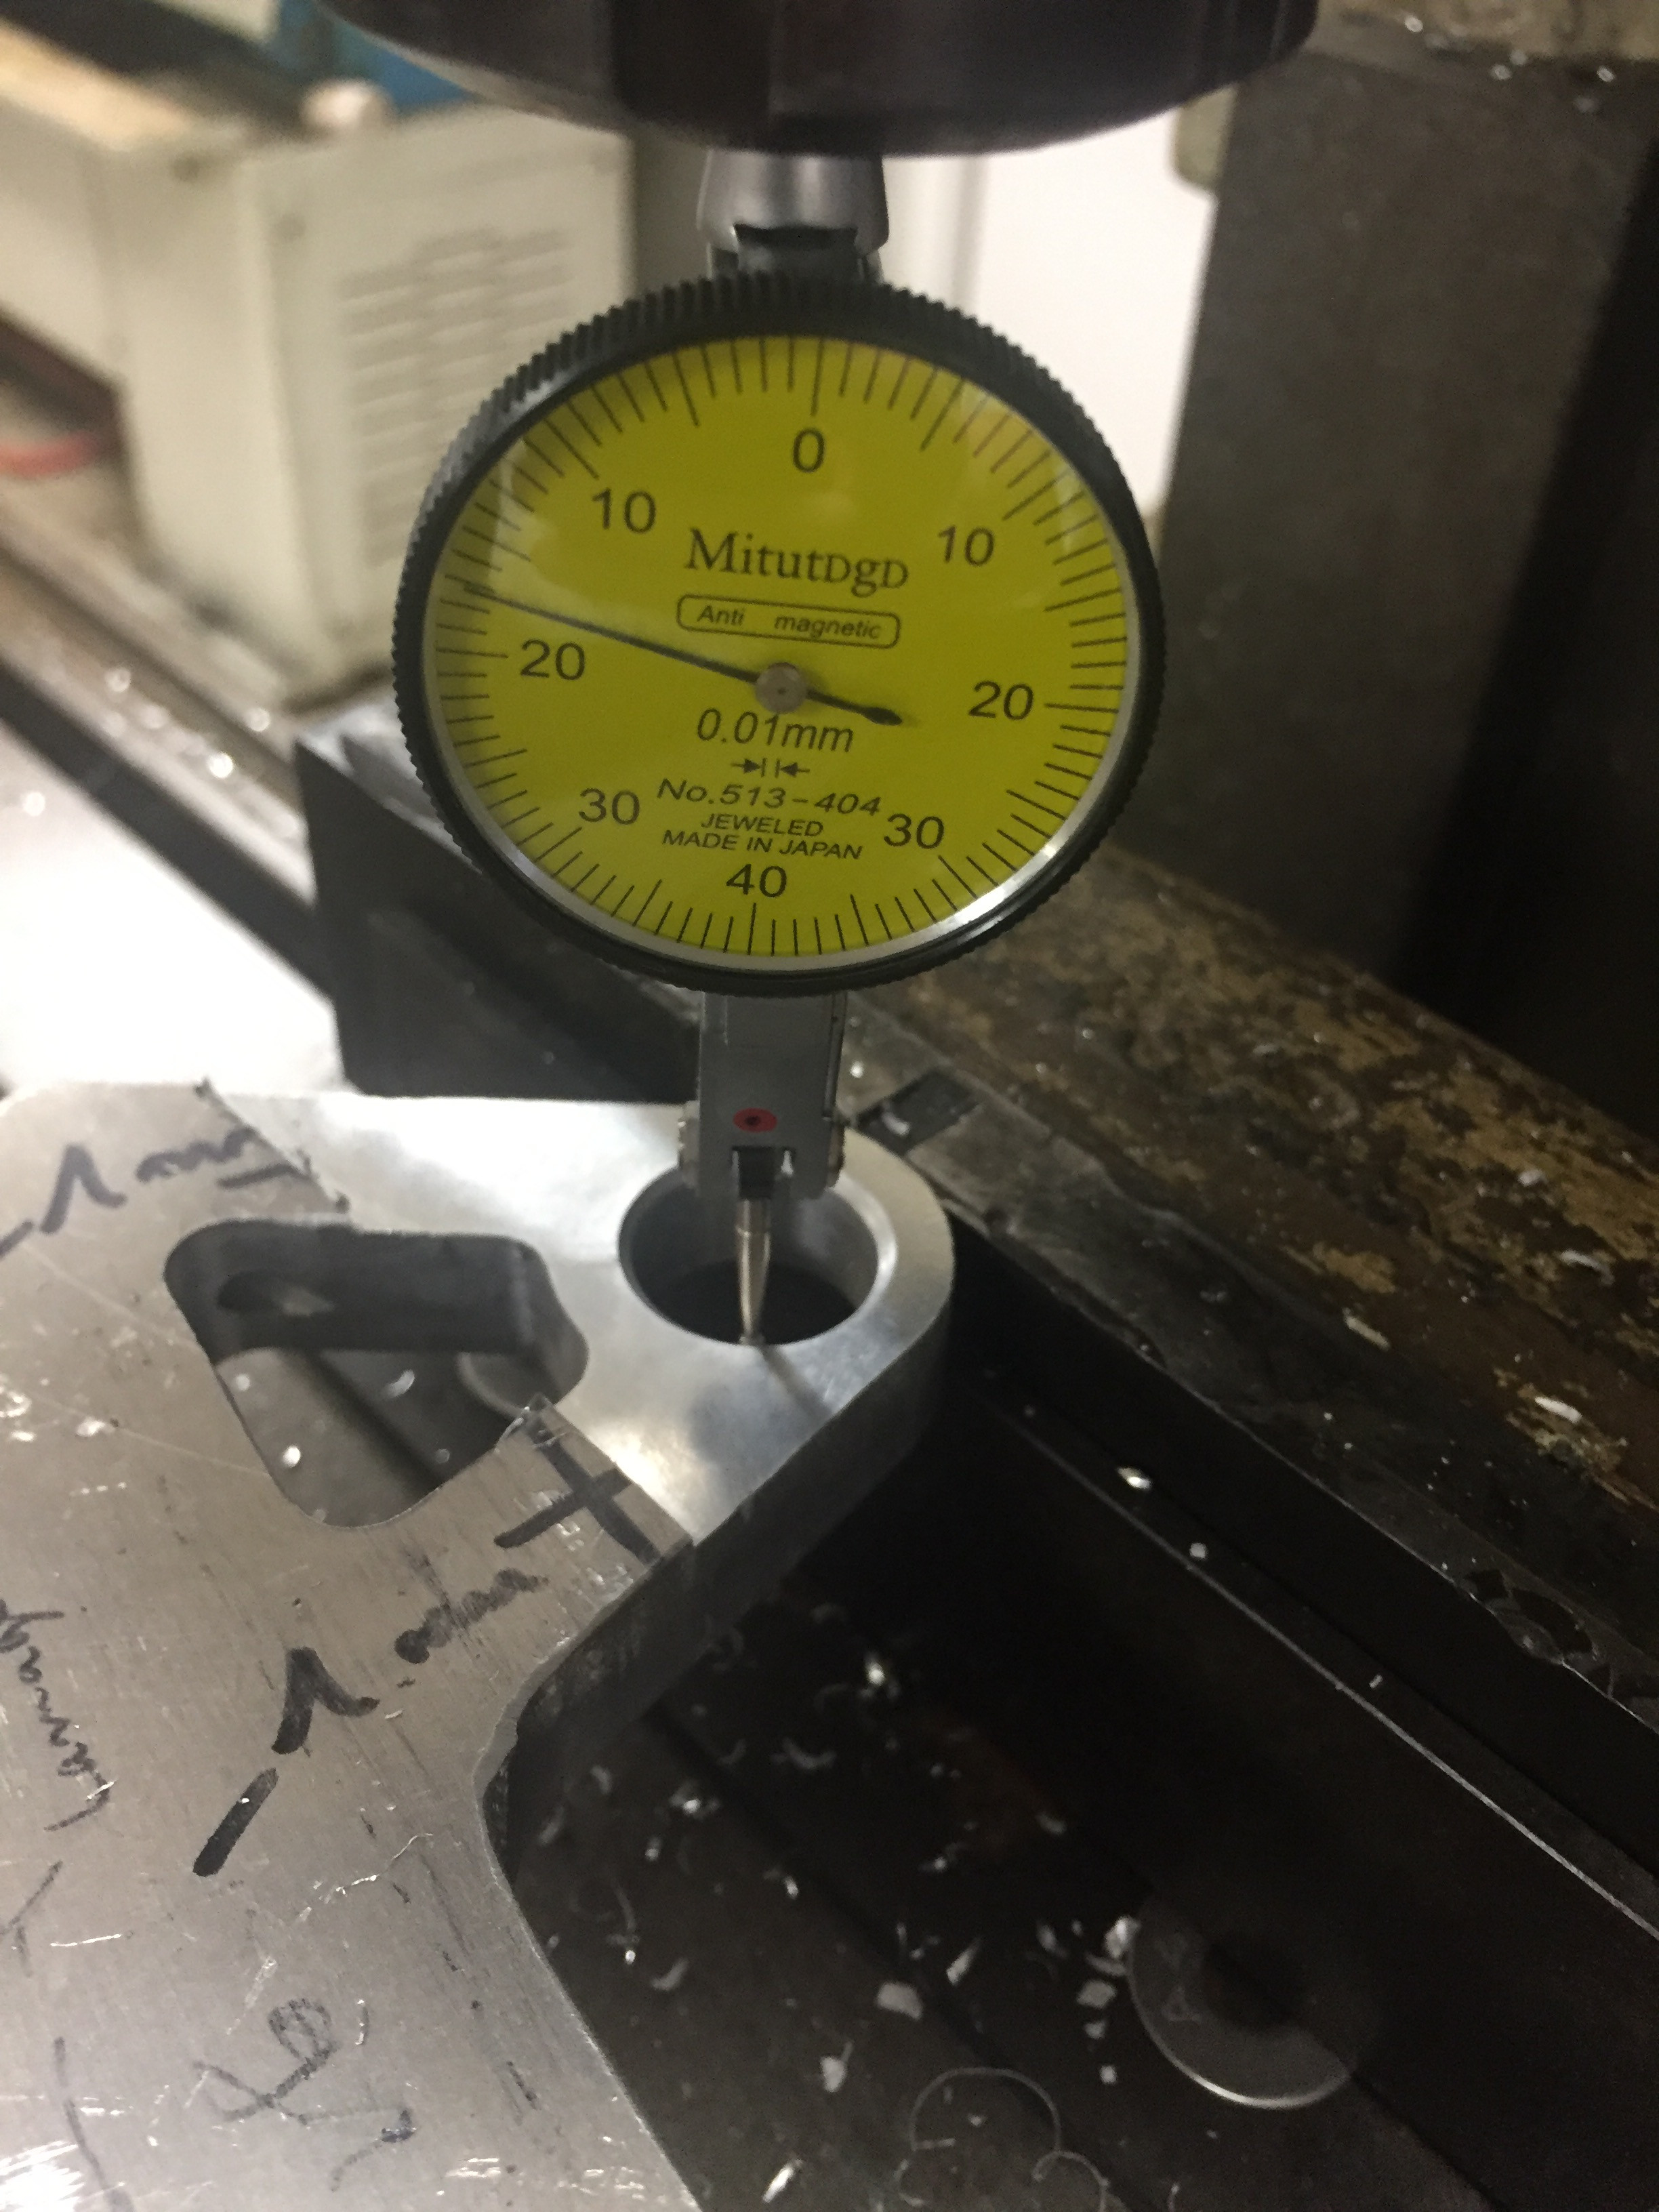
And then I had to machine the bearings housings on both sides of the parts
A bit of sanding
Add the derailleur fitting to the part
after some big welds
with the rear wheel mounted
Now we're good !
Next big step, the battery and controller housing. All parts were 3d designed and laser cut in 5754 aluminum sheets (3mm thick).
Now we have to assemble this on the frame...
make some space by removing some useless thing... :lol:
Tig weld the first parts
and the rest
Now the battery assembly ! It's a custom 20s 8P pack made with vtc5a cells
removing the olds spotwelds marks
Assembly test with the sabvoton and the 150A BMS
Ok that's tight but it fits
finish all welds
and new assembly test
and with the 2mm side covers
So coooool 8)
magura MT5 fitting test ok
Now the frame is finished ! Battery time
spot weld with the homemade microwave spotwelder
I used some wide nickel sheets
wiring for the BMS
some adhesive tape
and PVC Heat Shrink Wrap
Battery is finished !
Time to put it into the frame
Wiring wiring and wiring...
Charger plug
power button
and after some more wiring stuff... first test !
First impression, it's very powerful, a lot of torque a lot of fun 8)
But it can't stay like this. It needs some paint
new disassemble and prepare it to receive it's new color
epoxy primer
Dacia duster color (CNA)
and then I used a stencil to paint the design on the rear frame and side covers
the final coat, the varnish
final result exactly like I wanted
and after some burnouts in the garden :lol:
That's all, I don't have more pictures
The bike has now some months of trying, and kilometers, some wires issues but still works fine without surprises
Hope you enjoyed read it :wink: