Allex
100 MW
Double the power, double the range, read and find out how I did. If you are interested in the mods I've done, I can fix you up with a new 18650 Battery or Adaptto Controller.
View attachment 2
Stock Bomber is a great machine and it has enough power for every application. But this is why we are here on ES, to modify things.
Delivery:
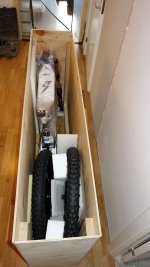
Stock Bike with Quigley motorsport fenders:
View attachment 4
Stock RST fork is ok for on road use, but when you go off road you better invest in something else. I went for 2013 888 Marzocchi.
The weight is about the same but it is a huge difference when I try to compress both forks fast.
Marzocchi 888 RC3 Evo V.2 Fork 2013 is a LOT faster in return it is also much softer.

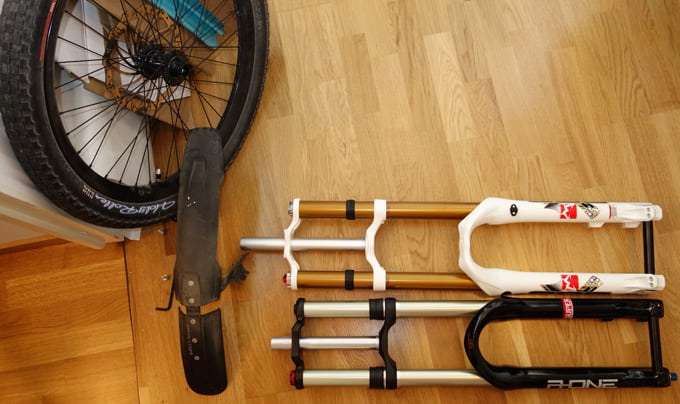
I could not feel the small bumps when driving down a big hill. When doing the same with the stock RST the arms where numb and had to work hard to have the bike in control. With this thing I just felt like I was flying over all obstacles. This must be the best upgrade ever for the stock bike! It feels stiffer to not so much flex(front back) in the fork.
Stock front brakes now fits perfectly without adapter
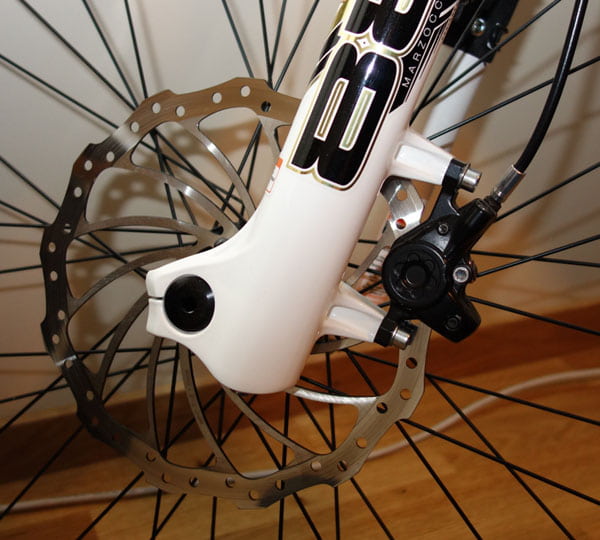
Now for the Brakes, Stock Magura MT2 are great, but I decided to get something else and see if it was even better.
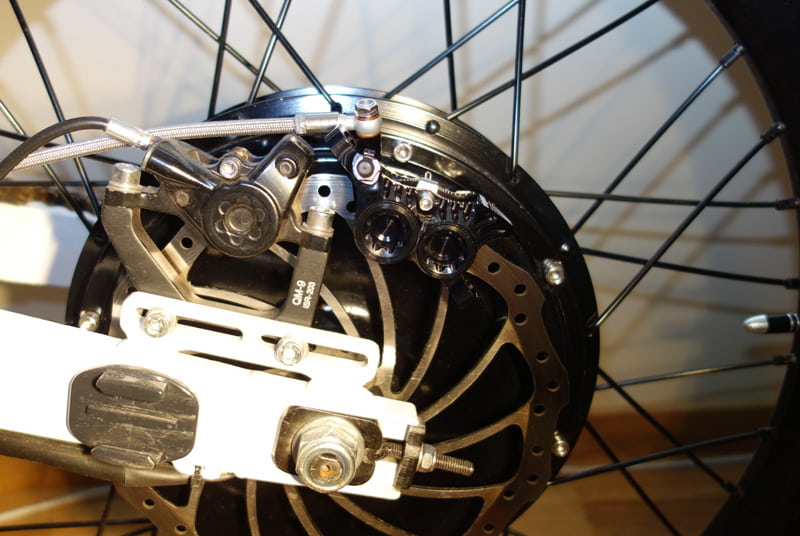
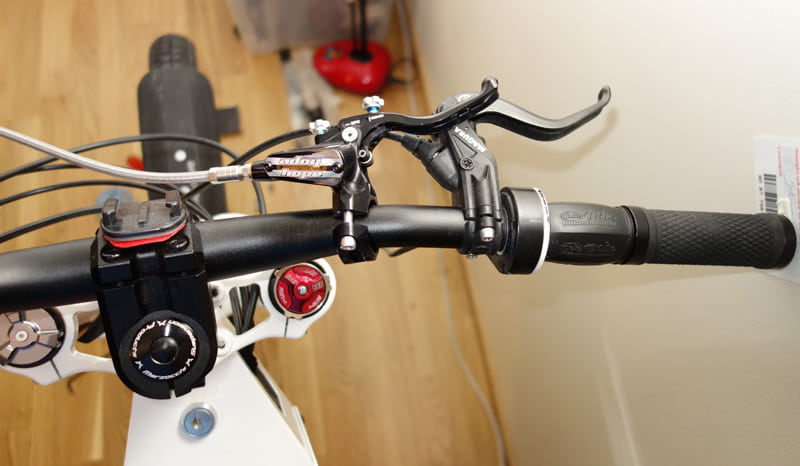
Hope Tech 3 V4 with 203mm Hope saw rotors.
I was thinking that Maguras was much lighter than hopes, but is was barely 50g. difference!
They don't look as big as I thought they would, in fact I like the looks, its like a miniature of MC brakes!
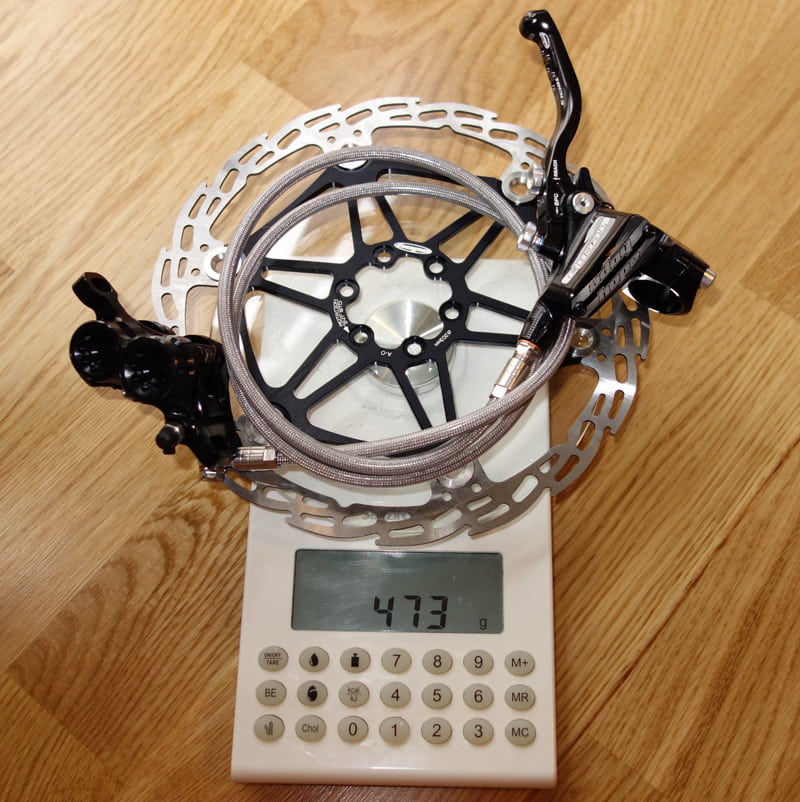
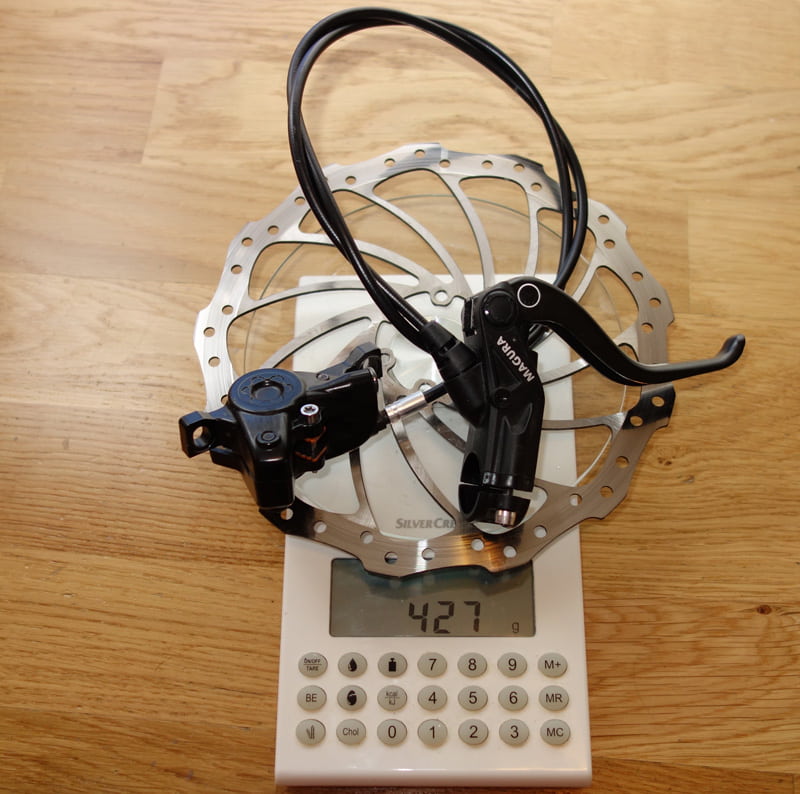
Hope front was easy, just mount it on the 888 fork without adapters.
Back needs Hope mount G. Actually, if you use non floating rotors(floating are thicker) the stock Magura rear mount works good.

This starts to be a pretty good bike now. What else can you do with it? I decided to get a new powerful Sine Wave controller. Currently the best out there is Adaptto.
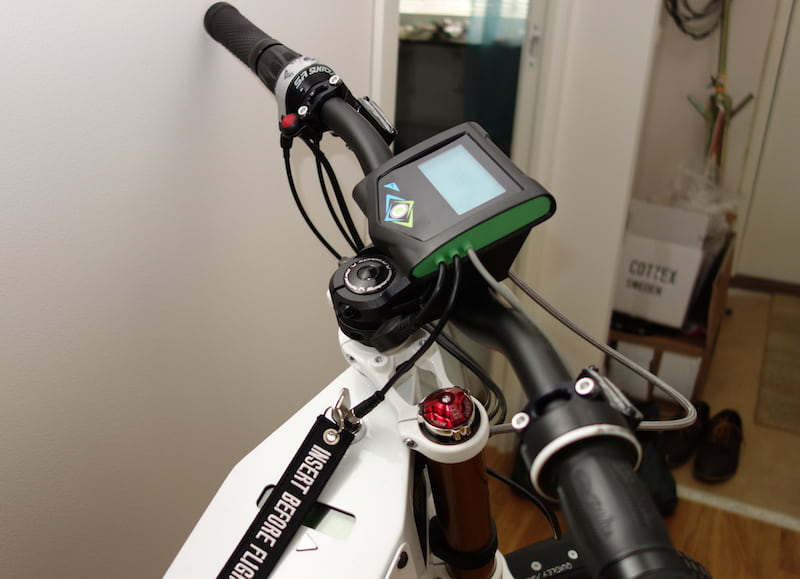
It cost a bit of money but for a reason:
Motor is silent!
Small but powerful at 12kW
Integrated display - Forget Cycle Analyst
Highly customizable on the fly at your local trail - everything can be changed directly from the screen, forget PC connections.
Charge through the controller - superfast charging at up to 70Amps(if your battery can take it) Forget messy bulk charging.
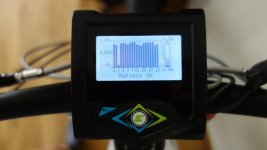
BMS option. See how the cells are doing and adjust the balancing needs.
And a lot more.
The package includes a temp sensor(kty83), so this is what I will start with. Need to open up that motor and install it inside.
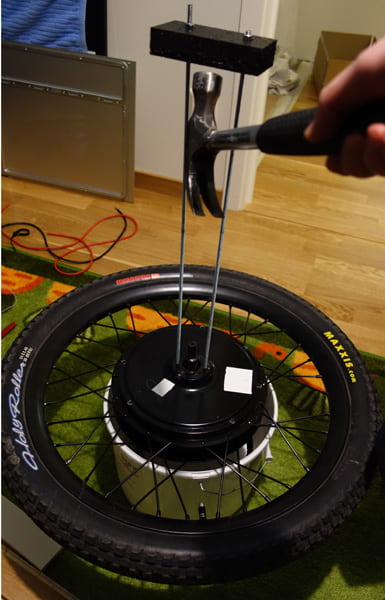
Did not have a gear puller so I took two long threaded rods, put them in the disc brake holes and slammed light with a hammer. Mark the cover sides with some tape to put it back as it was.
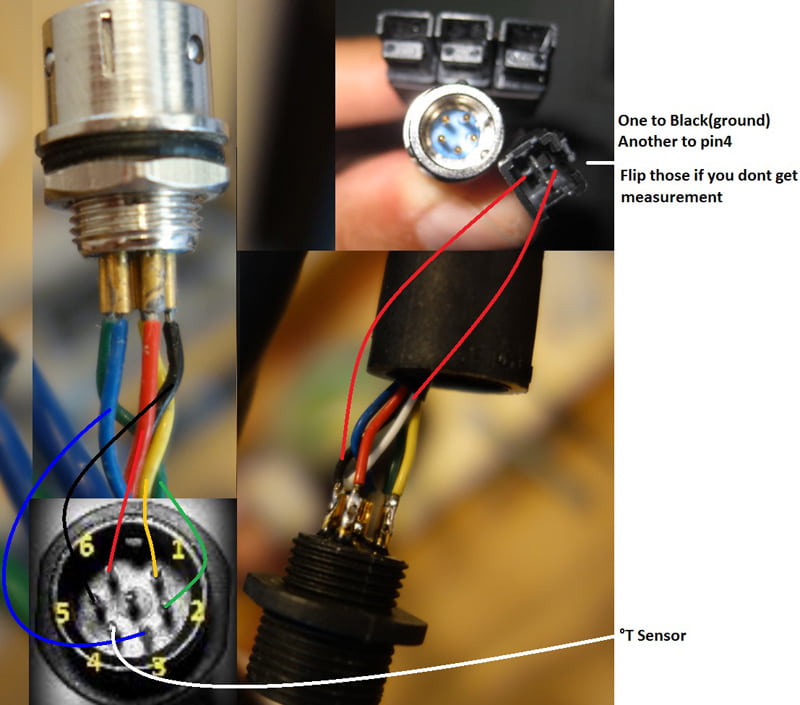
Next, access the black wires which goes to the halls. One end of the thermistor will go together with the black(ground) the other one(signal, white) will go out of the motor axle.
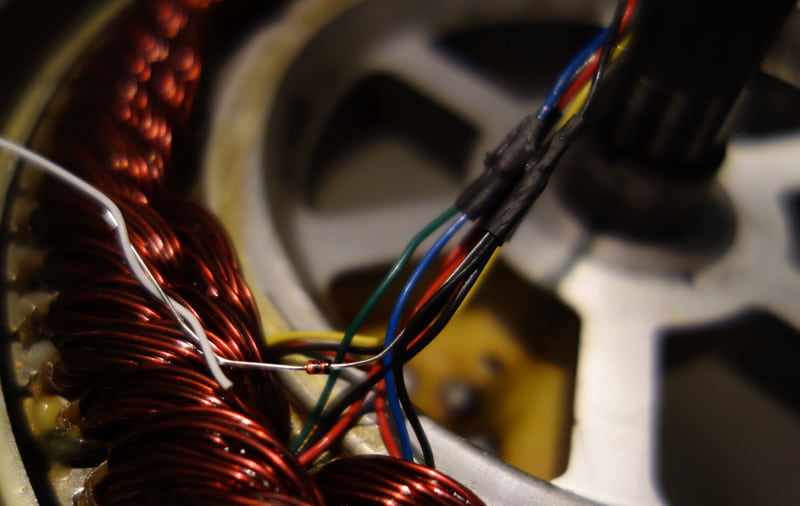
Solder the wires on and put shrink tube on the exposed parts, only leaving the themistor visible.
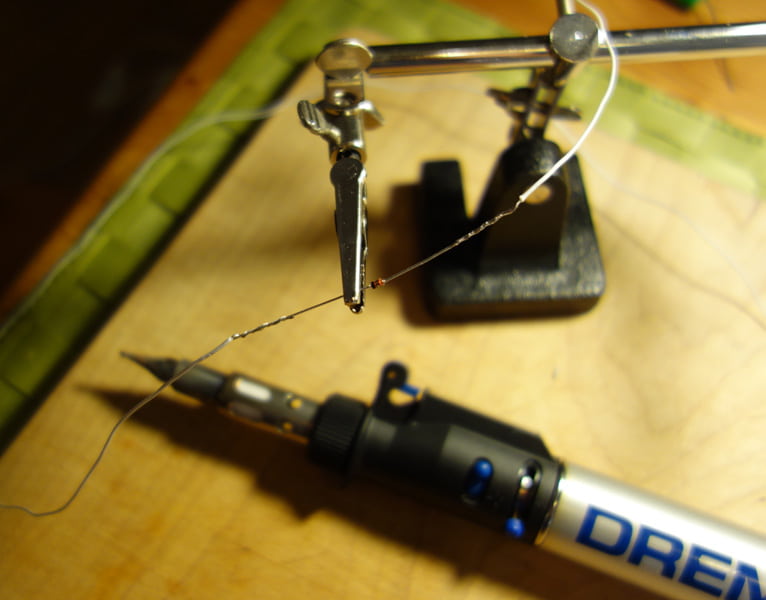
Disconnect the black ground wire, the one that goes out through the axle and solder one end of the thermistor, cover everything with shrink tube again.
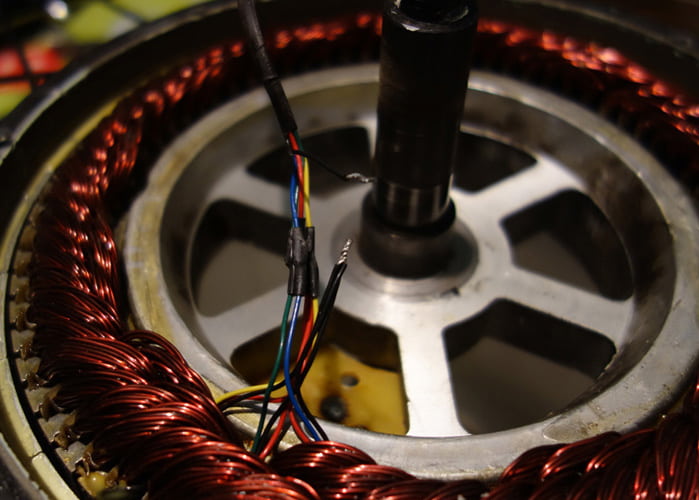
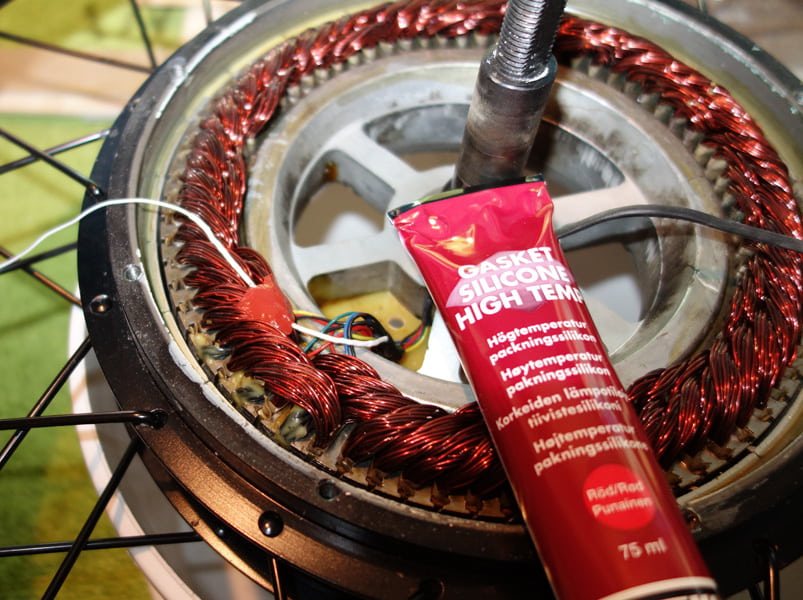
Next we need to put the little guy inside the windings, find a place where it can sit tight. Put some thermal paste in that area and press carefully the little one in, this way we will have a good contact with the windings for more accurate readings.
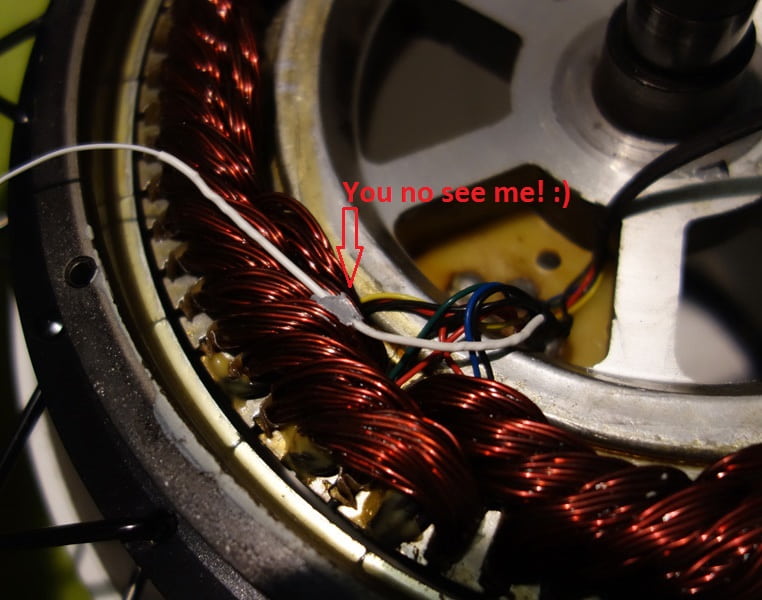
After that, secure it with some high temp silicone gasket, now he will not go anywhere
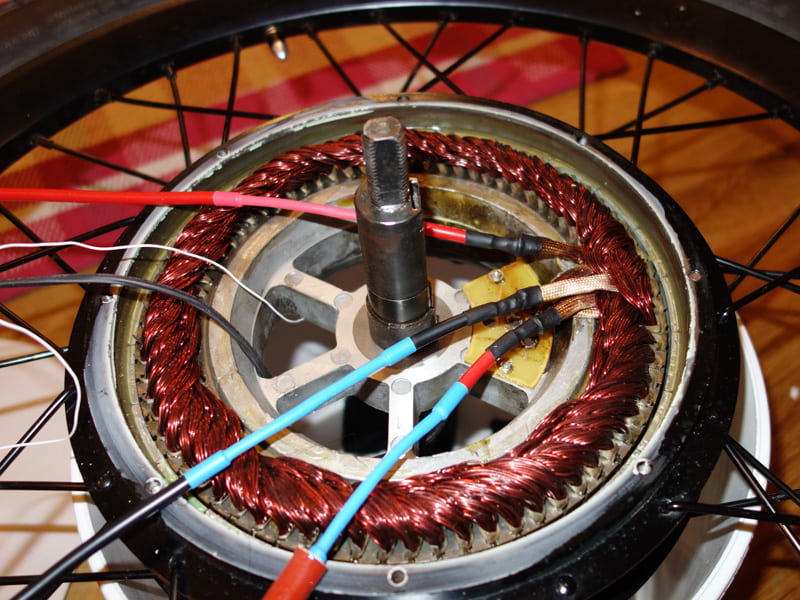
New 10AWG phase cables coming through Crystalyte 5403, we like to join 10kW club here...
Removed the silicone insulation and replaced it with heat shrink in the place where it will be going through the groove. This way I don't need to modify the shaft. Win!
Testing the temp sensor - seems to work. Heated motor up a bit with a hair dryer = 40°C
Still waiting for thicker AWG wires for the motor. I can then finish my hubbie and the new 30A charger!
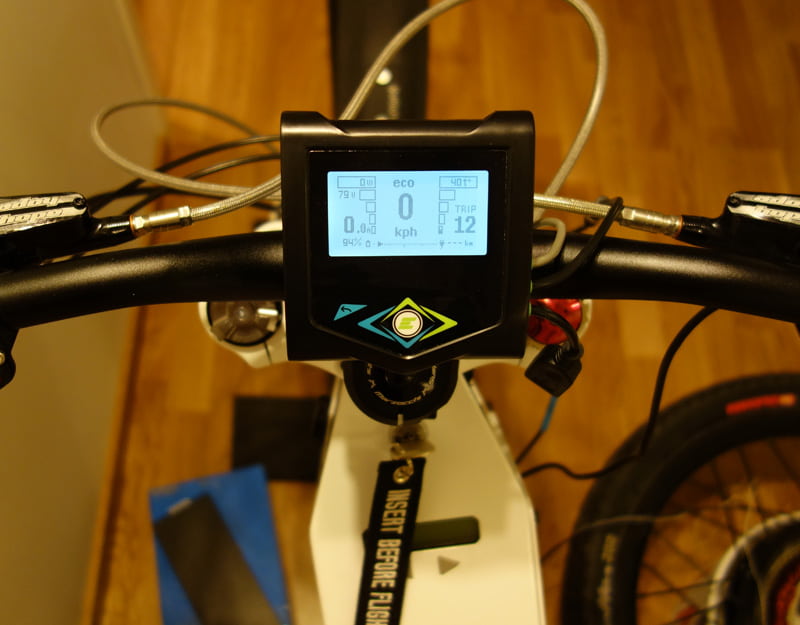
Had an Old Mac, can finally used for something now. See that the handles are missing on top? They went to the controller mounting.
Mac's are great, nice thick aluminum

Made aluminum mountings for the controller, look how small it is compared to stock 18FET
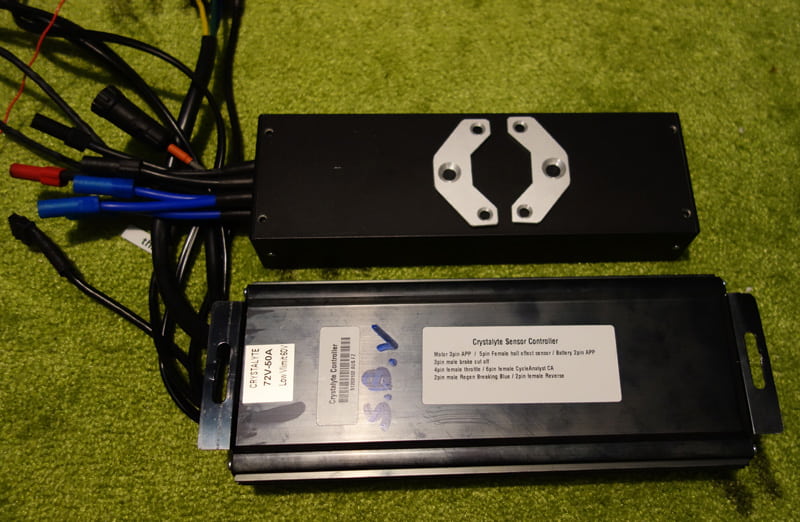
Fits nicely

Wired the Key switch to the display:
[youtube]7pN73-99cfc[/youtube]
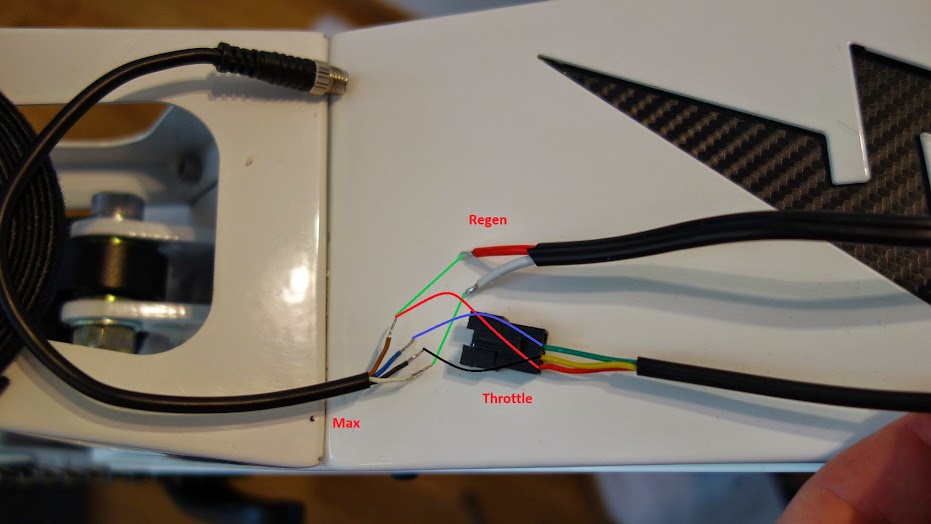
You have four wires coming from display(Gray cable), you need to place a switch on the red wire.
How to wire up the throttle with regen to Adaptto:
Wiring Crystalyte Halls to Adaptto:
Stock Crystalyte 18FET controller draws about 65Amps. Here is a first test what this bike with Crystalyte 5403 can do at 100Amps
[youtube]MmuKBPBY67w[/youtube]
Finished with my charging setup
1500W PSU@55V30A
Turnigy 10AWG wires to a 30A coil(Adaptto) with a Speakon Connector to the bike.

Speakon connector is really neat. And can handle more current than stock XLR, up to 30Amps I believe. I will be drawing 20Amps so this is safe.
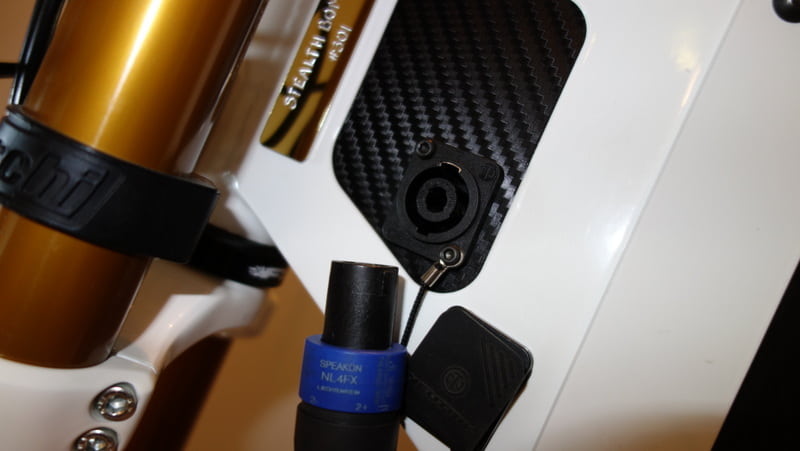
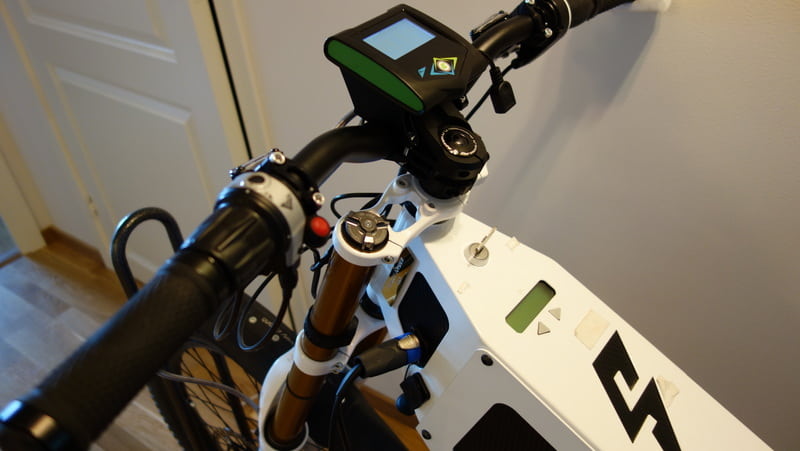
Going of to a road trip - Moscow, Russia
Have to meet up with some Adaptto gurus, and make a huge battery for the bike.
Here is a video of dissasemblement:
[youtube]w_MeaAnvgrs[/youtube]
Met up with some EV-masterminds and their bikes. Crazy configs with more than 10kW of power with headlights at 5000lumen...crazy bright and awsome throw. They charge bikes super fast at 3000Watts with small PSUs

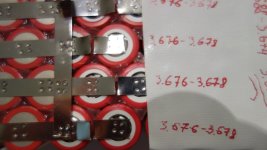
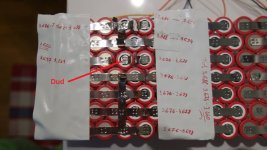
My new batteries are already waiting to be welded and fitted in to the frame, 280psc 18650 cells
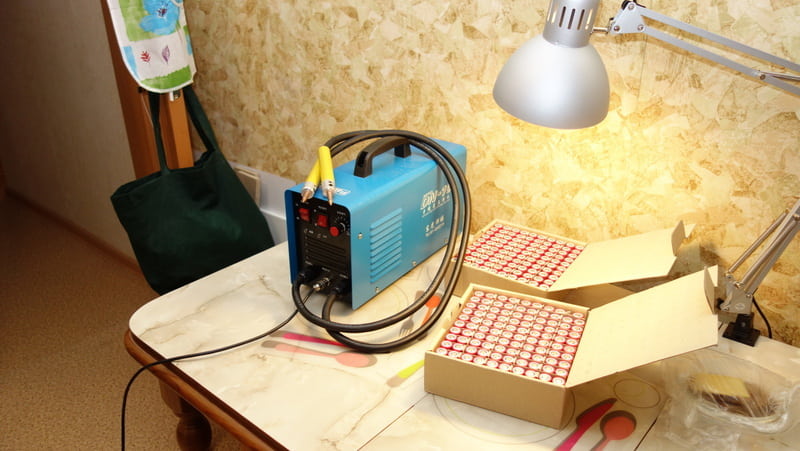
LG DBHE 2 cells, this will be a 20s14p pack
Specifications:
1.LG IMR18650 high drain li-ion battery
2.Nominal Capacity: 2500mAh;
3.Max. discharge: 35A
4.Cut-off voltage: 2.5V
5. Charge Current: 4A
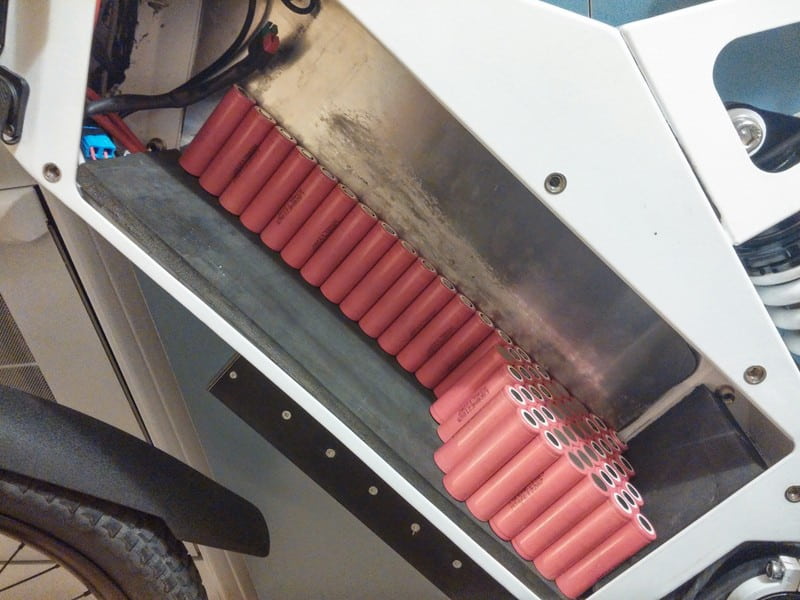
Nice spot welding, this is one half of the pack - 10s@37V nominal:

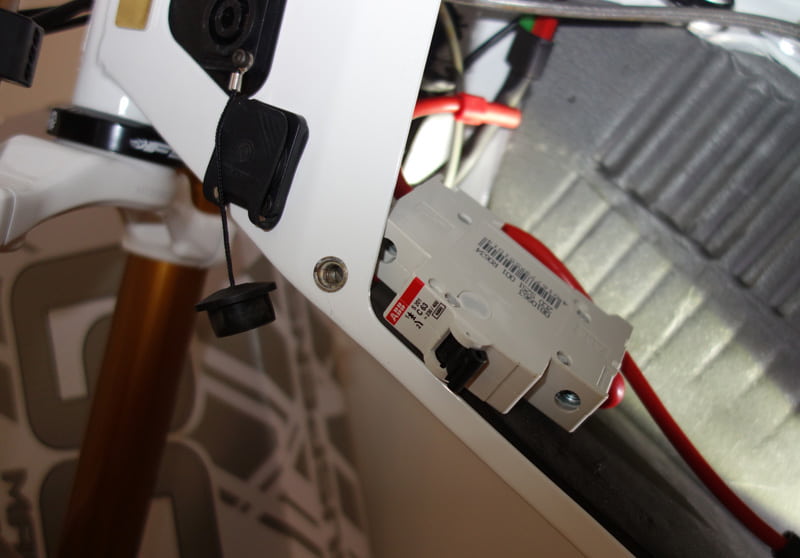
If you want a simple and reliable solution(Adapttos recommendation) just install a regular apartment breaker, I use C63A, it angages at about 135 DC Amps for me and you can use whatever battery voltage.
And you can say goodbye to all prechargers, no need them anymore!
http://www.abb.com/product/seitp329/49a79353b0194401c12572ab00257544.aspx?tabKey=2&gid=ABB2CDS251001R0634&cid=9AAC100489
Stock bomber battery:
80v, 18Ah, 1500Wh, 11.5Kg (Really 1368Wh in real world)
This battery:
84v, 35Ah, 3000Wh, 12.5Kg (Really 2382Wh in real world)
So double the range at almost same weight and better punch.
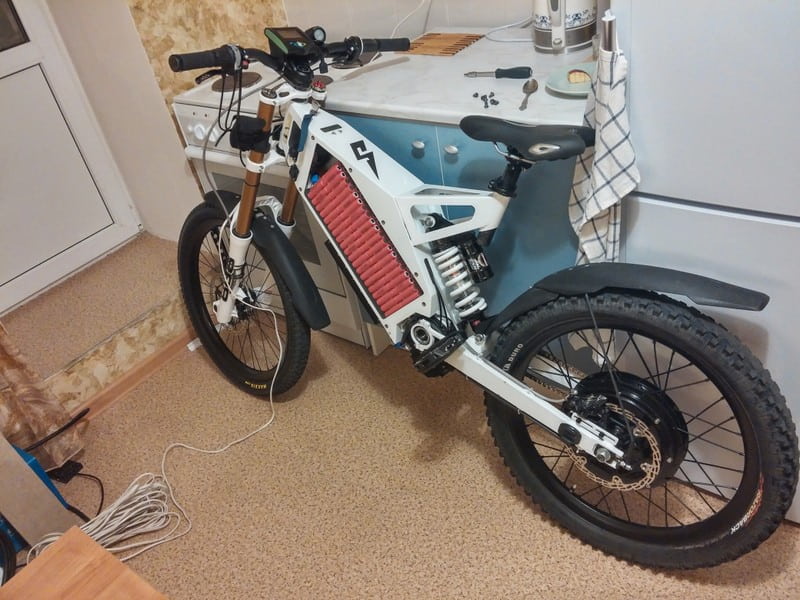
Now when I have a better battery lets push the current a bit more, in Boost mode I have it set to 130Amps

Tested for top speed, 120km/h:
Yup, this is at 10.4kW and 74V battery with Crystalyte 5403 motor
Here is a video at Dusk on a russian countryside road, doing 116km/h
[youtube]IvzJxmwVMv0[/youtube]
View attachment 2
Stock Bomber is a great machine and it has enough power for every application. But this is why we are here on ES, to modify things.
Delivery:

Stock Bike with Quigley motorsport fenders:
View attachment 4
Stock RST fork is ok for on road use, but when you go off road you better invest in something else. I went for 2013 888 Marzocchi.
The weight is about the same but it is a huge difference when I try to compress both forks fast.
Marzocchi 888 RC3 Evo V.2 Fork 2013 is a LOT faster in return it is also much softer.
I could not feel the small bumps when driving down a big hill. When doing the same with the stock RST the arms where numb and had to work hard to have the bike in control. With this thing I just felt like I was flying over all obstacles. This must be the best upgrade ever for the stock bike! It feels stiffer to not so much flex(front back) in the fork.
Stock front brakes now fits perfectly without adapter
Now for the Brakes, Stock Magura MT2 are great, but I decided to get something else and see if it was even better.
Hope Tech 3 V4 with 203mm Hope saw rotors.
I was thinking that Maguras was much lighter than hopes, but is was barely 50g. difference!
They don't look as big as I thought they would, in fact I like the looks, its like a miniature of MC brakes!
Hope front was easy, just mount it on the 888 fork without adapters.
Back needs Hope mount G. Actually, if you use non floating rotors(floating are thicker) the stock Magura rear mount works good.
This starts to be a pretty good bike now. What else can you do with it? I decided to get a new powerful Sine Wave controller. Currently the best out there is Adaptto.
It cost a bit of money but for a reason:
Motor is silent!
Small but powerful at 12kW
Integrated display - Forget Cycle Analyst
Highly customizable on the fly at your local trail - everything can be changed directly from the screen, forget PC connections.
Charge through the controller - superfast charging at up to 70Amps(if your battery can take it) Forget messy bulk charging.
BMS option. See how the cells are doing and adjust the balancing needs.
And a lot more.
The package includes a temp sensor(kty83), so this is what I will start with. Need to open up that motor and install it inside.
Did not have a gear puller so I took two long threaded rods, put them in the disc brake holes and slammed light with a hammer. Mark the cover sides with some tape to put it back as it was.
Next, access the black wires which goes to the halls. One end of the thermistor will go together with the black(ground) the other one(signal, white) will go out of the motor axle.
Solder the wires on and put shrink tube on the exposed parts, only leaving the themistor visible.
Disconnect the black ground wire, the one that goes out through the axle and solder one end of the thermistor, cover everything with shrink tube again.
Next we need to put the little guy inside the windings, find a place where it can sit tight. Put some thermal paste in that area and press carefully the little one in, this way we will have a good contact with the windings for more accurate readings.
After that, secure it with some high temp silicone gasket, now he will not go anywhere
New 10AWG phase cables coming through Crystalyte 5403, we like to join 10kW club here...
Removed the silicone insulation and replaced it with heat shrink in the place where it will be going through the groove. This way I don't need to modify the shaft. Win!

Testing the temp sensor - seems to work. Heated motor up a bit with a hair dryer = 40°C
Still waiting for thicker AWG wires for the motor. I can then finish my hubbie and the new 30A charger!
Had an Old Mac, can finally used for something now. See that the handles are missing on top? They went to the controller mounting.
Mac's are great, nice thick aluminum
Made aluminum mountings for the controller, look how small it is compared to stock 18FET
Fits nicely
Wired the Key switch to the display:
[youtube]7pN73-99cfc[/youtube]
You have four wires coming from display(Gray cable), you need to place a switch on the red wire.
How to wire up the throttle with regen to Adaptto:
Wiring Crystalyte Halls to Adaptto:
Stock Crystalyte 18FET controller draws about 65Amps. Here is a first test what this bike with Crystalyte 5403 can do at 100Amps
[youtube]MmuKBPBY67w[/youtube]
Finished with my charging setup
1500W PSU@55V30A
Turnigy 10AWG wires to a 30A coil(Adaptto) with a Speakon Connector to the bike.
Speakon connector is really neat. And can handle more current than stock XLR, up to 30Amps I believe. I will be drawing 20Amps so this is safe.
Going of to a road trip - Moscow, Russia
Have to meet up with some Adaptto gurus, and make a huge battery for the bike.

Here is a video of dissasemblement:
[youtube]w_MeaAnvgrs[/youtube]
Met up with some EV-masterminds and their bikes. Crazy configs with more than 10kW of power with headlights at 5000lumen...crazy bright and awsome throw. They charge bikes super fast at 3000Watts with small PSUs
My new batteries are already waiting to be welded and fitted in to the frame, 280psc 18650 cells
LG DBHE 2 cells, this will be a 20s14p pack
Specifications:
1.LG IMR18650 high drain li-ion battery
2.Nominal Capacity: 2500mAh;
3.Max. discharge: 35A
4.Cut-off voltage: 2.5V
5. Charge Current: 4A
Nice spot welding, this is one half of the pack - 10s@37V nominal:
If you want a simple and reliable solution(Adapttos recommendation) just install a regular apartment breaker, I use C63A, it angages at about 135 DC Amps for me and you can use whatever battery voltage.
And you can say goodbye to all prechargers, no need them anymore!
http://www.abb.com/product/seitp329/49a79353b0194401c12572ab00257544.aspx?tabKey=2&gid=ABB2CDS251001R0634&cid=9AAC100489
Stock bomber battery:
80v, 18Ah, 1500Wh, 11.5Kg (Really 1368Wh in real world)
This battery:
84v, 35Ah, 3000Wh, 12.5Kg (Really 2382Wh in real world)
So double the range at almost same weight and better punch.
Now when I have a better battery lets push the current a bit more, in Boost mode I have it set to 130Amps
Tested for top speed, 120km/h:

Yup, this is at 10.4kW and 74V battery with Crystalyte 5403 motor
Here is a video at Dusk on a russian countryside road, doing 116km/h
[youtube]IvzJxmwVMv0[/youtube]


