dogman dan
1 PW
Since I was planning to install a motor on some alloy suspension forks, I recently ordered some c washers and torque arms from Ebikes-ca
Justin has just done a redesign on his torque arms. The hole in the pivot on the main piece is now a slot, and presumably will fit more types of forks with fender eylets. The clamp arm has many slots now, and two hose clamps are provided so you can really clamp the thing down. The piece on the axle is nice and thick, and beautifly cut somehow. Water jet, laser? Anyway it's made to very tight tolerances and fit my axle on the 9c motor beautifully. The provided hose clamps were intended for use on normal forks, so I had to go get some larger ones. No big deal, but something to be aware of before the stores close for the night.
I was trying to fit the motor on a Rock Shocks Dart 1 fork, and ran into all kinds of problems. To make a long story short,,, Paint was filed from dropouts and the axle fit in the drops, but it was a tight fit. An allen bolt on the bottom of the fork interfered with the torque arm, so a bit was ground off the arm. The fit was very tight between the forks, but I got it crammed in there. Once on the bike, I found I had put enough outward tweak on the dang forks to make em stop functioning. The tubes were rubbing so hard they wouldn't move. So the install proceeds later with another set of forks. These ones, from Insync, had no problem fitting the 9 c motor.
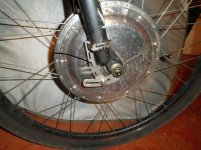
And on the other side, The fit is a bit different due to the disc brakes mount. Under the torque arms are c washers to fill the space inside the quick release cups. Never run a motor on front forks without a perfect fit of all the washers and nuts etc. Hiding a mistake behind a torqe arm is not acceptable. I chose to run two torque arms even on a moderate power motor to garauntee that the wheel stays on the bike if the forks should crack.
When installing a 14mm ebike motor axle on a 10 mm dropout, it is often required to file the dropout notch deeper by about 2 mm. This is to keep the center of the 14 mm axle located in the same spot as the 10 mm axle was before. Otherwise, you may have problems with the axle working loose from the fork.
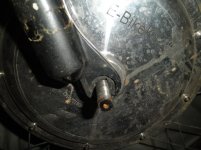
Here is the C washer in place, to fill the dropout. It is also advisable to use a spacer washer on the inside of the dropout. This will help with some types of motors with narrower axle shoulders. If a spacer washer is used on the inside, the axle shoulder will have to be filed shorter by the thickness of the washer. The alloy forks cannot be spread out, they must fit the width of the motor perfect. If not, the shocks will bind.View attachment 1
Now the torque arm is fitted to the fork. In this case only one hose clamp could be fitted, use two if you can. Tighten the nut between the two parts of the torque arm as much as you can.
Justin has just done a redesign on his torque arms. The hole in the pivot on the main piece is now a slot, and presumably will fit more types of forks with fender eylets. The clamp arm has many slots now, and two hose clamps are provided so you can really clamp the thing down. The piece on the axle is nice and thick, and beautifly cut somehow. Water jet, laser? Anyway it's made to very tight tolerances and fit my axle on the 9c motor beautifully. The provided hose clamps were intended for use on normal forks, so I had to go get some larger ones. No big deal, but something to be aware of before the stores close for the night.
I was trying to fit the motor on a Rock Shocks Dart 1 fork, and ran into all kinds of problems. To make a long story short,,, Paint was filed from dropouts and the axle fit in the drops, but it was a tight fit. An allen bolt on the bottom of the fork interfered with the torque arm, so a bit was ground off the arm. The fit was very tight between the forks, but I got it crammed in there. Once on the bike, I found I had put enough outward tweak on the dang forks to make em stop functioning. The tubes were rubbing so hard they wouldn't move. So the install proceeds later with another set of forks. These ones, from Insync, had no problem fitting the 9 c motor.
And on the other side, The fit is a bit different due to the disc brakes mount. Under the torque arms are c washers to fill the space inside the quick release cups. Never run a motor on front forks without a perfect fit of all the washers and nuts etc. Hiding a mistake behind a torqe arm is not acceptable. I chose to run two torque arms even on a moderate power motor to garauntee that the wheel stays on the bike if the forks should crack.
When installing a 14mm ebike motor axle on a 10 mm dropout, it is often required to file the dropout notch deeper by about 2 mm. This is to keep the center of the 14 mm axle located in the same spot as the 10 mm axle was before. Otherwise, you may have problems with the axle working loose from the fork.

Here is the C washer in place, to fill the dropout. It is also advisable to use a spacer washer on the inside of the dropout. This will help with some types of motors with narrower axle shoulders. If a spacer washer is used on the inside, the axle shoulder will have to be filed shorter by the thickness of the washer. The alloy forks cannot be spread out, they must fit the width of the motor perfect. If not, the shocks will bind.View attachment 1
Now the torque arm is fitted to the fork. In this case only one hose clamp could be fitted, use two if you can. Tighten the nut between the two parts of the torque arm as much as you can.


