Amperry417
Established
- Joined
- Aug 24, 2021
- Messages
- 67
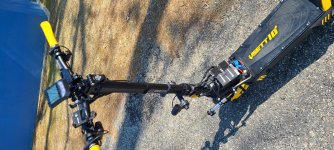
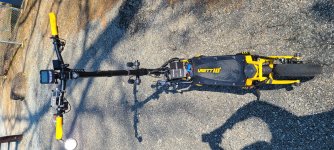
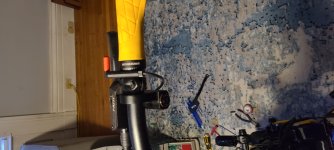
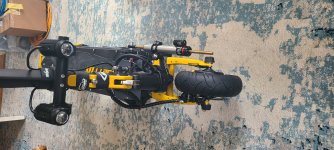
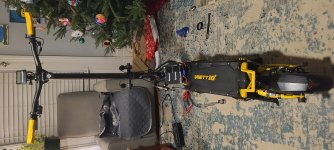
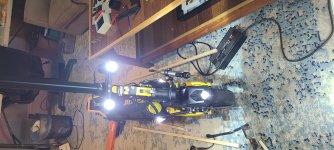
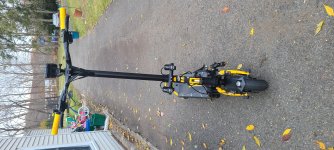
Hi everyone. I finished up the last of the major work on my Vsett 10+ project and wanted to share. All work has been done by myself.
What she is made of...
- Vsett 10+
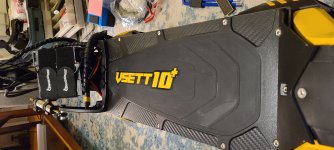
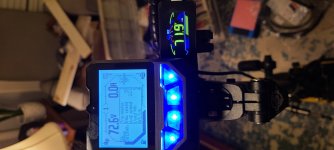
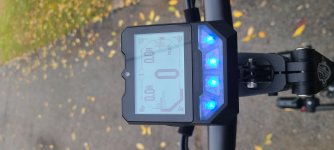
- 2X Nucular 12F controllers with display and uLight module. Controllers are mounted externally to the neck using straps and thermal pads. Entire inside deck space is now all battery
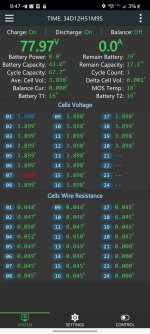
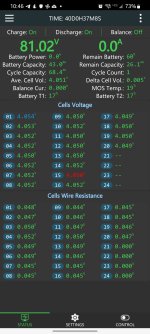
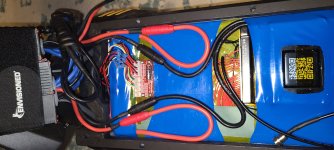
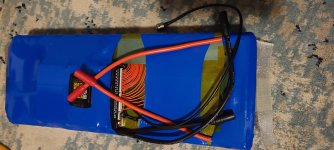
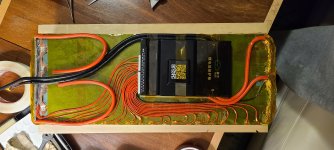
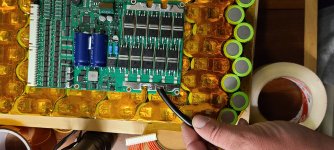
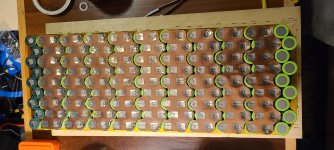
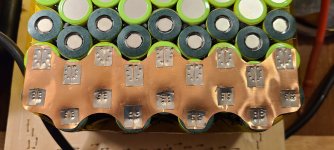
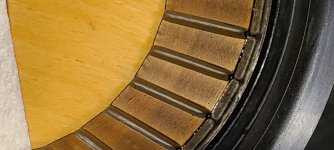
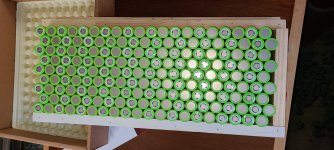
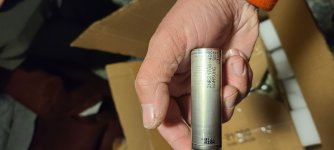
- 20s9p custom battery built by myself. Samsung 48X 27100 cells for 72v nominal and 150a discharge capability. Built using the copper sandwich method and custom copper plates. .1 copper plates using .1 nickel plated steel tabs as welding aids
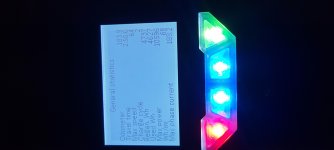
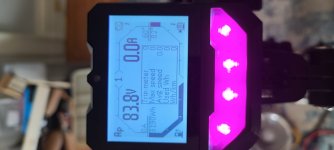
- JK 150a active balancer smart BMS with charge, discharge and active balance capabilities. Also have a neat little display for the BMS that allows me to power it on/off via button. The app allows charge, discharge and active balance modes to be toggled on or off independently. Really awesome and well built BMS
- Charging with Eltek Flatpack2 HE 2000w Rectifier using Nucular charge mode. On USA grid power 110v wall plug I can charge up to around 13a max if I choose. All charging parameters are set and controlled by Nucular controllers
- Stock 10+ 1400w motors
- 6ml of Grin Tech Statorade ferrofluid added to each motor
- Kart trigger throttle
- Kart thumb throttle is used for variable Regen/E-brake but have the Kart left handed trigger throttle on the way for better ergonomics
*Future Plan* is to aquire a Rion Curve dual action scroll wheel throttle that has throttle and Regen/E-brake integrated into one single unit.
- FalconGo damper kit with 35cm Matris damper
- Exa 291r 125mm front shock with 1500lb spring
- DNM DV-22 AR 165mm rear shock with 1800lb spring
- Both shocks protected with lizard skin shock boots
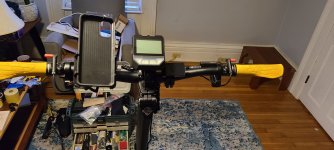
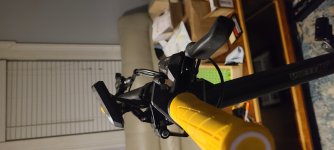
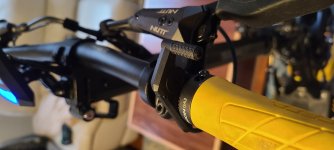
- 700mm solid Wake handlebars with similar rise and backsweep as stock bars
- PMT 10x3 E-Fire tires
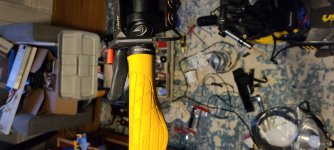
- Ergon ga3 grips. Currently yellow but will be switching to black
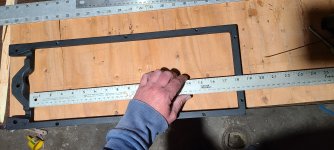
- Custom made 19mm PVC deck spacer painted black and 5mm acrylic sheet spacer (24mm spacer heigh added) to fit new battery with BMS on top. Inside deck addressable LEDs may be added in the future to illuminate through the 5mm acrylic
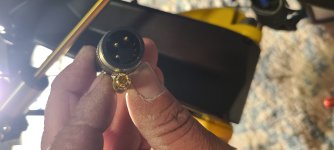
- Waterproof Higo connectors throughout for Canbus, lights, halls, etc..
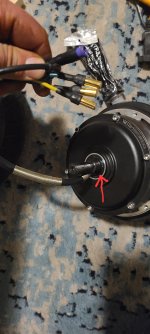
- Higo L1019 motor wires directly wired to stock stator phases and halls. NTC 10k temp sensor installed in both motors. L1019 wire/connectors houses all phase, hall and temp sensor wires within one single wire and connector. Stock phase wires were 3.0mm² (12awg). Higo L1019 uses 4.0mm² (11awg) phase wires, so they have been slightly upgraded as well
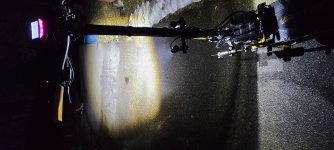
- 60w headlights with 6000 lumens each with integrated fans. Hooked to and powered by Nucular uLight module for high/low beam and running light settings
- FalconGo kiddy bar to mount the headlights
- 160mm Sram Cleansweep G2 rotors with ceramic pads using stock Nutt brakes. Was going to put on Magura brakes but after hooking up the variable Regen, they simply aren't needed. May be a fun project down the line for better modulation and just to say "I have Magura brakes". Nutt brakes along with variable Regen are plenty sufficient for slowing down the beast.
- Swingarm bearings, Headset bearings and Wheel bearings have been upgraded
I expect to be able to run around 65a battery per motor (130 battery amps) and around 150-125 phase amps per motor. Total power should be in the neighborhood of 10kw with the motors being the limiting factor. Ferrofluid will help push them to max. Top speed on full charge without field weakening I expect to be around 70mph. Field weakening should be able to get me over 80mph if I dare. Short test ride with battery at storage voltage (72v) had mind blowing acceleration at 55a battery set for each motor. I've been slowly working on this project for the past few months and just recently finished the battery which was the last big thing to do. Have had Nucular controllers installed and was running with stock battery at the end of last years riding season. It's still winter here so probably won't be able to justify charging battery and riding for another month or so. This has been a thrilling project and have learned everything along the way. I have a feeling I may have built one of the, if not the number one, fastest and most customized Vsett 10+ out there.
If anyone else has done similar or other upgrades to their Vsett, I would absolutely love to see what you've done.
I have plans to remove all of the yellow painted parts, sandblast the yellow off and paint a different color. I'm thinking either all blackout, pearl white or dark grey to replace the yellow.
The Samsung 48X 4800mah 21700 cells I used for the battery can safely be discharged to around 15-17a continuous giving me around 130-150 battery amps available. In 9P configuration I now have 43.2ah battery and will likely be able to get over 100 mile range per charge riding moderately. The nicest thing about these cells is that they have a 3000 cycle lifespan before 70% original capacity (30% degradation). I expect to have this scooter for many years to come. I also have the ability to use the controllers and battery on a different chassis in the future if I choose.
Any questions regarding parts used or processes involved, just let me know.
What she is made of...
- Vsett 10+
- 2X Nucular 12F controllers with display and uLight module. Controllers are mounted externally to the neck using straps and thermal pads. Entire inside deck space is now all battery
- 20s9p custom battery built by myself. Samsung 48X 27100 cells for 72v nominal and 150a discharge capability. Built using the copper sandwich method and custom copper plates. .1 copper plates using .1 nickel plated steel tabs as welding aids
- JK 150a active balancer smart BMS with charge, discharge and active balance capabilities. Also have a neat little display for the BMS that allows me to power it on/off via button. The app allows charge, discharge and active balance modes to be toggled on or off independently. Really awesome and well built BMS
- Charging with Eltek Flatpack2 HE 2000w Rectifier using Nucular charge mode. On USA grid power 110v wall plug I can charge up to around 13a max if I choose. All charging parameters are set and controlled by Nucular controllers
- Stock 10+ 1400w motors
- 6ml of Grin Tech Statorade ferrofluid added to each motor
- Kart trigger throttle
- Kart thumb throttle is used for variable Regen/E-brake but have the Kart left handed trigger throttle on the way for better ergonomics
*Future Plan* is to aquire a Rion Curve dual action scroll wheel throttle that has throttle and Regen/E-brake integrated into one single unit.
- FalconGo damper kit with 35cm Matris damper
- Exa 291r 125mm front shock with 1500lb spring
- DNM DV-22 AR 165mm rear shock with 1800lb spring
- Both shocks protected with lizard skin shock boots
- 700mm solid Wake handlebars with similar rise and backsweep as stock bars
- PMT 10x3 E-Fire tires
- Ergon ga3 grips. Currently yellow but will be switching to black
- Custom made 19mm PVC deck spacer painted black and 5mm acrylic sheet spacer (24mm spacer heigh added) to fit new battery with BMS on top. Inside deck addressable LEDs may be added in the future to illuminate through the 5mm acrylic
- Waterproof Higo connectors throughout for Canbus, lights, halls, etc..
- Higo L1019 motor wires directly wired to stock stator phases and halls. NTC 10k temp sensor installed in both motors. L1019 wire/connectors houses all phase, hall and temp sensor wires within one single wire and connector. Stock phase wires were 3.0mm² (12awg). Higo L1019 uses 4.0mm² (11awg) phase wires, so they have been slightly upgraded as well
- 60w headlights with 6000 lumens each with integrated fans. Hooked to and powered by Nucular uLight module for high/low beam and running light settings
- FalconGo kiddy bar to mount the headlights
- 160mm Sram Cleansweep G2 rotors with ceramic pads using stock Nutt brakes. Was going to put on Magura brakes but after hooking up the variable Regen, they simply aren't needed. May be a fun project down the line for better modulation and just to say "I have Magura brakes". Nutt brakes along with variable Regen are plenty sufficient for slowing down the beast.
- Swingarm bearings, Headset bearings and Wheel bearings have been upgraded
I expect to be able to run around 65a battery per motor (130 battery amps) and around 150-125 phase amps per motor. Total power should be in the neighborhood of 10kw with the motors being the limiting factor. Ferrofluid will help push them to max. Top speed on full charge without field weakening I expect to be around 70mph. Field weakening should be able to get me over 80mph if I dare. Short test ride with battery at storage voltage (72v) had mind blowing acceleration at 55a battery set for each motor. I've been slowly working on this project for the past few months and just recently finished the battery which was the last big thing to do. Have had Nucular controllers installed and was running with stock battery at the end of last years riding season. It's still winter here so probably won't be able to justify charging battery and riding for another month or so. This has been a thrilling project and have learned everything along the way. I have a feeling I may have built one of the, if not the number one, fastest and most customized Vsett 10+ out there.
If anyone else has done similar or other upgrades to their Vsett, I would absolutely love to see what you've done.
I have plans to remove all of the yellow painted parts, sandblast the yellow off and paint a different color. I'm thinking either all blackout, pearl white or dark grey to replace the yellow.
The Samsung 48X 4800mah 21700 cells I used for the battery can safely be discharged to around 15-17a continuous giving me around 130-150 battery amps available. In 9P configuration I now have 43.2ah battery and will likely be able to get over 100 mile range per charge riding moderately. The nicest thing about these cells is that they have a 3000 cycle lifespan before 70% original capacity (30% degradation). I expect to have this scooter for many years to come. I also have the ability to use the controllers and battery on a different chassis in the future if I choose.
Any questions regarding parts used or processes involved, just let me know.
Attachments
-
 20220305_123708.jpg2.6 MB · Views: 3,896
 -
 20220226_225327.jpg2.1 MB · Views: 3,888
 -
 20220226_213218.jpg1.9 MB · Views: 3,905
 -
 20220224_000435.jpg2.1 MB · Views: 3,903
 -
 20220221_222339.jpg2.2 MB · Views: 3,887
 -
 20220221_201015.jpg1.8 MB · Views: 3,893
 -
 20220218_193347.jpg2.2 MB · Views: 3,904
 -
 20220211_225554.jpg2.3 MB · Views: 3,899
 -
 20220210_203508.jpg2.1 MB · Views: 3,901
 -
 20220206_002756.jpg1.8 MB · Views: 3,890
 -
 20220201_202402.jpg1.1 MB · Views: 3,890
 -
 20220122_143938.jpg2.2 MB · Views: 3,896
 -
 20220115_202956.jpg1.9 MB · Views: 3,892
 -
 20220110_222900.jpg2.3 MB · Views: 3,893
 -
 20220104_174708.jpg1.7 MB · Views: 3,886
 -
 20211224_141727.jpg1.9 MB · Views: 3,883
 -
 20211130_205910.jpg2.3 MB · Views: 3,876
 -
 20211114_171842.jpg1.6 MB · Views: 3,876
 -
 20211126_094906.jpg1.7 MB · Views: 3,876
 -
 20211114_145332.jpg3.3 MB · Views: 3,880
 -
 20211114_145324.jpg1.4 MB · Views: 3,890