Yamaha PASB2 Battery non-recoverable error - AFE Fault

joe_velo

1 µW
Joined
Jan 16, 2024
Messages
3
Location
Millau
Hi all - First off, thanks for reading this and for any help that may trickle my way!

So I've got a Yamaha PASB2 B94-20 400Wh battery. I hooked it up to my homemade battery capacity tester (which has worked splendidly in the past!) and bam. The battery, which was functioning, now gives me a "non-recoverable" error code. Per the Yamaha manual, the code received is an AFE fault. Yamaha's recommended course of action is to REPLACE.

My question: anyone here have any advice on repairing the AFE/BMS on one of these older Yamaha batteries? Is it even possible?
 
Depends on what's wrong, and how the system was designed.

If the fault is a self-bricking code, it means that the BMS detected a fault (like votlage drop on a cell below it's worst-case LVC, below recharge-able level), and turned the input and output off and locked them that way, permanently.

In that event, if you have the Yamaha factory software/hardware used to service these, it might be resettable, or it might be something where the MCU inside the BMS writes a code into it's flash that tells it not to do anything when it wakes up next time, and after that there's nothing to be able to change that code so it's now a dead MCU. (or it erases a code that points to the startup location in the software, same effect). In theory if you could access the internal code with a programmer (like STlink for STM32 MCUs, etc) you could fix it but only if you know what the code is and where it is and what to put back to overwrite it with.


If it's actually just a cell or cells that have gone below LVC or there's a difference in voltage between cell groups outside some range (often 0.1v but could be anything the designers chose) but the BMS hasn't done a self-bricking, manually charging up those cells, directly at the cells inside the pack, so they are all equal and within the normal range, could cause the BMS to reset itself and work normally again. (if the BMS doesn't require an external reset command)

Same for if it's a blown fuse, etc.

So the first step in fixing it is to find out *why* it had a problem in the first place.

What exactly happened when it was hooked up to the capacity tester? What was done to it in the process?

If the pack can be opened without damage (or voiding any warranties, etc), then measuring the voltages at the cells themselves may tell you something.
 
@amberwolf thanks for the quick response!

Just so I understand, what purpose does the self-bricking serve other than to render the battery a brick? Is this to protect from potential physical harm to the battery/environs or is it to ensure only yamaha to yamaha compatibility (or both)?

I don't believe it's an LVC issue on the cells. The battery was functioning properly and at full charge when this happened. The test was being performed just to get an overall idea of potential capacity.

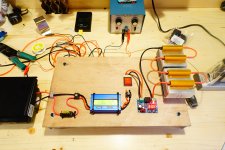
My setup runs the battery through a wattmeter then through a switchable series of resistors in series designed to draw at about 2amps for a gentle discharge. The resistor circuit runs through a programmable LVC switch to ensure cutoff. Prior to the resistor circuit, I've got an inline 20A fuse just in case. Picture of the setup attached.

Series of events: hooked up the leads to the battery with load bank switch "off" - got initial state readings on the wattmeter (battery at 42.3V) - hit the switch to load the battery - almost immediate LVC cutoff on the programmable LVC board (set to cutoff at 31V) - switched off load bank immediately and noticed no power to the wattmeter (total battery shutdown).

After this, E and F leds flashing on the battery. Long press battery button to reveal Error code corresponding to AFE Fault.

Do you think it's still worth opening up to check cell voltage?
 

Attachments

  • DSC02257.JPG
    DSC02257.JPG
    5.1 MB · Views: 6
Yamaha PASB2 is designed to brick itself. Even disconnecting a balance wire for half a second will brick it.
 
Just so I understand, what purpose does the self-bricking serve other than to render the battery a brick? Is this to protect from potential physical harm to the battery/environs or is it to ensure only yamaha to yamaha compatibility (or both)?
Theoretically it's to prevent a problem with a cell potentially causing a fire, which in addition to protecting the end-user also helps cover the legal department of the companies making and distributing them. ;)

Effectively it prevents non-factory repair of packs that do this.

It's even possible that this one is designed with a totally-non-safeguard bricking function, that if you attempt to use the pack on anything that's not the original system it does this--meaning if you draw any current from or feed any current to the battery when it is not communicating with it's original system, it "anti-hacks" itself and dies. The purpose of this could be argued....


Do you think it's still worth opening up to check cell voltage?
If Yamaha won't repair it, and it's unusable in it's present state, then it depends on your curiosity, skills, and the potential for reusing the pack on a different non-oem-locked-in system (generic ebike, etc) if the cells are good but the BMS is just bricked you could replace the BMS with a "generic" one to do that (even though it presumably wouldn't work on the Yamaha system).
 
First of all there is a problem with this forums: you need to have an account to post something. There are forums where you can post as anonymous. I have the information that can help a lot of people and now I have to make an account... pff. I'm sure many people who knows how to reset this battery BMS will not make an account just to let others know.
So I just made myself an account to this form. First I had the same problem as anyone else here, then I found a solution and now I'm here.
I have a PASB2 B94-20 battery that I've fix it today.
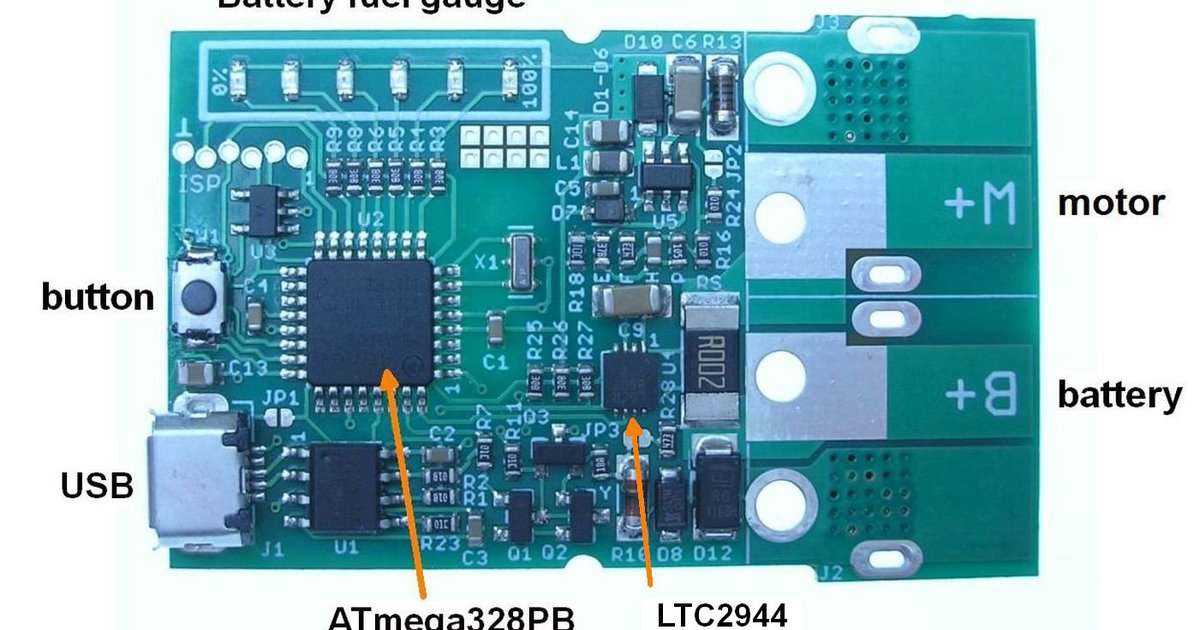
First I've unsoldered the BMS using kapton tape to cover all the PCB except the solder joints from the cells. Changed some cells, balanced all the pack with another Chinese BMS, then soldered the original BMS in place.
This was the moment when I've searched this forum. LED 1+3 and 2+4 where alternating when I've connected the charger, nothing more.
I found a way to make the battery work again and I will give you some hints (this is becouse of the frustrating fact that I've had to make an account here just to post this).
Hints:
1. Think about the way the battery is assembled in the factory. It is clear that the cells are welded together in the pack before the BMS is installed.
2. The BMS must be already programmed and tested before it is installed and soldered in place.
3. There are test points on the BMS, but no needle have been touched that test points. (checked under microscope)
4. All you have is a button and a charger. When you push the button, how long do you keep it pushed, until when you keep it pushed, when you plug the charger, how long you let the charger plugged I'll live it to you. The good thing is that is possible! (i bet is the factory procedure)
If the admins of all this forums think that my time don't cost nothing, and I will make accounts everywhere just to help people, then they are very wrong.
There are lots of people like me who will like to share some info but they will not make accounts just for this.
I work for 20 years now in electronics prototyping, firmware development, and firmware reverse engineering.
Admins from all over the world! just help us help you by adding anonymous post option on the forums.
Hi Stefan - sorry that your frustrated about this forum, but it is regardless a treasure trove of good insights from people like you! I'm not sure I understand part 4 of your series of hints. Are you saying that there's a simple combination of button presses that resets a "non-recoverable error" on these batteries without replacing the BMS? If so, this would be BIG NEWS. Thanks in advance.
 
Yes. There is a simple way of resetting this BMS. I had the BMS unsoldered from the battery pack.. totally aside under the microscope. There was a small smd resistor on the data line... a pull-up, or pull down - can't remember.... that have been burned and I had to change - this was on the other side of the BMS PCB. I've got a way to reset the BMS after reconnect it to the battery pack. I remember that I've kept the battery button pressed for a long time while I have plugged the charger and removed for 1 time. LEDs pattern have been changed 2 or 3 times with the button pressed.
Now I've got another battery with a molten connector to repair and I'm sorry that I haven't written here the steps that I've done to reset this BMS. Good thing that Google remembers my passwords for this forums, otherwise I would have been unable to post again 😁
 
I have hundreds of different electric devices for repair, all unrelated. Often I found myself discovering ways to fix this devices that otherwise I can't find a clue on the internet for how to fix them... And this is frustrating, because I want to share my findings and all the time I have to make a new account on a new forum for the device in question. For example: last discovery was a charging chip from a JBL portable speaker. There is no information on the internet for that chip, but working with that hardware topology for charging chips, I have easily guessed the part number - was a TI BQ chip. Now if you ask me what was the part number... I can't remember. If there was a easy way to post this things on a forum I would have posted them all.
Anyway, now I have this same battery with the charging connector molten and the charger has its connector molten too... I need to find a way to fix it.
 
Back
Top