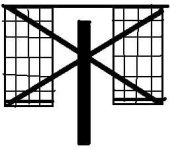
Rear Basket Fairing (first attempt for aero with coroplast)

LI-ghtcycle

10 MW
Joined
Aug 29, 2009
Messages
3,818
Location
Oregon City Oregon
Hello all, I have been scratching my head on this one, I have a few ideas on how to do this, but I keep feeling like I don't have a really good solution, I have been brain storming a few days now, and I have a "working" set-up, seems to bear weight fine, but I REALLY don't like how rickety it is.

I'd also like to mention that I'd REALLY rather not weld things, but if I have too, I have a gas welder here, and it would be a nice enough day to use it tomorrow (no room inside our huge garage, too much junk ... don't ask ... :roll: :evil: :oops: :wink: :lol: ) and I would really like to add supports at every corner top and bottom of each basket.

I'd also like to mention that I'm glad that this seems to be self-supporting, and that the sleeping bag has taken up considerably less space than I expected, but I still need to add some electronics (DC to DC converter, MS headlight, DC to AC inverter, solar panels, blinker and tail light, much of which will be embedded into the coroplast fairing that will skin all the cargo on back and be the total construction of the front fairing.) and a few misc. items, but some will be stored inside the fairing up front.

Here are some pics:

38376254035_large.jpg


38376254036_large.jpg


38376254037_large.jpg


38376254038_large.jpg


38376254039_large.jpg


38376254040_large.jpg


Don't forget, all the stuff in the baskets will be covered with a 4mm coro-plast skin, that will be supported by a 10mm coro-plast "skeleton"

I think I may have found a way to tie the 2 "stays" that normally would bolt onto the seat stays, and bolt them onto the modified piece I have from a bell rack that was designed for full suspension bikes, that would make a triangle that would be pretty strong, but it wouldn't add much side to side stability.

Gonna have to rough-up the aluminum spacers on the seat-post so they don't slip around so much.

Thoughts?

Thanks! 8)
 
I have those EXACT same baskets,
http://www.endless-sphere.com/forums/viewtopic.php?p=231001#p231001
which I used for years for different bikes, and until I started beating them up with my motor experiments on DGA they were fine, but eventually welds started popping on the wires at various points when I carried the SLA in them (especially when the bike fell over due to kickstand issues).
http://www.endless-sphere.com/forums/viewtopic.php?p=231004#p231004

file.php

file.php

For all of that time my main fix for the "ricketyness" was to dab some silicone sealant at every point where the baskets met the dropout support brace, along it's length, and then ziptie across those points, too. That fixed all the squeaks under load, as well. You've got a few zipties in place now, but if you do it at every wire that passes it, it's stiffer.

I wanted to use some thick stiff aluminum wire I had to twist around in place of the zipties, but I was not strong enough to twist it hard enough to make it tight. Baling wire would have worked but I did not have any then.


What I eventually planned to do was add an X brace across the back of it, so that the bottom of each basket would be braced up to the top rail, which prevents the sidesway of them when loaded. It would have been bent out of 1/8" steel panels off of something, hammered into J-shapes on each end, and then clamped with nut-and-bolt thru the J over the top wire rail and the bottom wires of the baskets (as I didn't have a welder at the time).
basket xbrace.JPG
After I got the welder I also planned to fix the broken welds on the wires around it, and add a second set of railing around the bottom of each basket to stiffen them further, but about that time I broke one of the motors on the friction drive, IIRC, and I was working on ReCycle, the never-finished recumbent, and then I built CrazyBike2, and in the process also built a new rack and cargo box for DGA, and didn't need the baskets anymore (I gave the front one away and the back one too but it came back to me already).

So the silicone and zip ties will help a lot, and I think (but never tested) the bottom rail and the X brace will help a lot, too.
The X-brace you can do without a welder (though it would be tougher if welded), but the bottom rail reailly would need to be welded to every wire around the basket's bottoms.
 
Kewl, I love the "X" brace idea, thanks! I hesitate to weld only because I never was good at gas, but I might be able to get my neighbor to lay a couple beads for me, can't believe I hadn't thought of that!

I have about 4 things still coming in the mail now, and once they are hear technically I could leave, but I really want to be sure I have all my ducks in a row before I go.

Thanks again! :D
 
Do you like your friction drive? Don't you think you may want a much wider seat maybe even with a back rest? I regularly ride 25-30 miles without stop and find I need a bigger seat and a backrest would help too. You are planning much longer time in the saddle. Well you can always try to get one out on your journey into the great outdoors.
 
I don't have trouble with my saddle, this brookes is amazingly comfortable, and yes, I love the friction drive, it's a lot different than a hub motor, so I am learning it's differences.

Right now I am waiting on a new ESC, and hoping that my original one will be warrantied.

My next step after securing the rear basket rack is building my fairing.
 
Whoo Hoo!!

I tried another idea and I think I hit pay-dirt!

38376254042_large.jpg


38376254043_large.jpg


38376254044_large.jpg


38376254041_large.jpg


Right now it's about 80% as rigid as I would like, which is a HUGE improvement over the 50-60% it was before. I will add some more supports to the bottom corners and see how solid it is and take some trips with it loaded up (Ironically the roll of fencing I bought at Home Depot will probably be the first heavy load I carry with it when I take it back :lol: ) to make sure it's solid and then I will add the coro-plast! :twisted: :twisted: :twisted:

Wish I had more in the budget for some good shears to cut those stainless steel zip ties though! They are very tough and flexible, I am thinking they might be ideal for major structural parts of the actual fairing too since they are so pliable and yet still so strong! :D

*** EDIT *** Almost forgot to mention, best part is it will allow me full access to the Kepler Drive and rear wheel even once I have the fairing attached (if all goes as planned, just taking me forever to do it! :roll: ) with a quick release system, the coro-plast will just be a non structural shell that goes over top the structural stuff, hopefully in a one piece unit for the back.
 
Add the rest of the zipties to all the points where the dropout supports cross the basket wires, and it will stiffen it even more. I do also really recommend the silicone at each point, too, but failing that, if you at least put a thin (1/8"-1/4") strip of closed-cell rubber foam along that entire area between the basket and the support, before tying them down, it will help with rubbing/squeaking and also keeping the zip ties from being cut thru/broken as easily.

 
Kewl thx, I am definitely going to have more zips on there, is the silicone needed for even stainless zips to keep them from wearing through?

I'm also going to attach the bottom front outer corners of the baskets to the seat stays (It will be easier once you see the new pics :p ) and I think that should do it!

Now my biggest challenge will be designing the removable fairing that will offer all the coverage I am looking for and still come on and off with ease.
 
The silicone isn't for keeping the zip ties from wearing thru, really, but rather to keep anything from vibrating just that little bit causing eventual wear.

I doubt the stainless zips would wear or break (but have never even seen them, much less used them), so there is less of an issue without the silicone.

However, unless you can get the stainless zips a LOT tighter than nylon zips, vibration will still cause rubbing of support against basket, loosening the contact over time.
 
You might want to try moving the supports to a point lower on the seatstays or even on the dropouts. The seatstay tubes will flex under load and the longer stance will help with side sway.
 
csmarr said:
You might want to try moving the supports to a point lower on the seatstays or even on the dropouts. The seatstay tubes will flex under load and the longer stance will help with side sway.

Agreed, I think I am going to have another set or 2 of supports both lower and higher, and maybe tied together. I mainly have the main supports where they are now just for proper height and clearance of my heels.

You can get SS zip ties at Harbor Freight, I forget how much they were perpackage, maybe $ 8-9 per pack of 15 or something. They are a pain to cut though, I can't find my EMT scissors and my sheet metal sheers aren't fine enough to cut them, so I have been using my best wire cutters and then twisting against them with some lineman's plyers.
 
Oh, I wanted to mention too that the reason I am not using the drop-outs is because I have quick release axles and I want the rear wheel as easily accessible for maintenance as possible.
 
csmarr said:
You might want to try moving the supports to a point lower on the seatstays or even on the dropouts.
Huh. I didn't even notice that they weren't already on the dropouts--I guess my brain assumed that they were, since that's how I had mine. :lol:

But this is correct--you'll want to put them as far down and back as possible, for the widest stance possible (on the outside of the stays immediately above the dropouts if possible).

On mine, I drilled a small hole in the rack support (can't remember if ti was above or below the existing large hole) and used that to bolt it to the accessory hardpoint just above the dropout on DGA. I did it for basically the same reason you want yours not on the axle itself--access to the wheel.
 
It's ALIVE!! :D :D :D

Got my new ESC today along with a couple other goodies, and I should be under power again tomorrow. :twisted:

I also have a new set of "stays" on the back of the rack that connect where the factory ones should have in the first place, all the way back at the thickest supports.

Pics coming soon!

Stainless Steel Zips normally are installed with a special tool, but I seem to be doing ok using some needle nose plyers and twisting them tight, but they are a pain. REALLY strong though! :D
 
New pics!

38376254045_large.jpg


38376254046_large.jpg


38376254047_large.jpg


38376254048_large.jpg


I am VERY pleased with the results! :D

I haven't got the bike loaded down with gear yet, but just testing it for stability, I'd say it's 99% as stable as I can get it short of doing some welding and really serious mounts directly to the frame.

Now I just need to figure out how I want to add the fairing and build it! 8)
 
What about using fiberglass and polyester resin to cover the racks. That would make the interior water tight and the setup would provide additional strength as well if the glass was used on the inside and outside of the wireframe, not sure how much weight this would add though.
 
You are right, if I used fiberglass it would make everything stronger, however, even just fiberglass alone would add more weight than I wanted, and I can't say it wouldn't be lighter than using it in-place of the baskets, but the time it would take and the custom metal framework I would need to build into it is much more time and money than I wanted to spend. I have much less weight in my coroplast than I would with fiberglass, and it's $8 a 4 X 8 sheet! I'm going to take back the metal fencing that I bought, seems I have to brain storm and buy something before I realize it's not what I need.

I have a design now in my head that I believe will streamline much of the rear trunk/fairing, and make it a lot simpler than I originally planned. I will let you know if it works today.

I also have all the electronic components to make my Kepler Drive work, just need to put it all together and make some test runs! :twisted:
 
scouser-nick:) said:
i used to make fairings out of paper mashe with a layer of thin card over the top :D

Not a bad idea, even if just for a "mold" of sorts! I am hoping to make the natural resistance of the coro-plast to make it stronger, so far so good, more pics coming! :D
 
Today's progress, achingly slow .... :roll: ... but still progress:

38376254049_large.jpg


38376254050_large.jpg


38376254051_large.jpg


38376254052_large.jpg


38376254053_large.jpg


38376254054_large.jpg


38376254055_large.jpg


38376254057_large.jpg


38376254058_large.jpg


38376254059_large.jpg


38376254060_large.jpg


38376254061_large.jpg


Ok, back to work! hopefully I can move it back inside the garage soon, working with just one weak outside light isn't very fun. :wink:
 
You bet, problem is it's an evolving design, every time I think I know how I'm going to build part of it, the way the plastic shows me how it forms when I attach it and I have to adjust the design. I really want it to be strong and light, and the shape is going to be dictated more by those factors than anything else, and it needs to have ample room for all my gear, so instead of the peaked roof I envisioned, it's looking like it might be more flat, but I just don't know yet.

I thought that I would be able to force the top together in a certain way, but this coro-plast is a lot different than any plastic I have worked with before. With ABS I can just heat it and form it around anything I want, but with this stuff, I have to pretty much cold form it since the air gaps inside don't seem to allow for uniform heating all the way through with a heat gun, so it really doesn't help.

It's not bad stuff to work with, just a lot different, and I am pleased with the results so far, it's just shaping up differently than I expected. :)
 
Oh I wanted to mention, the top half is either going to be one piece and removable, or just one side will open as a "flap" and be the only access inside to keep things strong.

The biggest question now is how to best attach some of my thicker "bulkhead" 10MM coro-plast to the front of the baskets in such a way as to lean it back so that I have ample room for a back-pack (if needed in emergency) but not so far as to compromise the storage capacity in the "trunk" or too far that it's not as strong. I want it to be bent back enough that it is under tension and pulling forward keeping things strong with static tension, but not so much that it's likely to weaken.

I think I will have some form of "spine" along the top of the "trunk" to attach the front bulkhead with the rear, but gonna have to experiment to see how it comes out.

I'm really surprised that it has taken an entire 4 x 8 ft sheet to do this much! I may have to order another sheet before all is said and done. Good thing it's only $8 and the local company will deliver it free. 8)
 
LI-ghtcycle said:
I may have to order another sheet before all is said and done. Good thing it's only $8 and the local company will deliver it free. 8)
If you could wait till November, you could have as much as you want in smaller pieces, just for the trouble of collecting it. ;)


Regarding forming with the heatgun, it takes two people with two guns to do it; one on either side. :(
 
Back
Top