Tight axle nuts with ebrake low/high?

calab

1 MW
Joined
Dec 10, 2013
Messages
2,063
Is there a cheap, down and dirty way to keeping the axle nuts tight?

I need ebrake but last time I hooked it up the axle nuts kept getting loose.
I wonder if my last attempt did not have the torque arms as tight a fit as they should have been, having the axle rotate, loosening the nut on just one short ride using the ebrake a few times.

Using blue Loctite might help, but I never tried that yet.
 
Use a mechanical brake and don't worry about it. That's what mechanical brakes are for.
 
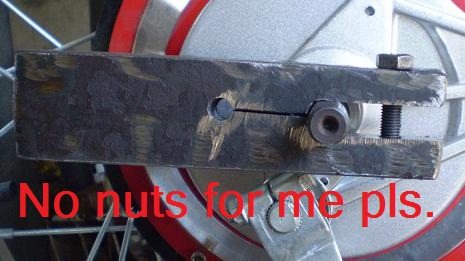
mongoose pinch dropout.JPGTake the axle nuts off, or at least one of them. Then use a clamping dropout system of some kind instead of the nut.

Another option is to really maximize the tight fit of a torque arm. This in general, means you fabricate a set of torque arms that fits so tight it allows near zero movement. This is a good approach even if you do not use your regen.
 
dogman dan said:
Another option is to really maximize the tight fit of a torque arm. This in general, means you fabricate a set of torque arms that fits so tight it allows near zero movement.
Also, whatever you use, make them as "thick" as possible to engage the maximum surface area of the axle flats on both sides. That contact area is so small in many cases that it causes problems even without regen braking. Increasing it to the maximum possible contact surface (such as the way Dogman's clamps look) will help.
 
I just go through a lot of brake pads, plus right now I just have a rear brake but I roll slow.
I found a local store that sells v-pads at a reasonable rate, N49 $5.99, Jagwire about the same but 3-4 months ago I bought Shimano's for $15.99
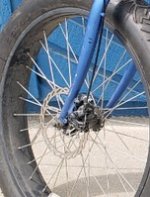
The front is the hub, with disk mount that I just need to find/fix a caliper and install but disk pads start at $15.99 locally.
Salmon KoolStops v's or disk pads would be nice to have, but would they last longer then the N49/Jagwire?
Having a front and rear brake will help reduce replace intervals.

Chalo said:
Use a mechanical brake and don't worry about it. That's what mechanical brakes are for.

I saw that same pic in my e.s. post/thread search. Zero movement was what I was hinting at.

dogman dan said:
Take the axle nuts off, or at least one of them. Then use a clamping dropout system of some kind instead of the nut.

Another option is to really maximize the tight fit of a torque arm. This in general, means you fabricate a set of torque arms that fits so tight it allows near zero movement. This is a good approach even if you do not use your regen.


I only have 1/4" maybe or slightly smaller (3/16) flat steel thickness gauages. I have a pile of steel stock and I could double it up but like many others the axle length of the hub isnt that long, I will take some measurements and get back to you all.

amberwolf said:
dogman dan said:
Another option is to really maximize the tight fit of a torque arm. This in general, means you fabricate a set of torque arms that fits so tight it allows near zero movement.
Also, whatever you use, make them as "thick" as possible to engage the maximum surface area of the axle flats on both sides. That contact area is so small in many cases that it causes problems even without regen braking. Increasing it to the maximum possible contact surface (such as the way Dogman's clamps look) will help.

I will take a few pictures of my setup

E-HP said:
calab said:
Is there a cheap, down and dirty way to keeping the axle nuts tight?
Do you have a picture of your current setup?
 
calab said:
I only have 1/4" maybe or slightly smaller (3/16) flat steel thickness gauages. I have a pile of steel stock and I could double it up but like many others the axle length of the hub isnt that long,

Since the nuts aren't what will secure the motor when using thick torque plates/arms, you can leave them off entirely to gain more axle length (mating surface area).


The important thing with a torque arm or plate, especially when using regen, is to ensure as perfect a fit to the axle flats as possible, across the entire mating surface area, to distribute the load evenly to prevent damage to the axle flats or the torque arm/plate flats that will then allow axle movement which will then increase damage which will allow more movement which will cause more damage, etc.
 
calab said:
I only have 1/4" maybe or slightly smaller (3/16) flat steel thickness gauages. I have a pile of steel stock and I could double it up but like many others the axle length of the hub isnt that long, I will take some measurements and get back to you all.
What are you using right now that is still allowing the axle to twist?
 
E-HP said:
calab said:
I only have 1/4" maybe or slightly smaller (3/16) flat steel thickness gauages. I have a pile of steel stock and I could double it up but like many others the axle length of the hub isnt that long, I will take some measurements and get back to you all.
What are you using right now that is still allowing the axle to twist?

He's using e-braking. Other than a tightly clamped torque arm, there's always some amount of clearance, however small. When the motor torque only acts in one direction, no problem. But when the motor torque reverses regularly, it can loosen the axle nut by whatever amount of clearance there is, every time it reverses.

I think using regen or e-braking with a non-clamping torque arm is folly. But if for some reason I felt I had to do it, I'd use a jam nut locked to the outer side of the axle nut in the hope of preventing it from backing off.
 
OK I get the over-all feeling here, clamping t.a.'s it is, I will have to figure something out.

The current ta's on my ebike are 1/8 - 3/16 thick not anywhere near 1/4 thick x 1" wide x 5" long, hot or cold rolled I cant remember.
If I can find some steel plate thats 1/4 but closer to 1/2" x 2" long x 1" wide then make some threads, make a slot for relief cut.
The angle iron ta's look complex, I feel scared not using an axle nut.

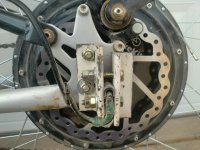
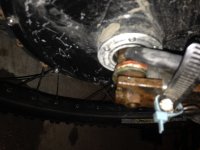
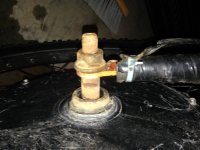
My cell phone ran out of juice the minute it felt a degree of cold in the garage. I will explain it the best I can, the first pic below is a good example of my fork.

After the axle nut there is an inch of threads
With current ta installed there is a half an inch of thread.
Axle nut, steel ta hose clamped to fork.
ta is 4-5" long, 1/8" x 1"
I could change the angle and use a pivoting ta.


Not mine but same model of bike.


nice view.jpg


my fork.jpg


my fork1.jpg


2 pics of mine
Of course now my computer doesnt recognize the cell phone plugged in. Maybe I will try with Linux hd.
 
Chalo said:
I think using regen or e-braking with a non-clamping torque arm is folly. But if for some reason I felt I had to do it, I'd use a jam nut locked to the outer side of the axle nut in the hope of preventing it from backing off.

Of course our opinions on regen differ, but my Grin torque arm(s), on the left side of my Leaf motor is literally a press fit. I think it would take me 10 or 15 minutes to get it all the way off, but I'm able to back is out just enough to get my wheel off when I need to. On the right side the torque arm is a tight fit, but I have it shimmed with a piece of razor blade that I can jam in with a chisel. If I start it sharp edge first, it only takes a couple of whacks to get it in far enough to take up any slack . Neither has any movement relative to the axle, and have solid anchors (no hose clamps).

I'm using slide regen so if I'm not throttling, I'm regening (but I can still use throttle for PAS or coasting, which took a couple of months of practice to become second nature). I don't set the regen high, since I primarily want energy recovery, but it's enough to slow the bike down pretty fast if I let all the way off the throttle. Never had a nut come loose or move. Clamping is ideal, but as long as torque arms are a tight fit and have a solid anchor, then I don't see an issue.
 
calab said:
Not mine but same model of bike.


nice view.jpg


my fork.jpg


my fork1.jpg


2 pics of mine
Of course now my computer doesnt recognize the cell phone plugged in. Maybe I will try with Linux hd.

Where's the motor?
 
Chalo said:
...I'd use a jam nut locked to the outer side of the axle nut in the hope of preventing it from backing off.
Good idea, thank you for that.

Just in case there's any confusion about where the jam (thin) nut should go, it should go on first, contrary to "common sense" opinion.

"Tightening one nut down and then simply tightening another nut on top of it achieves little locking effect. A specific procedure needs to be followed if locking is to be achieved. When a thin and thick nut are used, it may be thought that the thick nut should go next to the joint since this would take the entire load. However, by placing the thin nut on first, when the thick nut is tightened on top of it, the load on the threads of the thin nut are relieved of their load.

The thin nut should be placed on the bolt first. This nut is typically tightened to between 25% to 50% of the overall tightening torque. The second (thick) nut is then placed on the bolt and the thin nut held to prevent rotation by a spanner whilst the thick nut is tightened to the full torque value."

From https://www.boltscience.com/pages/twonuts.htm
 
99t4 said:
The thin nut should be placed on the bolt first. This nut is typically tightened to between 25% to 50% of the overall tightening torque. The second (thick) nut is then placed on the bolt and the thin nut held to prevent rotation by a spanner whilst the thick nut is tightened to the full torque value."

From https://www.boltscience.com/pages/twonuts.htm

Pretty cool. So does tightening the jam nut to 50%, then the main nut to 100% achieve the same clamping force on the dropout as just the main nut to 100%? Seems like it would.
 
99t4 said:
Chalo said:
...I'd use a jam nut locked to the outer side of the axle nut in the hope of preventing it from backing off.
Good idea, thank you for that.

Just in case there's any confusion about where the jam (thin) nut should go, it should go on first, contrary to "common sense" opinion.

Yeah, but if it's a flanged nut you're trying to lock, that doesn't work.
 
Reading more closely, I get it, clamping torque arm is where its at.
Its a matter of how do I implement it, not a lot of space, doubt the angle iron picture posted would do much, because I do not have a lot of area to play with. Not sure what that style of drop out is on my fork, but not a lot of surface area on the dropout area.
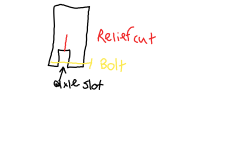
If I get really thick flat plate steel, make the axle notch as tight as possible, make a relief cut (red) on the where the axle bottoms out (black notch) to get it to flex with when bolts is inserted in the threaded hole (yellow). If I get 1/2" thick steel, means the threaded part would be half that so 1/4" threaded hole. Wont be much off-cuts in the sale bin for much thicker.

Untitled.png

E-HP said:
Chalo said:
I think using regen or e-braking with a non-clamping torque arm is folly. But if for some reason I felt I had to do it, I'd use a jam nut locked to the outer side of the axle nut in the hope of preventing it from backing off.

Of course our opinions on regen differ, but my Grin torque arm(s), on the left side of my Leaf motor is literally a press fit. I think it would take me 10 or 15 minutes to get it all the way off, but I'm able to back is out just enough to get my wheel off when I need to. On the right side the torque arm is a tight fit, but I have it shimmed with a piece of razor blade that I can jam in with a chisel. If I start it sharp edge first, it only takes a couple of whacks to get it in far enough to take up any slack . Neither has any movement relative to the axle, and have solid anchors (no hose clamps).

I'm using slide regen so if I'm not throttling, I'm regening (but I can still use throttle for PAS or coasting, which took a couple of months of practice to become second nature). I don't set the regen high, since I primarily want energy recovery, but it's enough to slow the bike down pretty fast if I let all the way off the throttle. Never had a nut come loose or move. Clamping is ideal, but as long as torque arms are a tight fit and have a solid anchor, then I don't see an issue.


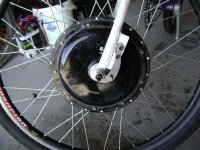
Front

E-HP said:
Where's the motor?


A bit confusing but I will pay attention more closely and read better.
2 nuts, one large, one thinnner.
So lets get this straight, I got the forks dropout metal whether it be steel or aluminum or cf or titanium.
The axle slips into the slot.
Normally you either use a washer with a nut or just a nut or a flange nut with or without a washer.
I dont do a washer, I tighten the nuts on both sides.
Slip on my ta's and secure them.
What you guys are saying is I can use two nuts, if I have the luxury of a long axle. One wider nut, one thinner nut.
Its the orientation and the amount of torque you apply to each.
Dropout then thin nut then wider nut or dropout then wider nut then thinner nut.
That just cant happen I do not have enough room on the axle for that.

My plan of attack is to get 1/2" to 3/4" off-cut in the sale bin. Do as pictured.

I'd feel more secure when riding, slow as I do, to have some thread left to use a nut. TA's got to be spot on tight with no play.

I remember the debate of hardened tool steel vs regular old steel. The thought was tool steel could damage the axle because the tool steel gives zero play in the steel itself. Whereas the regular steel (hot/cold) has a bit of give to it, yes one hot/cold has more give then the other. Tool steel I can only imagine is expensive, no clue, maybe double or triple? harder to work with tool steel, tap and cut holes.

I like the idea of shimming, never would have crossed my mind to shim with a razor blade, but it makes sense.

I dont know if the cheap generic controllers with e-braking high with the other option being e-braking low if thats considered regen, to me regen would be a feature you pay more for. All I know is when I used it, I did get a bit less distance as when e-braking high or low is engaged it uses some power. I just have short hills, excellent for saving on pads, then I am only using the brake pads at the very end to stop, as by that time the e-braking doesnt have enough force to do it like it did at the top of the hill. e-braking needs rpm to engage with a high braking force, as the rpm decreases there becomes less and less braking force to when I am at 1mph its non-existant braking force, which is where the pads come in to stop.

I am sure if I had regen, I would net 5% maybe 10% additonal battery juice. Yes the Phase Runner would be cool, a neat and slim controller but its expensive. Could play with all its features and still be clueless.


99t4 said:
Chalo said:
...I'd use a jam nut locked to the outer side of the axle nut in the hope of preventing it from backing off.
Good idea, thank you for that.

Just in case there's any confusion about where the jam (thin) nut should go, it should go on first, contrary to "common sense" opinion.

"Tightening one nut down and then simply tightening another nut on top of it achieves little locking effect. A specific procedure needs to be followed if locking is to be achieved. When a thin and thick nut are used, it may be thought that the thick nut should go next to the joint since this would take the entire load. However, by placing the thin nut on first, when the thick nut is tightened on top of it, the load on the threads of the thin nut are relieved of their load.

The thin nut should be placed on the bolt first. This nut is typically tightened to between 25% to 50% of the overall tightening torque. The second (thick) nut is then placed on the bolt and the thin nut held to prevent rotation by a spanner whilst the thick nut is tightened to the full torque value."

From https://www.boltscience.com/pages/twonuts.htm

E-HP said:
99t4 said:
The thin nut should be placed on the bolt first. This nut is typically tightened to between 25% to 50% of the overall tightening torque. The second (thick) nut is then placed on the bolt and the thin nut held to prevent rotation by a spanner whilst the thick nut is tightened to the full torque value."

From https://www.boltscience.com/pages/twonuts.htm

Pretty cool. So does tightening the jam nut to 50%, then the main nut to 100% achieve the same clamping force on the dropout as just the main nut to 100%? Seems like it would.

Chalo said:
99t4 said:
Chalo said:
...I'd use a jam nut locked to the outer side of the axle nut in the hope of preventing it from backing off.
Good idea, thank you for that.

Just in case there's any confusion about where the jam (thin) nut should go, it should go on first, contrary to "common sense" opinion.

Yeah, but if it's a flanged nut you're trying to lock, that doesn't work.
 
calab said:
I remember the debate of hardened tool steel vs regular old steel. The thought was tool steel could damage the axle because the tool steel gives zero play in the steel itself. Whereas the regular steel (hot/cold) has a bit of give to it, yes one hot/cold has more give then the other.

Soft and hard steels have about the same elasticity, so they deflect the same amount from the same stress. But soft steel deforms permanently at a much stress level. Ideally, a torque arm is made of the same strength material as the axle. If it's softer, it won't hold all the torque that it otherwise could. But if it's harder, the axle will be damaged before the torque arm.
 
calab said:
file.php
Drill a hole at the end of your relief slot to reduce stress riser there.
lmm6Vl.jpg
 
I am sorry, I did take pictures, but for some reason the iphone 5 is not recognized by W10 or Linux yesterday.
Today, the computer recognizes the iphone 5.

E-HP said:
Where's the pic with the motor in the forks?

Thats a great point, with the relief cut having a drilled hole at the end of it.

99t4 said:
calab said:
Drill a hole at the end of your relief slot to reduce stress riser there.
lmm6Vl.jpg

I can work with what I got, its just to nice out to be inside cutting steel, making slots, drilling and tapping holes.


IMG_0133.JPG


IMG_0134.JPG
 
calab said:
I can work with what I got, its just to nice out to be inside cutting steel, making slots, drilling and tapping holes.


IMG_0133.JPG


IMG_0134.JPG

Looks like plenty of room for a quality torque arm for the lower pic. The other out of focus pic looks like a hot mess, and the axle isn't fully seated in the drop out. Is that supposed to be a torque arm on the end of the axle? Did you file the dropouts so the axle would fit correctly when you first installed the motor?

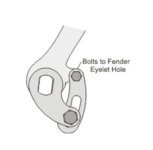
Since you have fender eyelets, I'd just file the dropout for the correct depth, then get two Grin V1 torque arms and be done.
V1.jpg
 
The axle spun a bit, widened the dropouts a tad :oops:
Its a ta on the one side (1st pic)
In the beginning, I did not file anything down. The axle sat good inside the dropout, until that one moment when changing a tire and I was not quite paying attention close enough and the axle spun because the ta wasnt properly in place, the ta widened as well. It wasnt that bad a day, I've had worse ebike days. 3 flats in one day was the last ordeal, stranded during rush hour with a mid drive that did not want to move kept dropping the chain and getting jammed due to a tooth being bent so 4 hr delay, walking bus stop to bus stop..... fun times.

E-HP said:
Looks like plenty of room for a quality torque arm for the lower pic. The other out of focus pic looks like a hot mess, and the axle isn't fully seated in the drop out. Is that supposed to be a torque arm on the end of the axle? Did you file the dropouts so the axle would fit correctly when you first installed the motor?
 
calab said:
The axle spun a bit, widened the dropouts a tad :oops:
Its a ta on the one side (1st pic)
In the beginning, I did not file anything down. The axle sat good inside the dropout, until that one moment when changing a tire and I was not quite paying attention close enough and the axle spun because the ta wasnt properly in place, the ta widened as well. It wasnt that bad a day, I've had worse.

E-HP said:
Looks like plenty of room for a quality torque arm for the lower pic. The other out of focus pic looks like a hot mess, and the axle isn't fully seated in the drop out. Is that supposed to be a torque arm on the end of the axle? Did you file the dropouts so the axle would fit correctly when you first installed the motor?

If the TA widened, it wasn't up to the task in the first place.
 
Hmmmm how do I explain it better.
The TA was not fully seated, I had the TA only at the tip so not a lot of beef to hold the torque.
This was 8 months ago, so put on countless miles since.
Yes I've only been using one TA for the last year, again countless miles but I roll slow.
I got lots to play with, steel TA is 1/8 or 3/16 not 1/4 by any means.
If red paint means anything or is standardized thats the paint on my steel flat stock.

Anyways thats all to explain away why it might not look right, as you say the axle doesnt look fully seated into the dropout.
I personally dont see it, but if you see it then I dont doubt it by a second.
I will take a better look before I roll out tomorrow, I gots to be safe.


E-HP said:
If the TA widened, it wasn't up to the task in the first place.
 
I see you can't do the kind of clamping dropout I showed on the front wheel.

You might try something I did for a race bike, using the good thick grin front torque arms. Instead of the hose clamp to secure the TA to the fork, I welded a small piece of steel to the fork, and placed it so I could secure the TA to the fork with two small grade 8 hex bolts.

Using this method, the TA was secured in such a way that I could have raced the bike with no nuts on the wheel at all. I was not using regen, and your nuts may still loosen after some riding using a lot of regen. But it definitely would eliminate the danger of a nut being loose. The axle might rattle around in the dropout, but the TA would keep it in the slot for certain sure. Race bike torque arm.jpg

Looking at that picture now, I could have put the mount on the fork in such a way as to use only the bottom piece of the TA, bolting it directly to the fork without the long arm piece at all.
 
Back
Top