Dogmans Re-Cycle, Pseudo Extracycle

dogman dan

1 PW
Joined
May 17, 2008
Messages
36,392
Location
Las Cruces New Mexico USA
Another Idea I've been stewing on for some time. A home brew extracycle type attachment. Bolt it to any frame, with one part of it customized for use with a particular frame. The main part of it though, should fit most bikes.

MINIMAL WELDING INVOLVED. So if this works, a good first project for the novice.

The basic Idea here is to get another affordable, compact longtail bike. So the goal is not a bike 2 feet longer, but a bike 8 or 9 inches longer. The advantages are a shorter parking length, a lighter bike, and short enough to carry on a rear bike rack on a car. But still having the better ride that results from a longer space between the seat tube and the rear wheel.

The idea is to start out with a swing arm from a used up, cheap ass MTB. You see these bikes new for less than $150, and the absolute max I'll pay for a used one is $50. Junk ones, 10-20 bucks at yard sales. In the USA at least, these bikes are at every garage sale if you get there early.

Also possible, and I'll try this too, is do the same idea with the ass half of a bmx bike.

Along the way, a disc brake mount will be added to the attachment.

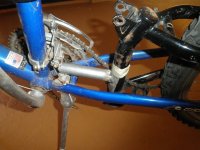
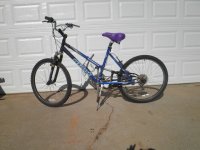
Heres the parts bike. One of my first commuters, I pretty much wore out this bike after 2000 miles. One bit of historical interest, it was the first e bike to race the gas bikes in the Death Race in Tucson.
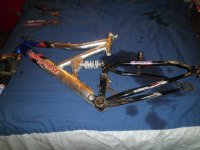
Cheap ass MTB.jpg

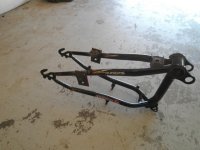
Remove this part of it. The entire black swing arm is mild steel. Pretty easy for even novice welders to work with.
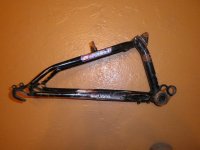
Cheap ass MTB swing arm..jpg

The approximate attachment points. It will bolt to the drop outs, and a bar will bolt to the shock mount. The other end of the bar will be custom length, so it can attach with some kind of large clamp on mount, to the seat tube. It might include a second bar, that bolts to the seat tube lower at the bb, or higher, at the seat stays. Bolt to a caliper brake mount or something like that perhaps?
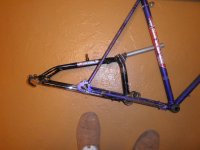
RE-Cycle concept.jpg

So a tab gets welded to the arm at the black arrow.

Pipe bolts to the arm at the shock mount at the yellow arrow. The tube will have to be the exact right size to fit good. It could be welded there if bolt on fails to be stiff enough.

At the blue arrow, the other end of the tube would have a fairly long, split in half tube welded on. That would allow some kind of clamp type attach to the seat tube. Possibly even just 4-6 hose clamps.
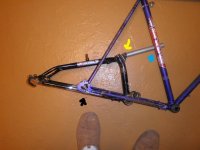

Attachment points.jpg

The tricky part, will be whether this can be done, without creating a rubbing chain on a bolt or something. Nice if you don't need to add a pulley to re position the chain.

This will end up as a 26" wheel attachment. But once finished, I'll explore whether it can be used with a 20" wheel.
 
Some more progress.

I'm going to use a ladies giant hard tail mtb to receive the attachment. Because of more similar frame, the steel swing arm fits much better on the MTB.

Going for about 6" of stretch this time.

Test fit on MTB.jpg

Next make two of these. Thick steel, about like a torque arm is made from. 2mm or so. About an inch and a half wide, several inches long. It will be too long, but easy to cut off excess later.

View attachment 2

They then bolt to the dropout, get the bolt in the bottom of the dropout so they are the same.

Tab bolted on to square up, and position it..jpg

Reposition the swing arm back, similar to the test fit photo. If the new chain stay lines up close enough with the old chain stay, it should not have a rubbing chain later. Once the tabs are welded, check the chain line before any more is done.

Then weld. See how the tab is not square to the swing arm. Start welding where they touch. then work on building up metal on the thick tab. Take time, let it stop glowing, then add more. Eventually the tab will be able to attach to the swing arm.

Weld first where tab touches..jpg

To get ready to weld, I used some paint stir stick to help align it. It's placed below the original chain stay, because if it's higher the chain will rub on the new stay.

View attachment 1

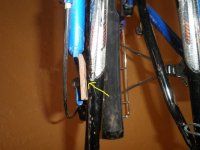
More cardboard shims prevent the attachment from touching the frame. If welded in place, they can touch. But as a bolt on attachment, I don't want to rub a hole in a good frame.

cardboard spacers.jpg
 
Next start welding. Start where the dropout tab touches the stay.

start welding where it touches.jpg

Then slowly so as not to burn a hole, add metal to the thick piece to fill the gap. When adding metal to the tube, weld for a sec, let cool, weld a sec. Once you build up some metal on the tube, then you can weld longer. Low power setting on the welder.

Fill the gap with metal.jpg

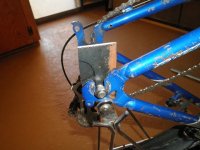
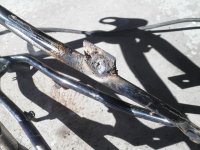
The finished attachment. Turns out one of the tabs got welded on crooked. That sucks, but in fact does not matter. The critical thing is the swing arm was straight when welded, and the tab bolt was all the way down in the dropout. The hole in the tab is still in the correct location, despite looking funny.

dropout tabs done.jpg


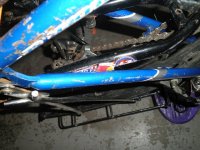
Next fabricate the other piece. This is a half tube, and a tube that fits the old shock mount on the attachment. BTW, I cut some metal off the attachment, where the old pivot was. Re bike attachment on steel bike.jpg

Close up of the attachment. As you can see, I need to re do this. On this frame, I need the half tube to be longer on the bottom. Can't clamp through the seat tube on this ladies bike. Close up of seat post connection.jpg

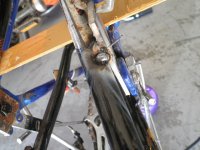
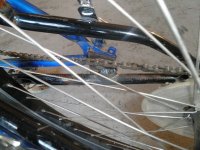
And now the disappointing part, but fixable. The chain will rub on that bolt. I can fix this by tilting the attachment, then making a new seat tube piece. Or, I can weld the bolt to the tab, then grind down the bolt head. Or, since it's a steel bike, I could just pry the stay apart till it clears, and use spacer washers on the axle.

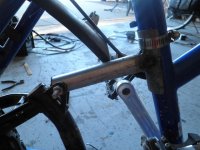
Chain rubs on bolt.jpg

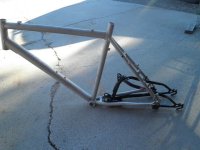
Nice to see, the attachment will work great with this aluminum frame I have lying around. That's the whole idea. I want to try to come up with stuff that will work with any MTB fame. Even a full suspension one could be possible, depending on the type of swing arm. It would connect entirely to the swing arm, rather than the seat post of course.

Re bike attachment on aluminum frame.jpg


Adjusting the attachmet, rotating it down, eliminated the chain rub. The length of the clamp on part now wrong. too long.

Adjustment to eliminate chain rub.jpg

Which then led to a "this could work" moment. Weld a bar onto it like this. This is how extracycle does it. I was sort of trying not to copy that part. But, on the other hand, if not selling them.... why not? It would be nice though, to come up with an idea somebody could make and sell without getting sued by clever cycles.

could do this, to attach extracylce style..jpg
 
Thanks Subscribed.

Maybe you should consider doing one of my concept to enjoy full suspension cargo bike :wink:
Concept_1.png

Concept_2.png
 
Actually, the first frankenbike I built was full suspension.

Bouncing Betty 2-2014  New Panniers.jpg

https://endless-sphere.com/forums/viewtopic.php?f=6&t=28389&hilit=bouncing+betty

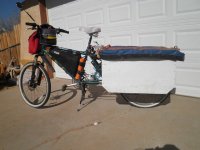
It worked great, and was able to run 35mph down a washboard dirt road with a full load of camping gear aboard. It had minimal welding, which I did with the worst stick welder ever made.

When I got the wire feed welder last winter, my first project was this one. The first compact longtail.

99% complete.jpg


https://endless-sphere.com/forums/viewtopic.php?f=6&t=66005

It ran great, but mistakes in the welding resulted in a crooked wheel. I made the rack too high, and most of all, the cheap bike I started with was not a good fit for my body. I just wasn't comfortable riding it really.

But as I built it, and after deciding I hated riding it, I began to think about a compact extracycle attachment. One that would make a good frame you like to ride just 6-10 inches longer. The original extracycle is a great thing, no doubt. But it does make a very long bike!! Not all have the space for one.

After I find the mistakes, you could make this your first project Cwah. Make one better than mine. Then, build your own, bolt on, very sturdy rack to go with it. This will be fairly easy, and prepare the way for you to weld your own deathbike, or your full suspension concept.

Next winter, we expect big things from you, after you learn to weld. 8)
 
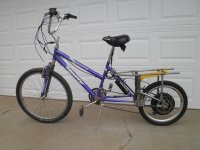
I think this is a great idea! A while ago, I liked the full suspension longtail I built out parts from two 26-inch bike frames. Bolt the rear swingarm pivot into the drop-outs of the main frame. As much as I liked it, I did wish for something slightly shorter. I thought that if I ever had enough room to store one more bike, I'd put together another, but using the swingarm from a 20-inch full suspension BMX (3 inches shorter), and perhaps the main frame from an MTB that had been intended to use 24-inch tires (shorter in height and length for "teen" riders), then swap in a real suspension fork.

Here is another example of an "extension"

https://endless-sphere.com/forums/viewtopic.php?f=6&t=235&start=1450#p1103687

file.php
 
Your bolt together suspension long tail definitely where I got the core idea of using the ready made swing arm.

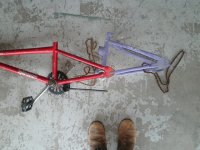
Already thinking about the bmx version. Makes two cheap bmx frames into a compact long bike with both wheels 20"

Damn its fun when the creative juices start flowing.


This one though, it might end up as a full weld permanent extension. In the end, the shortest possible long bike. Perfect for Cwah, except for the 45 mph part.

View attachment 1

long bmx.jpg

The ultimate end game though, might be learning to make Farfle swing arms for a DH bike. But that would be 26" or at least 26" front wheel again.
 
Part of the reason this is so timely is because...one week after Christmas, there's about a million bikes thrown in the trash to make room for the new bike, after the kid outgrew it. Its so cheap to do, I might just make the 20-inch rear/24-inch front just to see how it feels and rides. When the parts are free, its no loss if it turns out to be undesirable.
 
Yes, and colder weather makes hanging out in my garage nice. It faces the sun, so it toasts up fairly warm on a sunny day. My chat job slows down, so I can fart around with my welder while listening for the chime that means another newb needs advice.

Present to myself last night, an automatic dark hat, and two big spools of wire. Next project, I need to make some steel bike stands. And a stand for working on bikes. Man, that's an over due project.

Meanwhile, I finished off the Re cycle attachment, put on a long chain, and went out for a long ride. Works beautifully. If I was going to actually use it, I'd put a disc brake mount on it. Or make it longer, so the rim brake mounts could be used.

Then, make a rack for it, but a bolt on deal. Nothing welded to the original bike, so it can be used with an alloy bike.

Here's how the front attached to the bike in the end. Clamp and bolt on top, and a bar just resting on the kickstand bolt. The way this works, the wheel presses up on the attachment, the bolts in the dropout rotate till the bar pushes down on the frame. That bar could be bolted down, but in fact, it presses down hard when you get on the bike. The second bar clamping to the seatpost, that is more like insurance, in case a weld fails on the bar to the kickstand.

Front attachments, final version.jpg

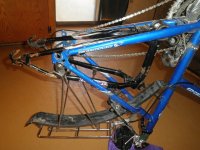
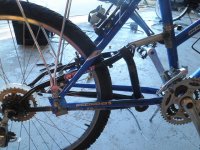
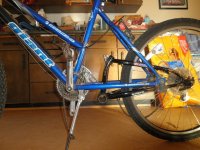
And a pic of the whole bike, finished enough to test ride. No creaks, nothing bending, very solid so far. Ridden about 2 miles last night. Pedaling. Whew! Good to be healthy enough to pedal that far now!

Re cycle attachment completed  (nearly).jpg


WHAT I'D DO DIFFERENT NEXT TIME.

1. Be more careful about that first weld, be sure both tabs are straight.

2 Make the stretch about 9" more. This may mean the attaching tabs will have to be made with angle iron. The upside will be a better ride, and the rim brake mounts will not be blocked.

3 Use thicker tube for the part that presses on the frame by the stand. I just grabbed some scrap. But in retrospect, this part needs to be strong.


Very tempting to produce these, buying up bikes at 10$ each, or even grabbing them freecycle. But this is OPEN SOURCE. Go for it if you want to. I'm not going to make these for money.
 
Love all your cargo bike builds! This is mine from last fall. No welding. I tapped the crank spindle of the add-on swingarm and bolted it directly into the dropouts. Aluminum square tube bolted to the shock mount and then bolted to a child's tag-along attachment. Works a treat. The two racks with the wood add a significant amount of stiffness.18084_copy_759x401.jpeg
 
Mine isn't an ebike yet but you're free to use the picture however you want. Could send you a better resolution picture if needed.
 
scottorious, great build! would love to see more detail photos, especially of the joint between the frames and how you made the various connections work. thanks in advance!
 
while it ended up not being a no-weld type, crazybike2 (in my signature) started out as a similar type of project, and evolved into a semi-recumbent instead. some pics of it's early stages are in the linked thread, and pics of it's original intent and build are at a link in the start of that thread. there's another one called recycle that was never finished also at that http://electricle.blogspot.com link.

some pics of one of it's earliest functional versions
https://www.endless-sphere.com/forums/viewtopic.php?f=6&t=235&p=185210#p185210
 
Back
Top