A123 ANR26650M1B Spot Welding

Joined
Nov 2, 2022
Messages
12
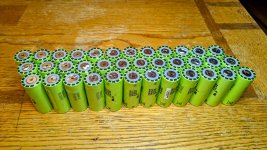
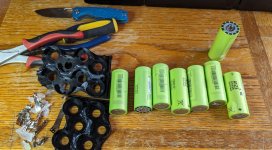
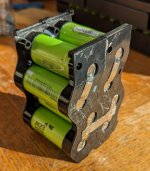
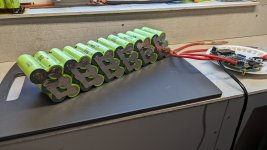
So I bought a 12S8P 26650 pack to chop up into thirds for 12V packs. I made the dumb mistake of taking one of the thirds and removing each cell from the nickel plate its spot welded on to. Huge mistake

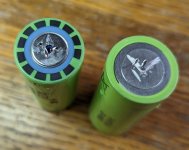
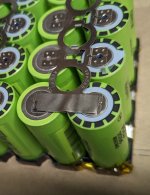
Obviously one of the main problems is if you're not careful you can rip the nickel off and leave a hole in the cell because the nickel A123 used was quite thick and must have been a very powerful spot welder. Due to the design of the cell its actually quite hard to spot weld pure nickel 0.15mm or 0.20mm thick nickel onto it but I finally found a welder that isn't kWeld expensive that does the job.

But on some of the cells I left the tab on the terminal.....Should I just spot weld on top of that or should I remove all the nickel and start fresh?
 
my understanding is that if you're doing nickel to nickel it shouldn't matter, but if you're doing something with higher resistance between the battery and the nickel (nickel plated steel for example) it's not good because it'll cause a hot spot. i'm not an expert on the matter though.
 
Yes, the thick tabs can be difficult to remove. Similarly, tool packs often have what seem to be .2 or .3mm tabs, and it's hard to remove from cells.

If you've been pulling holes in cells when tearing out the old tabs, I'd stop trying to tear the old tabs off. Welding nickel strips on top of old nickel isn't a problem. The joint isn't as strong as the weld between the nickel strip and the cell's can, because the can is often nickel-coated steel. Getting a good weld could be difficult if those thick strips are nickel-plated copper or something else. I've personally found 0.15mm nickel far easier to work with than .20. YMMV.

If those A123 batteries you have are lifepo4 chemistry, your 3S battery is 11V tops and 9.75V nominal. Most 12V packs from lifepo4 cells are 4S packs.
 
I'm about to weld up my first battery with recycled A123 cells. The 8 cell 12v packs that I bought came apart and cleaned up easy. I assume they were low power units, and built as such, and never used.

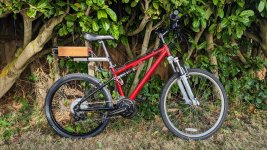
It's my entry into battery building. It will be a 12s3p pack to power my problemed child, a TSDZ2b. Wish me luck.

PXL_20231222_022748673~2.jpg

The problemed child:

PXL_20230915_233958394.jpg
 
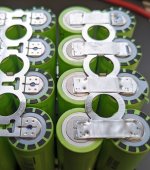
Well, I made a 4s2p practice pack out of some A123's using my $30 spot welder. It's my first weld up. Sure not pretty. The burn throughs are mistakes that hopefully can be eliminated by welder adjustments. There is no "user" instruction, so welder adjustment is a spark and arc trial and error.
PXL_20231225_203716047.jpg

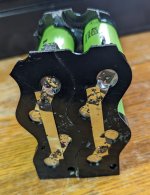
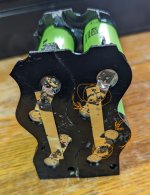
Disassembled it to check the welds. I used .15mm nickel, and the strips were all welded:
PXL_20231225_204647375.jpg

This is what the cell ends look like. It would seem to me that the weld area is not enough.
PXL_20231225_204851488.jpg

I guess it time to grind and try again.
 
Last edited:
Did you go straight through the can in the last pic?

Perhaps you have some old cells you can practice on, instead of the more expensive ones that will get damaged by practice.
 
I guess it time to grind and try again.
Don't grind the welds off use flush cut pliers to cut as much of the weld off as possible. grinding exposes the steel can to moisture. Moisture and steel leads to rust. Rust leads to bad connections
Later floyd
 
Did you go straight through the can in the last pic?

Perhaps you have some old cells you can practice on, instead of the more expensive ones that will get damaged by practice.
The negative end of the battery comes with a hole in it that I believe is a pressure relief port. I haven't yet burned through the cells, as far as I can see.
I purchased 80 of these used cells in 4s2p packs. They cost about $1 a cell.
I have cells set aside for a 36v 12s3p battery, and a 48v 16s2p battery from that purchase. These are what's left over, so they have become sacrificial in my quest to learn battery building. It's a steeper learning curve than I anticipated.
 
Don't grind the welds off use flush cut pliers to cut as much of the weld off as possible. grinding exposes the steel can to moisture. Moisture and steel leads to rust. Rust leads to bad connections
Later floyd
Hadn't thought of that. Will keep in mind.
 
I remade my 4s2p practice pack. It looks better, and I'm going to it call good enough for a bms.

PXL_20231228_215820243 (1).jpg

Next is a 12s3p pack for that little eMTB pictured earlier in the thread. I'm using this spot welder, it's all trial and error.

PXL_20231226_203031583.jpg

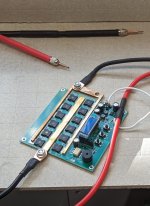
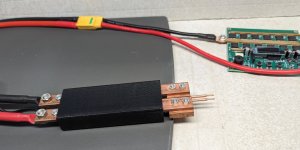
I'll probably use this until it burns up. There is no user manual. I only know how to use this from watching a YouTube video. It seems some guy buys these cheap welders and gives them a try (StevenK, IIRC). It does weld, though I do question the surface area of my welds.
 
Last edited:
Well, you can buy different handheld welder assemblies that would connect to it. I've seen several under $10 shipped on various aliexpress sales in the last couple of weeks. Maybe one of them will give larger-surface-area welds (different kinds of electrode tips, etc).
 
Moving these welds on top of the cell terminal is an easy way to prevent burn-throughs. Indeed, it is easy to burn through when you are trying to affix nickel to nickel with nothing behind it.

If your battery is going to power a low-current operation, power sharing/flow considerations that influence nickel layout matter less.


PXL_20231225_203716047.jpg
 
Moving these welds on top of the cell terminal is an easy way to prevent burn-throughs. Indeed, it is easy to burn through when you are trying to affix nickel to nickel with nothing behind it.

If your battery is going to power a low-current operation, power sharing/flow considerations that influence nickel layout matter less.
I redid the pack with more success, though I will take your advice in the future. It's maybe a low power 12v battery, definitely experimental, and most likely sacrificial.
 
Well, you can buy different handheld welder assemblies that would connect to it. I've seen several under $10 shipped on various aliexpress sales in the last couple of weeks. Maybe one of them will give larger-surface-area welds (different kinds of electrode tips, etc).
I tried this:
PXL_20240103_000412078.jpg

It didn't work all that well. My little welder has no switch, just a time delay. I kept picking up nickel with the negative electrode. I might put a switched contactor in the welders output circuit. I have a box of motor contactors that I can tryout.
 
I stripped down one of the 48 cell packs that I purchased from battery hookup. My plan is to construct a 24s8p battery out of 4 of them. So I started to add 10mm x .2mm nickel to the series connections. I figure the added nickel is good for almost 15a in addition to what is already there:

PXL_20240105_202428912.jpg

Welding was going well, the strips were stuck down ok, though I might need more heat. This pack is my practice one:

PXL_20240105_204939330.jpg

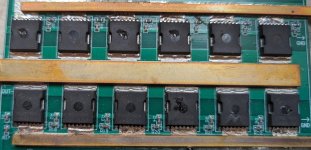
Then my $30 something welder blew up:

PXL_20240105_204953980.jpg

Oh well, on to the next spot welder. I could try to build one out of an old microwave transformer, or maybe I should just bite the bullet and buy a Kweld.
 
I wouldn't even think about that :|
It has its downsides, but I use one for my battery packs and it works splendid for me. I'm sure a Kweld is more powerful and perhaps easier, and certainly smaller. Upsides to mine is that the only cost a $15 control board, scrap cable, and a salvaged microwave transformer.
 
It has its downsides, but I use one for my battery packs and it works splendid for me. I'm sure a Kweld is more powerful and perhaps easier, and certainly smaller. Upsides to mine is that the only cost a $15 control board, scrap cable, and a salvaged microwave transformer.
Oh, I broke down an ordered a Kweld. After blowing up a couple of less expensive welders I believe I now know enough to not destroy a Kweld. Maybe I'll play with the microwave transformer in the interim, as I have all the stuff except a "$15 control board".
 
It has its downsides, but I use one for my battery packs and it works splendid for me. I'm sure a Kweld is more powerful and perhaps easier, and certainly smaller. Upsides to mine is that the only cost a $15 control board, scrap cable, and a salvaged microwave transformer.

Maybe but those downsides are a deal-breaker for me, I have never seen a good weld from those, they are impossible to control down to a level that is necessary for spot welding cell batteries properly.
 
My first ebike battery build, built with salvaged A123's. I'm finding that building batteries takes good vision, steady hands, and attention to detail. I'm pretty good on the first two, not so much on the last one.

In building the battery I made two mistakes that I know of. One was when I dropped a piece of nickel where it shouldn't have been. The nickel burnt quickly, and I flash burned the surface of skin on the end of my finger tips trying to fling it off. No significant damage to the battery noted. I then wired the plugs and put it on the charger. The Saitiator wouldn't initiate a charge, low voltage. So, I thought maybe it was at the cell group of the arc flash. Testing with the VOM I found the low voltage group was at the other end from the burn. Eventually I traced the bms balance leads and found that I had two wires wrong, which drained one of the groups. I had previously watched a youtube video where the guy said always check your bms leads elecrically after you connect them. I didn't do that. Simple solder job, how could I f*ck that up. But I did. Lesson learned. Fixed that up and charged the battery. All is good -- at the moment,

PXL_20240125_004011479~2.jpgPXL_20240128_042032678.jpg

You know, these A123 cells only cost me $1 each, but I'm on my third spot welder and there is all this other stuff you need to buy and learn.
So, this building of batteries is costing me a small fortune in time and money. It helps that the A123 is a mellow battery as far as spontaneously combusting, outside of dead shorting them. But this whole home built battery thing is probably going to be illegal in the not-too-distant future.
 
Well, I placed my first build battery on a 5.5a load test, and after about 10 seconds the battery shut off. So I put the battery on a charger. The charger read "Charge Complete", though the battery was about 39v when it should of been more like 42v.
So I replaced the BMS, same issue. Yeah, I knew there was a weak group, but I thought charging and sitting on balance might work. No, it did not work, and I didn't want to cut up the brick I just built.

No choice, so I took out the bad group. And yes, I found out that if you nick the adjacent cell cans with a metal tool you get arcs and sparks. Also, I have wondered what would happen if one accidently shorts a length of solder. Found out solder acts like a fuse. Another brilliant discovery!

Anyways, all is good now:

PXL_20240129_054123284.jpg
 
No choice, so I took out the bad group.
So you undid all the spot welds from an entire parallel group and redid it w new cells?

Unfortunately this is why I always recommend individually testing cells before building, if you are using salvaged cells.

And in my experience, those A123 cells can be good when they're good, but once they start dying, they fall off a cliff hard and can't be recovered. Maybe that's why BH had them for so cheap
 
Yeah, I clipped the group of 3 out and inserted another 3. I did match all the cells for voltage. I don't have a realistic way to load test cells, at least yet.
My problem was I had mistakenly connected two balance leads, and after I had soldered the bms the battery sat for several days and one group got drained.
I think the A123 is getting long in tooth in battery world, and after I assemble what I have I'll move on. It's easier for me to accept destroying $1 cells than something costing four or five times more.
 
Last edited:
Back
Top