BBS01 commute ebike v1

I don't get on here much anymore - hope we can organise a Melbourne group ride soon.

Cheers.
 
The guys at work were less than impressed with the crank situation. Frankly, I agree. Will need to pull it apart again and remove the play.

(they pointed out that once 100kgs are working on it each day, it could result in excessive wear on the frame threads)

Potential solutions to take up slack:-

- plumbers tape
- metal tape
- metal sleeve
- get cups and bore out the inside to suit the spindle and hope there's still enough meat to get it in and out of the frame

I'll be going to get some cups later today, have already acquired the other options in the event of not being enough left of the cup to mount to the frame. Not too sure how to bore it out to the correct size accurately (without it turning to an ellitpical shape/ just ruining it)

Second issue: battery mounting.

The em3ev battery box is disappointing. The finish is nice, but there's little to mount it by other than the bottle cage mounts, which are definitely insufficient to hold the weight for movement. Totally impractical out of the box.

Further, the bottom is square whilst the frame is rounded = dodgy and just likely to pull out the cage mounts. Pretty surprised it doesn't have some form of adapter to fill this space, be it various rubber inserts to take up the gap etc.

Sort term solution: mount to rack

Long term potential solutions:-

- hard foam carved to fit. (accessible but fiddly and unlikely to carve neatly enough to have a nice finished product).
- fibreglass (time consuming)
- carbon fibre (too hard/expensive)
- melt polystyrene with acetone, pour into mold. (uses oil based plastic and nasty acetone. also not sure what to make the mold out of which the acetone will not melt).
- experiment with bio plastic. Cook up, poor into mold and done.

At this stage, tempted to experiment with the polystyrene and bio plastic routes. Disadvantage of bio plastic is that it will not be waterproof. Despite criticisms of polystyrene route, could be the go. I really like the idea that once it's finished it will actually match the frame and (after painting) should be pretty inconspicuous.

Third issue: lack of sensor for brake

Wanted a sensor for each brake lever, only received one in exchange for the brake levers which are part of the kit (as they are for mech disc and I have hydraulic).

Potential solutions:

- order a sweet set of new levers for ebike hydraulic brakes ($$$)
- order another from em3ev (at $30 AUD without paypal fees, hell no.)
- acquire another set of brake levers with the correct fittings. Cut them off, acquire appropriate sensor/magnet

Last options the most viable, just need to find some local. The international exchange/shipping/paypal fees are killing me.

Fourth issue: Lack of integrated lights

Potential solutions:-

- use lights I have lying around with resisters to bring down the voltage to be appropriate. (inefficient).
- acquire new lights ($$, ones on ebay.com.au seem pretty average).

Need to think more on this one, want something around 1000 - 2000 lumens.. .would much rather use something I already have than buying more, just not sure on a smart solution to bring the voltage down without just wasting power.
 
Search 80v LED on ebay. They are ok.

So you are after stock BBS brake levers?
 
Repost from another thread as it's more relevant to this topic area.

Full thread:- http://endless-sphere.com/forums/viewtopic.php?f=3&t=66225&start=25

Basically there's about 0.5mm of play between the bbs01 spindle and the inner frame (threaded) socket for the crank (not sure of the technical name).

Lurkin said:
The guys at work were less than impressed with the crank situation. Frankly, I agree. Will need to pull it apart again and remove the play.

(they pointed out that once 100kgs are working on it each day, it could result in excessive wear on the frame threads)

Potential solutions to take up slack:-

- plumbers tape
- metal tape
- metal sleeve
- get cups and bore out the inside to suit the spindle and hope there's still enough meat to get it in and out of the frame

I'll be going to get some cups later today, have already acquired the other options in the event of not being enough left of the cup to mount to the frame. Not too sure how to bore it out to the correct size accurately (without it turning to an ellitpical shape/ just ruining it)

I have also read about using newspaper soaked in oil or grease to pack it....

Any other suggestions?
 
If you're worried about the bottle cage fixings pulling out, you can add extra ones. I added one extra one to mine so it's fixed with thee 5mm screws. It's done 1000 bumpy miles so far. The fixings are called rivnuts and are dead easy to fit. You don't need any special tools.
 
I've gone through what you're going through at the moment...

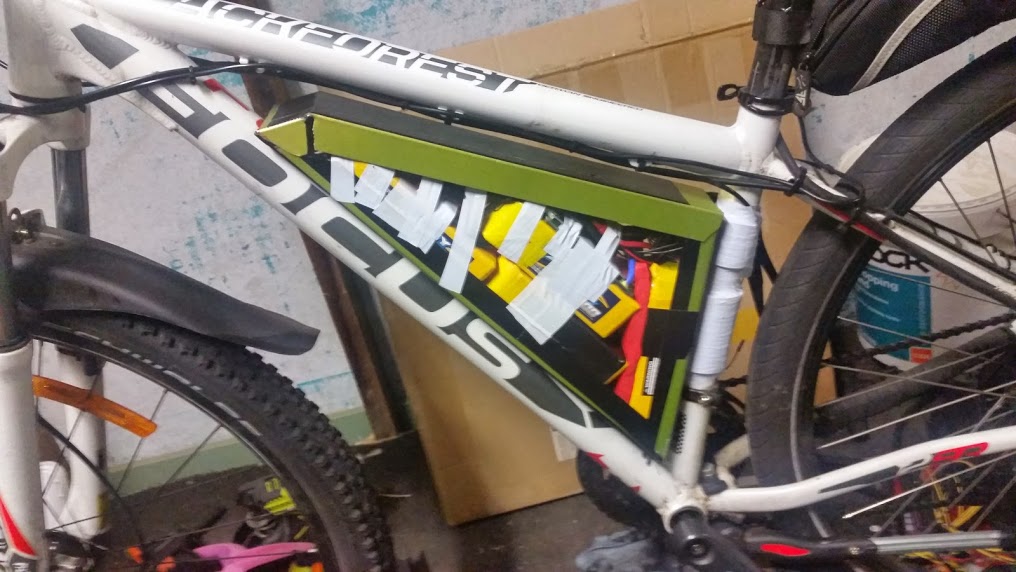
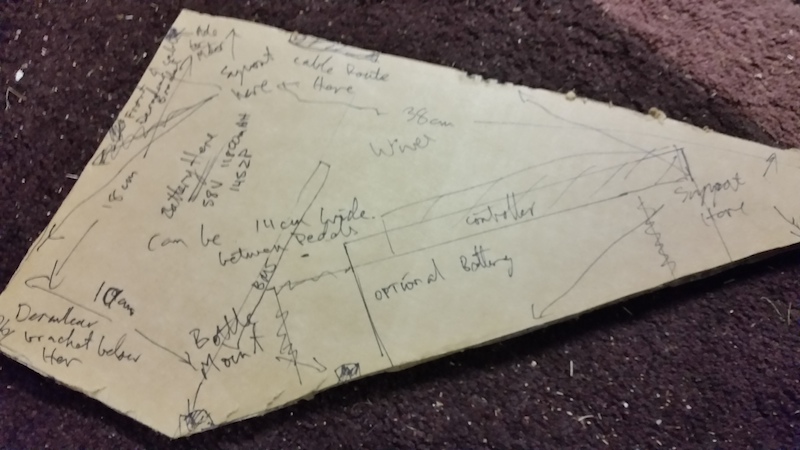
To make a battery mount in the frame nicely :
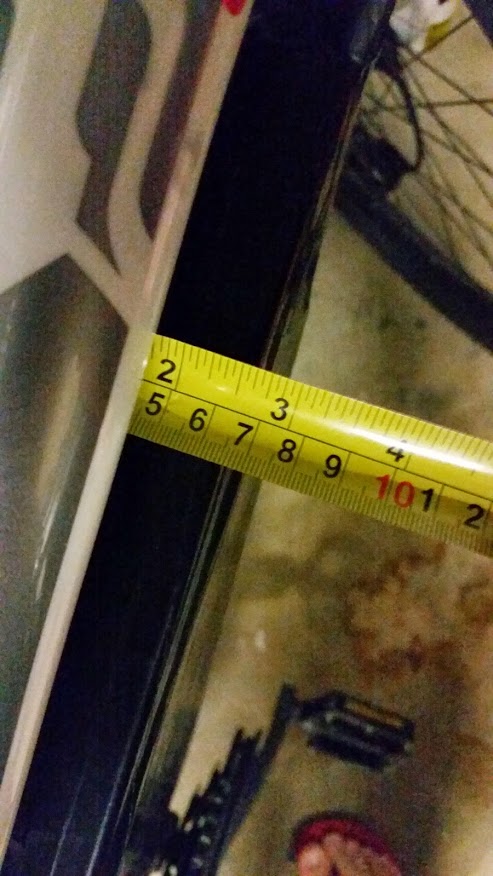
1. Make cardboard cutout of frame centre so you know how things will fit. Leave 1-1.5cm gap between edge of battery and any hard spot (for foam padding). Also leave 1cm gap for where wires enter/exit.
2. go to bunnings and buy some steel wall track wide enough to fit the battery. Eg. for a 60mm wide battery get a 65mm wide wall track. I think yours is bigger ( $15 - http://www.bunnings.com.au/peer-industries-76-x-3000mm-1-15bmt-steel-wall-track_p1090607 )
3. Measure the lengths of the cardboard and cut the sides where you need to bend. Use tin snips (cheap) or a sheet metal nibbler ( http://www.bunnings.com.au/irwin-nibbler-falcon-drill-attachment_p6377500 ) to cut the sides. You need to cut in a sorta V shape to bend it properly with about 1mm of flat for the metal to bend nicely. N.B. You might need to pad the seat post tube with rubber hose so that you can still adjust the front dérailleur if you need to. You need to put a hose clamp along the top to hold the battery in place.
4. Clamp a bit of wood at the edge of the bend and bend your metal into shape. The wood is to make sure your bend is sorta straight. The side and bottom should be 1 peice for structural strength and the top another peice.

Now you have your battery box case. Mounting it via the bottle holder screws... I bought something like this : http://www.ebay.com.au/itm/Bike-Cycle-Bicycle-Water-Bottle-Cage-Holder-Handlebar-Mount-/121289892351?pt=AU_Bicycle_Accessorries&hash=item1c3d70e1ff

Pop the bottle mount parts off (long bit) and use it to secure the battery box down. The actual mount (round bit) is then used for a headlight mount (I'll get to that later if I have time).

Use this for padding : $4 - http://www.kmart.com.au/product/sports-mat---blue/122558

Then tape the frocker down with heaps of cloth duct tape.

version3%20mount%20plan.jpg

14S2P_11600mAh_Test_Fit_Cover.jpg

Raged_Focus_Black_Forest_Battery_box_Version_6_Width.jpg


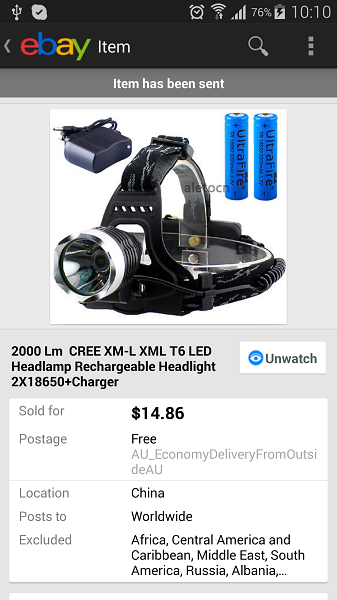
I got one of these for the headlight :
ebay_headlight_14_86.png
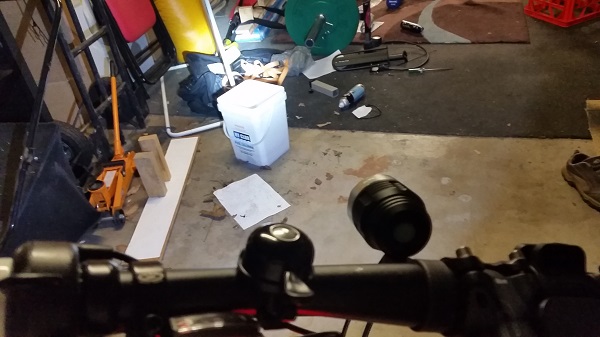
About 700lumens - XML-T6, 3 modes (low, high and strobe). Comes with it's own batteries and charger (last for about 2 hours on strobe).
headlight_beam_test.jpg


http://www.kiiku.com/ev/20140910/ebay_headlight_14_86.png


Edit. There is a weakness in my version 6 design. I needed another hose clamp near the front to stop sideways movement of the battery box. The bottle holder points work great top stop vertical movement though.
 
Hi D8veh, yep have thought about that. Will do if need be. Would rather not drill holes in the frame it it can be avoided.

Hi Raged, trying not to use steel due to weight/ lack of adequate tools. Definitely looks study and solid though, may give it a shot if another methods fail.

I've gone and purchased an 36w headlight (last night) as I want to wind up with integrated lights. Still sorting out what switch/ rear light to use.

I already have some of those lights which you have referred to. I've bought a battery for the bike that is bigger than required, hence if I'm going to lug it about, it needs to do everything. This is so it will have one charging point, which will charge (eventually by a solar set up) whilst I'm working.

At this stage, I'm more concerned about solving the play in the crank area. the battery can be rangi mounted to the rack in the meantime, solve it in the long term.
 
Popping a couple of rivnuts in the frame is the easiest thing to do. The underside of your downtube is in tension, putting a rivnut in its top section is a non-deal.

Once you've done it you'll be amazed. In fact some of us hang second batteries from rivnuts popped in the underside also.
 
Solved the crank play issue by wrapping pink plumbers tape round both ends of the spindle and wrapping over the top of that with a section of an aluminium can. Grease the daylights out of the threads and insert. Very tight fit. Wobblage and thread worries are over.

Headlight ordered from ebay, ditto for switch and sensors from ebikelife.

Had first maiden voyage up and down the street!

Seems like it will be a viable answer to the 80km commute once its robust and water tight.

Battery remains to be the pain in the neck. Cable tieing to the rack was totally insufficient. Next time I will ditch the pre made box and make my own in Raged's suit.

Also looked into bio plastics but looks like that would take too much experimentation/mucking around to get waterproof.

Investigated making plastic from acetone and polystyrene. Acetone to melt the polystyrene and remove the air pockets. Tried with a small amount and seems like it would set hard enough. Further confirmed that glad wrap, nitrile gloves and aluminium appear impervious to acetone.

Need to consider the best way to wrap the frame, construct a mould around it, melt a shedload of polystyrene, pour into mould, set, grind top flat, done.

I'll be happy to use a combination of the bottom of the frame, bottle cage mounts and one metal strap round the top to hold the battery on - once the about plastic moulded adapter is between the battery (flat bottom) and the frame (rounded edges).
 
Now done 2000 kms of commuting, no issues.

Solved battery by drilling holes in battery mount and fitting hose clamps round the frame. Not as pretty but a shitload more study than bidon mounts solely.

Annoying things which remain
Chain comes off due to poor chainline. Likely influenced by 73mm and bad offset.
Chain was too tight and was constantly pulling on the derailleur, noisy. New one to be picked up this week from the uk along with other maintenance goodies.
Want more power. Considering a 500w rear hub and or buying a dh comp to fit it too for more comfort,
 
It's been a while since updating this thread. It is going to turn into a long term test of a BBS01 unit, with extensive daily commuting. The commute is not offroad or particularly hilly, so if it can survive this it should indicate a durable commuter for others (under similar conditions).

The unit worked well, pretty much up until 3,500kms. Quiet but powerful enough for the commute without intimidating people, the inconspicuous mid drive is well suited to places where low limits on mid drives are endorsed. I had replaced chain, cassette (with SRAM for linear gearing), brake pads and was considering replacing the front chainring.

However, at 3,500kms, things went south. A 'grr' sound had developed when it was on acceleration and it became more frequent and louder as time went on. After reading up on here, an issue was identified by Kepler, that there is an o-ring on the end of the motor shaft, designed to make it grip the inside of the cassette bearing the end sits in. I took the unit apart and the o-ring had disintegrated and the shaft had been spinning within the bearing.

Photos of disassembly:

20150607_165829_zpswfbvopc5.jpg

20150607_165825_zpsimah6wvc.jpg

20150607_165837_zpsyykeiyy5.jpg


After contacting Paul of em3ev, a replacement half a motor was sent and installed. I replaced all disposables - various greases, sealant etc. I should note that other than the detonation of the o-ring and the lack of grease on the needle bearings, all appeared relatively ok inside.

Upon reassembly the motor continued to make the noise and had developed another note. Clearly there was more to the story.

The entire motor was sent to Bafang for reconditioning/repair. Several months later, it was returned and likely a replacement unit rather than repaired, given it's lack of dirt and scratches. Reinstalled in the weekend, works again like clockwork. This is a real testament to the extent Paul is willing to go to for his customers, which I am very grateful for.

I have been keeping a spreadsheet of my commuting, and will to continue to do so to keep track of when issues arise.
 
I've been a bit slack, but with the car being stacked into from behind and now being repaired for the next three weeks, this thing is going to be back doing 400km per week.

So far it's completed 507km with no issues detected. Actually, I had missed it's silence and user friendliness and had forgotten how sweet it was to ride it.

I am still musing of the cause of whatever damaged the last unit. Could be:
- poor weather
- load
- shifting technique
- crappy manufacturing

Spread sheet details about AUD$1000 to go before the commuting with this unit will have paid for the unit (by way of opportunity cost of petrol and surcharge for using the car), the bike and all additional expenditure to keep it going. This will reach zero if it can last 6-7 weeks of commuting every day on it. Unfortunately this is the same amount the original coped before dropping it's guts....

I had fitted a new cassette, chain, brake pads etc at the 2,046km mark. The replacement cassette I used was a SRAM 10 speed, rather than the existing Shimano. The purpose was to obtain the linear gear change from the SRAM cassette to see if it was better/nicer to use than the logarithmic shaped Shimano cassette.

Really its just been annoying - I end up trying to shift two gears in the first shift rather than just the one. I found this is also when the most chain derailments occur. I've dialled back to only shifting one gear at a time, which seems to have solved the issue, but the next cassette will be a Shimano one as the number of gear teeth are better suited to this.
 
Bikes done another ~2,000kms since putting the new/refreshed motor back on. I suspect it has become nosier since putting it back on...

It drops the chain constantly now, suggestions detailed on this forum for correcting or at least stopping the chain dropping were:
1. add a tensioner or chain guide
2. cop it
3. use front dérailleur as a chain guide
4. Lekkie ring due to greater offset

Attempted using a tensioner and/or a chain guide - neither really solved the problem and just made it harder to put the chain back on. I have become pretty skilled at using a stick to slip the chain back onto the bottom of the chainring and spin it as well to avoid dirty gloves.

Front dérailleur cannot extent far enough out to allow the full range of gears.

I've ordered a chain ring from Emax bikes, now awaiting it to turn up. Hopefully this will end the constant chain drop off issues.

During a minor accident, the battery mount has become damaged. Given it is mounted using both two bike frame water cage mounts and two hose clamps, the top hose clamp is going through the plastic part of the mount, which was potentially on a bit tight and when the dolphin pack has been hit side on it has forced the mount to break.

I've obtained a replacement mount which will go on this weekend, but not too sure how to solve this going forward. The hose clamp method is considerably stronger than the water cage mount, but doesn't have any give which has caused this breakage.

I am wondering if the lower height of the Bosch knock off replica battery packs now available from BMS Battery and similar have an advantage of being a bit longer and thinner with lower height, which could help avoid this problem.

Also, spokes on the rear wheel have been periodically breaking. I've been replacing them and in the process of getting more skilled in wheel building/truing so this can be avoided going forward.

On a brighter note, my spreadsheet tracking this discloses that between the opportunity cost of not using a car/petrol, the bike will be 'paid off' both in initial purchase of bike, ebike kit and all additional expenditure to keep it going including replacement parts and substitute public transport have been included.

I am in the process of putting together another, more powerful and comfortable bike to commute with, so this bike will end up as the backup in the next couple of months... assuming the drive holds itself together...
 
Fit a new chain. Downhill antidrop. Check the profile inside the side walls.
 
Theoretically, the only thing that has changed between converting to BBS01 is the 5mm difference between 73mm and 68mm chainlines. Thus a Lekkie ring should solve this issue, yes, with a new chain as well on there.

If you are meaning a chain guide to prevent chain drop, its exactly what I have already done with a roller.... its a solution for the wrong problem.
 
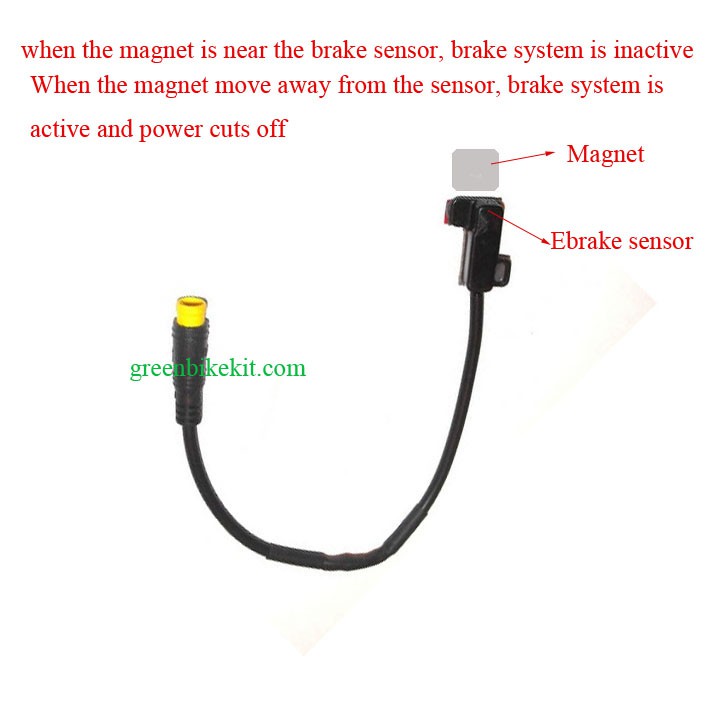
When I first purchased the kit through em3ev, I requested the regular ebike levers to be swapped for neat hydraulic sensors like these:

bafang-bbs01-bbs02-kit-hydraulic-e-brake-sensor.jpg


Paul decided to swap both levers for one brake sensor without telling me and shipped it like this, on the basis that they are more expensive and only one is technically required (although arguably none are required to make the kit function). If he had told me, I would have altered the order. Given the shipping cost of ordering one separately, buying an additional one at the time wasn't feasible.

Over time, I decided to buy one from elifebike, who decided to send a set of cheapo ebike levers instead. They've sat on the shelf for some time and I decided to just see if it is a microswitch inside them. Upon disassembly, the manufacturer has used a small hall sensor and magnet to make a micro switch, which can be disassembled and used without the entire lever.

Why is this significant? Rather than buying hydraulic ebike sensors for USD10 - 18 per sensor (this is required to get the waterproof, quality higo plug for the Bafang loom), one can obtain these brake levers for USD10 for a pair and disassemble them (thus ~USD5 each).

The hall sensor had the following written on it if its of any help:
s18
332

Pics:

20151226_152720_zpslbousqqo.jpg

20151226_152739_zpskj6pulwe.jpg
20151226_152751_zpshxtjb4eq.jpg

20151226_152842_zpsbvnp74sq.jpg

20151226_152926_zpsfp4qf5wn.jpg

20151226_155052_zpsl5keynac.jpg
 
I've been hanging out since 15 February 2015 to make this post.

Summary stats for the calendar year:
Total ebike kms cycled: 6,597.40 ----> 41% of total travel
Litres of petrol avoided from being burnt: 388L @ 17km/L
Total car kms commuted: 9,520.00 ---> 59% of total travel
Total travel: 16,117.40 kms

Best of all, after consideration of both ebike (bike, kit, parts, labour) and car (petrol, mileage), the ebike has made a profit of $17.47!!!!

Given the ebike was only operational for ~6 months of the Feb - Dec period, I consider this a win. Backup bike is the plan to improve these figures in the coming year.

Happy new year!
 
In other news, new cassette, chain and Lekkie Ring! The existing had become so worn it was dropping the chain approximately once per 10 kms. In the 80km daily round trip, its between 6 - 10 times.... was getting very, very old.

Zipping along without drop offs at full speed is bliss.

However, it does feel a little 'grindy' with the Lekkie. I suspect the offset is actually too aggressive and its now overdone. Next time round, will switch to a Raceface Narrow Wide (which I suspect has more to do with the lack of chain drop) ring to see if that can have a better offset for this bike without the 'grindy' and at a lower price per ring.
 
The bike has now done ~9,500 kms as an ebike.
The Lekkie ring has been the single best improvement one can have for a BBSX unit with a 73mm/offset BB. Need to update the odo spreadsheet, but no chain drops since installation.
The replacement unit (done ~6,000 kms now) is definitely making a similar noise to what it was pre replacement and is getting louder over time. As Em3ev/Bafang did not provide any data on what was wrong with the old unit, I intend to just keep riding it, unopened to completely wear out whatever is becoming worn/damaged.
If it makes it to 20,000 kms, or dies, whichever comes first, I will open up the unit and investigate what is getting worn out/making the din. I suspect it is wear on the nylon gear, caused by the fraction of movement in the motor shaft when the o-ring has been eated and the motor shaft end has become worn with movement. Only time can really tell/reveal this for certain.
That will also confirm/deny whether this issue is related or causing greater harm within the unit once it destroys the o-ring or whether it is a completely unrelated issue altogether.
 
Back
Top