• Hello ES! We could use some help to get us past the finish line on building the new knowledgebase for the forum.
    Can you donate? Please see our fundraising page. Thank you!

Can This Worn Connector be Causing My Power Loss?

Transit Artist

🔋 Established
Joined
Aug 8, 2025
Messages
76
Location
Lenapehoking
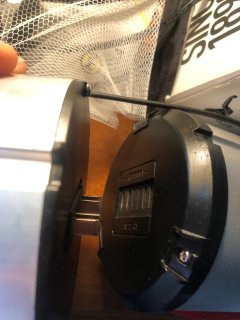
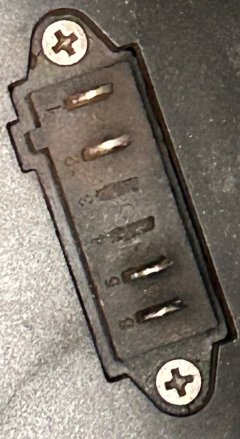
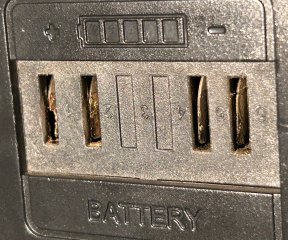
My bike's been losing power over bumps. All connections have been checked repeatedly. I just discovered my battery's female port is being chewed up by the male base. Can this be the culprit and is it fixable?
IMG_0455.jpeg
 
Last edited:
Very likely the cause of your problem. Another problem is that you probably cannot get the parts to replace from the vendor.
I would personally solder on some connectors to the battery and base that run externally, basically bypassing this connection.

This is just poor design with no interest in longveity, the best bet is to fix the design
 
We used to call these fork-and-blade connectors.

They can work well when correctly designed, fabricated, and with good materials. Cheap knockoffs, not so much.

Depending on the access, sometimes you can improve the connection by squeezing the "forks" so they can clamp the blades more securely.

That yours appear to be losing connectivity over bumps makes me think the battery is loose in the base. Maybe you can clamp them together better with straps?

Then again, the problem might lie somewhere else.
 
That yours appear to be losing connectivity over bumps makes me think the battery is loose in the base.
I considered that but it's as tight as new. So I might be able to replace the fork? I did notice that the blades are rather rough, not smooth, and seem destined to destroy the forks. What materials should I look for in a fork or fork-and-blade set and where might I find them/who uses them outside of bikes? Searches don't turn up matches that resemble bike battery connections. Is this one side of a fork?Screen Shot 2026-05-05 at 2.48.25 PM.png
 
Last edited:
As they are usually molded into place, they are not really DIY replaceable. That is why neptronix suggested running the wiring outboard of the original connector and splicing in more robust connector. You would trade your snap-in/plugged-in convenience for a better connection.

I did notice that the blades are rather rough, not smooth, and seem destined to destroy the forks.
The blades are rough and eroded from several disconnections/connections while under load, possibly exacerbated from poor alignment, poor materials, poor spring tension, or incorrect sizing.

My idea was more of using a small flatblade screwdriver to retension the fork contacts so they grab the blades more tightly. Might not be enough access to do this.
 
Replacing the blade connector will not fix the problem except temporarily. To me it seems your battery can move enough when bumped that the terminals lose contact and spark. If you replace with the same connector you will get the same problem.

Neptronix is correct that the best fix is to bypass the original connectors and attach better ones on both sides. If you say what volts and amps you are working with we can make recommendations.
 
If you say what volts and amps you are working with we can make recommendations.
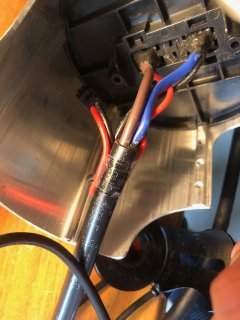
Thanks. 48V 15aH with intent to add a second similar battery and a balancer if it affects your design decisions. The frame housing the battery makes it tricky to configure something I can disconnect by hand as it's all enclosed. Here's the inside/back of the connector. IMG_0460.JPG
This is the base
IMG_3116.jpeg
It slides up into the tubular frame
IMG_3117.jpeg
and the battery is dropped in from above.
IMG_0412.jpeg
 
Last edited:
Thanks. 48V 15aH
Amp-hours are not the same as battery discharge amps and do not have a direct relation to power connectors. The same connectors do not work the same for 25, 50, 100 amps. So I will be more specific and ask what is the peak battery amp load for your controller?
 
Oh you're lucky, you only have two wires. And you also have lots of spare wire.

You need a drill, some grommets ( auto parts store may have them? ), a soldering iron, two antispark 90amp connectors and the will to go through with the procedure. But in this case it isn't going to require rocket science. :)

Amp-hours are not the same as battery discharge amps and do not have a direct relation to power connectors. The same connectors do not work the same for 25, 50, 100 amps. So I will be more specific and ask what is the peak battery amp load for your controller?

If those connectors get hot under use like i think they are due to poor contact, he may actually be losing some range to it; definitely losing some voltage ( more over bumps! )
 
what is the peak battery amp load for your controller?
The controller is a Phaserunner V6, 90A Peak Phase Currents (~45A Continuous) purchased separately from the factory battery. And this is the factory controller's numbers if that helps.IMG_2760.jpeg
You need a drill, some grommets ( auto parts store may have them? ), a soldering iron, two antispark 90amp connectors
I grasp the connecting but can't see how I'd be able to unplug it as the base is not accessible once in the tube. I'd need to fish it through the bottom which is stuffed with controller and wires then cap it with screws each time I take it out which is like doing maintenance twice a day. Is there a way to align plugs or upgrade the fork-and-plug so that the battery can drop in? Otherwise it seems this solution might only work if I put my internals outside the frame so as to access them, which I'd rather not as this is my all weather off roader.
 
Last edited:
The controller is a Phaserunner V6, 90A Peak Phase Currents (~45A Continuous)

Phase current is from controller to motor. Battery current is what dictates the battery to controller connector. In this case it is probably 45A. XT90 would be a good choice. Anderson SB50 is good too but very bulky.
 
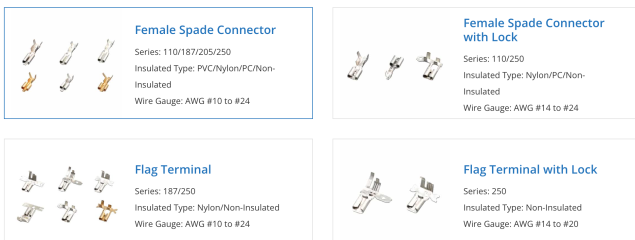
Searches don't turn up matches that resemble bike battery connections. Is this one side of a fork?
Screen Shot 2026-05-05 at 2.48.25 PM.png
No, more like this:

NOTE: These are far more sophisticated, better design, technology, materials than what is in your battery and housing base.
 
Is there a way to align plugs or upgrade the fork-and-plug so that the battery can drop in?
That's going to depend on the space and configuration constraints and your ingenuity and skills.

Here's an example of one i did (removed the original battery plug-to-base and spliced in a pigtail terminating in a XT60 connector):

P1050215.JPG
Original is on the right, modified on left.

Obviously here I had the luxury of not having to use the original base, so no space constraints there, freeing up plenty of space to arrange the pigtail for accessibility and water resistance. Maybe you can do similar? Do you absolutely need the base?
 
I grasp the connecting but can't see how I'd be able to unplug it as the base is not accessible once in the tube. I'd need to fish it through the bottom which is stuffed with controller and wires then cap it with screws each time I take it out which is like doing maintenance twice a day. Is there a way to align plugs or upgrade the fork-and-plug so that the battery can drop in? Otherwise it seems this solution might only work if I put my internals outside the frame so as to access them, which I'd rather not as this is my all weather off roader.

Welcome to the hidden cost of a bike with a proprietary frame and components :O

I would run the wires for the battery connection outside of the frame and battery holder. The holes that the wires go out of should oriented downwards so that water doesn't drip into it. use grommets for extra protection against the elements.

You may, after a long hunt, be able to find this part on aliexpress, but the next set of connectors will fail the same way.

If i had a bike like this, i would have put a rubber shim somewhere to prevent movement. Not only is the sound annoying, but also the connectors are undergoing repetitive mechanical stress, due to the motion. You must stop that motion.
 
Last edited:
First get another bike to ride because this is going to take awhile.

Be sure you are fixing the right problem. Never listen to other people. Only listen to the bike. Can you test by shaking battery around while riding?

How does battery male and female connection feel when sliding together? Like rough sex? Or is it smooth. Would some dielectric grease help? Don't know because I am not a expert in electricity.

Are parts available from manufacturer? Need telephone or email to answer this question. New parts and lots of dielectric grease might be a good solution. BATTERY MUST NOT BOUNCE AROUND EVER NEVER.

Try picking at goo on rear of battery connectors. Use screwdrivers, dental tools, small pliers, gentle heat from hair dryer or heat gun. Work slow. Repair is what you want to do. Autopsy is OK.

Is there any extra room at top of battery tube? If yes? Would a longer flexible wire and ("two antispark 90amp connectors" as Nep says.) Wire would squish into a horrible ball of spaghetti at bottom of battery tube. Use extreme care so that wire never gets pinched. If wire gets pinched FIRE could be the result. BATTERY MUST NOT BOUNCE AROUND EVER NEVER.

Think I am getting senile? What do you call flexible wire with lots of strands? Something you would use for test leads on a multi-meter. That is how I imagine the horrible ball of spaghetti wire at bottom of battery tube. Red and black wires wrapped together in a flexible rubber jacket. Use heat-shrink tubing near connections.

After 1 mechanic fixes a airplane, 2nd mechanic looks at what was done. Recommend hire a team of electrical engineers to look over repair to make sure it is safe.
 
How old is bike? Are there other problems? Friend bought a hunk of junk electric tricycle from Walmart. Took many emails with manufacturer and some videos. End result was [forget exact numbers] $900 refund on $1200 tricycle and keep the hunk of junk trike because no one wanted to pay shipping to send it back. Read warranty. Might be 30 days?
 
Obviously here I had the luxury of not having to use the original base, so no space constraints there, freeing up plenty of space to arrange the pigtail for accessibility and water resistance. Maybe you can do similar? Do you absolutely need the base?
I would run the wires for the battery connection outside of the frame and battery holder. The holes that the wires go out of should oriented downwards so that water doesn't drip into it. use grommets for extra protection against the elements.

You may, after a long hunt, be able to find this part on aliexpress, but the next set of connectors will fail the same way.
I do need the base to hold the battery in place. I really haven't had much movement from the battery at all. The grating has likely occurred because the round design does not perfectly align with the pins' rotation when dropped it. I think replacing what AliEx calls this "Power Discharge Connector" bi-annually is my best bet given the option of wearing my guts on the outside. Though I'd still like to find the best I can materially. Metals to look for in components would be appreciated.
I'm also not finding this configuration with 4-pin with two empty slots between. Can I use any config of 4 pins or the bottom example as (i think) @99t4 used? Is 45A 4-pin Power Discharge Connector all I need to know to buy or do pin numbers not apply to some? Can I just remove two or only connect four? (ali examples)
Screen Shot 2026-05-07 at 10.42.58 PM.png
 
Last edited:
If you are replacing both sides then there's no reason you couldn't double up the pins ( negative + negative, positive + positive ) exactly like your existing system. That would be ideal to minimize resistance in the connector

I think you may have a hard time finding a set of connectors with the same dimensions. You'll need to fish in the aliexpress dumpster for some time

I'd say i agree with marty, battery bouncing is not only bad for this type of connector but it's also not the best idea for the pack to constantly get spanked; this could over time wear out things like cell interconnections and wires, maybe the case. If you use this type of connector, you need to fix the original design problem too
 
I do need the base to hold the battery in place.
Poor design. Like plugging the TV into the wall and using the plug to hold TV to wall. MUST use second fastening devise to hold battery in hole. Bungee cord? Lots of fastening hardware ideas here:

 
Though I'd still like to find the best I can materially.
Enough connectors to make you crazy at these places.


Think you might have a hard time figuring out how to mount new connectors. Do connectors mate at the bottom of a dark tube? Good luck. Lipstick is good to figure out where things touch. + and - must not be able to be reversed by accident.
 
Last edited:
Is there any extra room at top of battery tube? If yes? Would a longer flexible wire and ("two antispark 90amp connectors" as Nep says.) Wire would squish into a horrible ball of spaghetti at bottom of battery tube. Use extreme care so that wire never gets pinched. If wire gets pinched FIRE could be the result. BATTERY MUST NOT BOUNCE AROUND EVER NEVER.

Think I am getting senile? What do you call flexible wire with lots of strands? Something you would use for test leads on a multi-meter. That is how I imagine the horrible ball of spaghetti wire at bottom of battery tube. Red and black wires wrapped together in a flexible rubber jacket. Use heat-shrink tubing near connections.
To explain what I am thinking. Imagine a electrician stuffing a bunch of wire into a electrical box.

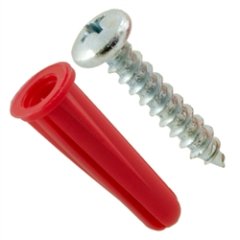
Story time - Mounted a electric box to a concrete wall with tapcon concrete screws. Pushed wires into box. Turn power on. POP??? What's the problem? Head of tapcon cut insulation on wire. No more using tapcons in electrical boxes. Live and learn. Use screw and anchor.
DFS-10200PK-2T.jpg
 
Last edited:
People see lipstick in my toolbox and they think I am weird. Well I am weird.

AI Overview
Locksmiths use inexpensive lipstick (or oil pastels) as a marking compound to identify misalignment in doors and deadbolts. By applying it to a latch or bolt and closing the door, the lipstick transfers to the strike plate, highlighting exactly where to grind or adjust to fix sticking issues.
 
Can I use any config of 4 pins or the bottom example as (i think) @99t4 used?
Yes (within reason). BTW, that bottom example is similar but not what came on my battery (MIL-SPEC). That battery was originally from an early generation sharebike. It was designed to slide down into an oversized seat tube, mating with the male connector housed down near the BB. I removed the connector to use it in a more horizontal "permanently" mounted orientation, with the wires brought out of the battery case to connect manually to the controller.

do pin numbers not apply to some? Can I just remove two or only connect four?
Up to you. Looks like your battery wires simply consist of + and - which makes it easier.

SAFETY TIP: Remove that inline fuse when doing any work on the connector!

That cylindrical battery looks mighty similar to what the early Sondors ebikes used. It also had sub-optimal connectors. What are its ratings?
 
After weeks of failed communication with the brand I was able to get through to the manufacturer on Alibaba and am near to scoring 5 new battery covers with the female side. 7 years worth assuming my battery might last 10 years, at which point I rebuild the whole battery and rethink this configuration. Now I just need to tend to the male side. If I can't find the exact size (plastic base) can I replace these chewed up blades or are they fused together in the making? Do blades come in standard sizes? Can I lube this with an appropriate gel to help prevent it from happening so frequently?IMG_0523.jpeg
 
Last edited:
Back
Top