Completed Build and Homemade Motor Bracket

LostMD

1 mW
Joined
Aug 1, 2013
Messages
13
Location
Florida aka God's waiting room
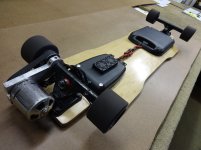
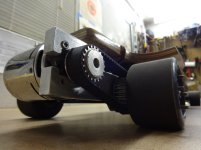
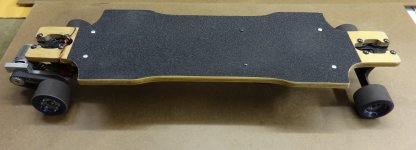
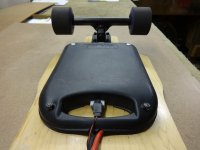
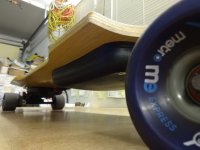
I have kept putting this off for some time but I finally have the time to put this up. Here everything I have put into this board plus some pics of the build. This is an ever evolving project with a lot of trial and error so I have made quite a few mistakes since I originally started, like destroying ESCs or redesigning motor brackets. I have found that with this project back up parts are necessary, especially when it comes to making your own bracket.

• Helmet.... if you choose to embark upon this challenging but rewarding journey the very first purchase you make is for a helmet. I don’t care if you have the money to buy everything at once, put the damn helmet in your shopping cart first. Oh, what’s that? You say you don’t plan on going faster than ‘X’ mph?... Get a helmet anyway
• Churchill MFG – Suzie Slide Through
• Metrowheels – Metro Express
• Caliber – 50° 10”
• IDS Oust – MOC 5
• 1/4th risers
• 200A Turnigy ESC
• (3x) 2s 6Ah 25c NanoTech LiPo
• 213kv SK3 Motor, also been playing around with the SK3 192kv and the SK3 245kv
• HK-GT2B Rx and Tx
• 8awg wire, XT150 connectors, 5.5 polymax connectors
• Hair clipper kit, shaving trimmer kit (these two are not a joke I swear lol, they were lying around the house I used the plastic cases they both came in)
• Turnigy Mega 400W v2 charger
• HobbyKing 540W Power Supply

1.JPG
View attachment 28
3.JPG
View attachment 26
View attachment 25
6.JPG
7.JPG
8.JPG
9.JPG
10.JPG


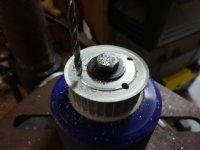
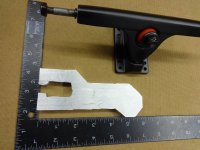
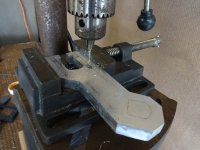
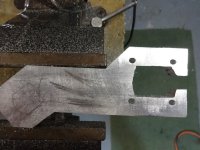
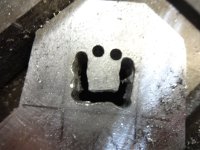
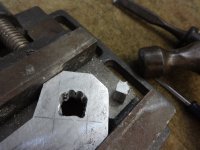
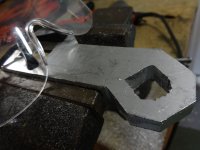
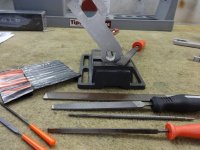
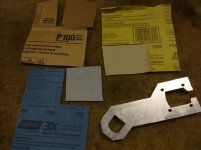
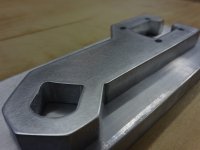
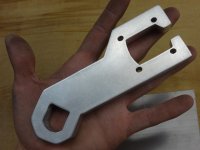
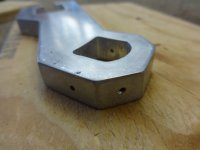
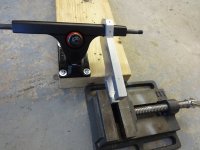
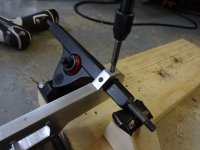
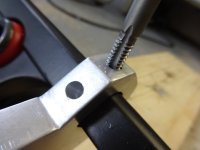
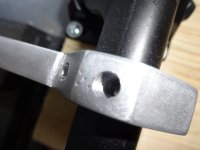
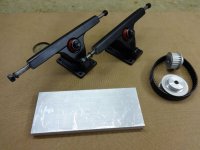
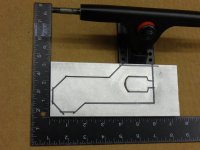
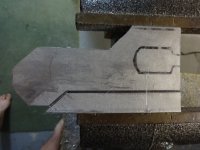
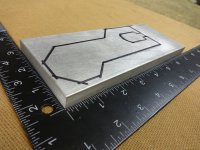
The motor bracket is made by me in my garage with easy to use tool (Safety is still priority!!!):
• Stationary Workbench Drill Press
• Drill gun
• Hacksaw
• Large assortment of metal files
• A lot of different sandpaper grits
• Dremel
• Vice
• Tapping Set for Metal
• Aluminum Flat Bar (7” x 3” x ½”)
• Socket set screws ¼-20 x 1”, ¼-20 x ½” and ¼-20 x ¼”
• There is more I just cannot remember, I will add later what I cannot recall now.


16.JPG
17.JPG
18 (1).JPG
18 (2).JPG
19.JPG
20.JPG
21.JPG
22.JPG
23.JPG
24.JPG
25.JPG
View attachment 8
27.JPG
28.JPG
29.JPG
30.JPG
31.JPG
32.JPG
33.JPG
34.JPG


Some stuff that I could not have done this without:
• Hot Glue
• Zip-Ties
• Carpet Tape
• Loctite


Questions are welcome and I will continue to update this log/guide as much as I can. :mrgreen:
 
Awesome build, truly homemade! I'm guilty for not wearing a helmet though it's just too cumbersome carrying one around. I haven't wore one for the last 500-600 miles of riding.

How are those XT150 connectors? Do you think they're really needed? Your enclosures actually fit real well. You should get one of those black wire sheaths to cover the wires in the middle.

I definetly like how you drilled the aluminum pulley onto the wheel. It's definetly the way to go as it's a lot more stable and solid. I'm going to try some 76mm wheels and drill through them should be nice.

Wow that mount is pretty sick for handmade dude! Awesome sand down. Nothing is usually made that way anymore I assume since most things are CNC'ed.

Question - When you threaded your holes did you thread them by hand?

I've also added your thread post into my guide below as it should help people for a true DIY build.
 
That motor bracket is no joke. :lol:
 
For awhile I was running around with 12awg wire and XT 90 connectors, twice I had a large enough arch/spark-jump to literally melt the connectors together. The blame for that is probably on something I did but nonetheless I decided to upgrade to 8awg wire and the XT150, I'm quite happy with the decision too because the XT150 connectors are a lot easier to work with than small connectors.

Tapping the holes is done by hand its not as hard as it look, a simple tap and die set can be bought at home depot but I you got the funds I would recommend buying tungsten carbide tap and die set because I actually broke off a cheap home depot tap inside one of brackets :evil: its a pain in the ass
 
Well done. I like how you took pics of the entire manufacturing process. I recommend you add two low-ESR capacitors to the power inputs, in-between the battery and controller (the stock ESC already has caps, but you will need to add more to suppress voltage spikes, because you weigh a lot more than a model airplane). Only $2 each.

5S-10S (18V-38V)
50V, 16 mOhm, 3.32A, 16 X 25mm, Panasonic-ECG
http://search.digikey.com/scripts/DkSearch/dksus.dll?Detail&name=P12393-ND

http://endless-sphere.com/forums/viewtopic.php?f=30&t=22194&start=25#p382837
file.php
 
spinningmagnets said:
I recommend you add two low-ESR capacitors to the power inputs, in-between the battery and controller.

Its funny that you mentioned that because my order from digi-key literally just came in :mrgreen: they were out of the 35 volt 1000microF, and out of all the larger ZLH series this had the largest ripple current rating.


These are but a fraction of the pictures taken, I will add the rest soon plus the pictures of mistakes and other bracket designs.
The ESC is the 1/5th trackstar 200A for cars, I just took everything and fitted the circuit board inside the smaller case
 
Hi, thxs for sharing. I would recommand gloves as well as far as safety is concerned. Very nice enclosures, mine are more from the kitchen world but seems I should also look on hairdresser inspired design too :lol:
Was there really no chance to keep the motor bracket closed on the motor side ?
 
Good looking build.

Electric skateboards will sell huge if the price ever comes down. I want to show some e-board video of a board in action to add some video content. Looks like lot of fun and a nice way to get around.

[youtube]ZzSb6M-ekT4[/youtube]
 
Whats the topspeed with you on the board?
And whats your weight?
And the torque? Will it get you started Or do you need to kick first?

Thanks!!
 
Hi, What gear ratios do you have there and how do they pull from a stop and accelerate?
 
LostMD said:
I have kept putting this off for some time but I finally have the time to put this up. Here everything I have put into this board plus some pics of the build. This is an ever evolving project with a lot of trial and error so I have made quite a few mistakes since I originally started, like destroying ESCs or redesigning motor brackets. I have found that with this project back up parts are necessary, especially when it comes to making your own bracket.

• Helmet.... if you choose to embark upon this challenging but rewarding journey the very first purchase you make is for a helmet. I don’t care if you have the money to buy everything at once, put the damn helmet in your shopping cart first. Oh, what’s that? You say you don’t plan on going faster than ‘X’ mph?... Get a helmet anyway
• Churchill MFG – Suzie Slide Through
• Metrowheels – Metro Express
• Caliber – 50° 10”
• IDS Oust – MOC 5
• 1/4th risers
• 200A Turnigy ESC
• (3x) 2s 6Ah 25c NanoTech LiPo
• 213kv SK3 Motor, also been playing around with the SK3 192kv and the SK3 245kv
• HK-GT2B Rx and Tx
• 8awg wire, XT150 connectors, 5.5 polymax connectors
• Hair clipper kit, shaving trimmer kit (these two are not a joke I swear lol, they were lying around the house I used the plastic cases they both came in)
• Turnigy Mega 400W v2 charger
• HobbyKing 540W Power Supply

View attachment 29
View attachment 28
View attachment 27
View attachment 26
View attachment 25
View attachment 24
View attachment 23
View attachment 22
View attachment 21
View attachment 20


The motor bracket is made by me in my garage with easy to use tool (Safety is still priority!!!):
• Stationary Workbench Drill Press
• Drill gun
• Hacksaw
• Large assortment of metal files
• A lot of different sandpaper grits
• Dremel
• Vice
• Tapping Set for Metal
• Aluminum Flat Bar (7” x 3” x ½”)
• Socket set screws ¼-20 x 1”, ¼-20 x ½” and ¼-20 x ¼”
• There is more I just cannot remember, I will add later what I cannot recall now.
View attachment 19
View attachment 18
View attachment 17
View attachment 16
View attachment 15
View attachment 14
View attachment 13
View attachment 12
View attachment 11
View attachment 10
View attachment 9
View attachment 8
View attachment 7
View attachment 6
View attachment 5
View attachment 4
View attachment 3
View attachment 2
View attachment 1


Some stuff that I could not have done this without:
• Hot Glue
• Zip-Ties
• Carpet Tape
• Loctite


Questions are welcome and I will continue to update this log/guide as much as I can. :mrgreen:

Hi, just wondering what belt pulleys you purchased? Do you have a link for them still or did you get rid of it? The sizes could help too if you dont have links.
 
Back
Top