RVD
1 kW
Hi Everyone,
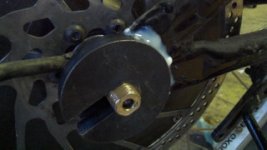
I thought I would create a thread for those of us who are installing DoctorBass torque arms.
I am finally ready to install my set. I have my epoxy (3M DP-420) ready to go, etc.
Looks like from watching videos, etc. that the proper sequence is:
1) clean the surface of your dropouts...with alcohol, acetone, etc...something that will clean them up.
2) roughen up the surface of the dropout and torque arms so that the epoxy will have some surface to bond to
3) mix up the epoxy with a wooden chopstick or something like that
4) use the wooden chopstick to apply epoxy to the dropout
5) press torque arm to the epoxy. use a clamp or something to hold it exactly in place. clean off any residue epoxy that may find it's way into the dropout.
6) build a hair dryer oven with a box and hair dryer up to about 70 degrees celsius
7) let it cook for about 2 hours
8) let it cool down at room temperature for some more hours
9) once epoxy is hardened...done.
Does that sound about right?
A few questions / options:
1) install torque arms on the outside or inside of dropouts? i think i'm going to install on the outside since there isn't much space inside anyway because of my freewheel, etc.
2) for the derailleur side, do you remove the derailleur and screw the derailleur into the torque arm hole? if so, the screw isn't long enough to go through the torque arm and the frame of the bike so it will only be in the torque arm. is that safe?
These torque arms are really nice...


