I found myself with the need to drill new spoke holes for smaller (13/14 butted) spokes, in an MXUS 3K that seems to be pre-drilled for what look more like motorcycle-sized spokes.
A handheld power drill wouldn't work, as I couldn't make a consistent angle, or hold it and the motor properly to get the holes right, and also to not break drillbits. :/
But I have a little HF drillpress, from one of their "big sales", if only I could find a way to hold the motor itself so that it would sit axle parallel to the drill, and flange perpendicular, in a way that lets me just rotate the hub for each new hole in one flange, then flip the mtoor over to drill the other flange holes.
The two obvious ways are to use either a vise or to build a "dropout" to bolt the motor to via the axle nuts, that then bolts or clamps to the base of the drillpress.
The latter would take a fair bit of work, but the vise method should be easy, right? I tried a few variations of the vise method using a small vise, but I couldn't get it to fit in a relationship with the press that would allow lowering of the bit into the flange at a perfect (or even close) perpendicular angle, except from positions that would not reach the flange at all, or that could not withdraw the bit from the flange at all.
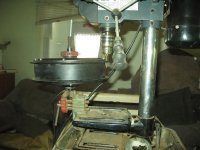
View attachment 8
I dug out my larger vise (which needed repair, see here: https://endless-sphere.com/forums/viewtopic.php?f=2&t=67833&p=1260615#p1260615
) and that just worked out fine. I secured the vise to a board, then clamped the board to the cart the press is on, with the press's base under the board.
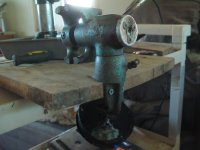
Clamped the motor in the vise, using the torque washers on that end for stability and to help it stay in place as I turn it around for drilling. Then I tapped the board around until the drill bit lined up with the spot on the flange I want the holes to end up, and tightened teh clamps holding the board to the cart.
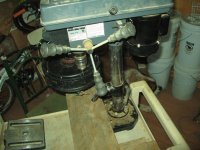
I setup the press's "shelf" to support the opposite flange/side of the motor, so when drilling down thru the flange, it doesn't move away and change the angle of the hole (or break the bit).
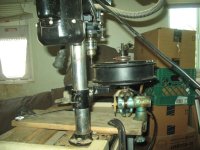
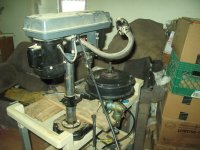
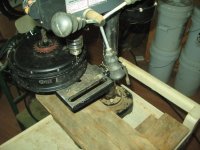
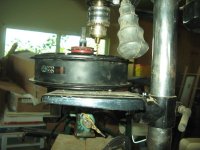
I've only had time to drill one hole so far, but it worked as planned for that one. Will see tomorrow how well it works for the rest of them.
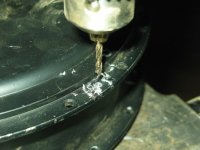
View attachment 4
.
A handheld power drill wouldn't work, as I couldn't make a consistent angle, or hold it and the motor properly to get the holes right, and also to not break drillbits. :/
But I have a little HF drillpress, from one of their "big sales", if only I could find a way to hold the motor itself so that it would sit axle parallel to the drill, and flange perpendicular, in a way that lets me just rotate the hub for each new hole in one flange, then flip the mtoor over to drill the other flange holes.
The two obvious ways are to use either a vise or to build a "dropout" to bolt the motor to via the axle nuts, that then bolts or clamps to the base of the drillpress.
The latter would take a fair bit of work, but the vise method should be easy, right? I tried a few variations of the vise method using a small vise, but I couldn't get it to fit in a relationship with the press that would allow lowering of the bit into the flange at a perfect (or even close) perpendicular angle, except from positions that would not reach the flange at all, or that could not withdraw the bit from the flange at all.

View attachment 8
I dug out my larger vise (which needed repair, see here: https://endless-sphere.com/forums/viewtopic.php?f=2&t=67833&p=1260615#p1260615
) and that just worked out fine. I secured the vise to a board, then clamped the board to the cart the press is on, with the press's base under the board.

Clamped the motor in the vise, using the torque washers on that end for stability and to help it stay in place as I turn it around for drilling. Then I tapped the board around until the drill bit lined up with the spot on the flange I want the holes to end up, and tightened teh clamps holding the board to the cart.

I setup the press's "shelf" to support the opposite flange/side of the motor, so when drilling down thru the flange, it doesn't move away and change the angle of the hole (or break the bit).


I've only had time to drill one hole so far, but it worked as planned for that one. Will see tomorrow how well it works for the rest of them.

View attachment 4
.

