E-bike + carbon frame + 52V. 18650 + BMC motor

Hi guys,

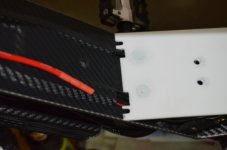
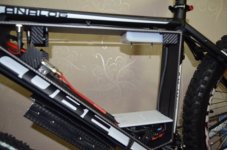
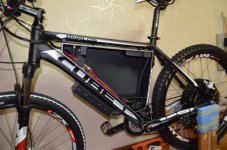
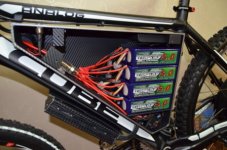
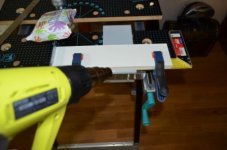
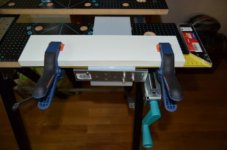
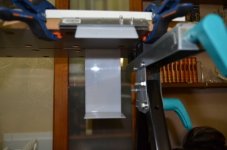
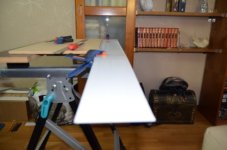
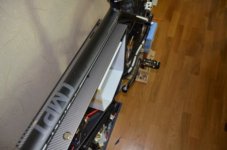
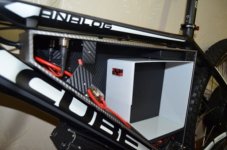
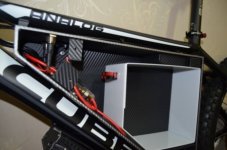
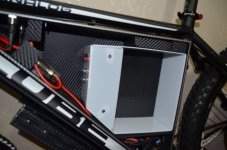
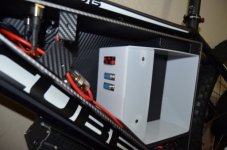
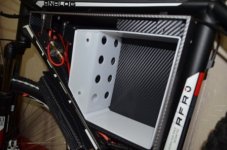
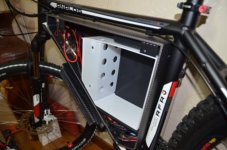
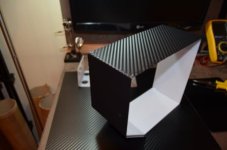
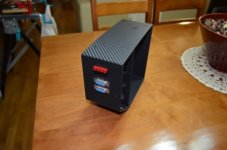
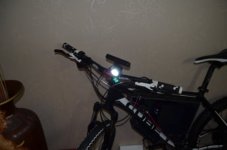
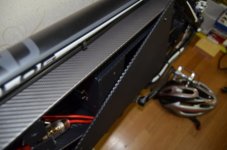
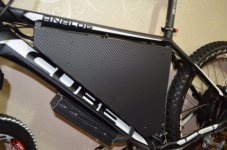
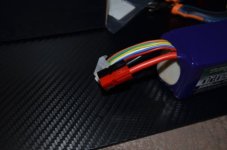
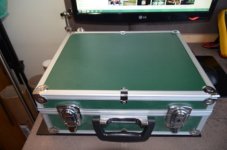
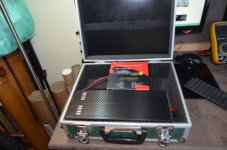
Between some small drives, I need to finish my battery layout.
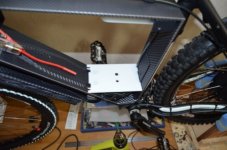
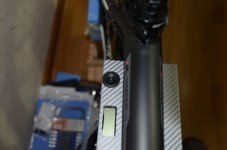
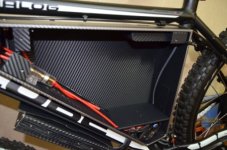
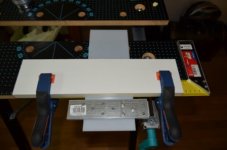
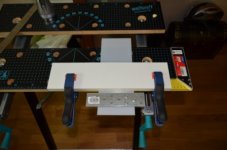
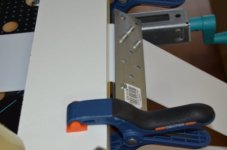
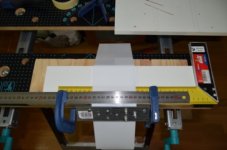
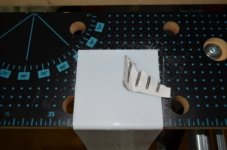
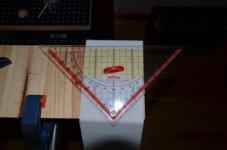
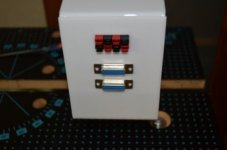
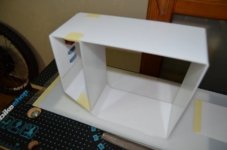
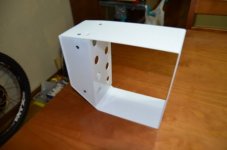
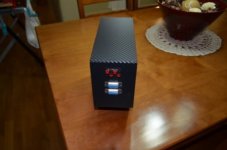
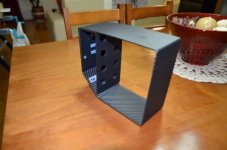
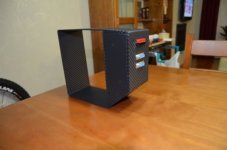
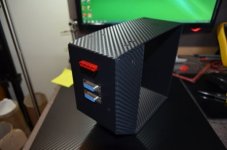
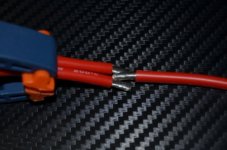
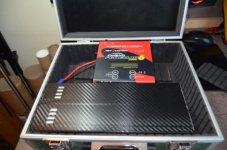
For me to put all the battery in a compact spot, inside the box...I need some changes... :evil: I need to take-out some of the vinyl, cut some parts, change the switch for my temperature-meter (small one), put the vinyl again...just because some centimeters.
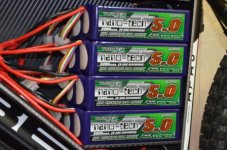
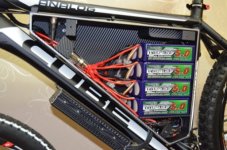
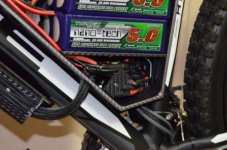
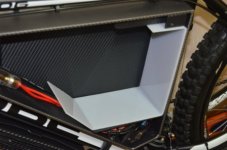
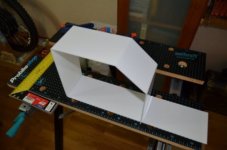
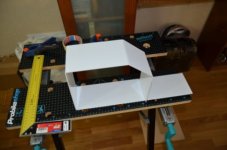
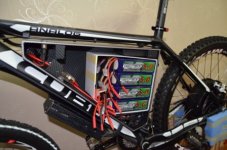
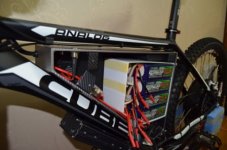
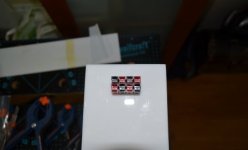
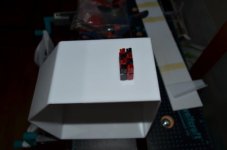
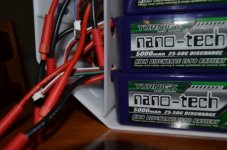
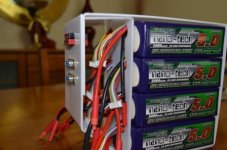
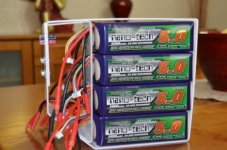
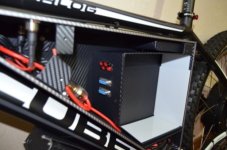
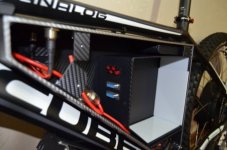
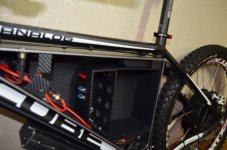
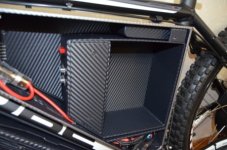
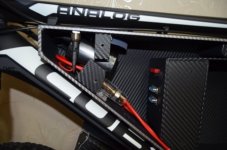
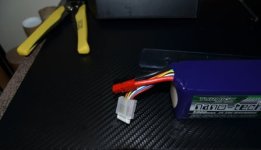
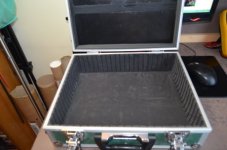
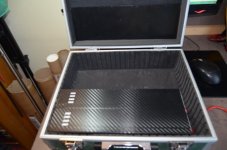
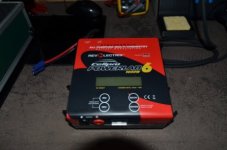
But its ok now. Now I can put all the 8 lipos together, and I have space to upgrade to 15amps.
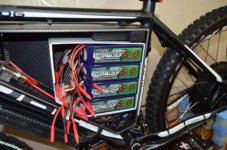
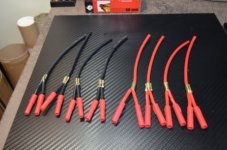
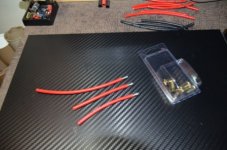
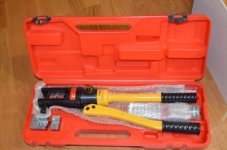
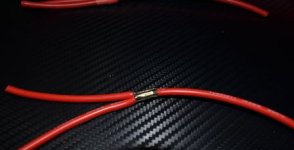
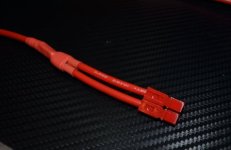
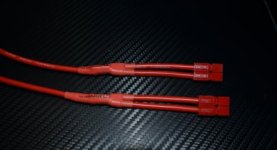
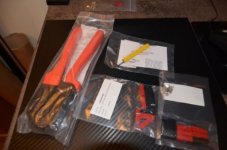
Its time to make the parallel connections and the final layout.

Luis.
 

Attachments

  • DSC_0626.JPG
    DSC_0626.JPG
    54 KB · Views: 4,330
  • DSC_0621.JPG
    DSC_0621.JPG
    66.3 KB · Views: 4,330
  • DSC_0619.JPG
    DSC_0619.JPG
    69.8 KB · Views: 4,330
  • DSC_0633.JPG
    DSC_0633.JPG
    60.5 KB · Views: 4,330
  • DSC_0612.JPG
    DSC_0612.JPG
    55.1 KB · Views: 4,330
  • DSC_0645.JPG
    DSC_0645.JPG
    71.3 KB · Views: 4,330
  • DSC_0642.JPG
    DSC_0642.JPG
    73 KB · Views: 4,330
  • DSC_0639.JPG
    DSC_0639.JPG
    82.9 KB · Views: 4,330
  • DSC_0637.JPG
    DSC_0637.JPG
    78.6 KB · Views: 4,330
  • DSC_0634.JPG
    DSC_0634.JPG
    76.1 KB · Views: 4,330
  • DSC_0638.JPG
    DSC_0638.JPG
    74.1 KB · Views: 4,330
...the work continues in my battery layout.
I'm building a protection in acrylic for my battery. Its more easy to put in, and take out...so I start to learn, how to bend acrylic. A first test, and the result is very acceptable.
You can see the idea.

Luis.
 

Attachments

  • DSC_0648.JPG
    DSC_0648.JPG
    60.9 KB · Views: 4,279
  • DSC_0647.JPG
    DSC_0647.JPG
    61 KB · Views: 4,278
  • DSC_0651.JPG
    DSC_0651.JPG
    63 KB · Views: 4,278
  • DSC_0652.JPG
    DSC_0652.JPG
    60.9 KB · Views: 4,278
  • DSC_0653.JPG
    DSC_0653.JPG
    62.4 KB · Views: 4,278
  • DSC_0654.JPG
    DSC_0654.JPG
    60.6 KB · Views: 4,279
  • DSC_0657.JPG
    DSC_0657.JPG
    63.8 KB · Views: 4,279
...the final push continues.
Yesterday, after some training on bending acrylic...its time to bend the box.
I believe this is the better approach. I'm going to use pp45 to pass from parallel to series and some bullet stile connector for the controller.
The pp45, going to be installed on the face of this box. For the balance wires, I'm going to use a DB37 connector.
Wen I want to ride, I take my battery box from my "bunker", install in the bike, attache my pp45 block...

Luis.
 

Attachments

  • DSC_0660.JPG
    DSC_0660.JPG
    62.5 KB · Views: 4,255
  • DSC_0659.JPG
    DSC_0659.JPG
    61.1 KB · Views: 4,255
  • DSC_0666.JPG
    DSC_0666.JPG
    59.5 KB · Views: 4,255
  • DSC_0667.JPG
    DSC_0667.JPG
    62 KB · Views: 4,255
  • DSC_0669.JPG
    DSC_0669.JPG
    55.2 KB · Views: 4,255
  • DSC_0672.JPG
    DSC_0672.JPG
    62.8 KB · Views: 4,255
  • DSC_0673.JPG
    DSC_0673.JPG
    60.6 KB · Views: 4,255
  • DSC_0674.JPG
    DSC_0674.JPG
    61.5 KB · Views: 4,255
  • DSC_0675.JPG
    DSC_0675.JPG
    70 KB · Views: 4,255
  • DSC_0676.JPG
    DSC_0676.JPG
    62.5 KB · Views: 4,255
  • DSC_0677.JPG
    DSC_0677.JPG
    73 KB · Views: 4,255
  • DSC_0678.JPG
    DSC_0678.JPG
    68.2 KB · Views: 4,255
  • DSC_0679.JPG
    DSC_0679.JPG
    78.3 KB · Views: 4,255
Working on this final task...
I want to have an easy way to charge. I can charge the 4 sub-packs individually or I can charge all at the same time in parallel.
I have a lot of wires to solder, and want to be very cautions.
To be continued...

Luis.
 

Attachments

  • DSC_0684.JPG
    DSC_0684.JPG
    62.4 KB · Views: 4,190
  • DSC_0687.JPG
    DSC_0687.JPG
    53.6 KB · Views: 4,190
  • DSC_0688.JPG
    DSC_0688.JPG
    54.9 KB · Views: 4,190
  • DSC_0689.JPG
    DSC_0689.JPG
    53.5 KB · Views: 4,190
...continues to 100% finish.
Still working on battery layout. Everything is thought, I just need to make it.

Luis.
 

Attachments

  • DSC_0700.JPG
    DSC_0700.JPG
    56.7 KB · Views: 4,088
  • DSC_0706.JPG
    DSC_0706.JPG
    58 KB · Views: 4,088
  • DSC_0709.JPG
    DSC_0709.JPG
    60.3 KB · Views: 4,088
  • DSC_0713.JPG
    DSC_0713.JPG
    72.5 KB · Views: 4,088
  • DSC_0715.JPG
    DSC_0715.JPG
    73.1 KB · Views: 4,088
  • DSC_0719.JPG
    DSC_0719.JPG
    75.3 KB · Views: 4,088
soaresdacosta said:
...continues to 100% finish.
Still working on battery layout. Everything is thought, I just need to make it.
Luis.
Luis how long till you finish
 
Hi Emoto,

...well...almost finish... :roll: :roll:

I'm just finishing my battery layout. Soldering the parallel connections, and the balance wires to the DB15. And soldering the wires on the charger side.
Wen I put the battery on the bike, I have 4 packs of 6s 10amps. Then I change to 24s 10amps, wen I connect the andersen connector block. To charge, I can charge each 6s 10amps individually or I can charge all the 4 packs in parallel, at the same time...the charger have power for that.
I want a "noob" proof charging system. And I want to charge and store my battery in my "bunker".

Take care,
Luis.
 

Attachments

  • DSC_0724.JPG
    DSC_0724.JPG
    56.2 KB · Views: 4,050
  • DSC_0720.JPG
    DSC_0720.JPG
    67.1 KB · Views: 4,050
  • DSC_0721.JPG
    DSC_0721.JPG
    66.4 KB · Views: 4,050
  • DSC_0722.JPG
    DSC_0722.JPG
    67.9 KB · Views: 4,050
  • DSC_0723.JPG
    DSC_0723.JPG
    69.7 KB · Views: 4,050
The "looks" of the box-inside-the-box, is finish. Everything test fitted, and so far so good. All the gaps are ok.
Now its time to assembly permanently and definitely the batterys in to the box, and start to ride more often.
I need to put some "Velcro-stile" to secure my "Magicshine" light battery.

Luis.
 

Attachments

  • DSC_0743.JPG
    DSC_0743.JPG
    60.1 KB · Views: 3,997
  • DSC_0745.JPG
    DSC_0745.JPG
    72.7 KB · Views: 3,997
  • DSC_0749.JPG
    DSC_0749.JPG
    66.3 KB · Views: 3,997
  • DSC_0750.JPG
    DSC_0750.JPG
    53.3 KB · Views: 3,998
  • DSC_0752.JPG
    DSC_0752.JPG
    62.7 KB · Views: 3,998
  • DSC_0753.JPG
    DSC_0753.JPG
    67.2 KB · Views: 3,998
Hi guys,

Long time waiting for some parts...cables and small stuff.
Its time to make the permanent connections on the battery. I choose to crimp the cables for the parallel connection, instead of soldering.
Wen I was trying to put a 10g cable on a anderssen pp45, without the proper tool, I send a couple of them to the trash. Then I decide to buy the tool from "powerwerx", and Its so easy now. Wen we have the correct tool for the job...

Luis.
 

Attachments

  • DSC_0855.JPG
    DSC_0855.JPG
    67.4 KB · Views: 3,874
  • DSC_0839.JPG
    DSC_0839.JPG
    68.6 KB · Views: 3,874
  • DSC_0856.JPG
    DSC_0856.JPG
    59.4 KB · Views: 3,874
  • DSC_0859.JPG
    DSC_0859.JPG
    61 KB · Views: 3,874
  • DSC_0876.JPG
    DSC_0876.JPG
    69 KB · Views: 3,874
  • DSC_0862.JPG
    DSC_0862.JPG
    59 KB · Views: 3,874
Happy New Year!

Such patience with this build. Can't wait for the end product - all the work will be worth it on this bike... I love your commitment to nothing but the most simple and user friendly end result. Gonna have to get me some of that carbon fiber stuff. Thank you so much for taking great pictures and sharing all the steps along the way.

Cheers!
 
Hi guys,

Since I was not happy with the bullets connectors, I need to change hall of them. Maybe its my soldering station...maybe its the guy soldering... :lol:
I go with Andersen 45 amp, and since I have the crimping tool, the job was easy.

Luis.
 

Attachments

  • DSC_0916.JPG
    DSC_0916.JPG
    63 KB · Views: 3,770
  • DSC_0910.JPG
    DSC_0910.JPG
    59.4 KB · Views: 3,770
  • DSC_0902.JPG
    DSC_0902.JPG
    60.6 KB · Views: 3,770
  • DSC_0905.JPG
    DSC_0905.JPG
    58.3 KB · Views: 3,770
  • DSC_0914.JPG
    DSC_0914.JPG
    56.2 KB · Views: 3,770
Since I change the bullets connectors, I need to redone all the parallel cables, with the new anderssen connectors.
In the meantime, I collect parts for my "lipo charging station"...that will be the last thing on this build.

Luis.
 

Attachments

  • DSC_0926.JPG
    DSC_0926.JPG
    67.7 KB · Views: 3,741
  • DSC_0929.JPG
    DSC_0929.JPG
    64 KB · Views: 3,741
  • DSC_0931.JPG
    DSC_0931.JPG
    65.6 KB · Views: 3,741
  • DSC_0936.JPG
    DSC_0936.JPG
    55.7 KB · Views: 3,741
  • DSC_0934.JPG
    DSC_0934.JPG
    58.4 KB · Views: 3,741
  • DSC_0940.JPG
    DSC_0940.JPG
    57 KB · Views: 3,741
  • DSC_0942.JPG
    DSC_0942.JPG
    54.9 KB · Views: 3,741
  • DSC_0946.JPG
    DSC_0946.JPG
    57.1 KB · Views: 3,741
  • DSC_0917.JPG
    DSC_0917.JPG
    60.5 KB · Views: 3,741
  • DSC_0919.JPG
    DSC_0919.JPG
    61.4 KB · Views: 3,741
  • DSC_0922.JPG
    DSC_0922.JPG
    63.6 KB · Views: 3,741
  • DSC_0921.JPG
    DSC_0921.JPG
    63.7 KB · Views: 3,741
  • DSC_0923.JPG
    DSC_0923.JPG
    60.3 KB · Views: 3,741
  • DSC_0924.JPG
    DSC_0924.JPG
    68.1 KB · Views: 3,741
  • DSC_0925.JPG
    DSC_0925.JPG
    65.8 KB · Views: 3,741
hi
What material did you inbox . Is this the plexiglass ? What is the material thickness ?
 
Such a shame I did not see this built earlier..
That a side a beautiful build bike!
May i ask where you bought your rivet nuts :)

Thanks in advance,
David Raaijmakers
:D
 
Back
Top