whitepony
10 kW
- Joined
- Feb 19, 2015
- Messages
- 663
Hello everyone, I'm a frequent sphere reader and I needed some sort of webspace to explain my evolve brothers what they have to do in order to double their range with zero-invasive actions and quite little cost - thought this might actually be a good spot to drop this summary of my actions! ")
Some facts:
* Evolve Carbon has a 37V 10Ah LiPo-battery, cells with nominal voltage of 3.7, cutting off around 4.2V max and 3Vish min
* Balancer of the BMS has 11 pins due to 10S?P battery layout, the pin distance is 2mm
* evolve quick charger is a constant current charger @ 42V, stopping once the current becomes too low
* evolve silent charger is a cc/cv charger, thats ultimately loading the battery @ constant 41.4V into saturation
* the available space for a battery is around 62 x 14.2 x 1.5cm
Minmum battery infos (stuff I didnt know and had to find out):
* LiPo based batteries have usually a nominal voltage of 3.6-3.7V which is sort of an average, they max out at 4.2V and shouldnt be discharged lower than 2.5V. LiFe-based batteries run at lower voltage per cell (3.3ish) and they are NOT compatible with the stock BMS. Look out ONLY for cells that use 3.6-3.7V nominal!
* for the panasonic and other tests, check http://lygte-info.dk/review/batteries2012/Panasonic NCR18650B 3400mAh (Green) UK.html
* if you build a 10S6P setup like me, it means you use 10 cells in series and 6 parallel - basically you weld together 6 cells in parallel for a capacity of 6x 3400mAh = 20.4Ah and combined 3.7V nominal. Then you connect the 20.4Ah 3.7V packs in series which adds up the nominal voltage of 10 x 3.7V = 37V.
* the nominal voltage is not the max voltage - a cell can usually be charged up to 4.2V and discharged down to 2.5V (in case of the panasonics I used), so the voltage of the total battery will be 42V max and 25V min. The evolve BMS is cutting off way before 25V though to give the cells a longer lifetime.
* a BMS is needed to keep all parallel 3.7V packs at the same voltage. It would be really bad if you charged the total 10S pack to 42V and some packs went up to 4.2V+ while others remain at voltages < 4.2V (likewise with draining them below 2.5V). Thats why you have to split the 10S block into 10 sections of 3.7V nominal voltage, so that an electronic can level these sections out in order to prevent discharging below min or overcharging above max voltage.
Material list:
* 62 cells Panasonic NCR18650b with nominal voltage of 3.6 and 3400mah capacity (2 spare cells incase i got a faulty one or I screw something up) (paid around 300€ @ http://eu.nkon.nl/rechargeable/18650-size/panasonic-ncr18650b.html )
* 3m hilumin or nickel band (my hilumin band was 99.5% nickel) 10mm x 0.15mm for spot welding cells (10€)
* multicoloured 0.5mm^2 cables for balancer connection (5€)
* 2m black 6mm^2 cable for +- poles (2€)
* balancer port http://www.conrad.de/ce/de/product/...ennstrom-2-A-PHR-11-JST-1-St?ref=searchDetail with 11x http://www.conrad.de/ce/de/product/...astermass-20-mm-BPH-002T-P05S-JST-1-St?ref=nz I linked these things cause it took me forever to find the compatible ones for a plug & play solution!
* about 2m 10x3mm sealing tape (I used neoprene stuff)
* heat shrink tube 1m 195mm width
*Edit: after building my 2nd evolve battery for someone else, I agree with riba: the Sanyo GA, LG MJ1 and Samsung 35E are much better cells overall.
Additionally I bought everything I needed to make my own spot welder. Thought a while about how to connect the cells - was reluctant to solder, cause I didnt have a high power soldering iron and I was also afraid to overheat the cells in the process. Finally I also dont really trust soldering as much as welding, so I followed many nice guides to build my own spot welder. Ill give a quick recap on material list and how to build one in the next post!
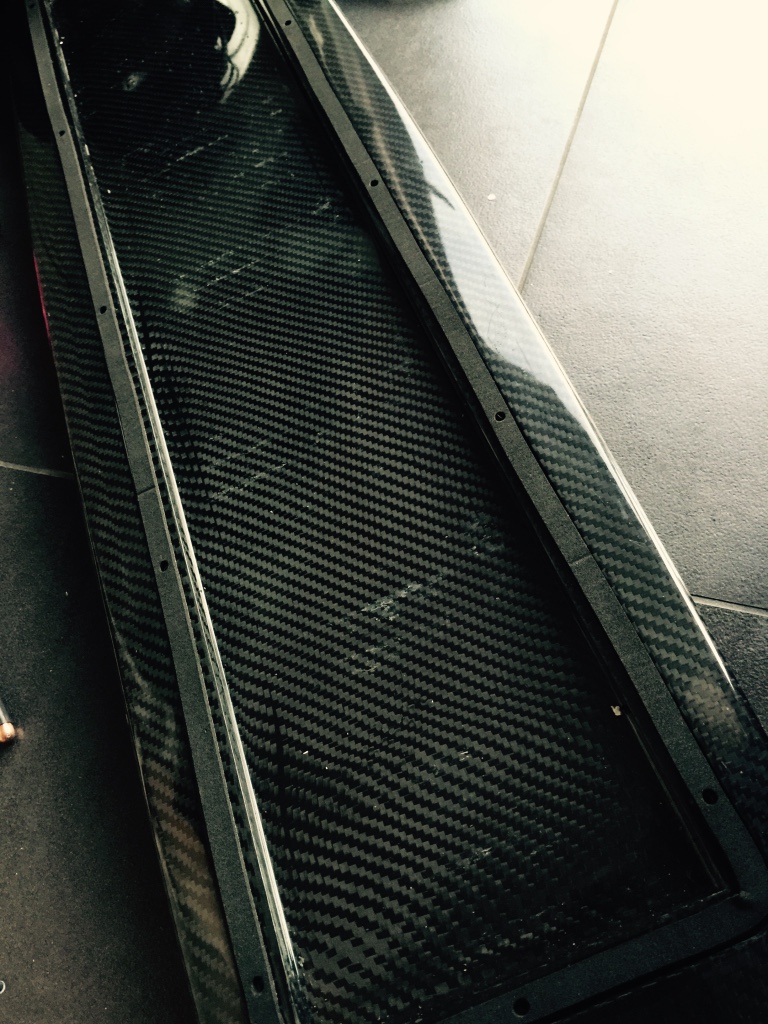
Dimension of the evolve carbon inside, its also where I measured balancer pins and voltages to check whether the evolve setup was compatible with regular LiPo batteries:
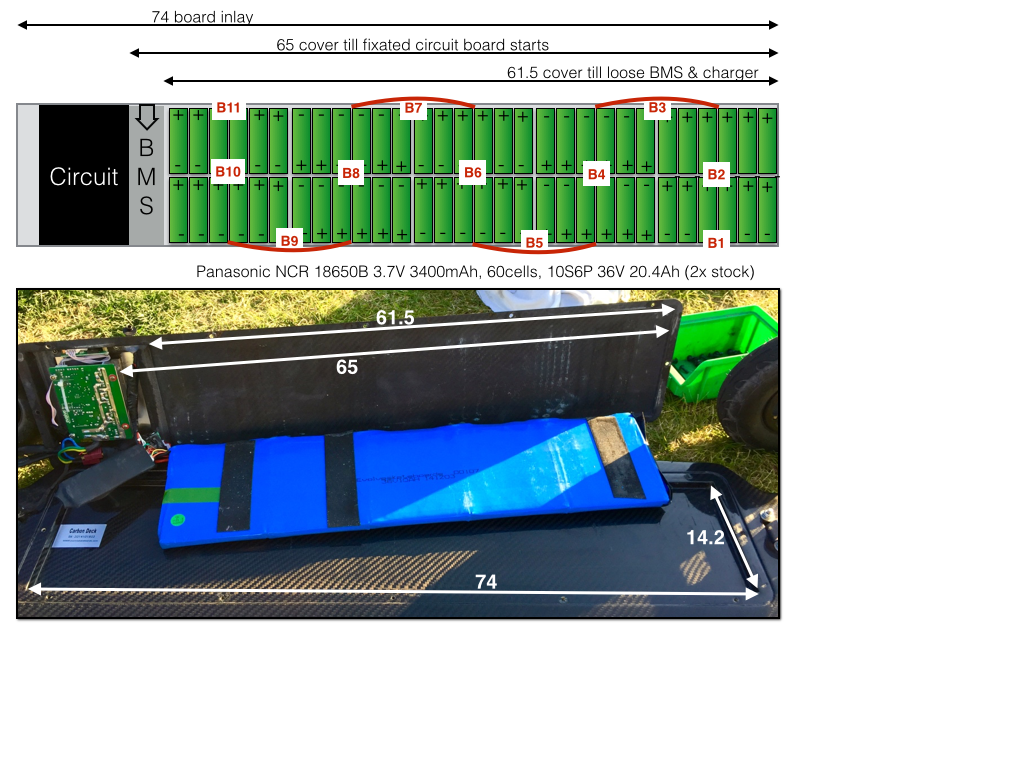
I quickly drew the battery setup with keynote, using 18650 (18mm width, 650mm length) cells in a 10S6P setup. The "B??" tags in the picture are where the balancer cables are placed - basically a 10S battery will have 11 balancer wires in total, dividing up the battery into 10 3.7V sections!
Then I tried to figure out which cell would be best for the job and after some interesting discussions in this thread I decided to give a heads up on that process to make people aware of a few things: the factory capacity of cells is only met under very low discharge currents, if you suck stronger currents from a sell, the discharge capacity might get smaller and smaller.
I started with thinking about how much power the Evolve actually sucks from the battery under demanding conditions - the motor is set to use up to 350Watts and from my experience with the original 10Ah evolve battery, that is actually a very reasonable value for the power consumption in demanding scenarios (25km/h, lots of carving, hills).
So, 350Watts at 36V nominal battery voltage means about 10A constant discharge current. This divides up on each of the 6 individual parallel cells and comes down to 1.5A constant discharge current per cell. Now the only reasonable source I had for battery comparisons has been http://lygte-info.dk/review/batteries2012/Common18650Summary UK.html where I checked the charts. The correct picture to look at is the discharge capacity down to 3.0V (stock BMS cuts off there) with discharge current of up to 2A -> http://lygte-info.dk/pic/Batteries2012/common/CapacityTo3.0.png (cyan colored bars). There are many good cells as you can see, some less and some more expensive - the Panasonic 18650B with 3400mAh seemed to be a very good choice in terms of very high capacity for moderate money.
When I had enough courage and was convinced that the stock battery management would work just fine with my 18650 cells, I went for it and ordered everything that was needed.
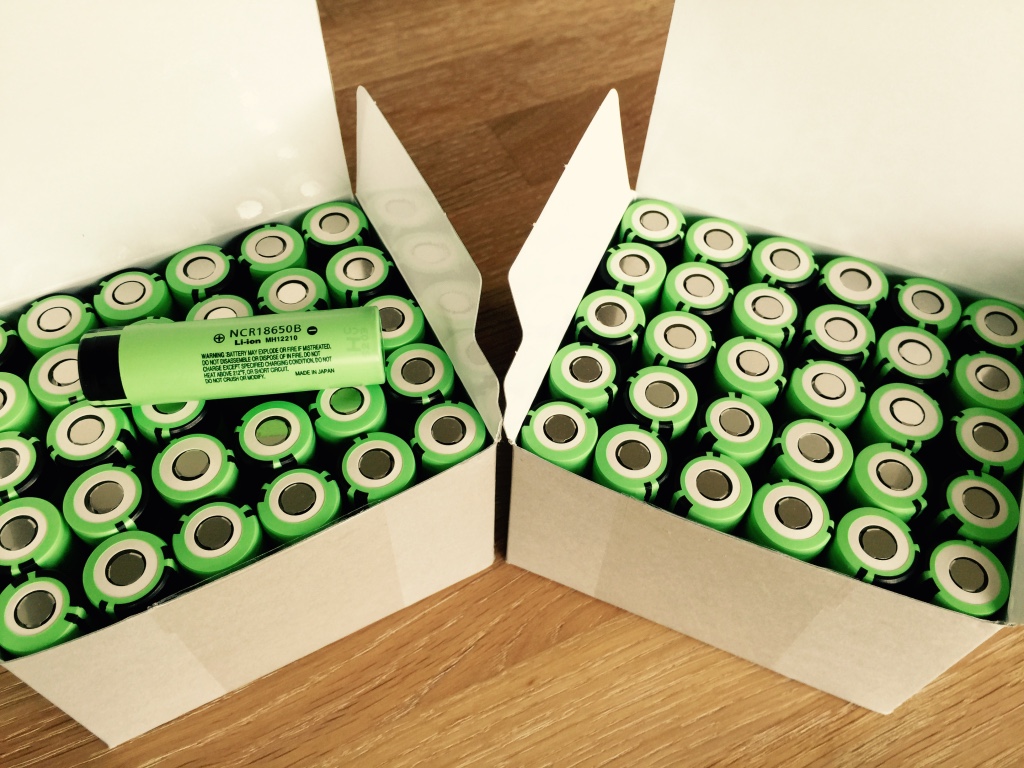
Cells arrived:
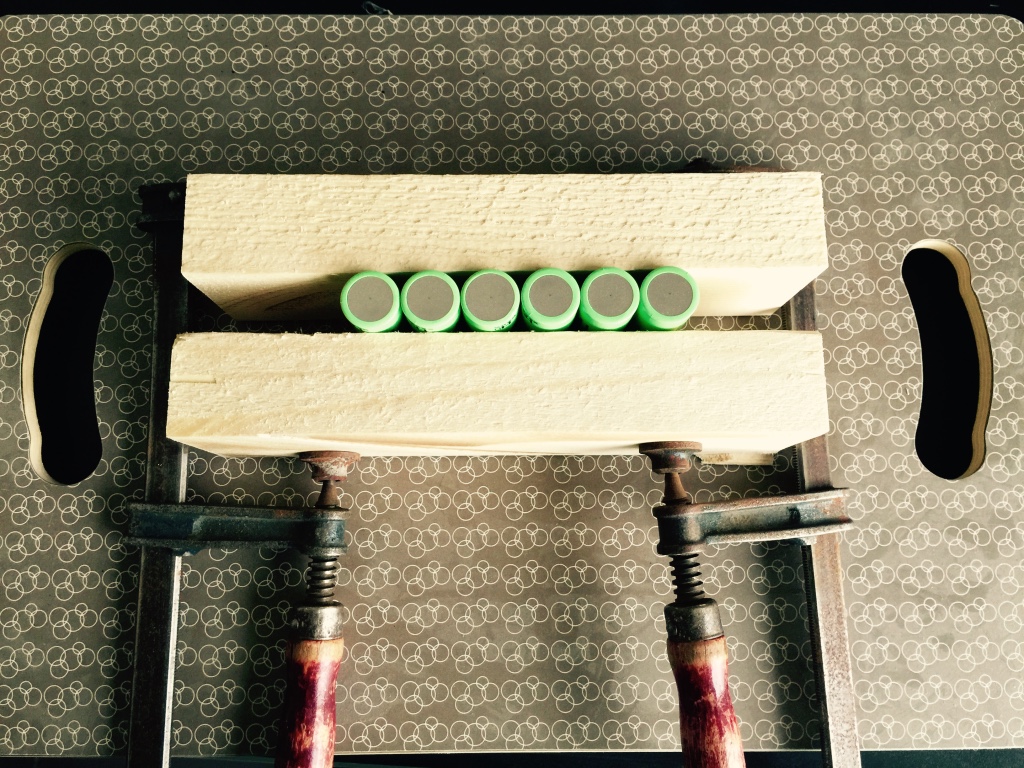
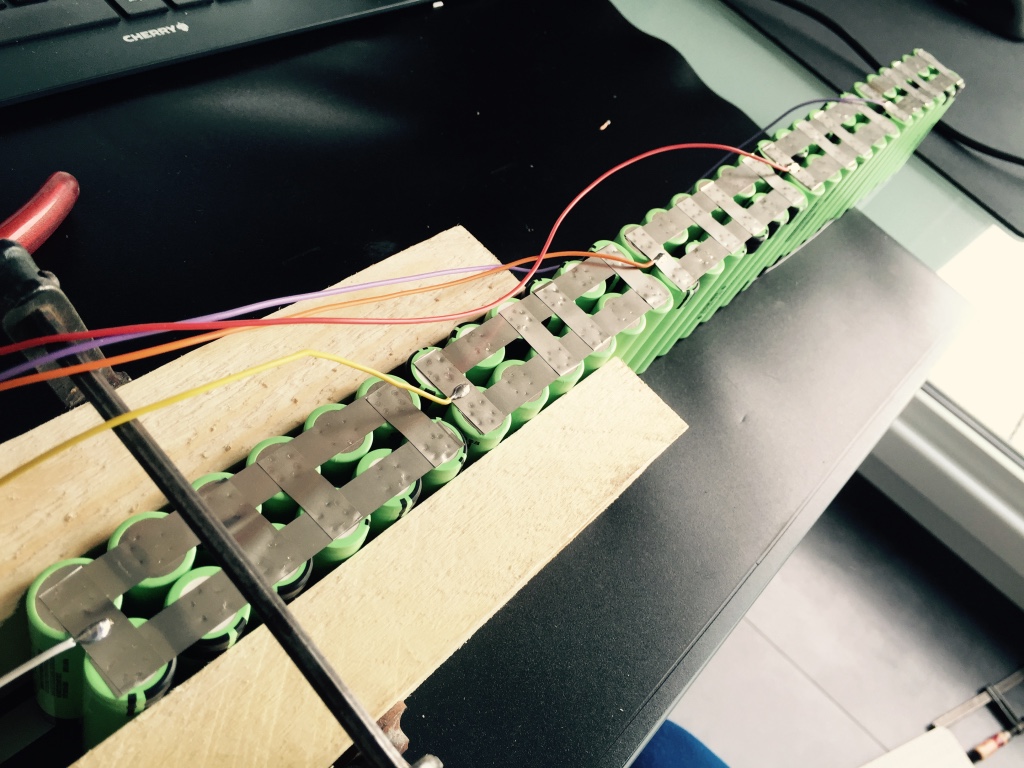
For spot welding, I used clamps and old pieces of wood, to keep them lined up well - in total 10 blocks a 6 cells (only use mild pressure with clamps, you dont want to kill your cells). I measured the voltage of every cell before connecting - in order to identify something thats broken and to avoid bleeding currents among cells of a pack:
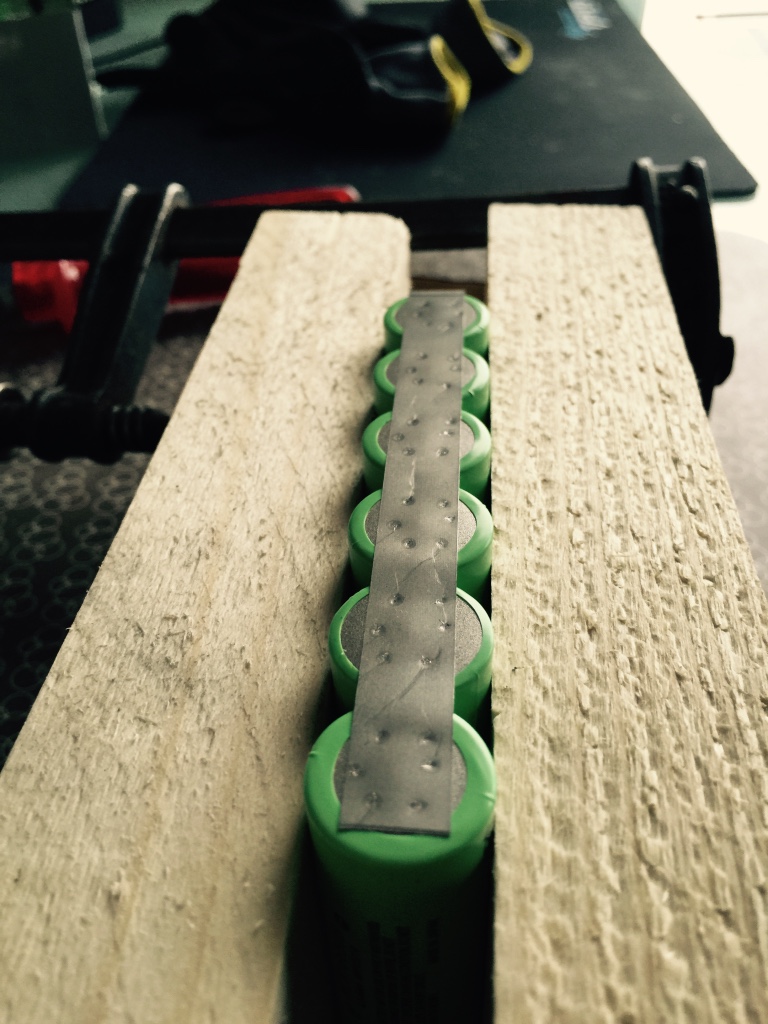
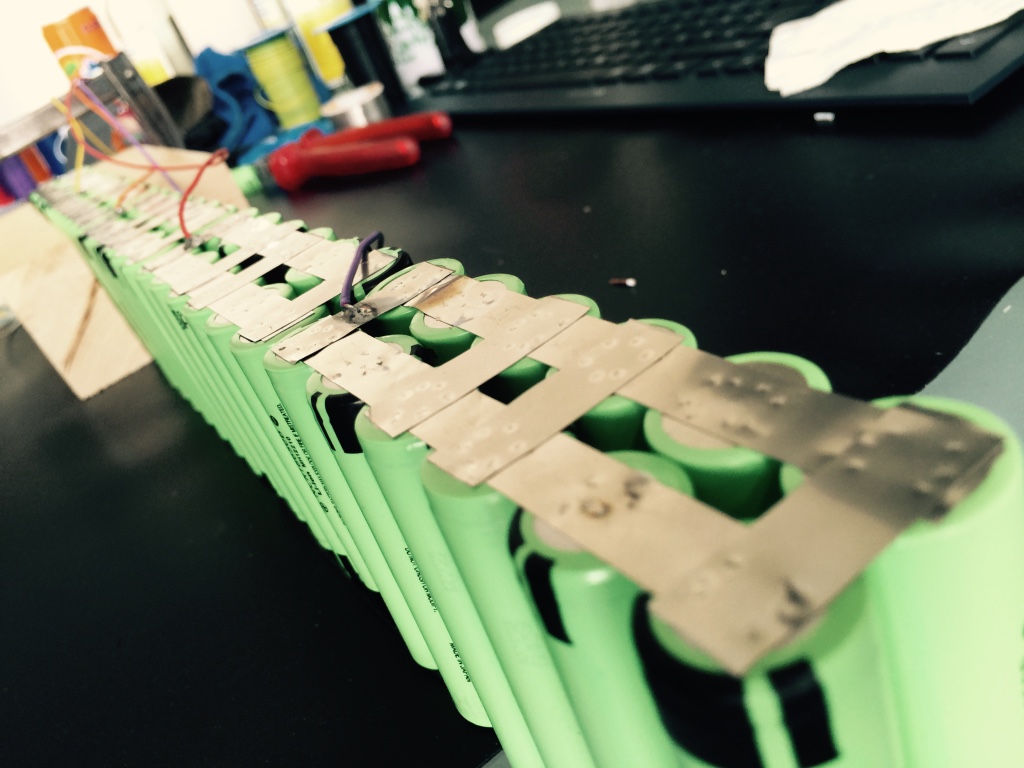
After spot welding with the hilumin band, it looked like this:
I connected pack 2&3, 4&5, 6&7, 8&9 with a second layer of welded hiluminband, then added the balancer cables with seperate small Hiluminbands, so I could solder the cables before I connect them to the cells (didnt want soldering heat transfer into cell, make sure to use soldering flux!). At that point it helps to stabilize the whole pack with wide clear tape (the super cheap one)... it will take a lot of stress from hilumin connections between packs and will make the whole pack much easier to handle. From here onwards you have to be very careful to not shortcut anything on accident. LiPo cells are very strong and can vaporize connecting metal in seconds. I started to use a lot of cheap wide tape to cover anything I didnt want to touch ... better safe than sorry!
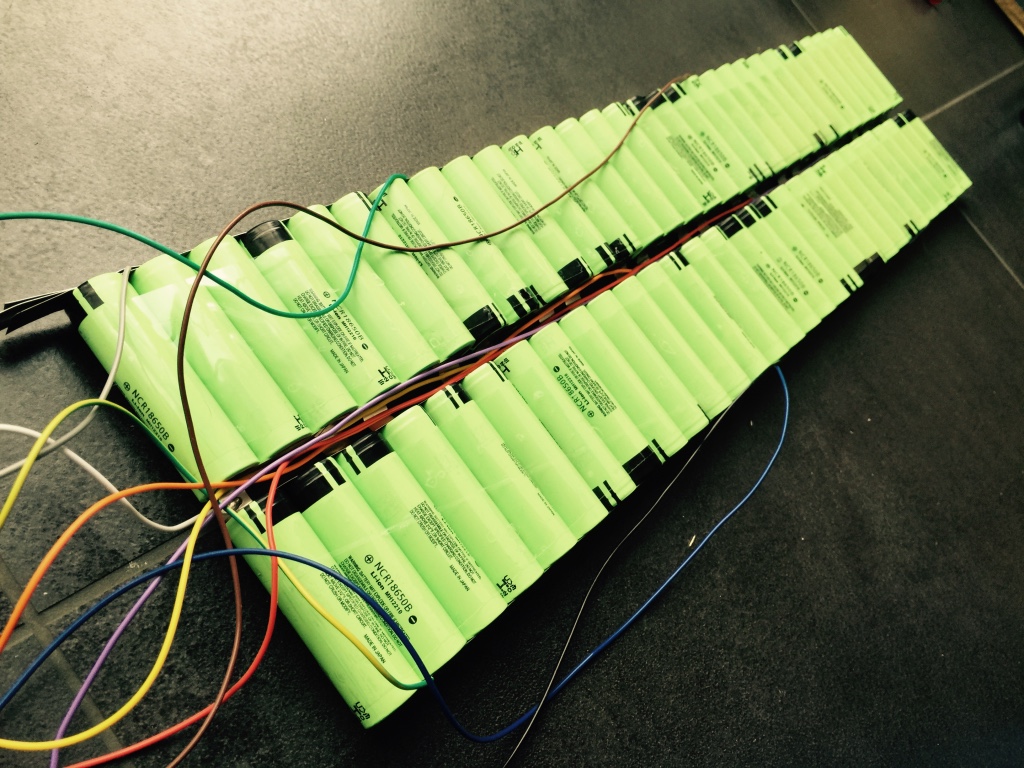
In that picture you actually see the middle section of the battery - my plan was to do the middle connection with hiluminband and then fold the 2 long rows of batteries like a butterfly. Used 4 interconnections for physical stability! Additionally, I added 2 more layers of hiluminband to minus pole of pack 1 and plus pole of pack 10, to account for the larger currents there. The 10x0.15 band only works up to 10A!
The butterfly idea worked well - just folded the 2 rows:
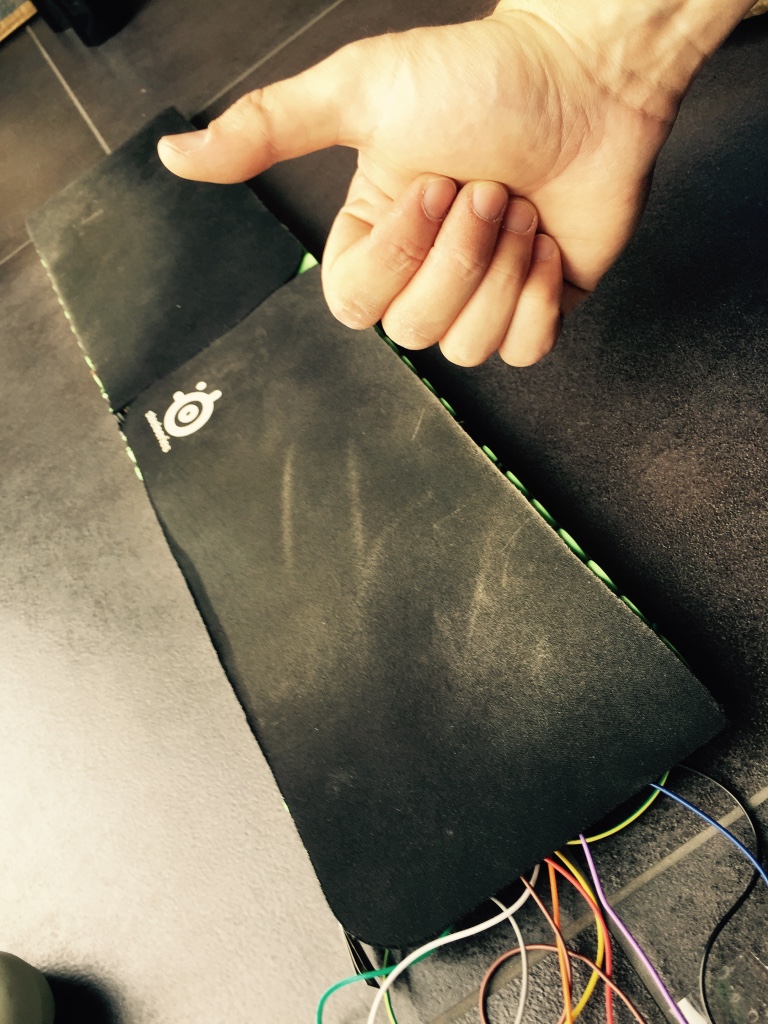
For shock protection at the side facing to the ground, I used a worn out mouse pad
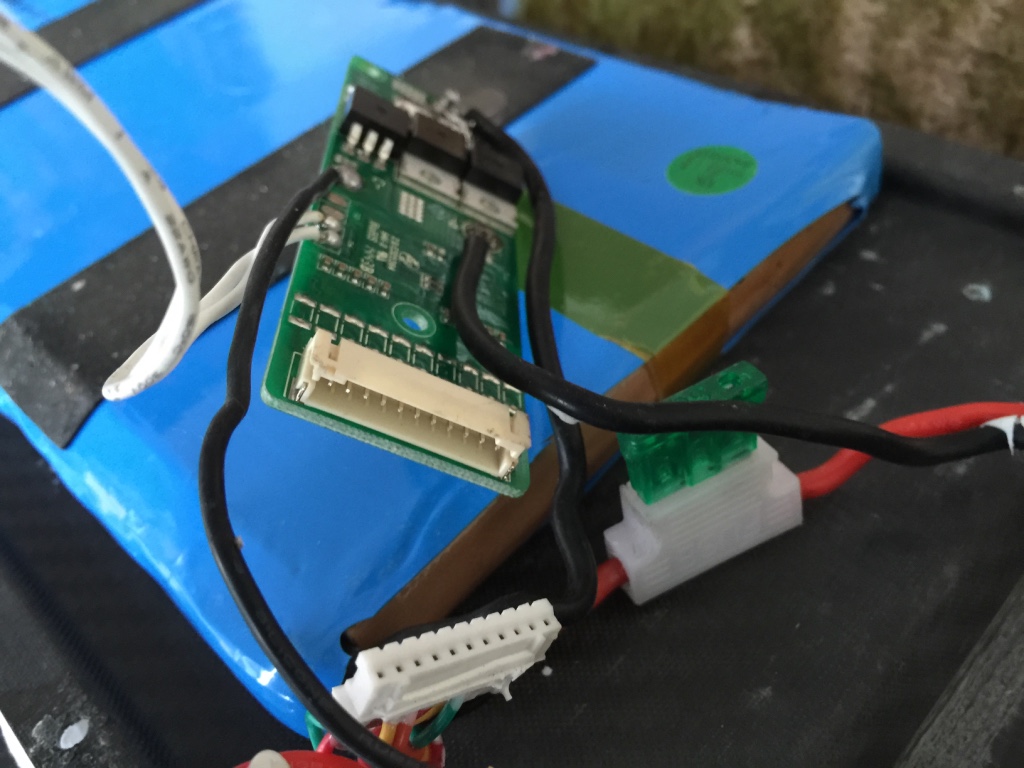
Connecting the 11 balancer cables to the connector, make sure to check every single one of them thoroughly with measuring the voltage (and keep the rest taped to avoid any shortcuts). it should always be 3.X V depending on factory charge. For the correct order, compare the pins with measuring your old battery balancer pins. If you remove the connector and look at it, cables facing away, it started with B1 on the left, then B2, B3, B4, ... you get the idea, could be different for your board though. Finally added some heat shrinking tube, had a very cold moist towel which I used to take out the heat the moment the stuff shrinked into place. sadly I screwed up that part, the heat shrink tube folded my battery into a v-shape, so I had to cut it off again and use the rest of the heat shrink tube to try it again - it worked better, but I didnt have enough anymore to do the full battery, so I used parts of the old tube and fixed it with tape. not proud of this

I knew my battery pack would be around 3mm too high for the original case, especially with my mouse pad protection - so I had 10x3mm neoprene sealing tape prepared to lift up the cover a little bit. the holes for the screws were cut by some magic leather stamp thing I lent from my mum: :lol:
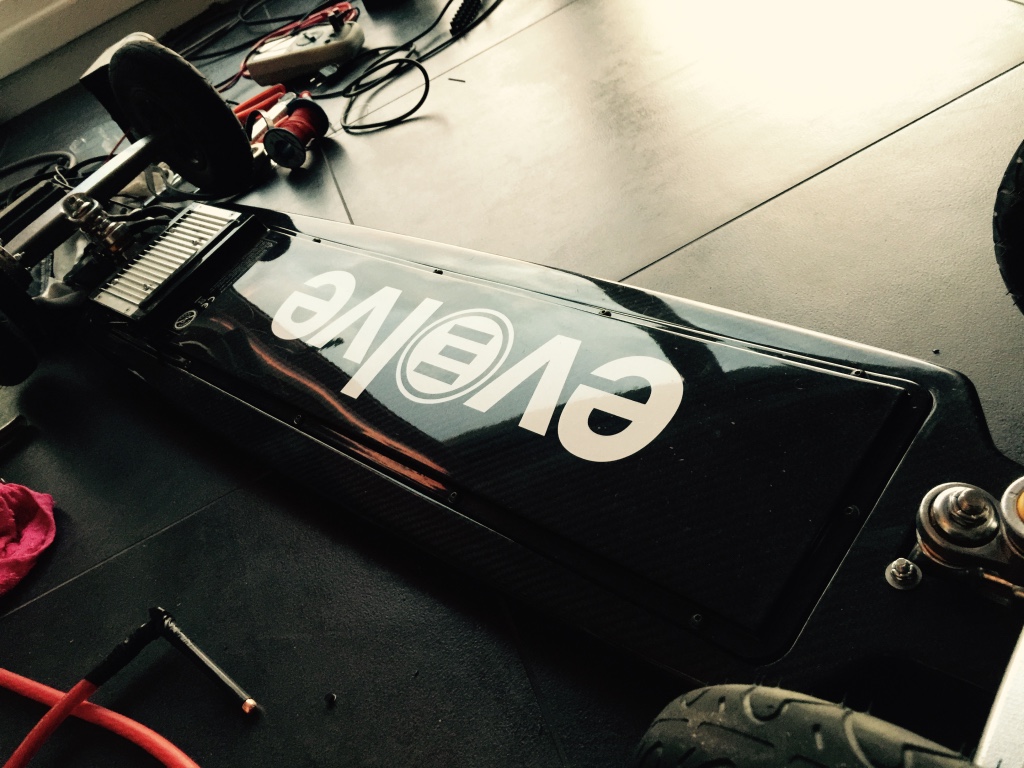
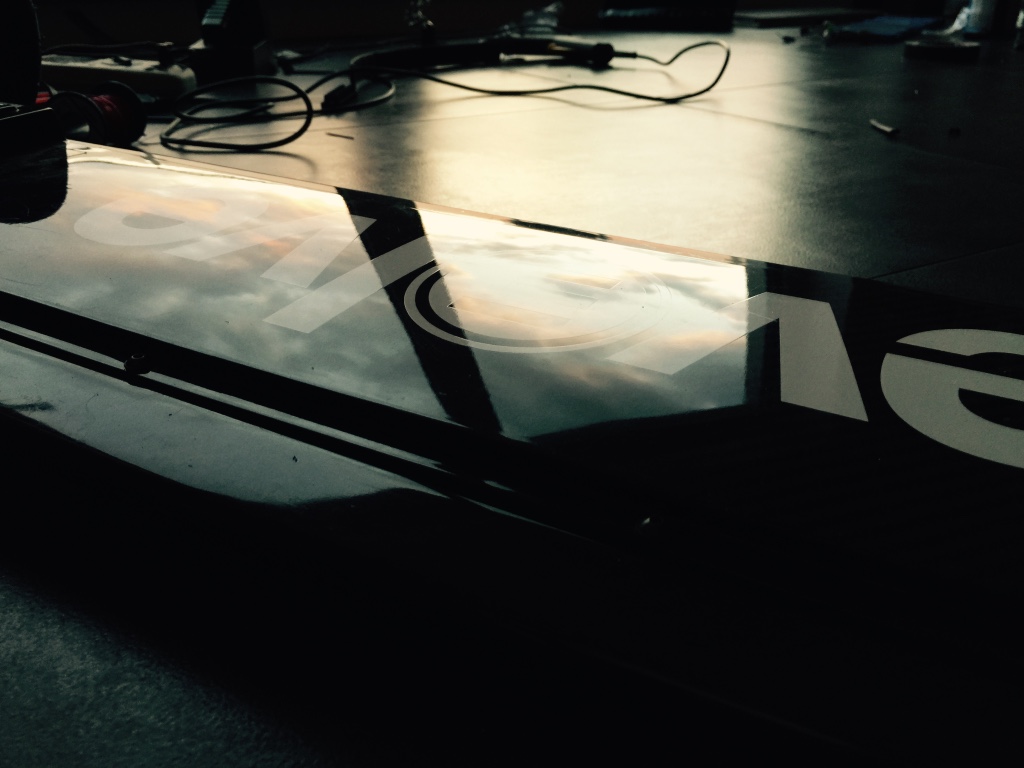
Putting everything together - beautiful evolve carbon <3
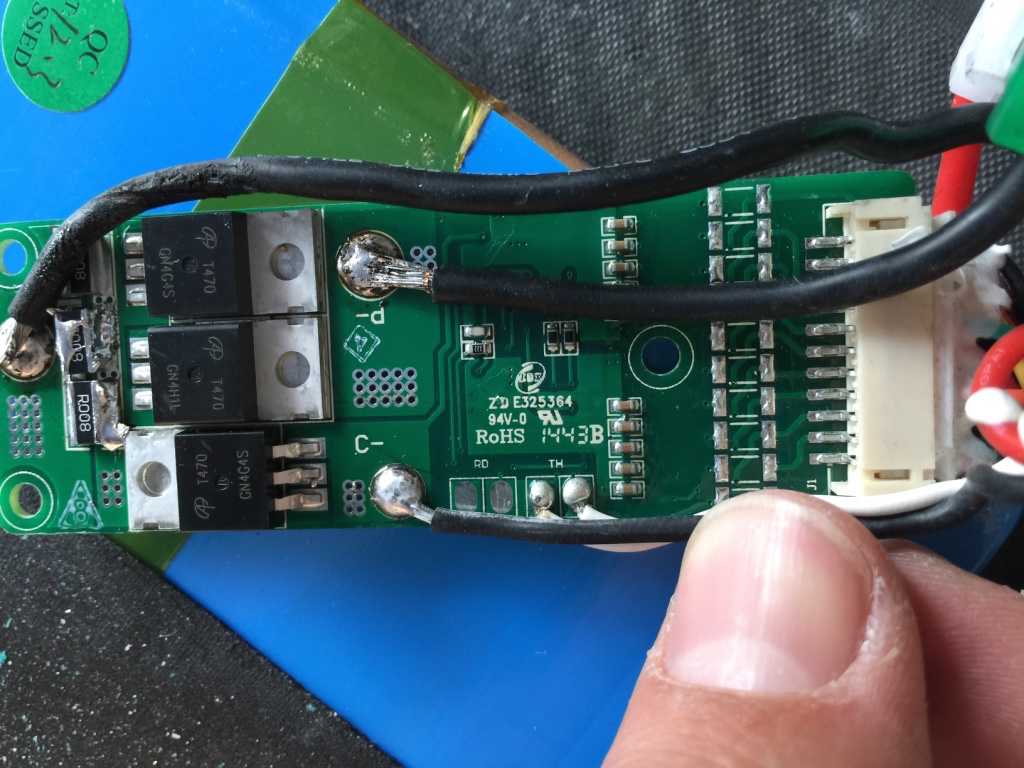
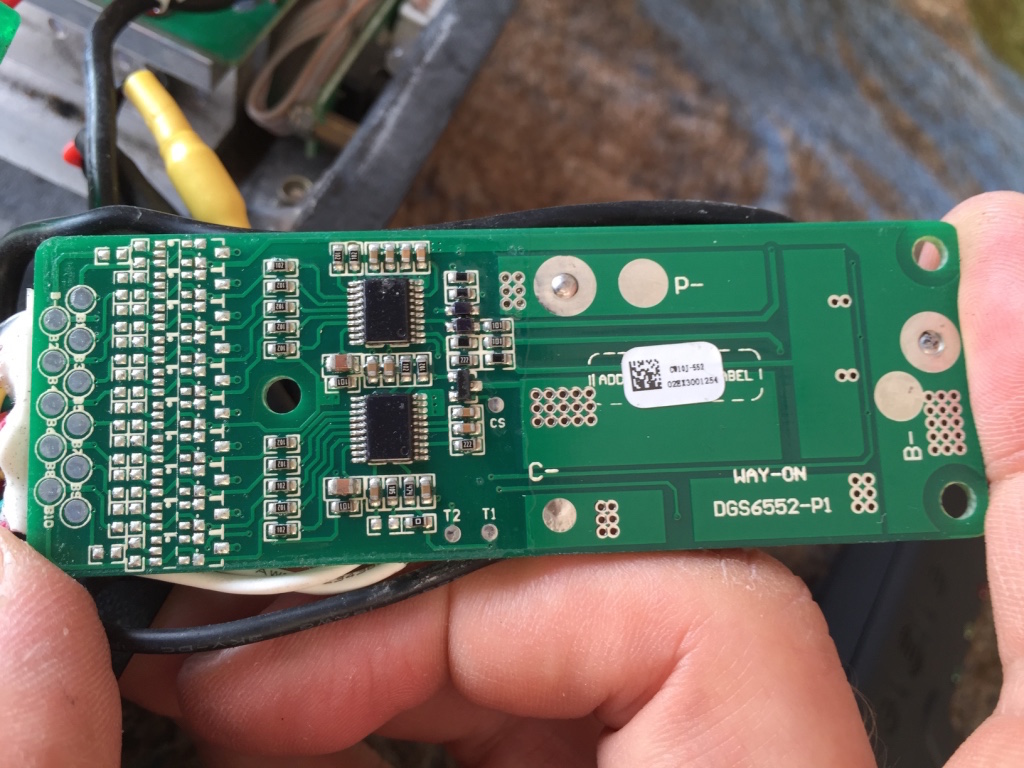
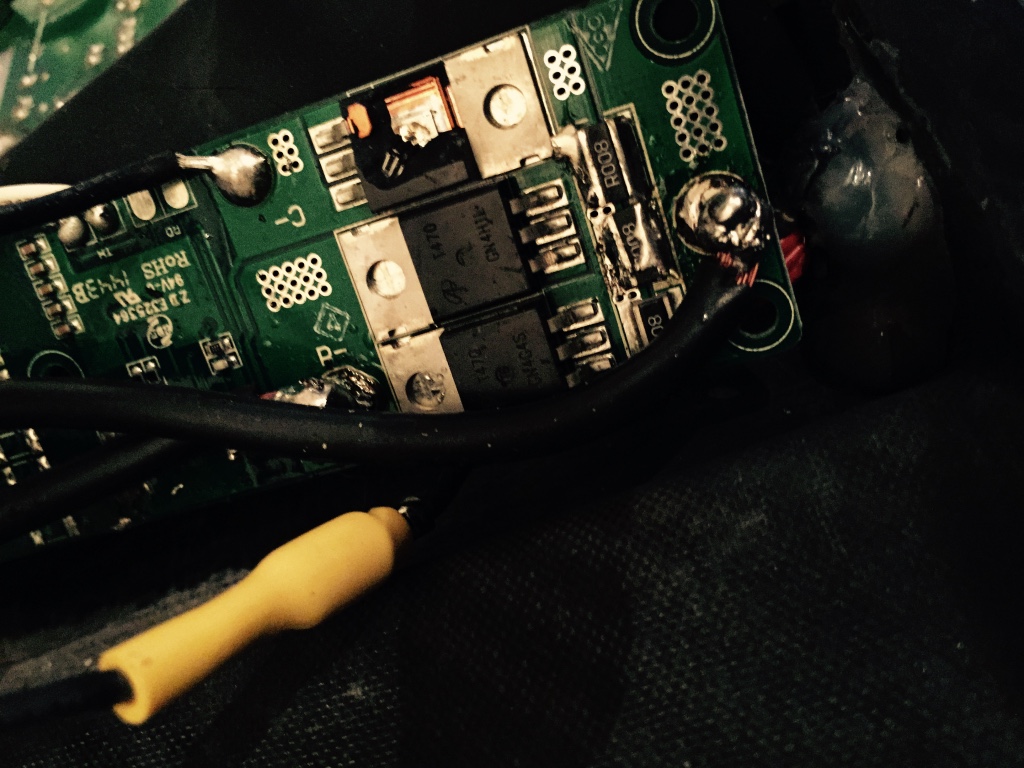
Sadly I screwed up badly in that final step of a 3 day odyssey, canted the BMS slightly when fixing the carbon cover and tore off a mosfet from mechanical stress - it killed the recharging mechanism of the BMS. stupid me :|
I took the BMS out completely for now and put the board back together. cell drift wont be a problem right away - Ill buy a replacement BMS or find a suitable mosfet and put it in in a few weeks from now. if anyone knows what mosfet is meant from whats written on it (t470 GN4G4S), please poke me!
Did a quick test run last night with a semi-charged battery - it worked! Dont think I'll have to do a range check - its double capacity = double range. With how I ride my carbon AT, this will be around 30km. A maximum of 50-60km should be possible in the AT setup if you do the 18km/h non carving max range thing - I might give it a try, but its a little too boring for my taste. :wink:
Hope you enjoyed it, it was a lot of work - together with building my spot welder, it took me about 3 evenings. The battery making until the evolve was up and running again took me about 6-7hours total. Then again Im new to this, first battery I welded, had to think about things long and hard before I dared to do them. Overall a *thumbsup*-experience. Ill report back in a few weeks how the battery is doing and what my average range is.
p.s.: I keep updating and adding stuff, also taking in new input when things could have been done better ... incase you are wondering about the edits!
Some facts:
* Evolve Carbon has a 37V 10Ah LiPo-battery, cells with nominal voltage of 3.7, cutting off around 4.2V max and 3Vish min
* Balancer of the BMS has 11 pins due to 10S?P battery layout, the pin distance is 2mm
* evolve quick charger is a constant current charger @ 42V, stopping once the current becomes too low
* evolve silent charger is a cc/cv charger, thats ultimately loading the battery @ constant 41.4V into saturation
* the available space for a battery is around 62 x 14.2 x 1.5cm
Minmum battery infos (stuff I didnt know and had to find out):
* LiPo based batteries have usually a nominal voltage of 3.6-3.7V which is sort of an average, they max out at 4.2V and shouldnt be discharged lower than 2.5V. LiFe-based batteries run at lower voltage per cell (3.3ish) and they are NOT compatible with the stock BMS. Look out ONLY for cells that use 3.6-3.7V nominal!
* for the panasonic and other tests, check http://lygte-info.dk/review/batteries2012/Panasonic NCR18650B 3400mAh (Green) UK.html
* if you build a 10S6P setup like me, it means you use 10 cells in series and 6 parallel - basically you weld together 6 cells in parallel for a capacity of 6x 3400mAh = 20.4Ah and combined 3.7V nominal. Then you connect the 20.4Ah 3.7V packs in series which adds up the nominal voltage of 10 x 3.7V = 37V.
* the nominal voltage is not the max voltage - a cell can usually be charged up to 4.2V and discharged down to 2.5V (in case of the panasonics I used), so the voltage of the total battery will be 42V max and 25V min. The evolve BMS is cutting off way before 25V though to give the cells a longer lifetime.
* a BMS is needed to keep all parallel 3.7V packs at the same voltage. It would be really bad if you charged the total 10S pack to 42V and some packs went up to 4.2V+ while others remain at voltages < 4.2V (likewise with draining them below 2.5V). Thats why you have to split the 10S block into 10 sections of 3.7V nominal voltage, so that an electronic can level these sections out in order to prevent discharging below min or overcharging above max voltage.
Material list:
* 62 cells Panasonic NCR18650b with nominal voltage of 3.6 and 3400mah capacity (2 spare cells incase i got a faulty one or I screw something up) (paid around 300€ @ http://eu.nkon.nl/rechargeable/18650-size/panasonic-ncr18650b.html )
* 3m hilumin or nickel band (my hilumin band was 99.5% nickel) 10mm x 0.15mm for spot welding cells (10€)
* multicoloured 0.5mm^2 cables for balancer connection (5€)
* 2m black 6mm^2 cable for +- poles (2€)
* balancer port http://www.conrad.de/ce/de/product/...ennstrom-2-A-PHR-11-JST-1-St?ref=searchDetail with 11x http://www.conrad.de/ce/de/product/...astermass-20-mm-BPH-002T-P05S-JST-1-St?ref=nz I linked these things cause it took me forever to find the compatible ones for a plug & play solution!
* about 2m 10x3mm sealing tape (I used neoprene stuff)
* heat shrink tube 1m 195mm width
*Edit: after building my 2nd evolve battery for someone else, I agree with riba: the Sanyo GA, LG MJ1 and Samsung 35E are much better cells overall.
Additionally I bought everything I needed to make my own spot welder. Thought a while about how to connect the cells - was reluctant to solder, cause I didnt have a high power soldering iron and I was also afraid to overheat the cells in the process. Finally I also dont really trust soldering as much as welding, so I followed many nice guides to build my own spot welder. Ill give a quick recap on material list and how to build one in the next post!
Dimension of the evolve carbon inside, its also where I measured balancer pins and voltages to check whether the evolve setup was compatible with regular LiPo batteries:
I quickly drew the battery setup with keynote, using 18650 (18mm width, 650mm length) cells in a 10S6P setup. The "B??" tags in the picture are where the balancer cables are placed - basically a 10S battery will have 11 balancer wires in total, dividing up the battery into 10 3.7V sections!
Then I tried to figure out which cell would be best for the job and after some interesting discussions in this thread I decided to give a heads up on that process to make people aware of a few things: the factory capacity of cells is only met under very low discharge currents, if you suck stronger currents from a sell, the discharge capacity might get smaller and smaller.
I started with thinking about how much power the Evolve actually sucks from the battery under demanding conditions - the motor is set to use up to 350Watts and from my experience with the original 10Ah evolve battery, that is actually a very reasonable value for the power consumption in demanding scenarios (25km/h, lots of carving, hills).
So, 350Watts at 36V nominal battery voltage means about 10A constant discharge current. This divides up on each of the 6 individual parallel cells and comes down to 1.5A constant discharge current per cell. Now the only reasonable source I had for battery comparisons has been http://lygte-info.dk/review/batteries2012/Common18650Summary UK.html where I checked the charts. The correct picture to look at is the discharge capacity down to 3.0V (stock BMS cuts off there) with discharge current of up to 2A -> http://lygte-info.dk/pic/Batteries2012/common/CapacityTo3.0.png (cyan colored bars). There are many good cells as you can see, some less and some more expensive - the Panasonic 18650B with 3400mAh seemed to be a very good choice in terms of very high capacity for moderate money.
When I had enough courage and was convinced that the stock battery management would work just fine with my 18650 cells, I went for it and ordered everything that was needed.
Cells arrived:
For spot welding, I used clamps and old pieces of wood, to keep them lined up well - in total 10 blocks a 6 cells (only use mild pressure with clamps, you dont want to kill your cells). I measured the voltage of every cell before connecting - in order to identify something thats broken and to avoid bleeding currents among cells of a pack:
After spot welding with the hilumin band, it looked like this:
I connected pack 2&3, 4&5, 6&7, 8&9 with a second layer of welded hiluminband, then added the balancer cables with seperate small Hiluminbands, so I could solder the cables before I connect them to the cells (didnt want soldering heat transfer into cell, make sure to use soldering flux!). At that point it helps to stabilize the whole pack with wide clear tape (the super cheap one)... it will take a lot of stress from hilumin connections between packs and will make the whole pack much easier to handle. From here onwards you have to be very careful to not shortcut anything on accident. LiPo cells are very strong and can vaporize connecting metal in seconds. I started to use a lot of cheap wide tape to cover anything I didnt want to touch ... better safe than sorry!
In that picture you actually see the middle section of the battery - my plan was to do the middle connection with hiluminband and then fold the 2 long rows of batteries like a butterfly. Used 4 interconnections for physical stability! Additionally, I added 2 more layers of hiluminband to minus pole of pack 1 and plus pole of pack 10, to account for the larger currents there. The 10x0.15 band only works up to 10A!
The butterfly idea worked well - just folded the 2 rows:
For shock protection at the side facing to the ground, I used a worn out mouse pad
Connecting the 11 balancer cables to the connector, make sure to check every single one of them thoroughly with measuring the voltage (and keep the rest taped to avoid any shortcuts). it should always be 3.X V depending on factory charge. For the correct order, compare the pins with measuring your old battery balancer pins. If you remove the connector and look at it, cables facing away, it started with B1 on the left, then B2, B3, B4, ... you get the idea, could be different for your board though. Finally added some heat shrinking tube, had a very cold moist towel which I used to take out the heat the moment the stuff shrinked into place. sadly I screwed up that part, the heat shrink tube folded my battery into a v-shape, so I had to cut it off again and use the rest of the heat shrink tube to try it again - it worked better, but I didnt have enough anymore to do the full battery, so I used parts of the old tube and fixed it with tape. not proud of this
I knew my battery pack would be around 3mm too high for the original case, especially with my mouse pad protection - so I had 10x3mm neoprene sealing tape prepared to lift up the cover a little bit. the holes for the screws were cut by some magic leather stamp thing I lent from my mum: :lol:
Putting everything together - beautiful evolve carbon <3
Sadly I screwed up badly in that final step of a 3 day odyssey, canted the BMS slightly when fixing the carbon cover and tore off a mosfet from mechanical stress - it killed the recharging mechanism of the BMS. stupid me :|
I took the BMS out completely for now and put the board back together. cell drift wont be a problem right away - Ill buy a replacement BMS or find a suitable mosfet and put it in in a few weeks from now. if anyone knows what mosfet is meant from whats written on it (t470 GN4G4S), please poke me!
Did a quick test run last night with a semi-charged battery - it worked! Dont think I'll have to do a range check - its double capacity = double range. With how I ride my carbon AT, this will be around 30km. A maximum of 50-60km should be possible in the AT setup if you do the 18km/h non carving max range thing - I might give it a try, but its a little too boring for my taste. :wink:
Hope you enjoyed it, it was a lot of work - together with building my spot welder, it took me about 3 evenings. The battery making until the evolve was up and running again took me about 6-7hours total. Then again Im new to this, first battery I welded, had to think about things long and hard before I dared to do them. Overall a *thumbsup*-experience. Ill report back in a few weeks how the battery is doing and what my average range is.
p.s.: I keep updating and adding stuff, also taking in new input when things could have been done better ... incase you are wondering about the edits!