Fractal's Norco A-line build

oatnet said:
There is that triangular hole behind the headtube - you could pass a bolt through that, and tie the pack to that, to keep it from sliding back.

-JD
excellent idea, thanks!!!
 
3 more months of this crappy wearher and ill be riding this bike and enjoying every moment.
 
fractal said:
sn0wchyld said:
fractal said:
I got a lot of work done of the battery boxes and mounting brackets. The boxes are made of 1\8 ABS and the brackets are 1\8 aluminium that are joined together by coupling bolts wich makes it easy for adjusting the width on the frame to make a tight fit. The boxes are made for 6 bricks of lipo each with lots of room for wires, parallel boards, ...etc. I still have to add more coupling bolts to solidify the whole thing. There are still a few adjustments to be made before this part of the project is finished. Check it out :


lookin tidy mate! you probably are planing already, but make sure you have something to spread the weight from those bolts onto the frame... either heaps of padding or a curved peice of alloy, or both... dont want to be denting up that precious piece of art!

Yeah I'm still thinking about how to do that. Maybe a piece of super rigid foam or something like that. I also got some rubber sheet to glue on the back of the brackets to protec the frame.

I can tell you that foam on its own will get beaten down to nothing after a few jumps n bumps, it looses its padding ability and looks crappy in the end... I was constantly having to add more padding to mine after every 3rd or 4th ride. I'd suggest a strip of aluminium in a rough U shape to match the frame, perhaps 3-5cm wide, and use high density foam on the inside of that. If you attach the alloy strip to the battery boxes and use thicker foam (say 5-8mm), it will 'grip' the frame really well when you screw in the mounting bolts tightly and stop any movement or vibration.

hows it all coming anyway? any progress pics?
 
its coming along good, as soon as i get the wheels ill post more pics. the wheel are being built as we speak. jrh told that he's truing them tomorrow morning. man!!! i dream about riding this thing every day!!!
 
My wheels are getting shipped monday :D ! In the meantime, I got my pack harness and some Method's LVC parallel boards to protect the pack. I hired Icecube57 to make my harness, since i'm so busy right now. He did a very good job and I can recommend him to anyone. To charge my pack, I read so much threads on different ways of doing it. I decided to series charge just like my friend El_Steak. I will use 2 Hyperion 1420i and 2 Meanwell power supplies. That way, you don't have to reconfigure your pack to charge and avoid dumd mistakes. I made a diagram to illustrate my setup and to make sure I fully understand how to do it. Here are some pics of the harness, parallel boards and charge-discharge diagram.

complete harness with Method's parallel boards
IMG_1911_1.JPG

80 amp fuse
IMG_1912_1.JPG

pre-charge resistor to avoid sparks when plugging in the controller
IMG_1913_1.JPG

charge-discharge diagram
charge-discharge diagram_1.jpg
 
Good progress, Frac!

Standard practice is to put the fuse in the middle of the pack, not at one end. The middle position will also protect against some shorts within the pack, and to cut your voltage in half in the event of a problem.

-JD
 
oatnet said:
Good progress, Frac!

Standard practice is to put the fuse in the middle of the pack, not at one end. The middle position will also protect against some shorts within the pack, and to cut your voltage in half in the event of a problem.

-JD

Thanks Oatnet! I will check that out.
 
oatnet said:
Good progress, Frac!

Standard practice is to put the fuse in the middle of the pack, not at one end. The middle position will also protect against some shorts within the pack, and to cut your voltage in half in the event of a problem.

-JD

I totally agree with this. To even be more protected it should be on each parallel group for even more protection. It isnt hard to do but it creates a very bulky harness.. I can create a plug if he wishes to where he can put it in the middle of the packs as you suggest. The fuse isnt going to protect the controller if the mosfets decide to do a dead internal short the damage would already be done its just protecting the batteries and one rule of fuses is to put it as close to the battery as possible which is what i did. There are several ways to do it depending on what you are trying to protect and how serviceable you want it to be.

Putting in the middle of the pack only reduces the voltage the fuse sees so there is less of an arc incase it does blow and a better chance for the fuse to do its job correctly.... I think or thats what i read on the forum.
 
icecube57 said:
oatnet said:
Good progress, Frac!

Standard practice is to put the fuse in the middle of the pack, not at one end. The middle position will also protect against some shorts within the pack, and to cut your voltage in half in the event of a problem.

-JD

I totally agree with this. To even be more protected it should be on each parallel group for even more protection. It isnt hard to do but it creates a very bulky harness.. I can create a plug if he wishes to where he can put it in the middle of the packs as you suggest. The fuse isnt going to protect the controller if the mosfets decide to do a dead internal short the damage would already be done its just protecting the batteries and one rule of fuses is to put it as close to the battery as possible which is what i did. There are several ways to do it depending on what you are trying to protect and how serviceable you want it to be.

Putting in the middle of the pack only reduces the voltage the fuse sees so there is less of an arc incase it does blow and a better chance for the fuse to do its job correctly.... I think or thats what i read on the forum.
Thanks for the tips guys!!!
I have decided to get the breaker board from Methods to complete my LVC/HVC setup. Now I will have full LVC/HVC protection wich will allow me to bulk charge and balance with battery medics when needed. you can just carry the charger in a backpack and charge pretty much anywhere! Here is the diagram with the complete system. And below is the full size diagram.
 

Attachments

  • bulk charging solution 1.JPG
    bulk charging solution 1.JPG
    42.9 KB · Views: 1,949
I didnt know you had dual 1420s but you got a pimpin protection system... Guess u can use my charge harness for a rainy day lol everything looks awesome.... CHEERS. What software do u use for your diagrams.
 
icecube57 said:
I didnt know you had dual 1420s but you got a pimpin protection system... Guess u can use my charge harness for a rainy day lol everything looks awesome.... CHEERS. What software do u use for your diagrams.

i use sfx for mac(i think thats what its called) its just a sketching software, has nothing to do with electrical schematics. i just use it because its really simple. i forgot to add the precharge resistor, will have to do that to make it complete!
 
!Taking shape! Its finally starting to look like a bike. I got wheels from John Rob Holmes! the back wheel with the cromotor is a 17 inch moto rim laced with 12awg spokes with a 2.5 Michelin gazelle tire. the front wheel is a 17 inch moto rim laced with 13awg spokes on a DMR hub with a 2.5 Michelin gazelle tire. I also got this really cool seat post rack for the 24 fet controller with an adjustable tilt to accommodate the seat post angle of DH bikes. Its made by pletscher. I figured out a way to securely fix the battery boxes, I also figured out a way to dish them outward a bit so that if the suspension bottoms out, the tire won't smash against them. I will finish that this weekend and post pics!

THe back wheel will be moved back about 2 or 3 inches to extend the swingarm and help prevent wheelies
IMG_1915_1.JPG

DMR hub on a moto rim! gotta love it!
IMG_1916_1.JPG

this adjustable seat post rack can be tilted so that its perpendicular to the ground
 
That looks so awesome! Good work, I can't wait to see if finished
 
Looking good!
My A-Line is still just a frame. And a bunch of boxes of parts. And I don't even have seat/seat post nor handle bars ordered yet! But I have rear wheel built, and spokes on the way from JRH. Build thread will begin as soon as I have something/anything attached that actually rotates!
 
looking good mate, particularly with the 17" on the front too. I just laced my rear to a 17" moto rim too, but it looks a bit weird/too much like a MX bike with the 26" still on the front.

Word of warning, watch your pedal clearance, particularly in the corners. Im getting way more pedal strikes now with the lower overall height. Not caused any crashes yet, but still jars your legs pretty badly. alternatively build your drop outs to raise the back by an inch or so to help compensate for the smaller wheels (I think your planning this already right?).

Any chance you can squeeze that controller in the gap between the tire and the rest of the swing arm now that there's a big gap there? Had I not mounted my 12fet already between the pedals I'd be mounting it there! 24fet's probably way to big unfortunately.


that seat looks comfy! where'd you get it/what type is it/cost?

Had a sick ride on my aline yesterday... raced a guy on a ice bike, and won easily! doing 60+km/h over speed bumps made it hard for him to keep up! :twisted: just wished I'd filmed it.
 
sn0wchyld said:
looking good mate, particularly with the 17" on the front too. I just laced my rear to a 17" moto rim too, but it looks a bit weird/too much like a MX bike with the 26" still on the front.

Word of warning, watch your pedal clearance, particularly in the corners. Im getting way more pedal strikes now with the lower overall height. Not caused any crashes yet, but still jars your legs pretty badly. alternatively build your drop outs to raise the back by an inch or so to help compensate for the smaller wheels (I think your planning this already right?).

Any chance you can squeeze that controller in the gap between the tire and the rest of the swing arm now that there's a big gap there? Had I not mounted my 12fet already between the pedals I'd be mounting it there! 24fet's probably way to big unfortunately.


that seat looks comfy! where'd you get it/what type is it/cost?

Had a sick ride on my aline yesterday... raced a guy on a ice bike, and won easily! doing 60+km/h over speed bumps made it hard for him to keep up! :twisted: just wished I'd filmed it.

Thanks! for the pedals, I chose a crank with 165mm arm lengths with is the shortest I could find. should help a bit. But I don't plan on pedalling at all :mrgreen: . The controller is too big to fit there, I'll have to leave it there. The seat is an Allay Nomad. Its pretty comfortable and its not too big : http://www.allaysaddles.com/products/detail/Nomad1_1_m
60+km/h over speed bumps sounds pretty exciting :twisted: I'll have to get a gopro :twisted:
 
The battery boxes are pretty finished. I still need to make a few minor adjustments. I'm very pleased with the end result. I will bolt the boxes with the brackets to secure them. Check it out :
 

Attachments

  • IMG_1930_1.JPG
    IMG_1930_1.JPG
    86.3 KB · Views: 1,820
  • IMG_1932_1.JPG
    IMG_1932_1.JPG
    80.2 KB · Views: 1,820
  • IMG_1933_1.JPG
    IMG_1933_1.JPG
    73.8 KB · Views: 1,820
  • IMG_1934_1.JPG
    IMG_1934_1.JPG
    69.4 KB · Views: 1,820
Justtoby said:
It's gonna hurt if you ash your knees on those boxes, have you tried them in a wind tunnel lol

Seriously though its a nice build but I think those boxes are massive.
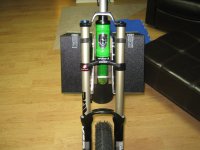
 :mrgreen:

my knees dont touch the boxes, i made sure of that. dude, thats for 24s 3p, 12 bricks of lipo! you need to get creative to mount those on a full suspension bike.
 
Sacman said:
That's 7 or 8-inches of front suspension travel right?
Isn't that front tire gonna be hitting your boxes if you're turning and hit a big bump? :shock:
(Should be okay if you're holding the wheel straight tho)

yes that is correct. if the wheel is straight, no problem. if i'm turning and i hit a massive pothole, i have 140mm of clearance out of the 200mm travel of the fork. so i need an extra 60mm to get peace of mind. i think i will make another set of boxes that are 30mm shorter and mount them 30mm higher so the fork can travel the full 200mm. it will be a tighter fit for the wiring but i can mange that. eventually, i would like to make something out of fiberglass.
 
hey frac
have you thought about putting some of your batteries in a hardcase box on the front of the handle bars? then you'll have a smaller # of packs to try and fit on the frame itself. Fitting 5 or 8 ah of 24s on to the front shouldn't take up much space or weigh too much, but it would free up allot of space on the frame.

I'm planning on doing the same myself, it was originally just going to be a 24s5ah booster pack to the 10ah I already have on the frame, but when I found I could fit 24s 8ah in the 25x15x10cm case I'd bought I'm now thinking of using that as my main battery and using frame mounted bats as booster packs, since 8ah is more than enough for my commute/shorter rides. its just a question now if the extra weight on the steering feels ok...
 
sn0wchyld said:
hey frac
have you thought about putting some of your batteries in a hardcase box on the front of the handle bars? then you'll have a smaller # of packs to try and fit on the frame itself. Fitting 5 or 8 ah of 24s on to the front shouldn't take up much space or weigh too much, but it would free up allot of space on the frame.

I'm planning on doing the same myself, it was originally just going to be a 24s5ah booster pack to the 10ah I already have on the frame, but when I found I could fit 24s 8ah in the 25x15x10cm case I'd bought I'm now thinking of using that as my main battery and using frame mounted bats as booster packs, since 8ah is more than enough for my commute/shorter rides. its just a question now if the extra weight on the steering feels ok...

I think i'm going to get the 6s 8000mah nanos. i'll have 8 bricks, and instead of having to rows wide, i'll just have one row and I can make the boxes more compact.
 
GREAT FIND!!! I found this direct mount stem made by Diety Componentshttp://www.deitycomponents.com/. Its a 2 piece stem that fits on a double crown fork (boxer race, ...etc). this means that you can fit your CA right smack in the middle of your handlebars :mrgreen: If fits like a glove!!!
check it out :
 

Attachments

  • IMG_1947_1.JPG
    IMG_1947_1.JPG
    49.5 KB · Views: 3,336
  • IMG_1948_1.JPG
    IMG_1948_1.JPG
    63.3 KB · Views: 3,336
Back
Top