mysurveymail
10 mW
- Joined
- Apr 17, 2019
- Messages
- 20
I "finished" my first 10s10p battery using vruzend 1.5 kit.
The longest part of all was that getting my cell count up to 100 used cells from laptops took forever. I started with over 200 18650 batteries. I used 2 4 slot "zanflare" chargers to do a "fast test" on all my cells. This meant a discharge first then to charge. This was so I could record the mAh capacity, internal resistance, and their final voltage.
I started out dividing them by capacity, then trying to make each series of 10 add up to the same overall mAh. It was somewhat maddening, so I gave up. Then I went to repackr.com and typed in all my cell capacities and let their website design all my 10s strings to be matched in Ah capacity. They managed to get the apparent capacities very very close. Cool. This seemed to be from everything I read to be the best method to get the maximum amp hours from my battery.
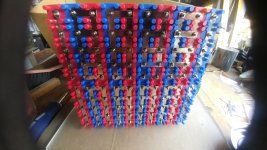
I started assembling my vruzend caps based on Micah's video on YouTube. That was fine until I realized that since I was starting out with a bunch of differing capacity cells (not all the same bought new). So based on repackr's design I had to build my caps in a SERIES fashion. This meant alternating the vruzend caps, red, blue, red, blue, etcetera. Then I had to pay attention to which direction the "dovetails" on the caps were oriented, so that I could successfully join each series string to the parallel caps in the array. It took a while, but went well. I have not yet put on the charge and load connectors yet, but that is quite easily done.
One suggestion that I do have which would have made putting the 200 nuts on would have been a magnetic nut driver. The nuts with this kit are nonmagnetic, so each one should be started by hand, and finish torqued with vruzend's nut driver.
My next challenge will be to bench test this battery with a load (not my ebike). I want to see how the cells hold up to a similar load as my 36v 750w brushless hub motor. I have thought to run a few 12v lights in series, much like Micah did in one of his YouTube videos. My load would ideally be 20 amps, so my small 12v garden lights are not adequate. I don't really want to buy some big resistors and just generate heat. I will be researching the wattage of automobile headlights to see if this is a viable option. Any suggestions would be greatly appreciated.
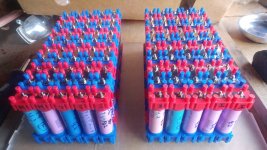
After half of my battery was built I realized that it would be better to "split it in half" to make it fit better in my battery box. So the photos attached reflect this. When finally wired onto my bike it will be the same as 10s10p (although physically each pack will be 10s5p). The weight of this pack is 16lbs, compared to the 36lbs of 9 (7Ah) SLA batteries I have been using for the last 2 years.


