OOPS, I bought another bike ... shaft drive

--- the best plans of mice and men ....

I got the spokes laced up in the new rim and installed the 700C x 2.0 Big Apple tire. Suprise there is a 1/4 offset in the rear triangle that is NOT documented (space for a non-existent disk brake?). Four half turns loose for the right spokes, three and half turns tighter for the left spokes. Well that looks about right. That worked and I adjusted the brakes, handle bars, etc. Then I took it outside to see how it rides (no battery yet).

AWFUL: Between the suspension fork, balloon tires and Thudbuster ST the lowest I can get the seat is 36 inches off the ground. The centerline of the crank is 13 inches off the ground. That gives me a really short pedal stroke and was just really a pain in the most southern region to ride. ... :cry: :cry: All that work and money :cry: :cry:

So I got rid of the Schwinn noseless comfort saddle and stuck a cheap,padded seat onit. WOW what a difference! The pedal stroke is still too short but it is not nearly as uncomfortable
Conclusion: Schwinn noseless comfort saddle = very, very, very bad idea

Now about the pedal stroke .... maybe if I put 24 inch rims on it ... but that will seriously mess with the gearing and motor speed :pancake:
 
You have pictures? that seat post tube looks short and low in that original picture. I'm having a hard time visioning 36" on that frame. I have a short travel thudbuster, and while it adds a couple of inches, it would be no problem on that frame. I wouldn't thing the other things make that much difference, but I guess it adds up. going from a "29" inch wheel to a 24 sounds like a pretty big jump...
 
chas58 said:
You have pictures? that seat post tube looks short and low in that original picture. I'm having a hard time visioning 36" on that frame. I have a short travel thudbuster, and while it adds a couple of inches, it would be no problem on that frame. I wouldn't thing the other things make that much difference, but I guess it adds up. going from a "29" inch wheel to a 24 sounds like a pretty big jump...
The real problem is the height of the BB center = 13 Inches. Assuming the same same tire profile the difference in diameters is 622-507=115mm but only the part below the axle has any bearing on the issue. That is 57.5mm = 2-1/4 inches. Thus the BB would be closer to 11 inches ... or about 'normal' (subjective opinion). There are too many problems with changing the rim size: gearing is fixed on the shaft drive, 'V' brake mounts would not work, motor speed vs ground speed due to smaller circumference. It was just an idle though.

I am going to mount the battery and fix the cabling. It is the my own fault. I failed to anticipate the consequences of my actions (modifications). Worse case scenario is that I put the 32C tires back on ... or admit that the frame geometry sucks and give up.
 
Because of all the 'trash talk' about various battery packs I decided it was time for someone to take a quick peek inside to reveal the truth about the construction. (so much for my warrnty) :oops:
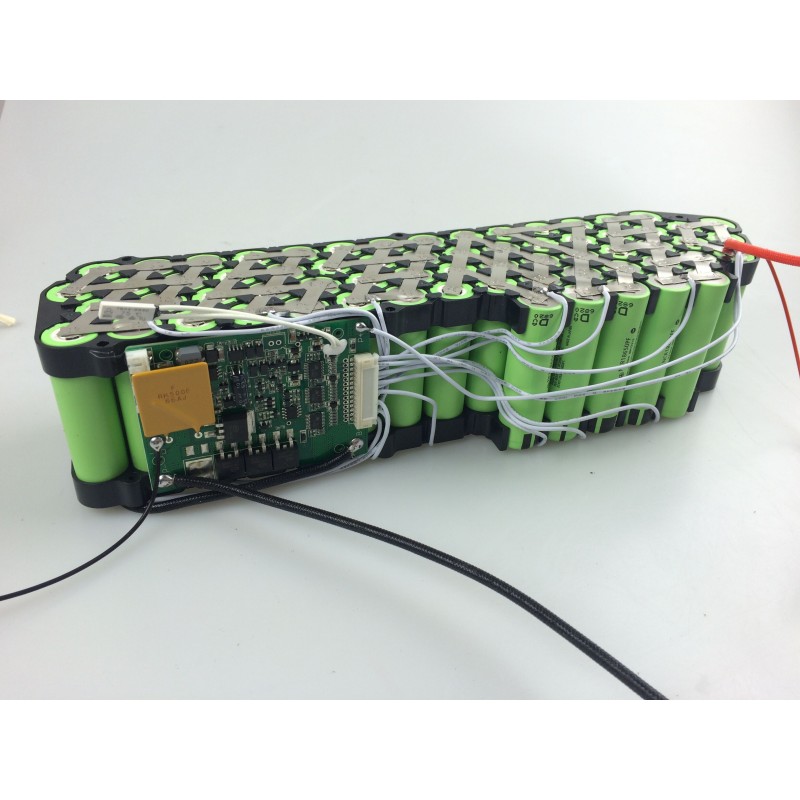
Once you get inside the case there is a layer of thick paper. When this is pealed back the cells and the BMS are exposed.
View attachment 7Luna 02(799).JPG
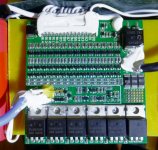
The BMS has a small piece of thick plastic separating it from the cells underneath. All the connectors and solder points are coated in some sort of soft white epoxy compound. I guess that was done to water proof it but it would make replacing the board a real pain in the ass. Luna BMS
Luna BMS.JPG
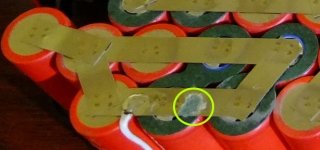
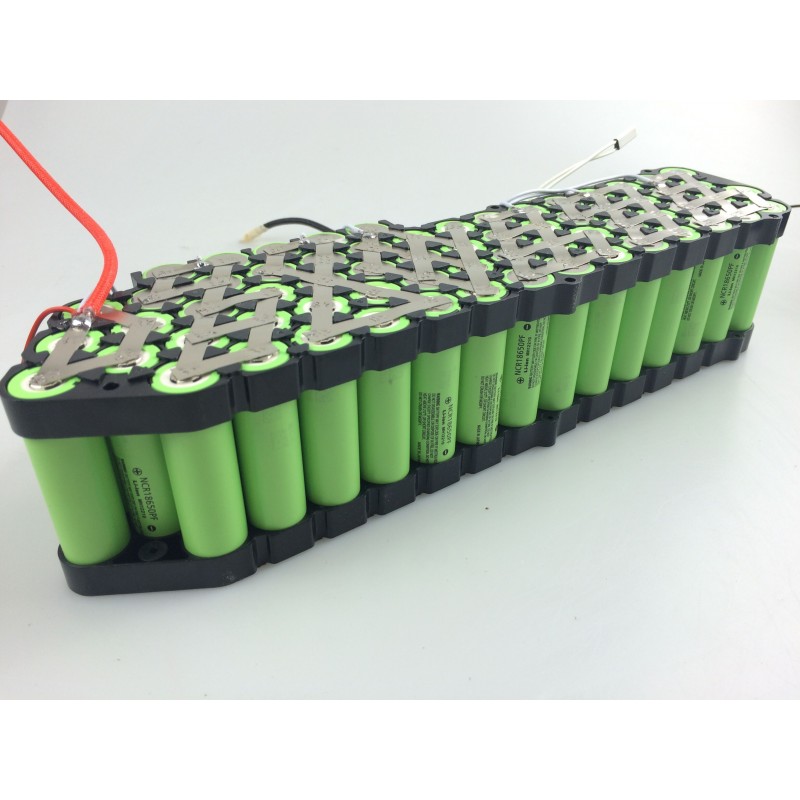
Peeling back a bit more of the paper will expose the nickel strips used to join the cells. Nothing of remarkable nature here. All the welds look to be of adequate quality. I did find one place where it appears a balance lead was relocated. Note the paper insulators on the positive ends. The cell are 'hot glued' together. I suspect that there is inadequate space to get this many cells in the case if molded end caps were used. Luna 03(799).JPGLuna 04(799).JPGLuna 04 close up.JPG
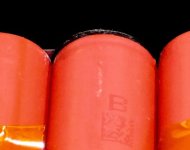
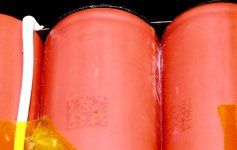
Now we come to the question of the cells. Part of the problem is that Samsung/Panasonic are not proud enough of their products to clearly label them however these do appear to be the genuine article.Label B1.JPGLabel B2.JPG
I am NOT a battery expert so all I can say is that the construction appears to be adequate and the methods used seem appropriate to fitting this many cells in the space available. Someplace I read that Luna had 'standardized' on XT60 connectors for the charger and XT90 connectors for the power. This pack has a three pole XTR connector for the charger. There is a XT60 to XTR adapter provided for the charger. The power connector in a pair of Anderson P45. It does seem like the person assembling had a perverse fixation with their hot glue gun. When I get around to fixing the cables some of that hot glued will have to be removed.

One last observation: By federal law any product produced outside the United States for import into the United States must be marked with the country of origin. I was not able to find a label or other indication of the country of origin on this pack. According to Luna Cycle "the cells are made in Korea, the case is made in china as well as the bms". No mention of where the pack is assembled. Luna Cycles has been made aware of this discrepancy and promised to address it.

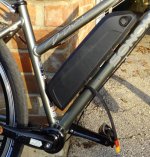
Next problem is mounting the pack to the lower frame tube ...

EDIT 11 Jan 2017:

I have recently been made aware of pictures of a Shark style battery pack on the BMS Battery site.
https://bmsbattery.com/ebike-battery/819-48v116ah-case-08-bottle-panasonic-battery-pack-battery.html
This is a 5P13S pack with 65 cells in it ... that is 9 more cells that the LunaCyle battery
The difference in quality is both obvious and significant ... I am NOT a happy puppy.
Hera are the linked pictures ... judge for yourself
48v116ah-case-08-bottle-panasonic-battery-pack-battery.jpg

48v116ah-case-08-bottle-panasonic-battery-pack-battery.jpg


This is a link to an interesting time lapse video of the assembly of a shark battery pack.
https://www.youtube.com/watch?v=xgcgkzwYnj8

Reference:
https://www.cbp.gov/trade/nafta/guide-customs-procedures/country-origin-marking
 
eTrike said:
The unusual discoloring of the tab, which appears to coincide with the a white substance shown between cells in your last photo? Do you have a welder by chance?
That would be a negative. I think you are seeing shadows on the tabs from the poor lighting. The only thing I see is some pinkest color most prevalent on the insulator for the 3rd battery in the bottom row. However that color appears on several of the paper insulators. The white substance is hot glue.
 
eTrike said:
Ah ok, it is hard to see in the pics. Is the discoloration stuck paper? It is where you mention the balance relocated?
Could be ... I would not know without taking it apart again. That won't happen unless there is a problem.
 
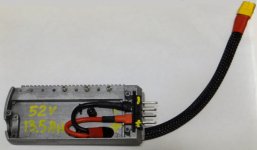
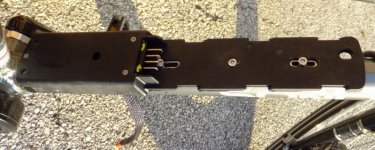
Before I mount the bracket on the bike I need to reterminate the power cable with an XT60 female connector. I use those for all my batteries so that I can move the batteries between systems or attach a watt meter or CA without having to rewire or make an adapter cable. The Shark battery pack has a metal heat-sink in the bottom for a built in motor controler. As this one does not have the controller the power cable goes straight through it to the bottom end of the mount. I need to rout the power cable 'up' the lower tube to the fork. So I put a 3/8 hole back side of the heatsink and ran the cable out that direction. I also added a fourth mounting hole for the bracket aproximate 5 inches from the existing center mounting hole. I am using some bits of inner tube and foam tape as the 'rubber baby buggy bumper' for the addition hole. I also replaced the heat shrink with 1/2" PET Expandable Braided Sleeving (3/8 would have been a better match).
Heat Sink(799).JPGMount Bracket Rear(799).JPGMount Bracket Top(799).JPG
Note the hole in the top to reach the fourth 5mm hex socket head mounting bolt. Because I am paranoid I used rubber cement to glue rubber spacers and the metal inserts to the plastic mounting bracket. I get the feeling replacements would be hard to come by.
 
Lew --
Purchased a Shark pack (Panasonic PF cells) recently from EMPoweredCycles in California.
Very happy with it so far.
They offer replacement mounting brackets
Not certain all Shark packs are standardized re mounting brackets, but guessing high probability they might be.
Matt -- the guy who runs EMPowered -- is a good guy, chances are he could provide answer re compatibility.
-- Steve
 
footloose said:
Lew --
Purchased a Shark pack (Panasonic PF cells) recently from EMPoweredCycles in California.
Very happy with it so far.
They offer replacement mounting brackets
Not certain all Shark packs are standardized re mounting brackets, but guessing high probability they might be.
Matt -- the guy who runs EMPowered -- is a good guy, chances are he could provide answer re compatibility.
-- Steve

Matt is a great communicator and a stellar reseller. I've done some parts business with him and he''s quick to respond and quick to ship!
 
Thanks guys ... when I said replacements might be hard to come by I was referring to those two narrow metal pieces in the slotted holes and the rubber pads that go between the bracket and the bicycle frame tubes. I am going to be careful not to lose them :)
 
So moving on. I had a slight problem mounting the battery pack on the lower tube. Only the lower slot aligns with the existing bottle mount threaded insert. The extra mount hole I added in the heatsink would align with the lower insert but I needed something for the top two mounting bolts. Most obvious solution is to install two more 5 mm inserts. The problem is that with the two down tubes there is not sufficient room to get drill motor between the tubes or room for one of those large double lever insert installation tools (not that i have one of those anyway).

First off I had to come up with a installation tool that would fit in the available space:
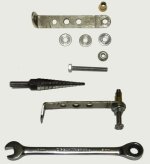
one 5 mm x 0.8 mm x 50 mm stainless steel hex bolt
one 5 mm x 0.8 mm stainless steel hex flange nut
three 5 mm flat washers
flat metal bar
8 mm ratcheting box end wrenchDIY Insert Tool.JPG

That little ratchet wrench is cheap and a big bonus particularly if one screws up as much as I did. To use this DIY tool you screw the insert on the end of bolt, insert it into the hole. The flat bar is used to hold the insert and the box end wrench is used to tighten the hex nut until the insert is crimped into place. The flat washers allow the nut to spin against the top surface of the flat bar.

OK … now I need holes. I mounted the bracket and marked the locations using a sharpie. The locations were center punched at a bit of a angle. I then proceed to use a 3/32 drill from the left side. Afterwards I drilled the same hole from the right side. Then the process was repeated with a 3/16 and a 1/4 inch bits. The holes need to be 0.270 inches in diameter. I used a step-bit that WOULD fit perpendicular between the tubes and a short crescent wrench to ream the holes out to 9/32 inch.

So here is where I screwed up. I had decided to use aluminum inserts so that they would match the frame material as well as requiring less force during the install. BAD MISTAKE … I stripped the threads during the install of one of the inserts. Next thing I did was order some steel inserts. The normal way to remove one of these insert is to drill off the top flange but of course I can not get a drill in there. So the alternative is a manually powered portable milling machine (a.k.a. 8 inch long mill file). Fortunately aluminum cuts as easily as it strips.

So after few days for the mail and a some time with the file I managed to install a steel insert. I was foolish to have been concerned with the amount of forced needed to crimp the steel insert. It worked so well that I removed the other aluminum insert and replaced it with a steel one … but I screwed up again. I managed to cross thread one of the new inserts. The steel inserts do not file down as easily as easily as the aluminum ones. Eventually I was able to punch the steel insert out and install a new one. This time I was very careful threading the mounting bolts. I did have to cover some bare spots from the filing with gray primer.

Finally I can bolt the bracket in place … or not. I have a bunch of 5 mm x 20 mm bolts but they all have a flat washer and a lock washer on them (the kind that can not be removed). Our friends in China did not allow enough head clearance for the luxury of washers. I have a some other SST 5 mm bolts but they are only 12 mm long. This bracket really needs some at least 16 mm long fasteners and 20 mm would be better. Back to Amazon to order some 5 mm x 0.8 mm x 20 mm hex socket head screws.bracket(799).JPGmounted(799).JPG Not a lot of room to spare but it fits and it is solidly mounted.
 
So while I was waiting for the 5mm fasteners to come in I fixed the torque arms. I drilled a 1/4 hole in each one as close as possible to the original hole. Then I filed out the area in the middle. Worked out fairly well.
 
Back
Top