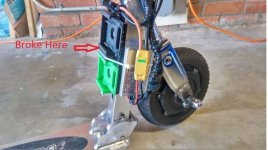
I wanted a lightweight electric scooter to help with part of my commute. It's a "last mile" solution, so it needs to be light to carry on and off buses/subway.
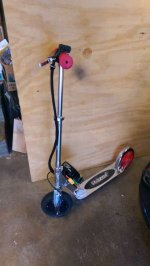
I bought one of these:View attachment 9
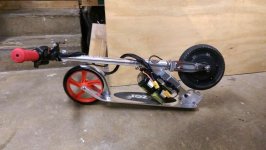
And the idea is to replace the front wheel with a hub motor.
So I bought a 200mm hub motor and controller from another forum member, shortcircuit911.
And I promptly took it apart: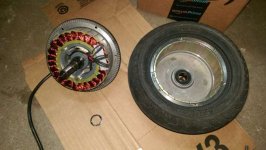
The motor was made for dropouts that were much wider than the stock fork on the Razor A5, so I needed to do some modifications.
The motor came with drum braking, and the drum was built into the motor casing, so I needed that to go away.
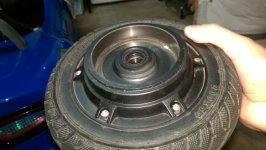
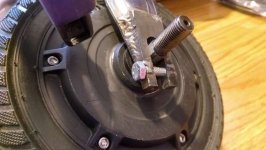
After some time with the band saw, grinder and a can of paint, this is the result (tire off):
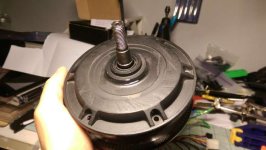
Next will be grinding new flats onto the axle, and welding on some clamping-style dropouts to the front fork. That will come later. But first, we need to see about some batteries.
Now one of the features I like about the A5 is it's very low deck. It makes mounting/dismounting the scooter very easy, and also kicking is very natural and easy. But the low deck doesn't leave room for batteries, so I needed another solution:
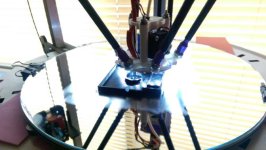
3D printing solution:
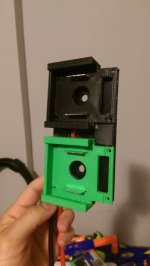
Glued up solution (sorry bout the random filament color):
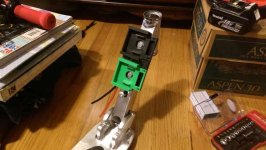
Bolted on solution:
Clipped in solution:
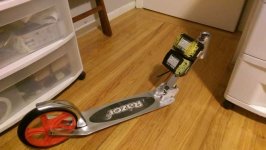
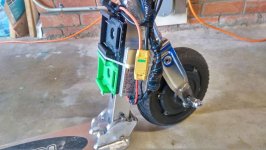
These are 18v (5S) 3AH Makita LXT battery packs normally found in power tools. The 3d printed parts allow the battery packs to simply snap in place, just like on any other Makita power tool. The clip was printed in ABS plastic, and is mounted via 1/4-20 bolts to the down tube with rivnuts installed into it.
I work in construction, and I have Makita chargers at work. And of course I have Makita tools and a charger at home. So the idea is that I'll be able to charge wherever I am without having to lug around the charger. These packs add a little bulk. But the convenience of charging at work or home, plus being able to easily swap packs, makes up for it.
Ok battery is mostly figured out, time to work on the throttle and watt-meter stuff:
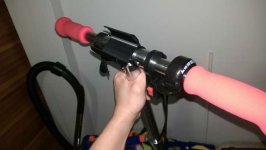
3D printed another part to snap into handle bar:
Watt-Meter snaps right into place:
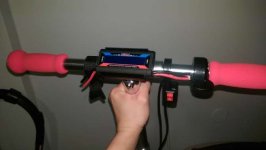
The throttle and toggle are cheapies from ebay. And to the left of the watt meter is a velcro flashlight mount I got a long time ago that I'm finally putting to use.
So that's pretty much all I have done so far.
To do:
Grind new flats onto motor axle.
Make/weld on clamping dropouts for front fork
Figure out where to mount controller
Wire up controller
Rewire watt-meter for 3 wire operation
Test ride!
I bought one of these:View attachment 9
And the idea is to replace the front wheel with a hub motor.
So I bought a 200mm hub motor and controller from another forum member, shortcircuit911.
And I promptly took it apart:

The motor was made for dropouts that were much wider than the stock fork on the Razor A5, so I needed to do some modifications.
The motor came with drum braking, and the drum was built into the motor casing, so I needed that to go away.

After some time with the band saw, grinder and a can of paint, this is the result (tire off):

Next will be grinding new flats onto the axle, and welding on some clamping-style dropouts to the front fork. That will come later. But first, we need to see about some batteries.
Now one of the features I like about the A5 is it's very low deck. It makes mounting/dismounting the scooter very easy, and also kicking is very natural and easy. But the low deck doesn't leave room for batteries, so I needed another solution:
3D printing solution:

Glued up solution (sorry bout the random filament color):

Bolted on solution:

Clipped in solution:

These are 18v (5S) 3AH Makita LXT battery packs normally found in power tools. The 3d printed parts allow the battery packs to simply snap in place, just like on any other Makita power tool. The clip was printed in ABS plastic, and is mounted via 1/4-20 bolts to the down tube with rivnuts installed into it.
I work in construction, and I have Makita chargers at work. And of course I have Makita tools and a charger at home. So the idea is that I'll be able to charge wherever I am without having to lug around the charger. These packs add a little bulk. But the convenience of charging at work or home, plus being able to easily swap packs, makes up for it.
Ok battery is mostly figured out, time to work on the throttle and watt-meter stuff:
3D printed another part to snap into handle bar:

Watt-Meter snaps right into place:

The throttle and toggle are cheapies from ebay. And to the left of the watt meter is a velcro flashlight mount I got a long time ago that I'm finally putting to use.
So that's pretty much all I have done so far.
To do:
Grind new flats onto motor axle.
Make/weld on clamping dropouts for front fork
Figure out where to mount controller
Wire up controller
Rewire watt-meter for 3 wire operation
Test ride!


