
El_Steak
10 kW
I was asked in the Zippy/ Flightmax / Turnigy/ Blue lipo testing (pt 2) thread to post some pics of how I replaced dead cells in some of my LiPo packs. Since this was a bit off topic, I created this thread.
If you have puffed cells and are willing to try and de-puff them, see AussieJesters video here: http://endless-sphere.com/forums/viewtopic.php?f=14&t=22650
And now the usual disclamer: This is a delicate task that you can easily mess up. Only do this if you have the right tools and skills. You are doing this at your own risks.
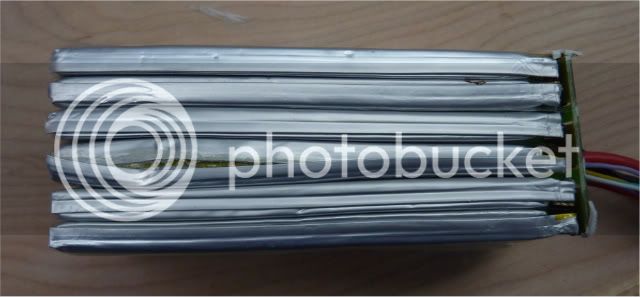
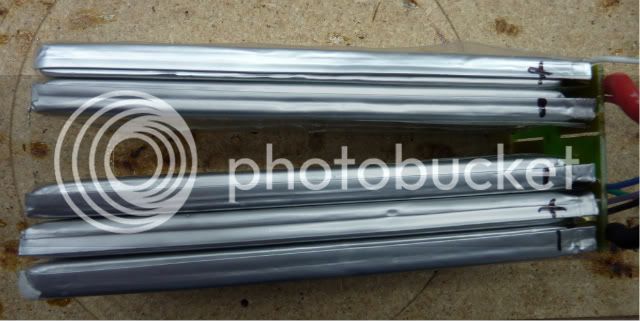
OK, now the candidate pack. This is a Turnigy 6s 5000mAh 25A pack. I removed the blue shrink wrap and some tape and plastic at the ends. As you can see, the third cell from the bottom is busted. This is the one I'm going to replace.
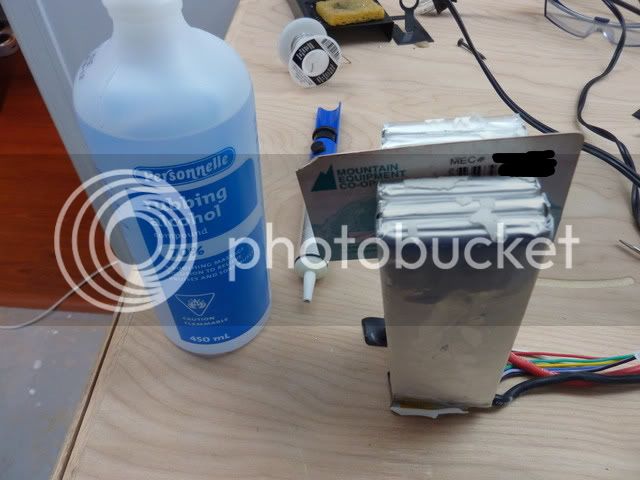
The cells are individually wrapped in clear plastic and glued together. To separate them, I use a thin plastic card that I slowly push down between the cells. To help it out, I put a bit of rubbing alcool on the glue using a Q-Tip. This is easy to do, you don't have to force it hard. The card I used is my MEC membership card. Its thinner than a credit card and doesn't have embossed characters. I think some have used a plastic spatula as well.
Next step is to remove the existing solder. To do this you need a BIG iron and a BIG tip. I'm using a large copper tip initially intended for soldering nicd/nimh cells end-to-end. Its got a lot of thermal mass. Of course you also need a pump or wick to remove the solder.
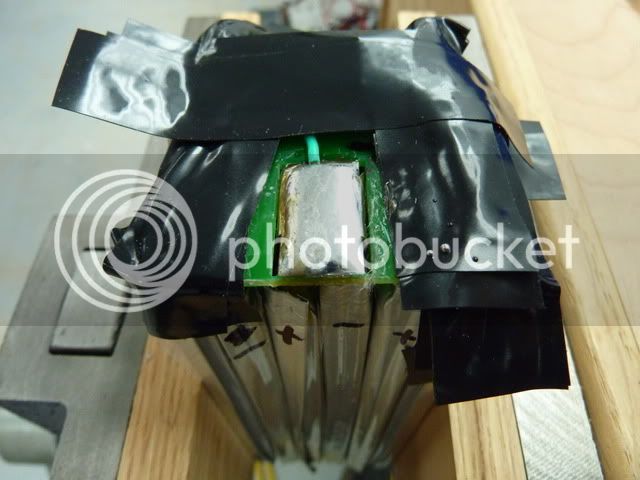
Before you start getting anywhere near those cell tabs, make sure to mask all the terminals with several layers of tape. Kapton would be ideal, but since I didn't have any I put 4 or 5 layers of vinyl.
The cell tabs are bended at a 90 degree angle on the terminal. After you've removed most solder with the pump, heat the tab a bit and gently pry it up with a small flat screw driver.
In this picture the solder has been removed and the tabs are up.
After the tabs have been released, just pull the cell out.
(notice how I marked the polarity on all cells. You really don't want to mix this up!)
Now carefully slide a new cell in. TRIPLE CHECK THE POLARITY BEFORE YOU DO IT. All you have to do now is reverse the process and resolder the tabs.
Here's the negative (looks better than the original IMO)
And the positive (don't forget to solder back that balance wire)
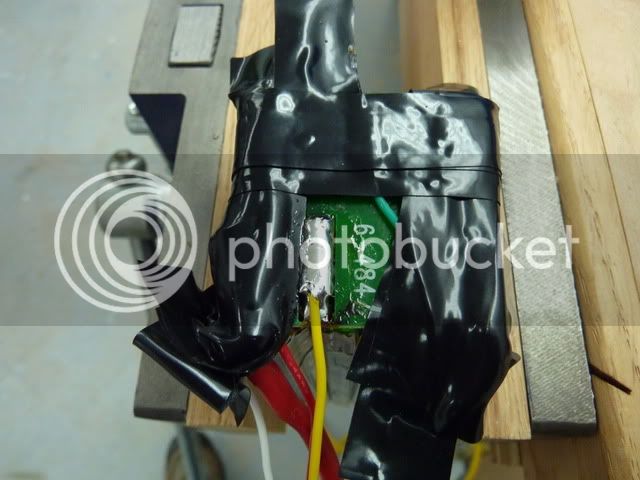
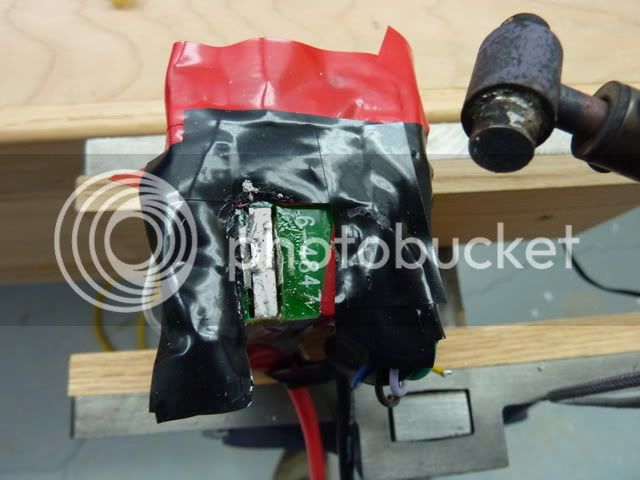
Final check-up
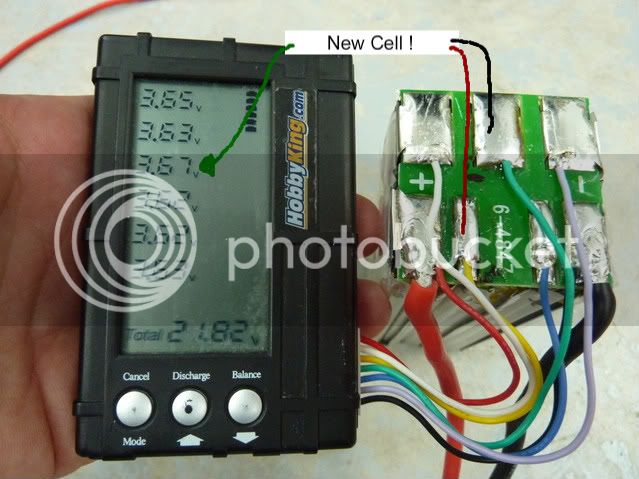
All you have to do now is re-wrap the pack properly and test your pack. I'll post a discharge curve of this pack when I get a chance.
If you have puffed cells and are willing to try and de-puff them, see AussieJesters video here: http://endless-sphere.com/forums/viewtopic.php?f=14&t=22650
And now the usual disclamer: This is a delicate task that you can easily mess up. Only do this if you have the right tools and skills. You are doing this at your own risks.
OK, now the candidate pack. This is a Turnigy 6s 5000mAh 25A pack. I removed the blue shrink wrap and some tape and plastic at the ends. As you can see, the third cell from the bottom is busted. This is the one I'm going to replace.
The cells are individually wrapped in clear plastic and glued together. To separate them, I use a thin plastic card that I slowly push down between the cells. To help it out, I put a bit of rubbing alcool on the glue using a Q-Tip. This is easy to do, you don't have to force it hard. The card I used is my MEC membership card. Its thinner than a credit card and doesn't have embossed characters. I think some have used a plastic spatula as well.
Next step is to remove the existing solder. To do this you need a BIG iron and a BIG tip. I'm using a large copper tip initially intended for soldering nicd/nimh cells end-to-end. Its got a lot of thermal mass. Of course you also need a pump or wick to remove the solder.
Before you start getting anywhere near those cell tabs, make sure to mask all the terminals with several layers of tape. Kapton would be ideal, but since I didn't have any I put 4 or 5 layers of vinyl.
The cell tabs are bended at a 90 degree angle on the terminal. After you've removed most solder with the pump, heat the tab a bit and gently pry it up with a small flat screw driver.
In this picture the solder has been removed and the tabs are up.
After the tabs have been released, just pull the cell out.
(notice how I marked the polarity on all cells. You really don't want to mix this up!)
Now carefully slide a new cell in. TRIPLE CHECK THE POLARITY BEFORE YOU DO IT. All you have to do now is reverse the process and resolder the tabs.
Here's the negative (looks better than the original IMO)
And the positive (don't forget to solder back that balance wire)
Final check-up
All you have to do now is re-wrap the pack properly and test your pack. I'll post a discharge curve of this pack when I get a chance.
