Slowbuilds first build

slowbuild

100 mW
Joined
Oct 18, 2009
Messages
49
Location
Border country Wales, UK
Hi,

ok this, as the subject suggests, is my first build. I've been lurking here for way to long and
have just started purchasing components (after much reading). This site is great and
a continual learning experience - fun to see techniques develop and nice to see these
techniques are way in front of the e-bike manufacturers (for a while anyway).
I'd like to document the progress here so others can avoid some of the mistakes I make :)
and possibly other readers will chip in and point out problems before I spot them..

I plan to use an inexpensive Raleigh (Apollo) mountain bike frame as the victim. The frame is steel
and has dual suspension. Currently I'm in the process of stripping down the frame from the
original components and upgrading some components. The brakes have been upgraded to
Shimano Deore V M590, which are now present in the blurred picture below.

The e-bike will be powered by an Astro 3220 6 turn and a Matt S. drive reduction mechanism
connecting to a SRAM dual drive and a white industries broached freewheel (many thanks Luke !!).
The e-bike will hopefully be used in fine weather only, but it will need to cope with reasonable hills.
I'm aiming for good to average performance but on balance would trade off a little speed for
distance. I guess my opinion might change after I've tasted my first ride.. :)

The main problems I see at the moment are the mounting of the drive and batteries. Current
thoughts are to build a steel or alum mount connecting to the rear suspension bracket. Batteries
possibly could be mounted on top of the low (ish) cross bar (it is a 17 inch frame) and the controller
to be mounted underneath the cross bar. Anyhow here is the initial blurred picture:
 
minor update, the first picture shows a possible mounting position for the motor. I'm considering attempting
to build a sturdy rear bike rack and the front fixing will be to the left of the rear suspension spring. The rear
attachments will be just above the hub and possibly also half way along the frame.

The next four images update the minimal progress showing the frame nearly stripped with the proposed
(bling) handlebars. Got to do the important stuff first :), well in reality the parts had just come in..
 

Attachments

  • 2010-01-21-225943.jpg
    259.7 KB · Views: 2,643
  • 2010-01-23-102308.jpg
    126.8 KB · Views: 980
  • 2010-01-23-102415.jpg
    145.8 KB · Views: 977
  • 2010-01-23-102440.jpg
    130.1 KB · Views: 980
a small update, some goodies have arrived:

interestingly the brake lever wire is too short for the handlebars I've chosen, so I'll have to
take them apart and re-wire. Also I wonder whether I should have gone for a Hall Throttle
rather than a 5000 ohm Magura throttle. Still time will tell and it might be interesting to experiment.
The Magura throttle certainly feels well built. The selection of chain wheels are to allow
experimentation with the final set up.
 

Attachments

  • 2010-01-29-145432.jpg
    124.8 KB · Views: 956
  • 2010-01-29-145458.jpg
    172.1 KB · Views: 956
  • 2010-01-29-145248.jpg
    92.8 KB · Views: 951
  • 2010-01-29-144931.jpg
    88.2 KB · Views: 955
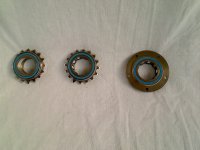
here are some pictures of the finished now splined freewheels which have come in todays post from Luke
and his father - many thanks guys! Loved the videos of the process, seen here,
http://endless-sphere.com/forums/viewtopic.php?f=28&t=17602

The first image shows the freewheels, the left hand freewheel is an original spare which has not been broached
and the center and right freewheels have been neatly broached:

2010-04-15-185538.jpg

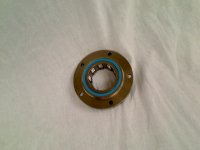
The second image shows the right most freewheel in more detail:

2010-04-15-185922.jpg
 
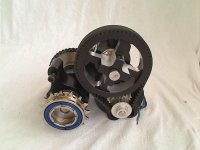
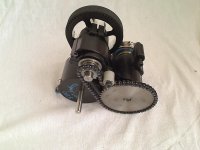
more goodies have arrived - this time from Matt and the amazing Astro group buy.
A huge thanks to Matt for organizing this group buy and also for the super drives!

Here is an

2010-05-13-180503.jpg

2010-05-13-180626.jpg

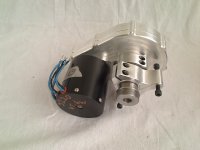
Astro 3210 10 Turn using a 10:1 drive reduction

ignore the white industries freewheel which I added - this will be replaced by a fixed wheel.

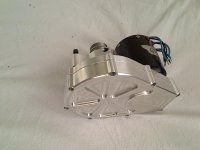
Also here is an Astro 3220 6 Turn using a 4:1 drive reduction

2010-05-13-180119.jpg

2010-05-13-180551.jpg

I had expected to use the Astro 3220 6 turn on this mountain bike - and use the 3210 Astro on another project.
But it maybe best to keep options fully open at present.
 
Looks good!

Make sure you use the smallest cog you can get (maybe 14tooth?) to get the most reduction.

Matt

P.S. Hmm, Slowbuild meets "Slow Ship"? :mrgreen:
Thanks for your patience.
 
no problem Matt - I think the volcanic ash and the British post office added 10-14 days or so :)

Thanks for the advice about using a smallish cog - I'm planning to use a 14T or 13T with 219 chain.
 
You're gona fall in love with 219 chain from the moment you touch it. :)

I'm excited to see how this build turns out! You've got all the pieces to make a no-compromise RC drive bike. :)
 
looking forward to seeing the 219 chain. Yes it is great to collect the components (hopefully before the pound collapses :)).
I'm currently rereading threads associated with motor mounts - this is the only major obstacle to overcome (well the one I can see).
I have some ideas on how to build a heavy duty rear steel bike rack but it is great to read other peoples experiences and neat solutions.
 
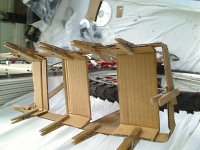
Here is the design of the motor mount produced in corrugated cardboard.

2010-08-15-180839.jpg

and

2010-07-06-202200.jpg

corrugated cardboard is roughly 3mm thick - which is great as this is the thickness of steel from which the motor mount will be made.

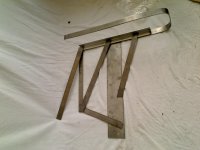
Here are most of the steel components, ready to be drilled, bolted and then later welded.


2010-08-15-181846.jpg

In more detail one side and the top brace.

2010-08-15-181718.jpg

and the other side.


I need to cut some more 70mm strips to connect the two sides together at the top and then
it will require two 50mm girders onto which I'll mount the motor. Thereafter it will probably require
two 25mm girder sections onto which I'll connect the diagonal down strip which connects to the
bike frame (below the seat). But hopefully these won't take too much time to finish. Finally I need to
drill and bolt all the pieces together before giving it to a friend of a friend to be welded.
 
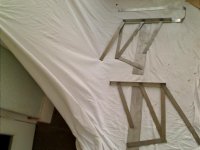
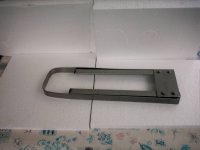
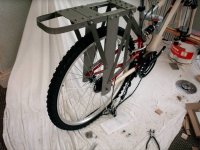
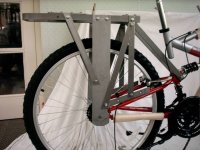
some more updates of the bicycle rack. It is very near completion - just requiring the motor mount to be made. At that point it can finally go and be welded!side-rack-frame1-web.jpg

Here is a side view side-rack-frame2-web.jpg
 
ok update - the bike rack has been welded - I just need to collect it from a friend.
A minor step forward - I've also ordered the tyres and inner tubes for the e-bike.
I'm hopeful that the bike rack will allow experimentation with the two possible MS drives I've bought.
 
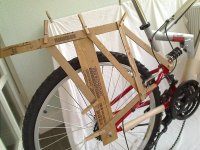
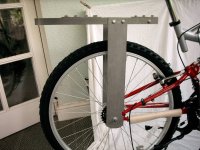
Here is a picture of the welded frame with wheel to give an idea of how it looks.
It now needs some paint and final motor mounting holes drilled on the top. But it is essentially complete.
 
Good to see progress, in regards to the painting, you haven't just
painted the gloss paint straight on to the metal without a surface primer have you?
if so it will chip and scratch off extremely easily...good luck with the rack anywayz should work a treat.

KiM
 
Boy, oh Boy! That rack is EXTREMELY stout! No chance of bending that thing!

I hate painting. I totally stink at it.

It looks like progress is slow but sure!

Matt
 
AJ:

ah I confess I did apply the paint direct to metal - I used "Hammerite Metal Paint". Misread the direct to rusty metal for
direct to metal.. oh well lesson learnt :)

Matt:

yes it does look pretty stable - it looked so much lighter without the paint! Still it will take either of the two motors
on top so I can experiment with the various options. Do you have a web site for your products? There is talk of
petrol rationing in the UK so I'm aiming for a spring completion.
 
Back
Top