The F3: "N minus one"

A couple of quick pix:

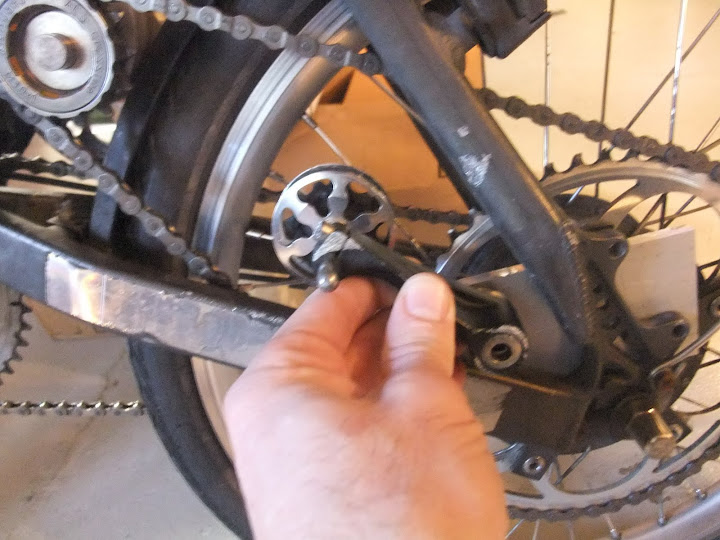
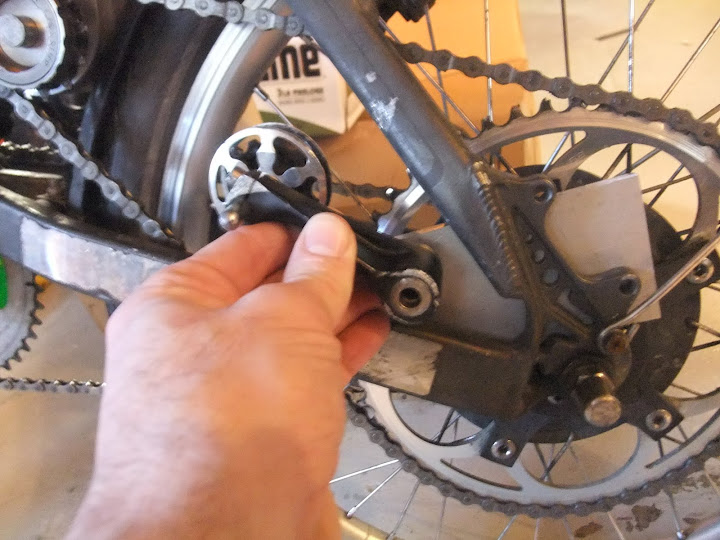
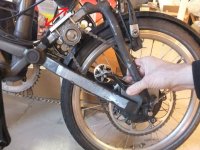
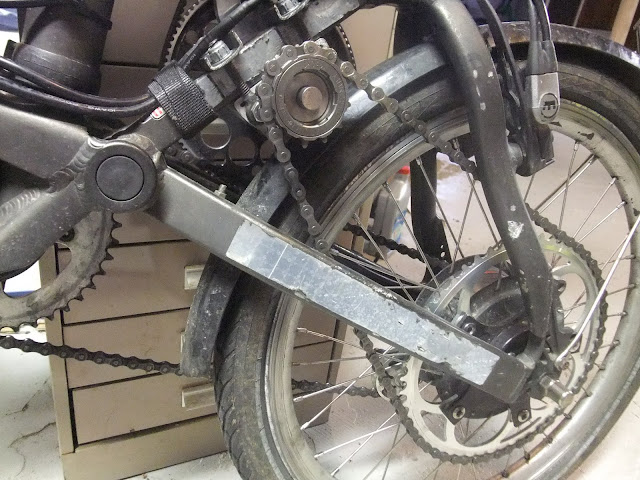
Here's the shiny new 52 tooth chainring. Maybe being silver it'll be slightly more stealthy than the black one? I sure do get a lot of people identifying it as an e-bike, I wish it was a bit more stealthy.
DSCF3721.JPG


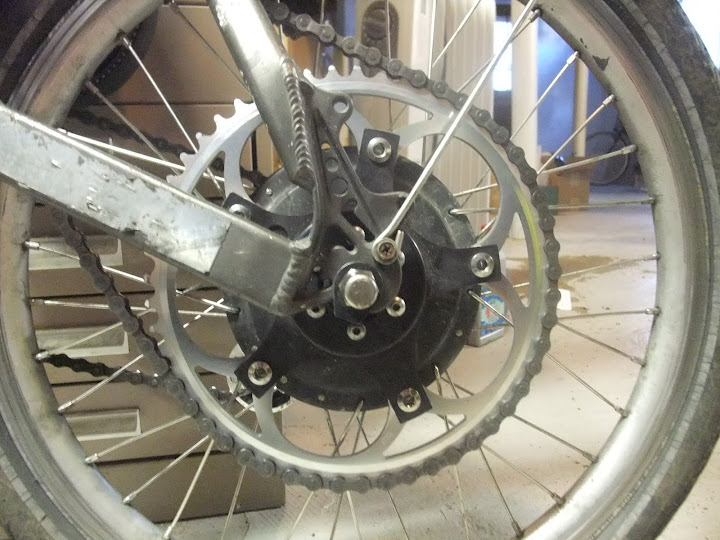
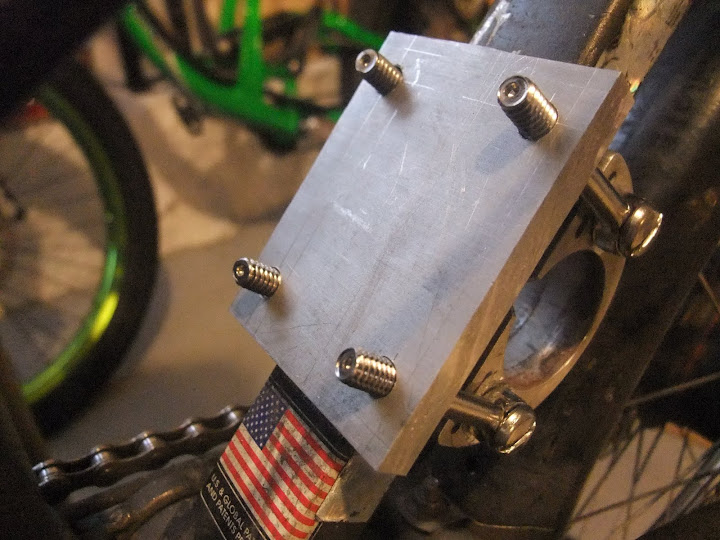
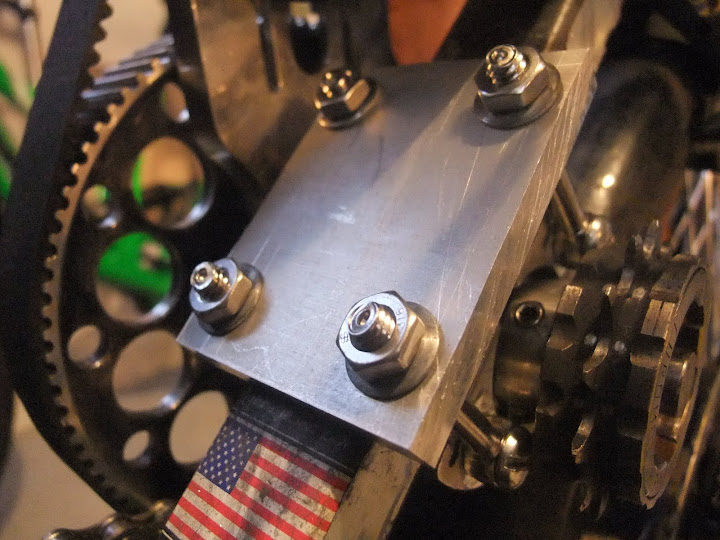
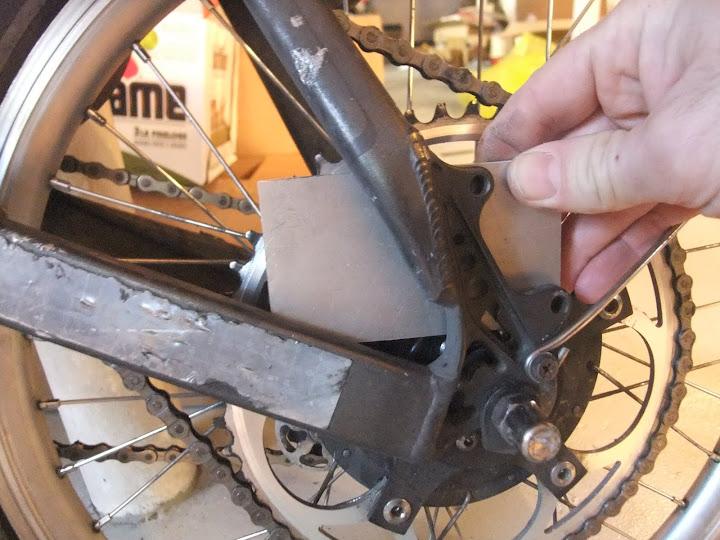
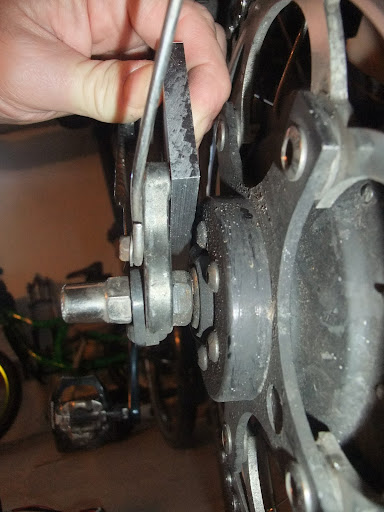
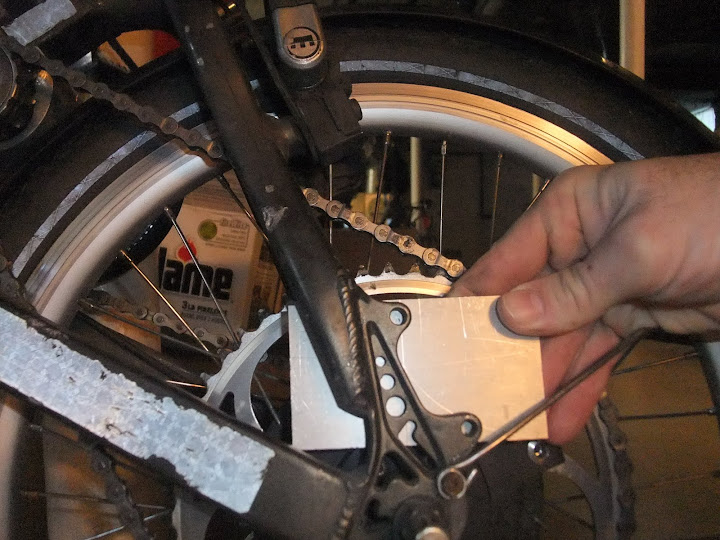
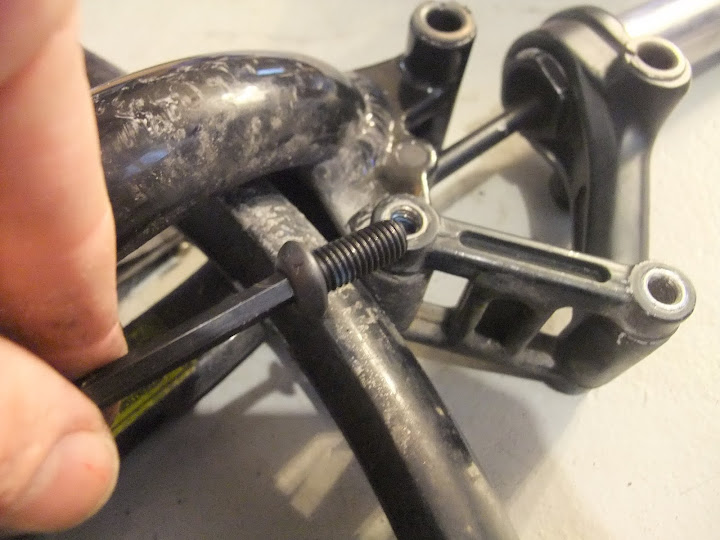
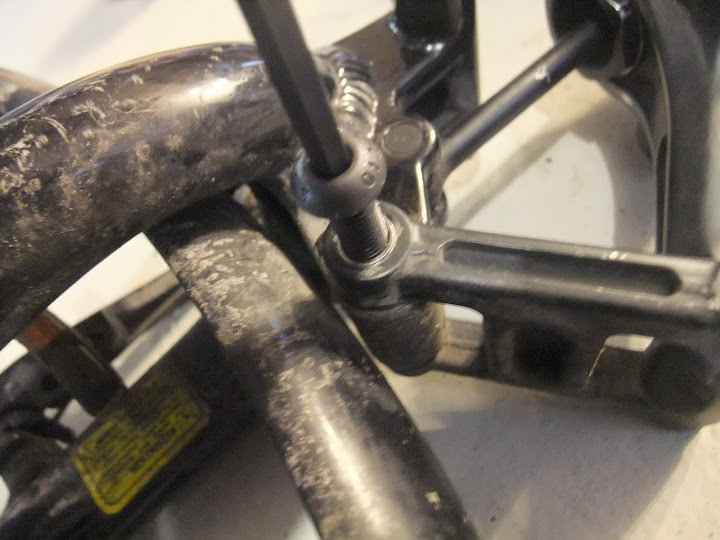
This pic shows the chain line. Above and left of the freewheel you can see the two mounting bolts, and to the left of each of them two black lines. The old freewheel was mounted properly when the bolts lined up with those permanent marker lines - so you can see that the drive is now about 20mm more centered than the old one was.
DSCF3724.JPG


I have company coming over, so no test ride. I'll be doing the test ride as my morning commute. Worst case - if something is colossally wrong with this setup, I'll just have to remove the chain and pedal all the way to work (8 miles).
 
A quick evaluation of the drive train changes:
Testing the higher ratio secondary reduction (3.3:1 --> 4:1) during this morning's commute was awesome. While I've lost top-end speed (~32/33MPH old top speed is now 27/28MPH top speed), the system sounds quieter, has wheelie potential torque from a standstill to about 20MPH, and has buttery smooth power from throttle to wheel at all speeds. The whole system feels subjectively "twice as good". A couple of times this morning I twisted the throttle and involuntarily laughed out loud.

What a big difference a small change has made!
 
iperov said:
can you please show video front fork in action ?

OK I hope this works:
[youtube]-BexPo5zqe8[/youtube]

If not, the youtube link is http://www.youtube.com/watch?v=-BexPo5zqe8&feature=youtu.be

You'll see it respond to a few bumps, and how it dives a bit when I hit the front brake hard a couple of times.
 
why so many breaking parts in this bike?
http://www.debcar.com/Story-BikeMechanical.htm
or this guy crazy ?
 
iperov said:
why so many breaking parts in this bike?
http://www.debcar.com/Story-BikeMechanical.htm
or this guy crazy ?
He gives the answer right under the section header "Frame", about 15% down the page. He rides the bike hard. Jumps, mountain biking, curb jumps.

I probably have about 4000 miles on my JetStream, the last 1000 miles electric assisted. No problems so far. I stick to roads, which in New England are rough enough.
 
crossbreak said:
nice fork! looks like your bike is almost perfect now! what about your belt cover? could you install it finally? I'd love to see how you fixed it ;)

No progress at all on the belt drive cover. As I posted in Nechaus' 3D printer thread (http://www.endless-sphere.com/forums/viewtopic.php?f=1&t=42259&start=300#p654174), my MakerBot has been down for the count. But after some rewiring and a big change in circuit board accessibility, I got it running again last night. So hopefully I'll be able to start printing my new, correctly sized side walls for the belt enclosure.

The wait has been worthwhile though, in the weeks/months since I put the enclosure thing on hold, I've made dozens of minor tweaks to belt drive mounting/location/alignment, etc., that would possibly have impacted the encolsure had I installed it way back when. So it's all good.

That said, with winter on the way, I'd love to have a splash/salt guard for the belt drive!
 
I took some video of the rear suspension and RC drive in action tonight:

[youtube]utc-mRXXhm8[/youtube]
 
More video - the morning commute. Not so much a view of the e-drive, but a view of how it gets me down the road...

[youtube]pE_aylzlCyc[/youtube]
 
nice video, do you live in Everett? I recognize the shraphs building, that is a Dangerous intersection even in a car.
So funny to see someone from ES in my old neighborhood. Maybe I will see you around sometime. I try to be stealth as possible but any other ebiker will recognize the Ebike.
 
Yeah that's East Somerville approaching Sullivan Square. It's crazy right past where the video ends (my heel kicked the camera and it went straight down). I battle busses coming out of the Sullivan T stop, and all the crazy a$$ drivers jockeying for position. I saw Senator Scott Brown about 2 weeks ago working the crowd in traffic where Charlestown Ave meets Rutherford at BHCC. I almost stopped, but since my bike looks like it has a bomb strapped to it...

You'll hear my bike before you see it I'm sure. I'm in Medford, on the way home I take the Longfellow bridge then Hampshire and Beacon, through Porter Sq and Davis, then home. Give me a shout if we cross paths. I'm usually lit up like an XMAS tree, night or day.
 
Just finished reading this thread, you have sorted a nice bit of kit for yourself there. I really look forward to seeing the covers installed, and impressed how you leveraged a vendor and your makerbot to create a solution. Thankd for the vendor links to, I am going to leverage them on my next builds.

Funky front suspension on your bike, reminds me of a thudbuster Seat post. :D Cool to see your ride to work, although every time you pedaled I wanted to duck! :lol:

-JD
 
I received dahon same model too.......
...................
bike suspension is hell tough! now I convinced that "sitting on shock" is worst suspension config ever, rear suspension can be better in classic configuration. Regular coil spring will be better than this tough worst air shock.
 
What's an e-biker to do on Thanksgiving, other than go to visit relatives cooking a full spread, drink some beers & watch football. Well, tinker of course!

I think I have the belt drive enclosure finally sorted out. Printed up new side pieces on the Makerbot last night - 3mm shorter than the last set. Test fitting it all, everything worked with the top cover off. Visually everything worked out nicely. Then of course when I mounted the top cover I heard an awful grinding noise. The drive pulley is about 1/2 mm too tall! So the bike has its drive system taken 1/2 apart as I turn to getting ready for family time.

I have an drive pulley - one where the flange came off when I applied too much pressure in the wrong places trying to remove it. I'll replace the current pulley with this one, and take about 1.5mm off the un-flanged side with a hacksaw. I don't think I need the flanges, as the belt stays nice and centered due to the nice alignment of the components.

I'll have time to work on/finish this on Saturday... Can't wait.
 
Chains stretch.
Chains on electric bikes stretch... quickly.

I went to replace my chain this evening, and while doing so I stripped the threads off one of the motor mount bolts (one of the black bolts, pictured below when new)
DSCF3376.JPG


So I have four new bolts on order from McMaster - going for 304 stainless (because the old plain steel ones were getting pretty corroded). So the bike's off the road for a few days :cry:
 
OK, got my parts and had time to install. This will make my mounting bracket system work better for sure.

The stainless steel rod ends are a bit smaller in outside diameter - good, as the plain steel ones were a smidge to big, and had to be filed down where the shaft collar goes through. You see in this pic that I took a dremel to the face of the mount bracket and carved away about 0.5mm behind the rod ends, to make everything fit together better.
DSCF3859.JPG


Previously, I bolted the drive mount to a pair of U channel steel pieces. These pieces were junk metal and started to bend, plus the "U" sides got in the way of accessing the nuts. So I decided to replace it with an aluminum plate. Here it is before I cut it down to size:
DSCF3865.JPG


And here it is in place:
DSCF3868.JPG


Going a bit out of order here, here's the plate with the drill holes started:
DSCF3860.JPG


Drilling...
DSCF3862.JPG


And aluminum pubes in the dustbin
DSCF3861.JPG


I'm using stainless jam nuts - box of 50 pretty cheap from McMaster. 1/4" x 20 is a really convenient size. I didn't take a final pic, but there's room for two jam nuts on each of the rod ends, so I won't have a problem with nuts backing off due to vibration.
DSCF3870.JPG


Great to have this bike back on the road. Monday I took my "spare", pedal-only bike to work. It's fitted with studded tires for the icy roads. Made it 8 miles to work then 1/2 way home when the rear tire blew. My analysis - the rim is too narrow for the tire, and the tire simply came off. I'll be buying new rims, then lacing up wheels...

Some day, I'll have a small collection of bikes that are truly bullet proof.
 
Forgive the cross-posting, but... I was in a car collision on that bike last night (http://endless-sphere.com/forums/viewtopic.php?f=26&t=46726). I'll not be riding that bike for a few days until the weekend, when I can spend some quality time looking over every piece/part for latent damage. All seems well right now, but can't be too careful!
 
There's one more thing mechanically I want to do with this bike: I want to add a chain tensioner to the electric drive.

DSCF3871.JPG


I had a chin tensioner initially, but the mounting system was poor and it caused more problems than it solved. I need a rigid mount that keeps the tensioner in the plane of the chain. What I've decided to do is use an 8mm thick aluminum plate attached to the disc brake mounts, and fitted with a mount for a Surly Singleator (I use the Surly tensioner on all my bikes - parts standardization, you know). Here's another view of where I plan to put the tensioner. You can see the Al plate sort of sitting there where it will be mounted
DSCF3873.JPG

DSCF3874.JPG


Here's a piece of the aluminum plate I'll be using. Yes, all the excess will be cut off for lightness & such:
DSCF3875.JPG


It will be a tight fit - I'll want to tap/thread the plate vice bolt through it, because I have only about 1mm clearance between the plate and the left side chainring mount
DSCF3880.JPG


Once the tensioner is in place I'll have much more freedom with tweaking gear reduction. At present, there's an extremely small sweet spot where the system runs with correct chain tension, and it's near impossible to find other combinations that work (I can't just drop a pair of teeth and expect things to work right since the diameter(s) would change, and throw things off)

One more shot of me test fitting the aluminum plate:
DSCF3882.JPG
 
You could easily use your mount as a tensioner, couldn't you? Would be much better since it doesn't eat amps. I'd propose also to use a non-shifter chain, since these are much less likely jump off, they are not made to flex like a shifter chain.
 

Attachments

  • matty_chain_tension.jpg
    matty_chain_tension.jpg
    77 KB · Views: 3,669
The bike is being renamed, based on inspiration and input from here: http://endless-sphere.com/forums/viewtopic.php?f=3&t=46820&start=30#p687314
 
Riding home one night last week I noticed some slop in the front suspension. If I lifted the front end, the front wheel would drop about 1/2". This is not good - suppose I came up off a pothole and the front wheel dropped, then when the bike came down it overly stressed one of the suspension linkages. I'd hit the ground right quickly I imagine. So I went about taking the front suspension apart. I didn't take pix because it was late and I was tired, and I got grease everywhere. I hope to take some nice pix of the reassembly.

The suspension is pretty simple. There's a bit of air dampening action I suppose, plus a spring, then an elastomer to soften the system right before it bottoms. The air dampening comes from a piston with a couple of O rings. This is where the spring sits, with the elastomer inside it.

The picture below shows the elastomer (looks like a tootsie roll), beneath that the original spring, and on the bottom a replacement spring. The wire diameter and coil diameter of the two springs are the same, but the distance between the coils on the new spring are shorter. I set out to replace the original coil because I felt that the original coil probably got shorter over time, causing the 1/2" slop. The new one is as close as I could easily find dimension-wise, and with a max compression of 152 lbs, is probably stiffer than the original - exactly what I want.
DSCF3902.JPG


Here they are again. The original has some type of goo on it that I imagine keeps the spring from scratching the inside of the head tube. It's rubbery. I wonder where I can get something similar.
DSCF3903.JPG


Here's the partially disassembled front fork. You can see the piston (silver near center of the pic).
DSCF3904.JPG


Here are the linkages and the linkage bolts I removed.
DSCF3905.JPG


I sheared the head off one of those bolts when I disassembled the suspension. There are 8 bolts in the linkage, and the upper four are actually drilled through and held exactly in their position with set screws. Sadly, I did not know this - I backed the set screws out some, then started to unscrew one of the bolts, and sheared its top section right off. So I bought a bunch of new ones - I'll replace the lower four bolts that were simply loc-tite'd in place, and I'll certainly have to drill through and replace the bolt I sheared off. But unless close visual inspection of the other three thru-holed bolts shows wear/damage, I'll use the originals. I don't imagine drilling the thru hole will be easy to do correctly given the tools I have on hand :(
DSCF3906.JPG


While it's cold as hell outside, I want this bike back on the road ASAP - hopefully tonight so I can ride it in to work tomorrow. Driving, as we all know, sucks.
 
The bike is on its way back up. Here's what got done:

I cut the new spring to height. It's about 20mm longer than the one it replaces. The spring comes as a 4" unit, so one end had the spring coil "taper" as these tend to do. I used a Dremel tool to grind it down a bit flatter so it will mate better with the top of the assembly:
DSCF3909.JPG


Here it is cut to length. The cut on the other end is also flattened, but because I cut it somewhere in the middle I don't have the coils getting closer together like I do at the top.
DSCF3910.JPG


The original spring is covered with a protective rubber coating as I said in the last post. I'm in a hurry to get this bike back on the road - so I covered the coils with electrical tape. We'll see how that works out.
DSCF3911.JPG


Here's the spring with the "tootsie roll" end stop elastomer inserted partially
DSCF3912.JPG


Inserting the spring assembly...
DSCF3914.JPG


And spring almost in
DSCF3915.JPG


Here's a closeup of the piston
DSCF3916.JPG


Below the piston is a rubber bumper atop a nut that threads into the bottom of the tube and keeps everything together.
DSCF3917.JPG


ANd again with that retaining nut screwed partially in
DSCF3924.JPG
 
...And here the steerer tube is fully assembled.
DSCF3925.JPG


I should probably wash this thing in the basement basin since I have everything apart. Anyhow, here I am reassembling the linkage. The lower four bolts are a one-for-one replacement with new M8 bolts & blue thread loc:
DSCF3927.JPG

DSCF3928.JPG

DSCF3929.JPG


Bolts replaced. You can see in in back a little out of focus that the upper linkage is completely removed.
DSCF3933.JPG


Here's a closeup of one of the upper bolts. It's drilled through, and pinned with a long set screw.
DSCF3935.JPG


Clearly this is the part of the suspension that moves the most
DSCF3941.JPG

DSCF3943.JPG


Set screw inserted till it bottoms firmly
DSCF3947.JPG


Here's the bolt I ruined:
DSCF3948.JPG


I tried to make a replacement. Started by grinding a flat with the dremel tool:
DSCF3956.JPG


Then clamped it in a vice and drilled it with a hand drill
DSCF3952.JPG


But the hole was not straight enough. I ordered extra bolts. When I find the time I'll try again on a friend's drill press. For now, a boatload of loc-tite will have to do...
 
OK, bike is back together - front suspension feels pretty nice. The slop is gone from the front wheel. But only a road test at speed will tell me if I really like the results.

While in the neighborhood I true'd the wheel and adjusted the brake, so the front end is all nice and tight.
 
Back
Top