
diablo2112
1 µW
- Joined
- May 10, 2014
- Messages
- 4
I own 2 Trek Ride+ bikes purchased in 2010. Both batteries have since gone bad, and the Trek replacement was ridiculous at over $750 to replace the batteries. As an alternative, I rebuilt the batteries myself, increased the capacity substantially, and used the new build to install additional diagnostics which provide some interesting info the Trek Ride+ system. As the Trek system is proprietary and provided by Bionx, I thought I'd post a bit of info here to document this for future owners.
Battery Replacement
The Ride+ battery in my bikes were based on an 11S4P configuration of Sony 18650 cells. This yields (roughly) a 40.7V pack at 6.7A/Hr or so of capacity. The pack is tightly constructed, and rather than rebuild this configuration to fit in the original case, I went with a custom built pack to fit in my trunk bag. I've built many packs for RC use over the decades, so felt confident in building a pack for the Ride+. I wanted to retain all other aspects of the Ride+, including charger, controller, etc.
I found a decent deal on ebay for 120 18650 Li-Mn cells rated at 2200 mAhr. These cells are labelled as "INR" which I believe is a newer Li-Ni-Co-Mn chemistry. They retain the safety characteristics of traditional Li-Mn cells, while being capable of higher discharge rates (up to 5C). Samsung manufactures these cells, and I suspect these are Samsung cells labelled for off-brand sale. Paid about $190 for a box of new cells. I measured my trunk bag, and felt an 11S10P configuration for these batteries would fit nicely, and give a total capacity (at 40.3v) of 22 Ahr, a nearly factor of 4 increase compared to stock.

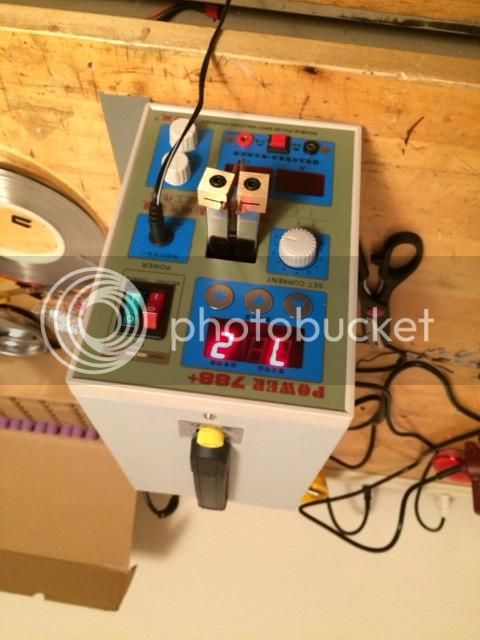
To construct this pack, I decided to pickup a cheap CD battery spot welder off ebay. A bit of research, and I found this unit for about $200.
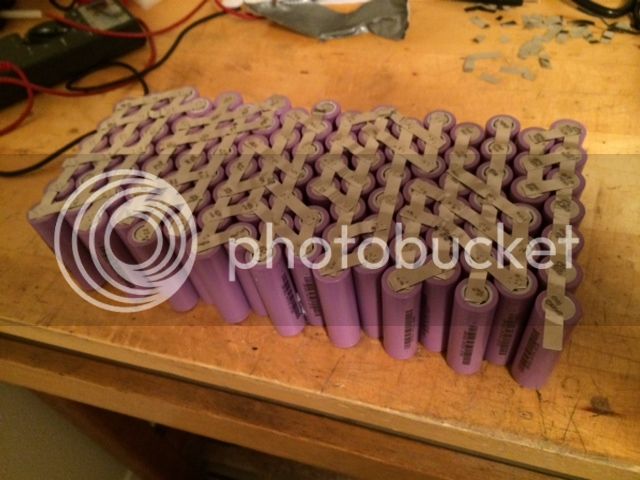
I also ordered a reel of battery tab material. With great care - and I don't recommend anyone try to weld up the following, you will do certain damage if you make even the slightest construction mistake - I welded together the 18650 cells into the 11S10P configuration:
I'm sure more experienced experts here will agree. The amount of energy in this pack is large, and with welding, once you bridge a circuit, the pack is going to discharge until you melt the straps. This is potentially very hazardous. I really don't recommend this to the casual DIYer. There is great risk here, and you must know what you're doing.
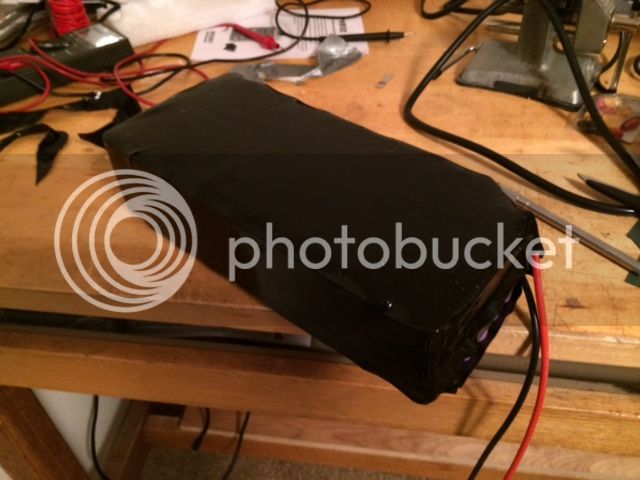
With the pack welded, I used fish paper to insulate the vulnerable top and bottom, and the shrunk the whole thing in a large piece of battery shrink wrap and finished construction of the pack:

And now the shrink wrap:
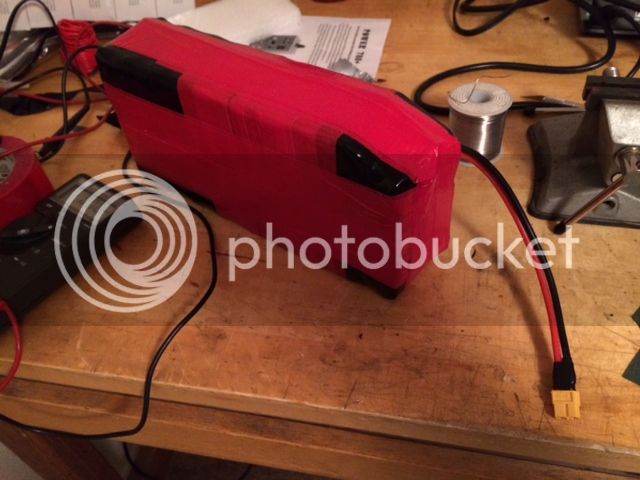
And finished this off with high-current RC connectors
Installation on my Ride+ and Diagnostic Info
Since the pack is now remotely mounted, I took advantage of this to also install a Cycle Analyst meter which can now provide some long-sought info on the proprietary Ride+ performance.
Here's the bike and the meter installed

Note that I swapped the Ride+ components from the original Trek Valencia frame to a Specialized Urban frame, mainly to get a sprung front fork and wider urban tires. I've got about 4000 miles on this frame in riding/commuting over the last few years, I don't commute everyday but frequently enough.
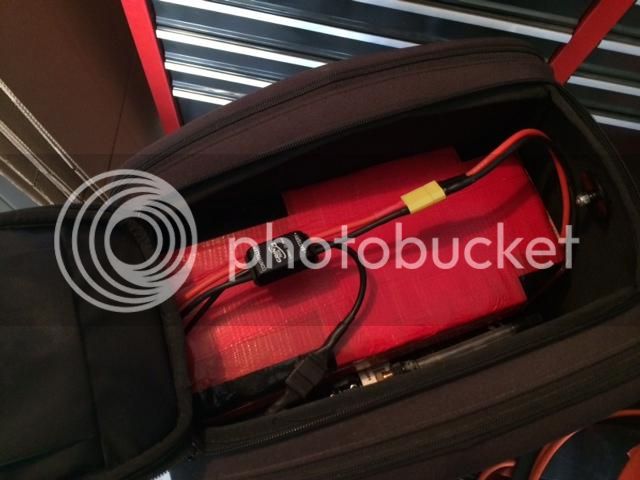
Here's the pack in the trunk bag along with the shunt for the Cycle Analyst:
And here's the analyst mounted on the bike.

The setup works great. I haven't drained the pack or even used a half of its capacity yet. I can report back once I get a much longer ride on the setup. I have monitored performance and found a number of interesting things regarding Ride+ performance.
In the 4 Bionx/Ride+ modes, the maximum current draw is as follows:
Mode 1: ~120W
Mode 2: ~300W
Mode 3: ~550W
Mode 4: ~1200W (!!!!)
Quite a bit more than the rated motor constant-duty power in mode 4. Above about 800W of current draw, my Ride+ motor gives a low humming sound. FYI.
With the system turned on, the steady state power consumption is about 7W (see pic, above). WITH THE BIONX SYSTEM OFF, current draw is in the range of 10mA. I confirmed this by monitoring with the Ride+ controller both connected and disconnected to the Cycle Analyst and the battery. This explains a lot. The BMS on the Trek system has long been suspected of being both a parasitic current draw as well as a terrible BMS. Both my batteries have gone below critical voltage with the Trek system, the BMS may very well be a contributor!
Charging
Charging current from the Trek/Bionx charger is 2A. This charges the pack at around 80W. I'm not sure what it monitors during charge, but as it gets closer to terminal voltage, amperage decreases until the charger cuts off at about a charging current of 0.25A. This is a very good thing for bulk-charge of the LiMN 18650 cells. Individual cell cutoff is ~4.1V/cell, which coupled with the low current tapering gives a margin of safety for the non-balanced, bulk charge. I'm not looking to extract every A-hr from this pack, and prefer a margin of safety, anyway. The stock Trek Ride+ system is bulk charged as well without balancing, so they clearly designed this margin of safety into the system. My pack should be at least as safe, given that I'm charing at well below 0.1C (more like 0.01C at end-of-charge).
The fan on the charger runs at any power draw above 30W. Here's a pic of the Analyst during steady-state charging at 2A:

Excuse the long post, and excuse my return as a newly registered member. I thought I'd document this for others that might be interested in either battery replacement on the Ride+ or some performance details for the system.
Battery Replacement
The Ride+ battery in my bikes were based on an 11S4P configuration of Sony 18650 cells. This yields (roughly) a 40.7V pack at 6.7A/Hr or so of capacity. The pack is tightly constructed, and rather than rebuild this configuration to fit in the original case, I went with a custom built pack to fit in my trunk bag. I've built many packs for RC use over the decades, so felt confident in building a pack for the Ride+. I wanted to retain all other aspects of the Ride+, including charger, controller, etc.
I found a decent deal on ebay for 120 18650 Li-Mn cells rated at 2200 mAhr. These cells are labelled as "INR" which I believe is a newer Li-Ni-Co-Mn chemistry. They retain the safety characteristics of traditional Li-Mn cells, while being capable of higher discharge rates (up to 5C). Samsung manufactures these cells, and I suspect these are Samsung cells labelled for off-brand sale. Paid about $190 for a box of new cells. I measured my trunk bag, and felt an 11S10P configuration for these batteries would fit nicely, and give a total capacity (at 40.3v) of 22 Ahr, a nearly factor of 4 increase compared to stock.

To construct this pack, I decided to pickup a cheap CD battery spot welder off ebay. A bit of research, and I found this unit for about $200.

I also ordered a reel of battery tab material. With great care - and I don't recommend anyone try to weld up the following, you will do certain damage if you make even the slightest construction mistake - I welded together the 18650 cells into the 11S10P configuration:

I'm sure more experienced experts here will agree. The amount of energy in this pack is large, and with welding, once you bridge a circuit, the pack is going to discharge until you melt the straps. This is potentially very hazardous. I really don't recommend this to the casual DIYer. There is great risk here, and you must know what you're doing.
With the pack welded, I used fish paper to insulate the vulnerable top and bottom, and the shrunk the whole thing in a large piece of battery shrink wrap and finished construction of the pack:

And now the shrink wrap:

And finished this off with high-current RC connectors

Installation on my Ride+ and Diagnostic Info
Since the pack is now remotely mounted, I took advantage of this to also install a Cycle Analyst meter which can now provide some long-sought info on the proprietary Ride+ performance.
Here's the bike and the meter installed

Note that I swapped the Ride+ components from the original Trek Valencia frame to a Specialized Urban frame, mainly to get a sprung front fork and wider urban tires. I've got about 4000 miles on this frame in riding/commuting over the last few years, I don't commute everyday but frequently enough.
Here's the pack in the trunk bag along with the shunt for the Cycle Analyst:

And here's the analyst mounted on the bike.

The setup works great. I haven't drained the pack or even used a half of its capacity yet. I can report back once I get a much longer ride on the setup. I have monitored performance and found a number of interesting things regarding Ride+ performance.
In the 4 Bionx/Ride+ modes, the maximum current draw is as follows:
Mode 1: ~120W
Mode 2: ~300W
Mode 3: ~550W
Mode 4: ~1200W (!!!!)
Quite a bit more than the rated motor constant-duty power in mode 4. Above about 800W of current draw, my Ride+ motor gives a low humming sound. FYI.
With the system turned on, the steady state power consumption is about 7W (see pic, above). WITH THE BIONX SYSTEM OFF, current draw is in the range of 10mA. I confirmed this by monitoring with the Ride+ controller both connected and disconnected to the Cycle Analyst and the battery. This explains a lot. The BMS on the Trek system has long been suspected of being both a parasitic current draw as well as a terrible BMS. Both my batteries have gone below critical voltage with the Trek system, the BMS may very well be a contributor!
Charging
Charging current from the Trek/Bionx charger is 2A. This charges the pack at around 80W. I'm not sure what it monitors during charge, but as it gets closer to terminal voltage, amperage decreases until the charger cuts off at about a charging current of 0.25A. This is a very good thing for bulk-charge of the LiMN 18650 cells. Individual cell cutoff is ~4.1V/cell, which coupled with the low current tapering gives a margin of safety for the non-balanced, bulk charge. I'm not looking to extract every A-hr from this pack, and prefer a margin of safety, anyway. The stock Trek Ride+ system is bulk charged as well without balancing, so they clearly designed this margin of safety into the system. My pack should be at least as safe, given that I'm charing at well below 0.1C (more like 0.01C at end-of-charge).
The fan on the charger runs at any power draw above 30W. Here's a pic of the Analyst during steady-state charging at 2A:

Excuse the long post, and excuse my return as a newly registered member. I thought I'd document this for others that might be interested in either battery replacement on the Ride+ or some performance details for the system.
