

superfluxer
🧲 New user
For years I had this old Schwinn Stealth 1000 scooter sitting in my garage. The model is 20 years old and the original lead acid AGM 36V 10Ah battery pack was too weak to begin with for the robust scooter with double suspension on the hills in my neighborhood. Of course it also had long since expired and the throttle was busted. Aside from one leaky innertube the scooter was otherwise in good shape. I looked on here for parts but only got partial info, so I decided to write up a brief set of instructions with sourcing info, if you want to upgrade a similar scooter. There are still many old Schwinns and Curries out there.
I looked into replacement batteries and quickly learned:
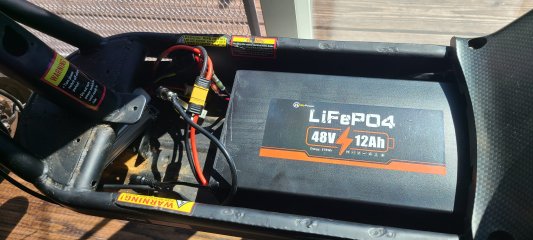
New battery easilty fits in compartment with lots of room to spare
I ordered the three parts and a new innertube online for $170, significantly cheaper than a new comparable scooter would have cost at around $300. And it still would have only had a less safe Li-Ion battery.
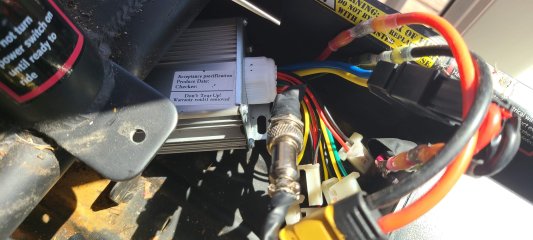
New 48V controller with customized connections
The throttle has a 3 wire configuration and two wires for a power lock, that’s compatible with the controller, but the connectors did not match, so I put all five wires in a 5 pin connector and matched it with a 5 pin socket on the controller. I also had to remove the old wire harness and replace the battery connector with one that came with the battery. I reused the battery connector and replaced it with the motor connector in the scooter to make that connection. I waterproofed the connectors with hot glue and electrical tape.
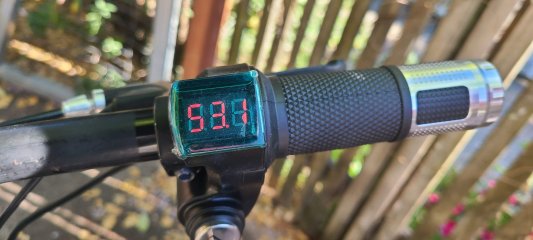
New Throttle with Volt meter and ignition key
The controller allows for brake signals, powering brake lights and a separate voltage indicator, but I did not use those, so I just taped them up. There is a sport mode jumper, but it’s in sport mode already, and you’ll want that, so I just taped it up as well.
To button things up safely, I wrapped the battery in 5mm packaging foam, attached the controller with a velcrostrap to an already existing bracket, hacked off three dowels on the underside of the battery compartment lid and tied up the wires with several zip ties. Overall, I got the whole project done in about 5 hours.
The scooter now reaches 20mph and can climb the steepest hills. I have yet to figure out the range, but I’d guess 20 - 30 miles. YMMV.
Future improvements:
I looked into replacement batteries and quickly learned:
- The 1000W direct drive brushed motor works ok with 48V
- LifePo4 batteries are safer and much longer lasting than Li-Ion or Li-Po and only 50% of the weight of the old AGM batteries and about double the range
- A new battery needs to fit in the existing chassis unless I want to chop up the whole frame
- A 48V battery helps tremendously to improve performance to get up hills around where I live
- The new battery voltage requires a new controller, a new controller requires a new throttle, which I needed anyway
New battery easilty fits in compartment with lots of room to spare
I ordered the three parts and a new innertube online for $170, significantly cheaper than a new comparable scooter would have cost at around $300. And it still would have only had a less safe Li-Ion battery.
New 48V controller with customized connections
The throttle has a 3 wire configuration and two wires for a power lock, that’s compatible with the controller, but the connectors did not match, so I put all five wires in a 5 pin connector and matched it with a 5 pin socket on the controller. I also had to remove the old wire harness and replace the battery connector with one that came with the battery. I reused the battery connector and replaced it with the motor connector in the scooter to make that connection. I waterproofed the connectors with hot glue and electrical tape.
New Throttle with Volt meter and ignition key
The controller allows for brake signals, powering brake lights and a separate voltage indicator, but I did not use those, so I just taped them up. There is a sport mode jumper, but it’s in sport mode already, and you’ll want that, so I just taped it up as well.
To button things up safely, I wrapped the battery in 5mm packaging foam, attached the controller with a velcrostrap to an already existing bracket, hacked off three dowels on the underside of the battery compartment lid and tied up the wires with several zip ties. Overall, I got the whole project done in about 5 hours.
The scooter now reaches 20mph and can climb the steepest hills. I have yet to figure out the range, but I’d guess 20 - 30 miles. YMMV.
Future improvements:
- Connect brake indicator and get brake lights as well as powered front, rear lights and turn signal and a horn
- Currently I open the battery compartment to charge, but I might route the charging through the old charge port. The controller has a chargeport, so I could connect through it.
- Upgrade the battery. There is another LiFePo4 battery, that’s 20Ah with 3.75” height. It might just fit in the battery compartment, if I chop the grid inside the lid.
- USB-C Chargeport for phone, speaker, etc.
- Speaker
- LED Strip around battery case for better night time visibility
Last edited:


