World Domination, I just got my self a 3d Printer!!!

They seem to support only ABS via their website, so I'll start there I guess! I'm right down the bottom of the learning curve!
 
I'd been interested in these DIY printers for a while, but I didn't know they had come down in price to a (moderately) affordable level until I found this post a couple months ago. After researching the RepRap world for a while, I ordered a Prusa V2 with the linear bearings from these guys: http://www.makerfarm.com/index.php/3d-printer-kits/v2-linear-prusa-kit-deluxe.html.

To say it's a "kit" is a bit of an overstatement- you'll have to source some build components (support structure rods, power supply, etc) and detailed instructions on your own as there is some variance to the Prusa builds. Everything you need to know is on youtube or other forums though. I probably have 15-20 hours into the physical build of the machine and another 10 hours of figuring out how to tweak the firmware (Printrboard) and getting my bed level, but now I'm printing and am very pleased with the results. I went with the .35mm nozzle (J-head type hot end fed via a Greg's extruder) and have only been using ABS (3mm, black) that I sourced from ultimaker and the quality is exceeding my expectations.

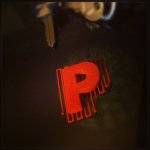
I got my first real print this past weekend and have had it running almost non-stop since. Here's a couple quick snaps (iphone pics, apologies fro the poor quality) of an end cap I drew in sketchup and then printed out. It fits snugly in 4" vinyl fence post tubing and will make for some pretty battery packs. Gloss black ABS is difficult to photograph, the waviness you see is mostly visual and can just faintly be detected by touch.

View attachment 3
View attachment 2

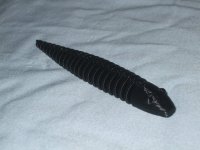
I also printed this little guy: http://www.thingiverse.com/thing:4743
Not my pic, but it looks identical to it.
snake.jpg

And this was printing (about 5 hours into it so far) as I left for work today: http://www.thingiverse.com/thing:43591
Mine's black and is looking fantastic so far, I'll post pics when I get them.


This is the coolest "toy" I've picked up in quite some time. Stay tuned for more projects...

Let's see those e-bike related components and design files guys!
 
Hi Nechaus, I'll be using the default gcode/slicer combo that ships with the Solidoodle - pronterface and skeinforge. I clean my models in meshlab (free and grouse), and I use Sketchup and Openscad to model. Openscad is awesome for making parametric things like threaded bolts and nuts based on a few numbers in the code.

It's time the world had a sexy Cycleanalyst, they appear to be a great device but look like the south end of a north bound cat IMHO. :?
Who's up for a new casing for that one???

A can feel a custom thumb throttle coming on!

Sam.
 
Samd said:
It's time the world had a sexy Cycleanalyst, they appear to be a great device but look like the south end of a north bound cat IMHO. :?
Who's up for a new casing for that one???
Yeah I'm up for a custom riced up CA housing. The more over the top scifi looking the better. It should of course have fins and lumps and bumps that look tricky but serve no purpose :lol:

EDIT: I just google image searched "sci fi gadget" and this was one of the images - exactly the sort of design elements I was picturing in my head :lol:

gad5670004.png676dac1c-6fa6-43fc-97ef-a0d08eb4624bLarge.jpg
 
She's pretty sexy Hyjinkas!

Maybe building in a second use would work - like a beer opener. Or that handiest of items - the Banana Chopplespork.
http://www.thingiverse.com/thing:40221

You can have your thread back now Nechaus ;)
 
Custom abs casing for the CA, fuuuuuu make one with a proper dual clips for mid mounting :D

Be nice to proto a steampunk style case then get it milled, I want more retro ebikes stuff.

You're welcome to borrow my V3 for a few weeks if you want to proto
 
Hey that sounds like fun. I did receive a pm from a certain forum member looking to mount one "directly and solidly to 'fleshlight' in a waterproof fashion" (whatever that is - I wouldn't know) but I'm not sure it sounds kosher...
 
Samd said:
You can have your thread back now Nechaus ;)
Bullshit, we're just getting started! :mrgreen:

t3sla said:
make one with a proper dual clips for mid mounting :D
Definately! Though the new V2.3 revision is better with a larger clamp that fits over stems that aren't too chunky.
If that's really bothering you though you only need use a small plate with another nut on it that offsets the CA an inch or so to the left or right.

t3sla said:
Be nice to proto a steampunk style case then get it milled, I want more retro ebikes stuff.
True dat.
I've been trying to make my bikes more and more stealthy and minimalist over the last few years but I still have a deep desire to make something that really looks like something off a scifi movie set - clear perspex windows showing controller internals, some sort of pulsating glowing orb that is supposedly the power core / flux capacitor etc. 8)


Samd said:
Hey that sounds like fun. I did receive a pm from a certain forum member looking to mount one "directly and solidly to 'fleshlight' in a waterproof fashion" (whatever that is - I wouldn't know) but I'm not sure it sounds kosher...

LAWL - devices manufactured for use with "pork swords" are definately not kosher!
 
I'll say, you wouldn't want fall on your sword staring at it and crash the yoghurt truck...
 
This needs more thought. Parents and safety types might complain.
dawg2.jpg
 
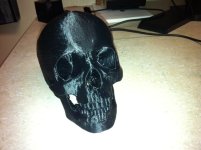
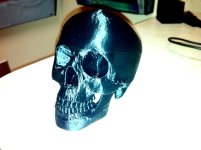
Got the skull done, looks like it was pulled from the La Brea tar pits. Stuck with iphone pics again. Did I say this black is hard to photograph? 8)
skull1.jpg

skull2.jpg

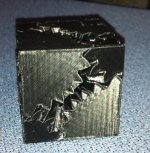
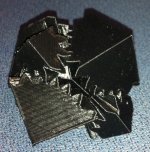
Also had to try out the cubed gear thing. Took a couple iterations, but this one's functional.

cubed gear1.jpg

cubed gear2.jpg

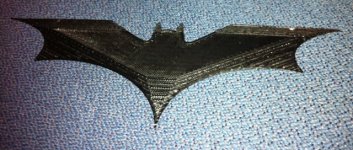
And who never wanted a batarang?

batarang.jpg

I'm printing almost everything at .25mm layer height using a .35mm nozzle (nozzle extrudes to .38mm in free air) and am very pleased with the detail that's coming out. Hopefully, I'll get some e-bike specific parts modelled and printed this coming weekend.
 
For most prints, I'm using 60 mm/s for perimeters and infill and 30 mm/s for small perimeter in slic3r. I've just been using the slic3r version that was bundled with my pronterface download- I think it's 0.7.2 or something whereas there was just 0.9.8 released on Jan 17th. I haven't delved into the real fiddly, spindly prints yet- these have been coming out more from dumb luck than skill at this point :lol:
 
That is quite speedy!

i use around 20 to 30 mm, i am using the same version to you, i think ill update my slicer version soon..

Im pretty keen to print with flexible PLA, looks really friken cool and from the videos iv seen its very strong !
 
huh, I haven't heard of the flexible PLA. I'll check it out!

I started a pictorial build thread using the battery tube end caps I showed earlier in this thread- you can get to it by clicking the " Battery Backpack Project" link in my signature.
 
Digging that battery case man. I didn't realise that you could do movable parts with extrusion machines - I have done them with an SLS process but that is exciting for low cost parts.

Got mine up about 10pm last night. First one out was a fail - i didn't heat the bed and the raft just skidded about. Once I figured that out I was away.
Couldn't sleep, head afire with ideas - literally mind blown. 25 years of amateur 3D modelling and electronics just paid off. Need to buy some other colours now...
6ee436ea6a0b11e2bb3e22000a1fb8a8_7.jpg
 
That's awesome Sam, can't wait to see what you come up with.

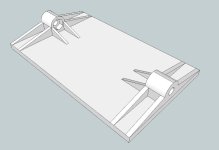
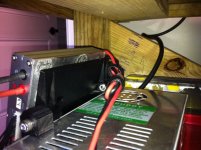
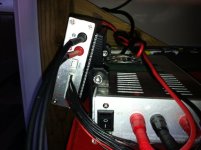
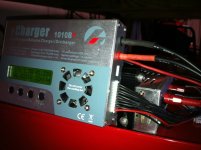
Here's a quick little mount I scribbled up and printed out. I needed something to hold my icharger at an angle and came up with this.

Mounting plate- I just velcro'd the charger to this. I should have integrated some airspace in this flat hunk of plastic, but it's functional.
icharger meanwell mounting plate.jpg

These brackets mount to a couple threaded holes on the side of the meanwell.
View attachment 3

All up and running- think it was about 2 hours of total printing again. I should have made the captured nut void a little bigger since i printed it vertically, but I just melted it in place with a soldering iron and now it's permanent.
icharger mount 001.jpg

icharger mount 003.jpg

icharger mount 004.jpg
 
Neat!
For dumping some material, there's a sketchup plugin called 'drill' somewhere. You select a diameter and then set about shotgunning the weight out of your structure in the unloaded spots but keep the strength up in higher stress areas. It doesn't slow down select lasering (in fact it speeds it up) but not sure about extrusion machines...

Working on a heliostat knuckle that lets you beam light/heat from your yard in your window controlled by your PC. I have about 50 ideas jotted now - Excited. :D
 
Just stumbled across some conductive filament - that could be real handy. Unfortunately it's out of stock....
 
heads up, conductive filament is very low conductivity. It's useful for things for which the inductance is more important than the conductivity, i.e, emf noise and stuff like that. or for contact sensors of any sort. Not for carrying current.


A lot of the chinese filament sellers stock it. I think there might even be some on amazon.
 
I was just about to say that I wouldn't expect any meltable plastic like this to be a very good conductor. Thanks for confirming your findings Kin.

That lead me to thinking though, without a huuuuge amount of effort you could probably convert one of these to work as a soldering robot for making up PCBs. High temperature head, solder instead of plastic filament and it could run around a precision solder up your board. That'd be pretty cool :)
 
Back
Top