19" Motorcycle Wheels vs 26" Bicycle Wheels (rim and tires)

Guess I have been one of the lucky ones. Local shop here 'Culture Velo' which has many chains across France, I have brought the bike over many times and the lead mechanic has done some work on the lacing of the wheels. Him and the rest of the guys have rid-in the bike and thought it was a blast. Small parts which I have gone to them before to get. So, never any kind negative vibes. All is good.
 
This thread is a awesome source of information on the MC/Bike rim choice. Particular thanks to Rix and his many responses/purchases!

It's a common theme through this thread that MC rims are not required for on road commuting, unless high power is applied. At what point is it considered sufficient power to go to a MC rim? I am buying bits for the next bike now (Flux Beta, Leafmotor 1500w 5T) and have gone DD for reliability rather than speed. I intend to do a max of 35km/h.

It was also suggested to put a MC tyre on a DH 26" rim, but I didn't see anyone actually do it. Is this possible? I would really like the durability of a MC tyre without the weight penalty of the rim, but also am concerned a DH rim isn't strong enough?
 
MC tyres will NOT fix bicycle rims (with the exception of being able to shoe horn a 16" moto tyre onto a fat 20" bicycle rim)

For street use at 35km/hr top speed you certainly don't a mc rim, not even a downhill one. Any old rim will do, though you may as well go for DH for a few bucks extra. Just run the thickest tubes you can find +/- slime for the best puncture resistance.
 
I'm concerned bicycle tyres will wear out too fast with the increased weight and the future pie weight provision.

So that means it's either all MC or all Bicycle, where DH bicycle should be enough? How to solve the tyre wear issue?
 
There's different rubber compounds, some tyres are harder and longer wearing than others.
How far will you ride each day ? Unless you're doing a few hundred km per week I'd just stick with bicycle spec stuff and save the hassle. Changing the rear crazy bob tyre was only an annual occurrence on my commuter bike so not really a big deal and I wouldn't consider running a moto rim and tyre combo for that purpose. You need to decide what's more important to you, lugging around an extra few kg every day or changing a tyre maybe yearly instead of 2 yearly. Again with the top speed you're suggesting you're not talking big power so you're not going to wear it out quickly anyway. The weight is not really a big issue, your riding style will be a more significant influence on wear. I suspect you're overthinking it...
 
Yeah, I think you are right. Although I do 400km+ per week (80km commute per day + varying between 40 - 60km on the weekend). I'll go DH rim, and Schwabe Marathon on the back if wear starts to be an issue.
 
My MC rear tyre upgrade is done. The part I liked the most so far is the only 1Kg added at the rear wheel. The complete rear wheel with Halo Contra 24X3.0 was 17Kg and the new wheel with 19x1.6 MC rim with Maxiss Maxcros HT 70/100-19 is 18Kg.
20150928_124033.jpg


This is my alignment tooling:
20150926_233400.jpg

The upper check is for radial run-out and lower one is for axial run-out

These are some data I measured during the process.
Maxiss Maxcros 70/100-19 with inner tube weight 2.6Kg and Halo Contra 24X3.0 with Kenda DH Tube weight 2.0Kg
Holmes Rim 19X1.6 weight 1.4Kg and stock rim weight 0.8Kg
Inner tube for MC tyrs weight 0.3Kg
These are the weights of the pneumatics only:
Vee Rubber 2.75-19 Trial tyre = 3.1Kg
Maxiss Maxcros 70/100-19 = 2.3Kg
Halo Contra 24X3.0 = 1.5Kg
These are the total diameter and width of the two type of tyres:
Halo Contra 24X3.0 diam 650mm width 70mm and Maxiss Maxcros 70/100-19 diam 616mm and width 73mm.
Comparing the two tires:
20150928_125018.jpg


During the first ride I reached a top speed of 84Km/h checked with GPS and before the change I was doing about 90Km/h with OVS =3.0°

These are two video I think useful for DIY rim installation
https://youtu.be/DeBEXq2dGnU?list=PLFh9MdiDZwju45S7WviAt-4OluOzbBujp
https://youtu.be/FCQtuGfz3c8?list=PLFh9MdiDZwju45S7WviAt-4OluOzbBujp
 
Which pressure are you using with MC tyres? I have inflated my rear tyre at 20PSI or 1.4bar.
This morning I had my first off road trip, I noticed a lot of rear traction and entering the curves the front Halo Contra 24X3.0 tends to push out of the corner. I will need to adjust the suspensions to gain some front traction entering the corners.
In the order I will try: more rear spring pre-load and then lowering the front fork in the clamps.
 
I run 17x3.00 shinko 241 on the rear and found 14 PSI to work really well. I wouldn't even mind going lower as lower PSI I found helps with the heavy hubmotor. Dirt bike riders use like 8 PSI.

Front tire I run like 19PSI on my duro razorback which is basically a Halo Contra.

20 PSI is way high for an offroad moto tire.
 
bigbore said:
Which pressure are you using with MC tyres? I have inflated my rear tyre at 20PSI or 1.4bar.
This morning I had my first off road trip, I noticed a lot of rear traction and entering the curves the front Halo Contra 24X3.0 tends to push out of the corner. I will need to adjust the suspensions to gain some front traction entering the corners.
In the order I will try: more rear spring pre-load and then lowering the front fork in the clamps.

You are ball park ideal. As you noticed, the front end pushes a lot more with the rear motor wheel. Raise your forks tubes 4mm above the top triple clamp which lowers it and try it, lowering it, should help a lot. You will still need to adjust your riding style a bit as the shittiest offroad moto tires offers way more traction then the best offroad MTB tire.
 
Rix said:
You are ball park ideal. As you noticed, the front end pushes a lot more with the rear motor wheel. Raise your forks tubes 4mm above the top triple clamp which lowers it and try it, lowering it, should help a lot. You will still need to adjust your riding style a bit as the shittiest offroad moto tires offers way more traction then the best offroad MTB tire.

For the moment I have increased the rear spring pre load ferrule 4 more turns (now is 11mm) and my static rider sag changed from 63mm to 49mm. Yesterday I rode about 10Km in the trails and on the beach and the things start to improve .... I gained more front traction.
Now I have to check the rear shock compression doing some jumps because until now I always compressed to the limit the rear shock even with small jumps of one meter. And also another symptom of to much rear squat is that the bike tended to jump nose up.

By the way yesterday I rode with 15PSI rear pressure and It feels good, but is not going to pinch flat the rear inner tube if I ride over sidewalk edge at a speed of 20Km/h or more?
 
Bigbore, if you ride tubeless pinch flat will not be an issue. Take a look a tubeless ghetto style on youtube.
You can use your inner tube and some Stan's tire sealing or gaffa tape.
And if you should be so unlucky to still get a flat, those tubeless repair kits are cheap. Just plug & play :)
Air will leak slower from a tubeless then if you have puncture in an inner tube tire.

http://www.singletracks.com/blog/mtb-repair/tech-how-to-ghetto-tubeless-for-mountain-bikes/

[youtube]ByBAItDM3Ws[/youtube]


[youtube]0MyRoTaAUqg[/youtube]
 
I actually went 21" rim/tire. Cost me probably another $100 in parts cost to go to that size, but it ended up matching my rolling diameter of existing 26x2.5" hookworms. Snipped from my build thread:

I started making some brass washers for my spokes; the flange thickness for the 3.5mm spokes I got was ~0.080" wider than the actual flanges on my motor, and I wanted them to locate as close to the elbow as I could manage without causing problems. Made from 1/4" solid brass bar, drilled, parted, and countersunk at an appropriate angle to match the flare on the end of the spokes. Flare angles don't quite match up perfectly, which is good; gives about 1-2 degrees of play, so the spokes can angle as required off the flange. Made 5 last night before/after lifting my rebuilt transmission back into my truck, and I'll probably finish off the remaining 31 today. I'll update this post with more "making of" pictures as I go.

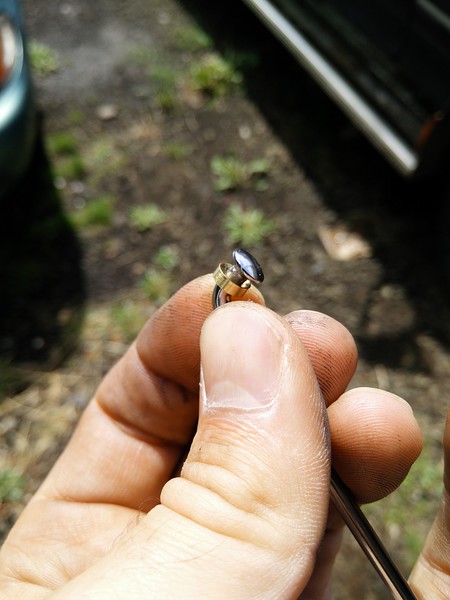
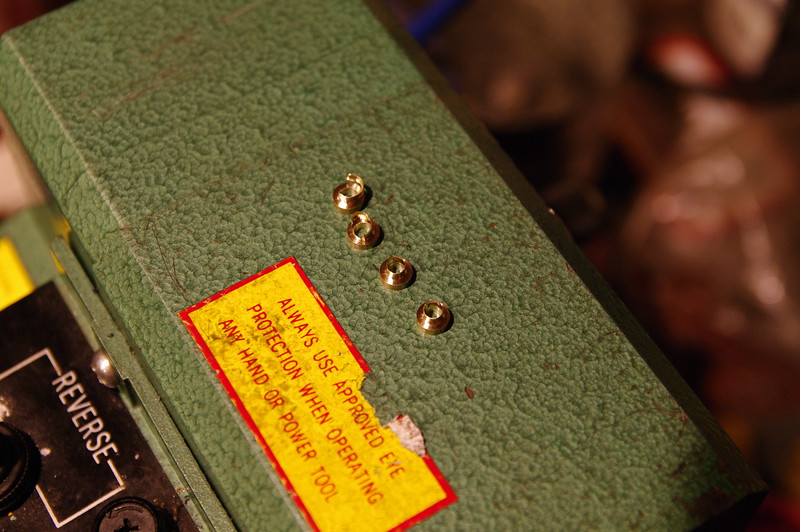
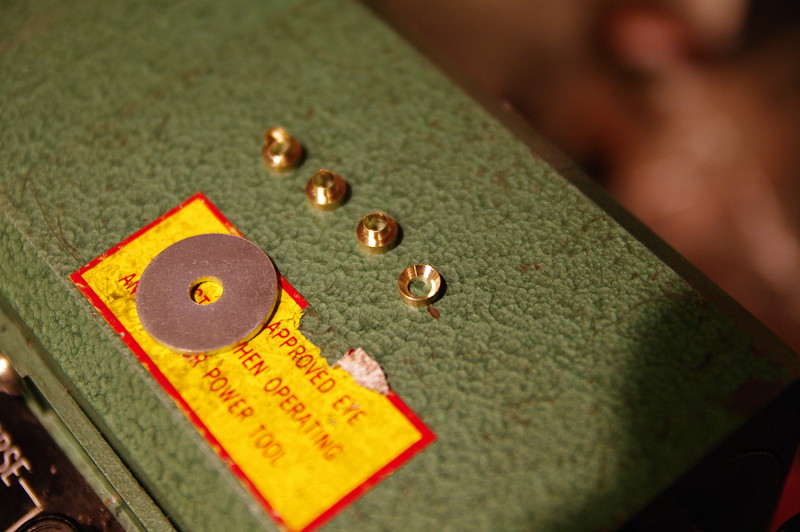
Here's a couple I took with my cell phone of the prototype and following 4 I made while trying to figure out a good process for making lots of them:

i-R848Wp4-L.jpg

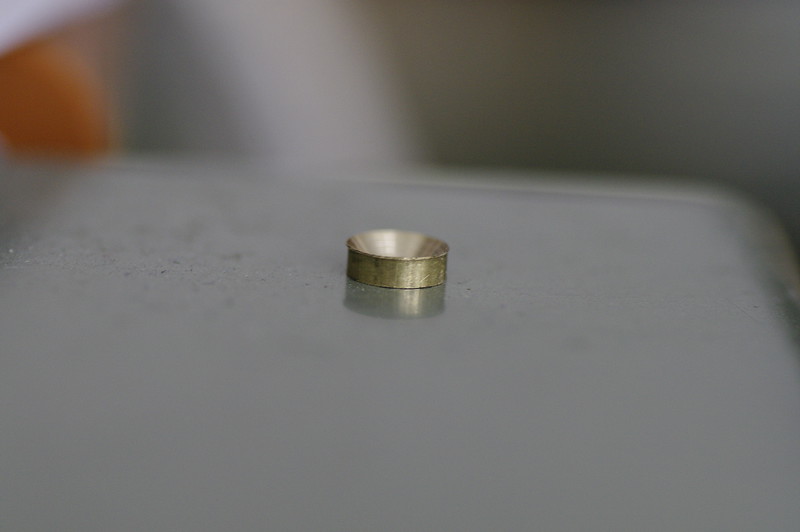
First prototype made!

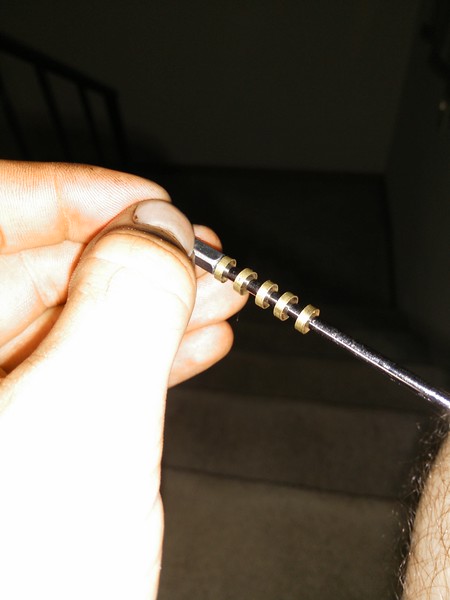
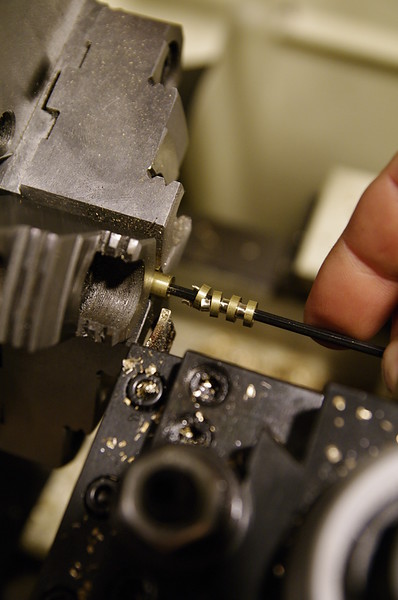
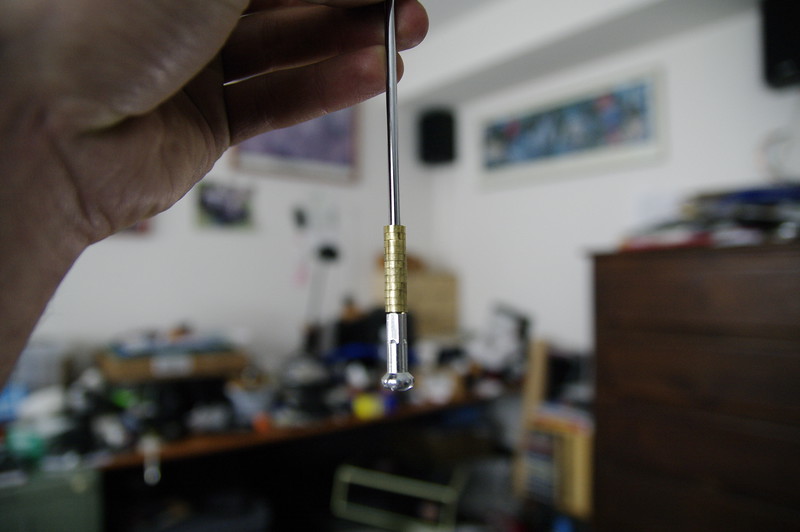
Here's all 5 I made last night on one of my spokes:
i-gdsfmpH-L.jpg


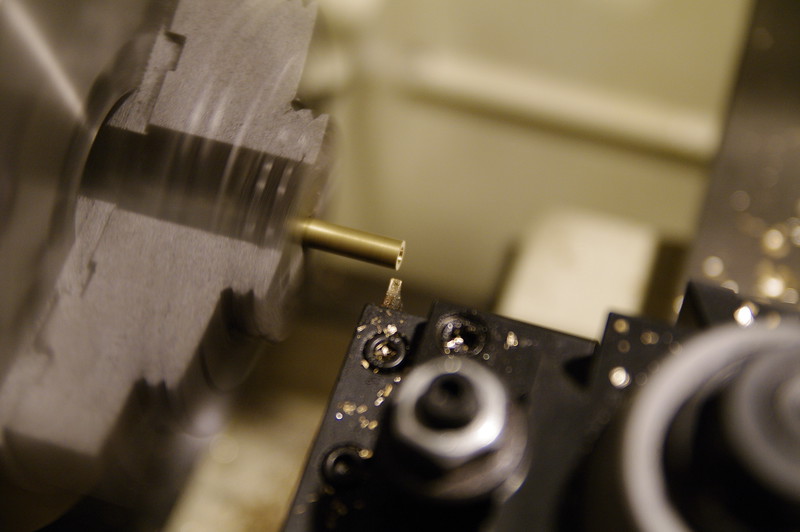
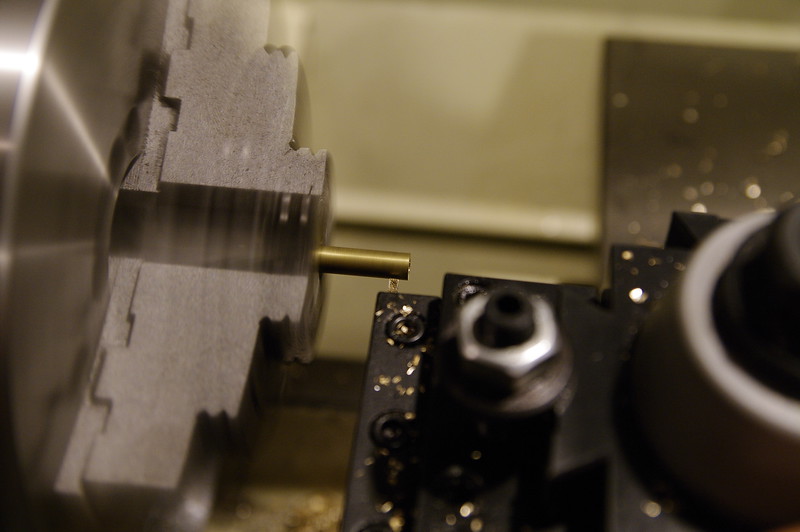
My parting inserts were ~0.085", (supposedly 2mm-ish), so I'd face cut a new bar with the parting tool, zero my DRO, center-drill to get a good center, drill the rod through with a long parabolic 3.5mm bit an inch or two,
i-XktQP7k-L.jpg


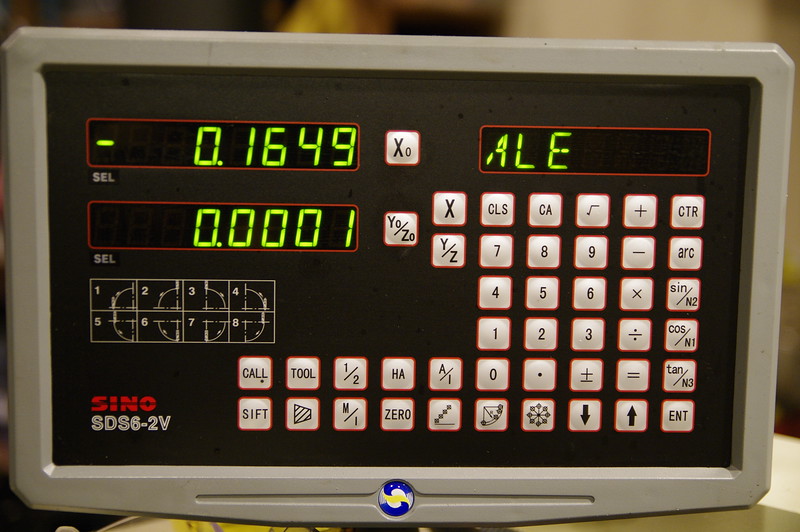
Then advance 0.165",
i-sPS4LNH-L.jpg


Part off,
i-WSGk48t-L.jpg


Zero, repeat.
i-VrkkXPh-L.jpg


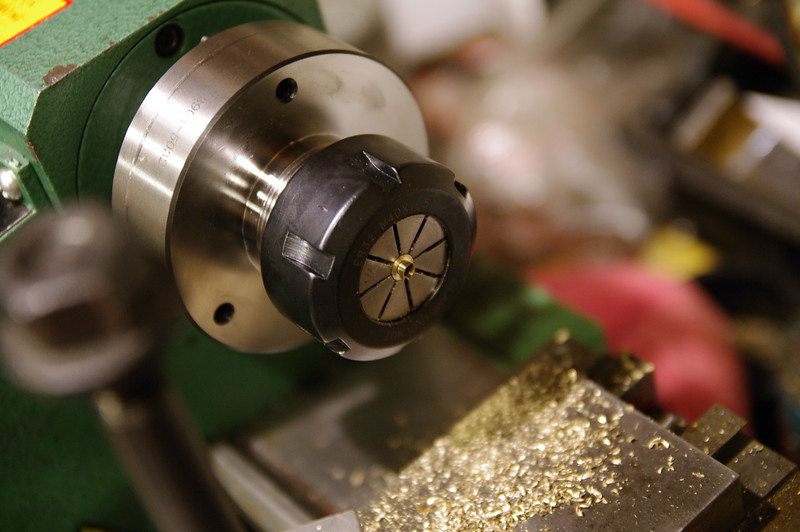
Now I move from the big lathe to the small one for finishing; not because I need to, but because it's faster and the big lathe doesn't have a collet chuck, not to mention the time it would take to swap chucks would make this workflow impractical for 36 identical parts.

They look like this after parting; Since it's small brass and I'm doing 4-5 at a time before advancing the rod in the chuck, the whole rod flexes when I part and leaves these sharp bits. Easy enough to fix in the next step.
i-nWrDksL-L.jpg


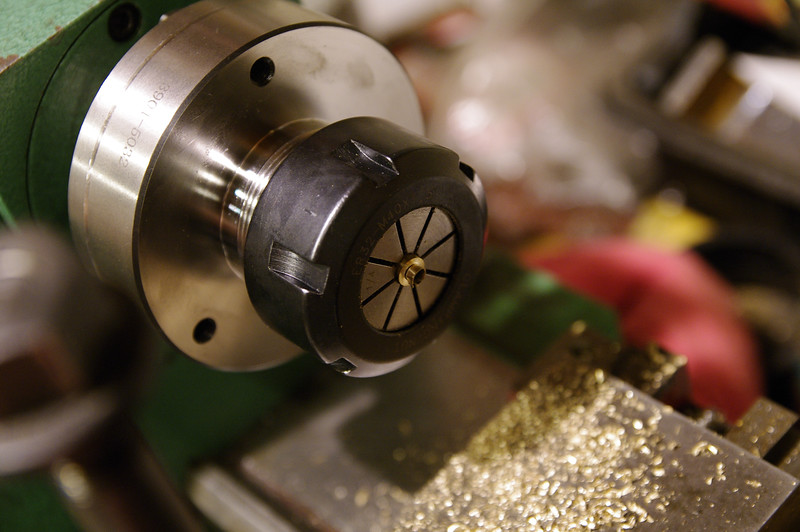
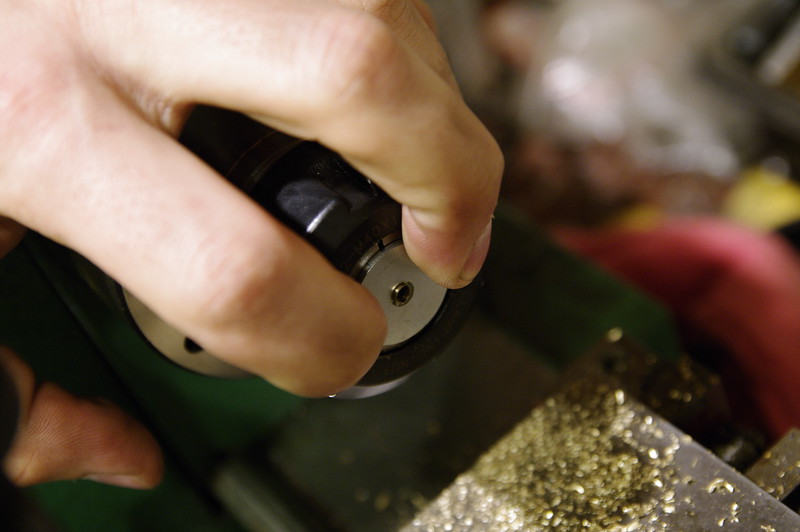
The 3.5mm hole wasn't wide enough to clear the threaded section of my spokes, so I enlarged that with a second drill. Normally you can't work on stuff this stubby, but I have an el-cheapo 7x8 harbor freight mini lathe I've upgraded to a 7x14 with proper tapered roller bearings and all kinds of other stuff, (upgrades cost more than the lathe did originally,) and I'm running an ER32 collet chuck on it. Collet chucks are amazing for this sort of thing as they will grip round stock of literally almost any length with equivalent to about 8-12 jaws. That means I can put a part that's only 0.080" long into it and it'll grip hard enough to stay without distorting it on the outside.

So I push the spacers into the collet a bit, with the parted side facing out, as they usually have a bit of a lip still stuck on the end.
i-5GDs2TF-L.jpg


I push them into the collet flush using a washer that's about the right size.
i-bRksrzm-L.jpg

This aligns them axially and makes sure they are mounted in approximately the right depth every time.

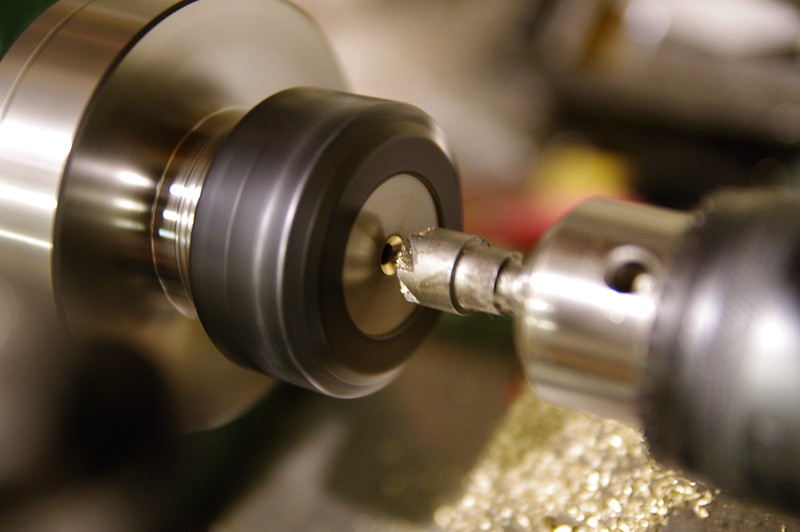
Then I tighten the chuck and drill them out to the final diameter on the small lathe.
i-n4f8Fwm-L.jpg


Once drilled through, I swap tailstock chucks to one with a small 6-tooth countersink bit, and plunge by eye (as I don't have any indicators or DRO's to measure depth on the small lathe,) until the taper almost becomes a knife edge on the periphery.
i-nBJvzSb-L.jpg


Loosten chuck, take a small rod and pop the part out from the rear of the spindle bore, on to the next one.
i-M692c6n-L.jpg


I'll probably forego the first drill step for the rest as I'm thinking at this diameter it's unnecessary to add an extra step; should speed me up quite a bit as well since I'm building a lot of these little buggers.

Now up to 12!
i-j9wdtK6-L.jpg


Unfortunately, I've also produced two "duds" which were countersunk too deep and started to flare out on the periphery.
i-LNmZVnt-L.jpg


Skipping the first drill step is definitely faster. I was able to do 10 in ~17 minutes, from start to finish.

One quick tip on working with brass: If you drill it, knock the sharp leading edge on the tip off your drill bits. Brass likes to grab really hard if you have a positive rake drill bit; (literally like 99% of all metalworking drill bits use a positive-rake leading edge). When that happens, the bit basically acts like a screw, plunging in without removing material. At best you get lots of chatter, at worst your drill bit breaks inside the part. Buy a cheap set of drill bits, take a stone and swipe it once or twice across the leading edge of each one, and throw them in a bucket labeled "for use on brass". You essentially have made the leading edge into a zero-rake tool geometry, without making the bit completely dull. Makes a HUGE difference and it'll keep you from breaking your bits or causing weird things to happen while drilling.

Update - 2015/09/07 - Did another 6 in 10 minutes while waiting for some pizza to bake. Also de-laced all of the spokes so I can start reassembly. Halfway there!

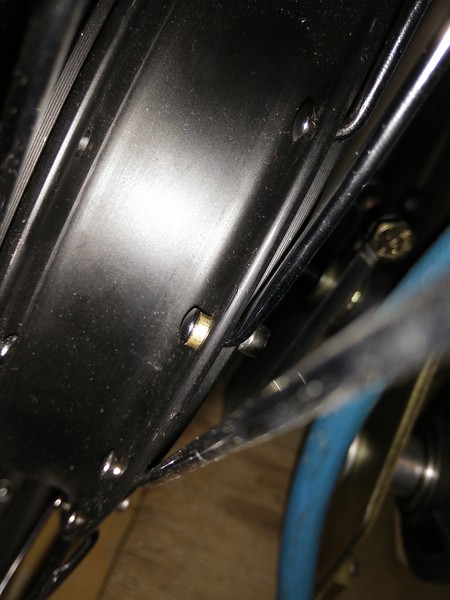
Also, yes, they do fit.
i-cbp5BHt-L.jpg


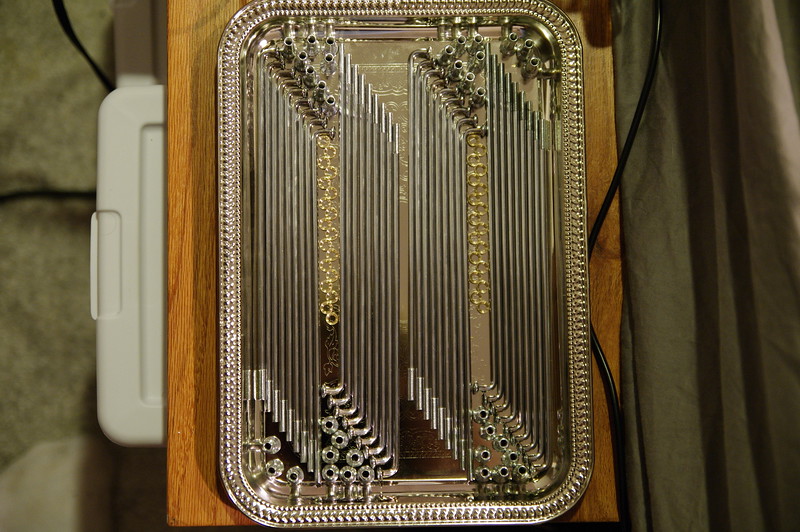
Update - 2015/09/08 - Finished all the spacers. Gratuitous OCD picture because I can:
i-H36FSMg-L.jpg


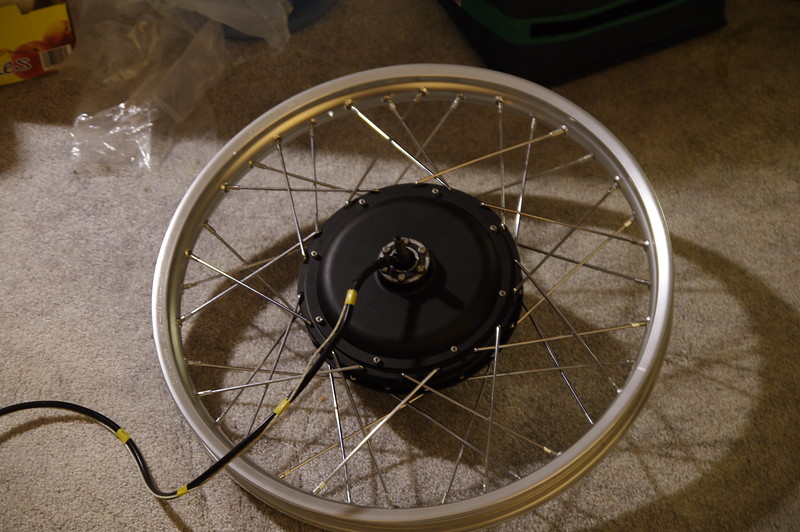
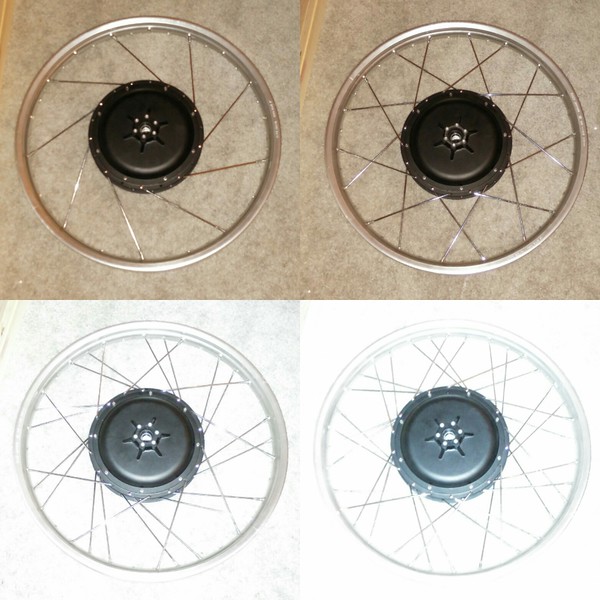
I'm using a DID 21x1.6" aluminum motorcycle rim. Super beefy. Here it is test-laced in a 2-cross pattern when I first got all the parts. This was before I made the brass spacers.
i-m8Bxg2J-L.jpg


Spokes are 3.5mm in diameter, so I had to drill out the flange holes slightly. Holes are not drilled perfectly concentric to the shaft bearings; they vary ~1mm or so in and out. I discovered this while drilling the holes larger.
i-mN5snfJ-L.jpg


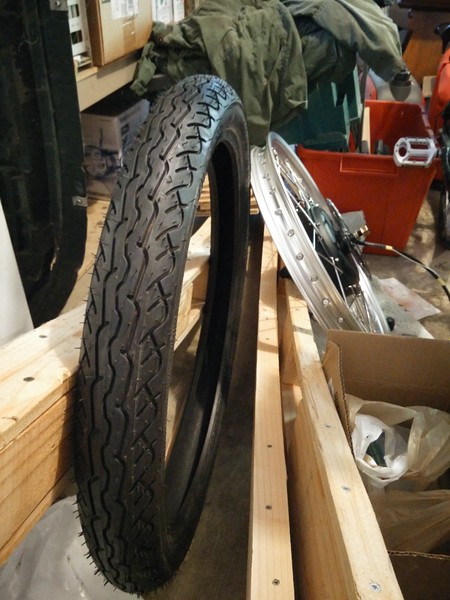
The tire I bought is a Pirelli MT66 front tire, in the 80/90-21 size.
i-P7pK74c-L.jpg

This means it's 80mm tall with a 90% height-to-width ratio. Means this tire is slightly taller than it is wide, but I was worried about chain lines in granny gear, and this looked like a good size to start with.

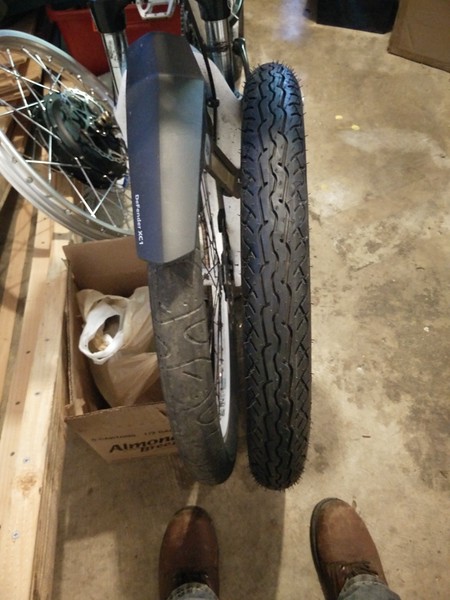
Here's a comparison to my 26x2.5" Hookworms.
i-5cXrRZQ-L.jpg


Compound feels just as grippy if not more so than the Hookworms, and this tire is STIFF. As in when they shipped it, they wrapped packing tape around it and shipped it as-is. It holds it's shape really well compared to the Hookworms. It's a tubed-type tire, so it's rated to be ridden with a tube in it; I figured that was the best option for this build. I can't wait to see what it feels like on the road.

Update: As other projects have taken my time and my lathe dogs hadn't arrived yet to do center turning, I re-laced the rotor to my rim with the brass spacers.
i-2tHtRXg-L.jpg


Not sure if spokes vary slightly in elbow length or if my brass spacers thickness vary at the countersink, (did them all "by eye" for depth), but a few of the spokes feel somewhat tight. Might pull off the tight ones and cut them down ~0.001mm or so to get them perfect, but for now I'm pretty happy with my batch part build.
 
When I have time to cut the new 4340 shaft. Lathe dogs arrived but the next couple weekends will be occupied by other projects and I'm not in state on weekdays.
 
Kodin, why did you go through all the trouble making those washers? Couldn't you have ordered the right spokes to begin with that fit snug?
 
Offroader said:
Kodin, why did you go through all the trouble making those washers? Couldn't you have ordered the right spokes to begin with that fit snug?

I am guessing that when he ordered the bends, they came too wide and no refund. That happened to me. One my lace jobs on a 5404 had 6mm of space between the bends and the flange was about 2mm narrower. I laced it up anyway and it stayed true. Should be noted that I was using 8g spokes and high quality SS units designed for 60HP motor cross machines, this is probably why I got away with it as the spokes were tough enough to handle any lateral movement on the flange.
 
These were not custom; they were the only pack of spokes in 3.5mm that were appropriate length I could find on ebay. The spokes were honestly an exercise in getting my lathes tuned in. I probably could have run the spokes without and been just fine, or just used basic brass washers, which I ordered originally. I didn't like the way they fit, and I wanted to pay attention to detail, so I did. Also, the single foot of brass bar I used was far less money than the required number of washers would have been. I saved all of like $3.50 doing it myself. :p
 
Kodin said:
These were not custom; they were the only pack of spokes in 3.5mm that were appropriate length I could find on ebay. The spokes were honestly an exercise in getting my lathes tuned in. I probably could have run the spokes without and been just fine, or just used basic brass washers, which I ordered originally. I didn't like the way they fit, and I wanted to pay attention to detail, so I did. Also, the single foot of brass bar I used was far less money than the required number of washers would have been. I saved all of like $3.50 doing it myself. :p

Sounds like my kind of economics. Ah, how many dozens of hours I have spent and realized I save $10.
 
Total work time was maybe 4-5 hours. And most of that was because I was optimizing the process. The last 25 took half an hour.
 
Kodin said:
These were not custom; they were the only pack of spokes in 3.5mm that were appropriate length I could find on ebay. The spokes were honestly an exercise in getting my lathes tuned in. I probably could have run the spokes without and been just fine, or just used basic brass washers, which I ordered originally. I didn't like the way they fit, and I wanted to pay attention to detail, so I did. Also, the single foot of brass bar I used was far less money than the required number of washers would have been. I saved all of like $3.50 doing it myself. :p


fantastic work man!
as the washers should help to keep the wheel more long lasting it was not a waste of time as a whole :)
 
Call it practice for if I ever build a high power setup. (High end QS motor)
 
halp!

https://www.torpedo7.co.nz/products/DZTU4NN24/title/dsi-tube-24-x-1-75-2-125--schrader-valve-

Will this 24" tube fit a 19x1.6" rim and 19x2.75" Shinko SR244? I am having a hard time finding suitable 19" tubes.

edit: got this:

http://www.mxshop.nz/kenda-inner-tube-70-100-19-hd-at197010kehd?search=AT197010KEHD
 
jmz said:
halp!

https://www.torpedo7.co.nz/products/DZTU4NN24/title/dsi-tube-24-x-1-75-2-125--schrader-valve-

Will this 24" tube fit a 19x1.6" rim and 19x2.75" Shinko SR244? I am having a hard time finding suitable 19" tubes.

edit: got this:

http://www.mxshop.nz/kenda-inner-tube-70-100-19-hd-at197010kehd?search=AT197010KEHD

Any 70/100x19 tube will fit any 2.75-3.00 MC tire, especially your SR244. Also, Kenda makes a great 2.75-3.00x19 MC tube that will work. That 24 1.75 tube will probably work, even though to fill the space of your 244 will be on the ragged edges of over expanded. I have ran 80x100/21 MC tubes on the 24MTB successfully. those tubes worked because a 21"MC tube is only 1" bigger ID and OD than a 24x3.00 Duro HD Tube. I think a 24" tube could work on a 19MC wheel, but If my measurements scale correctly, the 24MTB tube would have a 1" diameter bigger ID and OD than the 24 MTB.
 
Back
Top