• Hello ES! We could use some help to get us past the finish line on building the new knowledgebase for the forum.
    Can you donate? Please see our fundraising page. Thank you!

72V 8kW Rockrider with MXUS 3K Turbo and VESC Controller

bruno4500

🔌 New-ish
Joined
Mar 22, 2024
Messages
32
Location
Osijek
Last summer, I built my very first ebike, and there were a ton of things to learn and consider, so I decided to make a detailed post about the build to hopefully help and inspire people who are getting started.

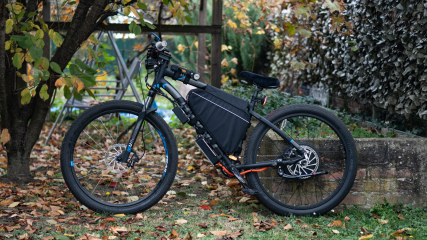
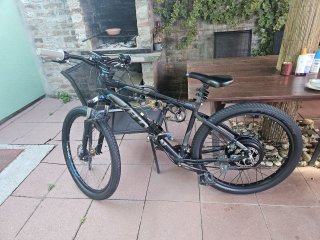
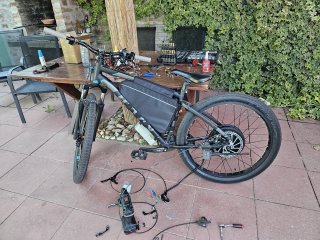
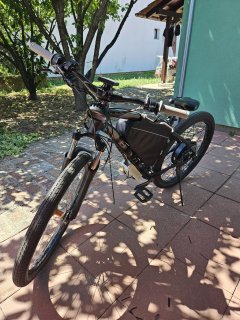
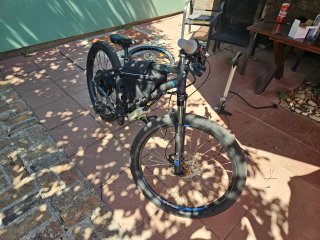
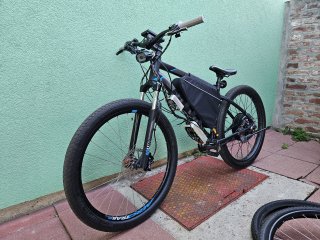
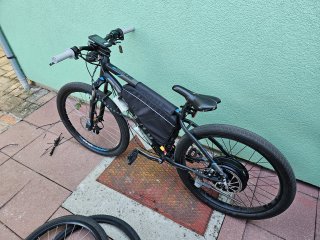
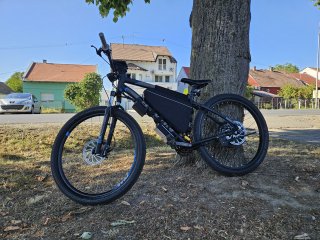
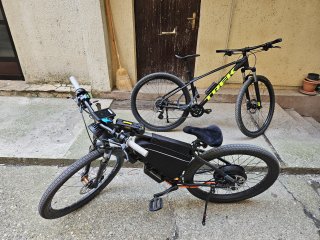
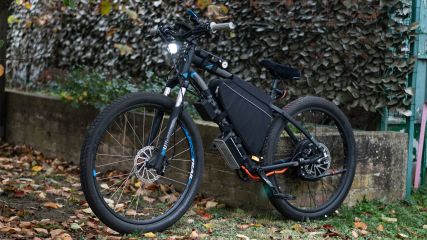
Here are pictures of the bike in its current state. Top speed is above 100 km/h, I never actually hit the limit because it’s just too fast for me. The range is around 100 km with a 72V 20Ah battery. Around 4 hours of charge time.
1comp.png2comp.png

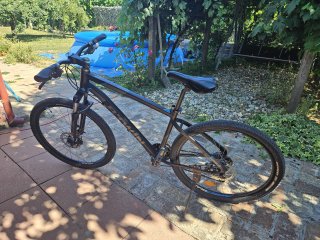
After deciding that converting my Tomos moped and getting it street legal was too difficult, this build started with a bike I got from Facebook Marketplace for 120 Euros. It’s a Decathlon Rockrider 520. L size, which is a little bit small for me, but I was happy with the price, so I took it. My only requirements were the disc brakes and front suspension. The bike was overall in good shape, and I was super excited to finally start building an e-bike.
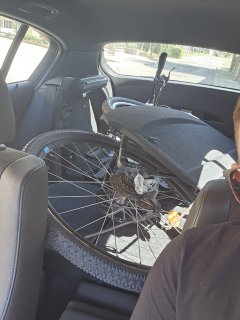
3.jpg4.jpg

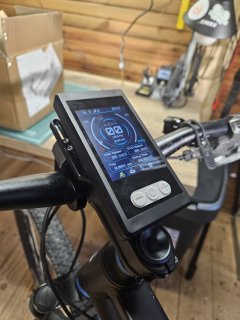
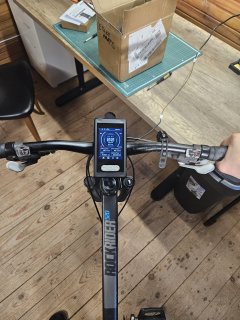
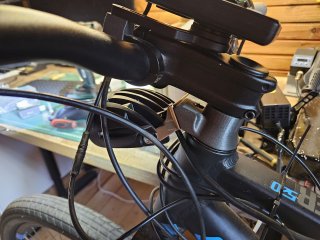
I got a Flipsky FSESC75200 Pro V2 VESC with a Flipsky VESC Display. I mounted the Display to the bike to see how it fits.
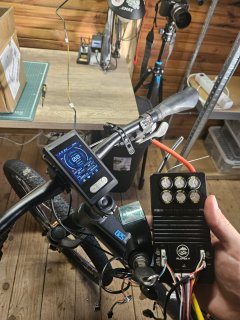
5.jpg6.jpg7.jpg

At this point, I didn’t have anything else. The motor was on the way, and I knew that I needed to reinforce the dropouts so the frame wouldn’t crack. I took some pictures of the frame, which I imported into Fusion 360. After scaling the picture, I spent some time designing a pair of torque arms. At this point, I realized that this is probably the worst frame for a hub motor, but in the end, I got it sorted out.
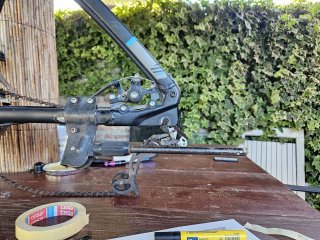
8.jpg

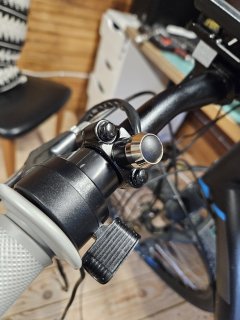
I got a Surron Throttle from Aliexpress, and here I was test-fitting everything on the handlebars. I also got a thumb-style throttle, which I mounted on the left side, and it is used for regenerative braking.
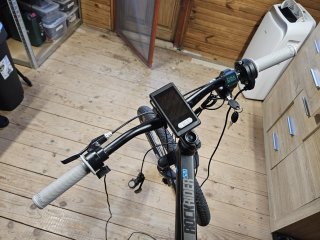
9.jpg

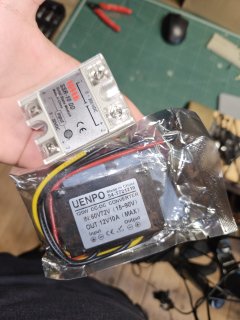
A few more parts came from Ali. I got a push-button switch for the lights, a 12V buck converter, and I also got a solid-state relay, which I planned to use for switching the lights, but that thing blew up the second I connected it to my battery.
10.jpg11.jpg12.jpg

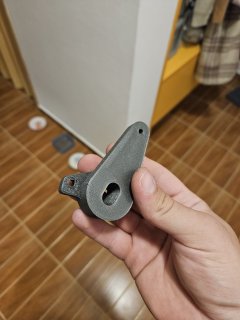
Here is a 3D printed prototype of the first torque arm design. The thing was way too thick to have any thread on the axle left, and I was designing around an M14 axle while the motor actually had an M16, but all of that was fixed later. I had to make these torque arms a little thicker than usual because I can machine aluminum only, and it is much softer than steel.
13.jpg

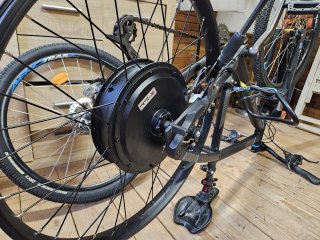
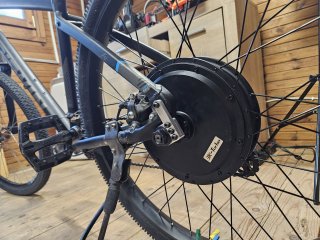
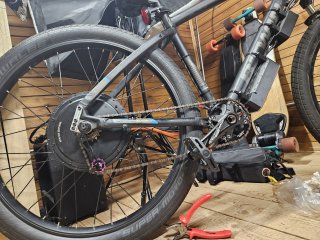
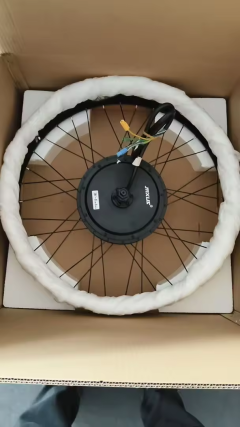
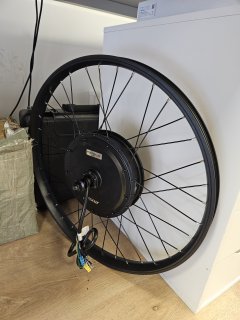
The motor has arrived! It’s an MXUS 3K Turbo. 135mm dropout to fit my frame. I got a 3T version, not knowing that this motor has too high a KV value for my 27.5-inch wheels. I didn’t know about the different winding versions at this point, and the seller didn’t ask me about the turn count, so I was stuck with the 3-turn version. I was a bit underwhelmed with the power when I installed it, but increasing the phase amp setting helped.
14.jpg

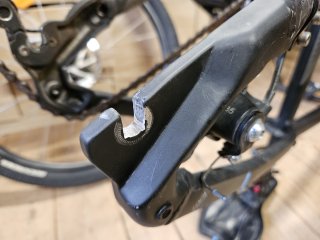
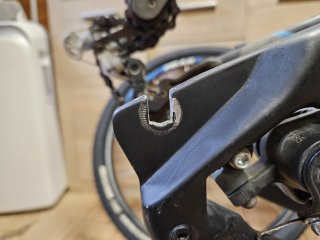
Of course, I couldn’t wait any longer, so I installed it on the bike the same day. I had to file the dropouts a little bit to make the motor fit.15.jpg16.jpg
17.jpg

I 3D printed another set of torque arms to confirm everything fits before I machine them. The design is a bit complicated, but I had to make it this way because of the frame's geometry.
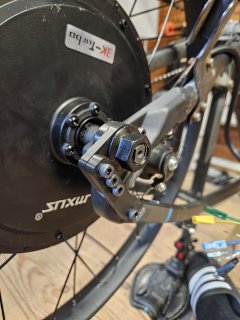
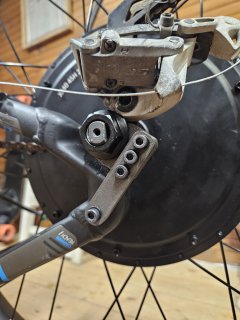
18.jpg19.jpg


Continuing the build in the comments since I can't upload more pics here.
 
Last edited:
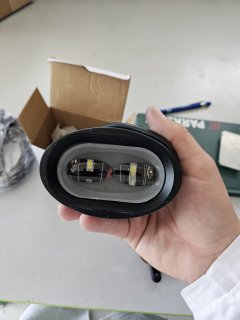
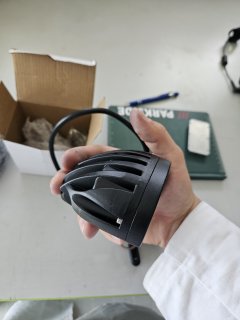
Meanwhile, the front light arrived. It looks sick!
20.jpg21.jpg

Milled the torque arms!
22.jpg23.jpg

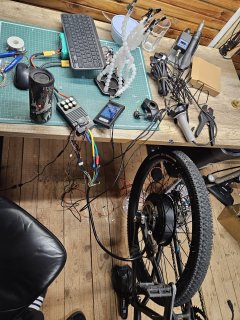
Then I did some test runs with my esk8 10s battery on the bench.
24.jpg

Got everything mounted to the bike so I can try it out. I was lucky that I had 2 10S packs on the side, so I just connected them in series so I could ride the bike until I finished everything. I used 12 AWG wires and XT90 anti-spark connectors. The XT90 antispark will give you around 10 connections before the resistor inside blows up. I was smelling something weird for a few days after plugging the battery in, and then I realized it’s the precharge resistor inside the connector. These motor controllers have huge capacitors, and they draw huge currents when you first connect them. I later solved this issue with a separate preload line with a 10W ceramic resistor.
25.jpg

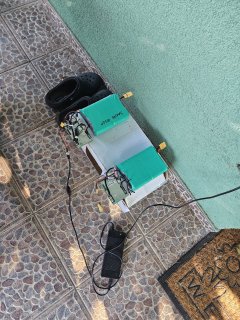
Current charging setup:

26.jpg

The bike was a blast to ride. I got the two packs inside my backpack, and I used to ride it to work like this for weeks.27.jpg
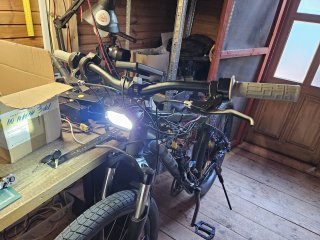
I still didn’t have the lights on the bike at this point, so I took some measurements and designed a 3D printed headset spacer to hold the light in place.
28.jpg29.jpg

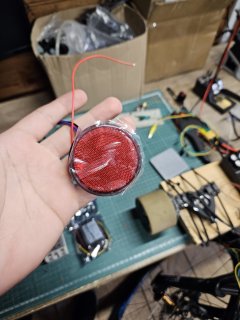
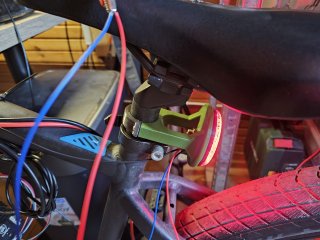
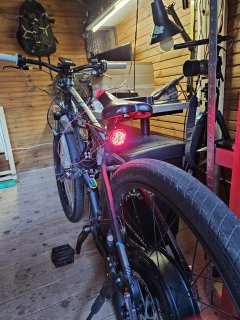
I did a similar thing with the rear light, which I mounted to the seatpost. I also got some new tires, which you can see in these pics. A colleague of mine told me that cheap tires explode on fast ebikes, so I got a pair of Schwalbe Super Moto X 27.530.jpg31.jpg

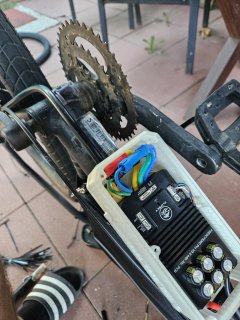
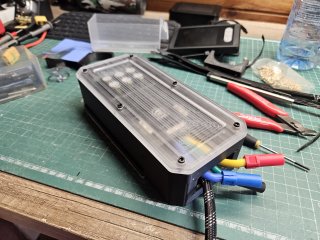
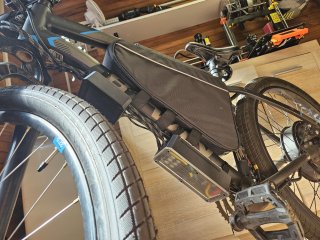
The battery bag arrived, so I did a test fit. I also designed and 3D printed an enclosure for my VESC controller.32.jpg33.jpg

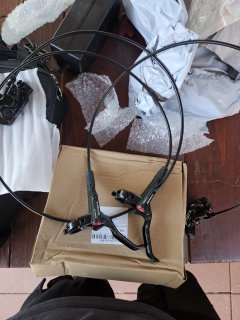
I also got the brakes. The cheapest 4-piston brakes I found on Aliexpress, and they look sick, but unfortunately, they sent me two right brake handles, so I had to mount the rear one upside down.34.jpg

A few pics of the bike in its current state.

35.jpg36.jpg

I got everything wired up…

37.jpg38.jpg
 
Last edited:
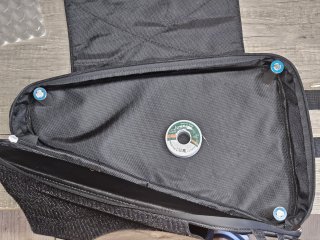
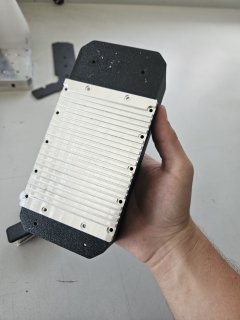
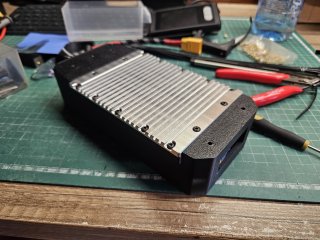
And then I printed the enclosure in black PETG with an acrylic cover and a rubber gasket to keep some of the water out. I also designed an aluminum heatsink that connects to the VESC directly.
39.jpg40.jpg41.jpg

And here are the new enclosures mounted to the frame. The small one holds the 12V buck converter for the lights. At this point, the last big thing to do was to build the battery… And put a chain! I didn’t have the chain on the bike at this point, and the pedals were always hitting my legs, which was terrible.

42.jpg43.jpg

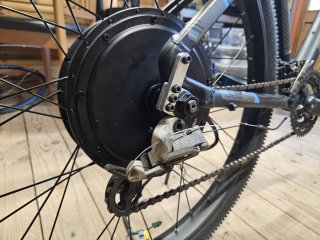
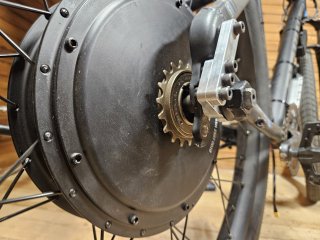
I got an 18T freewheel at a local bike shop and installed it on the hub. The current cranks situation was awful, but that got fixed too, later in the build.

44.jpg45.jpg

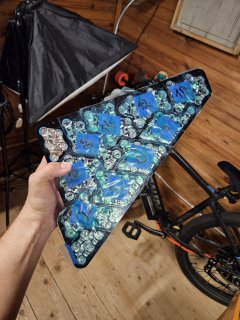
At this point, I didn’t even know how many cells I could fit in the bag, so I took some measurements and reference photos. Later on, I decided to go with a 20S5P 21700 config.
46.jpg

But until the battery was built, the charging situation still looked like this:47.jpg

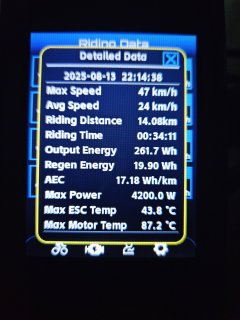
The Flipsky Display trip data is awesome.
48.jpg
 
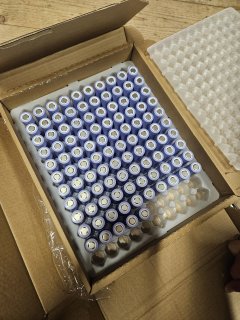
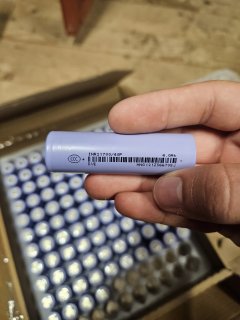
Then the battery cells arrived. I got 100 EVE 21700 cells. They are EVE INR21700-40P 4000mAh - 50A. I got them for 1.92 euros a cell from NKON.nl
http://nkon.nl
49.jpg50.jpg

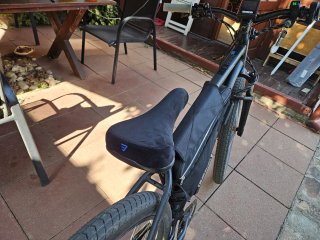
Also got a new seat.

51.jpg


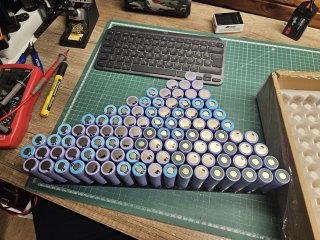
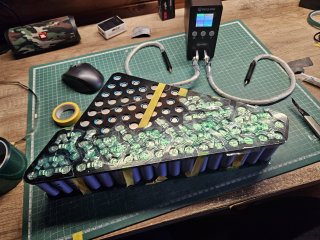
Battery build took way too long. I used more than 25 meters of nickel strips…52.jpg53.jpg

The cells were welded, so I was ready to install a BMS!
54.jpg

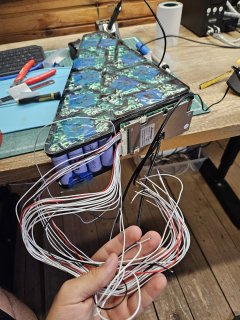
I got a JBD 80A BMS. It’s awesome, and I love the Bluetooth app. The only thing I would change is the current rating. At the time, I was thinking 80A would be plenty, but now I find myself pushing 100 battery amp peaks, so a 100A or 120A BMS would have been a better choice. Since my cells can give 50A per cell, the battery is good for 250A continuous, and at 72V, that’s 18kW. 55.jpg

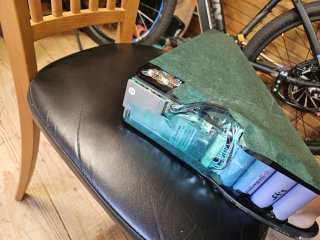
Got everything connected and wrapped in Kapton tape and fish paper. No fiberglass sheets, but the cells don’t have anything to short out on the sides, so it’s fine.

56.jpg57.jpg


I also put some construction foam on the sides to help with vibrations.58.jpg

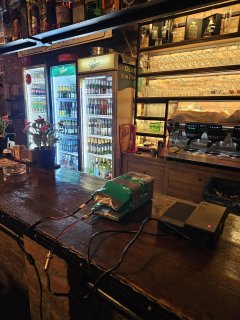
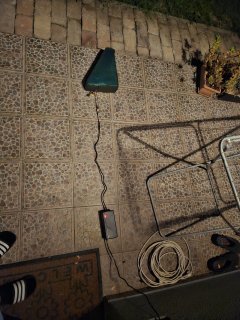
NEW CHARGING SITUATION:

59.jpg

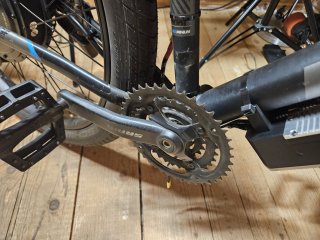
Got a cheap crankset from Ali with a single-speed chain tensioner.60.jpg

And that’s about it for now.
61.jpg
 
Very nice build!
A much faster Rockrider than mine with only a tuned (1,2kW) BBS02 mid drive.
Do you have a link to the headlight unit?
 
Nice build.
Most of the BMS can run double the current for a few seconds.
The JK BMS in my scooter is 200A rated, I am drawing up to 400A during acceleration.
If tested the JK BMS to death with an electronic load. 450A for 20 seconds is no problem, 500A for 10 seconds was still ok.
500A for 15 seconds and it turned off forever, without any burnt components inside.
There must be some kind of second level over current protection for long time abuse.

The ANT BMS used before, took double the rated current without any problems.

The JBD BMS in the childrens kettcar, can also do nearly double the rated current for a few seconds before it shuts off, but you have to stay under the hardware current limit which is also shown in the app.

Have you got a temperature sensor in the windings?
With the 3T winding you need a lot of phase current to get tourque, that will heat the windings and the phase wires.
 
Nice build.
Most of the BMS can run double the current for a few seconds.
The JK BMS in my scooter is 200A rated, I am drawing up to 400A during acceleration.
If tested the JK BMS to death with an electronic load. 450A for 20 seconds is no problem, 500A for 10 seconds was still ok.
500A for 15 seconds and it turned off forever, without any burnt components inside.
There must be some kind of second level over current protection for long time abuse.

The ANT BMS used before, took double the rated current without any problems.

The JBD BMS in the childrens kettcar, can also do nearly double the rated current for a few seconds before it shuts off, but you have to stay under the hardware current limit which is also shown in the app.

Have you got a temperature sensor in the windings?
With the 3T winding you need a lot of phase current to get tourque, that will heat the windings and the phase wires.
Yeah, I set my 80A BMS to 100A, but I would feel safer if the BMS was rated for more. I know it has a 120A peak.
I will have to increase my battery cable first. I'm currently on 12 AWG wires, and I think that's a bit thin.

My 3T does get hot! I installed Statorade, which helped, but it still overheats in around 10 minutes if I'm pushing it hard.
I set the maximum phase current to 200A, anything lower, and the torque is weak. I set the temperature cutoff to 90°C, which may be low, but I don't want to damage anything inside the hub.

I ordered a 5-turn version the other day, and hopefully this will fix my issue. With field weakening, inside a 27.5 wheel, it should give me 70 km/h, which is enough for me.
 
I have my temperature power reduction starting at 140°C cutting off at 160°C.
90°C for a motor winding is very conservative.

The 5 turn will definitly run a lot cooler.
 
I have my temperature power reduction starting at 140°C cutting off at 160°C.
90°C for a motor winding is very conservative.

The 5 turn will definitly run a lot cooler.
Okay, I didn't know I could go this far. The MXUS took a lot of effort to import from China, so I was being very careful :LOL:
I still have 5ml of Statorade left for the new motor, but I also heard some bad stuff about Statorade drying out...
I will definitely test the hub without SA first.
 
Very nice build!
A much faster Rockrider than mine with only a tuned (1,2kW) BBS02 mid drive.
Do you have a link to the headlight unit?

Links for the parts I used:
VESC Controller: https://s.click.aliexpress.com/e/_c4sO5Cx1
Surron Headlight: https://s.click.aliexpress.com/e/_c2u5iloJ
Tail light: https://s.click.aliexpress.com/e/_c359rYhN
Light Switch: https://s.click.aliexpress.com/e/_c3b5v3x5
12V Buck Converter: https://s.click.aliexpress.com/e/_c3GOFSHN
1.5KE91A TVS Diode: https://s.click.aliexpress.com/e/_c2xxa2Mj
(Adding this diode to the input of the buck fixed the sparking issue)
Crankset: https://s.click.aliexpress.com/e/_c4ONQlWF
Seatpost Clamp: https://s.click.aliexpress.com/e/_c3qXRW9N
Chain Tensioner: https://s.click.aliexpress.com/e/_c4FPn0Or
Brake Discs: https://s.click.aliexpress.com/e/_c3XKi5ET
Brake Caliper Adapter: https://s.click.aliexpress.com/e/_c4NQchkB
Hydraulic brakes: https://s.click.aliexpress.com/e/_c2wVcu47
XT90s Connector: https://s.click.aliexpress.com/e/_c4cr43F9
Orange Motor Cable Heatshrink (16mm): https://s.click.aliexpress.com/e/_c2xwMZj5
Waterproof Connectors: https://s.click.aliexpress.com/e/_c38Yv4HH
Braided Cable Sleeves: https://s.click.aliexpress.com/e/_c4WQNznd
XT150 Phase Wire Connector: https://s.click.aliexpress.com/e/_c2uYlIEJ
JBD BMS: https://s.click.aliexpress.com/e/_c4CyMax1
Insulation Fishpaper: https://s.click.aliexpress.com/e/_c4lshh1t
Kapton tape: https://s.click.aliexpress.com/e/_c35IZ4g7
72V 5A Charger: https://s.click.aliexpress.com/e/_c4UlDICT
Insulation stickers: https://s.click.aliexpress.com/e/_c3tEyAVd
High Current Wire: https://s.click.aliexpress.com/e/_c43c1V2x
Ignition Key Switch Display: https://s.click.aliexpress.com/e/_c3iXeN9t
Surron Throttle: https://s.click.aliexpress.com/e/_c3NLLJun
Regen Thumb Throttle: https://s.click.aliexpress.com/e/_c4pvbKiJ
 
Okay, I didn't know I could go this far. The MXUS took a lot of effort to import from China, so I was being very careful :LOL:
90C for long time and peaks to 140C is safe for every motor. I took my old 5kW QS260 to 160C and more with a SVMC72150 (measured 180C at the phase wires) and a year later I melted the phase wires with a Fardriver ND72680, feeding it with 18kW and 630pA during uphill tests.
 
90C for long time and peaks to 140C is safe for every motor. I took my old 5kW QS260 to 160C and more with a SVMC72150 (measured 180C at the phase wires) and a year later I melted the phase wires with a Fardriver ND72680, feeding it with 18kW and 630pA during uphill tests.
Interesting... I got the motor to 200 phase amps by slowly increasing it over a longer period of time. I didn't really want to push it over 200 because I don't know how high of a peak it can handle before one of the strands melts. I know that the temperature sensor is not directly on the windings, and it might take some time for the heat to get to it. At 200 phase amps, I was hitting 8000W peaks.

I also heard about the "copper fill" which I don't fully understand. Is it the amount of copper inside the hub? I heard that higher turn motors can't take such high current as a 3T, but I also saw some people pushing 4T and 5T over 300 amp phase. I'll definitely let you know how the 5-turn hub performs in a big wheel when it arrives.
 
You may want to round out the sharp corners left after your dropout filing. The sharp corners are stress risers, inviting it to crack there.
15-jpg.382984


250px-Cracking_in_concrete_due_to_stress_concentration.jpg

"The sharp corner at the brick has acted as a stress concentrator within the concrete causing it to crack"
 
You may want to round out the sharp corners left after your dropout filing. The sharp corners are stress risers, inviting it to crack there.
15-jpg.382984


250px-Cracking_in_concrete_due_to_stress_concentration.jpg

"The sharp corner at the brick has acted as a stress concentrator within the concrete causing it to crack"
Noted. I’ll take a second look when the new motor arrives. Thanks for the tip
 
Then the battery cells arrived. I got 100 EVE 21700 cells. They are EVE INR21700-40P 4000mAh - 50A. I got them for 1.92 euros a cell from NKON.nl
http://nkon.nl
View attachment 383026View attachment 383027

Also got a new seat.

View attachment 383028


Battery build took way too long. I used more than 25 meters of nickel strips…View attachment 383029View attachment 383030

The cells were welded, so I was ready to install a BMS!
View attachment 383031

I got a JBD 80A BMS. It’s awesome, and I love the Bluetooth app. The only thing I would change is the current rating. At the time, I was thinking 80A would be plenty, but now I find myself pushing 100 battery amp peaks, so a 100A or 120A BMS would have been a better choice. Since my cells can give 50A per cell, the battery is good for 250A continuous, and at 72V, that’s 18kW. View attachment 383032

Got everything connected and wrapped in Kapton tape and fish paper. No fiberglass sheets, but the cells don’t have anything to short out on the sides, so it’s fine.

View attachment 383033View attachment 383034


I also put some construction foam on the sides to help with vibrations.View attachment 383035

NEW CHARGING SITUATION:

View attachment 383036

Got a cheap crankset from Ali with a single-speed chain tensioner.View attachment 383037

And that’s about it for now.
View attachment 383038
How do you Rate the vesc I am planning a 12kw 17kw peak mtb conversion and am torn between using a fardriver nd72680 or a spintend vesc I have heard good things about vescs but I am more familiar with fardrivers. What has been your experience?
 
How do you Rate the vesc I am planning a 12kw 17kw peak mtb conversion and am torn between using a fardriver nd72680 or a spintend vesc I have heard good things about vescs but I am more familiar with fardrivers. What has been your experience?
Well, I started in maybe 2016, with electric skateboards. The VESC type controller is the only one I have ever used, and my experience is good. I only used Flipsky controllers because they were the most affordable.

The controller I got back in 2016 for my electric skateboard is the FLIPSKY Dual FSESC 4.20 Plus, and it's still on the board, working. I have heard some bad stuff about Flipsky's build quality, and last year I actually had to fix something on this VESC. It has a built-in antispark switch, which, after using it for more than 5 years, has given up. It was stuck in the ON position, and after some troubleshooting, I found out that one of the MOSFETs was blown. Since nothing else was damaged, I checked the MOSFET type and ordered new ones for a few euros. Replaced them with a hot air station, and now everything works. For 5 years, everything worked perfectly, so I'd say it's definitely worth it.

The one I have for the bike is the FLIPSKY 75200 Pro V2.0, which has a 150A rating at 75V. I was not sure if this was battery current or phase current, so I sent them an email to check. They said it's the motor current, which I though is a bit low. So, I totally ignored the warning and bumped it up to 250A phase, and after an hour of riding, the controller doesn't even hit 40C, so I bet you could push it even more. I'm currently running 8000W peaks and the controller handles it fine...

For a 12kW, 17kW peak, you would definitely need something more powerful. I don't know what voltage you are running, but the 75200 would definitely be too weak. Maybe check out the Flipsky FSESC 110300 or something even more powerful.

With these controllers, there is also a big learning curve because you have to tune them to get the most power you can. There are also not many good display options, but the Flipsky TFT works fine for me. The Bluetooth app is super handy, and there's a ton of data you can monitor in the real-time data app.
 
I had a ND72680 in my 180kg heavy scooter, the Fardriver can output up to 680A phase current and over 300A line current, not only for a few seconds. The heat sink looks a bit small for longtime use of all that power. I added a temperature controlled fan in my scooter. Driving 60km with 100kph on the motorway I never saw more the 60C in the app without the fan. Only on hottest summer days driving in the city with a lot stop and go I made it to turn on the fan, which kicks in when the heat sink gets over 55C.
I think you will not be able to overheat it on an MTB with 1/3 the weight and 1/3 of the battery.

The new ND961000, I have, uses the same heatsink size. Probably they reduced losses.
 
Interesting... I got the motor to 200 phase amps by slowly increasing it over a longer period of time. I didn't really want to push it over 200 because I don't know how high of a peak it can handle before one of the strands melts. I know that the temperature sensor is not directly on the windings, and it might take some time for the heat to get to it. At 200 phase amps, I was hitting 8000W peaks.

I also heard about the "copper fill" which I don't fully understand. Is it the amount of copper inside the hub? I heard that higher turn motors can't take such high current as a 3T, but I also saw some people pushing 4T and 5T over 300 amp phase. I'll definitely let you know how the 5-turn hub performs in a big wheel when it arrives.
Job well done! Nice build.
Did not know about copper fill when my trike was built. Ordered a 7T leafmotor and running it on 72V. Learned later different windings have different copper fill. Better to stick with the most fill. It is not a given that more turns are less copper. Some turn counts have more and some less. If I replace my leafmotor it will be with a 6T. Over all tunning with windings is great.
 
Job well done! Nice build.
Did not know about copper fill when my trike was built. Ordered a 7T leafmotor and running it on 72V. Learned later different windings have different copper fill. Better to stick with the most fill. It is not a given that more turns are less copper. Some turn counts have more and some less. If I replace my leafmotor it will be with a 6T. Over all tunning with windings is great.
My 5T MXUS was shipped today, can't wait to try it out :LOL:
 
Can you replace the core without doing the whole motor/unlacing it?
Yeah, sure, but I got the motor with a rim already installed, so I'll have two complete wheels, which I can just swap. The luxury of having another set of spokes with a rim + installation and balancing cost me only $15 extra haha
1768642495905.png
 
You must have great roads if you're willing to have a 70 km/h top speed without full suspension.

I like this build. You could make it even more stealthy with a rear wheel disc cover to hide the motor(with strategically placed vents for cooling), and then hide the electronics in panniers with a similar appearance to what the battery is hidden in. Wrap the exposed orange wiring in electrical tape to make it blend in with the frame. This way, it will look more like a normal bicycle and help you avoid unwanted police attention. I plan on doing a stealth build with 10 kW someday, and would like for it to look as unmotorized as possible.
 
You must have great roads if you're willing to have a 70 km/h top speed without full suspension.

I like this build. You could make it even more stealthy with a rear wheel disc cover to hide the motor(with strategically placed vents for cooling), and then hide the electronics in panniers with a similar appearance to what the battery is hidden in. Wrap the exposed orange wiring in electrical tape to make it blend in with the frame. This way, it will look more like a normal bicycle and help you avoid unwanted police attention. I plan on doing a stealth build with 10 kW someday, and would like for it to look as unmotorized as possible.
I feel you Toecutter, would like to do over 35 some day. My 20" front tires almost killed me when hitting a large size pot hole.
The only lace wheel i've used was one laced from Grin that I had to pay a fee for plus the rim. So $15 is a good deal if its a keeper.
 
Back
Top