amberwolf said:
RTIII said:
Drill a hole where you want the axle to end up and then cut slots to the inside tangent...
That would be the preferred method, but:
In steel like this, I don't have bits that can drill thru it (more than once per bit, anyway). Thin steel (or really soft, like I can bend with hand tools) I can do, with oil and time, on the little drill press. But not this stuff.
I work with stuff like this all the time, as you can see in my various threads. ... I make a lot of stuff out of steel, far beyond what I publish here. For a simple and very recent example, on Sunday I fabricated a special 4" across the flats end wrench out of what was laying around, including some really good steel. WHY make a wrench you can just buy? Well, you can't buy a wrench like I made as a standard, off the shelf product, because I curved the handle to match the inside diameter of a 55 gallon drum! The steel I made the handle out of was some pretty awesome stuff! And, the 1/2" square tubing I made the flats out of was no slouch either, though, admittedly, I didn't need any holes in these pieces.
Here are the two new plastic drums I fitted Sunday (yesterday) to my Stuska water-brake engine dynamometer - replacing two steel drums because I was just sick and tired of having to fix all the damned leaks caused by rust:

And here's a spare fitting that needed the special wrench and the wrench, sitting on top of one of the new barrels:

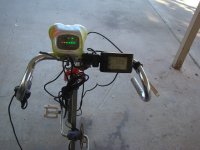
I'll BRIEFLY point out that when I did the recent kick-stand work on my San Rafael, I had to use steel virtually identical to yours, and bored two M10 clearance holes in identically thick stock - no problem:
... So, when I hear of your difficulty, I am reminded of a conversation I had with a close friend who happens to be a machinist of many decades, and he related a story where he was having trouble with another vendor making a part to his specifications in their CNC milling machine. In the conversations with them, they made a complaint much like yours - that it was costing them a new bit roughly per hole of a particular size in a particular piece of steel. Incredulous, but not wanting to alienate his vendor, he asked a few questions and It became clear to my friend that even though they have a business that makes stuff using a CNC four or five axis milling machine, they had somehow not been aware of the importance of not turning a drill bit too fast! The issue was that they were spinning the bit at maximum speed - because the material was hard (!!) when what was needed was spinning it slowly instead! Doah! They then slowed it down to something like 150 RPM (I don't recall exactly what he said, but it was fairly slow) and now they got a great many holes out of their bit and were a bit embarrassed - if you'll pardon the pun! :lol: Problem solved!
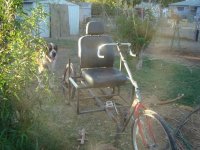
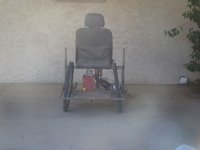
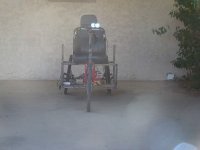
Try slowing it WAY down. High speed is almost never helpful. I saw where you got that metal - a commercial office chair; I can tell you a standard "HSS" bit should have cut through it like butter - presuming a sharp bit, turned slowly with only modest pressure on the drill handle. Choose a speed where the most material is coming out - that will likely be about the best speed. And as for pressure, don't push too hard - it dulls the bit and does NOT help! (Note, once a bit is already dull, pushing hard CAN help, so, how hard to push needs to incorporate into it how dull the bit may be.) Also, try and avoid as best you can letting the drill bit hit a surface after punching through - that dulls them, too. (You know, like when you're drilling through a bit of tubing or something close to another part.) And, finally, buy packs of 5 or 10 or so 1/4" and smaller bits in bulk - they're dirt cheap. I just bought 10 1/4" HSS bits at the local Harbor Freight for less than $5 - and start your hole with the small bit. This keeps the cutting tips of your more expensive bits sharp because you're doing the punch through with a cheap throw-away, and only using the outer edges for cutting to simply enlargen an existing bore!
When to use and not use "cutting fluid" is a bit of an art I have not yet mastered. The only thing I'm sure of is that it's required when drilling through - or milling - aluminum and other very soft materials (softer than your cutting tools) because otherwise the material gums up the cutting tool and causes tearing. Generally, I avoid it for steels and only try it to see if it can help for particularly difficult situations - and even then, I'm quick to remove ALL of it if it doesn't work out.
amberwolf said:
So what I do for slots like this is to cut them with the angle grinder cutoff wheels, then use well-used grinding wheels with rounded edges to smooth out the end to finish the slot, and round it to the axle curve.
I can then recommend: cut your slot short of where you want it and don't over-cut the depth. Then use your grinding wheel or whatever to make the surface that defines the depth. A sharp round bastard file can make quick work of finishing off a slot like you made for this trike. This technique also avoids the stress-riser problem because by not over-shooting, there's no stress-riser "built in." (Large radius curves - the larger the better - are the best way to avoid stress cracks caused due to material shape (as opposed to due to brittleness or something like that).
amberwolf said:
RTIII said:
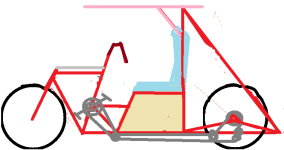
That way, you haven't created a stress-riser and a pre-started crack, as is clearly visible in your other images.
I looked thru all the images of the dropouts and don't see this. Which one is it in, so I can fix it?
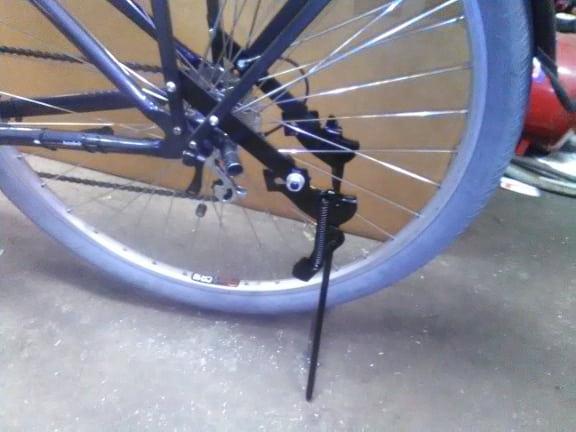
Looks to me like all of them show it, but I'm not saying they're already stress cracked, only that you've pre-started where the stress cracks will come from. Here's one:
Those two slots that over-shoot will eventually be where cracks start - most likely, in this image, the lower one first!
amberwolf said:
FWIW, I've used this method for all of the dropouts I've made, including those on CrazyBike2, which have seen loads high enough to break the frame, and have not exhibited any failures. (might just be lucky, but so far never seen any fractures in the dropouts).
My guess is that your having avoided stress cracks in those locations is simply because the thickness of the materials alone helps delay their onset. But with long-enough duration of those stresses, they'll come. It MIGHT just be that they'll come after we're all long dead and the bike has long since rotted away 150 years from now, but... should it stay in service long enough, those are the kinds of things you want to avoid!
")
amberwolf said:
In various projects mobile and otherwise, I do get stress fracture failures in other areas, sometimes in tubing that's been drilled or cut, and sometimes in the middle of stuff that has nothing I've done to it during building (but could have manufacturing defects, or just see too high a stress at that point).
WAY back when, when I was actively pursuing a carrier in aerospace engineering, I got a lot of training in stress cracks and failures. When you DO find a crack, the best way to stop it is to drill a small-ish hole at the end of the crack to stop its propagation and then weld (welds will NOT stop cracks without drilling first, so we were taught - something to do with "crystal alignment"), or "sister" a patch. As for cracks that come along where you don't think you did anything, you probably did, especially in YOUR work: you probably put loads on the part that the original engineer never envisioned and right where the cracks appear is where there's some change you didn't notice happens, often a change in the shape (thinning point of a tube or a crimped section or bend, etc), but it could also be to treatment of some kind such as the extent of the heat range of a weld done which changed the brittleness of the metal - or some other similar process.
Now, to something you often talk about in your threads: electrical efficiency. Today I went 7 miles with my San Rafael, over virtually flat ground (doubt there was 10' in elevation change over any of it - just curbs and the like), at about 10' above sea level, towing my usual trailer, one way empty and the other way loaded with around 100 lbs, not quite but almost entirely using the throttle and with me putting in very little energy due to my bum knee. I started with a freshly charged battery and recharged when I got back. Traffic was fairly light but there were lots of stops and I went as fast as I could. I was shocked I got it up to around 24 MPH, though most of the trip was peaking more like 20 and ... I forgot to capture the average, but it's still in the bike if I go look! AND... It took 3.41 Ah to do those 7 miles.
Here's the charger following the top-up after the trip:

Oh, gosh, there's a bit drill bit in this image - take care of your bits, keep them sharp, and they'll take care of you!