Battery Backpack and Retracting Power Lead Project

Awesome use of your 3D printer! :D
Have you got much experience with or background in CAD ? That's my major stumbling block in the whole 3D printing world. I've made up a few drawings to print but I typically spend 2 hours to draw up something simple that I could otherwise make in 10 minutes with a hand tools. Complex stuff is another story of course - I probably just need to master the software better. Have you tried acetone vapour for a smoother finish ? Full throttle had good results with the parts he had printed over in the GNG drive thread.

I agree with Clay, if you could mount that to the underside of your backpack and have it retract all back into there that'd be better that something that dangles - if that is indeed how it is now.
 
Was loving the packs but my jaw just dropped at the retractor.

After a few rides with batteries in a backpack and not being able to stand up due to a short cord (which got in the way of my suspension/spinning parts if I made it longer), you're certainly heading in the right direction.

Impressive stuff - thanks for sharing it.
 
Some skills there for sure. I was wandering all along why make a battery case for a back pack if you could make something for the frame that just clips in and out when needed?. There would be no need for complex cable retraction mechanism, you could have few beers and a snack in your back pack?
 
flyinmonkie said:
I'm guessing the cord pulls out of both ends just like the mouse cord. That would leave the whole mechanism to dangle in the middle between the rider and the bike.

You are correct sir. The spring that's in this prototype isn't strong enough to test it on the bike, but I'm hoping that by reducing the size/mass as much as possible ,and by it being under constant tension, it won't flop about noticeably. But, I'll report back when I get the next iteration up and running.

flyinmonkie said:
Would it be better to have it just pull off one end and have the reel in the pack or mounted on the bike?

On the pack is a no go, as I've proved with the bungee tube apparatus above. When the feed mechanism is on the pack, inherently the line will drag across the rider's body at some point. This could possibly be avoided by mounting it to a belt, but that further complicates an already complex solution.

Mounting it to the underside of the bike seat, like in a seat bag, though is another possibility. The problem with feeding the power cord out of only one side of a reel retractor is that the end that is connected to the hub must spin freely somehow. I looked inside a spring-loaded extension cord retractor I've got in the garage and they solved this problem by using a clock-spring type mechanism where the power leads are attached to a spring-loaded contactor that slides against a copper ring. Similar to brushes in a DC motor. Going this route may end up being the best solution, but it will be the most complicated. I've got some ideas to try though.

But if the free-flopping of this version is within acceptable tolerances, I may just end up with this solution

flyinmonkie said:
I look forward to seeing version 2. What you have done so far is fantastic.

Clay

Thanks man, I appreciate the questions- helps me see things I might have overlooked.
 
Hyena said:
Awesome use of your 3D printer! :D
Have you got much experience with or background in CAD ? That's my major stumbling block in the whole 3D printing world. I've made up a few drawings to print but I typically spend 2 hours to draw up something simple that I could otherwise make in 10 minutes with a hand tools. Complex stuff is another story of course - I probably just need to master the software better.

Thanks man. I just started using sketchup back in January, still have tons to learn on it. Like you, when I'm working in the garage with hand tools (be it wood, metal or whatever) I usually have a design in mind and maybe a rough sketch, but it I usually let the design "organically evolve". That means I use all the screw-ups and act like I meant to have the part/piece/etc look and work it like it does 8)

Hyena said:
Have you tried acetone vapour for a smoother finish ? Full throttle had good results with the parts he had printed over in the GNG drive thread.

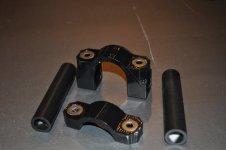
I haven't tried vapor yet, but I have dipped a few parts in an acetone bath and let them dry. It seems to (qualitatively) increase the strength- I think it helps bond the strands of ABS together int he outer shells. It leaves a very glossy finish when allowed to air dry. This is a clamp from another build. You can also see the top pulley mount on the bungee tube was dipped in the pics earlier in the thread.
new footpegs parts.JPG
 
Tinto said:
Was loving the packs but my jaw just dropped at the retractor.

After a few rides with batteries in a backpack and not being able to stand up due to a short cord (which got in the way of my suspension/spinning parts if I made it longer), you're certainly heading in the right direction.

Impressive stuff - thanks for sharing it.
Thanks Tinto, appreciate it. I know what you mean about the spinning bits and suspension interference.
 
agniusm said:
Some skills there for sure. I was wandering all along why make a battery case for a back pack if you could make something for the frame that just clips in and out when needed?. There would be no need for complex cable retraction mechanism, you could have few beers and a snack in your back pack?

Thanks man. The easiest answer to your question is "options". Being able to use backpack mounted power give's portabiltiy and can be used on any of the bikes I've got. I've got a bunch of different frames (and some non-ebike things that need juice) and some of them don't fit batteries well. With the battery tubes I'm using now, I'm working on some frame mounted options for a couple of my bikes though too- nothing beats a solid mid frame mounted pack.
 
I've been running into issues finding the right spring for this device; unfortunately, it's not something that's stocked on the average hardware store shelves. I ordered a few variations of the "constant-force springs" http://www.mcmaster.com/#constant-force-springs/=m6344d from mcmaster, but these are wound backward to what I needed. I've taken apart a dozen different key retractors, tape measures and dog leashes in search of the perfect spring, but nothing has fit the bill. I think the retractor spring from a lawn mower pull starter will fit the bill best, but I've only been able to find these for sale online and I need to put my hands on it first to see if it will work.

In the mean time, I'm using one of the mcmaster springs wound backward against itself and it seams to be working so far. Im using the 2# pull force spring in it right now, but I think the 4# spring will work a touch better. Mcmaster also sells strips of spring steel if I feel particulary adventurous- not sure it's worth it at this point.

So enough of my whining, here's some updated pics.

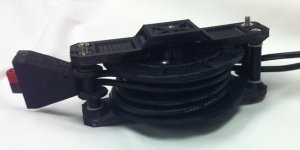
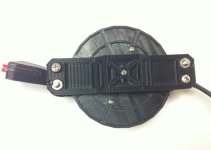
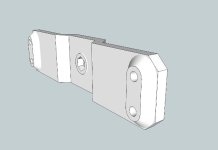
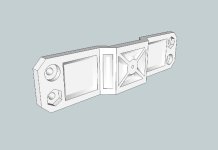
I've changed the design up a little and tried to make it as small as possible. I've moved the bearings to sit outside the hub and made a "bent" side plate to hold everything in place. Working well, I'm happy with the package.
side 1.jpg
side 2.jpg

To help guide the power lead there's a couple pulleys on each end. I may experiment with a couple regular old hardware store nylon bushings and see if it works a little smoother than these ABS variants.
View attachment 1

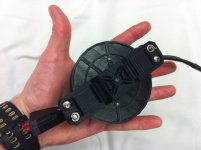
And to give some size perspective, here I'm holding it in my hand. It's not a huge device, but it's not exactly "invisible" either. It will flop around a bit on the bike, but I've not ridden with it yet. I'll report back when I do, maybe shoot a vid of the operation.
scale.jpg
 
Changed up the connectors to incorporate a 3rd magnet, but I haven't had a chance to put 'em into action yet.

Anderson Power Lead Connector 3 magnet 12g.jpg

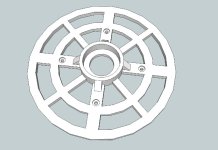
I've also changed the side plates of the reel itself to make them smooth inside and out

Cord Reel Bearing Plate 90mm od outboard 608 w cutouts.jpg

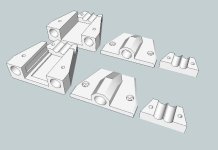
And the finalized design for the external brackets.

Cord Reel Mounting inside.jpg
Cord Reel Mounting outside.jpg

The biggest challenge I've run into regarding this retracting mechanism is sourcing a proper spring for inside the reel- I still haven't found the perfect one. As it sits, and as I've used it for the last month, I'm happy with the performance of the reel. It is smooth and only minimally invasive on the ride. The mechanism is under constant tension so it doesn't bang into the rider as often as I'd feared, but it's also not invisible. Ultimately, the best place for the batteries IMHO is on the bike, but this is turning out to be an adequate solution for certain situations.

I also have plans to break out the wife's sewing machine (need to watch some youtube "how to sew" vids first 8) ) and make a sleeker, form fitting fabric mount inside of a camel back for my main batteries. The plastic tubes are great from a durability/protection standpoint, but they are far larger than necessary and are to rigid in the current mount to be considered comfortable.

I'll update when I've got more info- may be a while, too many projects...
 
Bumping this thread up because I had a stupendous thought about the validity of battery backpacks.

Here it is: Many devices run on 36-48 volts. Bikes, skateboards, yard equipment, home improvement devices, housekeeping devices, etc. Instead of relying on separate batteries for each device, you could tether one battery backpack to all your devices just as long as the voltages are roundabout similar. :wink:
 
Not really supposing anything :| Just a thought bubble. :wink:


You going to make this into production for us to purchase with our hard earned moolah? :twisted:

I'm thinking of a 10mile skateboard run. :twisted: :twisted: :twisted:
 
hhaha.. I can't really remember where I was going with that, but I think I was hoping you were going to come out with a range of e-goodies like Makita / Bosch / Ryobi interchangable 48V power skateboards, ebikes and mini cars.. :twisted:
 
Wonderful project! this makes me think there is a market for a triangle battery pack kit. All of the flat surfaces would be sourced locally (1/4-inch plywood, fiberboard, aluminum sheet), and cut to shape by the builder. I understand the angles on the corners of the triangle packs would be different for the variety of frames, but that's the beauty of 3D printing. Someone can order a 90-degree corner, a 60 and a 30, or...a 90/50/40, etc

Also, 3D tubing clamps...

Only the edges and end-pieces are the parts that would be 3D plastic. Lined with holes so self-tapping chamfer-head screws can be used. Here is an example of the shape I mean:

http://endless-sphere.com/forums/viewtopic.php?f=28&t=30457
file.php

file.php
 
100mm square is a standard. Many end caps exist.
Example: http://www.rgstech.co.uk/categories/end-caps/square/imperial-sizes/100mm-x-100mm-square-plastic-end-cap
 
I'd like to get a 3d printer to customize my bike too.

Do you think this model would be good?
http://www.ebay.fr/itm/3D-Printer-with-2-Extruders-Based-on-MakerBot-Replicator-Better-than-Reprap-/121123144570?pt=UK_CamerasPhoto_Printers_Printers_JN&hash=item1c3380837a
 
Back
Top