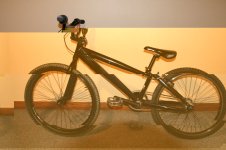
Now comes the interesting bit. We made
fiberglass side panels that not only tidyed everything up but also holds the batteries and bms in place. I haven't seen this type of mounting used on any other builds to date, at least not the ones I've had a look at. There are two piceces, they confirm perfectly to the frame and just clamp on with 2 (better 3) bolts. Everything is just squished together inside and can't move.
I guess the reason it's not done or is uncommon is that it appears to be hard to make a mould the exact shape of the bike frame and batteries. Well the way we did it may be an example of bad fiberglass fabrication, but it is quick and easy and worked pretty well!
Here's how it goes:
We had the perfect mould right there alreay, what could be better than the frame itself, and what better indicator of battery pack size than the battery pack itself!
Step 1: Lie the frame and it's eventaly contents (battery pack) down on a table and put shims under the frame so the battery pack is centered. Put cling film (gladwrap in NZ) over everything.
Step 2: Next to make the mould look a nice shape go and mix up a big batch of play-doh!

Yup you read that right, a great cheap, dense maliable thing to make your mould out of.
Step 3: Lay out and mould the playdoh over the frame and battery pack until you have the shape you are looking for. Play-doh is very easy to work with, even kids can do it!
Remember to allow raised areas for things like cable entrance holes, brake cables etc. Once you have the shape you want put another layer of gladwrap over the top and make sure everything is nice smooth. Obviously It isn't a hard mould, in fact it is really soft, so you're not going to be making top quality fiberglass with it (you'll have to put on a few more layers than if you were doing it with a propper mold), but it is easy and painless (and kinda reminicent of ones childhood
 Step 4:
 Next cut pieces of your favourite composite material (fiberglass/carbonfiber - I used 3-4 layers of 200g woven fiberglass cloth) to a bit bigger than the size you need.

By the way, don't be put off trying this fiberglass stuff just because you've never done it before, this was only my second time doing anything with it. big kit )I just bought a fiberglass kit from a boat shop for about US$60 and gave it a go. It is really just like adults pape mache!
Step 5: Basically, just mix up some epoxy don a gasmask and rubber gloves and carefully lay up your side cover, one layer at a time making sure that each layer is well wetted with epoxy. I found it easiest to spread the epoxy around just using my hands (with silicon gloves on) It only takes about 30mins. Make sure the windows are open and wear a propper gas mask, this stuff can really make you light headed!
 Step 6:
Obviously with this molding technique you can only do one side at a time, but you can even reuse the play-doh. The gladwrap under the fiberglass will inevitably become stuck to the inside, but that doesn't matter because no one sees that bit!

 Step 7:
 Leave to cure for 48 hrs and then trim, sand and admire your handywork.
Step 8:(Optional) You may want to heat cure the panels it in a large cardboard box lined with aluminium foil and heated by lightbulbs - a makeshift low temp (100-120deg C) oven for about 12 hours if you want good heat resistance and added stiffness, but for most applications room temp curing should be ok. If you want to heat cure the part, you just need to raise the temp slowly over a period of a couple of hours, eg. start with one bulb on and the box open, then after half an hour close the box, after another half hour turn another bulb on, half an hour later the third bulb goes on and then after another half hour insulate the box with a towel. (A multimeter temp probe is handy) Leave it for 9-12 hours, then reverse the process to cool it down again. (you'll need to do this somewhere where the smell of hot epoxy doesn't bother anyone! Believe me, you don't use the oven in your kitchen!)
Basically with heat curing fiberglass the deal is that it'll start to get softish at about 30deg C higher than the temp at which it was cured at, so if you don't intend having hot batteries or using it in the desert, then room temp curing should be ok, but heat curing seems to make the panels a bit stiffer though, which is a good thing. You'll need to sand the panels again after heat curing because somehow the grain of the fiberglass cloth shows through more afterwards.
Step 9 : Drill any holes you require in the panels eg. charger sockets, LED's, switches etc.
Step 10: Paint the panels. Definately only do this after heat treatment (if you choose the heat treatment option) as heat treatment will change the surface of the fiberglass. I found that epoxy spraypaint works pretty well on fiberglass.
Right so that's the panels done, now all that was required was just to mount everything in the frame and keep our fingers crossed that the spokes would turn up in time.