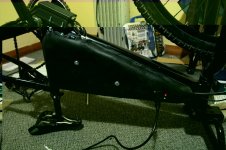
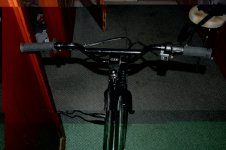
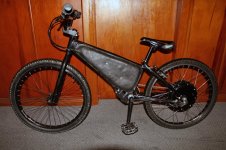
E-BMX built in a week

keyne

100 W
Joined
May 18, 2009
Messages
215
Location
New Zealand
I've been skulking around this forum for quite a while, I've built three electric bikes before, two of them have come and gone and been canabalised, as they often seem to. This fourth e-bike is one I built with a friend in a great hurry (a week) and is the first one I've documented. I have a fifth on the go (it has been for many months) I will post about it in due course.

My friend works for the local polytechnic and runs a sustainable housing program. They had planned a big road trip around part of the country to promote sustainable living and things associated with it and he really wanted to take an electric bike with him to show off. Long story short, I helped him to choose what to order and did so well in advance but a week before he was due to leave he had most of the parts, but hadn't done anything about actually constructing a bike. So I stepped in and got things rolling!
First problem - no bike and most importantly, no spokes! You'd think that not having a bike would be more of a concern, but I'm pretty sure there is nowhere to get spokes cut locally, so we'd have to order some in and time was tight!

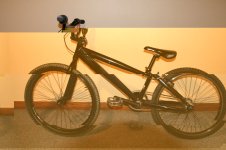
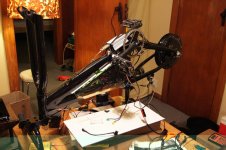
On a local secondhand trading website (New Zealand's Ebay equivalent) I found an auction for a BMX locally. After some shady dealing I managed to shortcut the auction and we picked up the bike the next day for NZ$250 (US$190).
 

Attachments

  • ebmx_before.JPG
    ebmx_before.JPG
    60.8 KB · Views: 2,039
The first thing we did when we got it home was measure up and order spokes from ebikes.ca and request express priority shipping. With that underway we got stuck into the rest.
2_parts.jpgparts.jpg
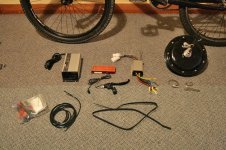
These are the parts we had:
Bike - Local secondhand auction site (effectively ebay/craigslist)
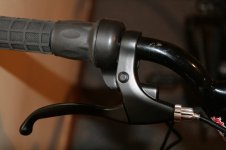
Throttle - ebikes.ca
Ebrake - ebikes.ca
Batteries - 48x A123 cells from cellman
Motor - Rear Nine Continent 9x7 direct drive from ebike-kit.com
BMS - Capacitive balancing 16s lifepo4 from evassemble.com
Controller - kelly KBS48121 from evassemble.com
Charger - 360W 48V (58.3V) charger from evassemble.com
Torque arm - ebike-kit.com
3_parts.jpg
 
The battery pack was going to be by far the most work (I'll be avoiding loose A123 cells in the future because Lipos and Headways are so much easier to build into packs). That and changing the annoying connectors that come on the kelly controller were the most work.

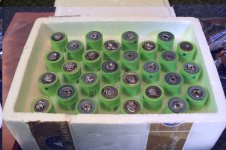
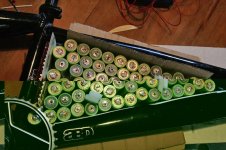
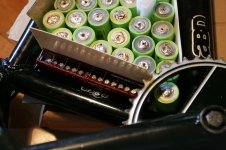
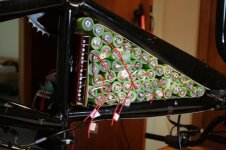
We set up the battery pack in a 16s 3p configuration, the 48 cells plus the BMS fitted absolutely perfectly in the triangle of the bike, another cell and there's no way it could have fitted.
Batteries and BMS position

4_batt_frame.jpg5_bms.jpg

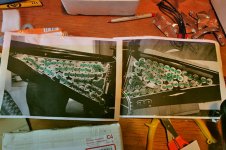
We carefully mapped out the cell configuration and took photos and printed them so we could have it on paper in front of us during construction.

6_map.jpg

We cafefully left two gaps (3 would have been better) for bolts to mount side panels with (I'll explain later).
We started with copper sheet, but decided that multiple strands of copper worked better. Then we carefully attached the BMS tap wires.

7_bms_wiring.jpg8_bms_wiring2.jpg

At this point we temporarily connected everything up to see that everything is working as expected.
9_motor_check.jpg


The three edges of the pack were lined with ice cream container lids and then everything was taped to death with insulation tape.

11_mould.jpg
 
We had to grind off the tabs where the brake cable used to be to make room for everything. We just used a single piece of gear cable outer.

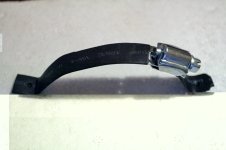
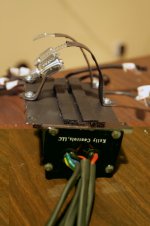
Mounting the controller by the bottom bracket was straightforward. Two large hose clamps some heat shrink and 4 bolts. (like the early 'journey' controllers from crystallite)
17_hose_clamp.jpg

We thought we'd go with the black theme so the controller got a coat of paint.
18_controller_attachment.jpg

The rear droput on the BMX was a horizontal 10mm dropout with 110mm spacing, so we had to file down flats on about 12mm of the each side of the axle. I had also previously put new fatter phase wires in the motor, so it should be good for all the controller could throw at it!
 
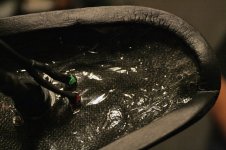
Now comes the interesting bit. We made fiberglass side panels that not only tidyed everything up but also holds the batteries and bms in place. I haven't seen this type of mounting used on any other builds to date, at least not the ones I've had a look at. There are two piceces, they confirm perfectly to the frame and just clamp on with 2 (better 3) bolts. Everything is just squished together inside and can't move.

I guess the reason it's not done or is uncommon is that it appears to be hard to make a mould the exact shape of the bike frame and batteries. Well the way we did it may be an example of bad fiberglass fabrication, but it is quick and easy and worked pretty well!

Here's how it goes:
We had the perfect mould right there alreay, what could be better than the frame itself, and what better indicator of battery pack size than the battery pack itself!
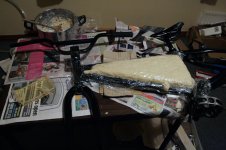
Step 1: Lie the frame and it's eventaly contents (battery pack) down on a table and put shims under the frame so the battery pack is centered. Put cling film (gladwrap in NZ) over everything.

Step 2: Next to make the mould look a nice shape go and mix up a big batch of play-doh! :D Yup you read that right, a great cheap, dense maliable thing to make your mould out of.

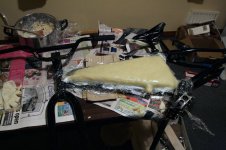
Step 3: Lay out and mould the playdoh over the frame and battery pack until you have the shape you are looking for. Play-doh is very easy to work with, even kids can do it! :) Remember to allow raised areas for things like cable entrance holes, brake cables etc. Once you have the shape you want put another layer of gladwrap over the top and make sure everything is nice smooth. Obviously It isn't a hard mould, in fact it is really soft, so you're not going to be making top quality fiberglass with it (you'll have to put on a few more layers than if you were doing it with a propper mold), but it is easy and painless (and kinda reminicent of ones childhood:)

13_playdoh_mold.jpg

Step 4: Next cut pieces of your favourite composite material (fiberglass/carbonfiber - I used 3-4 layers of 200g woven fiberglass cloth) to a bit bigger than the size you need.
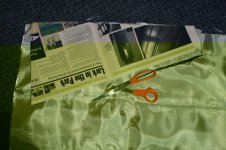
12_fiberglassPattern.jpg

By the way, don't be put off trying this fiberglass stuff just because you've never done it before, this was only my second time doing anything with it. big kit )I just bought a fiberglass kit from a boat shop for about US$60 and gave it a go. It is really just like adults pape mache!

Step 5: Basically, just mix up some epoxy don a gasmask and rubber gloves and carefully lay up your side cover, one layer at a time making sure that each layer is well wetted with epoxy. I found it easiest to spread the epoxy around just using my hands (with silicon gloves on) It only takes about 30mins. Make sure the windows are open and wear a propper gas mask, this stuff can really make you light headed!

14_rh_side_layup.jpg

Step 6:Obviously with this molding technique you can only do one side at a time, but you can even reuse the play-doh. The gladwrap under the fiberglass will inevitably become stuck to the inside, but that doesn't matter because no one sees that bit!
15_lhs_mold.jpg
16_lhs_layup.jpg
Step 7: Leave to cure for 48 hrs and then trim, sand and admire your handywork.

Step 8:(Optional) You may want to heat cure the panels it in a large cardboard box lined with aluminium foil and heated by lightbulbs - a makeshift low temp (100-120deg C) oven for about 12 hours if you want good heat resistance and added stiffness, but for most applications room temp curing should be ok. If you want to heat cure the part, you just need to raise the temp slowly over a period of a couple of hours, eg. start with one bulb on and the box open, then after half an hour close the box, after another half hour turn another bulb on, half an hour later the third bulb goes on and then after another half hour insulate the box with a towel. (A multimeter temp probe is handy) Leave it for 9-12 hours, then reverse the process to cool it down again. (you'll need to do this somewhere where the smell of hot epoxy doesn't bother anyone! Believe me, you don't use the oven in your kitchen!)
Basically with heat curing fiberglass the deal is that it'll start to get softish at about 30deg C higher than the temp at which it was cured at, so if you don't intend having hot batteries or using it in the desert, then room temp curing should be ok, but heat curing seems to make the panels a bit stiffer though, which is a good thing. You'll need to sand the panels again after heat curing because somehow the grain of the fiberglass cloth shows through more afterwards.

Step 9 : Drill any holes you require in the panels eg. charger sockets, LED's, switches etc.


Step 10: Paint the panels. Definately only do this after heat treatment (if you choose the heat treatment option) as heat treatment will change the surface of the fiberglass. I found that epoxy spraypaint works pretty well on fiberglass.
Right so that's the panels done, now all that was required was just to mount everything in the frame and keep our fingers crossed that the spokes would turn up in time.
 
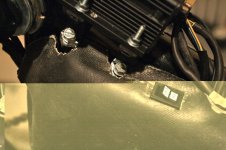
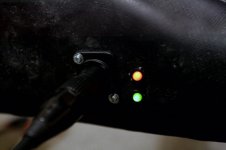
We chose to put two indicator LED's in the side of the panel by the charger plug, along with a discrete HI/LO switch down by the controller. We were in a bit of a hurry and had to modify the panels around the controller mounts.

22_status_leds.jpg27_hi_lo_switch.jpg26_charge_port.jpg

We also put adhesive open cell foam around the perimeter of the panels to make a good seal with the frame.

25_foam.jpg

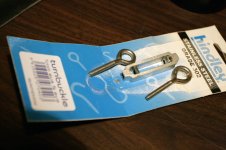
Now how to attach the pannels. We bought two turnbuckle of the correct lenght (shorter than the battery cells) and drilled out the thread, we then filed slots in them and added nuts.

20_turnbuckle.jpg

We then wrapped them in tape and put them in the pack. (Remember from earlier how we had left two gaps in the battery pack) Now with (some difficulty) Put bolts through the panels and thread them into the turnbuckles, and do them up tight. YOu may need to put some foam between the panel and the pack to ensure no movement inside.

On the afternoon of the day before the bike had to be done, a fedex van pulled up! Yes, the spokes arrived in the nick of time. We laced up the wheel (easy once you've done it a couple of times) and she was ready to go!

In our rush to finish the bike on time, we didn't have time to heat cure the fiberglass, nor did we get a chance to really sand it completely smooth, or put a top coat on. All the paint you see in the photos is just the black primer that we sanded back in parts. That's why it looks kind of strange. (That's my story and I'm sticking to it)

28_assembled_and_charging.jpg31_controls.jpg29_after_lhs.jpg

The plan is that my friend will take the bike apart on his trip and spray the panels when he has time to let them dry properly.

I only got to ride the bike twice before it was whisked away. We hadn't turned the settings on the controller up very far at that point, (I think it was only on about 30%) but it was still pretty fun!
Top speed is somewhere around 37km/hr (24" wheel with a 9x7 9C motor on 16s A123's) but it should be pretty grunty when he turns it up a bit. Don't know about the range yet, It's got around 365Whrs, so I'm guessing 18-20km is realistic.

In all it added about 10-12kg to the bike, so it was heavy, but still pretty easy to manouver.

I've got a video of my only daylight ride on the bike, nothing exciting, just going up and down the street. I'll post it later on.

Thanks for reading.
 
Great post! Thanks for adding so many pics. I think cell_man will be selling quite a few batteries soon, good to see an example of building a pack with his raw cells. I had thought he was spot-welding tabs to the cell-ends to make assembling a pack easier with a very hot soldering iron? At 3.2V per cell, 16S is 51-ish volts?

It looks like you have a "drip loop" on the wires going into the rear axle, but...I highly recommend some type of splash-cover over the controller, as the tiniest amount of moisture weaseling into it can cause expensive havoc at just the wrong moment.

For composite shaping filler, "Big Daddy" Roth used plaster with 75% vermiculite. Dried fast, shaped easy. Here's one recipe out of many after I Googled "DIY Playdoh", I just may have to try this.

http://www.thedailygreen.com/living-green/blogs/organic-parenting/DIY-playdough-55090801
 
Yes, good spotting with the rear axel wires. At this point the bike was 95% finished, but because of our tight timeline I didn't get any proper finished pics.

Yes the pack sits at about 52V. Cell man now has a spot welder, so I think his cells are easier to work with now, but these were from before he had the spot welder.

We ordered the "waterproof" option on the controller, but we do need to cap the serial port.

The play-doh thing is really unconventional and won't make strong/light fiberglass but it should be fine for most people's needs.
 
Back
Top