RadPowerBike RadCity Commuter

formula101 said:
20 mph uphill on a 7 percent grade is EXTREMELY fast for a bicycle. I typically manage 7 to 10 mph on a regular bicycle (no motor). 3x that speed is amazing.

Clearly, bicycle speeds are insufficient for your son. Get him a car or a motorcycle. The rad ain't cuttin' it. Common sense FTW.

20 mph is not fast for an ebike, even on a hill. Even 750W ebikes have triple to quadruple the power of an average cyclist. The purpose of an ebike is not to emulate a cyclist.

Not everyone wants a driver's license.
 
Alan B said:
formula101 said:
20 mph uphill on a 7 percent grade is EXTREMELY fast for a bicycle. I typically manage 7 to 10 mph on a regular bicycle (no motor). 3x that speed is amazing.

Clearly, bicycle speeds are insufficient for your son. Get him a car or a motorcycle. The rad ain't cuttin' it. Common sense FTW.

20 mph is not fast for an ebike, even on a hill. Even 750W ebikes have triple to quadruple the power of an average cyclist. The purpose of an ebike is not to emulate a cyclist.

Not everyone wants a driver's license.

So get a different bike. Duh. The rad clearly isn't up to the task.
 
Alan B said:
In summary, the new RadCity 2019 is a solid ebike at the price point. It has a great rack, decent fenders, a good kickstand. The brakes are adequate, the gearing is okay (aside from the skipping that needs to be fixed). The front spokes were a disaster tension wise out of the box - rattling loose. The 12 gauge spokes are a poor design choice, 14 or 13 would have been better (12 requires too much tension for a bicycle wheel). The 2 amp charger is too slow, if you work a 4 hour shift the battery will not be fully recharged for the return trip. The PAS delay is OK but the throttle delay is excessive. The connectors and cabling are good.

Seems like compared to other factory ebikes, the Rad bikes have decent build quality and features, and to modify it to make up for any shortfalls, doesn't require rebuilding the entire bike.
 
I think the RadCity is a good starting point, we'll see where it takes us. Hopefully a controller/display upgrade and maybe a small spare battery (like 52V 6AH) will get us there, or perhaps a battery upgrade (say 52V 17AH). I don't think any off the shelf class 2 ebike is going to be significantly better for this use-case.
 
formula101 said:
AHicks said:
formula101 said:
You're looking for a bike that you can ride at 20 to 25 mph, so you buy a class2 bike that tops out at 20 mph, then complain that the bike is too slow.

Yeah, the bike is not the problem here. smh.

You're inexperience is hanging out sir.

It tops out at 20 because it's limited electronically (that's how it got the Class II rating). The Bolton kit doesn't know Class II from a hole in the wall. It's just fine with removing that restriction, or any others RAD has in place.

The rad isn't really capable of anything beyond 24 mph even with a kit.

You're better off buying a class 3 instead such as a juiced bikes. They start at $1800 vs $1500 and have several significant upgrades:

-hydraulic brakes

-28 mph top speed (more like 30-32 mph real world)

-52 volt battery standard

-3 or 4 frame sizes

-3 colors (if that's your thing)

-torque sensor

-9 vs 7 speed drivetrain

-stock 52 tooth chainring

-ergo grips vs. undersized fake leather grips

-standard 1000 lumens headlight

-cadence sensor built in

The rad should never be on anyone's list for a fast bike.

Do you even have an ebike? You just don't get the purpose of this string do you. We're here discussing a Rad City and what can be done to improve it. I don't think replacing the entire bike is on the table.
 
Alan B said:
I think the RadCity is a good starting point, we'll see where it takes us. Hopefully a controller/display upgrade and maybe a small spare battery (like 52V 6AH) will get us there, or perhaps a battery upgrade (say 52V 17AH). I don't think any off the shelf class 2 ebike is going to be significantly better for this use-case.

Have you played with the Grin motor sim? It's an awesome tool, but I have no idea of what to tell you for help selecting a 750w(500w) motor for it to base it's calculations. Maybe somebody can hep there?

From there you can plug in a generic 35a controller and battery of the size you want. Those should be close enough. By opening "System B" you can even plug in a second set of specs for a side by side comparison.

Among the variables to play with are amount of throttle used, inclines, "Human Power" contributed, and an output you might be interested in in the lower RH corner showing range.

https://www.ebikes.ca/tools/simulator.html?wheel_b=26i&grade=10.5&grade_b=10.5&motor=MMAC12T&batt=B4814_EZ&cont=C35&motor_b=cust_10.38_0.12_0.2_23_0.77_0.0185_0&batt_b=B4814_EZ&cont_b=C35&mass=100&mass_b=100&axis=mph&blue=Lbs&hp=100&hp_b=100&throt=100
 
Have used the simulator quite a bit over the years. I don't think Justin has the RadCity motor on there, so not easy to do that analysis. It's a good tool for motors that are there, or that you have data for. Their trip simulator is even better, but I haven't messed with that recently.

Changing the controller from one that is locked down to one that is programmable is the obvious first step. Reducing the delays and ramping makes the bike feel more responsive and powerful even at the same power level. I've got programmable controllers sitting around from upgrades that I could use but I don't want to hack up the cables on the RadCity, so the Bolton plug-and-play kit looks like a good starting point, and it is a lot cheaper than a PhaseRunner and Cycle Analyst. If a 17 amp (35 peak) 12 FET KT Controller won't do the job then we'll have to consider other motors, but I don't think that will be required. We could consider adding a front gearmotor like I did on the Bonanza, doubling the torque does amazing things for hill climbing, but I don't want to make the bike that heavy and complicated. It looks to me like they are basically starving the RadBike's DD motor for current as the speed rises. Anyway we'll take this one step at a time and see how far it goes. I think we're pretty close. The next problem will be range, we're on the edge now and raising the power will almost certainly reduce the range. If I can't get him to pedal more he's certainly going to need a capacity increase of some kind, at least for this particular commute. If he changes jobs it may all change.

I looked over formula101's postings, it doesn't look like he has an ebike yet. He's mentioned the Juiced bikes a lot, and some mid drives that he's interested in. My experience with ebikes over the last 9 years is that everybody has different ideas about what they want, but getting some real experience often changes that. So get something and learn first hand! This is my son's second ebike, and I didn't build him a fast bike as he had no motorcycle experience. He used to commute with the bike and BART until he quit that job, and it worked out well. I had an old 9C, 10S 20AH lipo and a 12 FET Infineon controller on the Peugeot. It wasn't fast, I left it limited at 20, but it did have fairly good torque and didn't slow down too much on the hills. So it isn't so much the speed that we're lacking, it is the torque. This is the controller more than the motor, I'm pretty shure. We'll find out soon.

I've been down most of these roads since I started in 2010 with the motor and controller kit that's on my son's old mountain bike now. I've done direct drive motors, gear motors, really big hubmotors, dual hubmotors, two speed hubmotors, a couple of mid-drives and even a recumbent. This is the first commercial ebike I've been involved with. It is all interesting.
 
The day I received my new MAC 12t, I learned about the GMAC. I wish I had known about it prior as that concept sounds super interesting to me. The potential for a gear drive hub with regen is fascinating as well as practical for the areas I frequent. The absolute best of both worlds! My next bike WILL have that feature. As a matter of fact, I would not surprise myself if THIS bike didn't end up with one.....

Point being, the PhaseRunner and Cycle Analyst are pretty much required for that setup. In your position, with this knowledge in hand, I'd be pretty tempted to go that way, setting myself up for a GMAC if new power became necessary.

To temper that further, for my purposes/riding habits, I've found the MAC 12t WAY more efficient than the big DD hub. Where the DD hub would give me a solid 25 mile range (with me pedaling), the MAC gives me closer to 40 miles! Exact, no other changes made comparison! It just flat mows down the small hills that I used to have to add power to crest (using a higher PAS or adding throttle). Theory was wishful thinking going into the MAC conversion, but has now proven itself beyond any doubt. That's me and MY habits though....
 
So now I see why Bolton says "kit not tested on RadCity but customers say it works". There really isn't enough room between fender and seat tube for the thick controller. My brackets don't help, adding a couple more mm, but even bare it doesn't fit directly. Also one of the connectors is inside the downtube, how does one deal with getting to that? Must be enough slack to slide it out somehow. The PhaseRunner begins to look better all the time, it is so small and fits in so many places. There may be a way to move the fender out but it is going to be tight. And getting the last cable connected is going to be fiddly. I can add washers to space the fender mount out, but the clearance may still be tight, the brackets I made probably won't fit as they add 2.1mm spacing.

OK, I removed the lower fender mount bolt and put the controller in with the 3d printed mounts I made. The fender is resting on the controller and is now about half an inch out from where it belongs, probably too close to the tire. So we need zero clearance mounts, and even then it will be squished and the fender displaced. I was hoping the controller would not rest on the seat tube directly as it will damage the finish.

The efficiency of gearmotors is complicated. The gears waste energy in all the time, but they help the motor accelerate quickly and don't spend much time in the low efficiency region. I like the way they glide when unpowered due to the clutch. Depending on the terrain an efficiency comparison with a similar Kv DD motor can go either way. The DD motor is more efficient at constant speed, the gearmotor wins if there's lots of stop and go.

At higher speeds the gearmotor losses grow as magnetic losses mount up. So going fast isn't their forte. They have a range they want to be operated in, and it is lower RPM than DD motors. Some have commented that gearmotor losses mount even faster in small wheels where the RPM is already higher. So comparisons at higher (constant) speeds favor the DD motor. Heat buildup in gearmotors can also be a problem, so high ambient temperatures favor the DD.

The part I don't like a lot about gearmotors is maintenance. I like to build a bike and not have to work on it. Taking a gearmotor apart to grease it or replace clutches and gears is a big negative for me compared to the DD. DD with regen systems just last and last. The brakes don't even wear out. The only thing my commuter needed was tire replacements and the occasional flat repair. Perfect for a commuter, get to work on time, every time.
 
The beauty of the MAC is that you can get the wind you want for the mission at hand/speeds you frequent most often. I've seen info saying that you can do the same with some DD's but I've never seen it advertised.

Heat dissipation issues granted, but I think that might only come into play in extreme conditions.

Will also grant that on paper, the gear drives lose efficiency at higher speeds. From a practical point though, I have to wonder if that's much of a factor at the speeds we're talking about here? The 12t, the wind with the lowest recommended speed, is supposed to be good for 20-25mph. That leaves the faster 8 and 10t's able to go much faster with the manf's blessing?

The gears themselves, and the clutch, are obviously going to need attention on occasion. That said, depending on how the bike is used, I don't see that as something that's going to happen frequently.

The challenge here, from what I understand, is the ability to climb a hill without using a ton of the available battery power, as well as having the torque available to get the job done. Sure would be nice to have a comparable motor available for the sim!
 
The 9C's used to come in a lot of different winds, if you get motors made you have the choices. One I have is 6x10 and the other is 9x7 as I recall.

Gearmotor efficiency is fine at 20-25, at some higher speed it will fall off significantly depending on the details of the design and construction. The winding doesn't change the loss characteristics of the motor, that's fixed by the magnetics, like the torque capability. The windings only change the Kv and Kt values (back EMF RPM/Volt and Torque NM/Amp values). The heat problem is significant. People who operate the large gearmotors (BMC/MAC) at 1500W or more melt a lot of gears. They don't like higher voltage much either. The DD's can take a great deal more, at least for a short time.

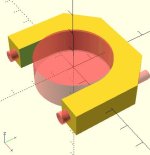
The new bracket printing now eliminates the spacing, but still fits the seat tube. I'll have to use something to pad the controller to tube contact to avoid damaging the finish.


u bracket.JPG
 
As mentioned, I'm using tie wraps and a thin foam double sided tape to secure my controller. It's not heavy, so it works fine. Using a tie wrap to hold the bottom of the fender too! Sounds Micky Mouse, but from a practical stand point, I have had no trouble with this very simple system.

Pull the grommets at each end of the down tube to allow the wires you're after to be pulled through pretty easily. I had no trouble there at all. Grommets are easily reinstalled when you are done messing around.
 
If you want something that wont' break like zipties can, I'd recommend metal hose clamps. (its' waht I used to secure a 6FET to a front fork leg on Dayglo Avenger years ago).
 
Hose clamps are sturdy, but hard on the finish of a new ebike. :)

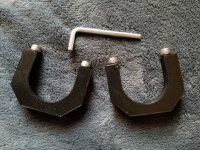
Once I get these new U brackets installed (I tapped them for M5x35mm so they have a good grip on the threads) I'll see how much gap there is for the fender mount. Perhaps print a 3D adapter for that too. It certainly is nice to be able to fabricate custom brackets when I need them. These fit the seat tube and have 1mm of clearance to the controller at the ends, so they can be snugged down and still fit everywhere. I could make them snap onto the tube a bit, but these are already printed and tapped.


u brackets 20191005_175700.jpg
 
Alan B said:
Hose clamps are sturdy, but hard on the finish of a new ebike. :)
True, though a bit of innertube under them (or heatshrink slipped over them before install) fixes that. ;)

But I was really replying to Ahicks about his solution, since you have your printer and such to make your own solutions if you need to. ;)
 
OK, makes sense. I have trouble with inner tubing staying where I want it.

Thanks for the tip on the grommets, when I get back to it I'll do that. I didn't work too hard on the wiring since the mounting was the first issue.

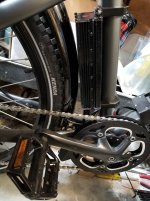
Here's what it looks like with the first generation mounts, which add 2.1mm of offset to the controller from the seat tube. There below the chain you can see the fender and the 1.5cm gap to the fender mount as it currently sits. The fender is very close to the tire. We could just hack off the lower end of the fender, the controller is probably a more effective spray stop than the fender there anyway. :)

However if I change to a PhaseRunner it won't be a very effective spray deflector.


radcity upgrade 20191005_133944.jpg


Folks are saying the Ender 3 is the best $200 3D printer. I don't have one or know the details but I really get a lot of good use from my Prusa i3 Mark3. Rare is the day I don't print something on it.
 
Re: the tie wraps, obviously not in the same class of workmanship as a custom printed, then drilled and tapped set of mounts like these, but they are effective in this install. They are doubled up as a safety precaution (2 on each end), but even if one end were to fail, it's wouldn't be that big a deal. Not obvious in the pictures here, but there is one big gob of wiring under the controller that is very likely contributing to the support of it's weight once everything is cleaned up into a nice clean package. They have proven themselves over the last 2 years of riding over various surfaces without a failure to date, and they can be used without danger regarding the bike's paint.

I will acknowledge the big clamps covered in shrink are a good option. I might have gone that way if I had thought about sliding shrink over the clamp. That's a good idea. Will file that one for possible use at a later date.

Last, the rear fender could use some support at the top in my install that uses a tie wrap to secure the bottom front. At the top, it was able to move from side to side pretty easily, so I used another tie wrap to secure it to the rack using a couple of small holes drilled in the fender. Again, no issues to report after 2 years and maybe a thousand miles. Black tie wrap Makes for a tidy install too . Unless you're looking for it, it's barely noticeable - pretty much like the rest of the install.

Not attempting to beat a dead horse here, just assuring those following later (that may not have access to a printer) that they can be used successfully.
 
Cable ties are pretty amazing. They also differ in quality a lot. My experience with the cheaper ones is that they might break as they are installed, the little locking tongue breaks off. This is exacerbated in cold weather. But once installed they generally do not fail.

I have some very old ones that actually use metal locking tongues. They were white nylon back then, no other colors were available. The material seems a bit different from today's products.
 
Alan B said:
Cable ties are pretty amazing. They also differ in quality a lot. My experience with the cheaper ones is that they might break as they are installed, the little tongue breaks off. This is exacerbated in cold weather. But once installed they generally do not fail.

I have some very old ones that actually use metal locking tongues. They were white nylon back then, no other colors were available. The material seems a bit different from today's products.

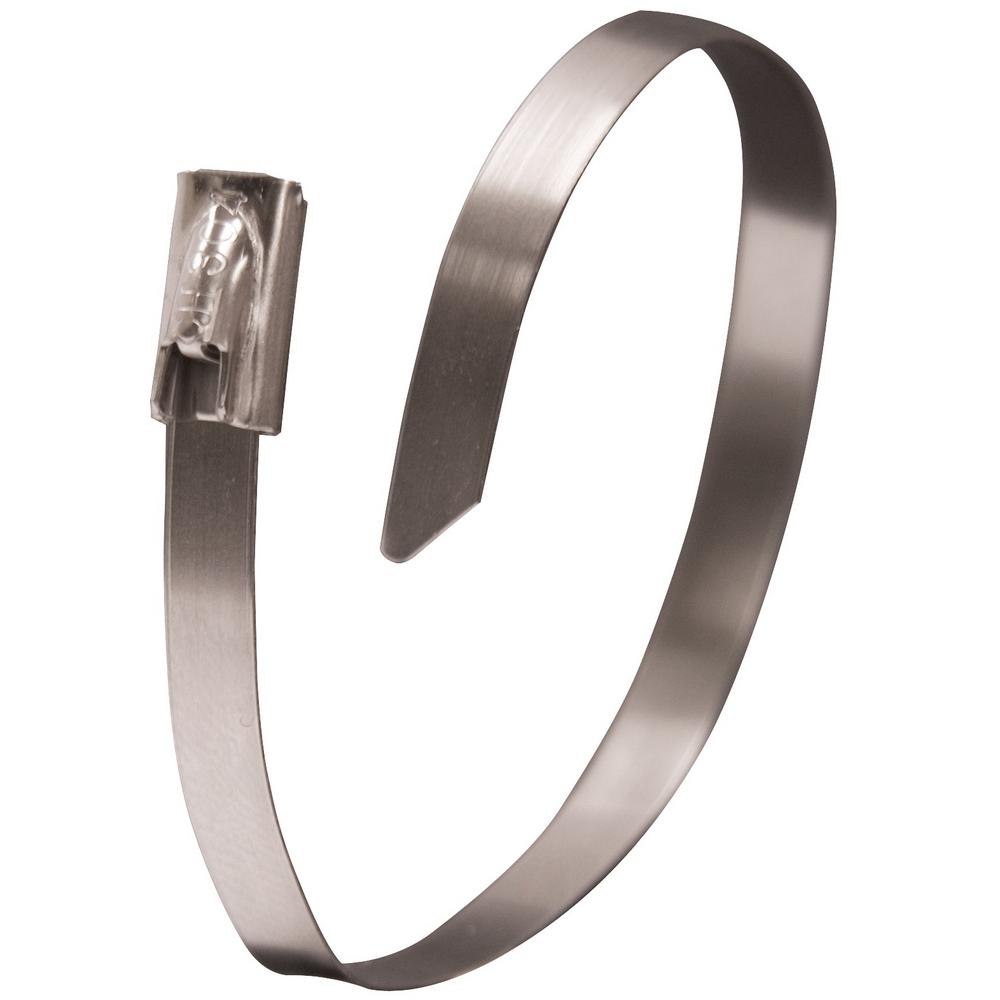
They also make stainless steel zip ties.

stainless-look-gardner-bender-cable-ties-45-312ss-64_1000.jpg
 
Alan B said:
Cable ties are pretty amazing. They also differ in quality a lot. My experience with the cheaper ones is that they might break as they are installed, the little tongue breaks off. This is exacerbated in cold weather. But once installed they generally do not fail.
They fail all the time here, when exposed to the sun, regardless of the type I get. Even the "UV resistant" ones of various brands and sources, though some of those take longer than others, they all get fragile eventually. Most of the cheap ones fail in a few months of intermittent exposure, the better ones can take a year or two that way, or just a few months at most with constnat direct sun exposure.

I have some very old ones that actually use metal locking tongues. They were white nylon back then, no other colors were available. The material seems a bit different from today's products.

They still make those--we use them at work to tie "power panels" and clipstrips down to the edges of shelves so they dont' flop around and get in people's way in the aisles. I've used a few in areas that get direct sun thru the windows and they last at least as long as the better regular ones (though we move stuff around so often for resets that it's tough to say how long any of them is actually in-place...but they haven't ever gotten fragile before we have to cut them to move stuff). I'll see if I can remember to get the brand name / etc off the bag, if you want to try to find some.
 
Sun destroys plastic, though it should last awhile at least - especially the heavy black ones. I store my bikes out of the sun so I don't have that particular problem. I still have some of the old nylon cable ties, not really looking for them.

I guess you should upgrade to the metal ties for sun resistance. Or just buy some aluminum ground wire and use that if twisting gets tight enough.
 
I've used them for years on wire harnesses on boats that are out in the Florida sun/weather 365 days a year. They're good for at least 5 years, and I've removed them still intact from installs the are at least 10 years old.

Point being, source for the wire ties might be (is likely) a factor.

In any case, I'm not even a little concerned for them in this application, as they are installed on a bike that's stored under cover when not actually in use. I doubt the sun will even be a factor.
 
OK, I mounted the Bolton upgrade and fired it up. The power and PAS cables are a bit short. The controller, as mentioned earlier, is a bit thick. I used the AHicks tiewrap on the fender trick, bending it slightly to get better clearance. I didn't go through all the settings yet. Acceleration is slightly better, up to 1300W, indicated top speed is slightly lower at 21 (however calibration may be different). There's no place to plug in the rear light, which we knew, they plan to have another kit out later that includes the light connector. The controller seems to make a little more noise through the motor, there are some resonances at some combinations of speed/power that make a buzz. They say something about sinewave tuning on one parameter, so I don't know what's going on there.

I also adjusted the derailleur. It seems to be not quite straight, but the bracket looks okay so perhaps that's just the design. It seems to be shifting better after the adjustment, perhaps the cable stretched a bit which is common with a new setup.

My son tested it and declared that it is good enough to commute with. He put his mirrors on. I need to clip the tie wrap tails yet. The bottom grommet is difficult to get back into position, that needs more fiddling. But it is probably good to go.

The PAS is not working, hopefully it is a setting.
 
You aren't getting any leg hit with the controller mounted like that? I tried mounting a similar controller that way but found it hit the leg. Ended up mounting it on the rack.
 
Back
Top