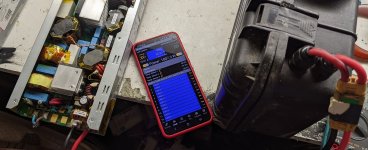
Eaton APR48-3G 1.8kW Light Compact Charger PSU

HK12K said:
Eaton's are awesome but without something in the middle to regulate things they're just a power supply. Most ebikers use stand alone chargers that handle cc/cv and termination. An Eaton on it's own will not do this. For those who own Adaptto's and Nucular's which offer on board charging via (just about) any DC input however, the Eaton really shines.

Eaton is CC/CV charger with program EEPROM

https://endless-sphere.com/forums/viewtopic.php?f=2&t=66169&p=1255648#p1255648
 
Hello everyone,
I am a radio amateur from San Marino (T72DF) and repair technician.
I would need the manual service or the schematic of the EATON APR48-3G PSU, for a repair.
Can anyone help me?
Thanks in advance
Dany
My email: info@electronic-center-rsm.com
 
BH4SKM said:
honya96 said:
Still no one knows how to limit current by HW?

current can be adjusted by hardware, 0 ~ 38A

Think I found our friend video for the hardware adjustable current modification of the APR48-3G.

Unfortunately it's in Chinese...

Even if I don't understand anything it does not seem to be easy anyway...

https://www.youtube.com/watch?v=uhPeFq1HjHM
 
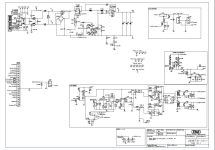
I found a schematic for the electronic of the FlatPack 2.

There are some similarities with the APR48-3G but the quality of the file is quite low

Difficult to read everything but if it cant help to find how to change current via an hardware mod it would be awesome :)

FlatPack2_Schem.png
 
I thought these sort of units were designed to be controlled by an MCU based controller using standard comms protocols?

When you spend tens of thousands on these in a rack system, there is documentation and support channels available.

I would think chasing that down would be easier than messing with hardware mods
 
I tried to use the Eaton Patch Tool you can find here at the beginning of the topic (https://drive.google.com/open?id=0B1sNQs8gfn7ibldkZHdXaXRkUEk) but neither "eeprom.bin" nor "test.bin" files which are in the folder with Eaton.exe are working, I have always "Error: File Not Open"

I tried with the file I extracted from my eaton but nothing better.

I tried to run Eaton.exe as administrator or with Windows 7 (I'm one Windows 10) compatibility mode but nothing better either.

Could someone (re)download the file and tell me if it is working ?

Otherwise any suggestions are welcome :)
 
It is possible to re-program Eaton so you can have lower voltage and lower amps, this is perfect if you have 14s battery with Adaptto system. Or you want to bulk charge to your preferrable voltage during a simple bulk charge.

First you need to get a 2USD USBasp USBISP 3.3V / 5V AVR Programmer, I used this one:
View attachment 3

Then drill out all pop rivets and open the case:
View attachment 191774

Then using pin out diagram to solder on the wires:
View attachment 191773

After that, download the software (Eaton Software.zip), you will need:
-usbasp driver
-Khazama AVR programmer(software that extracts the original EEPROM file from the Eaton and writes back your modified)
-Eaton patch tool(with this one you modify settings in your EEPROM file, like voltage and amps)

Install driver and solder on the wires, connect USB programmer to eaton and plug in programmer to your computer. DO NOT plug in you Eaton to wall socket!
If done correctly you will see two Eaton LEDs lit up(one will flash):
View attachment 191776

Once Windows recognize USB Programmer, open up Khazama AVR programmer.
Choose ATMEGA32 in AVR scroll down window. You can test communication by choosing "Command" -> Read Chip Signature
Now you need to read your current EEPROM from Eaton. Command->Read EEPROM to buffer
Then you need to save it to a file. File->Save EEPROM buffer As... Save it to something like DefaultEaton.hex
Start Eaton patch tool, Eaton.exe
Open your saved hex file
You will see current values. Change to what suits you and press Patch
Open up Khazama and load you patched file. File->Load EEPROM file to Buffer
Now write the file to Eaton. Command->Write EPROM buffer to Chip
During write LEDs will turn of on the Eaton.
Then you will get Write OK in Khazama
View attachment 191777

View attachment 191778

Good luck!
I have some EATON APR48-ES which are the same but 3000W output. The control board inside is different, does anyone have any information on how to connect the USB AVR to this model?
 
It is possible to re-program Eaton so you can have lower voltage and lower amps, this is perfect if you have 14s battery with Adaptto system. Or you want to bulk charge to your preferrable voltage during a simple bulk charge.

First you need to get a 2USD USBasp USBISP 3.3V / 5V AVR Programmer, I used this one:
View attachment 3

Then drill out all pop rivets and open the case:
View attachment 191774

Then using pin out diagram to solder on the wires:
View attachment 191773

After that, download the software (Eaton Software.zip), you will need:
-usbasp driver
-Khazama AVR programmer(software that extracts the original EEPROM file from the Eaton and writes back your modified)
-Eaton patch tool(with this one you modify settings in your EEPROM file, like voltage and amps)

Install driver and solder on the wires, connect USB programmer to eaton and plug in programmer to your computer. DO NOT plug in you Eaton to wall socket!
If done correctly you will see two Eaton LEDs lit up(one will flash):
View attachment 191776

Once Windows recognize USB Programmer, open up Khazama AVR programmer.
Choose ATMEGA32 in AVR scroll down window. You can test communication by choosing "Command" -> Read Chip Signature
Now you need to read your current EEPROM from Eaton. Command->Read EEPROM to buffer
Then you need to save it to a file. File->Save EEPROM buffer As... Save it to something like DefaultEaton.hex
Start Eaton patch tool, Eaton.exe
Open your saved hex file
You will see current values. Change to what suits you and press Patch
Open up Khazama and load you patched file. File->Load EEPROM file to Buffer
Now write the file to Eaton. Command->Write EPROM buffer to Chip
During write LEDs will turn of on the Eaton.
Then you will get Write OK in Khazama
View attachment 191777

View attachment 191778

Good luck!
Hi, I can connect usbasp and read eeprom data successfully with 3.3V usbasp voltage with both led remain off. It is safe to use 5V usbasp (jumper on) to connect to this board?
Thank You
 
It is possible to re-program Eaton so you can have lower voltage and lower amps, this is perfect if you have 14s battery with Adaptto system. Or you want to bulk charge to your preferrable voltage during a simple bulk charge.

First you need to get a 2USD USBasp USBISP 3.3V / 5V AVR Programmer, I used this one:
View attachment 3

Then drill out all pop rivets and open the case:
View attachment 191774

Then using pin out diagram to solder on the wires:
View attachment 191773

After that, download the software (Eaton Software.zip), you will need:
-usbasp driver
-Khazama AVR programmer(software that extracts the original EEPROM file from the Eaton and writes back your modified)
-Eaton patch tool(with this one you modify settings in your EEPROM file, like voltage and amps)

Install driver and solder on the wires, connect USB programmer to eaton and plug in programmer to your computer. DO NOT plug in you Eaton to wall socket!
If done correctly you will see two Eaton LEDs lit up(one will flash):
View attachment 191776

Once Windows recognize USB Programmer, open up Khazama AVR programmer.
Choose ATMEGA32 in AVR scroll down window. You can test communication by choosing "Command" -> Read Chip Signature
Now you need to read your current EEPROM from Eaton. Command->Read EEPROM to buffer
Then you need to save it to a file. File->Save EEPROM buffer As... Save it to something like DefaultEaton.hex
Start Eaton patch tool, Eaton.exe
Open your saved hex file
You will see current values. Change to what suits you and press Patch
Open up Khazama and load you patched file. File->Load EEPROM file to Buffer
Now write the file to Eaton. Command->Write EPROM buffer to Chip
During write LEDs will turn of on the Eaton.
Then you will get Write OK in Khazama
View attachment 191777

View attachment 191778

Good luck!
Why it doesn't work on me? . I used USBasp ISP, but it detected as USBHID? what should I do?
 
Why it doesn't work on me? . I used USBasp ISP, but it detected as USBHID? what should I do?
You need install the driver from the downloaded zip file. Mine don't work on windows 11 (I have newer libusb from zadig, can't downgrade the driver), but work on windows 10, using manual driver update in device manager.
 
You need install the driver from the downloaded zip file. Mine don't work on windows 11 (I have newer libusb from zadig, can't downgrade the driver), but work on windows 10, using manual driver update in device manager.
now it worked sir . and I observed that in the control board part are warming. what means?
 
Hello guys,

Im new here and read through this thread with great interest.
I plan to use three of these in series to fast charge the NiCD pack of my EV. (3x50V=150V. Topped off by the onboard charger to 163V)
The pack can go as low as about 110V in practial use, which would be about 36V per device.
Can anyone confirm the behavior of the devices with a programmed setting of 50V and 30A?
Will it:
- go down to 36V and current limit to 30A? (what I want it to do)
- go down to 36V, but without current limitation as it is below the 43V spec? (what I DONT want it to do, but has been indicated by a post here)
- completely switch off?

thank you!
BR, Alexander
 
I had success doing this today, and it was a pain in the ***. So im leaving this here in case it helps anyone in the future

I used latest version of windows 10, i had driver signature enforcement off.

Khazama Version 1.7 refused to work for me it would read the chip signature fine, but not the eeprom. I had to use Khazama version 1.6.2. and I used 5v for the usbasp.

I had to use captains method to get eaton patch tool to recognise the file, but it wouldnt save the bloody file, however it left a temp.bin in the folder i was trying to save to, and that had my settings saved successfully.

Thank you everyone is this thread. I got there in the end :-D

The files i used are here including my stock and modded firmware (58v, 58.8v max and 17.9a amps)


usbasp USE 5V

...Kahzama USE VERSION 1.6.2...
Command---> Read Chip Signature (to see if wired correctly)
You might see this warning "Error Setting USBasp ISP Clock" when using Kahazama with a certain type of USPasp programmer, click ok as it does not affect the programming process.

Read Chip Signature (This is the check to see if the computer is communicating with the power supply)
1. Read EEPROM to buffer (Pulls .hex file from power supply)
I had a red light and yellow flashing light at this point.
File
Save EEPROM buffer as…
The lights went out when actually programming?
Command
a. Save EEPROM in folder with srec_cat program. (Srec_cat is a conversion program and will convert hex to bin and back again, its in the eaton patch tool folder)

Srec_cat Conversion from hex to bin format.

Open CMD Prompt file directory which contains srec_cat program (this is in easton patch tool directory)
To go to folder containing srec_cat in CMD prompt hold shift and right click on folder containing srec_cat “open command window here” or type cmd on the address bar.

Type code in CMD prompt: "Srec_cat (Your file name).hex –intel –o (Your file name).bin –binary"
(This converts .hex to .bin and vice versa. -intel (type of hex) or -bin (binary)

...Eaton Patch Tool...
Once .hex file has been convert to .bin open Eaton Patch Tool and open .bin file. Change values to suit needs
Power supply range: Voltage: 43 - 59 volts: Amps: 0? - 37 amps
Once settings are ok click Patch – Save as …… ideally it would match your settings ie) 49v5a.bin, mine wouldnt save, however it created a temp file in the directory which had my saved settings.
Save file in same folder as srec_cat program

....Srec_cat Conversion....
Convert .binn (temp file) to .hex in cmdprompt so that Kahzama 1.6.2 can read file.
Srec_cat FILENAME.bin –binary -o FILENAME.hex –intel

....Kahzama 1.6.2.....
File
Load EEPROM file to buffer. (Find file we just converted to hex.)

Command
Write EEPROM buffer to chip
PXL_20240529_223244803.jpg
 
Last edited:
Back
Top